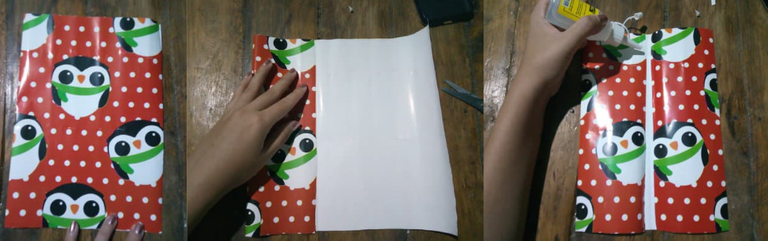
The first step is based on taking the sheet of wrapping paper or craft paper, and place it horizontally, after this step we will slightly mark the middle of our sheet, and then fold the two ends of the paper, as shown in the image. This in order to get an idea of where the center of our bag is located. Next, we mount one part of the sheet on top of the other and using the silicone or white glue, we join them together. Letting it dry for a few minutes.
El primer paso se basa en tomar la hoja de papel de regalo o papel craft, y colocarlo de forma horizontal, realizado este paso vamos a marcar ligeramente la mitad de nuestra hoja, para después doblar los dos extremos del papel, tal cual como se refleja en la imagen. Esto con el fin de que nos hagamos una idea de donde está ubicado el centro de nuestra bolsa. Seguidamente, montamos una parte de la hoja sobre la otra y usando el silicón o pega blanca, la unimos. Dejando así secar por unos minutos.
Once these steps are done, we proceed to give shape to our tree, once the ends of our triangle are cut, we open it and start gluing strip by strip, in the image you can better appreciate how to do it, it is really very easy. I must point out that in my case I used glue. Then I used silicone.
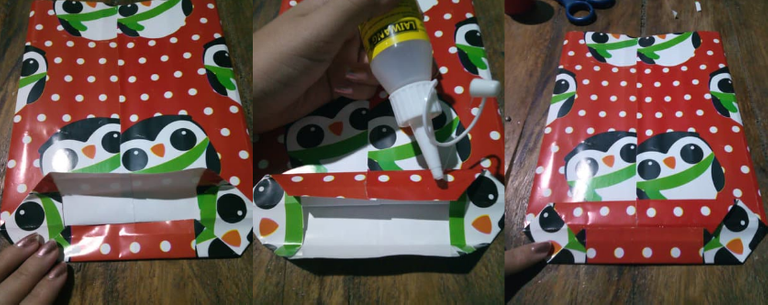
Después de ello, doblamos nuestro papel en la parte superior quedando un rectángulo de aproximadamente 7 cm de ancho. Después desdoblamos y introducimos las dos puntas para ir dando forma a la bolsa de regalo, marcamos los bordes y dobla el lado de arriba sobrepasando el centro, luego hazlo con la parte de abajo y pon pegamento en los cuatro triángulos de las esquinas.
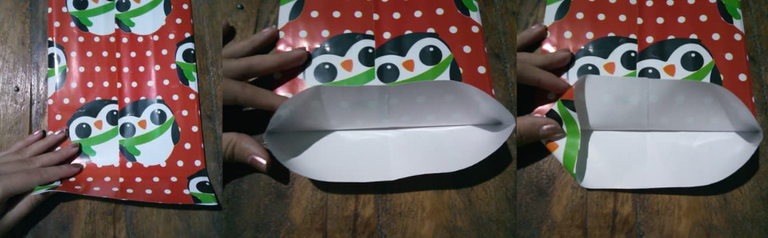
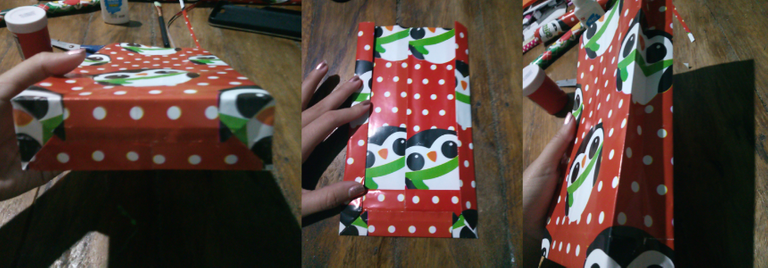
Then, we mark the edges and fold the bottom side over the center, then we do the same with the top and glue, I must emphasize that for all these steps we must mark very well when folding, so the realization of our bag we can do it easily and smoothly.
Luego, marcamos los bordes y doblamos el lado de abajo sobrepasando el centro, luego lo hacemos lo mismo con la parte de arriba y pegamos, Debo resaltar que para todos estos pasos debemos marcar muy bien a la hora de doblar, así la realización de nuestra bolsa la podremos hacer facilmente y sin problemas.
Then, we mark the edges and fold the bottom side over the center, then we do the same with the top and glue, I must emphasize that for all these steps we must mark very well when folding, so the realization of our bag we can do it easily and smoothly.
Asimismo, por ambos lados de la bolsa hacemos un dobles, después tenemos que abrir la bolsa de regalo, para organizar su forma y definir qué altura queremos que tenga.
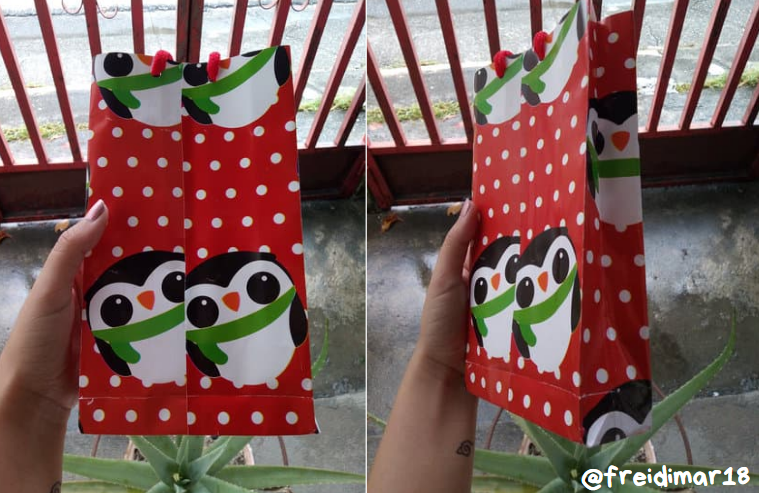
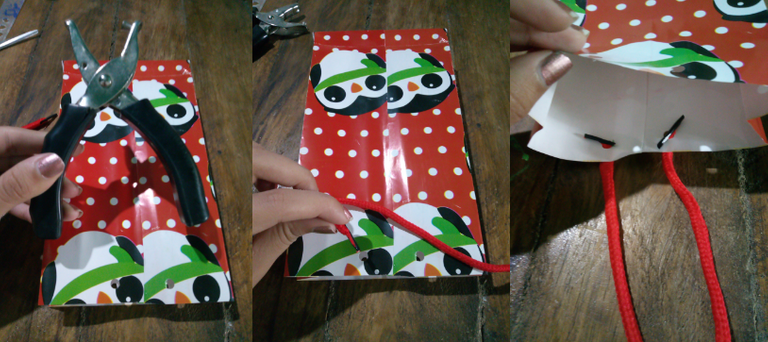
Finally, we open a small holes with the punch and place our ribbon, in my case I used two special cords for bag, you can place the details you like to decorate and give a unique style to your bag inspired by Christmas.
Finalmente, abrimos un agujeros pequeños con el sacabocado y colocamos nuestra cinta, en mi caso utilicé dos cordones especiales para bolsa, ustedes pueden colocar los detalles que gusten para decorar y darle un estilo único a tu bolsa inspirada en la navidad

Final result! | ¡Resultado final!
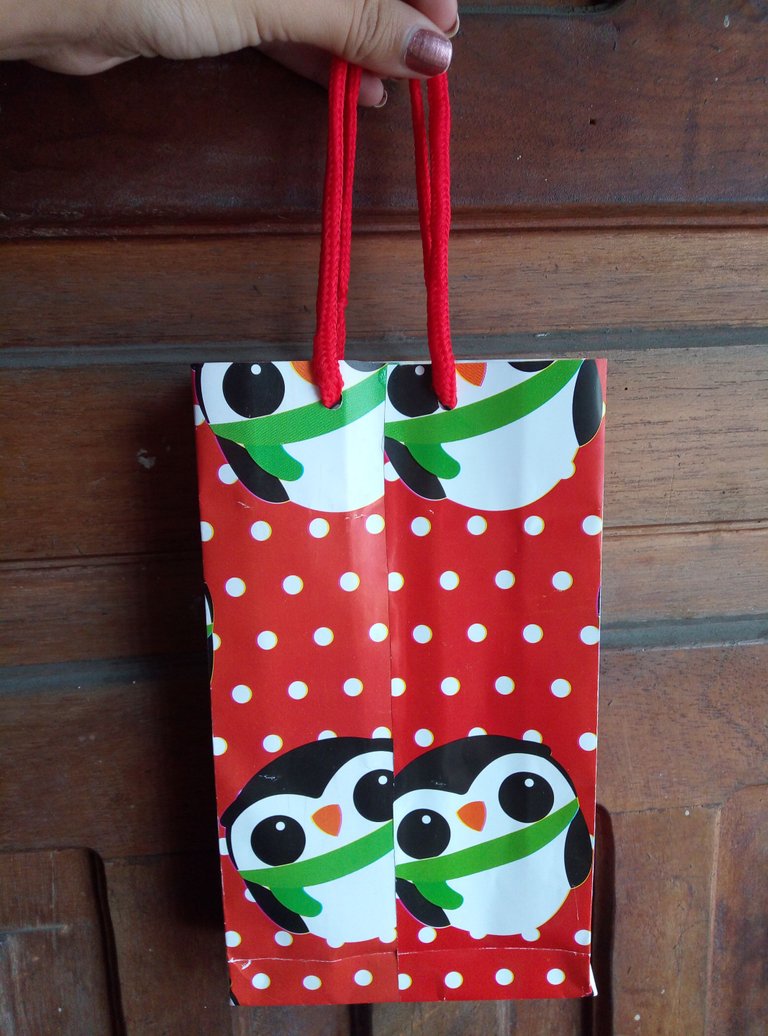
Without further ado, thank you for making it this far, see you next time!/ Sin más que agregar, gracias por llegar hasta aquí, ¡nos vemos en una próxima oportunidad!.


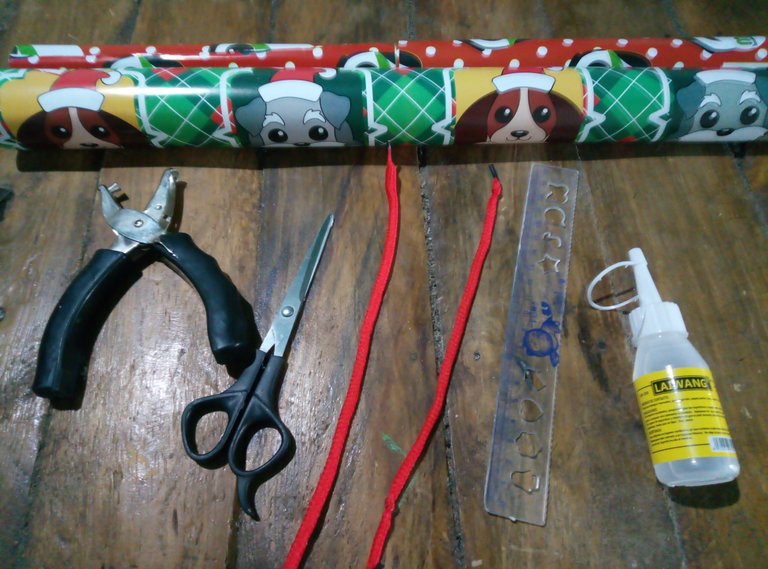
Important sources / Fuentes importantes:
✎Translator / Traductor
✄Text separators for blog / Separadores de textos para blog
|The rest of the pictures were taken from my phone / El resto de las fotografías fueron tomadas desde mi teléfono|