
ESPAÑOL
Buenas tengan todos en esta hermosa comunidad de manualistas @Hivediy en esta oportunidad me gustaria mostrarle un paso a paso como srealizar un bello llavero de buho, ideal para usar o para regalar a algun ser querido. Es muy facil de hacer y con poco material solo es cuestion de intentarlo, espero que el materia sea de su agrado e intenten hacerlos, quedan muy bonitos..
ENGLISH
Good to have all in this beautiful community of manualistas @Hivediy in this opportunity I would like to show you a step by step as srealizar a beautiful owl keychain, ideal for use or to give to a loved one. It is very easy to do and with little material is only a matter of trying, I hope that the matter is to your liking and try to make them, they are very nice ...
MATERIALES
- Foamis de colores
- Silicon frio o caliente
- Aro para llaves
- 30cm de Cordon(rabito de raton)
- Lapiz
- Papel
- Tijeras
- Marcador Negro
MATERIALS
- Colored Foamis
- Hot or cold silicon
- Ring for keys
- 30cm of cord (mouse tail)
- Pencil
- Paper
- Scissors
- Black marker

PROCEDIMIENTOS // PROCEDURES
Realizamos un boceto del buho que queremos hacer, donde remarquemos las partes del mismo.
We make a sketch of the owl we want to make, where we highlight the parts of the owl.

Trasladamos cada una de las partes a los foamis de colores, y recortamos con unas tijeras.
We transfer each of the parts to the colored foamis, and cut them out with scissors.

Cortamos un cordon de 30cm de largo, al cual le hacemos un nudo simple en cada punta y luego amarramos al aro.
Cut a 30cm long cord, tie a simple knot at each end and then tie it to the hoop.
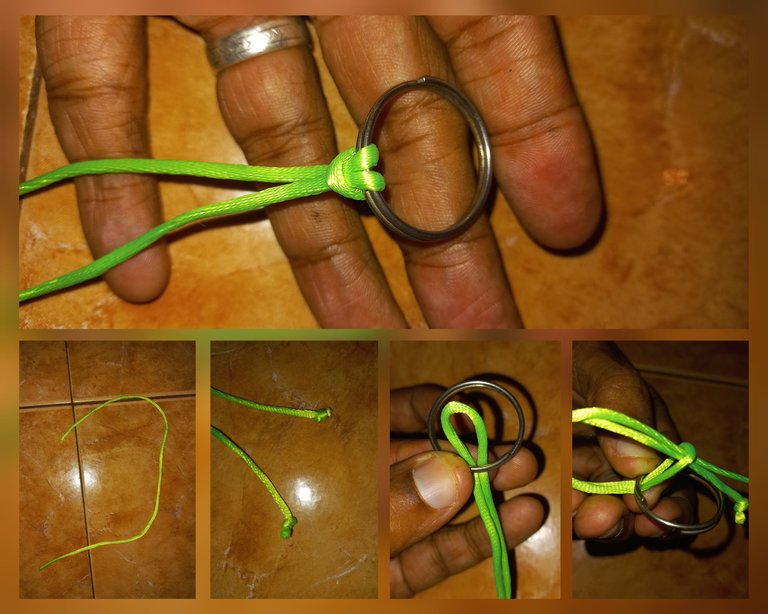
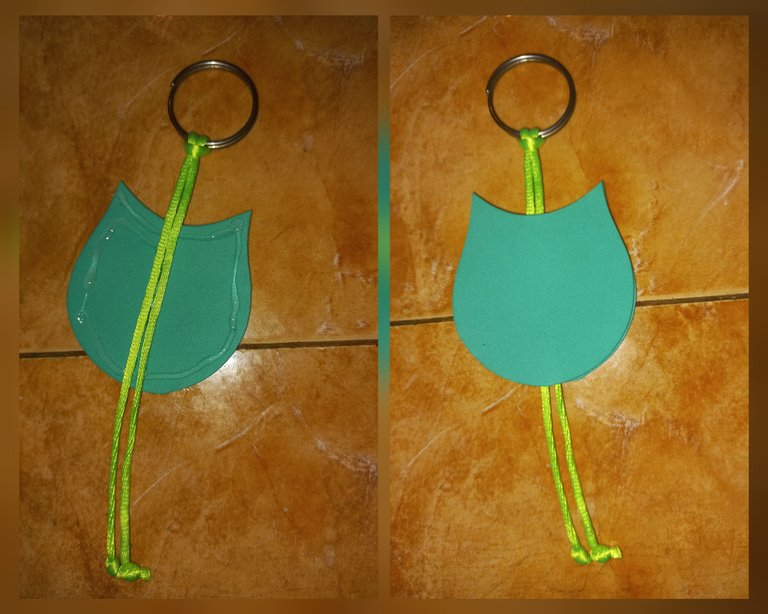
Colocamos silicon sobre unas de las caras de cuerpo, colocamos el cordon por el centro y luego pegamos la otra capa del cuerpo del buho
Place silicone on one side of the body, place the cord in the center and then glue the other layer of the owl's body.
Pegamos cada una de las partes en su lugar, como la barriga, ojos y pico.
We glue each of the parts in place, such as the belly, eyes and beak.
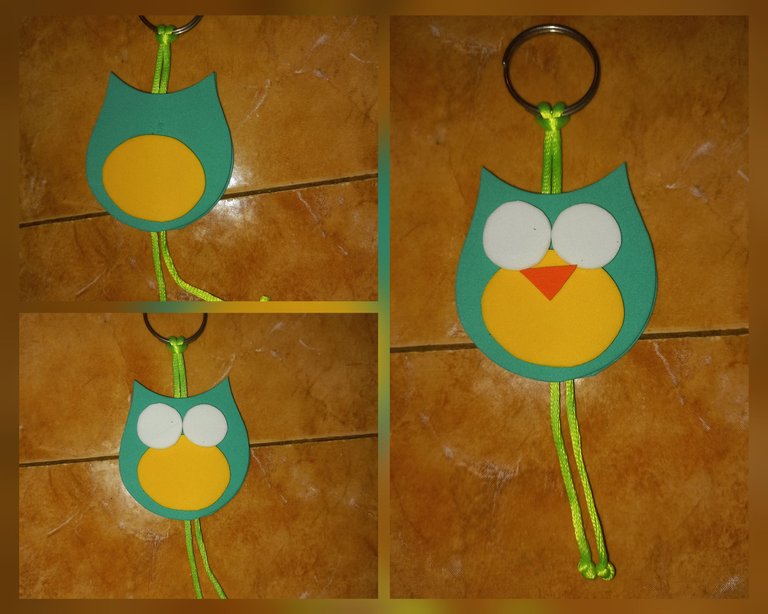
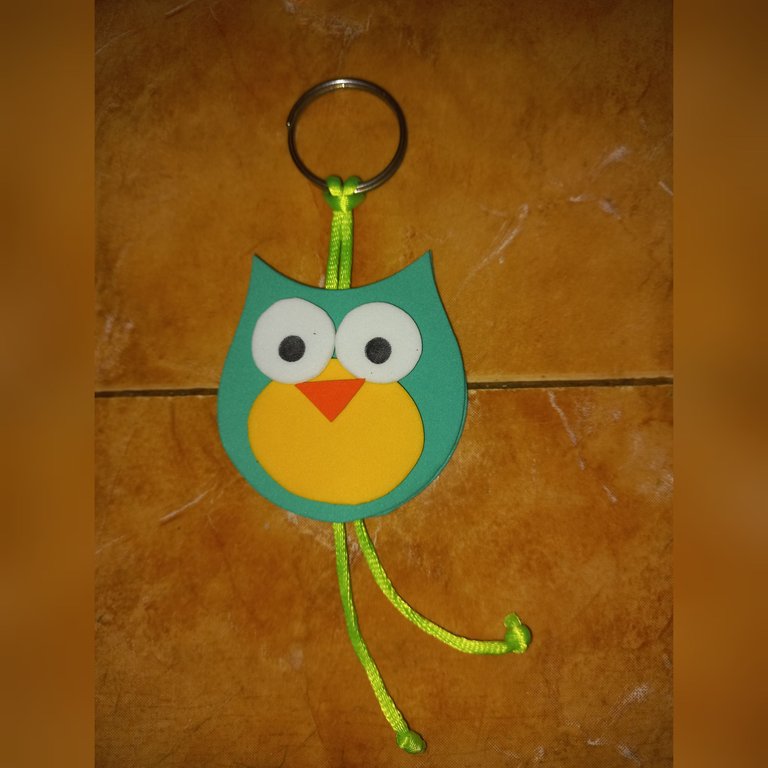
Finalmente con un marcador negro agregamos detalle en los ojos y listo, ya esta listo nuetro lindo llavero de buho
Finally with a black marker we add detail in the eyes and that's it, our cute owl keychain is ready.

Gracias por visitar mi blog y espero vernos en mi próxima publicación.
Thanks for visiting my blog and I hope to see you in my next post.
REFERENCIAS/ REFERENCE
Todo el texto de mi autoria / All the text of my authorship
Fotos tomadas desde mi Samsung A32 / Photos taken from my Samsung A32
Foto de portada realizada en Canva / Cover photo taken in Canva
Collage realializados con GridArt / Collage made with GridArt


Que bonito llavero! es un mini búho adorable!
Si quedan super lindos y tienos, gracias por tu comentario...@beidacarolina