
✨💐Hello community! Welcome | ¡Hola comunidad! Bienvenido/a💐✨
Hello creative friends of Hive Diy! 🌹 Today I want to share with you an exciting and beautiful craft: creating a bouquet of everlasting roses. Dive into the magical world of crafts and discover how to make your own roses that will last forever - join me on this creative and beauty-filled journey!
¡Hola amigos creativos de Hive Diy! 🌹 Hoy quiero compartir con ustedes una emocionante y hermosa manualidad: la creación de un ramo de rosas eternas. Sumérgete en el mágico mundo de las manualidades y descubre cómo hacer tus propias rosas que perdurarán por siempre. ¡Acompáñame en este viaje creativo y lleno de belleza!
•💐🌹Materials to be used🌹💐•
•💐🌹Materials to be used🌹💐•
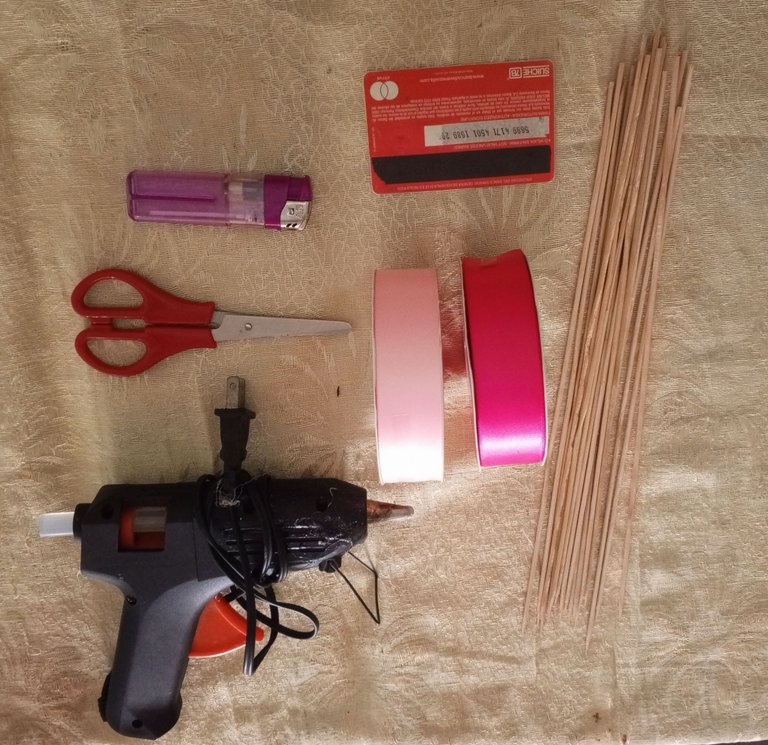
| - Scissor | - Tijera | |
|---|---|---|
| - Hot and cold silicone | - Silicón caliente y frío | |
| - Fuchsia and pink satin ribbon roll 2.5 cm wide | - Rollo de cinta raso de 2.5 cm de ancho color fucsia y rosado | |
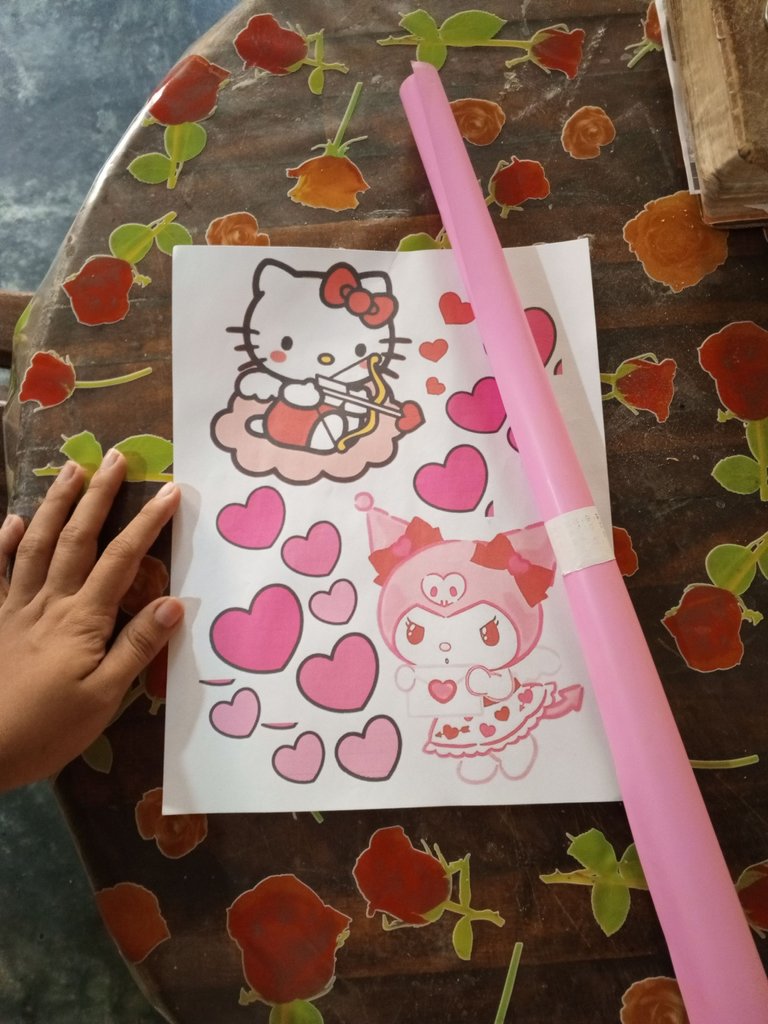
| - Valentine's Day Impressions | - Impresiones de San Valentin | |
| - Anime sheet | - Lámina de anime | |
| - Pencil | - Lápiz | |
| - Rule | - Regla | |
| - Lighter | - Encendedor | |
| - Candle | - Vela | |
| - Adhesive tape | - Cinta adhesiva | |
| - Fuchsia frosted cardboard | - Cartulina escarchado fucsia |

•💐💖STEP BY STEP💐💖•
•💐💖STEP BY STEP💐💖• Comenzamos enrollando nuestra cinta de 2.5cm de ancho en la parte ancha de la tarjeta como se ve en la foto. La vamos a enrollar 27 veces. Cortamos. Estos 27 rectángulos que recortamos va a ser para una rosa. Para hacer las 9 rosas que hice tienen que ser 243 rectángulos en total y lo separaremos, es decir, 122 rectángulos los cuales serán mitad de pétalos rosados y mitad de pétalos fucsias. Luego de estar recortados quemaremos los extremos con el encendedor para que no se deshilache o con la vela, porque después se daña el encendedor si lo utilizamos por mucho tiempo. Después de haber terminado de quemar todos vamos a doblarlos como se ven las fotos: Primero formamos unos mini triángulos en las esquinas lo pegamos con el silicón caliente un puntico pequeño y volvemos a doblar colocando otro punto pequeño. Formando un pétalo. Traten de no pegar todo el triángulo porque eso debe de sobresalir un poquito.
En este paso tomaremos el palito de altura y enrollaremos uno encima de otro hasta tener 12 pétalos y formar una pequeña rosa tipo botón, a continuación, con los 15 pétalos restantes vamos a pegar una esquina con otra formando una tira, lo volteamos y en esa parte lisa de la tira vamos a aplicar silicón y enrollaremos con el botón que realizamos. Mientras enrollen, vayan acomodando y viendo cómo va la flor, un tip que doy es que la pongan boca abajo en la mesa y vayan enrollando y formando la rosa.
Por otra parte, habiendo finalizado las 9 rosas, vamos a recortar las decoraciones para nuestro ramo.
Como paso número 4 buscaremos un plato pequeño, moldemos con un cuchillo el mismo en el anime y recortamos. Coloremos las rosas unas al lado de las otras, cosa de que el anime no se me y arreglen también para que sobresalgan las rosas. ya más o menos se va viendo la organización de nuestro ramo.
Aquí doblaremos nuestro papel coreano por la mitad, recortamos sacando dos partes iguales, seguidamente, lo tomaremos por una esquina y lo doblaremos como por la mitad, pero de tal manera que quede como en la foto. Lo repetiremos con la otra mitad.
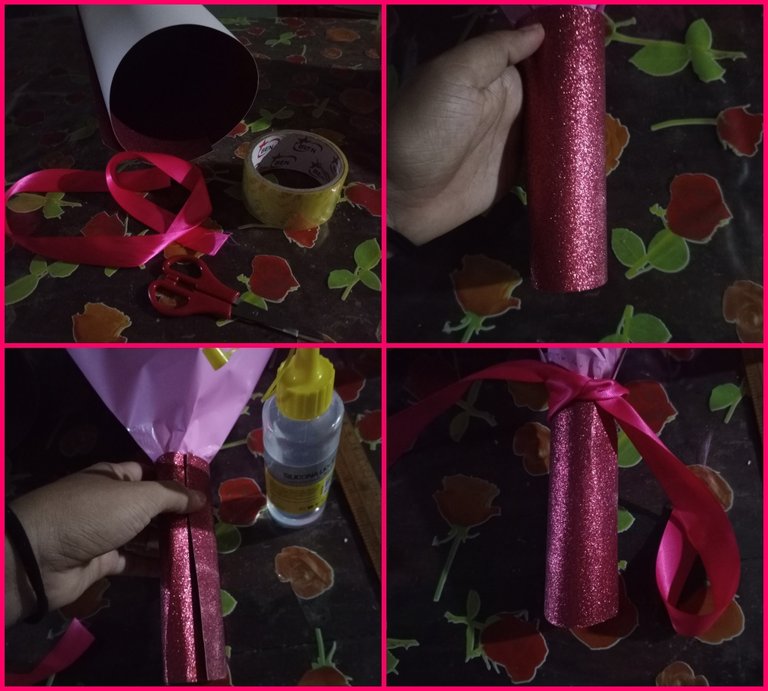
Por último, vamos a envolver nuestro ramo. Centramos bien el ramo en el papel, pegamos las esquinas con la cinta adhesiva y repetimos el mismo paso con la otra parte del papel coreano. Para la parte de abajo que queda sobresalida y se notan los palitos, lo envolví con una cartulina escarchada de 21cm, lo pegue con silicón caliente y le añadí un lazo de 30 cm color fucsia para que se mirara más bonito.
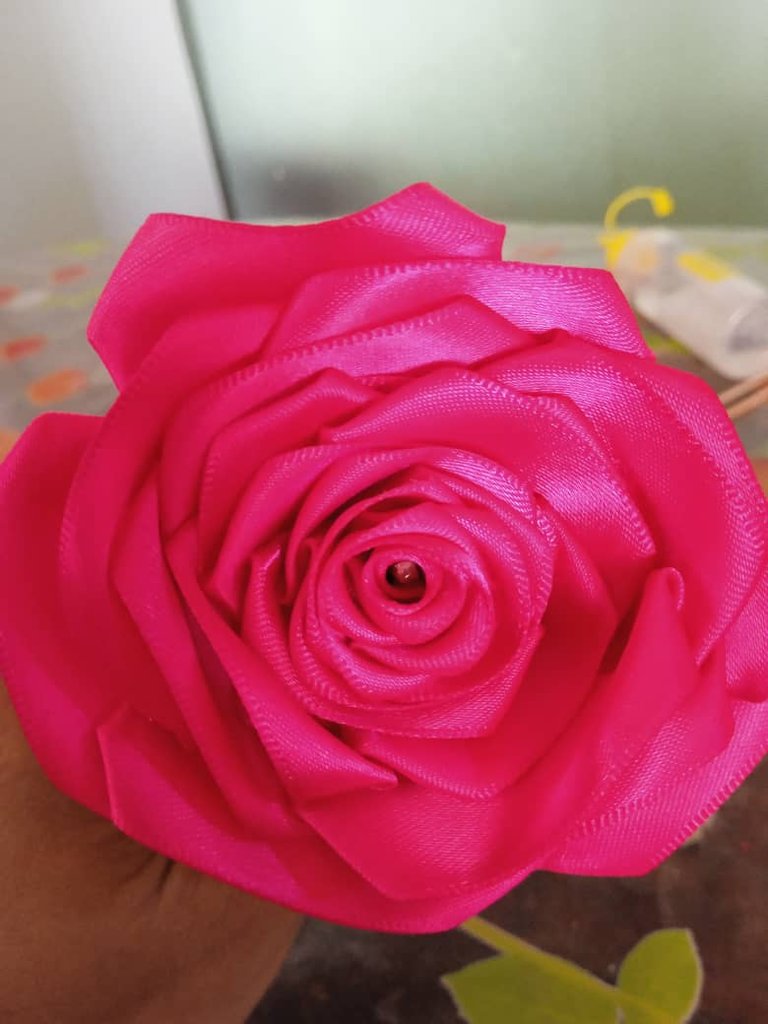
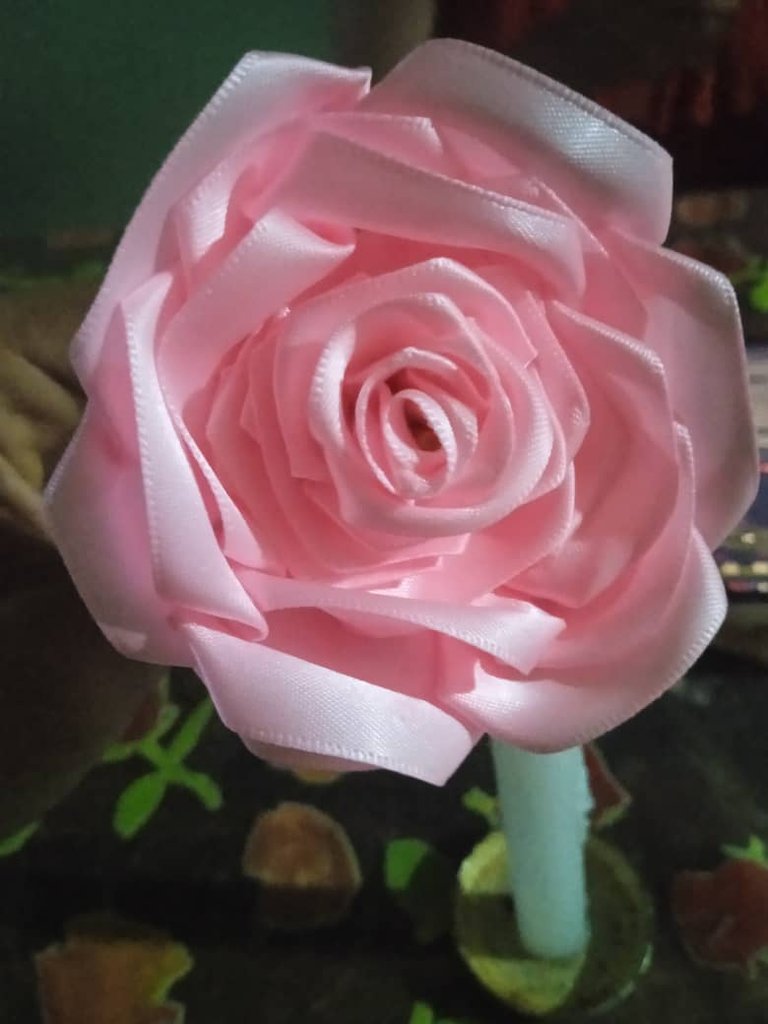
We start by winding our 2.5cm wide ribbon around the wide part of the card as shown in the picture. We are going to roll it 27 times. We cut out. These 27 rectangles that we cut out are going to be for a rose. To make the 9 roses I made, there must be 243 rectangles in total and we will separate them, that is, 122 rectangles which will be half pink petals and half fuchsia petals. After being cut out, we will burn the ends with the lighter so that it does not fray or with the candle, because the lighter will be damaged if we use it for a long time. After we have finished burning all of them we will fold them as shown in the pictures: First we form mini triangles in the corners we glue with the hot silicone a small dot and we fold again placing another small dot. Forming a petal. Try not to glue the whole triangle because it should stick out a little bit.
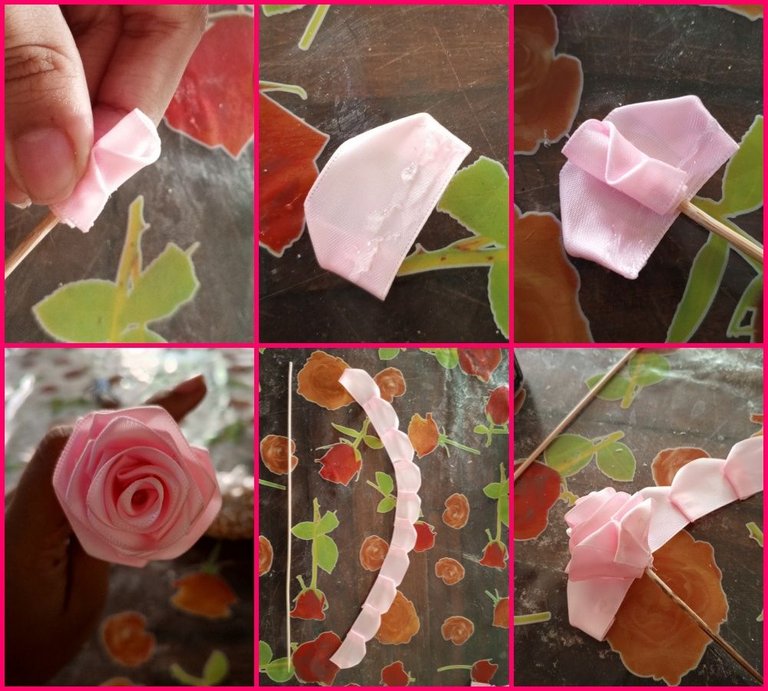
In this step we will take the height stick and roll one on top of the other until we have 12 petals and form a small button type rose, then, with the remaining 15 petals we will glue one corner with another forming a strip, we turn it over and on that smooth part of the strip we will apply silicone and roll it with the button we made. As you roll it up, keep adjusting and watching how the flower is going, a tip I give is to put it face down on the table and roll it up and form the rose.
On the other hand, having finished the 9 roses, we are going to cut out the decorations for our bouquet.
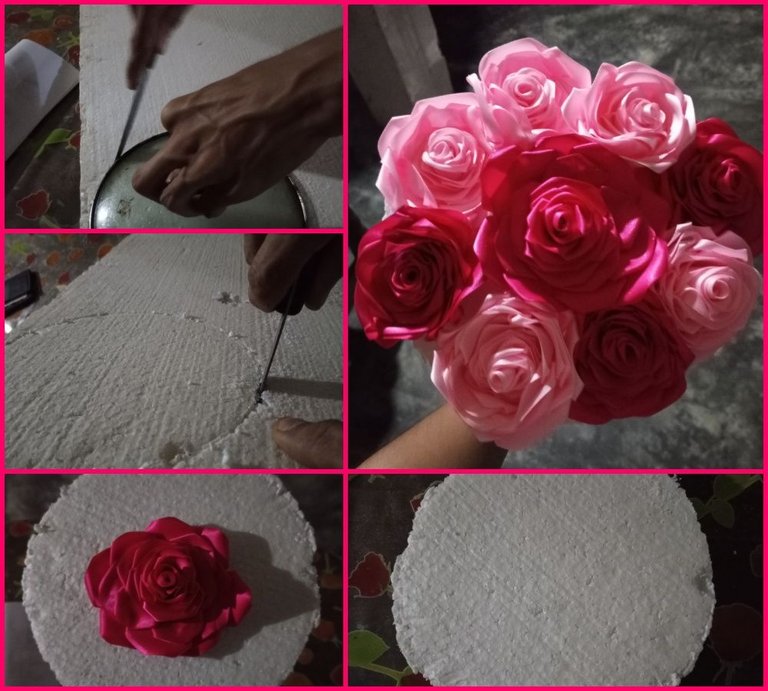
As step number 4 we will look for a small plate, mold with a knife the same in the anime and cut out. Color the roses next to each other, so that the anime does not get me and also arrange so that the roses protrude. and more or less you will see the organization of our bouquet.
Here we will fold our Korean paper in half, cut out two equal parts, then we will take it by one corner and fold it in half, but in such a way that it looks like in the photo. Repeat with the other half.
Finally, we are going to wrap our bouquet. We center the bouquet well on the paper, stick the corners with the tape and repeat the same step with the other part of the Korean paper. For the bottom part that is protruding and the sticks are visible, I wrapped it with a 21 cm frosted cardboard, glued it with hot silicone and added a 30 cm fuchsia ribbon to make it look prettier.
•💐💖IMAGES OF STEP 1&2💐💖•
•💐💖IMAGES OF STEP 1&2💐💖• 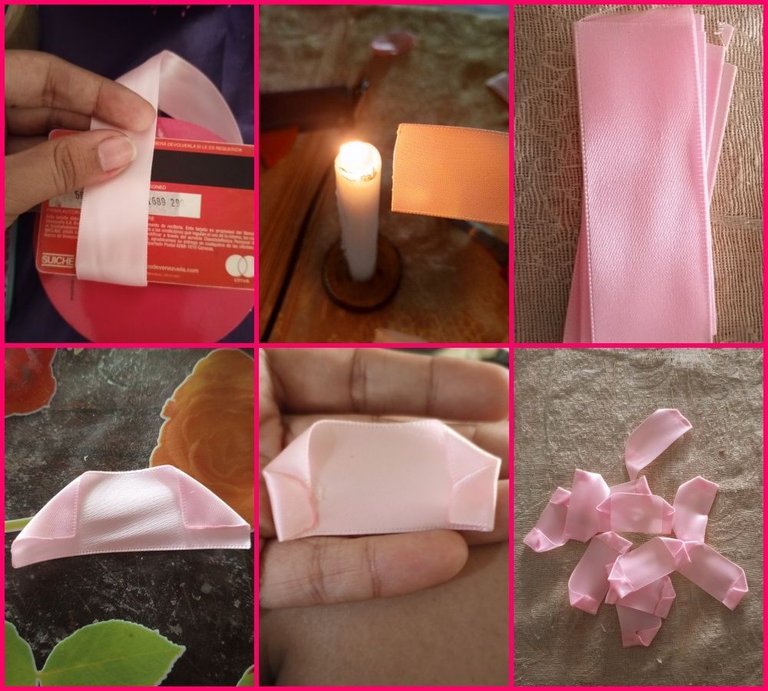
•💐💖IMAGES OF STEP 3&4💖💐•
•💐💖IMAGES OF STEP 3&4💖💐• 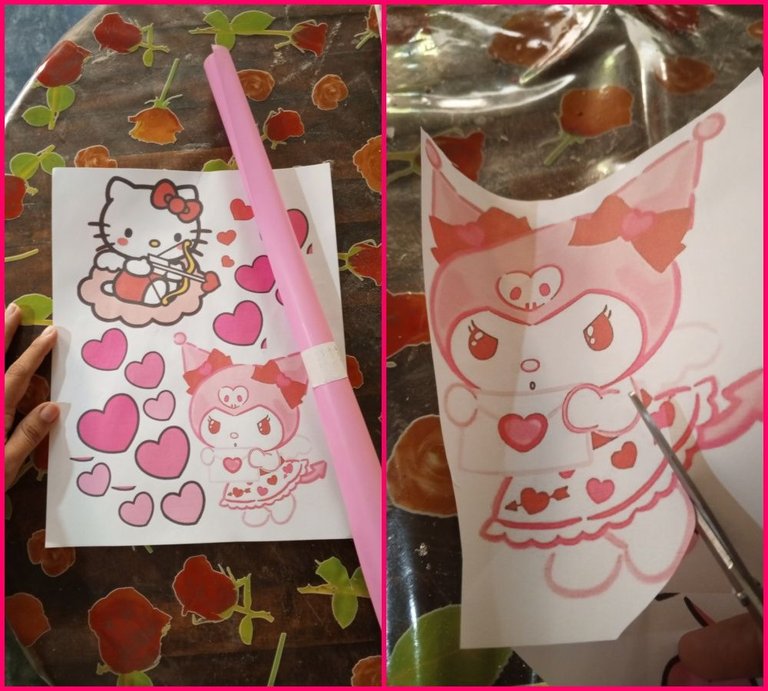
•💐💖IMAGES OF STEP 5&6💖💐•
•💐💖IMAGES OF STEP 5&6💖💐• 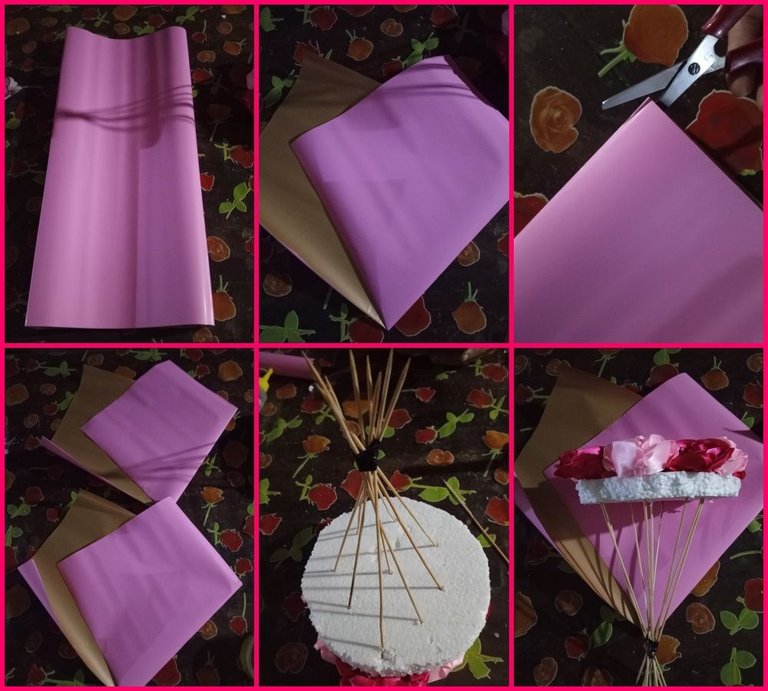

•💐💖RESULT💐💖•
•💐💖RESULT💐💖•
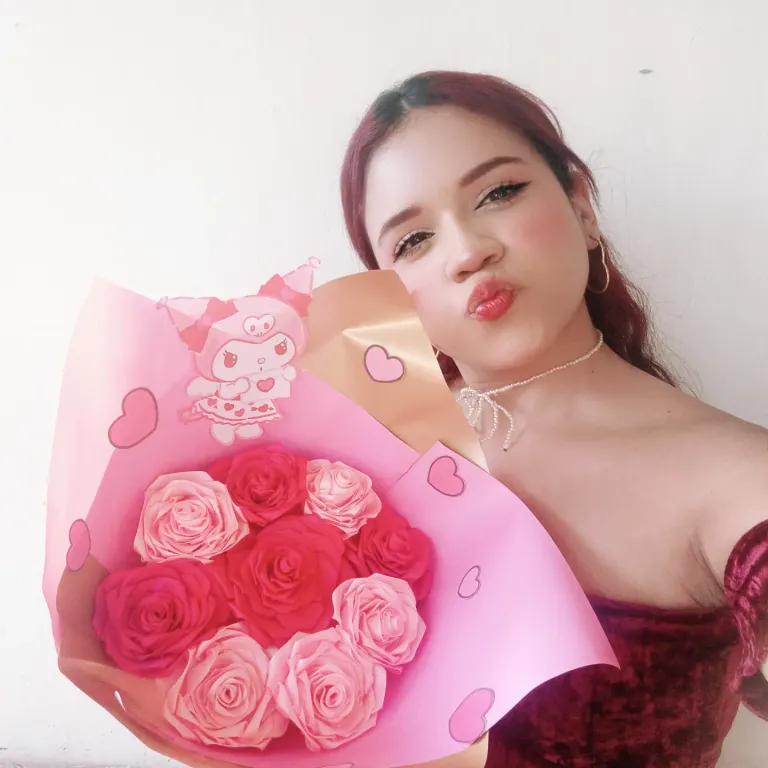

Y este es el resultado😊
Realmente espero que puedas hacer esta manualidad tan bonita, sobretodo que se lo regales a alguien especial😊💐💖.
I really hope you can make this beautiful craft, especially if you give it as a gift to someone special😊💐💖.

💞Thank you so much for making it this far! I hope you liked my post, I'll see you next time!💞
💞¡Muchas gracias por llegar hasta aquí! Espero que te haya gustado mi post. ¡Nos vemos en una próxima oportunidad!💞
📲 Todas las fotografías fueron tomadas con un teléfono Tecno Spark 10 pro
📷 TODAS LAS FOTOS SON DE MI PROPIEDAD


Here is a brief tip. When you make tutorials I recommend accompanying the text with images, so the reader can visualize in the image what you describe in your text and better understand the process. You know, a picture says more than a thousand words.
@sagarkothari88 vote
Thank youu Hive Diy💗💞
!discovery 30
This post was shared and voted inside the discord by the curators team of discovery-it
Join our Community and follow our Curation Trail
Discovery-it is also a Witness, vote for us here
Delegate to us for passive income. Check our 80% fee-back Program
Thank youu 💗💞🙌
Te ha quedado espectacular, exitos
What a beautiful craft! It will surely bring a lot of joy to the person who receives it. I loved the idea of giving useful tips to improve the final result.
Thank you very much for your comment and yes it is a very special gift 🥺.
~~~ embed:1759674837608300803?t=mDMhHkjIQMt_xiEvMYj33Q&s=19 twitter metadata:TWF5ZWxpbjIwMjF8fGh0dHBzOi8vdHdpdHRlci5jb20vTWF5ZWxpbjIwMjEvc3RhdHVzLzE3NTk2NzQ4Mzc2MDgzMDA4MDN8 ~~~
Gracias Mayiii por apoyarme 💖
wow, this is a perfect gift for loved ones. Amazing work
Thank you DIYhub 💖🥺
Saludos @genesis.sojar, que hermosas flores, me encantó el resultado se ven hermosas, sin duda es un hermoso regalo.
Que tengas una excelente semana!
Graciasss 🥺💖. Igualmente para tí! Saludos 🫂💜
HERMOSA RAMO DE FLORES
Gracias 🫂🥰
Te quedó demasiado hermoso ese ramo, gracias por compartir.✨❤️
Muchas gracias 🫂🥰