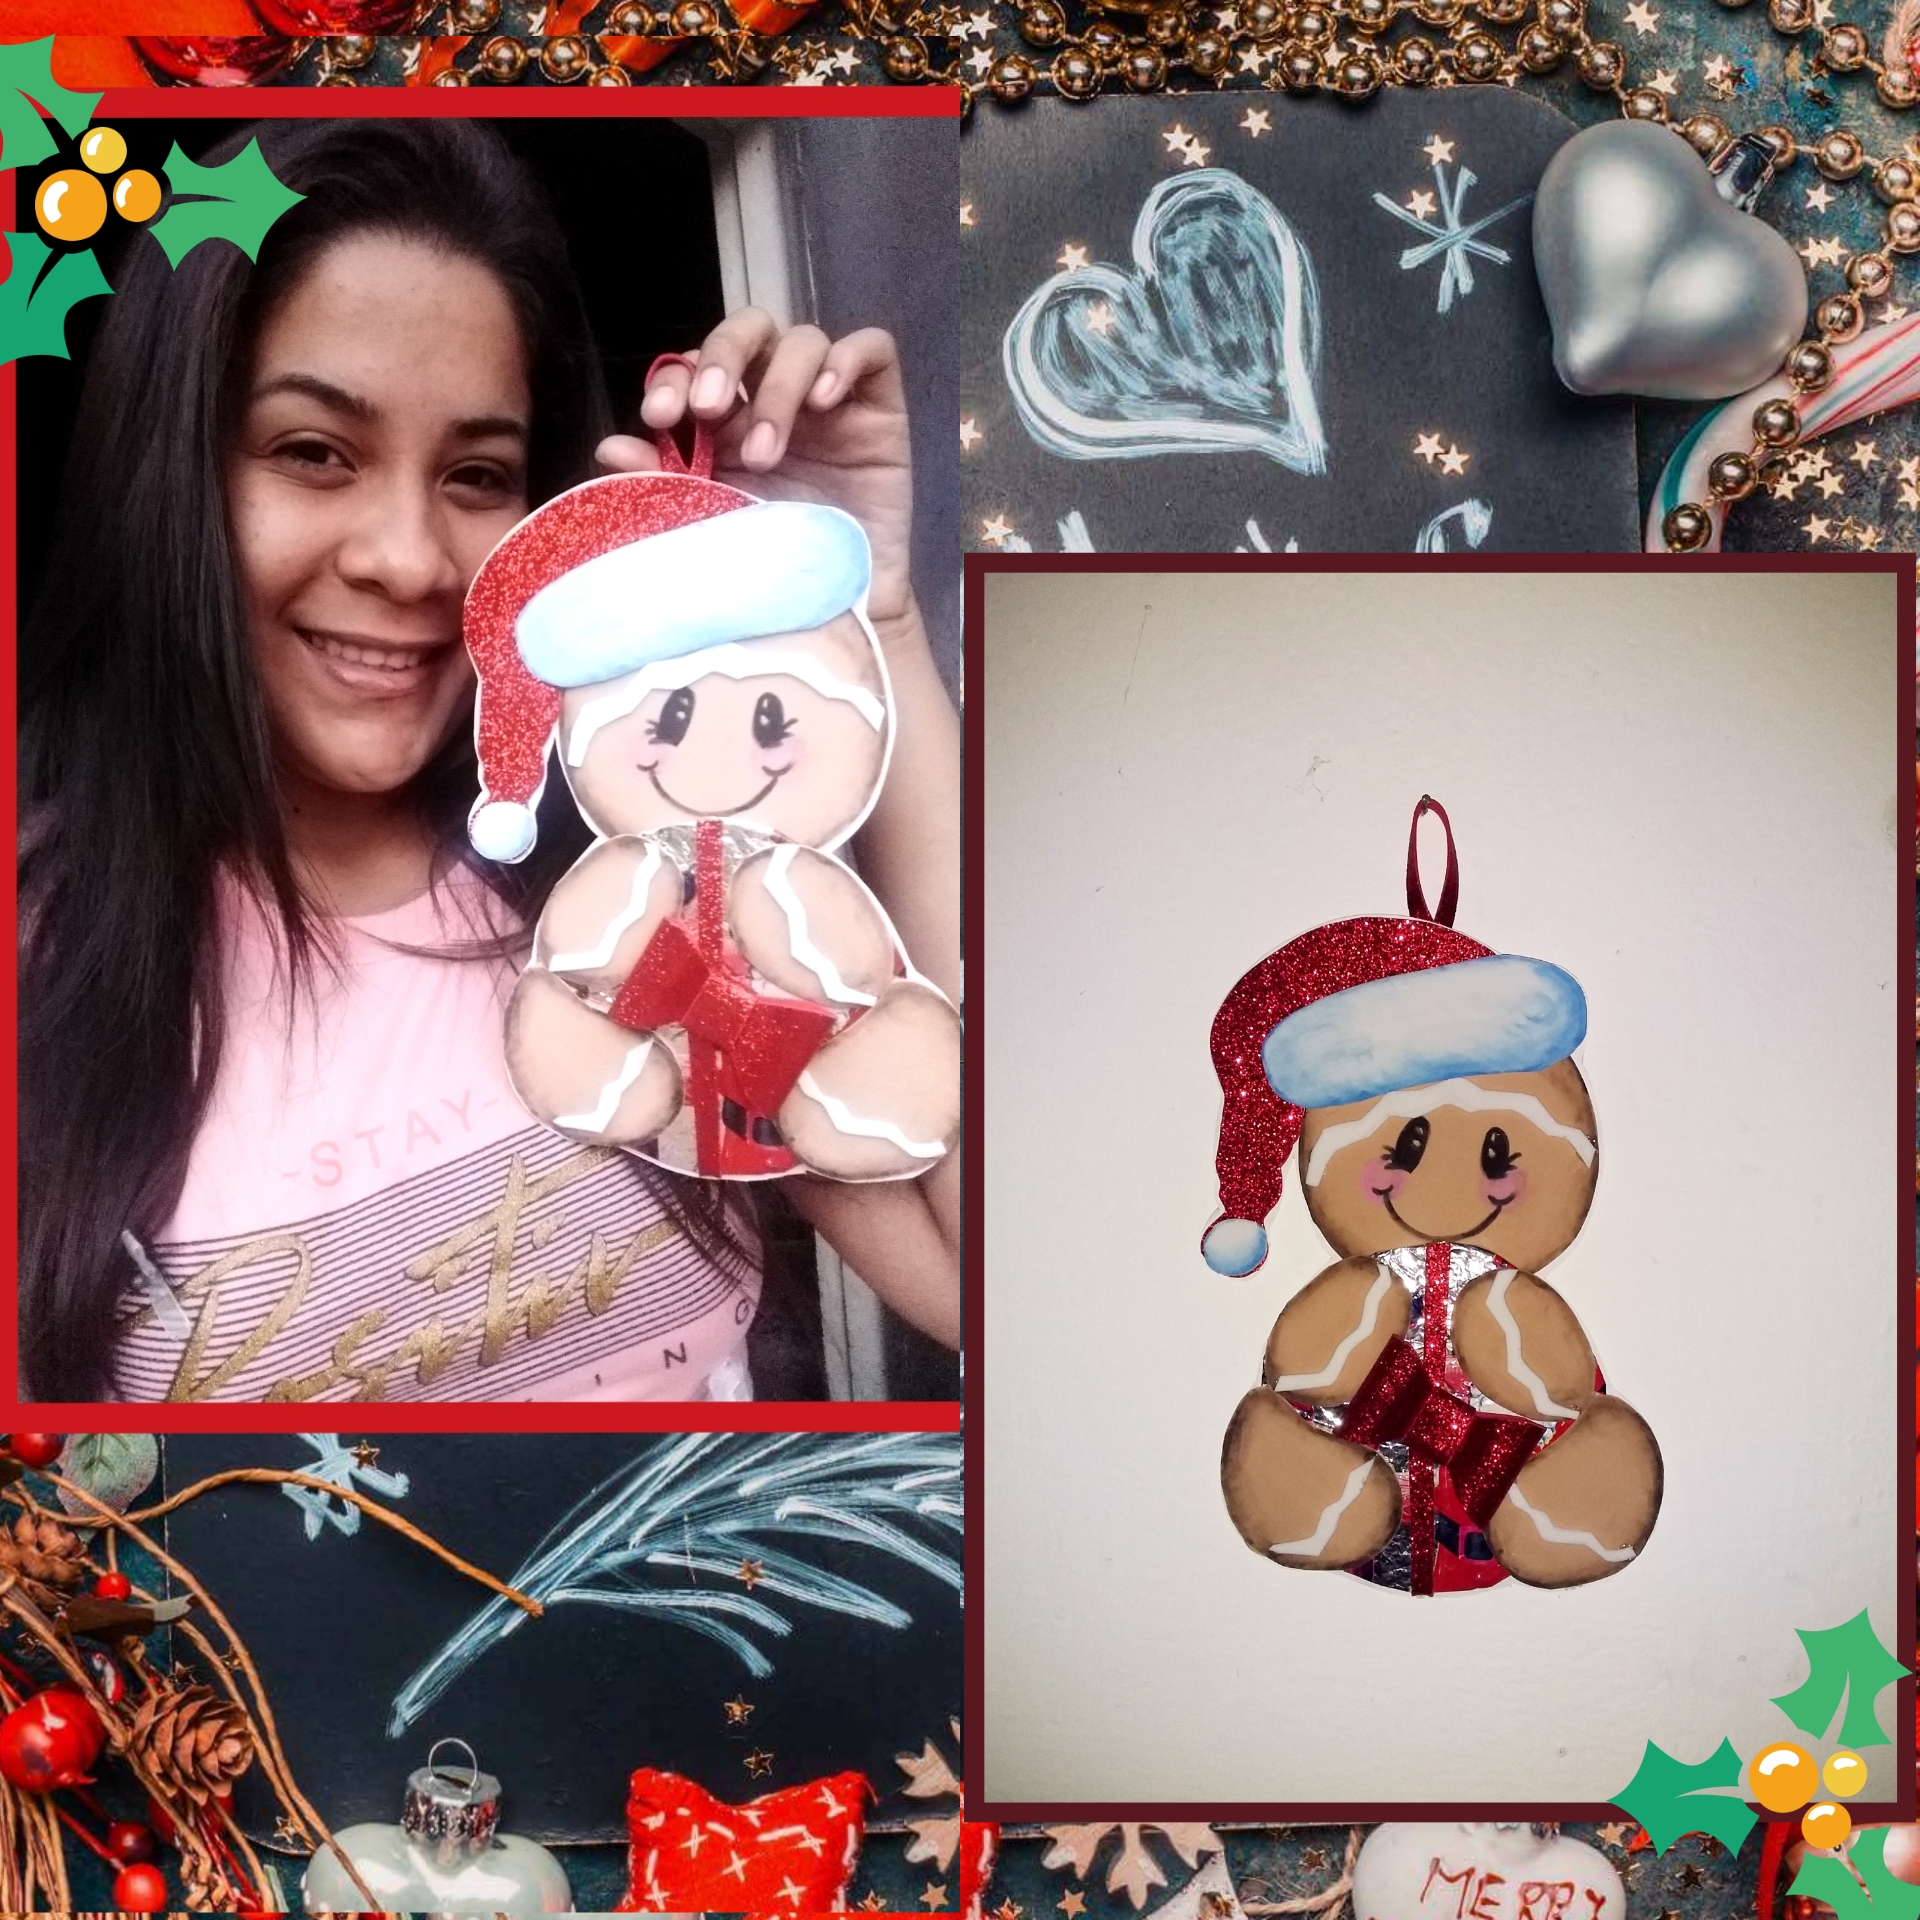
Hola amigos de la colmena, ¿cómo están? Bienvenidos de nuevo a mi blog, feliz día a todos, hoy les vengo a mostrar un hermoso trabajo que hago, una Preciosa galleta de jengibre abrazando su regalo de Navidad aquí les dejo el paso a paso de este maravilloso trabajo.
Hello friends of the hive, how are you? Welcome back to my blog, happy day to all, today I come to show you a beautiful job that I do, a * Beautiful gingerbread cookie hugging her Christmas gift * here I leave you the step by step of this wonderful work.
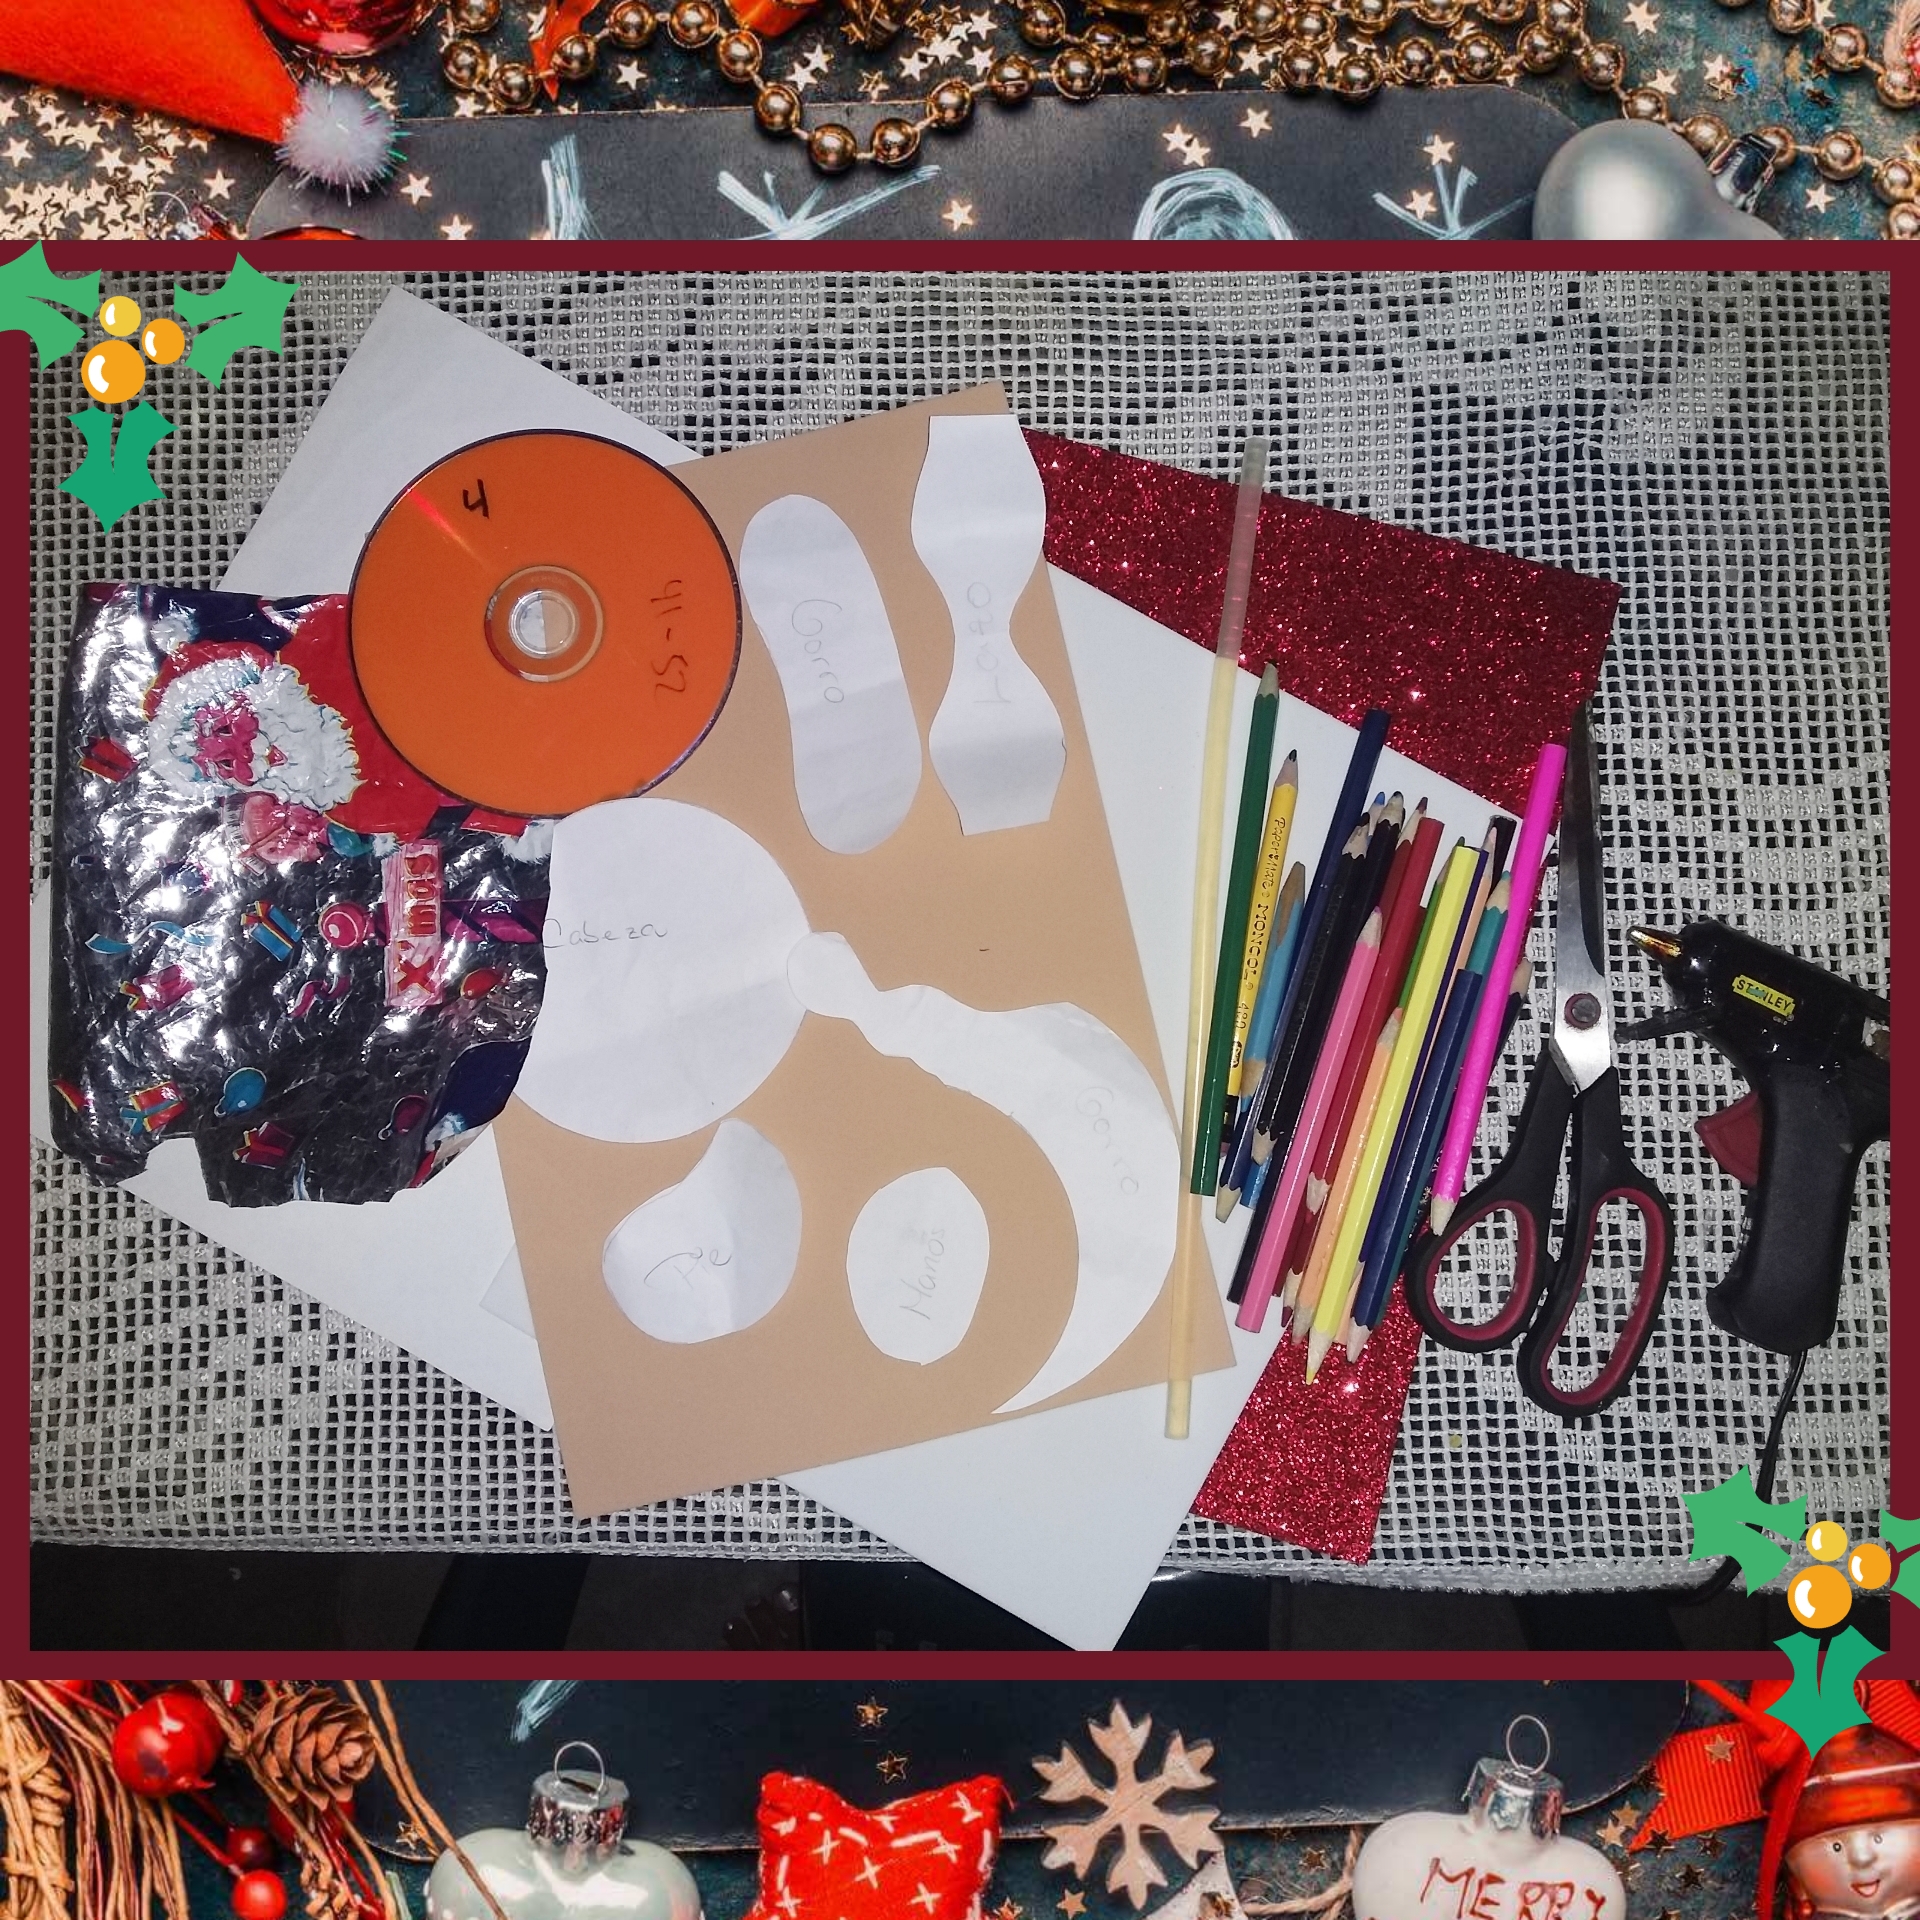
Materiales:
- Foami: rojo escarchado, blanco y color piel.
- Una hoja de papel blanca (o se puede reciclar)
- Colores.
- Pistola y varilla de silicona.
- Patrones.
- Papel de regalo.
- Un CD.
Materials:
- Foami: frosty red, white and skin color.
- A white sheet of paper (or it can be >recycled)
- Colors.
- Silicone gun and rod.
- Patterns.
- Gift Wrap.
- A CD.
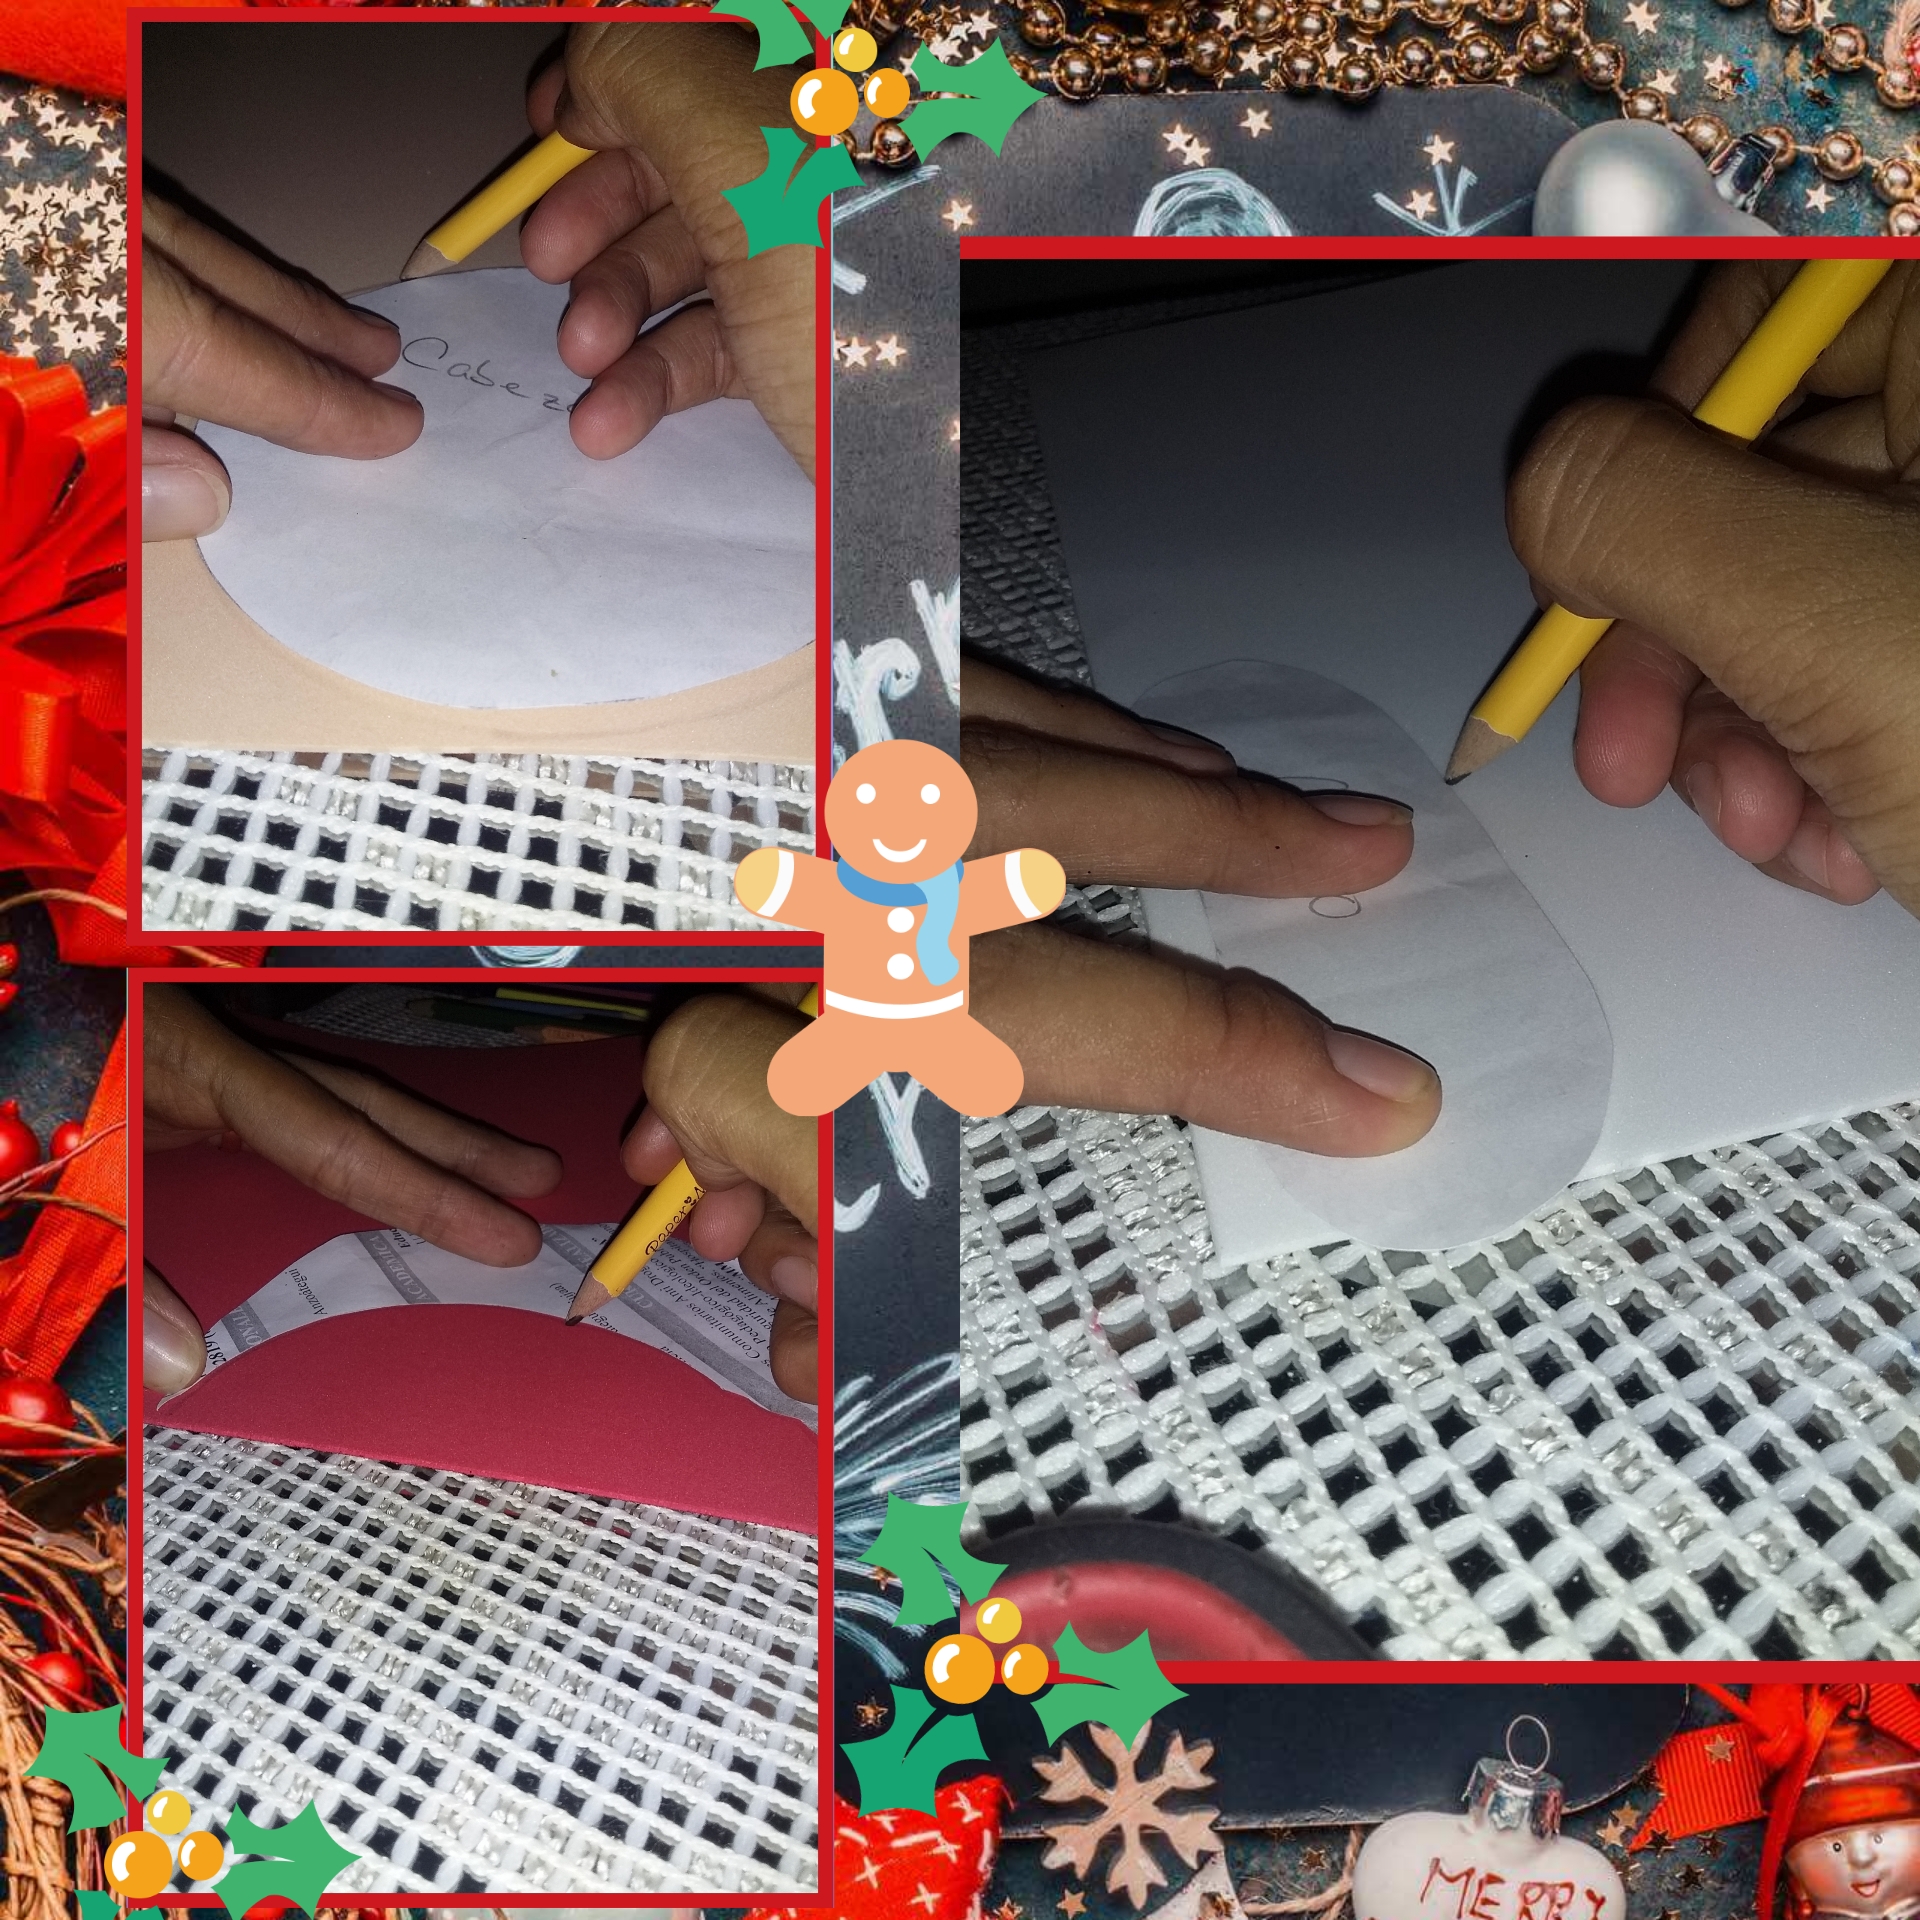
Pasos a seguir
Primer paso
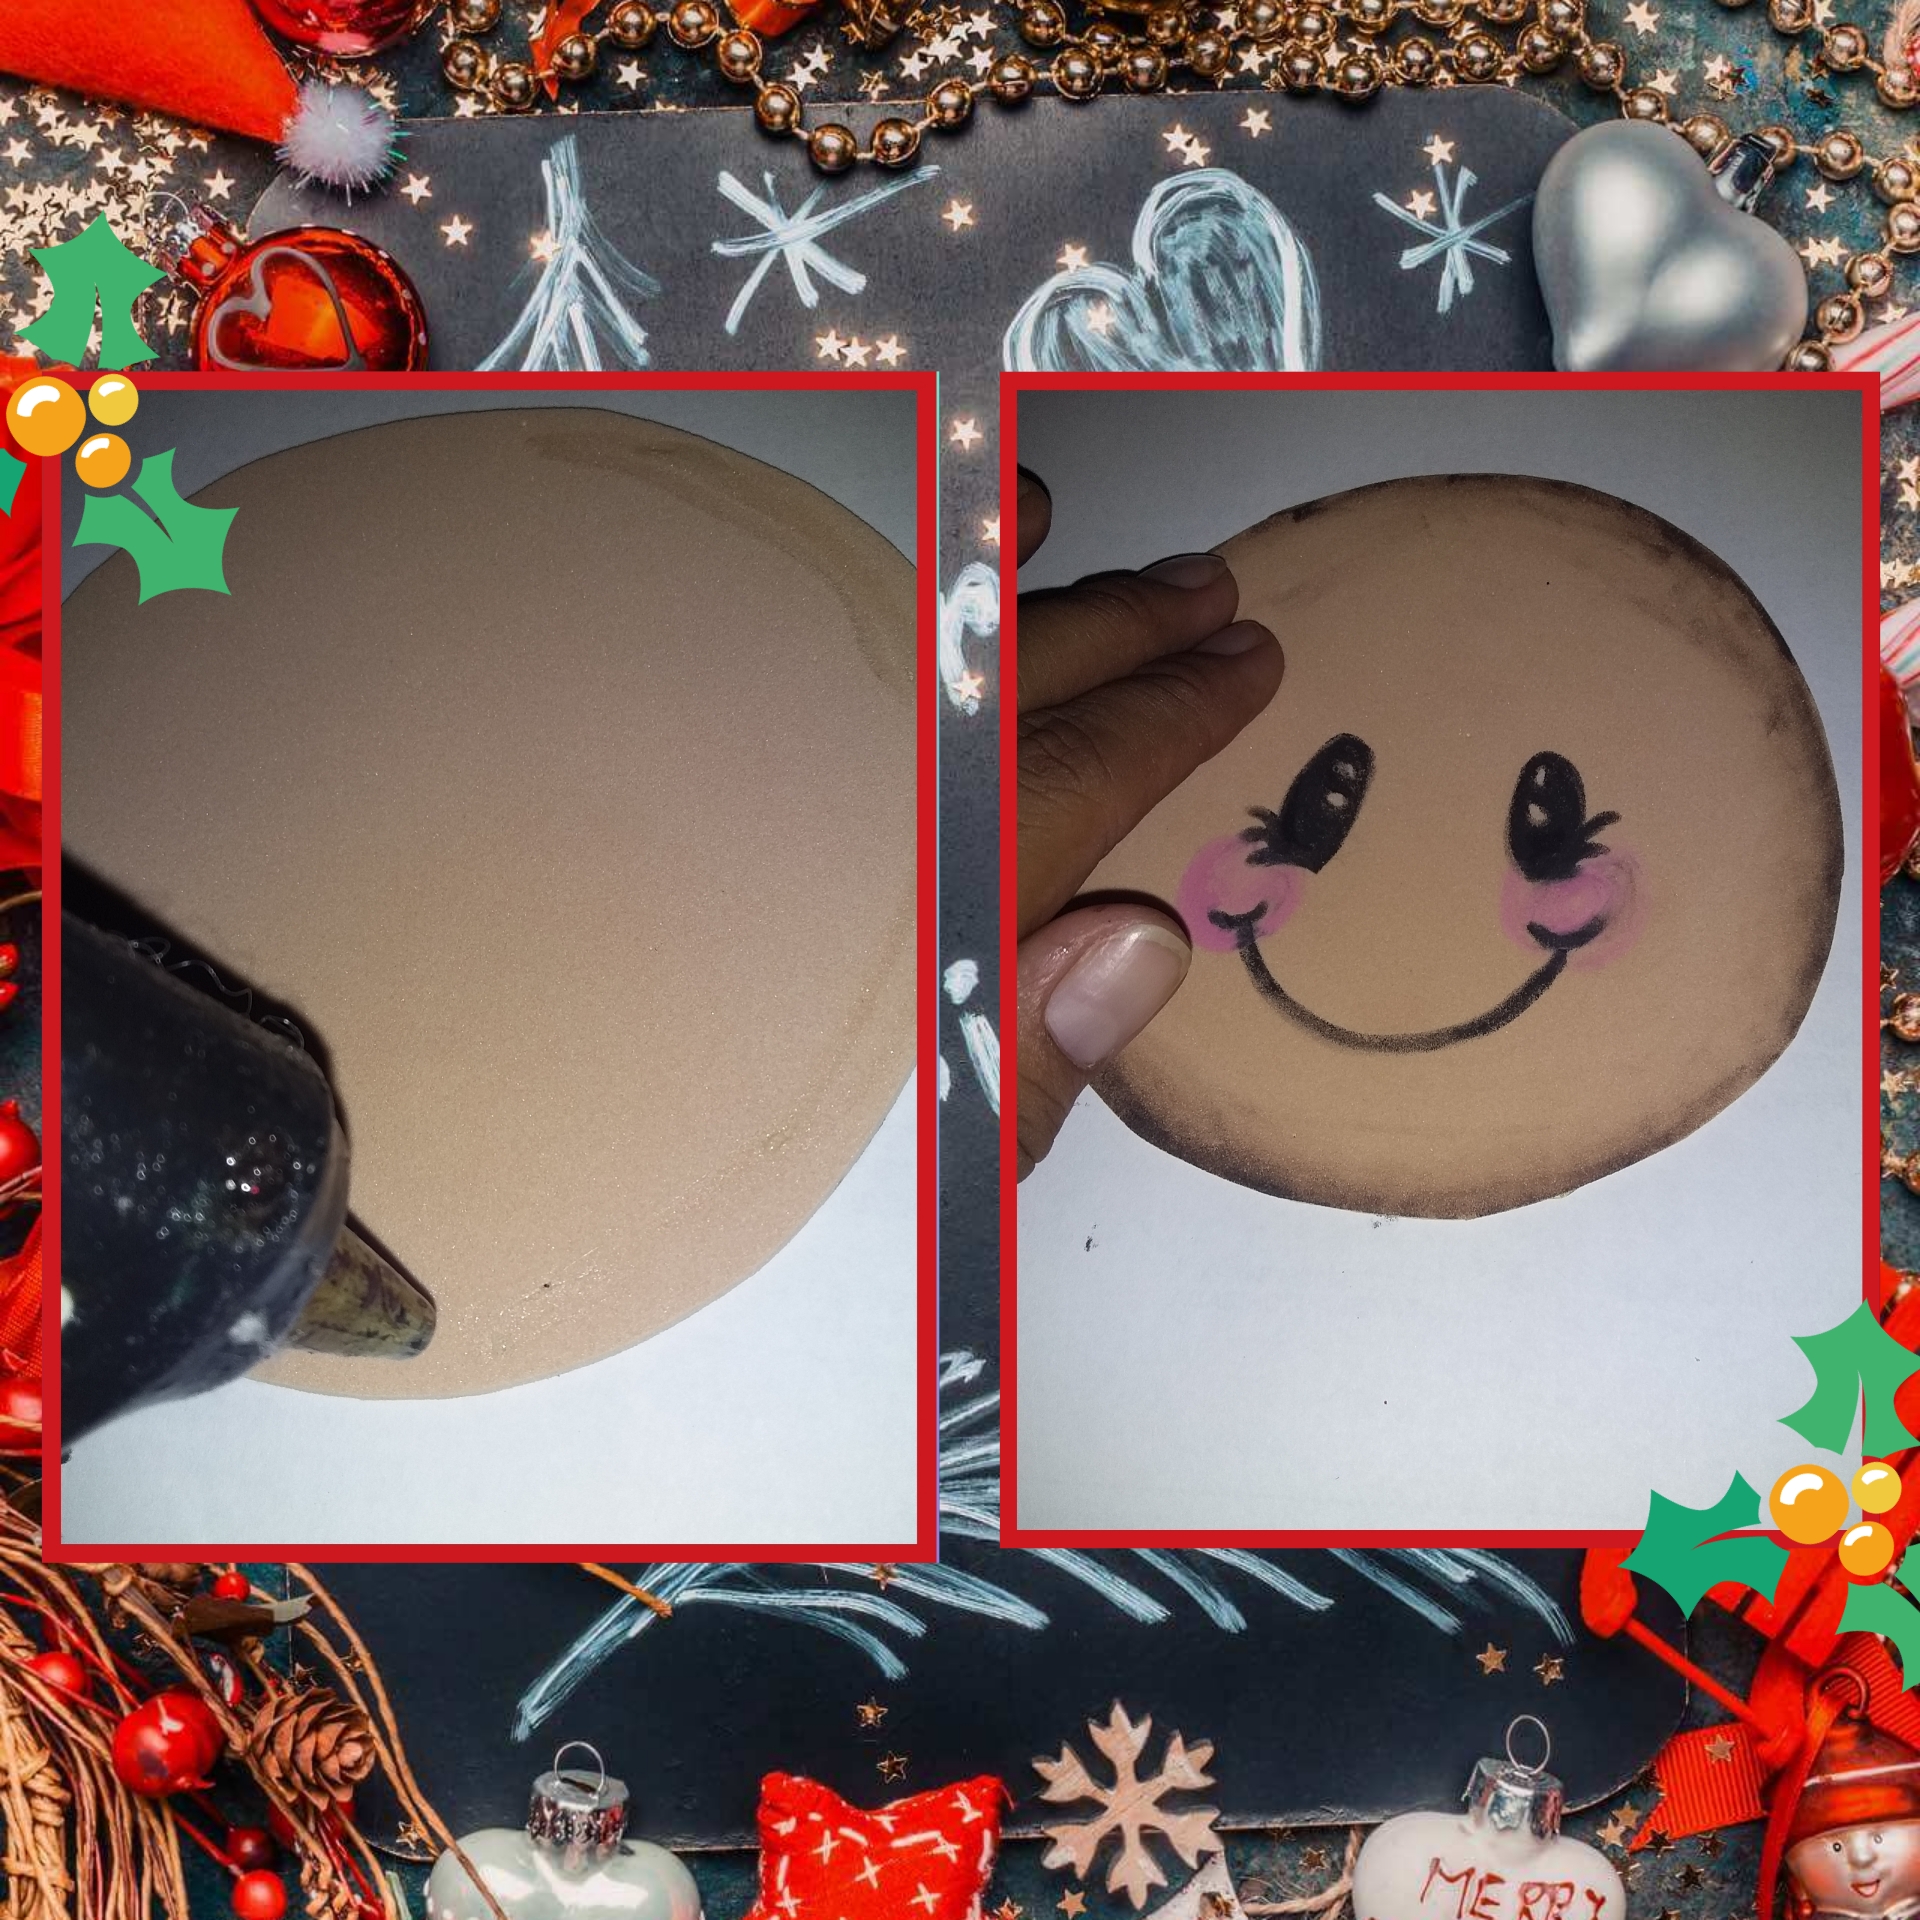
Marcamos los patrones, el rostro, las manos y los pies en la espuma color piel. Gorra de espuma blanca y roja. Y por último hacemos unas tiras en zigzag con la espuma blanca.
First step
We mark the patterns, the face, the hands and the feet in the skin-colored foam. White and red foam cap. And finally we make some strips in zigzag with the white foam.
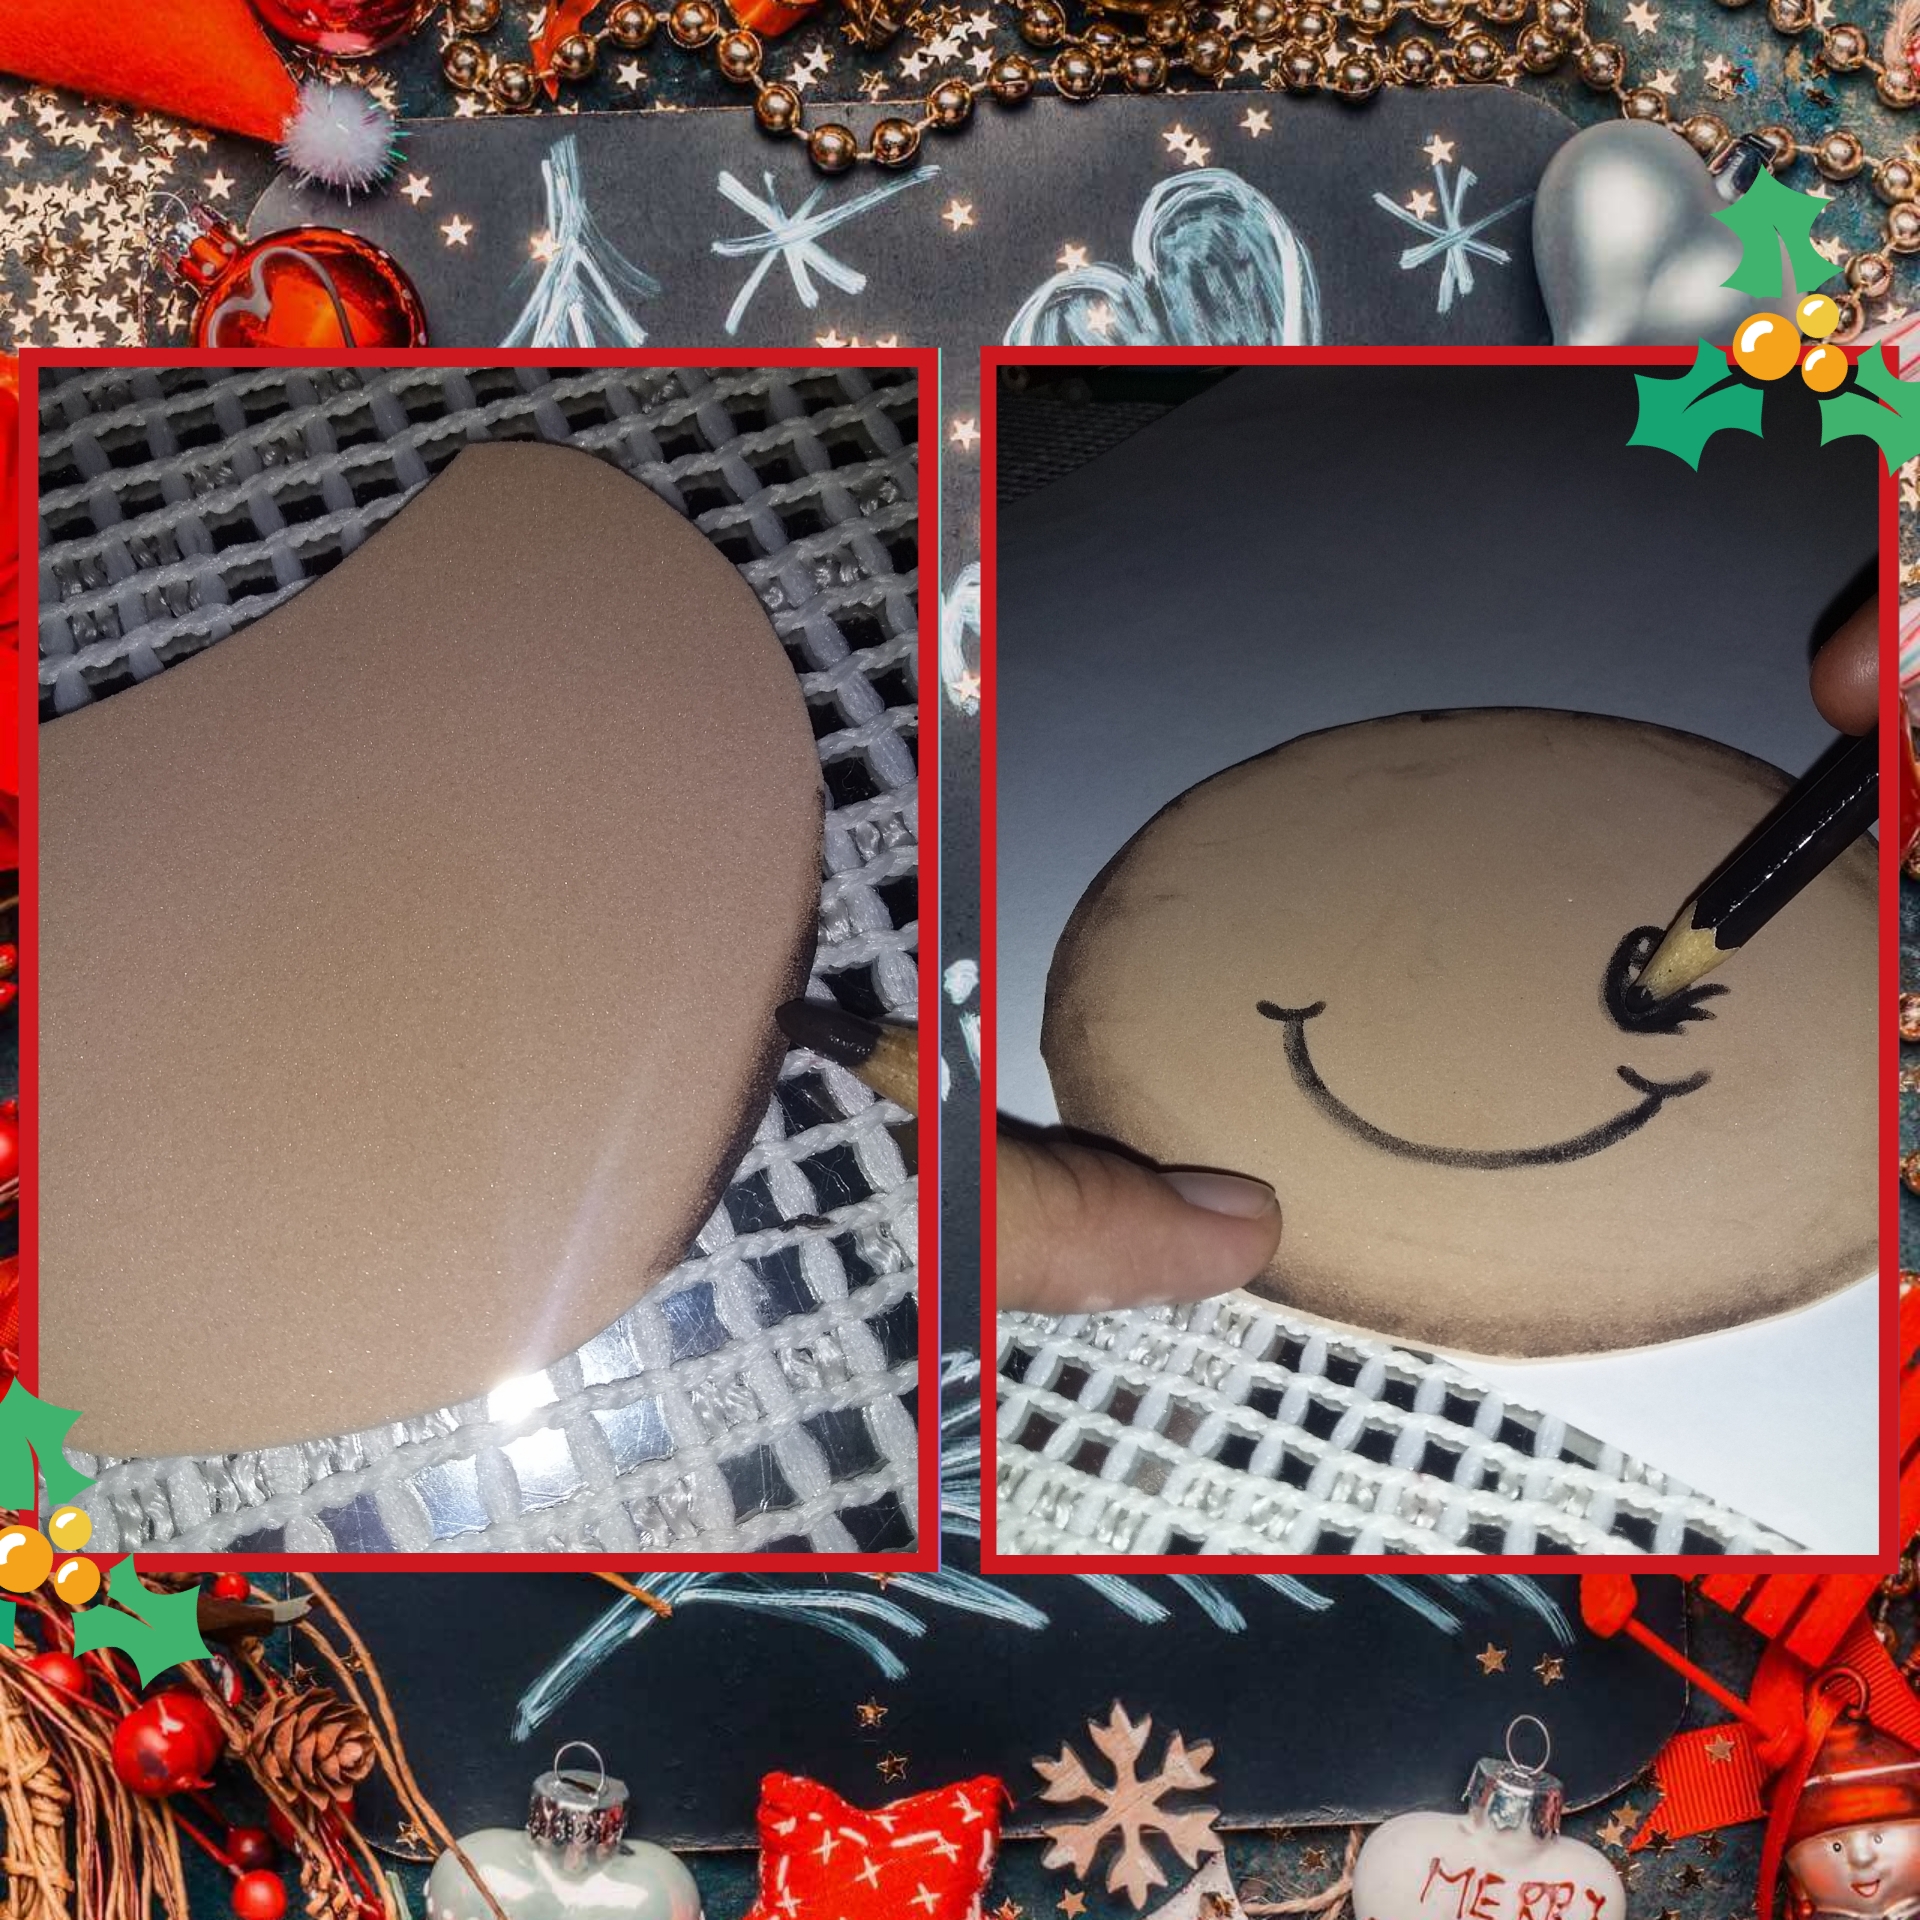
Segundo paso
Después de tener todas las piezas vamos a difuminar los bordes de las manos, pies y cara con marrón oscuro, mojar la punta con agua y difuminar de forma circular desde el borde hacia el centro. Y con el color azul los trozos de espuma blanca para el sombrero. Y finalmente haremos la cara de nuestra galleta.
Second step
After having all the pieces we are going to blur the edges of the hands, feet and face with dark brown, wet the tip with water and blend in a circular way from the edge to the center. And with the blue color the pieces of white foam for the hat. And finally we will make the face of our cookie.
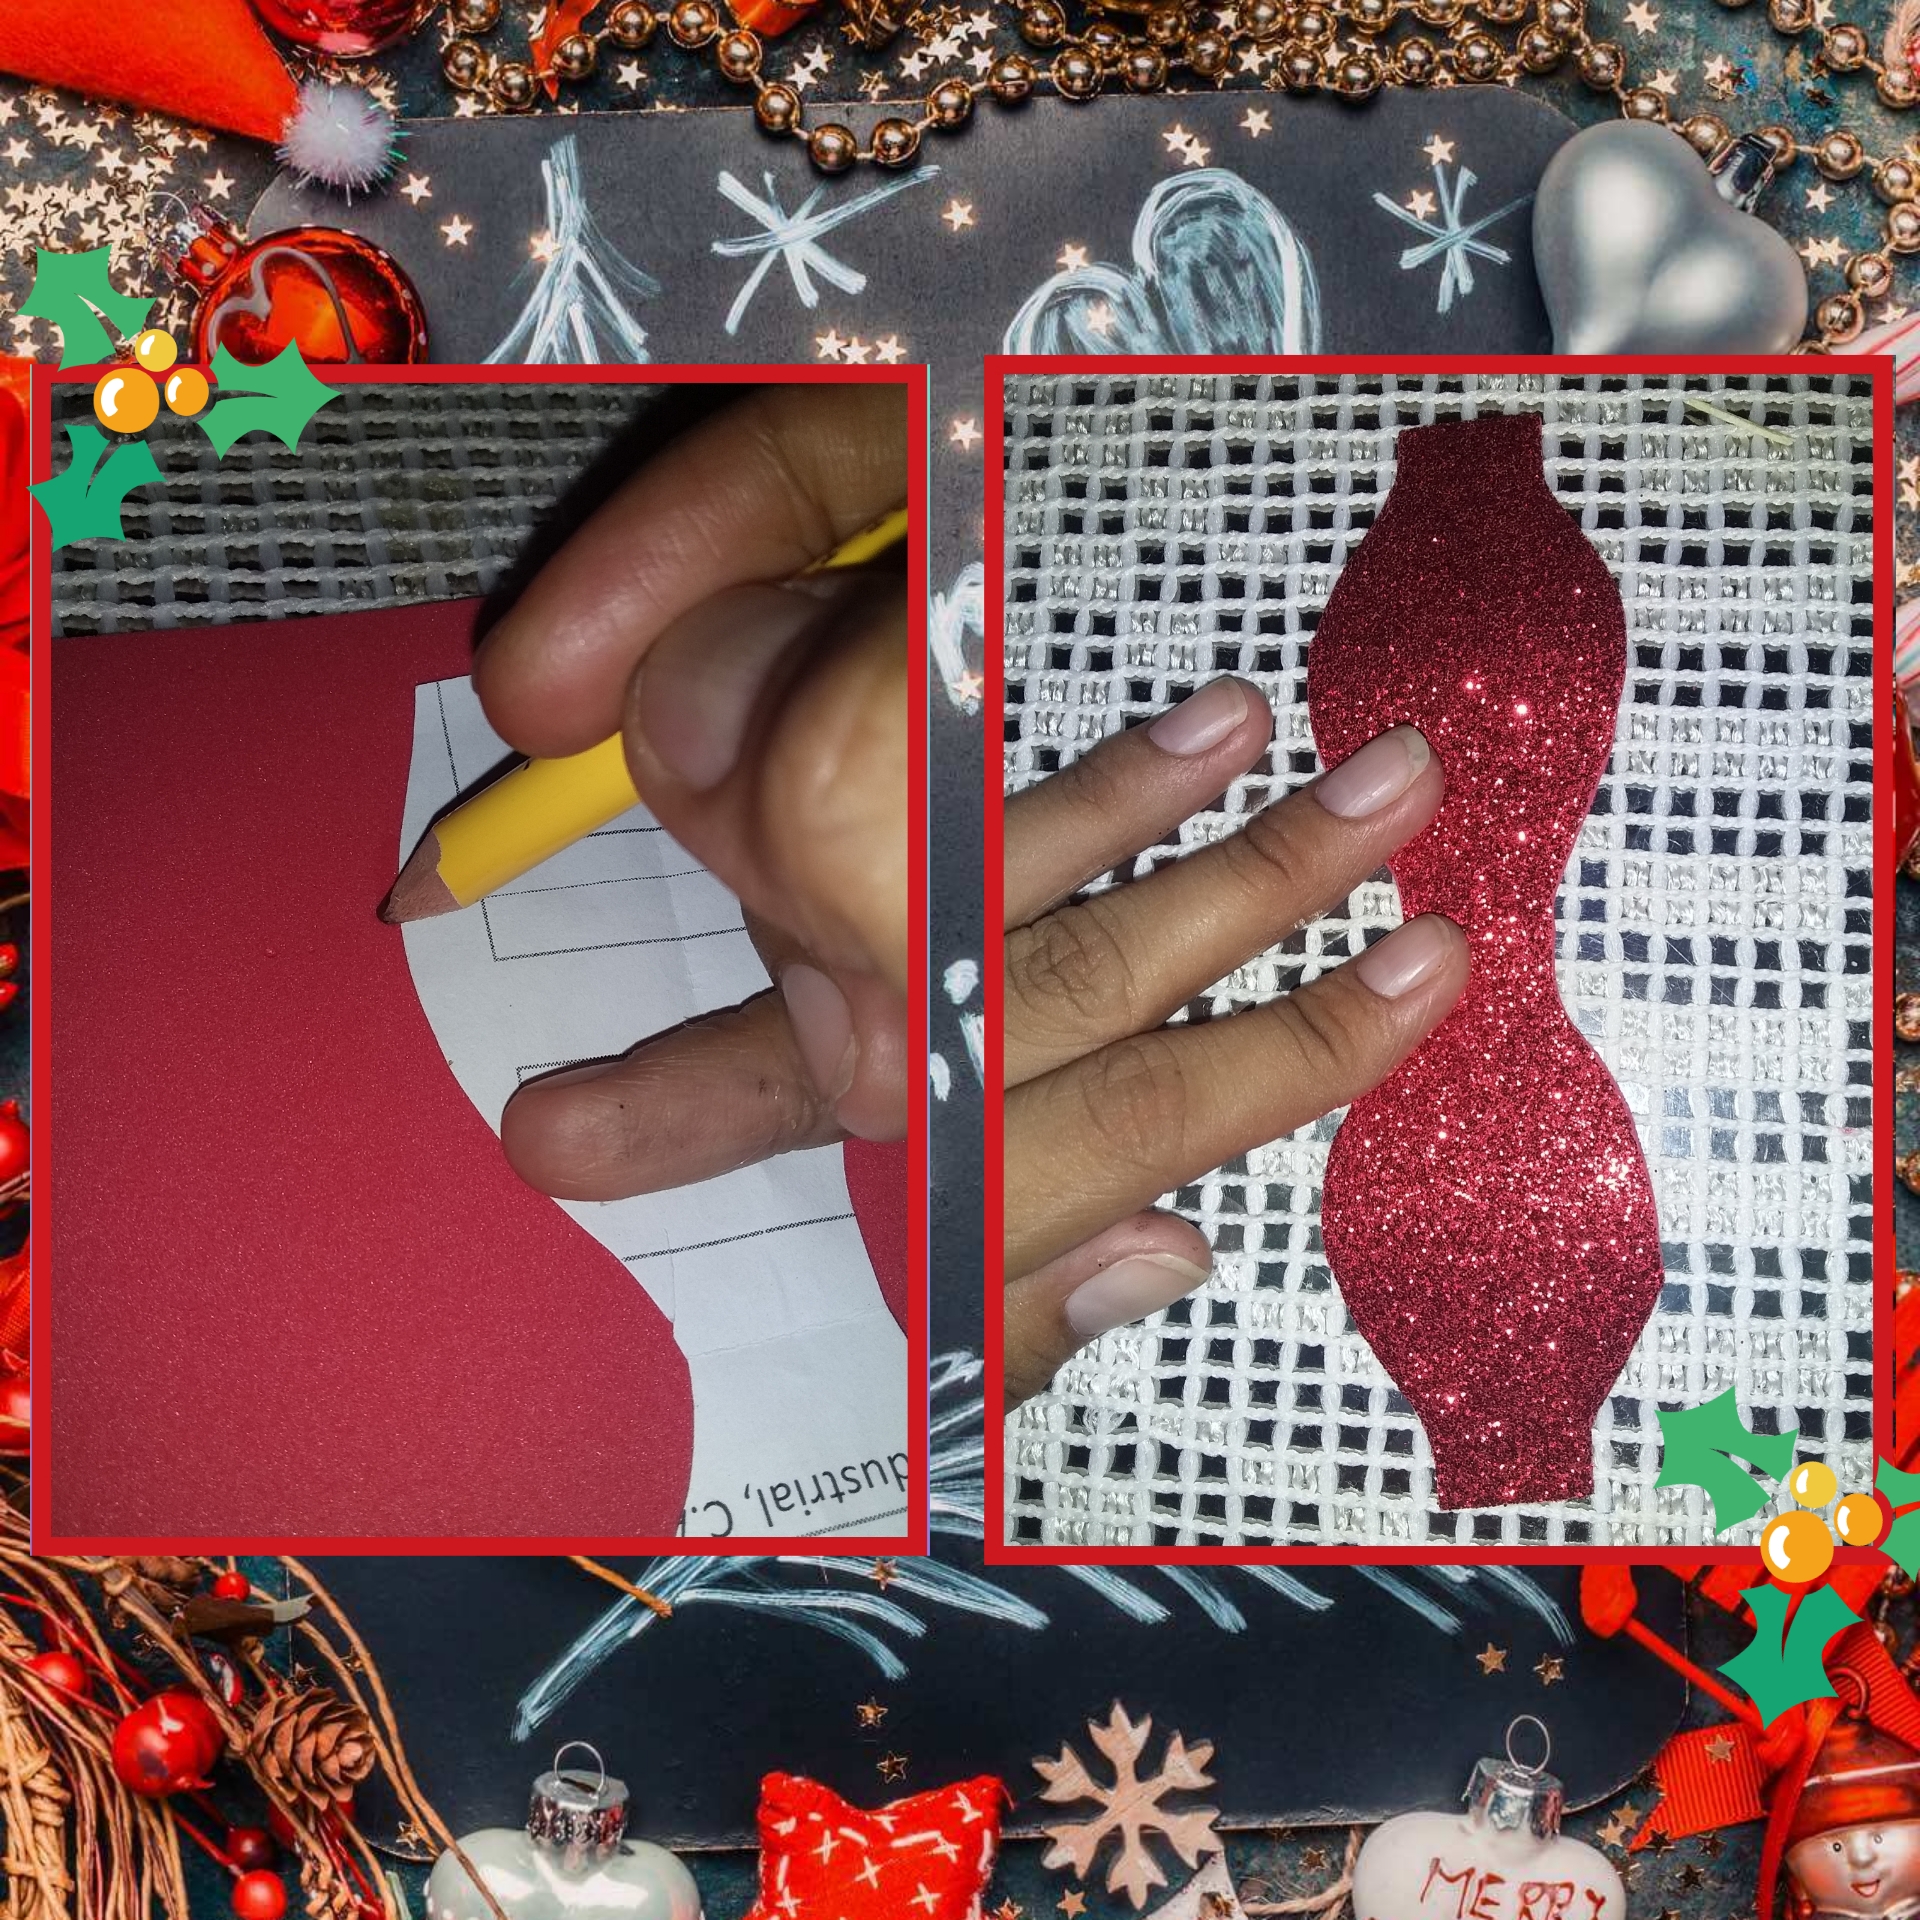
Tercer paso
Con el papel de regalo vamos a tapar el CD.
- Third step *
We mark the patterns, the face, the hands and the feet in the skin-colored foam. White and red foam cap. And finally we make some strips in ziczas with the white foam.

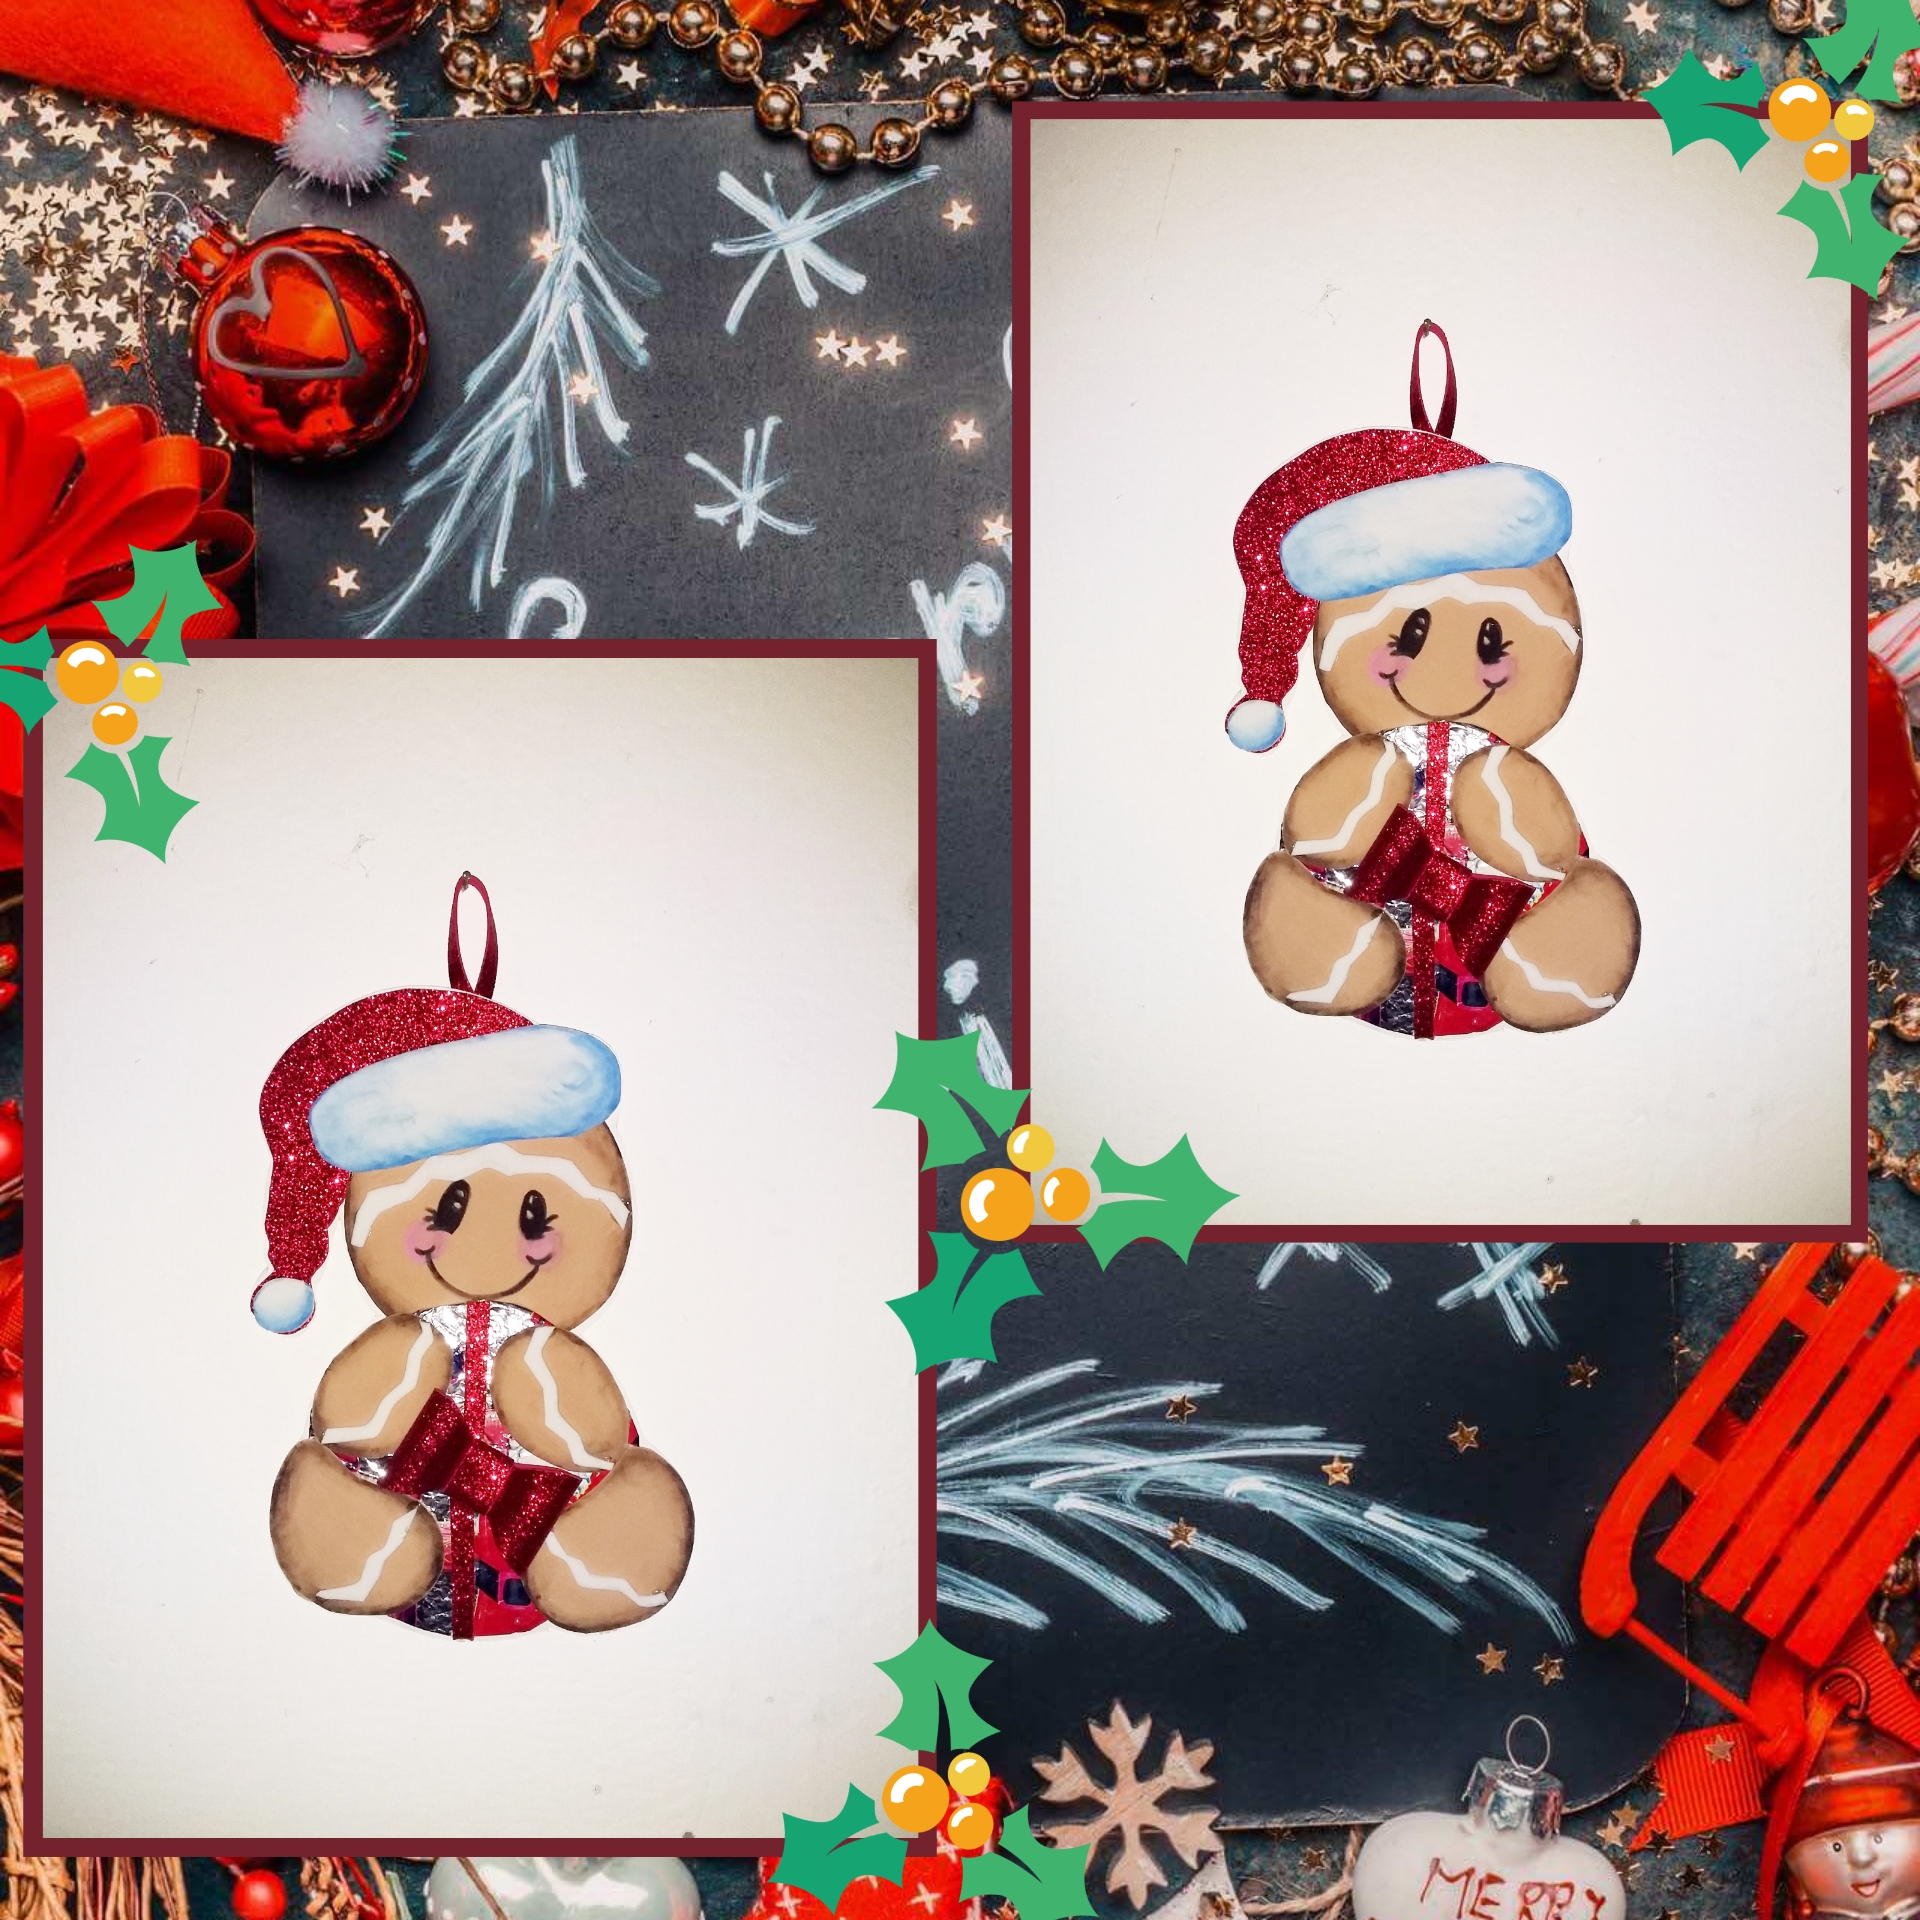
Cuarto paso
Después de cubrir el CD con el papel pegamos todas las piezas en la hoja blanca empezando por la cabeza y finalmente cortamos alrededor de la hoja.
Fourth step
After covering the CD with the paper we glue all the pieces on the white sheet starting with the head and finally we cut around the sheet.
Quinto paso
Finalmente haremos un lazo con el foami rojo y lo pegaremos en el centro del CD.
Fifth step
Finally we will make a loop with the red foami and stick it in the center of the CD.
Una vez que se hayan completado todos los pasos, así es como se ve nuestra galleta de jengibre. Espero les haya gustado y muchas gracias por leerme!
Once all the steps have been completed, this is what our gingerbread cookie looks like. I hope you liked it and thank you very much for reading me!
Para ver más tutoriales como este te invito a seguir mi cuenta
To see more tutorials like this I invite you to follow my account
Nota: Las fotos son editadas por mi propiedad con el editor de fotos Polish.
Note: The photos are edited by my property with the Polish photo editor.