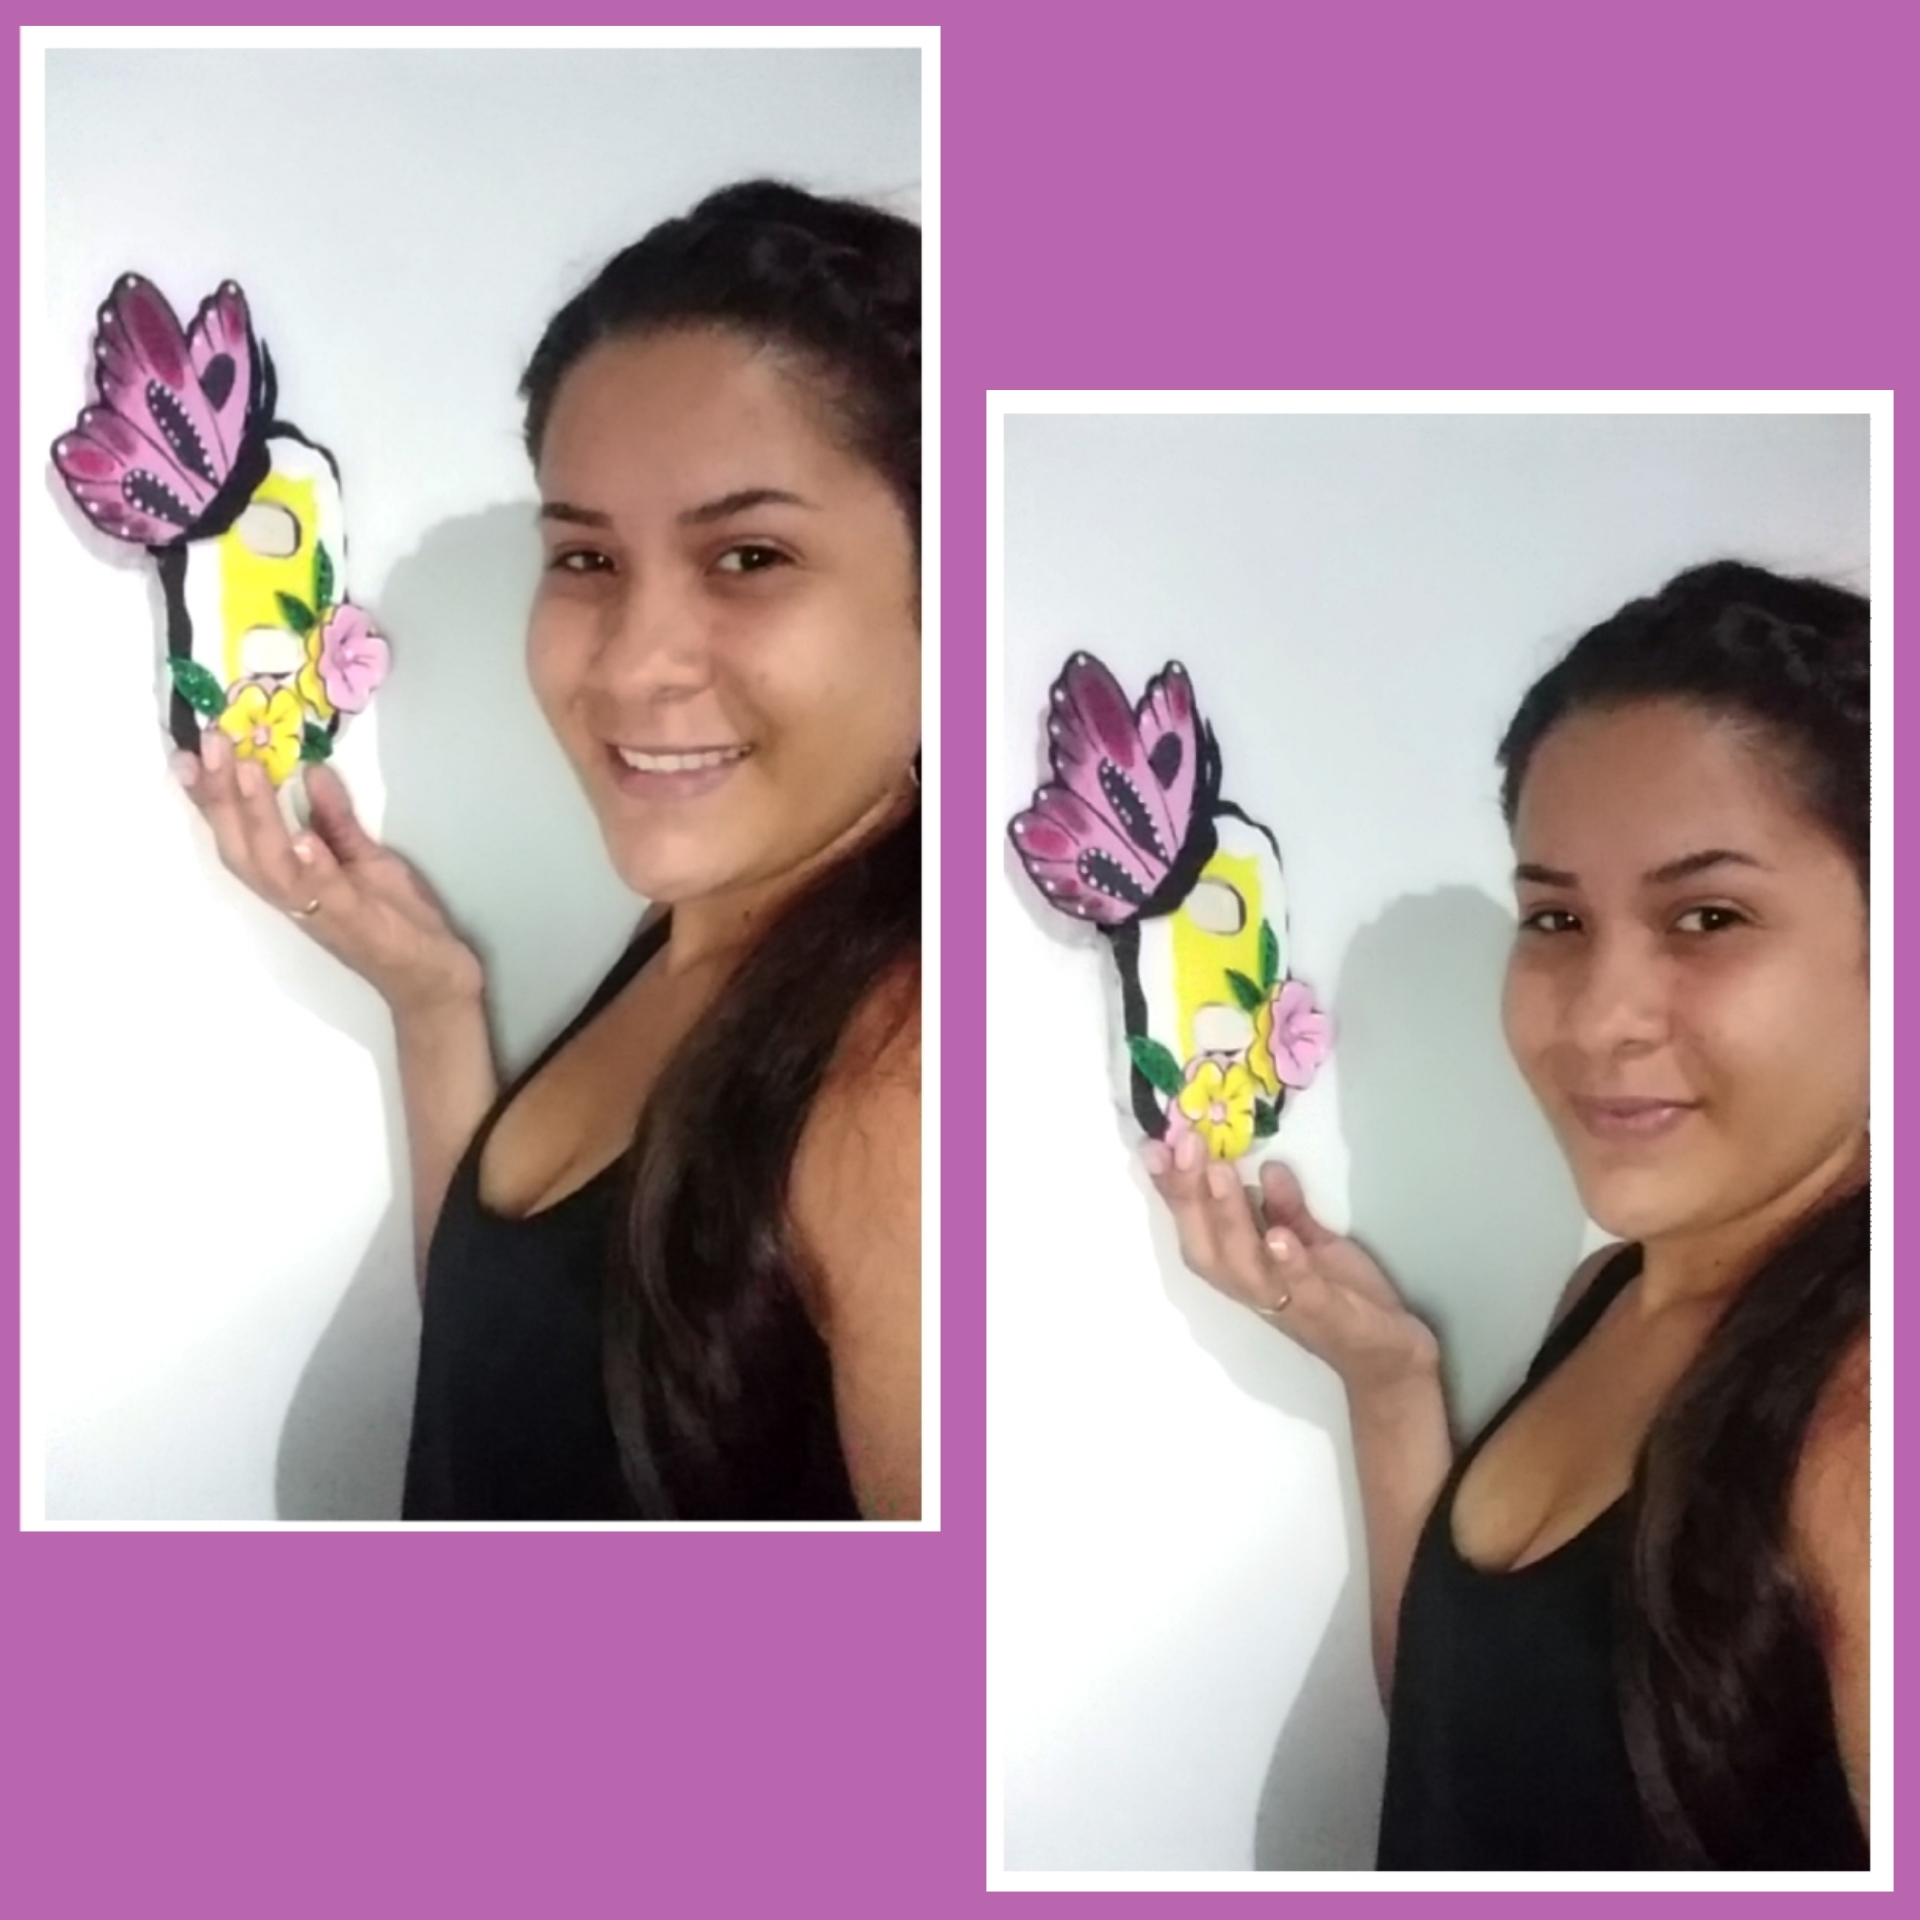
Hola hola amigos, ¿cómo están hoy? Estoy súper feliz de poder mostrarles este hermoso adorno que hice para el interruptor de luz de mi casa... En este post les cuento como hacerlo, los materiales y herramientas que utilizo para ello.
Hello hello friends, how are you today? I am super happy to be able to show you this beautiful ornament that I made for the light switch in my house... In this post I will tell you how to do it, the materials and tools that I use for it.
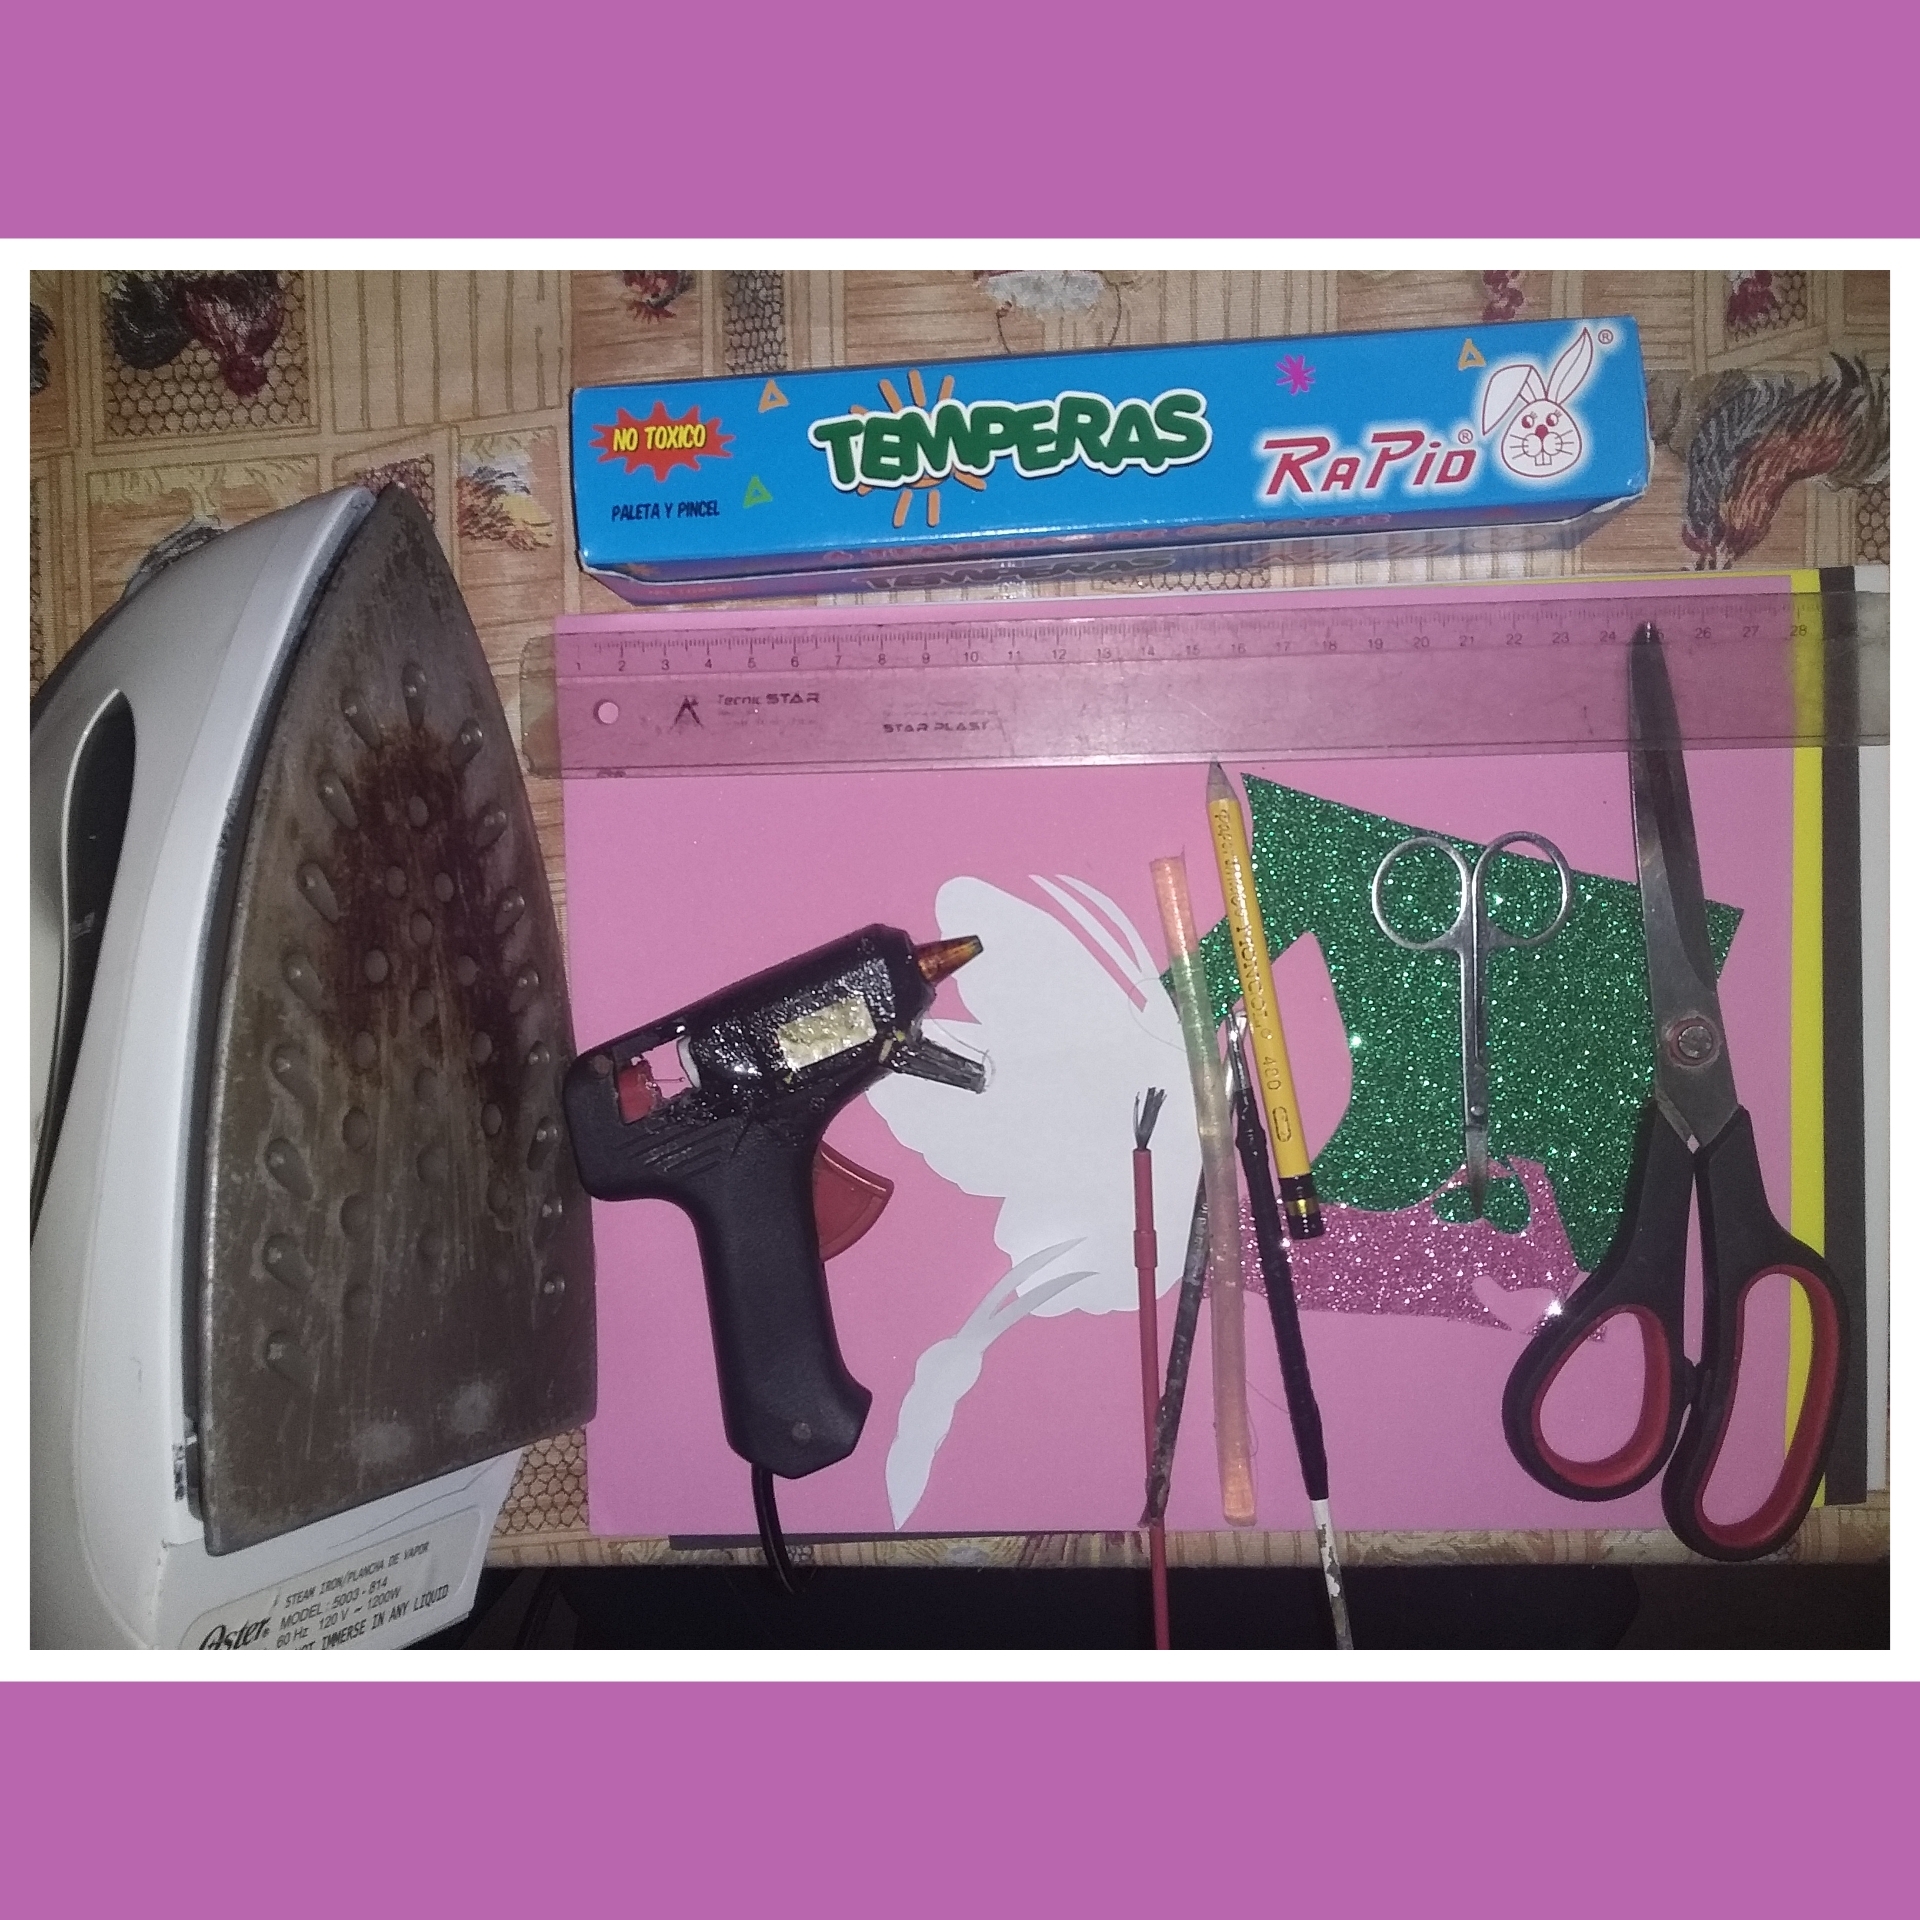
Materiales y herramientas:
- Goma eva negra, amarilla, blanca y rosa.
- Recortes de espuma EVA verde y rosa brillante.
- Patrones de la mariposa y el cuerpo.
- Regla.
- Pistola y barra de silicona.
- Pinceles y pinturas.
- Tijeras: una grande y otra pequeña.
- Plancha para planchar ropa.
Materials and tools:
- Black, yellow, white and pink eva rubber.
- Green and bright pink EVA foam cutouts.
- Patterns of the butterfly and the body.
- Rule.
- Gun and silicone bar.
- Brushes and paints.
- Scissors: one large and one small.
- Iron for ironing clothes.
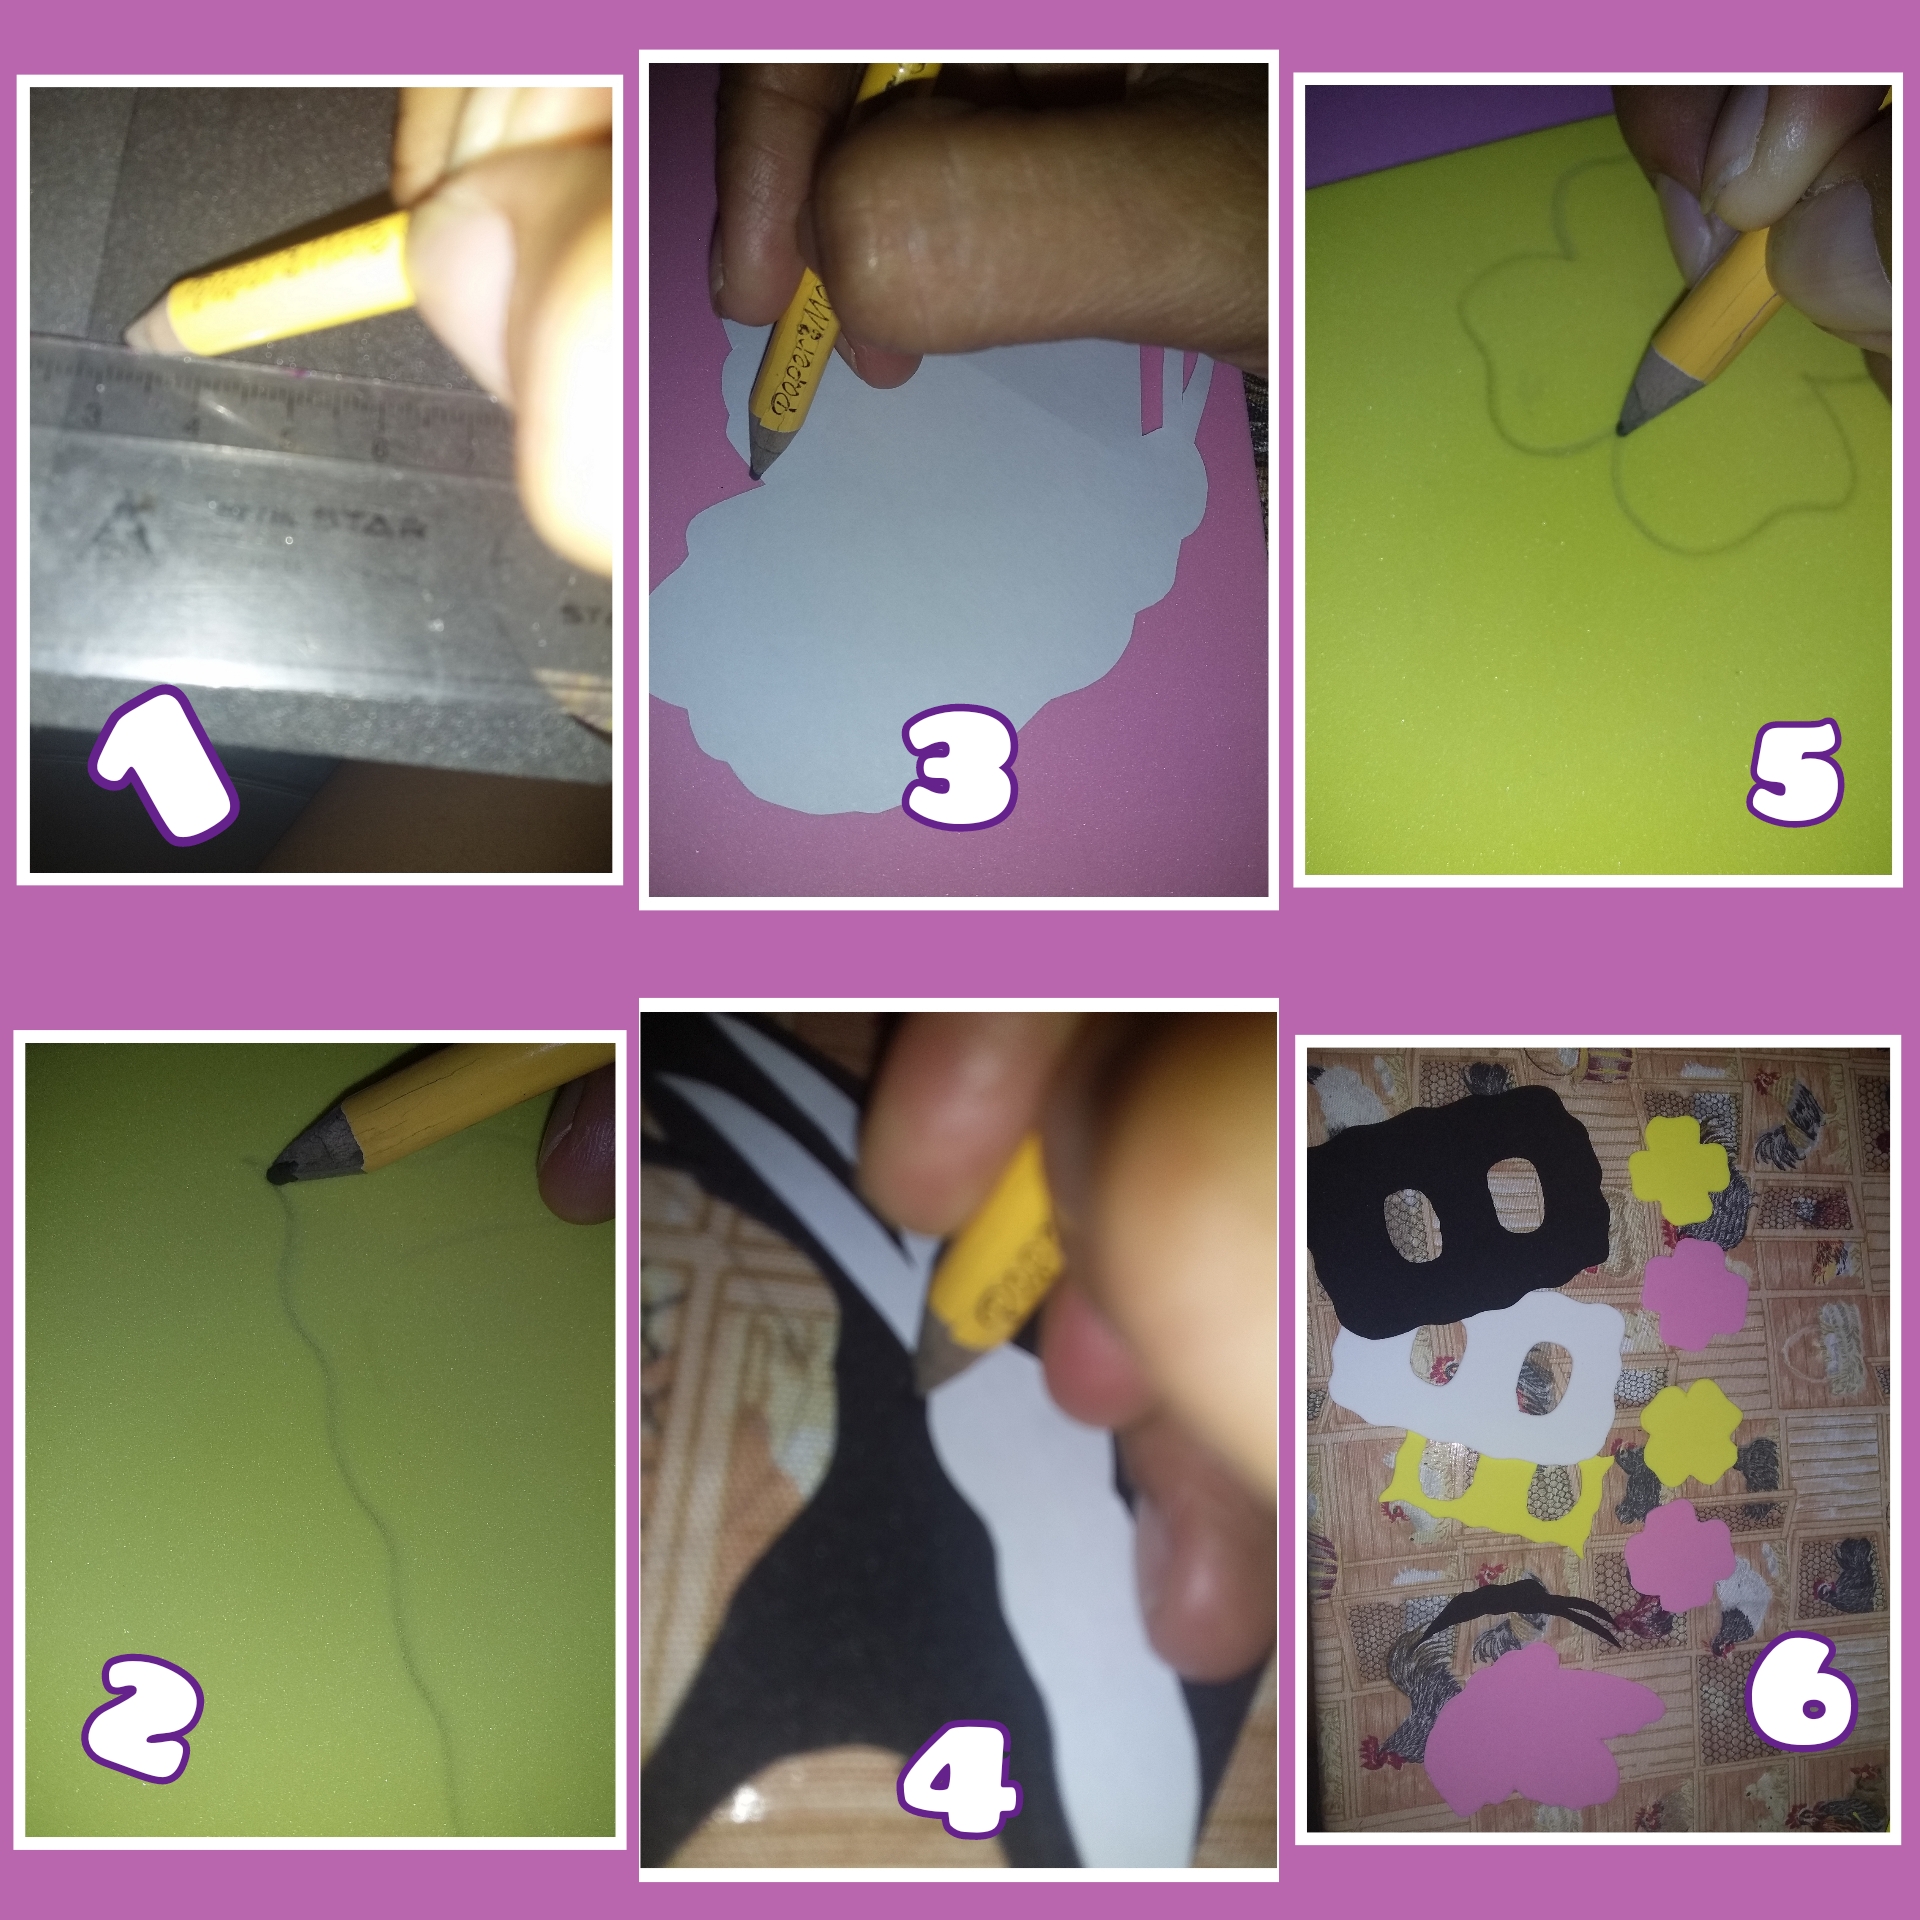
Paso 1
Para empezar con una regla tomamos las medidas del interruptor, en esta que hice las medidas eran 11 cm x 13 cm. Luego la marcamos sobre la goma eva negra, y la cortamos dando formas onduladas al borde, repetimos este proceso con la goma eva blanca pero más pequeña que la negra de la misma manera con la goma eva amarilla. Luego marcamos la mariposa en la espuma rosa, el cuerpo en el negro y haremos unas flores con la espuma amarilla y rosa.
Step 1
To start with a ruler we take the measurements of the switch, in this one that I made the measurements were 11 cm x 13 cm. Then we mark it on the black eva rubber, and we cut it giving wavy shapes to the edge, we repeat this process with the white eva rubber but smaller than the black one in the same way with the yellow eva rubber. Then we mark the butterfly on the pink foam, the body in the black and we will make some flowers with the yellow and pink foam.
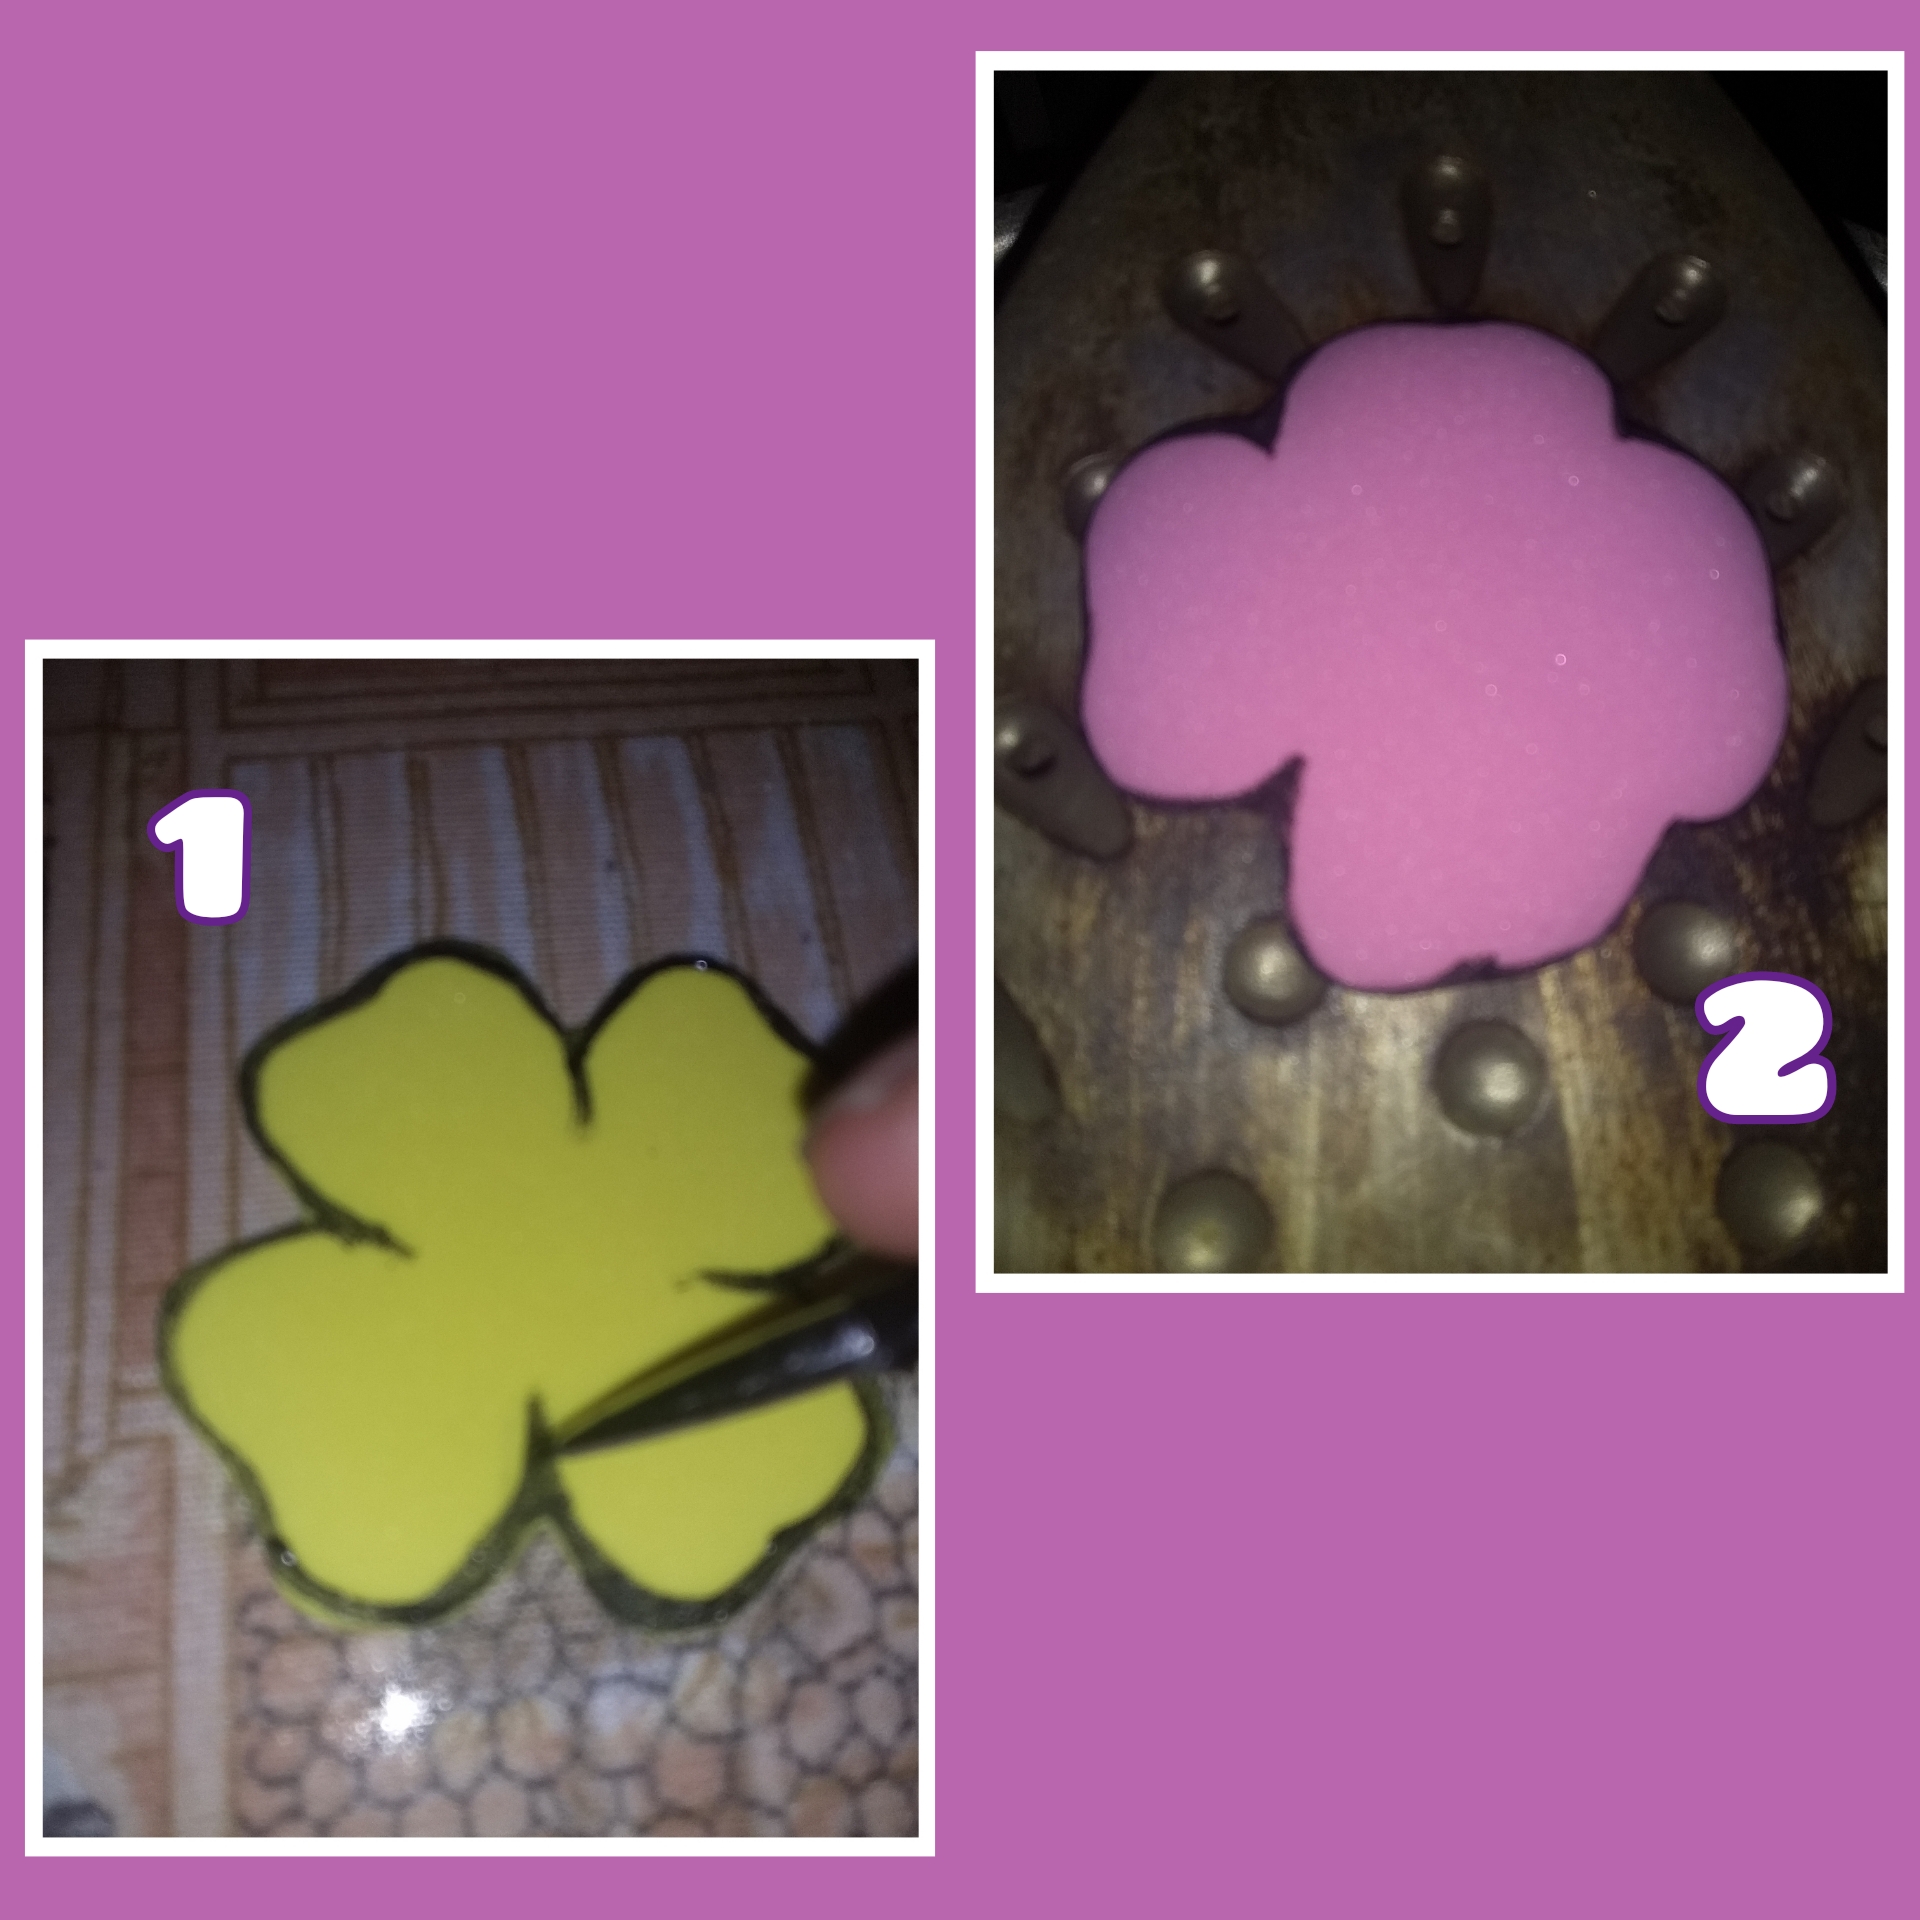
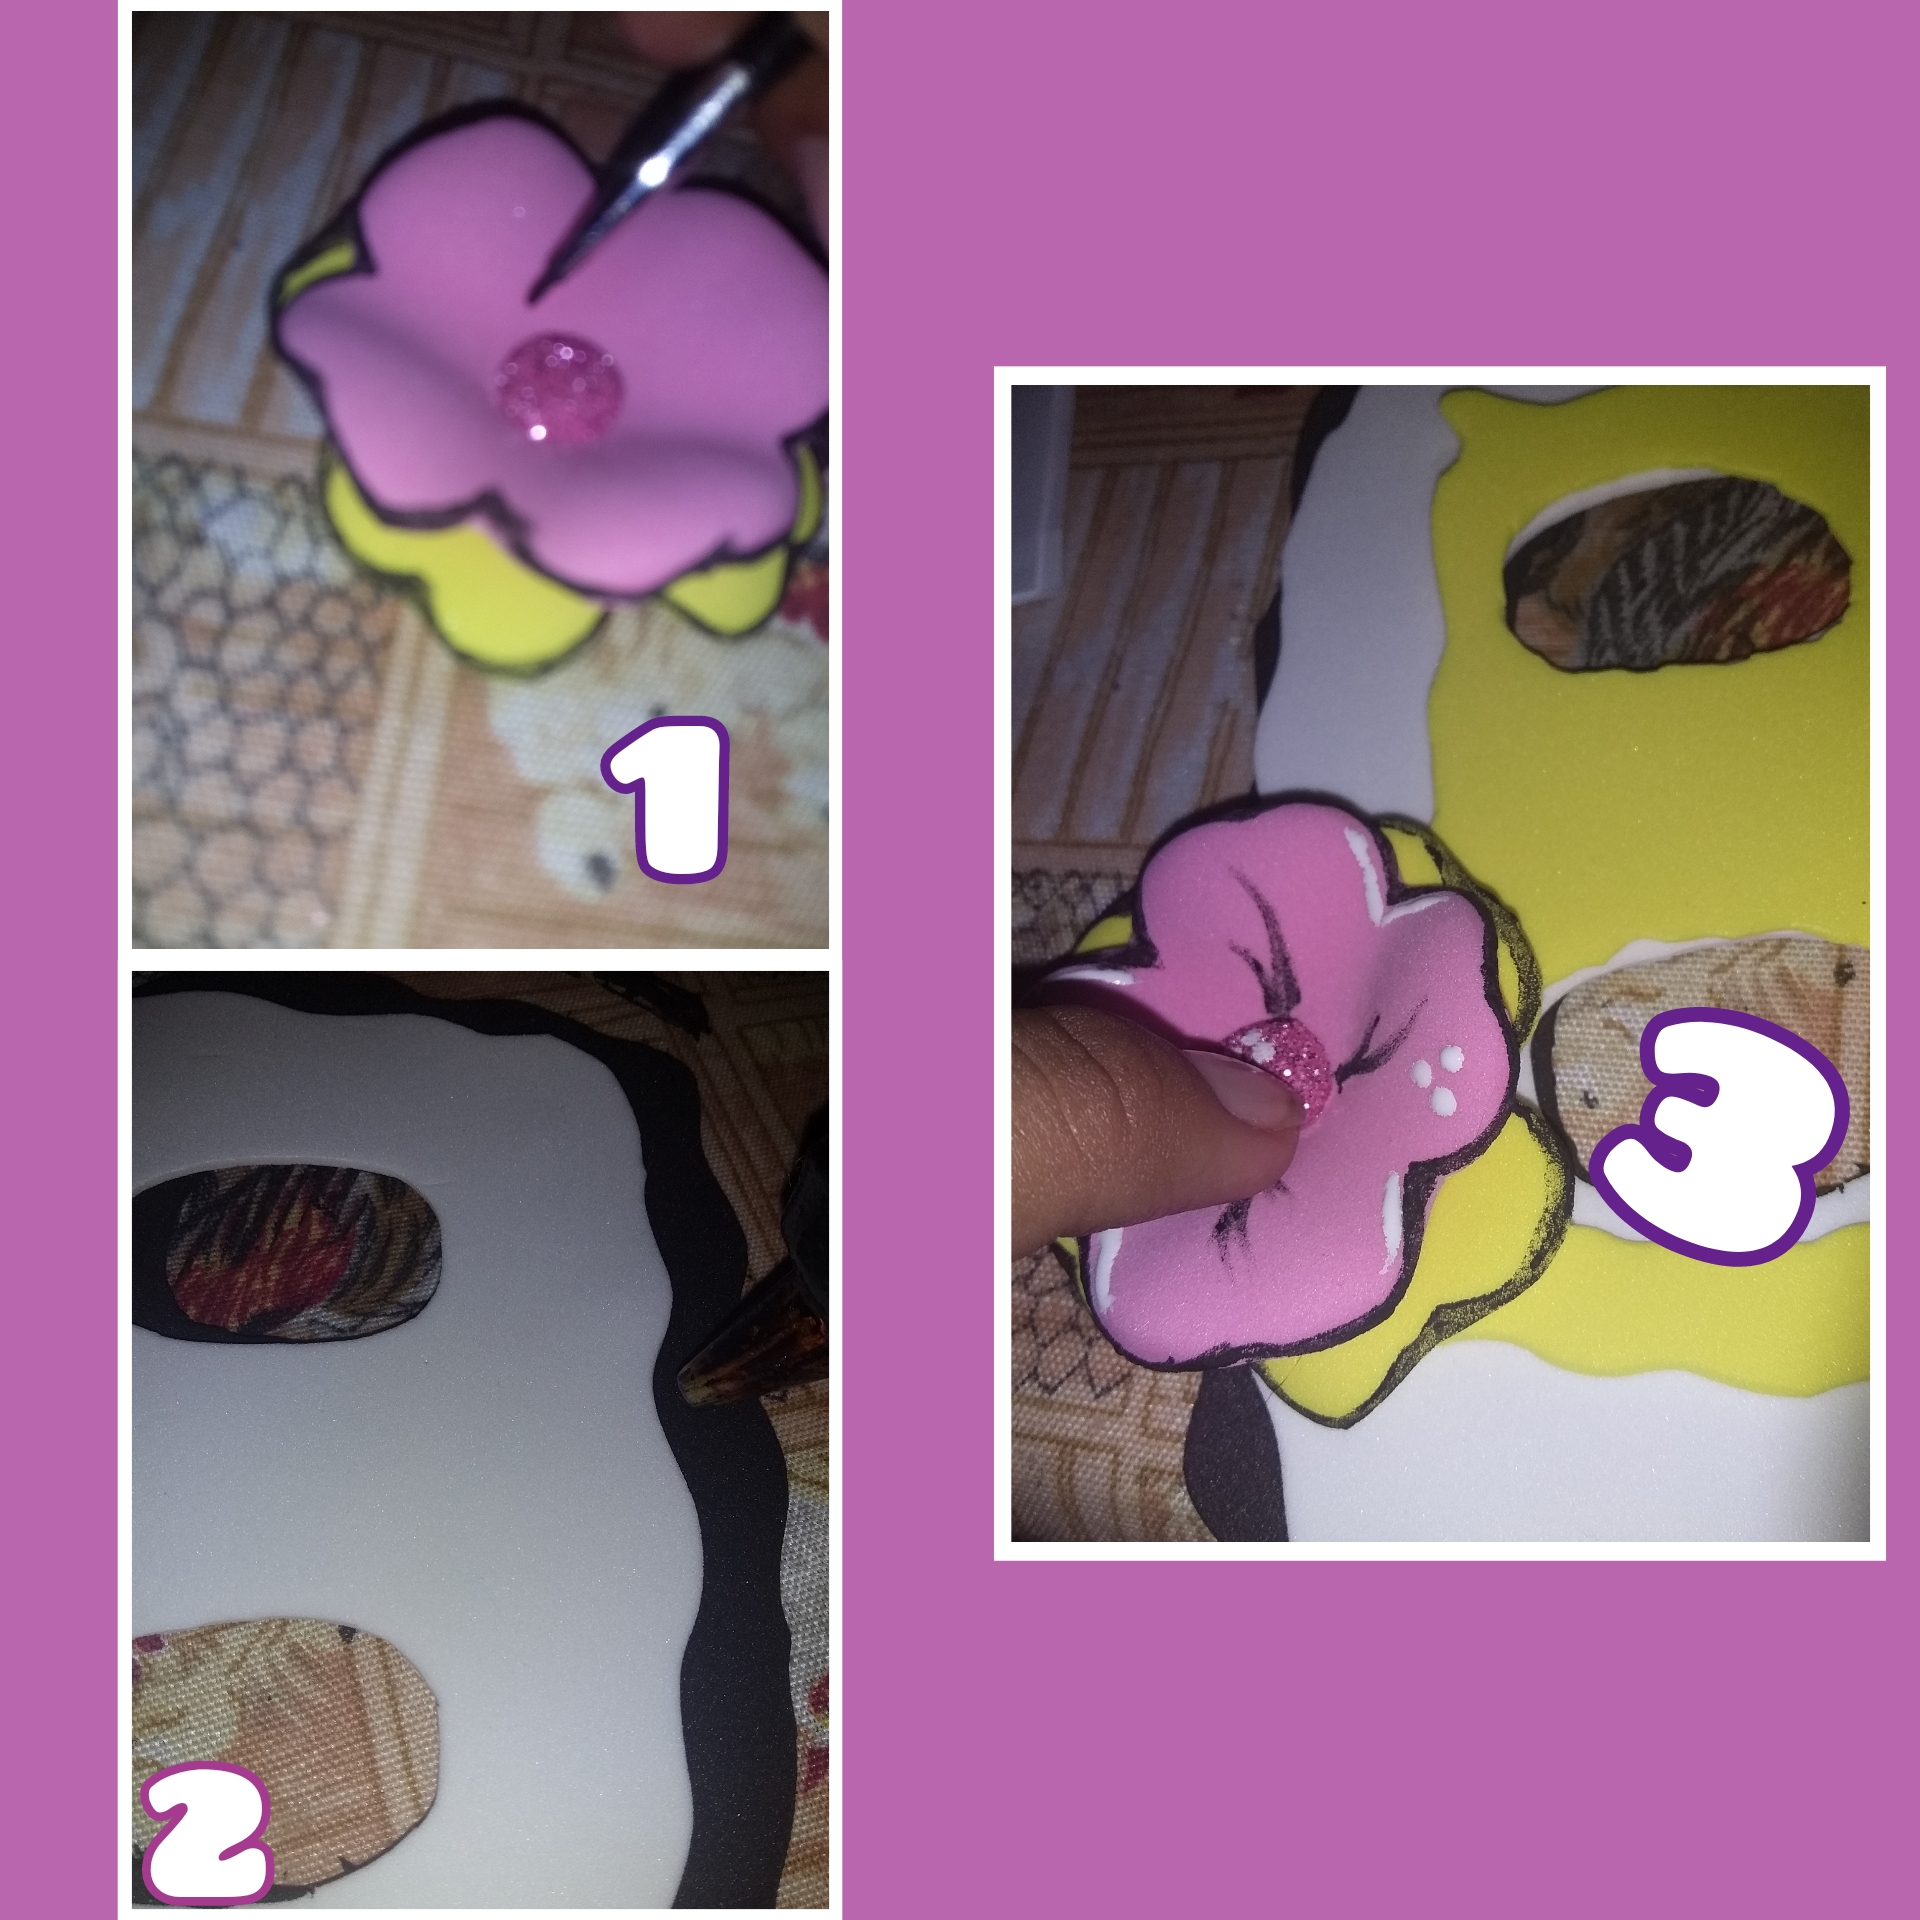
Paso 2
Ponemos la plancha a calentar y con pintura negra pintaremos un borde fino a las flores y luego las colocaremos sobre la plancha para darle forma, una vez que la veamos abombada la agarramos y le ponemos la parte del centro con nuestro dedo.
Step 2
We put the plate to heat and with black paint we will paint a fine edge to the flowers and then we will place them on the plate to give it shape, once we see it bulging we grab it and put the center part with our finger.
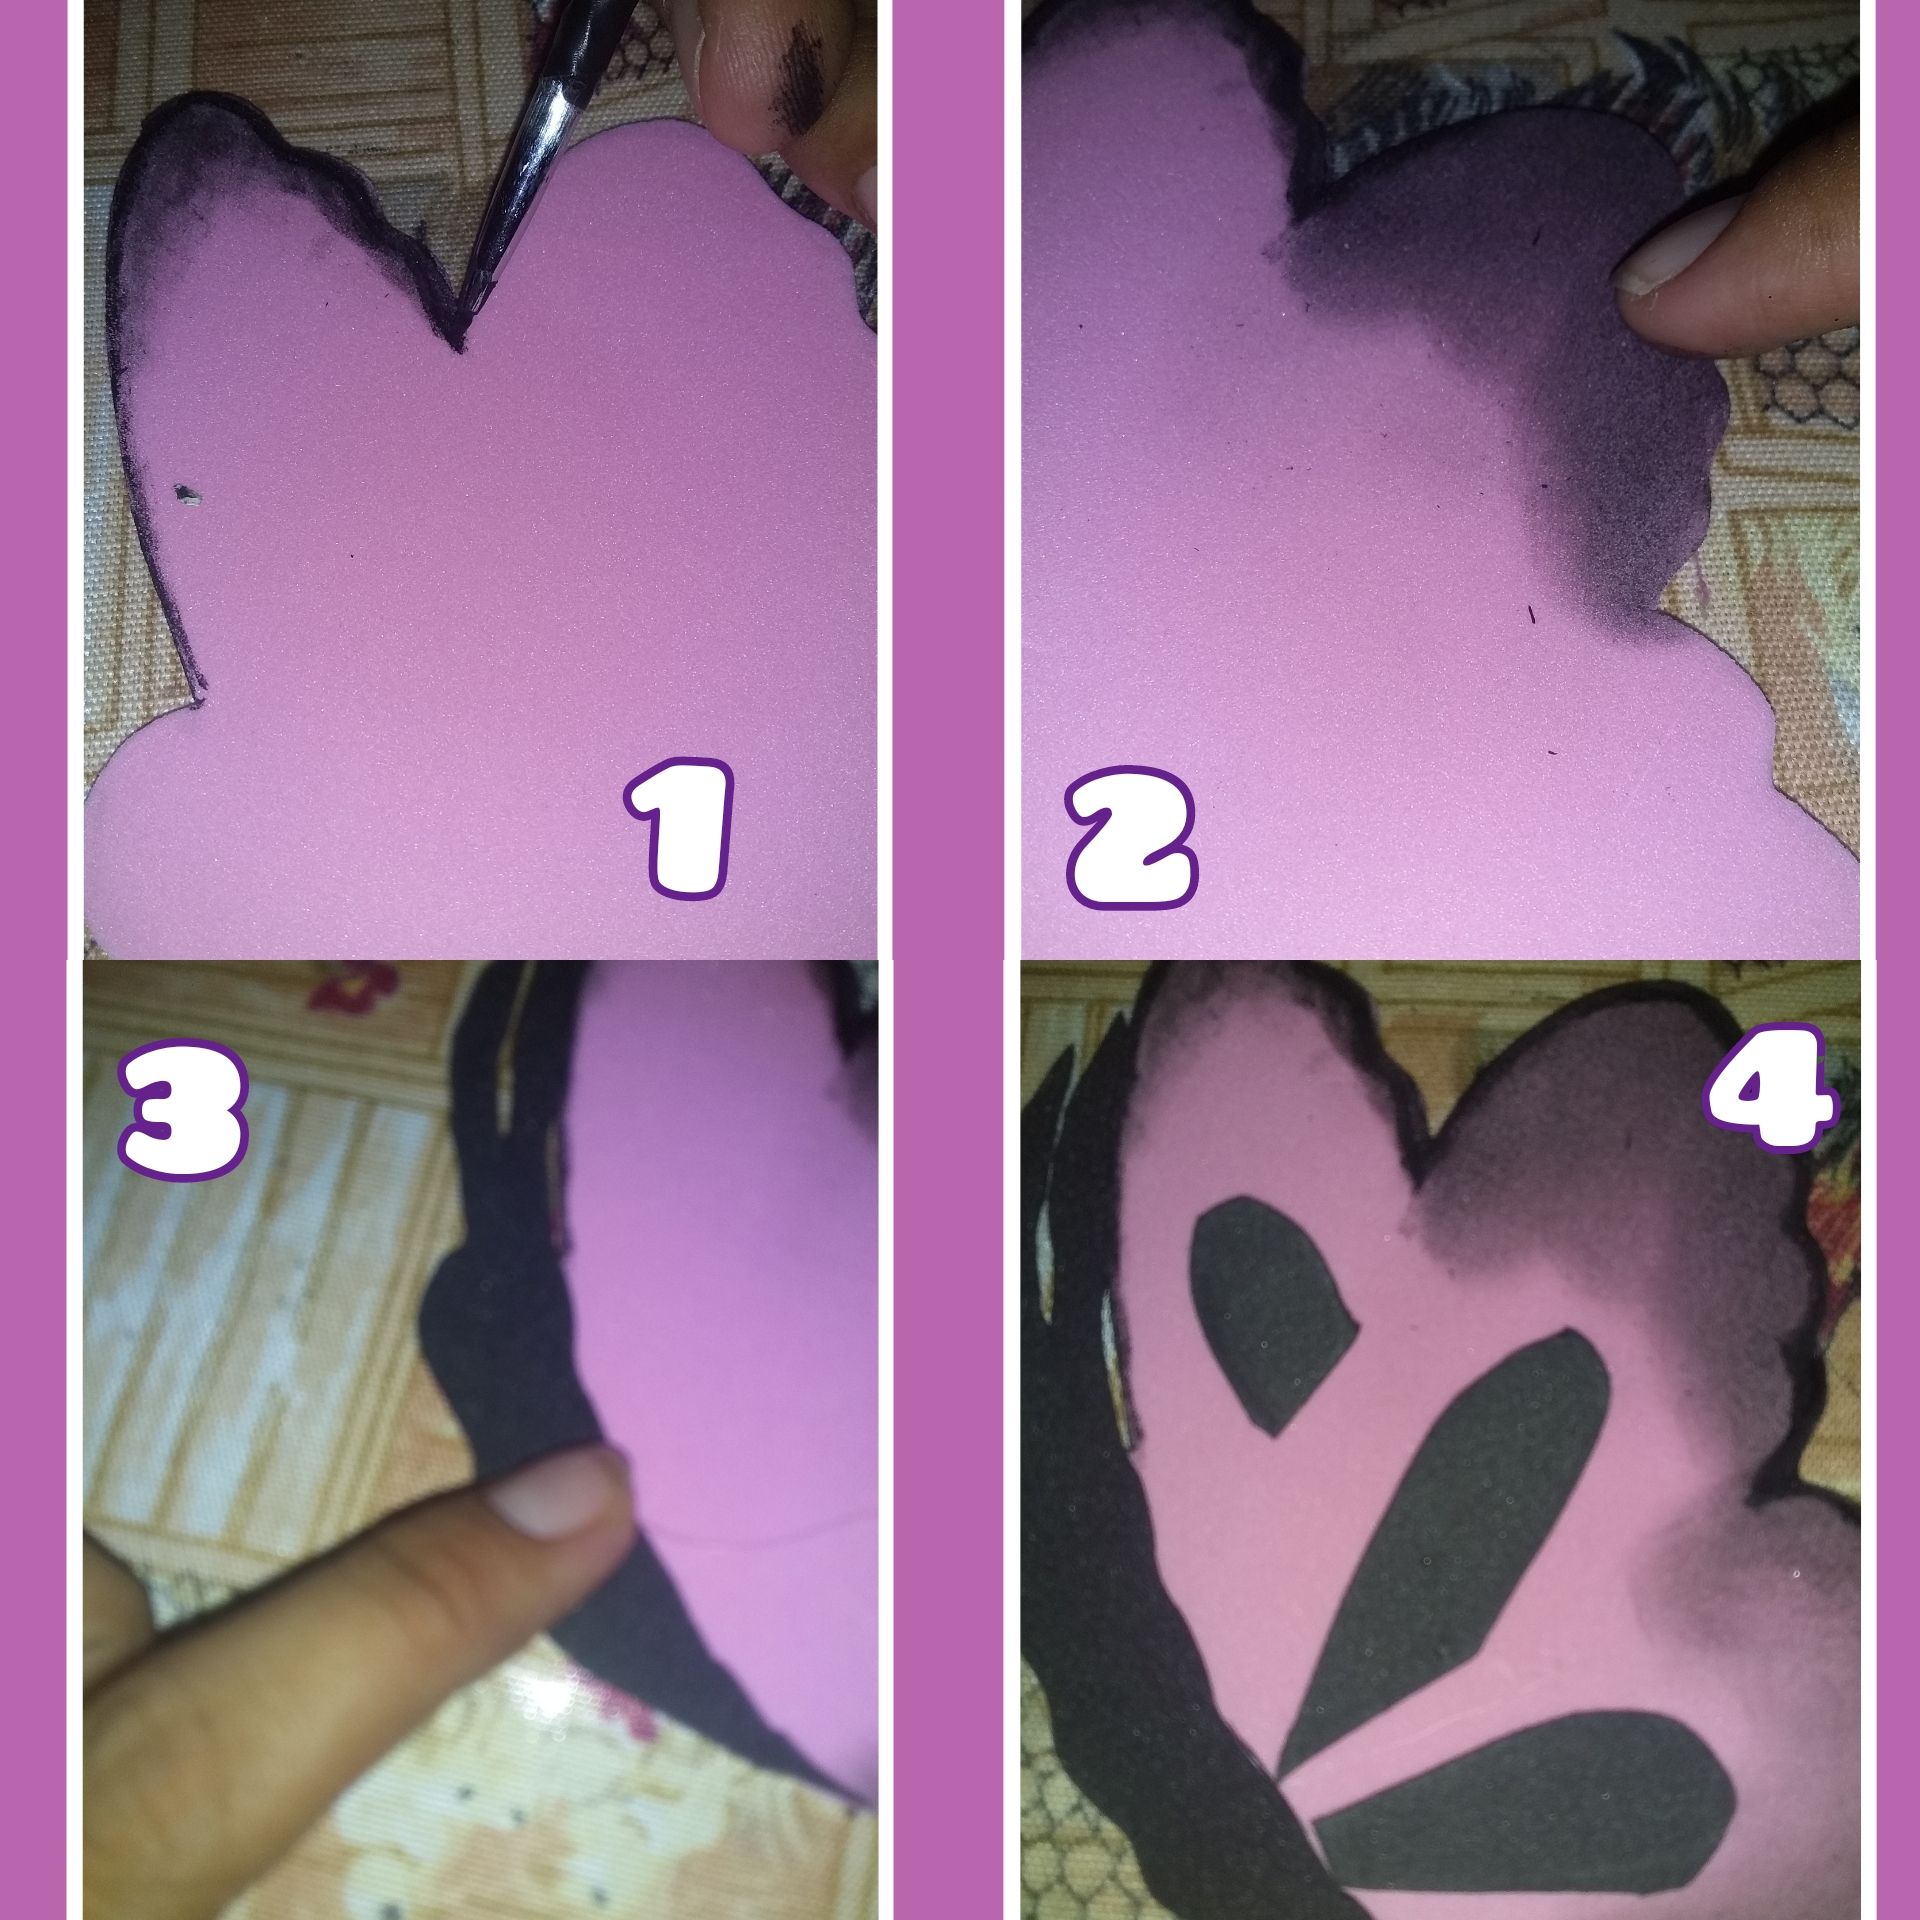
Paso 3
Para la mariposa pintamos el borde de negro y con el dedo desdibujaremos, y volveremos a pintar el borde de negro, luego pegamos el cuerpo de la mariposa, y el centro de las alas lo haremos con goma eva negra, eso nos será más fácil guiarnos y terminar de pintar nuestra mariposa.
Step 3
For the butterfly we paint the edge black and with our finger we will blur, and we will paint the edge black again, then we glue the body of the butterfly, and the center of the wings we will do it with black eva rubber, that will be easier for us guide us and finish painting our butterfly.
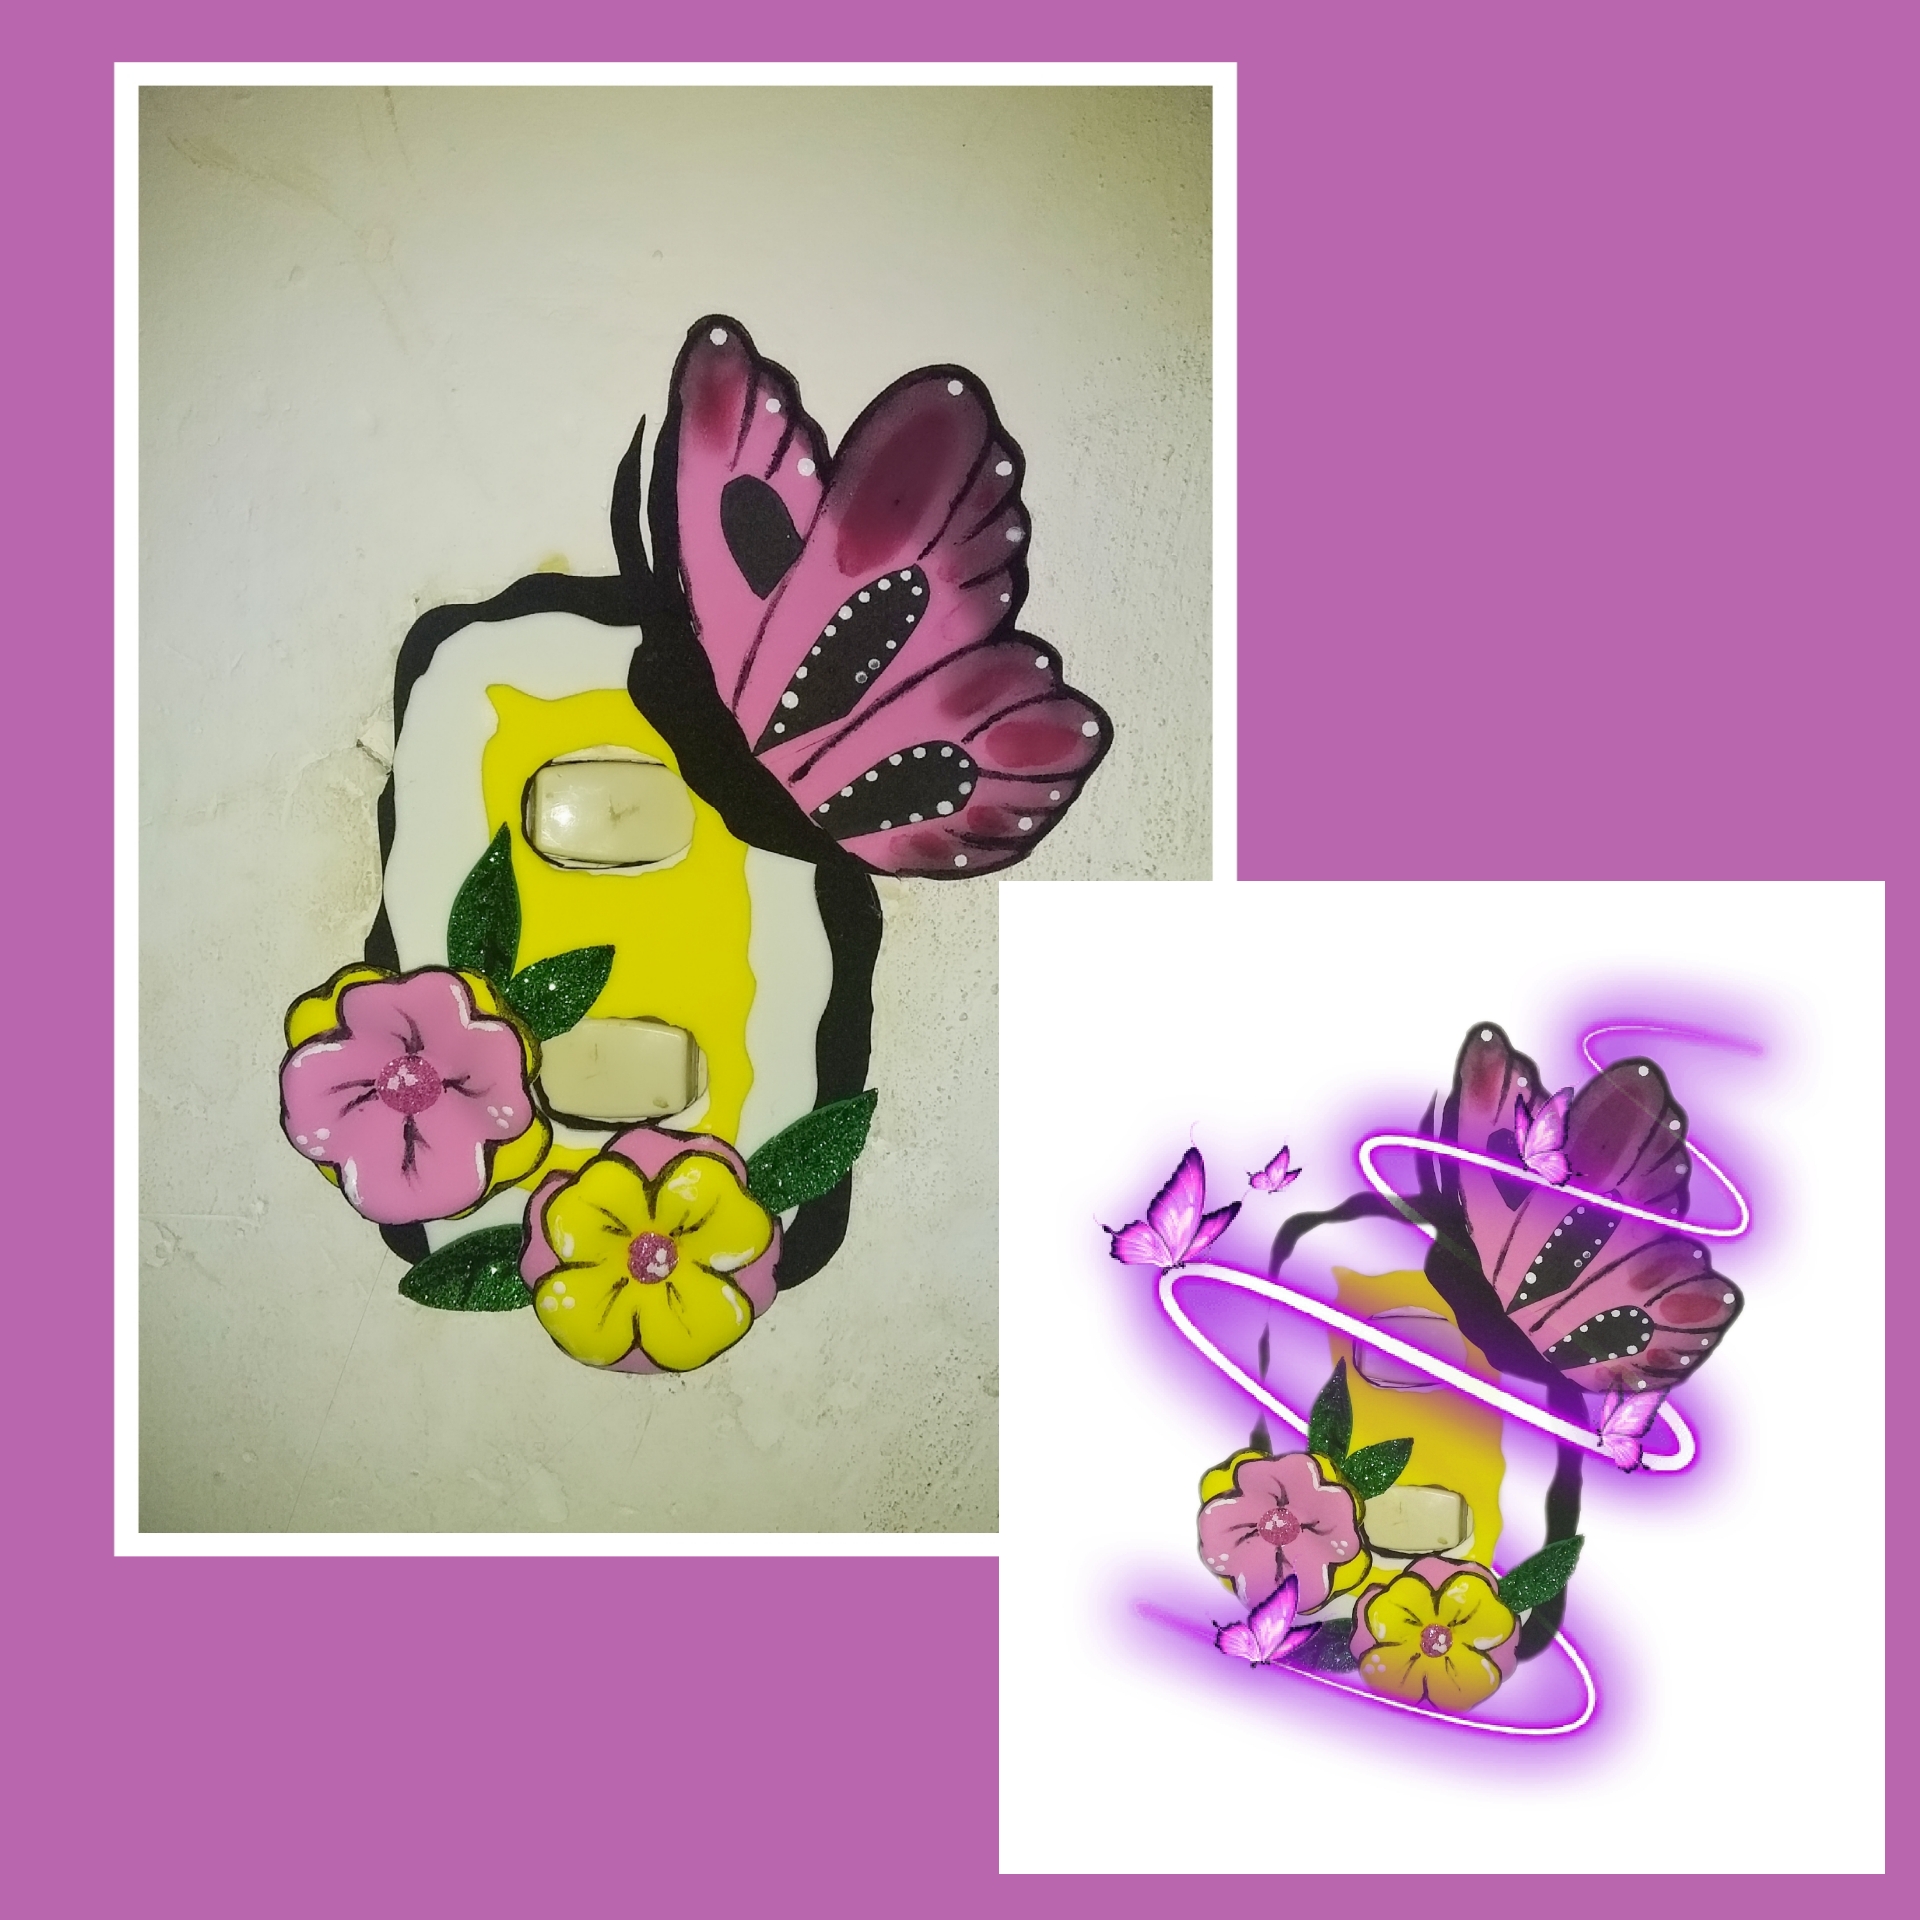
Etapa 4
Pegamos las flores una encima de la otra, con la goma eva rosa brillante sacamos un círculo y lo colocamos en el centro y con la goma eva verde brillante haremos unas hojas, pegamos los tres moldes del interruptor, el fondo negro, luego el blanco y sobre estos el amarillo, finalmente terminamos de hacer los últimos detalles a las flores y la mariposa, y las pegamos.
Step 4
We glue the flowers one on top of the other, with the bright pink eva rubber we take out a circle and place it in the center and with the bright green eva rubber we will make some leaves, we glue the three molds of the switch, the black background, then the white and on these the yellow, finally we finished making the last details to the flowers and the butterfly, and we glued them.
Y así ha quedado este precioso adorno, espero que os guste, gracias por leerlo, hasta la próxima. ¡Bendiciones!
And this is how this beautiful ornament has turned out, I hope you like it, thanks for reading it, until next time. Blessings!
Las fotos son de mi propiedad y están editadas por la aplicación Polish
The photos are my property and edited by the Polish app
Congratulations @gness! You have completed the following achievement on the Hive blockchain and have been rewarded with new badge(s):
Your next target is to reach 50 comments.
You can view your badges on your board and compare yourself to others in the Ranking
If you no longer want to receive notifications, reply to this comment with the word
STOPTo support your work, I also upvoted your post!
Check out the last post from @hivebuzz:
Support the HiveBuzz project. Vote for our proposal!
Has sido votado por
PROYECTO ENLACE
'Conectando Ideas y Comunidades'
PROYECTO ENLACE es un proyecto de curación de habla hispana enfocado en recompensar contenido de calidad y apoyar autores en su proceso de crecimiento en HIVE.
Creemos y apostamos por el futuro de esta gran plataforma, y estamos muy emocionados de poder hacerla crecer junto a esta comunidad. Así que te invitamos a usar nuestra etiqueta ENLACE y estar atento a todas las actividades que tenemos preparadas y que estaremos publicando en breve.
¿QUIERES AUTOMATIZAR TUS GANANCIAS DE CURACIÓN? SE PARTE DEL PROYECTO ENLACE APOYANDO A NUESTRO TRAIL EN HIVE.VOTE INGRESA AQUÍ PARA CONOCER LOS DETALLES.
¿QUIERES INVERTIR ENLACE? DESCUBRE COMO HACERLO Y GENERAR INGRESOS DE FORMA SEMANAL MEDIANTE TU DELEGACIÓN DE HP AQUÍ TE EXPLICAMOS COMO.
Te invitamos a participar en nuestro servidor de Discord: https://discord.gg/3S9y7BbWfS
Atentamente
EQUIPO ENLACE 2021