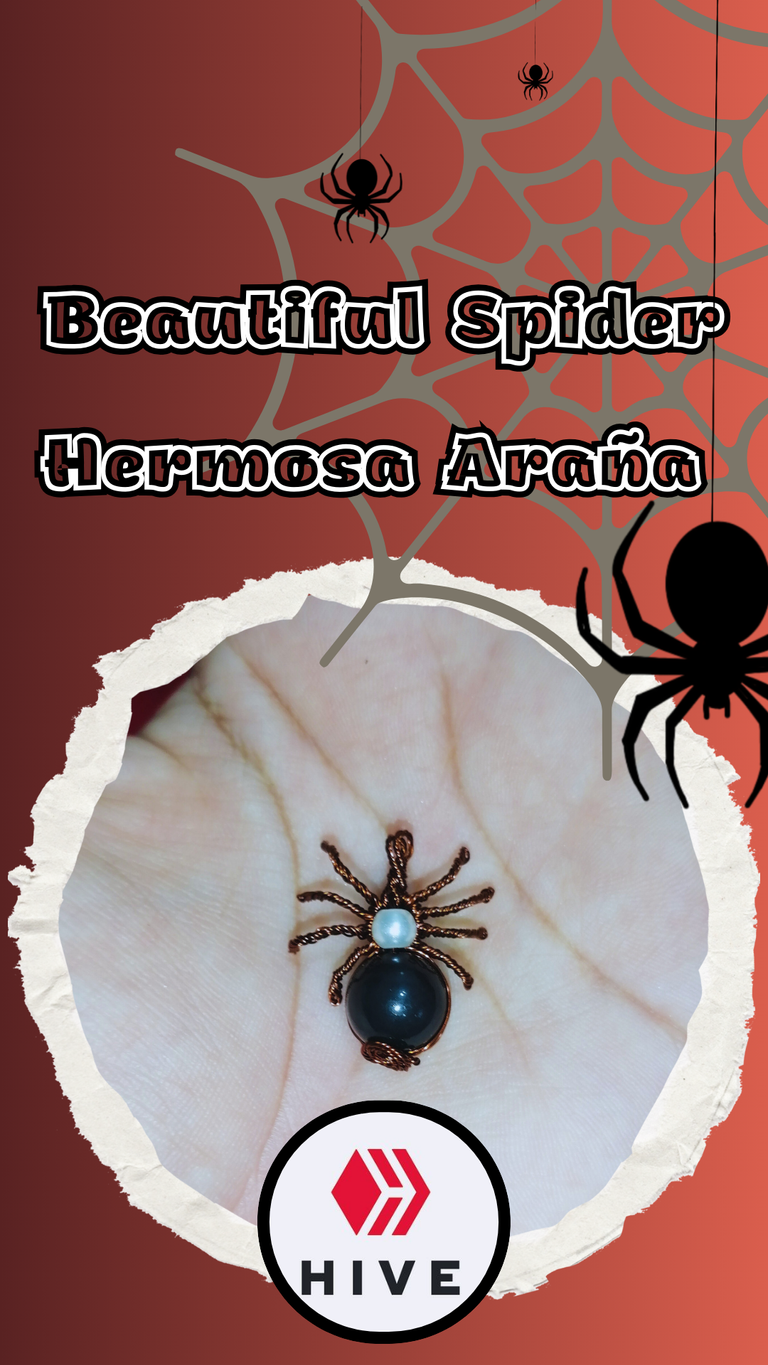
Hello, guys of this beautiful community. I hope you are having a wonderful weekend. Today I want to show you how I made a spider out of recycled copper wire, I previously made a mini bonsai with this material and I thought it would be interesting to continue working with it. I hope you can enjoy the step by step tutorial and put it into practice if you are up for it. Let's start with the tutorial.
Hola, chicos de esta bonita comunidad. Espero estén teniendo un maravilloso fin de semana. Hoy quiero mostrarles cómo hice una araña en alambre de cobre reciclado, anteriormente realicé un mini bonsai con este material y pues me pareció interesante seguir trabajando con este mismo. Espero puedan disfrutar del paso a paso y ponerlo en práctica si se animan. Empecemos con el tutorial
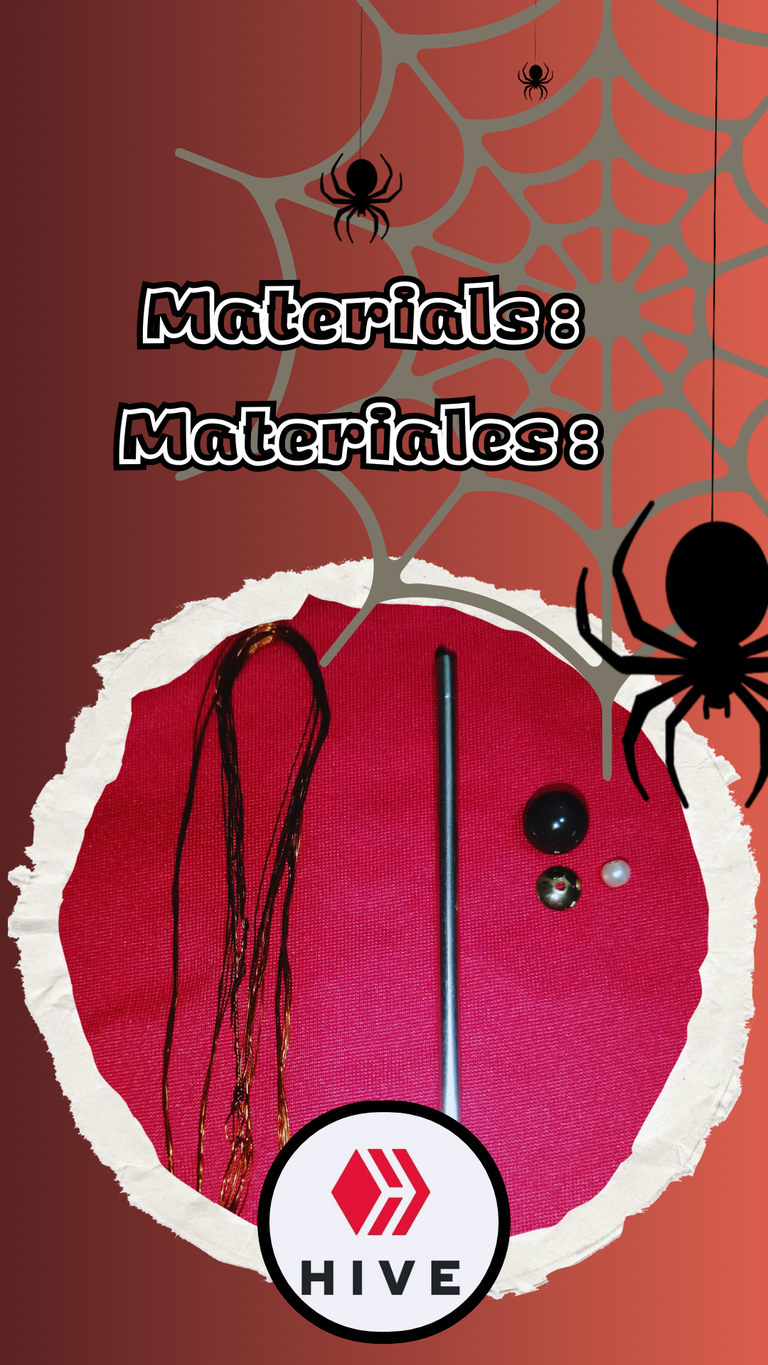
Materials:
- Recycled copper wire.
- 2 beads of different sizes.
- 1 stick that I can use to make a hoop, you can use any height stick or anything depending on the size of your smallest bead.
Note: you can use any type of wire you have on hand, it all depends on the size you want to make the spider and that it is moldable. I used it to make a charm since it was quite thin.
Materiales:
Alambre de cobre reciclado.
2 Cuentas de diferente tamaño.
1 Palito que me pueda servir para hacer un aro, ustedes pueden utilizar algún palito de altura o cualquier cosa dependiendo del tamaño de su cuenta más pequeña.
Observación: pueden utilizar cualquier tipo de alambre que tengan la mano todo dependerá del tamaño que quieran hacer la arañas y que este sea moldeable. Yo lo utilicé para hacer un dije ya que este era bastante fino.
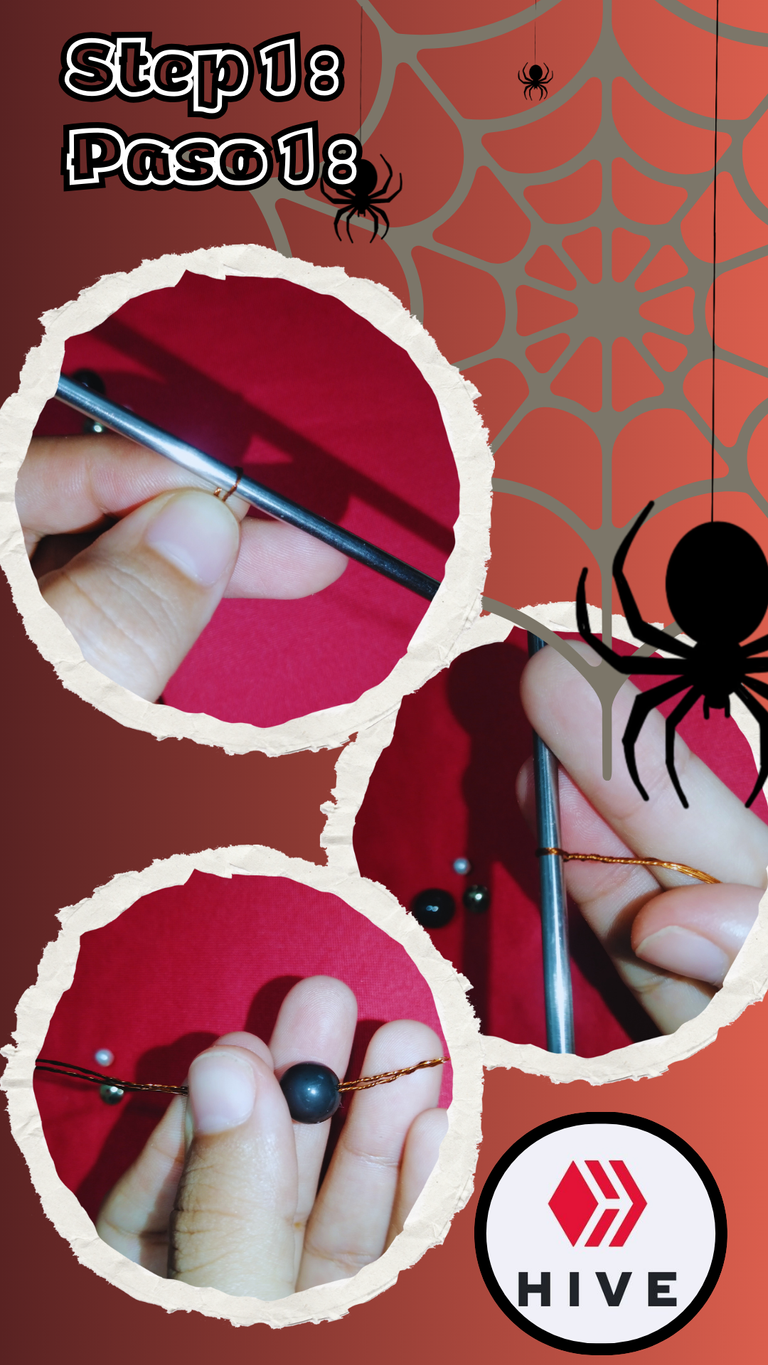
Step 1:
We will use the stick to make a ring and we will twist to give firmness to the wire we will join the two ends and we will pass the first bead that will be the big one.
Paso 1:
Usaremos el palito para hacer un aro y entorcharemos para darle firmeza al alambre uniremos las dos puntas y pasaremos la primera cuenta que será la grande.
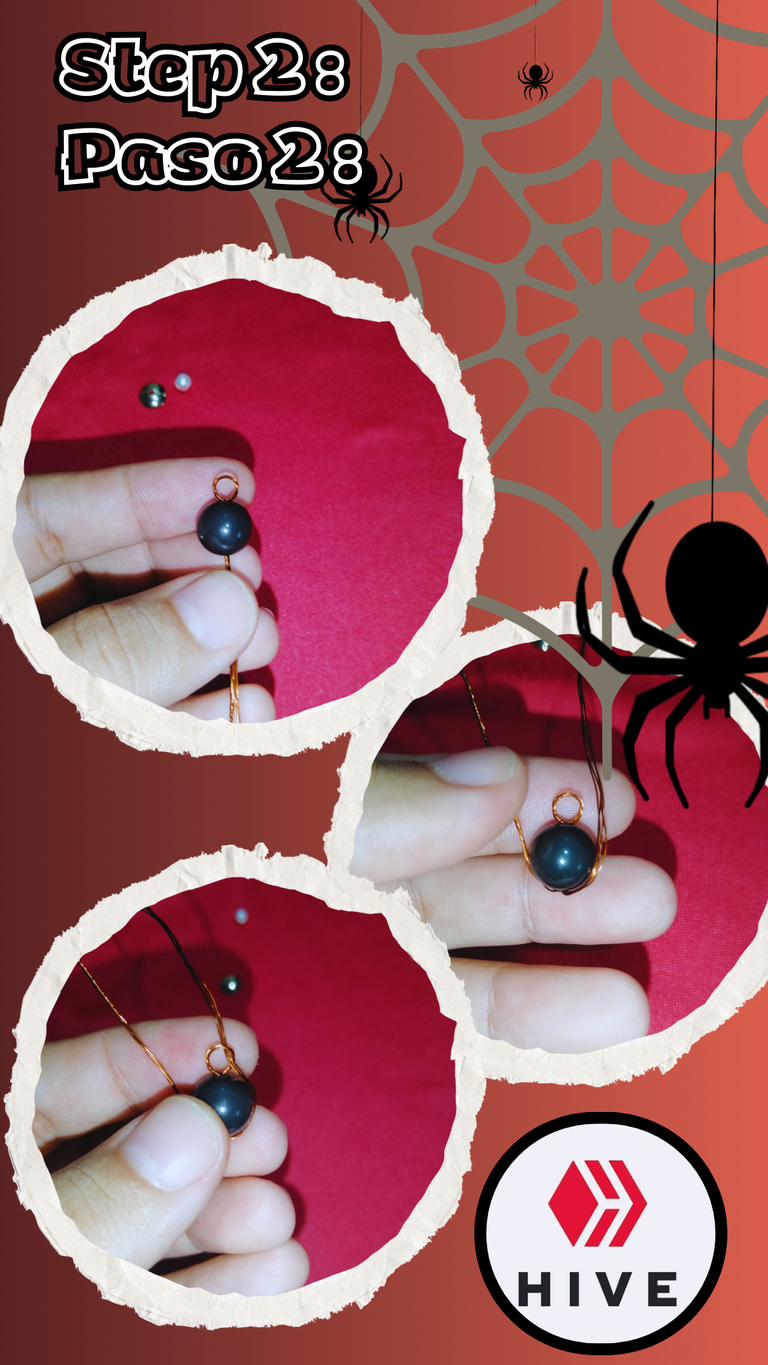
Step 2:
We will separate the two ends and surround the big bead, we will pass each end through the inside of the hoop.
Paso 2:
Separaremos las dos puntas y rodearemos la cuenta grande, pasaremos cada punta por dentro del aro.
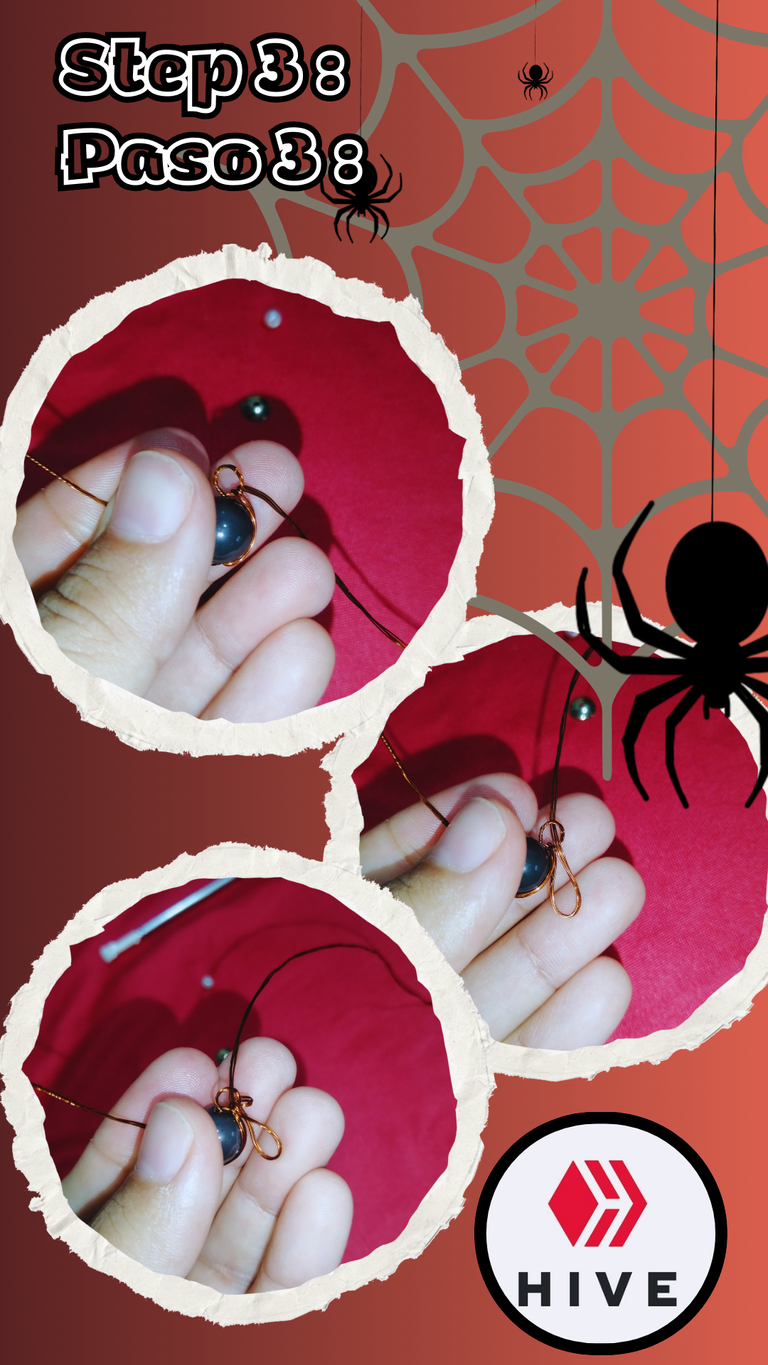
Step 3:
We will make another turn and adjust, then we will take out a little wave that will be our first leg, we will pass the wire again through the inside of the hoop making another turn and adjust.
Paso 3:
Daremos otra vuelta y ajustaremos, luego sacaremos una ondita que será nuestra primera patita, pasaremos nuevamente el alambre por dentro del aro dando otra vuelta y ajustaremos.
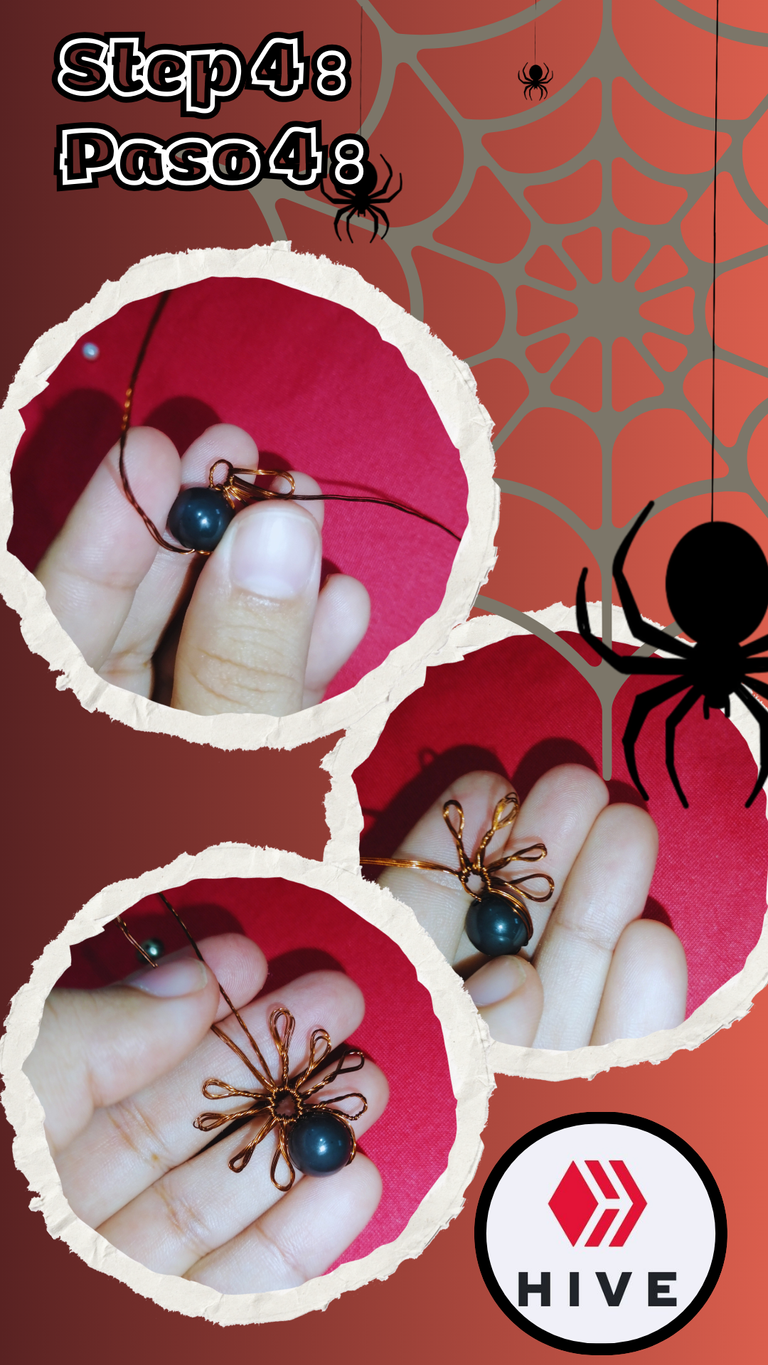
Step 4:
Repeat the previous process to form the four legs on the right side of the spider. Then we will do this same step with the other wire to form the other four legs, it should look like the one in the picture.
Paso 4:
Repetiremos el proceso anterior para formar las cuatro patitas de el lado derecho de la araña. Luego haremos este mismo paso con el otro alambre para formar las otras cuatro patitas, nos deberá quedar como está en la foto.
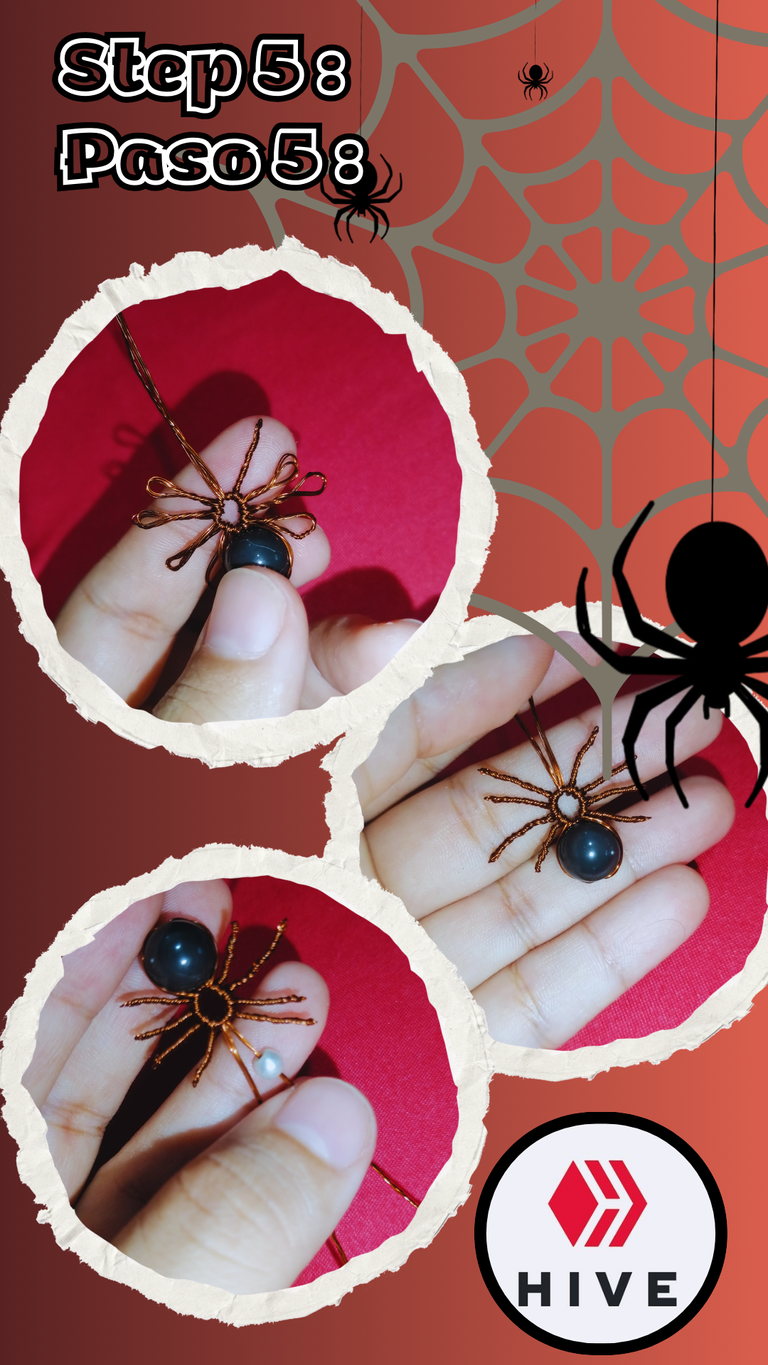
Step 5:
We will wind each of the legs so that they are taut as a single wire, we will separate the two ends of the wire and in one we will put the small bead.
Paso 5:
Enrollaremos cada una de las patitas de forma que queden tensas como un solo alambre, separaremos las dos puntas del alambre y en una pondremos la cuenta pequeña.
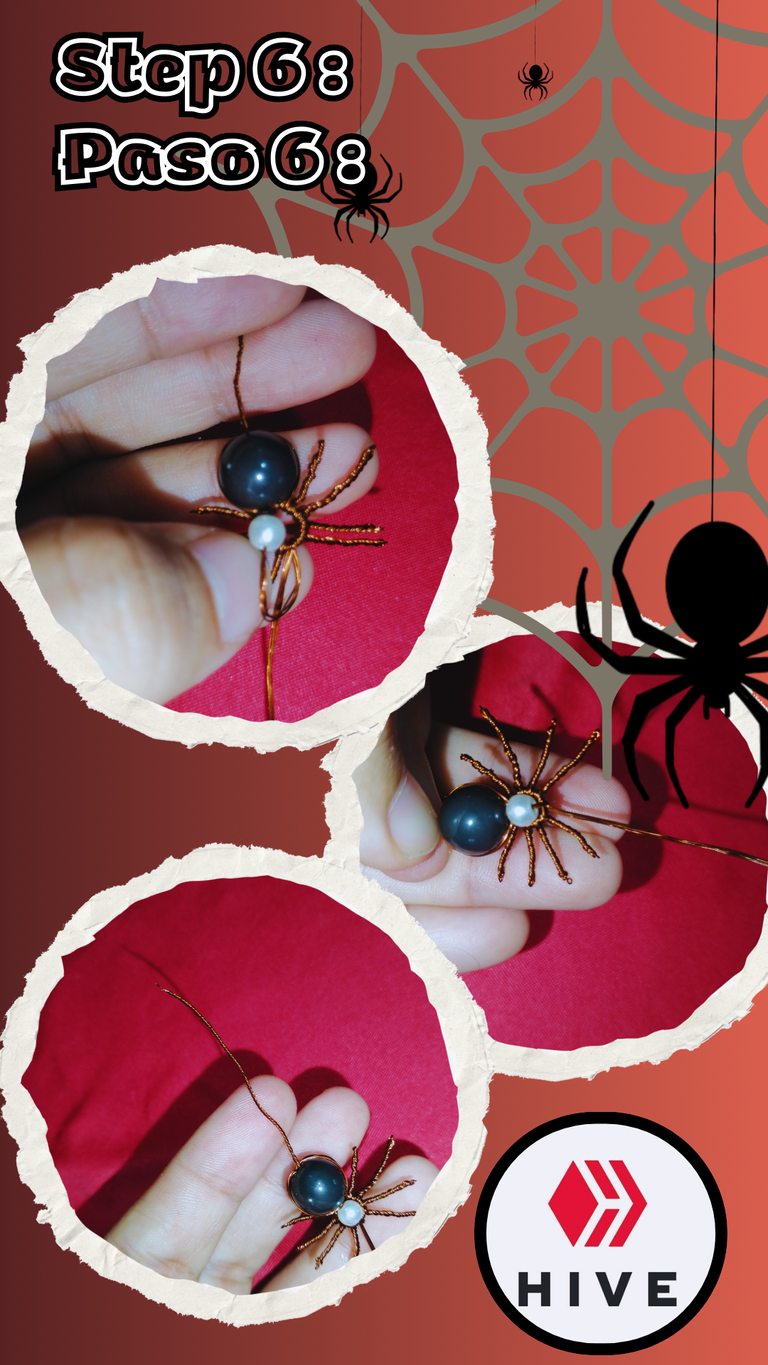
Step 6:
We will pass the wire through the center of the large bead and we will wind it so that it is taut.
Paso 6:
Pasaremos el alambre por el centro de la cuenta grande y enrollaremos de forma que quede bien tenso.
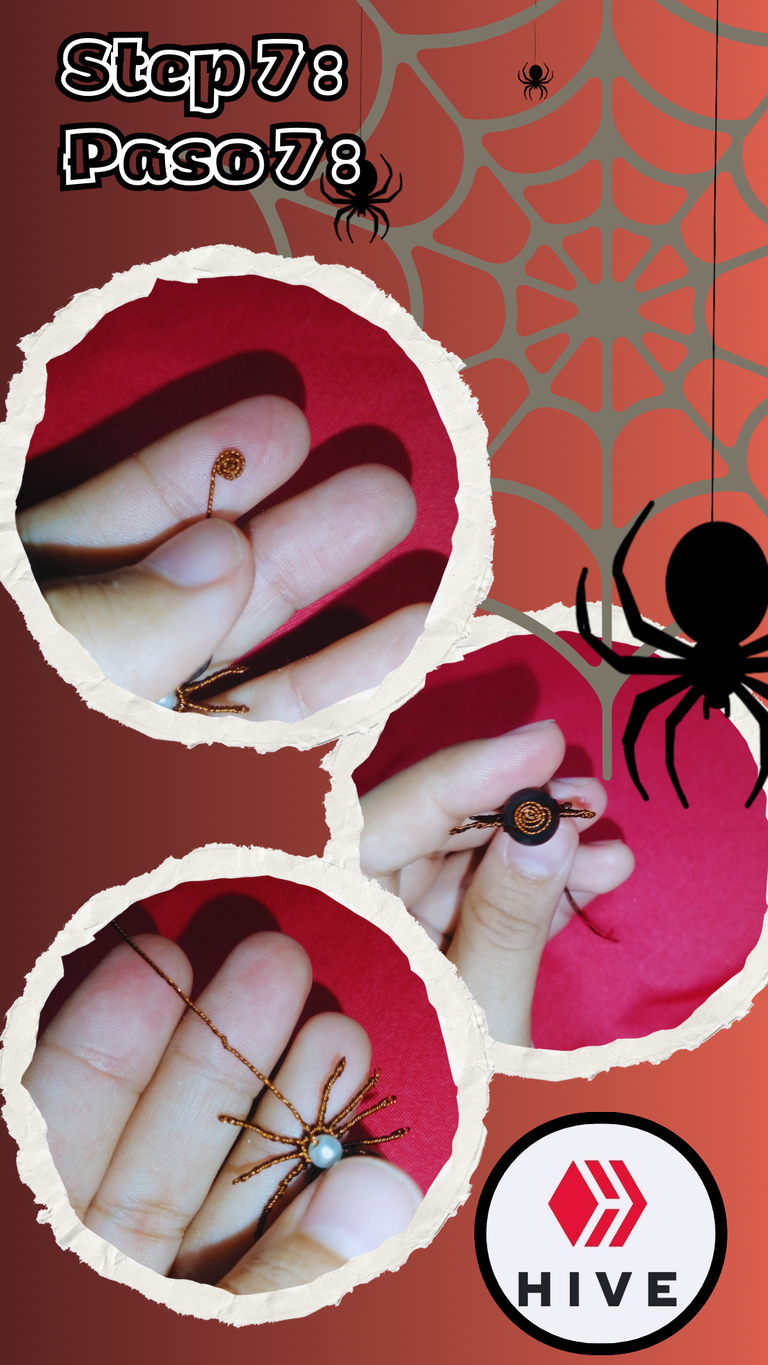
Step 7:
We will wind in a spiral shape the wire that came out of the large bead and with this step we finish the shape of the first wire, the remaining wire we will also wind it so that it is taut.
Paso 7:
Enrollaremos en forma de espiral el alambre que salió por la cuenta grande y con este paso terminamos la forma del primer alambre, el alambre sobrante lo enrollaremos también de forma que quede tenso valga la redundancia.
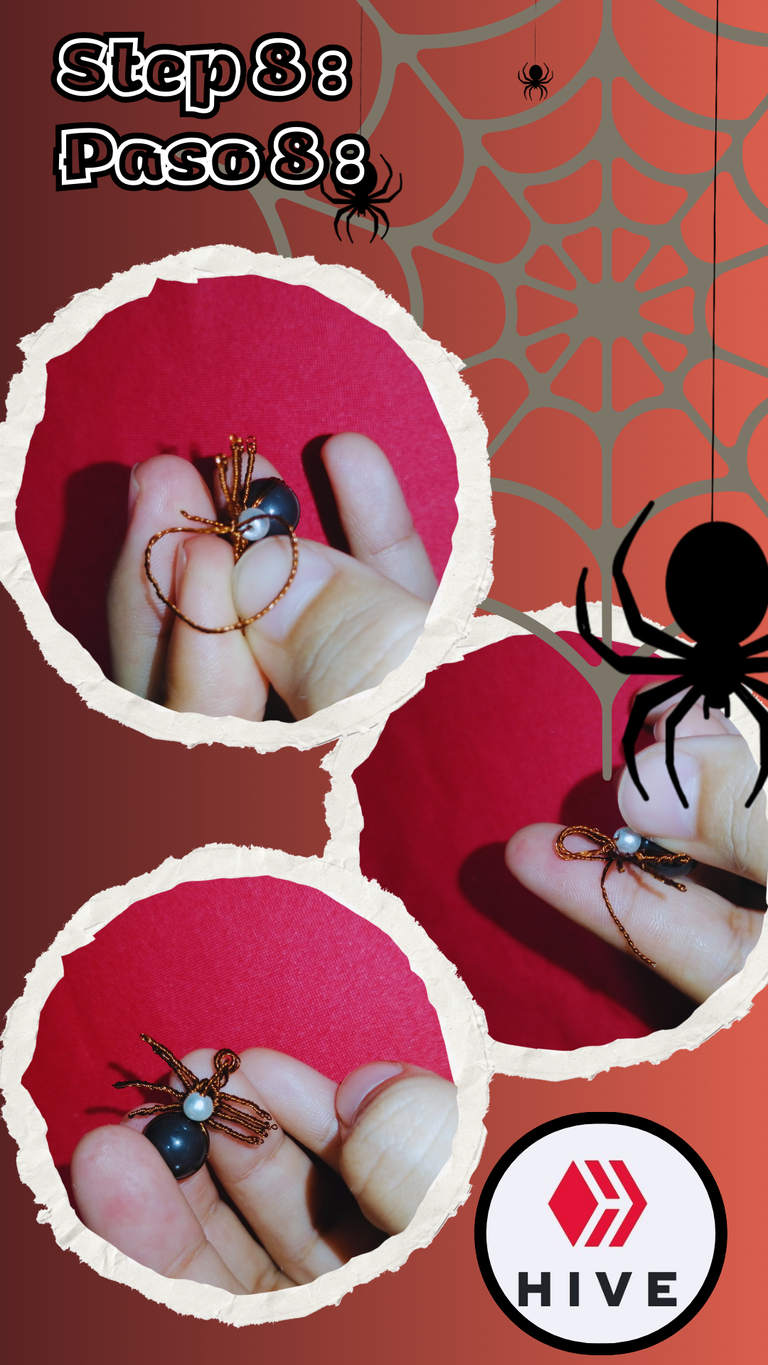
Step 8:
We will make two turns through the center of the wire where the small bead is and we will wind it to make the ring where our charms will hang, there will be an excess on the side of the back of the small bead, with this we will also make a spiral and it will be centered.
Paso 8:
Daremos dos vueltas por el centro del alambre donde se encuentra la cuenta pequeña y enrollaremos para hacer el aro donde se colgará nuestro dijes, va a quedar un excedente del lado de la parte trasera de la cuenta pequeña, con este haremos un espiral también y quedará centrado.
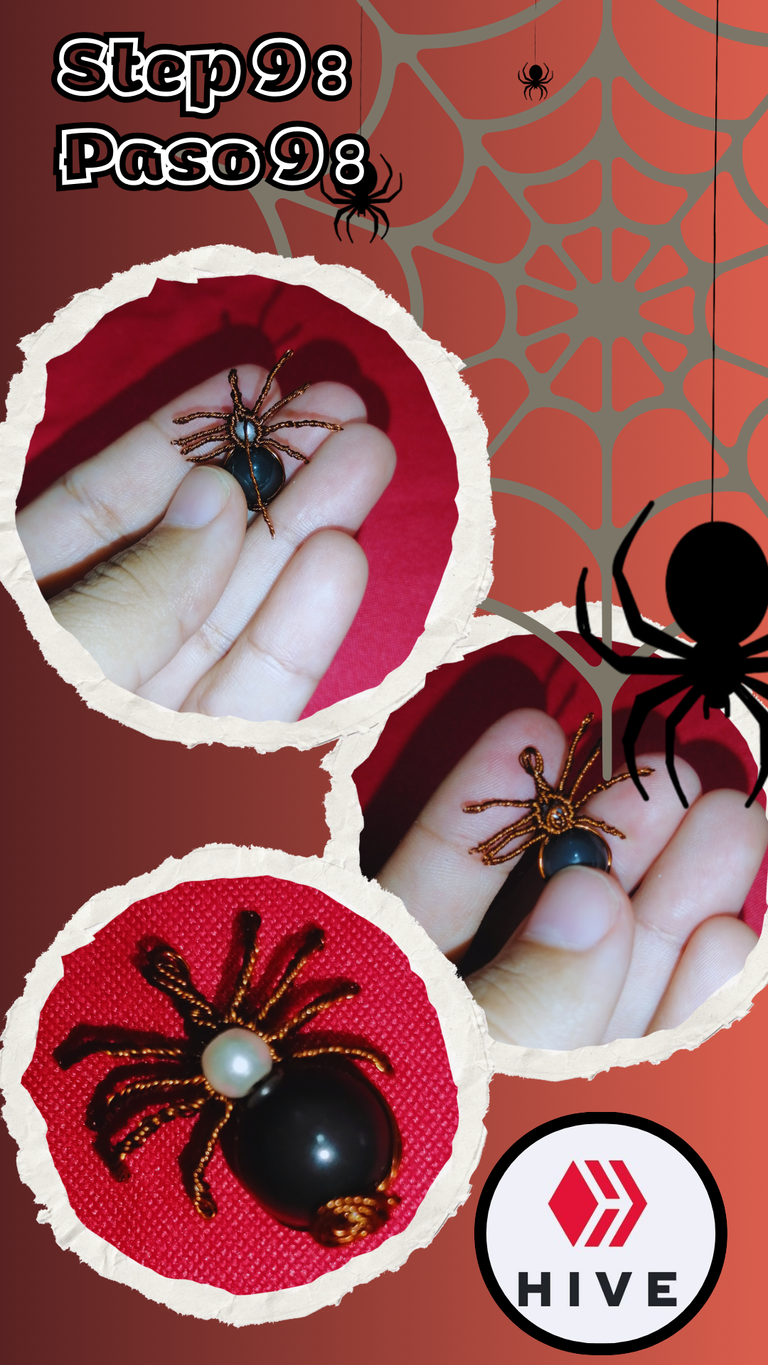
Step 9:
Once everything is done, we proceed to shape the legs of the spider and with this our spider charm is finished.
Paso 9:
Una vez realizado todo, procedemos a darle forma a las patitas de la araña y con esto ya está terminado nuestro dijes de arañita.
I hope you liked this content and that you can put it into practice.
A hug from afar and take care of yourselves guys.
Espero les haya gustado este contenido y que puedan ponerlo en práctica.
Un un abrazo desde la distancia y cuídense mucho chicos.
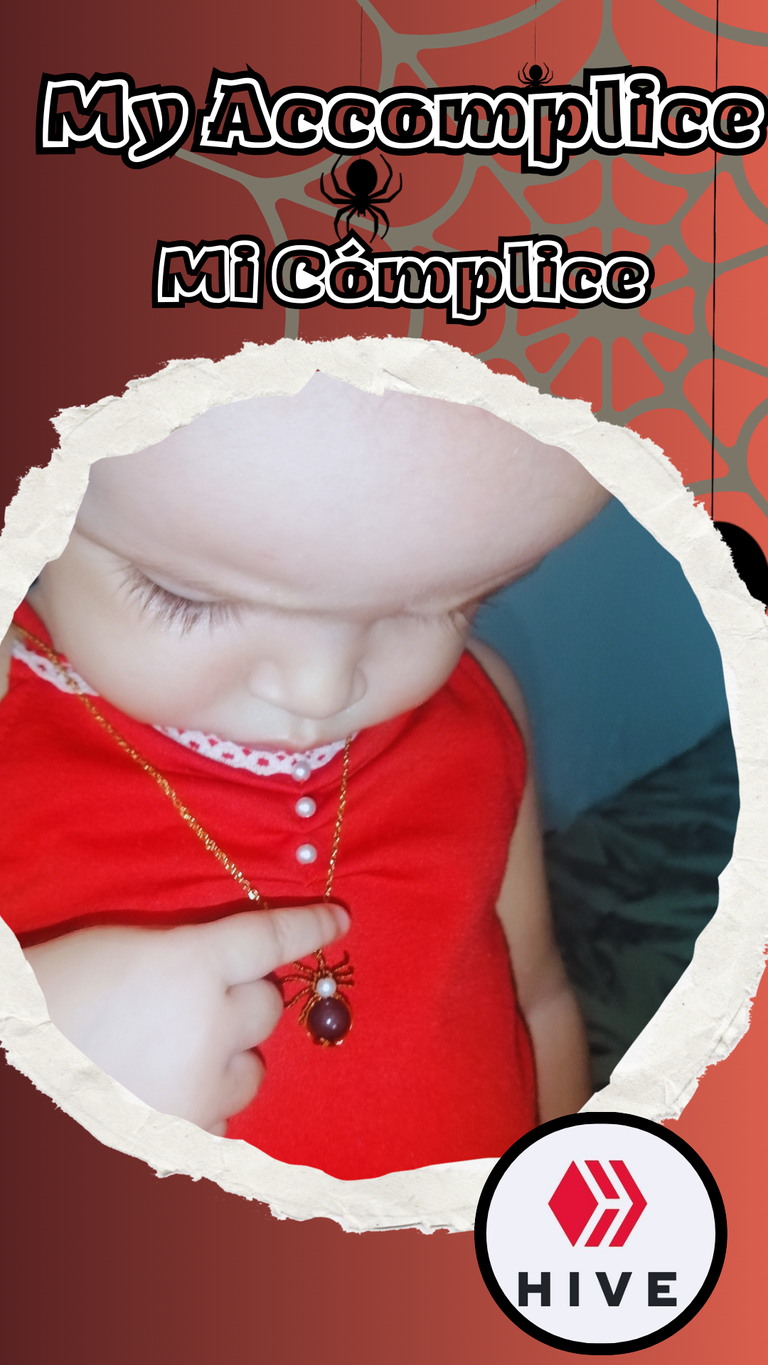
Obviously I couldn't miss a picture with my super model and accomplice.
Obviamente no podía faltar una foto con mi súper modelo y cómplice.

Photos taken by my Huawei Y9 Prime
Editing done from the Canva application
Translation by Deepl
Fotos tomadas por mi Huawei Y9 Prime
Edición realizada desde la aplicación de Canva
Traducción por Deepl
Congratulations @hayleysv! You have completed the following achievement on the Hive blockchain And have been rewarded with New badge(s)
Your next target is to reach 7000 upvotes.
You can view your badges on your board and compare yourself to others in the Ranking
If you no longer want to receive notifications, reply to this comment with the word
STOPHola Génesis. Que paciencia y ganas de que este proyecto salga hermoso como para hacerlo hasta el final ❤️. No debe ser facil manipular este alambre tan finito pero te quedó hermoso. Te felicito ❤️
Gracias Laura. Sí, es un poco incómodo trabajar este tipo de alambre. Pero el resultado fue lo mejor, valió la pena. Saludos😊