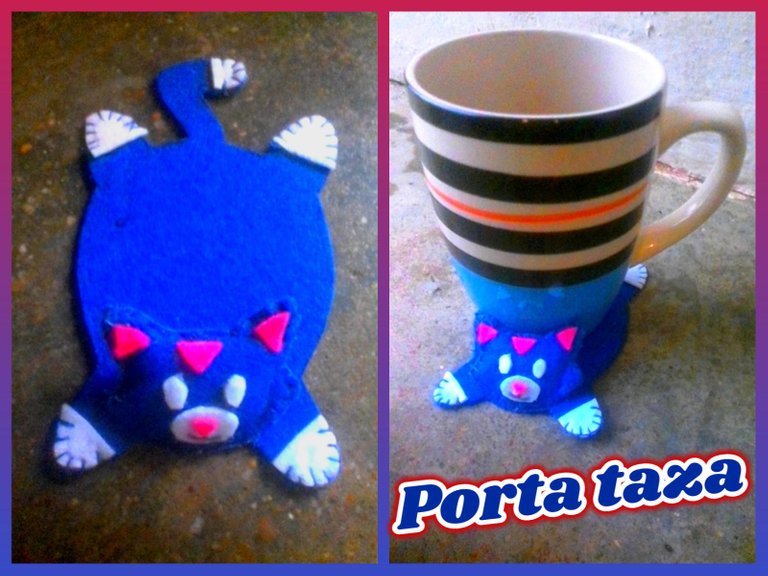
Hello my dear friends, greetings to all the people who make up this beautiful house of Hive Diy, where they make very beautiful handicrafts and crafts daily.
Today I am going to show you how you can make a felt cup holder, in order to have a nice base to place our cup, on the internet there are many varieties of designs, but I chose this kitten one. I hope you can enjoy each of the steps, which I will show you below.
Hola mis queridos amigos, un saludo para todas las personas que conforman esta bella casa de Hive Diy, donde diariamente realizan manualidades y artesanías muy hermosas.
En el día de hoy voy a enseñarles como pueden hacer un porta taza de fieltro, con la finalidad de así tener una linda base para colocar nuestra taza, en internet hay muchas variedades de diseños, pero yo escogí este de gatito. Espero que puedan disfrutar de cada uno de los pasos, que le mostraré a continuación.
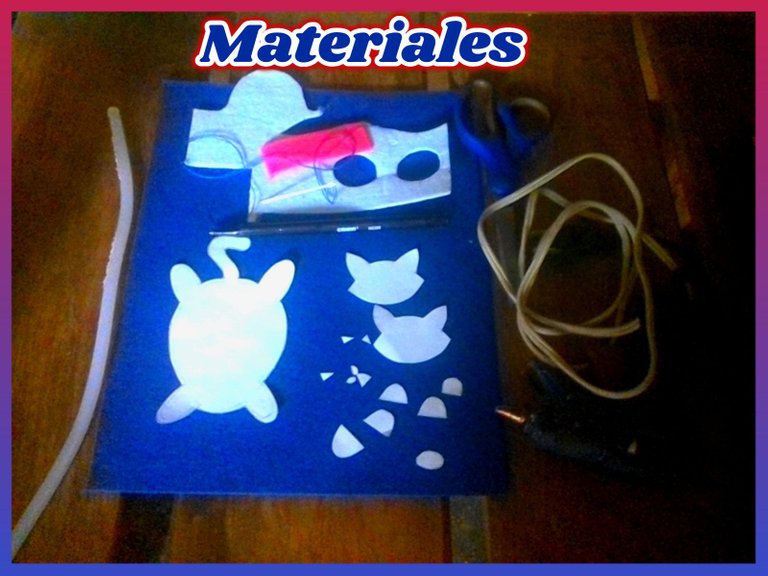
Materials:
Cat pattern.
blue felt
Scraps of felt (white and fuchsia).
Silicone gun and bar.
Needle, blue sewing thread, cotton.
Scissors.
Black pencil.
Materiales:
Patrón del gato.
Fieltro azul.
Retazos de fieltro (blanco y fucsia).
Pistola de silicona y barra.
Aguja, hilo de coser azul, algodón.
Tijera.
Lapicero negro.
Procedures:
Step 1:
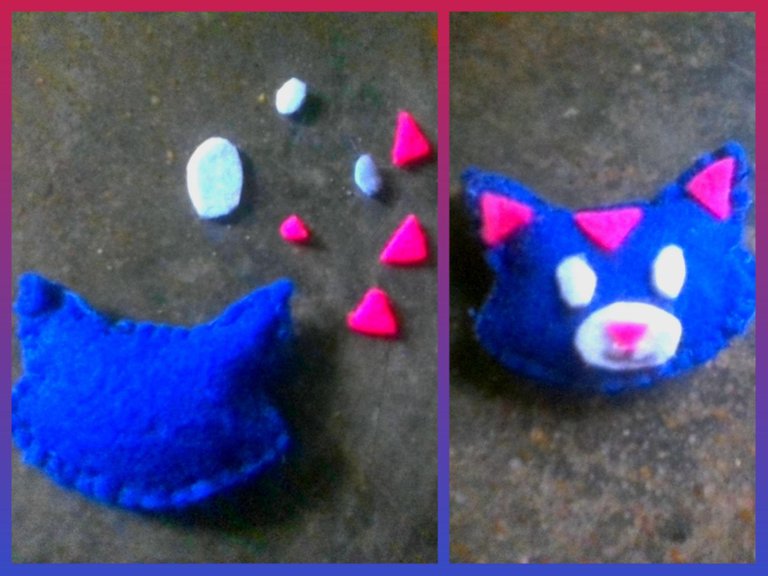
It begins by placing part of the cat pattern on the blue felt, marking it and cutting it out, then the other parts are placed on the piece of white and fuchsia felt and cutting it out.
Procedimientos:
Paso 1:
Se comienza colocando parte del patrón del gato sobre el fieltro azul, se marca y se recorta, luego las demás partes se colocan sobre el retazo del fieltro blanco y del fucsia y se recortan.

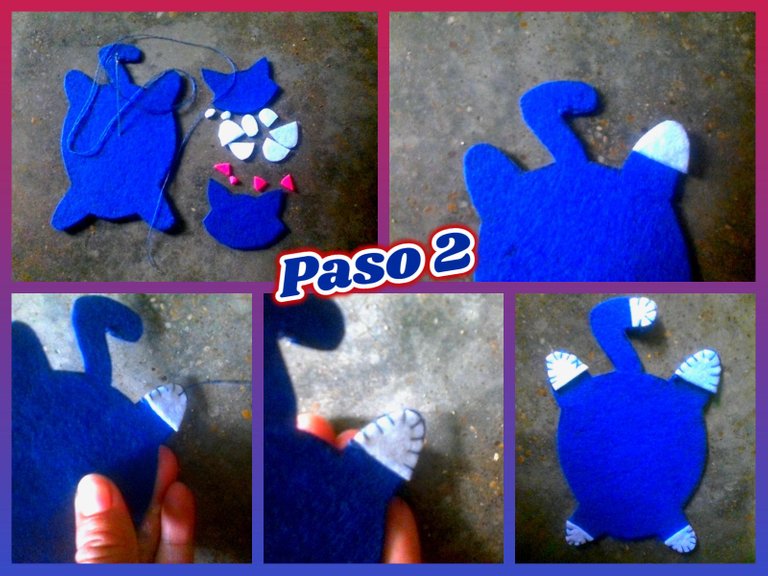
Step 2:
Once the image has been cut out, we begin to sew, first placing the white legs that had already been cut out above the legs, sewing along the entire edge, one by one until completing the 4 sewn legs, finally sewing the tip of The tail.
Paso 2:
Ya recortada la imagen, se empieza a coser, primero colocando sobre de las patas, las patas blancas que ya se habían recortado anteriormente, cosiendo por todo el borde, una por una hasta completar las 4 patas cosidas, por último se cose la punta de la cola.
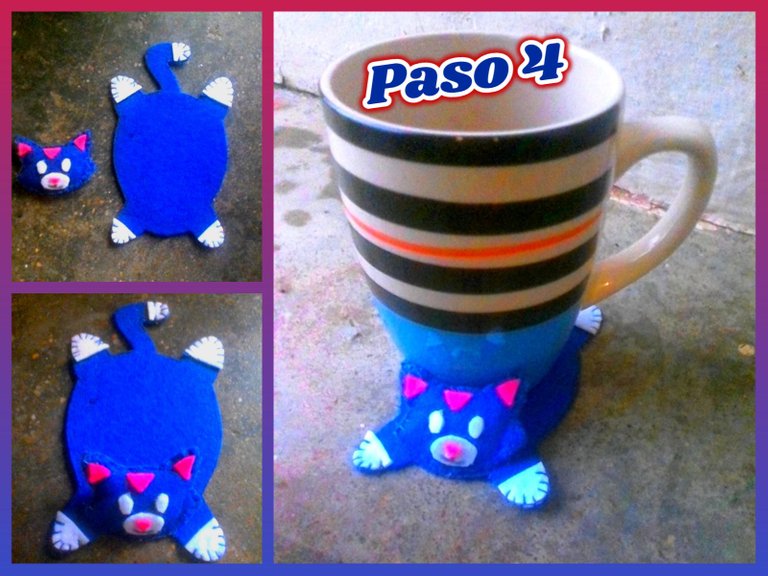
Step 3:
In this part, one piece is placed on top of the other, and it is sewn along the edge, then a small opening is left to fill with the cotton and the sewing is finished, leaving it this way.
Paso 3:
En esta parte se coloca una pieza sobre de la otra, y se cose por todo el orillo, luego se deja una pequeña abertura para rellenar con el algodón y se termina de coser, quedando de esta manera.
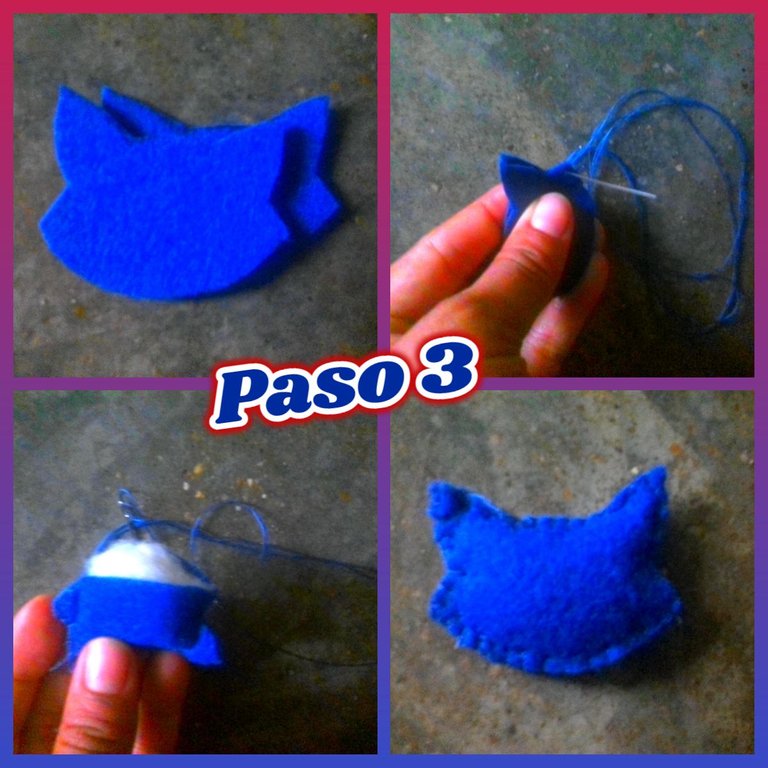
Having the head ready, begin to glue part of the ears, eyes, nose, and with the black pen the shape of the mouth is made.
Ya teniendo la cabeza lista, se comienza a pegar parte de las orejas, ojos, nariz, y con el lapicero negro se le hace la forma de la boca.
Step 4:
To finish the cup holder, only the head will be attached to the body, and that's it. Here we finish. I hope you have been able to enjoy it, and so that you can make one as you wish, from the pet of your choice.
Paso 4:
Para dar por terminar él porta taza, solo se pegará la cabeza al cuerpo, y listo. Aquí terminamos. Espero que lo hayan podido disfrutar, y para que así puedan elaborar uno como lo deseen, de la mascota de su preferencia.
Collage making program: Fotojet Link
Translated from google translator Link
Photo editing program: PhotoFiltre 7
Las fotos fueron tomadas desde una tablet Canaima.
Programa para hacer el collage: Fotojet Enlace
Traducido del traductor de Google Enlace
Programa para editar fotos: PhotoFiltre 7
I say goodbye until another opportunity.
Thanks for your support.
Me despido hasta otra oportunidad.
Gracias por su apoyo.
Copyright @imargasa. All rights reserved.
Precioso.me Gustó mucho.
Congratulations @imargasa! You have completed the following achievement on the Hive blockchain and have been rewarded with new badge(s):
Your next target is to reach 100 comments.
You can view your badges on your board and compare yourself to others in the Ranking
If you no longer want to receive notifications, reply to this comment with the word
STOPTo support your work, I also upvoted your post!
Check out the last post from @hivebuzz:
Support the HiveBuzz project. Vote for our proposal!
Thank you for sharing this amazing post on HIVE!
Your content got selected by our fellow curator @rezoanulvibes & you just received a little thank you via an upvote from our non-profit curation initiative!
You will be featured in one of our recurring curation compilations and on our pinterest boards! Both are aiming to offer you a stage to widen your audience within and outside of the DIY scene of hive.
Join the official DIYHub community on HIVE and show us more of your amazing work and feel free to connect with us and other DIYers via our discord server: https://discord.gg/mY5uCfQ !
If you want to support our goal to motivate other DIY/art/music/homesteading/... creators just delegate to us and earn 100% of your curation rewards!
Stay creative & hive on!
Congratulations, your post has been upvoted by @dsc-r2cornell, which is the curating account for @R2cornell's Discord Community.
Enhorabuena, su "post" ha sido "up-voted" por @dsc-r2cornell, que es la "cuenta curating" de la Comunidad de la Discordia de @R2cornell.