Bienvenidos a mi blog.💙✨
Welcome to my blog.
💙✨
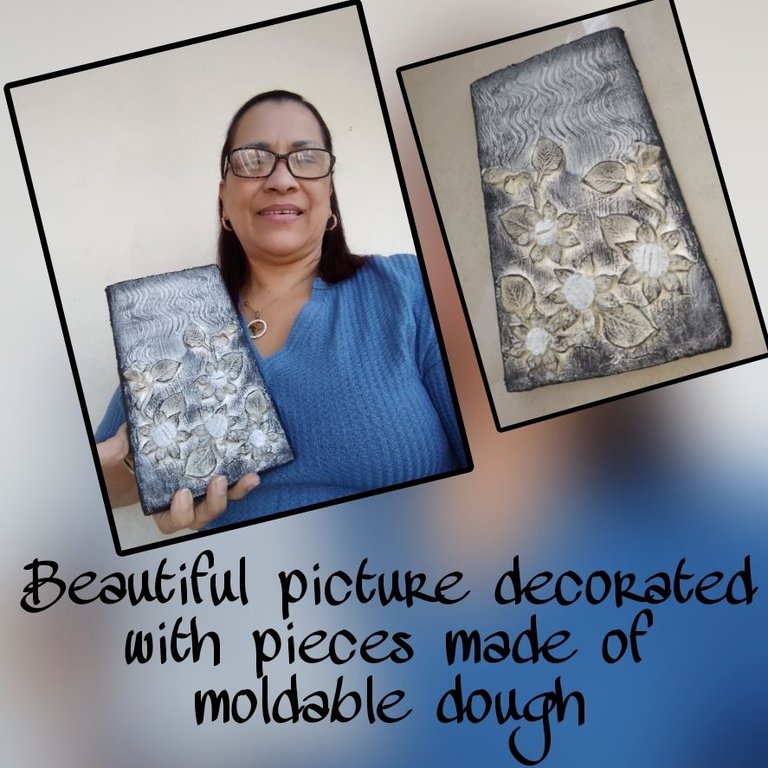
- Feliz día amigos de la creatividad espero se encuentren muy bien, como siempre inspirada y motivada para una nueva publicación, soy aficionada del arte y todo lo que tenga que ver con la creatividad, para esta ocasión les tengo un hermoso cuadro decorado con piezas de masa moldeable también utilice pasta profesional. para la realización de este cuadro dure dos días puesto que tenia que esperar que las piezas se secaran, este cuadro es ideal para ambientar cualquier espacio de nuestro hogar sin mas nada que agregar acompañenme y les enseño.
- Happy day friends of creativity I hope you are very well, as always inspired and motivated for a new publication, I am fond of art and everything that has to do with creativity, this time I have a beautiful picture decorated with pieces of moldable dough also use professional paste. for the realization of this picture lasted two days since I had to wait for the pieces to dry, this picture is ideal to set any space in our home without anything else to add join me and I'll show you.
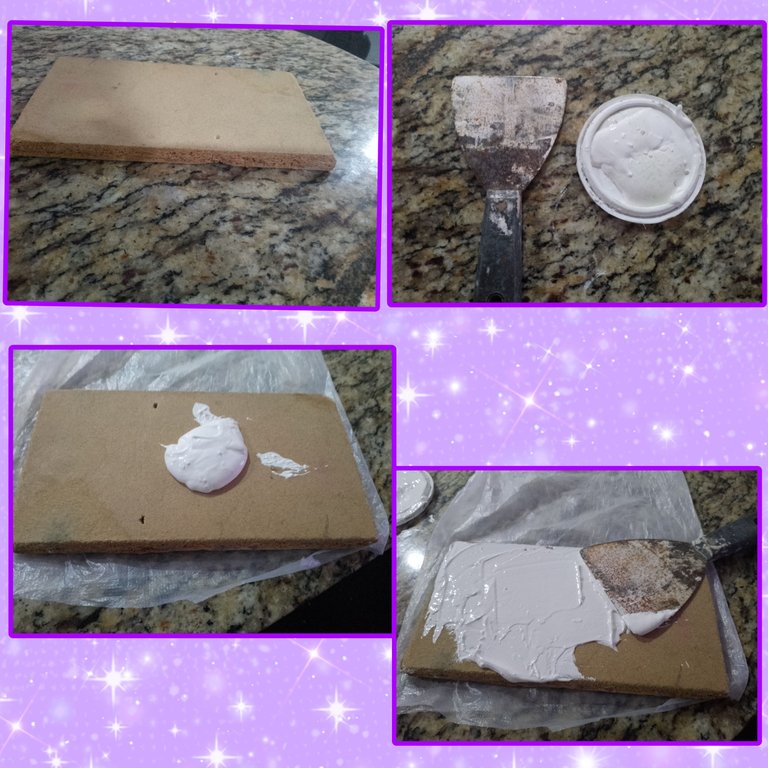
Materiales.
- Masa moldeable.
- Pintura al frío.
- Pincel.
- Tabla pequeña.
- Pasta profesional.
Materials.
- Moldable dough.
- Cold paint.
- Brush.
- Small board.
- Professional paste.
Paso a Paso||Step by Step.
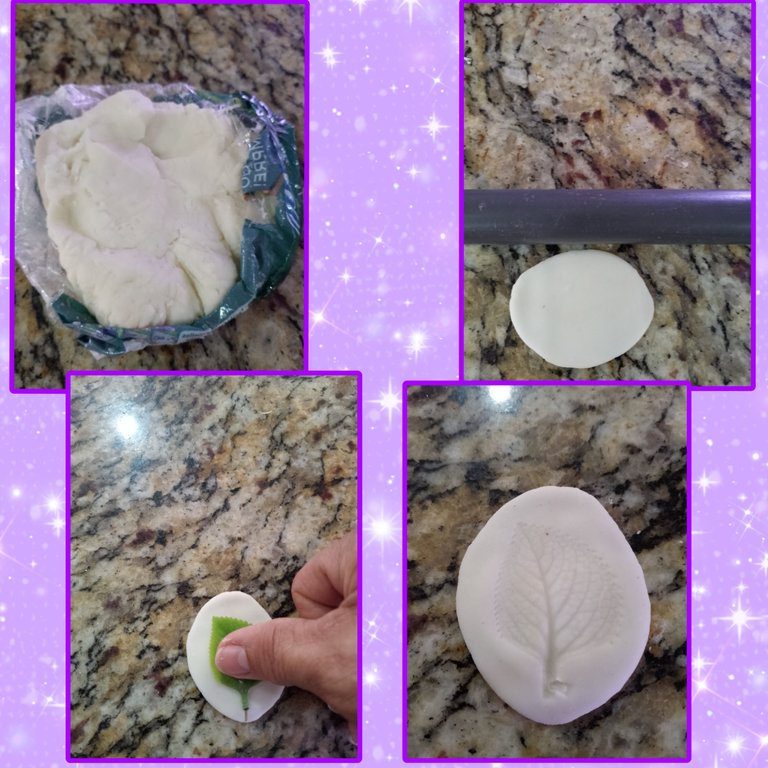
- Empecemos tome una porción de masa moldeable la estire con un pequeño rodillo y coloque encima una hoja y presione para que se marcara la figura.
Let's start by taking a portion of moldable dough, stretch it with a small rolling pin and place a sheet of paper on top and press it to mark the figure.
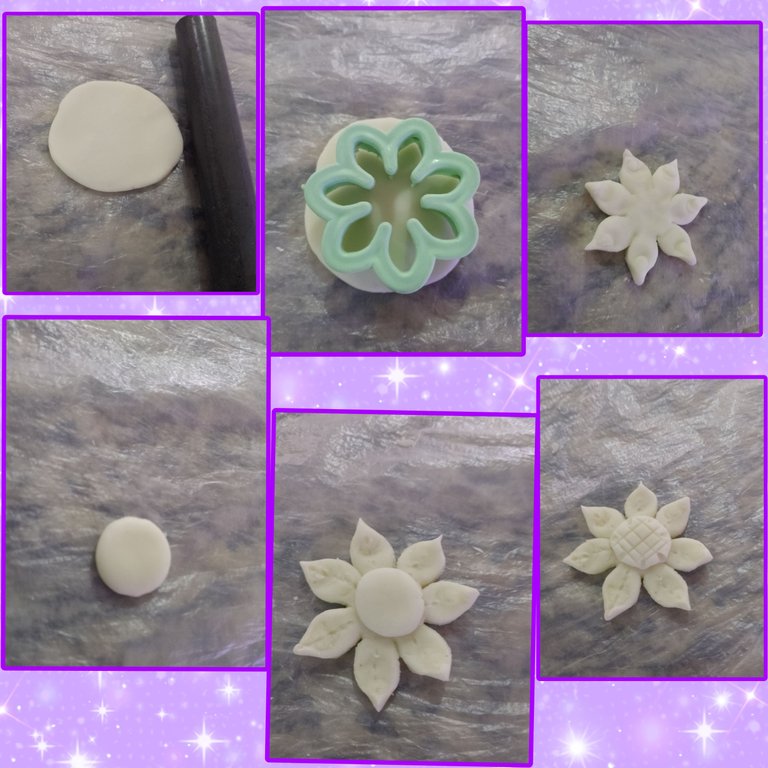
- De igual manera hice con la flor estire una porción coloque el molde encima de la moldeadora y saque la figura luego hice unos unos círculos y los coloque en el centro de la flor.
In the same way I did with the flower, I stretched a portion, placed the mold on top of the molding machine and took out the figure, then I made some circles and placed them in the center of the flower.
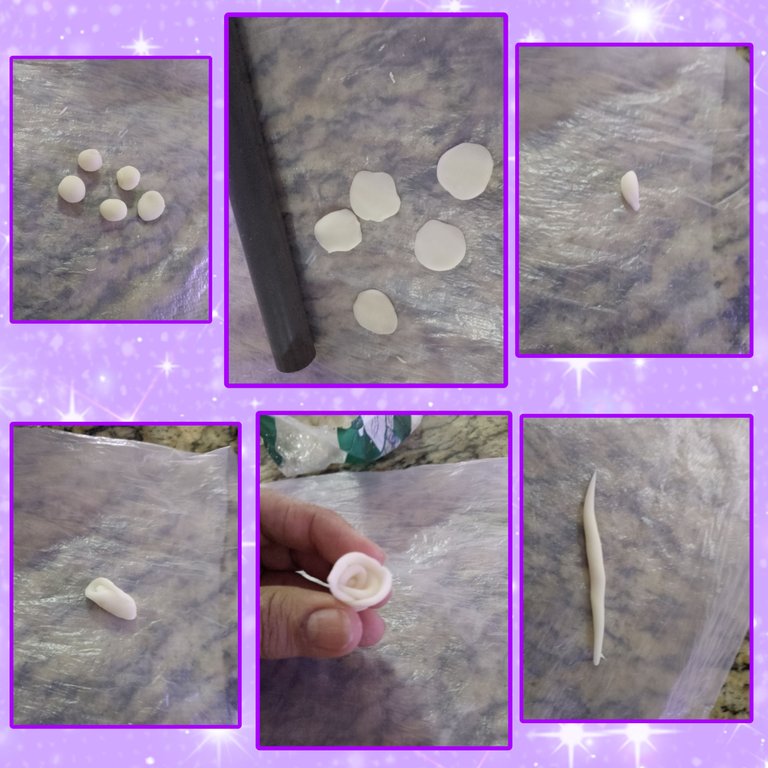
- Aquí hice cuatro bolitas también las estire para unos pétalos junto con otra pieza para hacer el centro del capullo poniendo una encima de la otra dejando un espacio y por ultimo el palito del capullo.
Here I made four little balls and also stretched them for petals along with another piece to make the center of the bud by placing one on top of the other leaving a space and finally the stick of the bud.
- En la tablita agregue un poco de pasta profesional y con la ayuda de una espátula la fui esparciendo hasta que quedara uniforme.
On the small board I added some professional paste and with the help of a spatula I spread it until it was uniform.
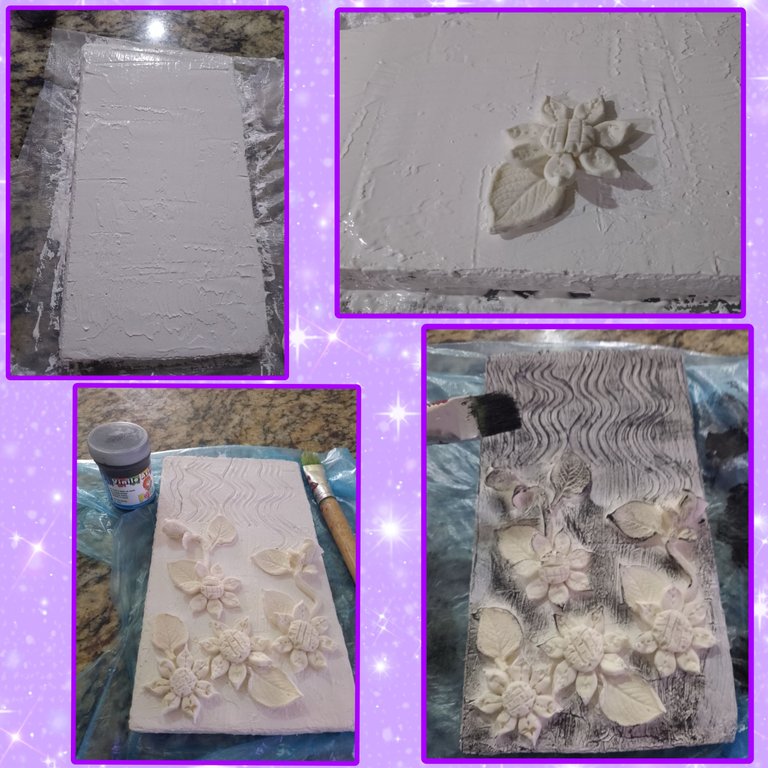
- Seguidamente ya tengo la superficie lista y empece a colocar las piezas antes de que la pasta endureciera y así las deje secar este proceso duro dos días luego empecé haciendo pinceladas secas con pintura al frío negra esas rayitas que se ven en la parte de arriba las hice con un tenedor
Next I have the surface ready and I started to place the pieces before the paste hardened and so I let them dry this process lasted two days then I started making dry brushstrokes with black cold paint those little stripes that you can see on the top I made them with a fork.
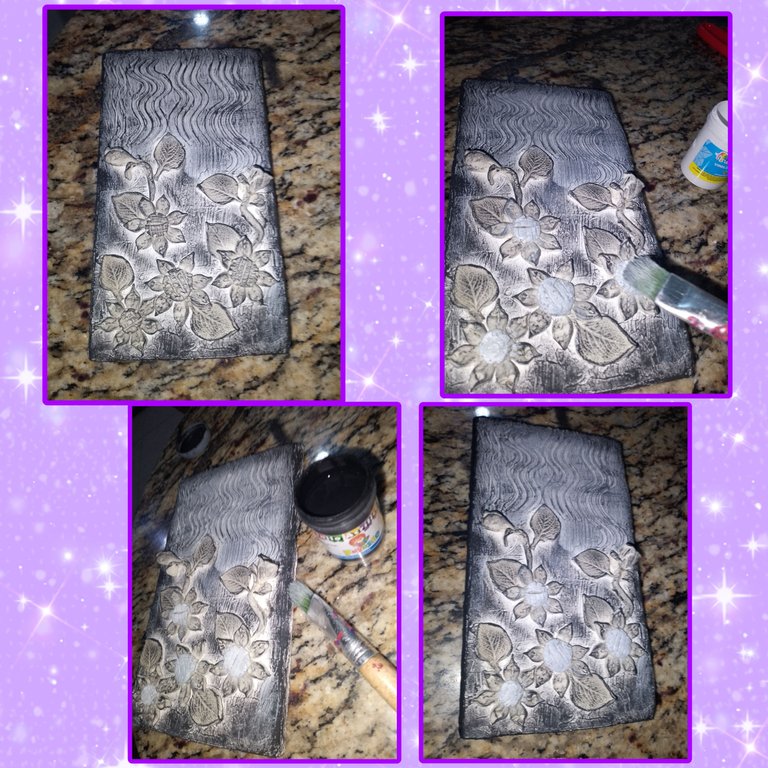
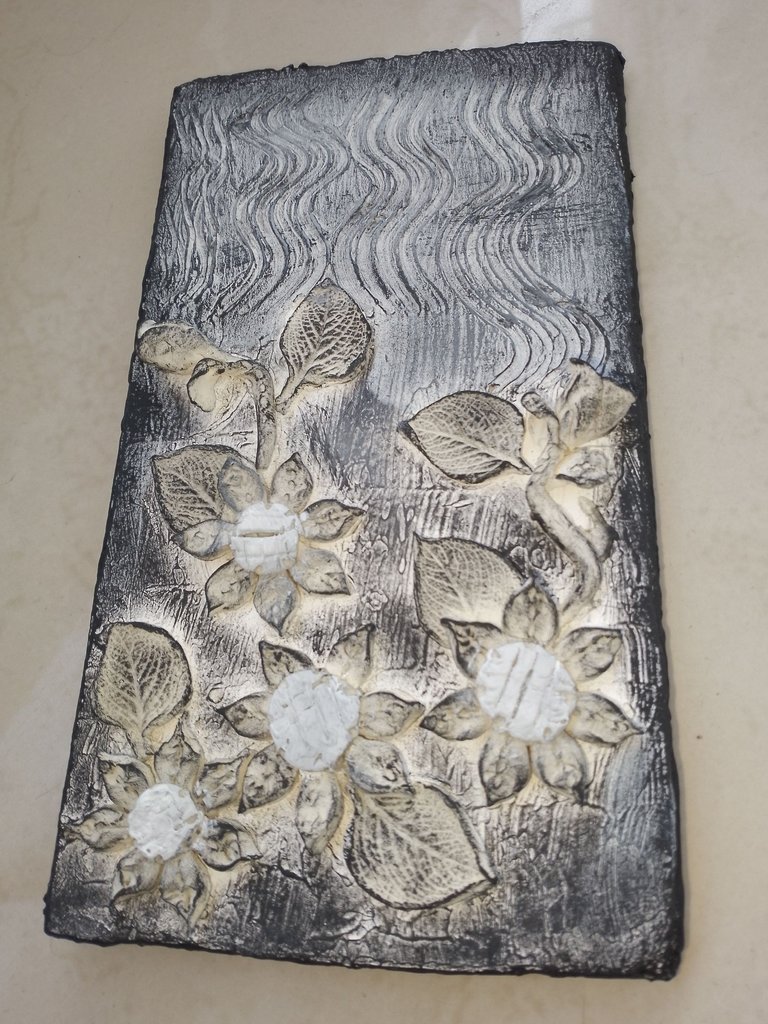
- Aquí ya termine de darle la técnica del pincel seco ahora voy a pintarles los lados con la pintura negra y con la pintura blanca le pinte los centros de las flores y ya he terminado este hermoso cuadro.
- Here I have finished the dry brush technique and now I am going to paint the sides with the black paint and with the white paint I painted the centers of the flowers and I have finished this beautiful painting.
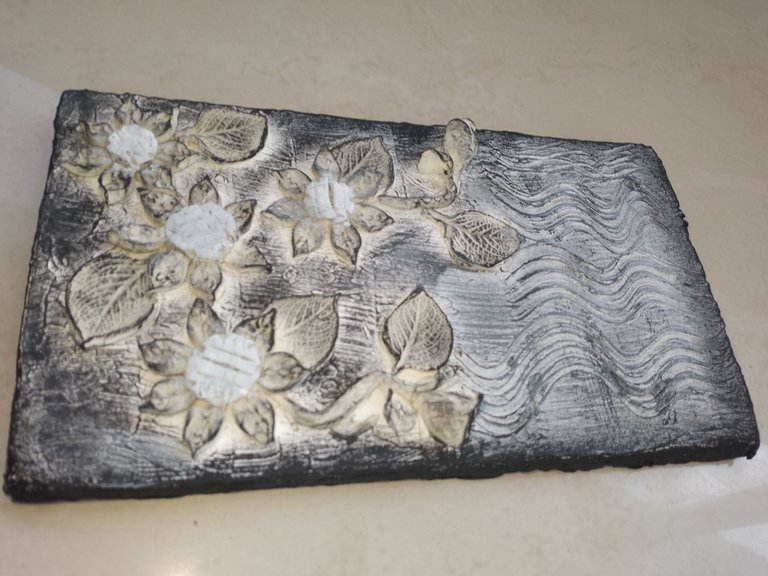
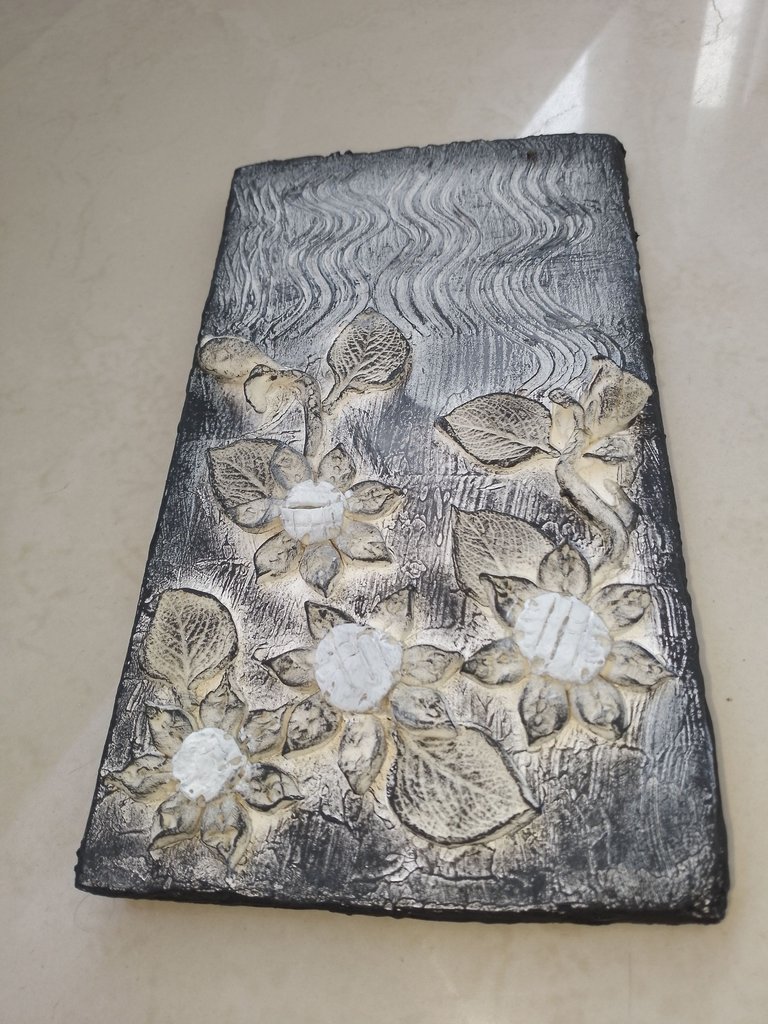
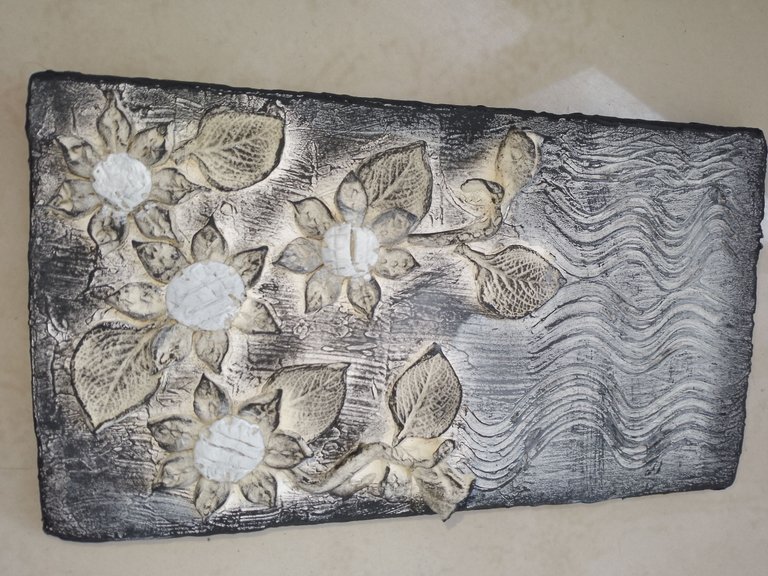
- Y este es el resultado final de este hermoso cuadro ideal para embellecer cualquier rincón de nuestro hogar, espero que les haya encantado igual que a mi ahora solo me queda despedirme hasta otra oportunidad en donde estaré nuevamente con otra publicación.
And this is the final result of this beautiful picture ideal to beautify any corner of our home, I hope you loved it as much as I did, now I just have to say goodbye until another opportunity where I will be again with another publication.
Gracias por visitar y leer mi post.
Thanks for visiting and reading my post.

*Las imágenes son propiedad del autor.
*The images are property of the author.
Que increíble el matiz de colores y texturas que se obtiene cuando se pinta sobre una superficie con relieves. Yo soy fan de usar esa técnica, ya sea dando relieve con arcilla o con papel arrugado. Buen trabajo, gracias por compartir.
A mi también me encanta el acabado de esa técnica gracias por el comentario saludos
Muy bello trabajo, los materiales usados, el diseño, los colores, de verdad muy hermoso, lo pondría con mucho gusto en mi casa.
Gracias por regalarnos tu proceso creativo @janet.urba ✨
!DIY
You can query your personal balance by
!DIYSTATSVery beautiful!