Hola Amigos de Hive!
Espero se encuentren saludables y productivos. A veces me ausento de la plataforma pero la señal y las ocupaciones familiares no permiten mi constancia para trabajar en Hive.
Me gusta mucho escribir mis post sobre las manualidades y recetas que acostumbro hacer en casa.
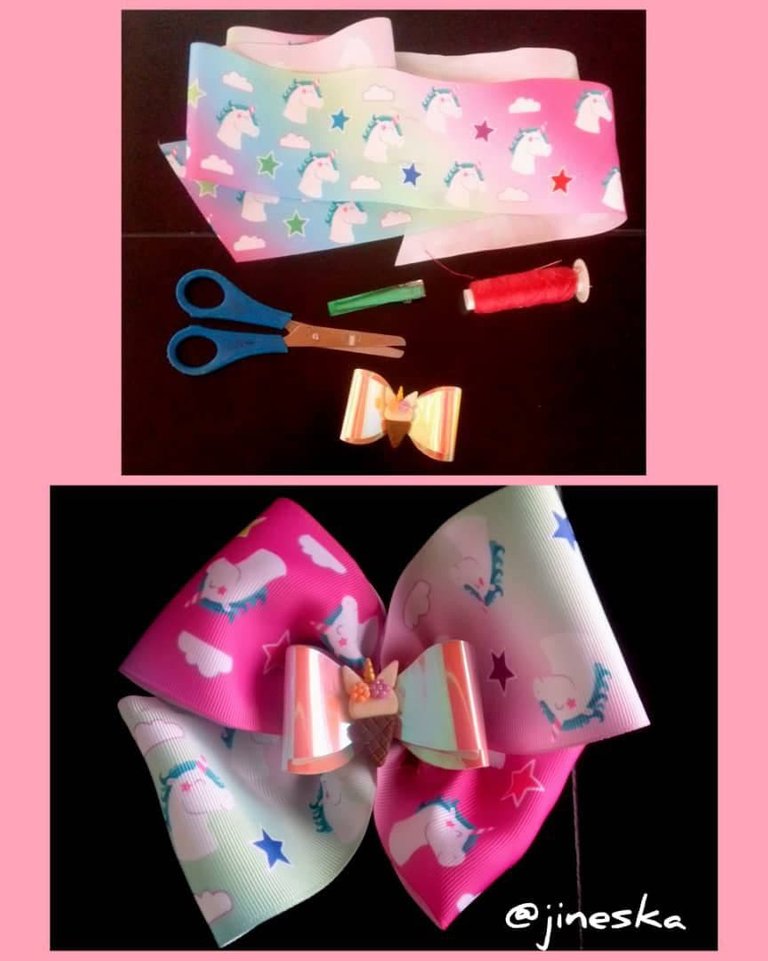
Hoy me tocó elaborar un lazo para una sobrina que estará en unos días de cumpleaños. Estos accesorios son ideales para que las princesas de la familia se vean más hermosas.
I hope you are healthy and productive. Sometimes I am absent from the platform but the signal and family occupations do not allow my constancy to work on Hive.
I really like to write my posts about the crafts and recipes that I usually make at home.
Today it was my turn to make a bow for a niece who will have a birthday in a few days. These accessories are ideal for the princesses of the family to look more beautiful.
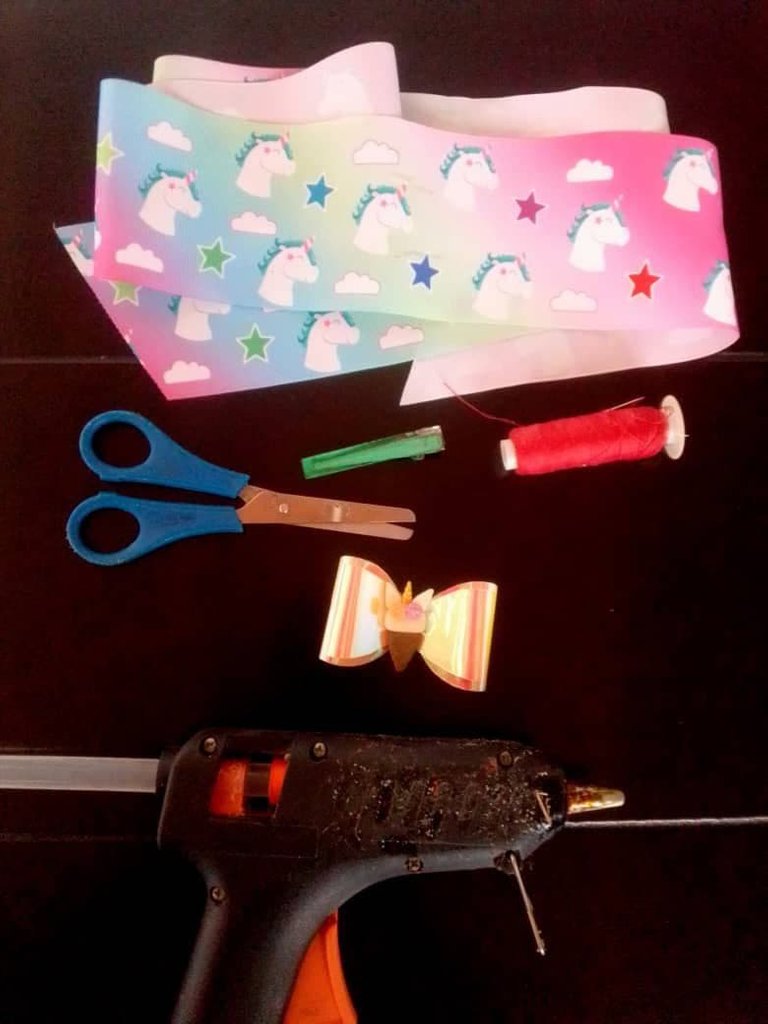
Los materiales que utilizaremos son los siguientes:
The materials we will use are the following:
- Un metro de cinta estampada.
- Un aplique que combine con el motivo de la cinta.
- Hilo y aguja.
- Silicón.
- Tijera.
- Pinza tipo caimán.
- One meter of printed ribbon.
- An applique that matches the motif of the ribbon.
- Thread and needle.
- Silicone.
- scissors.
- Alligator clip.
Paso a Paso / Step by Step
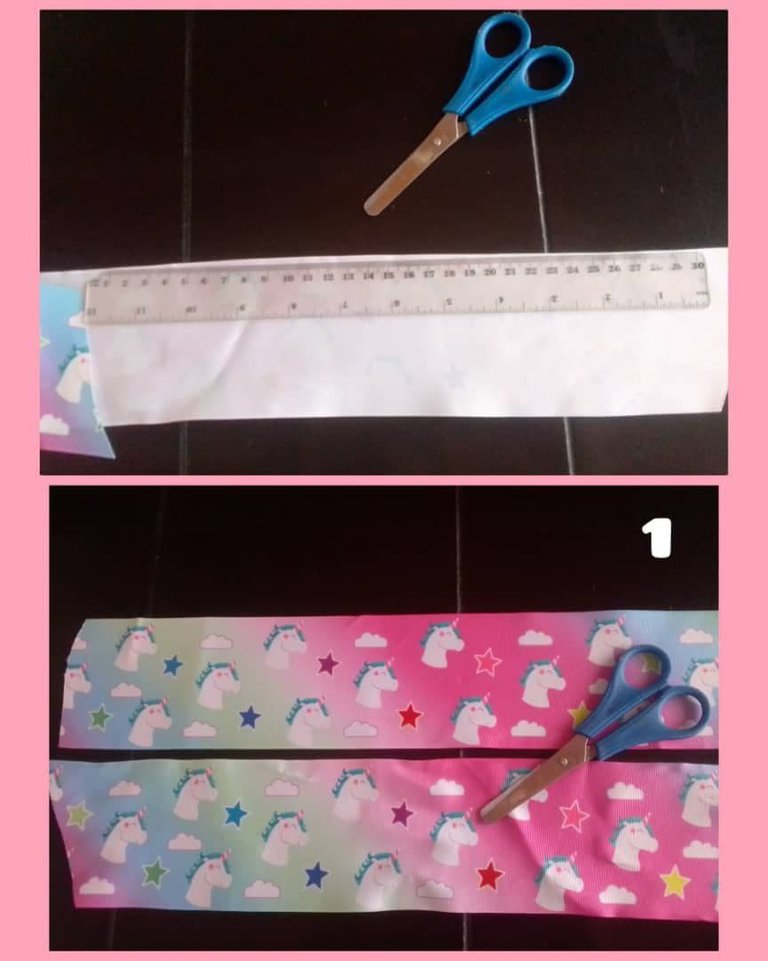
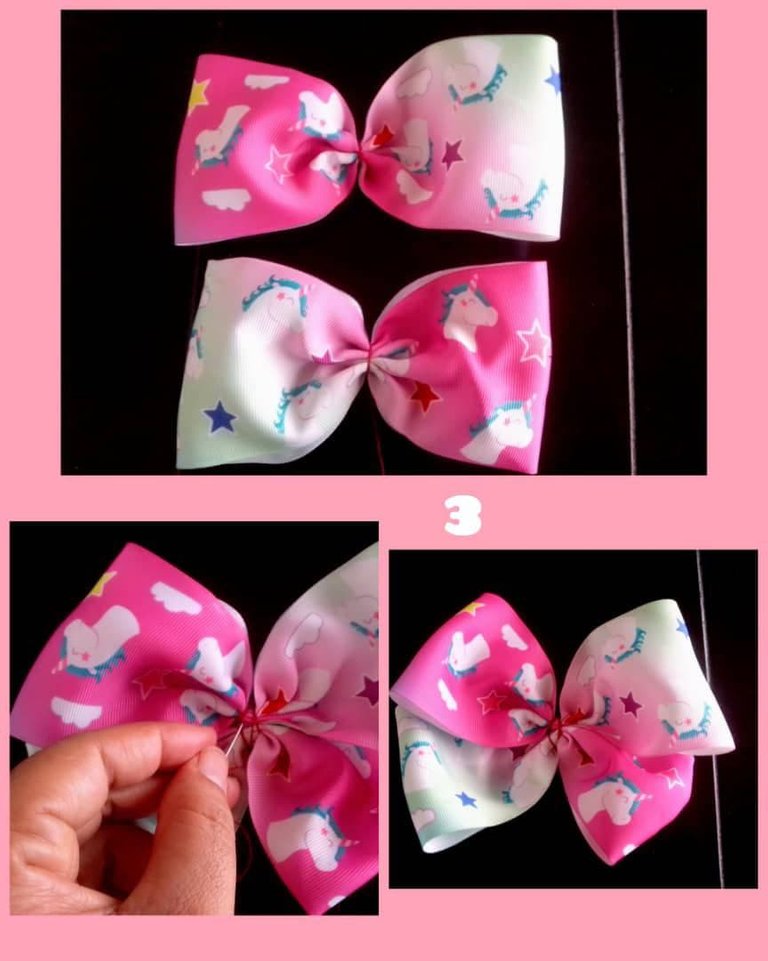
Primero mediremos 32 cm en la cinta y cortaremos 2 piezas de igual tamaño.
First we will measure 32 cm on the ribbon and cut 2 pieces of equal size.
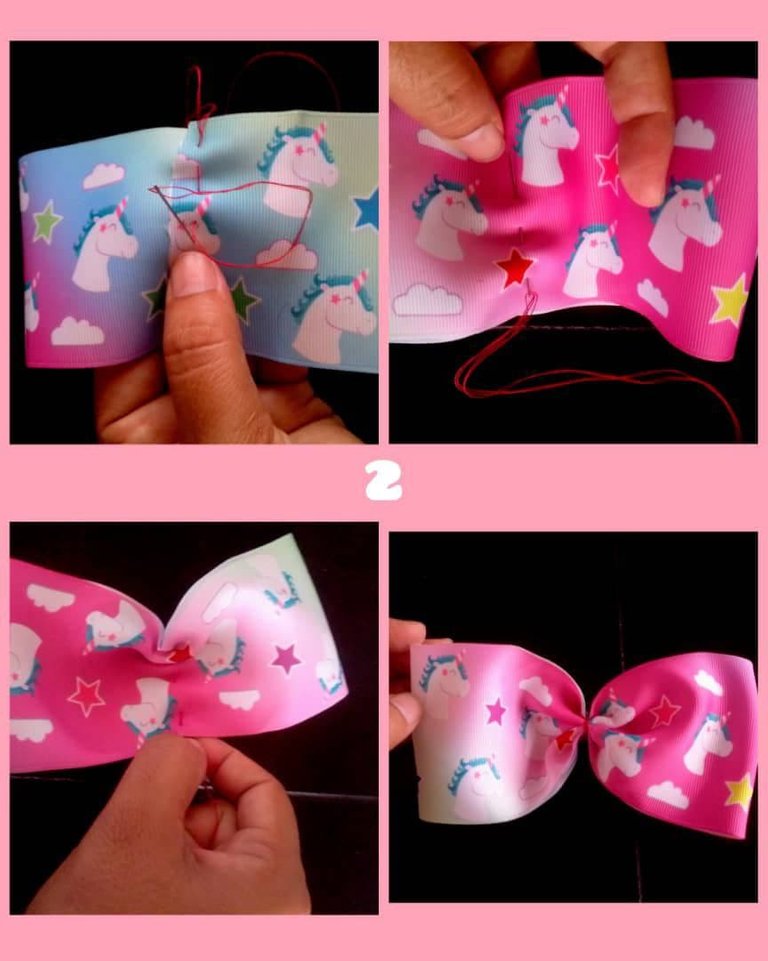
Tomaremos cada punta de la cinta y las coseremos. Después coseremos el centro del rectángulo formando el lazo, para ello arruchamos con el hilo y aseguramos con un nudo. Este paso lo repetiremos con la otra pieza de la cinta.
Take each end of the ribbon and sew them together. Then we will sew the center of the rectangle forming the ribbon loop, for this we will sew with the thread and secure it with a knot. We will repeat this step with the other piece of the ribbon.
Luego uniremos por el centro cada lazo formado, sujetamos muy bien cosiendo.
Then we will join in the center of each loop formed, we fasten it very well by sewing.
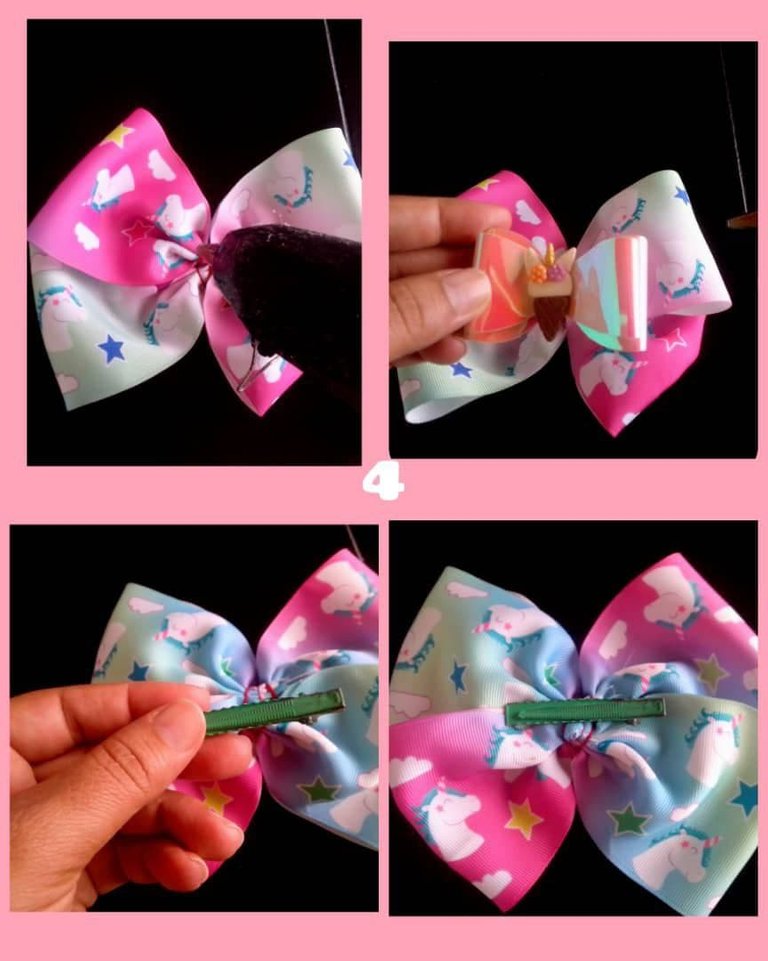
Finalmente pegaremos con silicón el aplique en el centro del lazo y la pinza por la parte trasera del mismo.
Finally we will glue with silicone the applique in the center of the bow and the clip on the back of it.
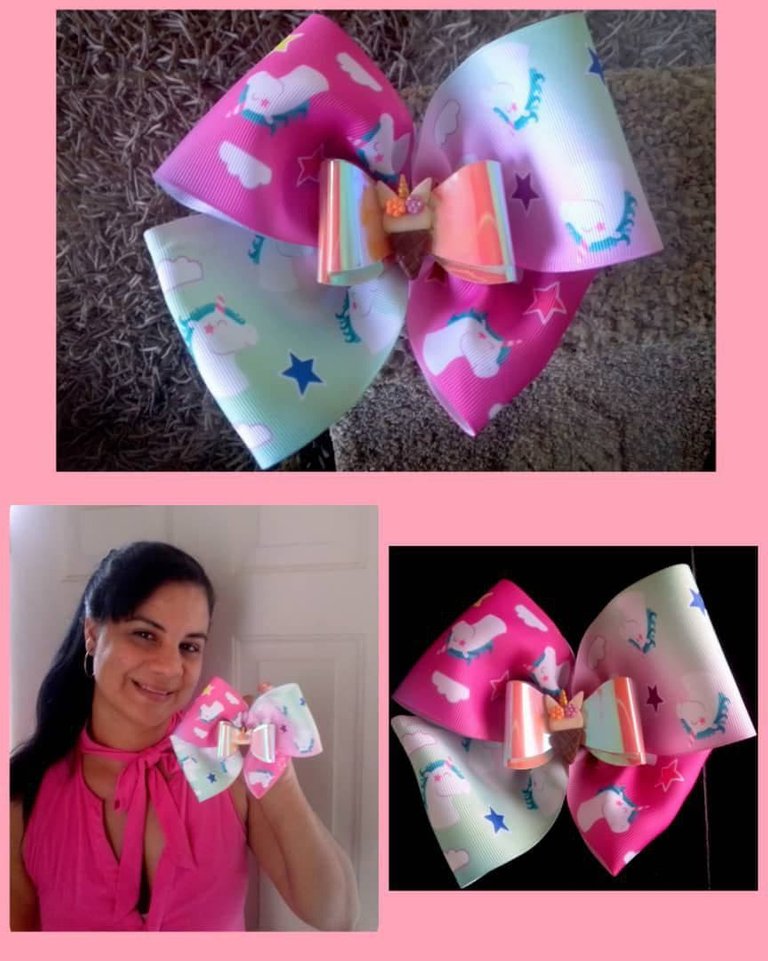
And that's how beautiful this bow will be for the princesses of the house.

¡Bendiciones infinitas!
Fotos de mi propiedad.
Tomadas con mi Celular BLU G5
Se ven delicados y lindos, solo hice moños para paquetes de regalos. Hay muchos emprendimientos que hacen moños personalizados con temáticas.
Thank you for sharing this amazing post on HIVE!
Your content got selected by our fellow curator @rezoanulvibes & you just received a little thank you via an upvote from our non-profit curation initiative!
You will be featured in one of our recurring curation compilations and on our pinterest boards! Both are aiming to offer you a stage to widen your audience within and outside of the DIY scene of hive.
Join the official DIYHub community on HIVE and show us more of your amazing work and feel free to connect with us and other DIYers via our discord server: https://discord.gg/mY5uCfQ !
If you want to support our goal to motivate other DIY/art/music/homesteading/... creators just delegate to us and earn 100% of your curation rewards!
Stay creative & hive on!