Español
Hola amigos
Espero que se encuentren súper bien, desde hace un tiempo que nos les comparto un dibujo, la semana anterior me llego un encargo de para un trabajo, me pidieron que pintara un bodegón con grafito, un bodegón es un estilo de arte que representa objetos, animales o flores, también es conocido como naturaleza muerta.

Hoy les quería enseñar a pintar un bodegón con grafito paso a paso, la verdad este es un estilo de dibujo bastante entretenido de dibujar y no es tan complicado y los resultados finales quedan muy bien.
Paso numero 1
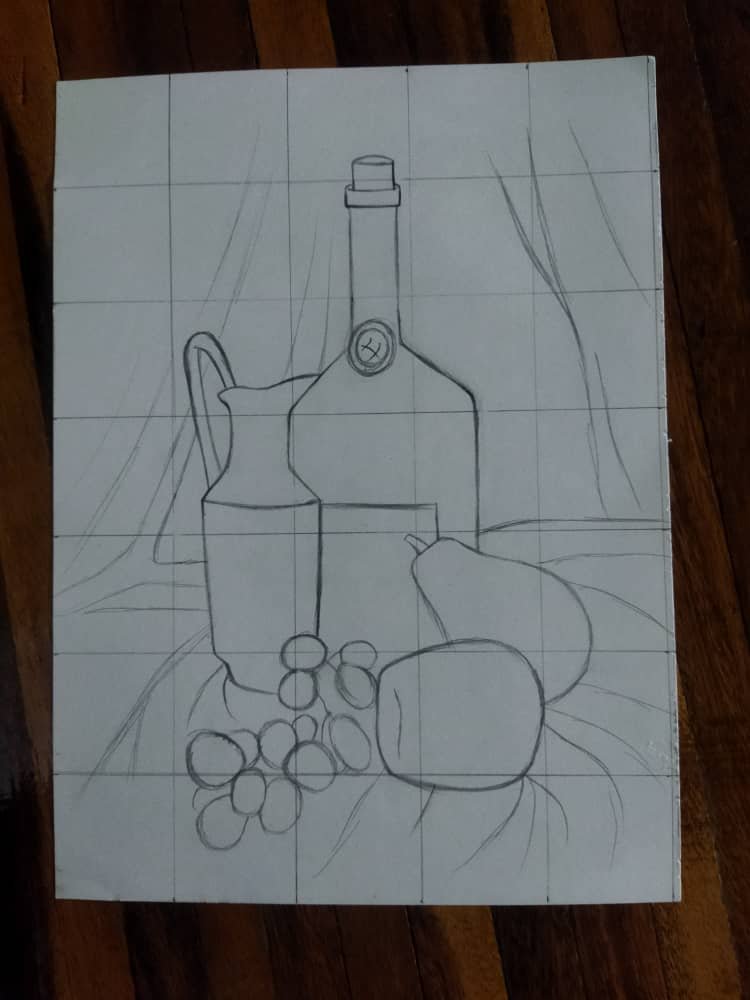
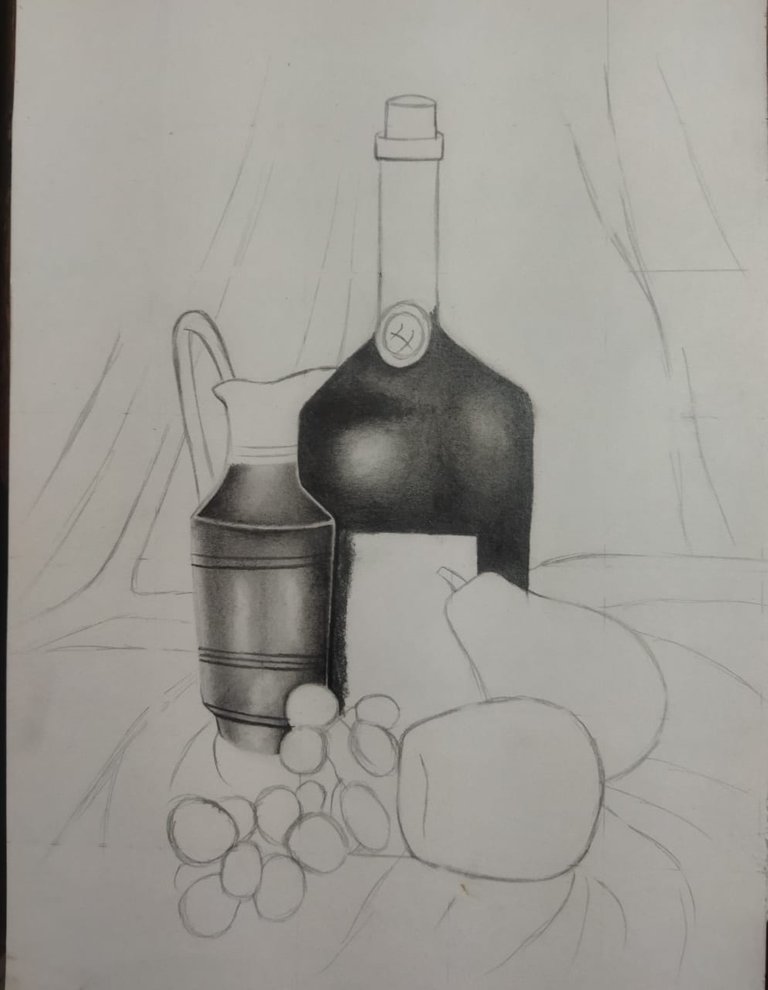
Realizar el boceto
Al inicio tendremos que realizar el boceto, hay varias formas o métodos para hacer el boceto, uno que me gusta utilizar mucho es el método de la cuadricula el cual consiste en dividir en cierta cantidad de cuadros, normalmente realizo los cuadros de 4cm por 4.1cm, este método es de gran ayuda al momento de realizar los bocetos porque gracias a los cuadro podemos guiarnos además pueden ayudarnos a que todo que lo mas proporcionado posible, es importante tomarse el tiempo necesario para que el boceto quede lo mejor posible porque es una de las partes más importantes de todo el dibujo.
Paso numero 2
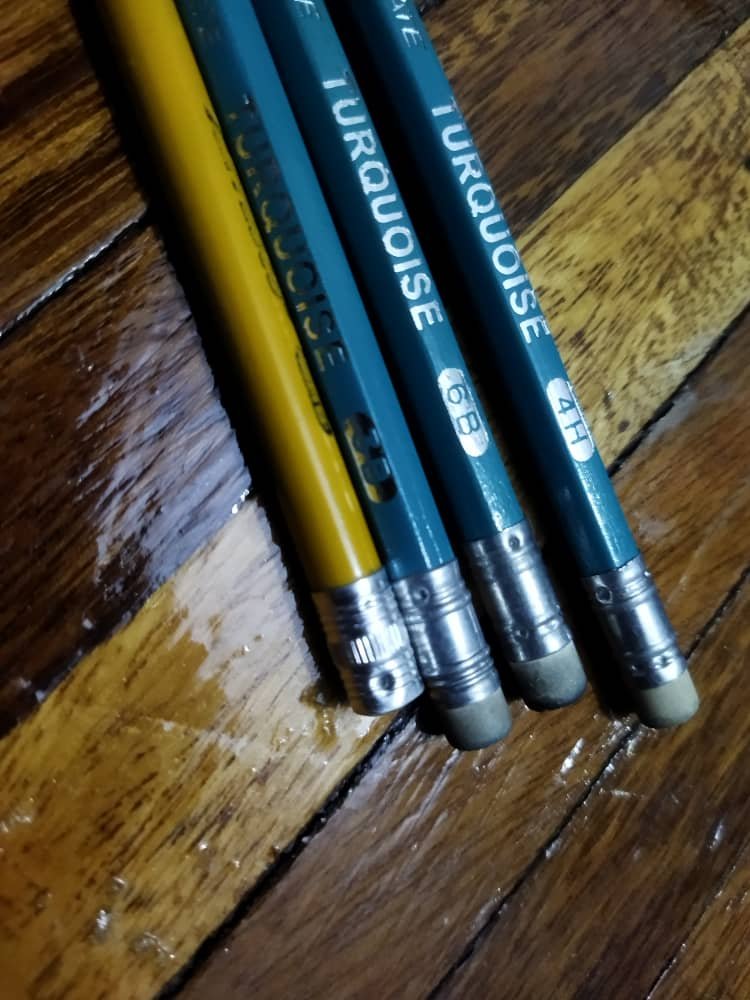
Seleccionar los lápices
Antes de realizar el sombreado del dibujo tenemos que elegir los lápices que vallamos a utilizar, normalmente utilizo 4 tonalidades de lápices de grafito los cuales son (2H, HB, 3B y 6B) cada uno de los lápices de dibujo tienen diferente tonalidades algunos son más oscuros y otros son más claros, los lápices que tienen la letra (B) son lápices de tonalidad oscura y mientras más alto sea el numero que tienen al lado de la letra más oscuro será, por otra parte los lápices que tengan la letra (H) son lápices claros y mientras más alto sea el numero que tienen más claro será, les recomiendo mucho utilizar los lápices (2H, HB, 3B y 6B) son los mas útiles al momento de hacer un dibujo con grafito.
Paso numero 3
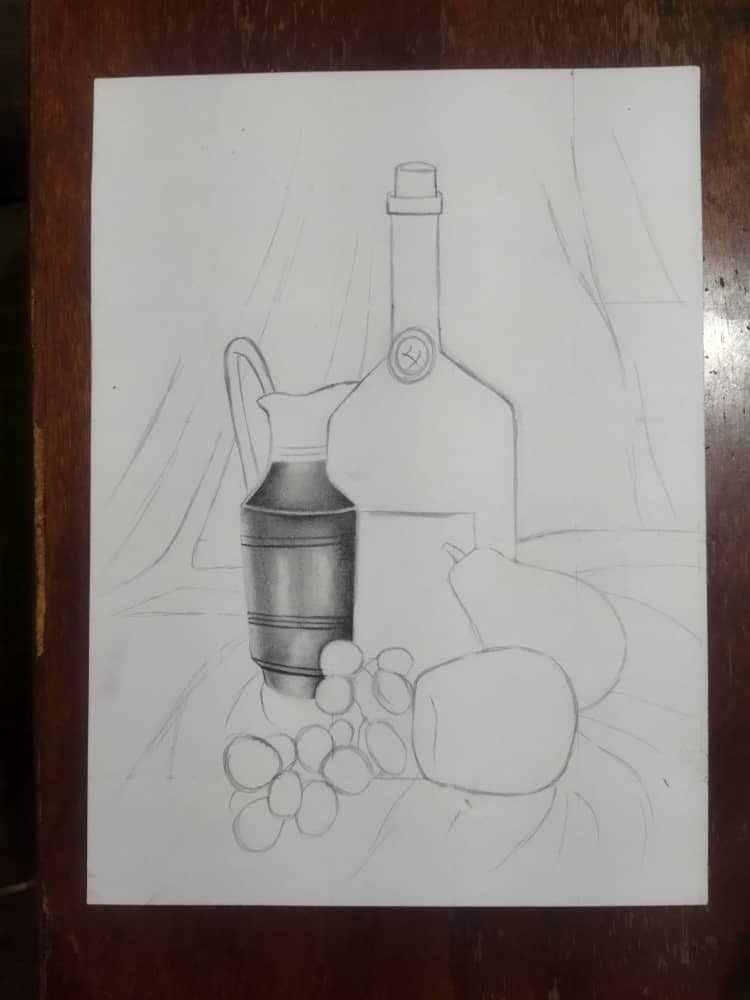
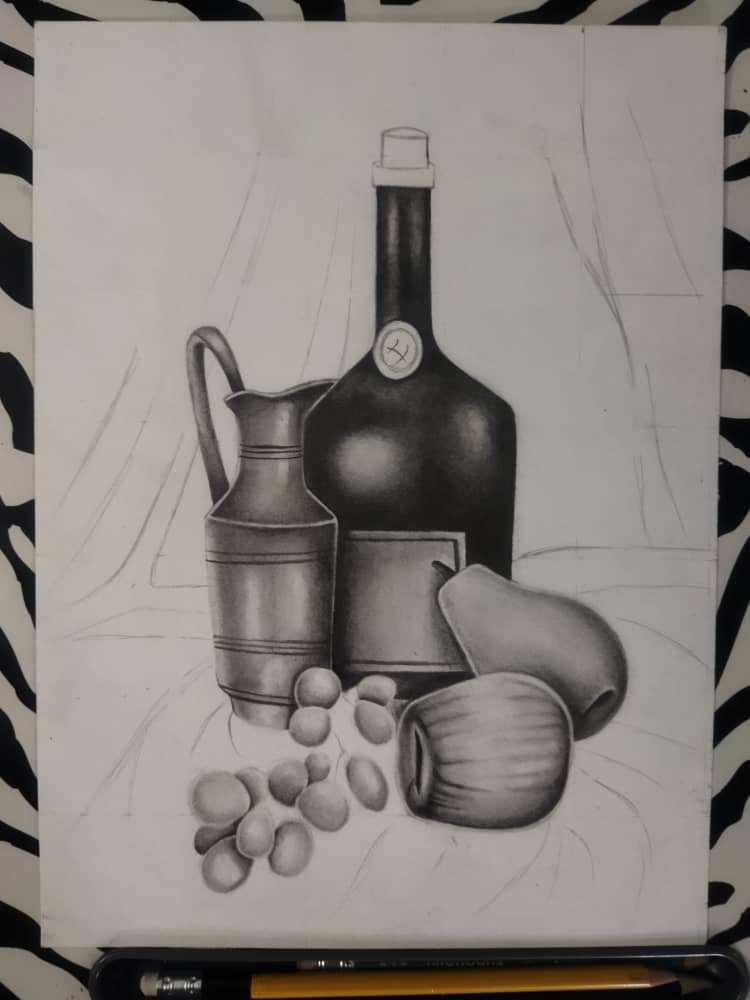
Comenzar a sombrear
Al momento de sombrear tendremos que aplicar suavemente los lápices es decir, no debemos afincarlos, podemos aplicar primero los tonos oscuros o los tonos claros dependiendo de la parte que vallamos a sombrear primero, es recomendable ir sombreando por partes para que el dibujo quede lo mejor posible.

Paso numero 4
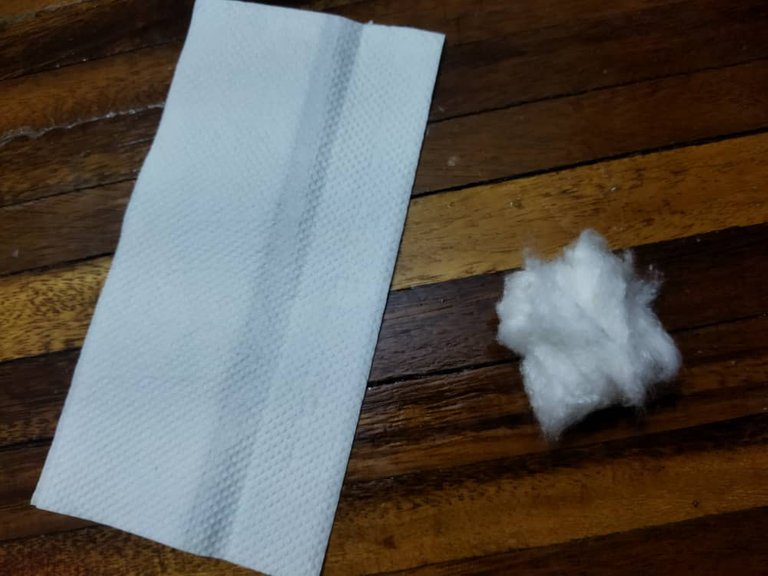
Difuminar
Para difuminar podemos utilizar un trozo pequeño de algodón, también servilleta, esos dos utensilios son fáciles de conseguir y son de gran utilidad al momento de trabajar con grafito, el algodón sirve mucho para partes que son claras y también para zonas pequeñas y la servilleta sirve bastante para las partes oscuras y grandes porque ayuda a difuminar bastante rápido.
Paso numero 5
Agregar pequeños detalles
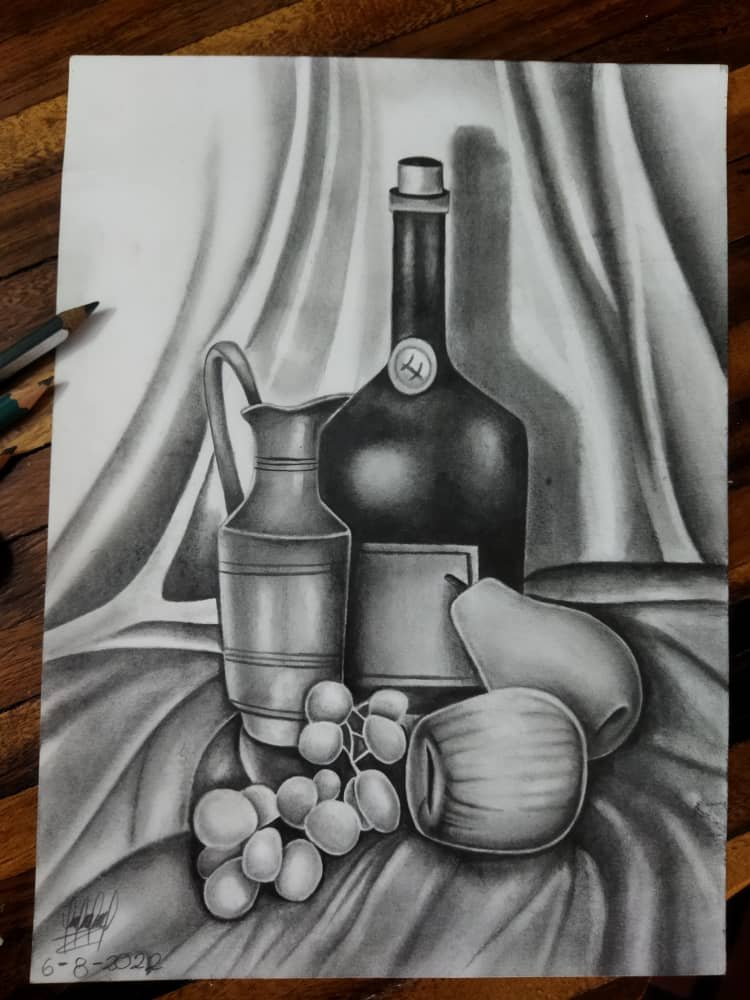
A todo dibujo se le pueden agregar pequeños detalles de texturas que lo ayudaran a que se vea más realista y mucho mejor, agregar eso detalles extras lleva más tiempo pero lograran que el resultado final se vea muchísimo mejor.

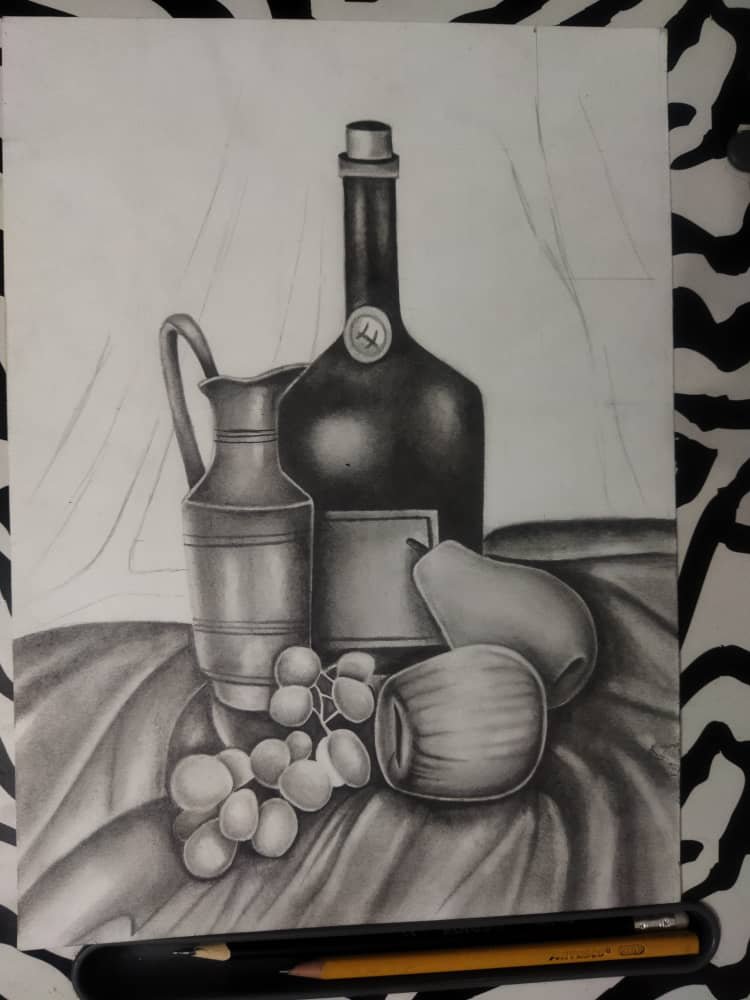
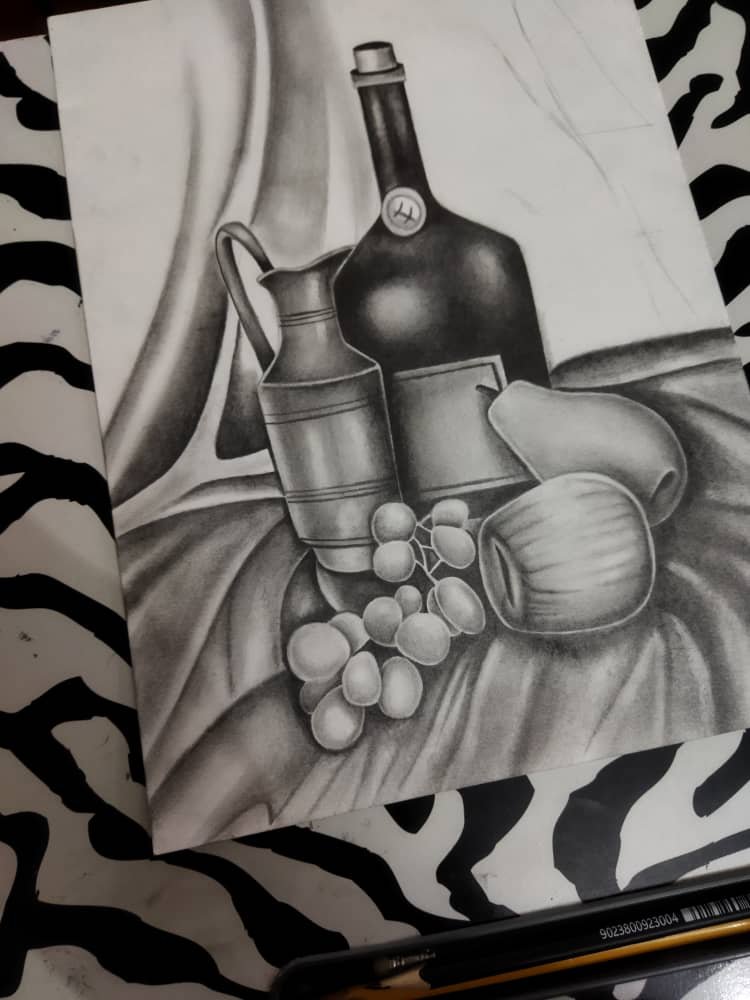
Espero que el resultado final del dibujo les guste mucho, tarde aproximadamente unas 10 horas en realizar el dibujo por completo pero el resultado final valió cada minuto de trabajo, si tienen algún consejo o recomendación pueden dejarlo en los comentarios, espero que la explicación les guste mucho, los invito a realizar dibujos de bodegones la verdad son muy entretenidos de hacer y muy buenos para pasar el tiempo, muchas gracias por leer la publicación y nos vemos próximamente con un nuevo dibujo adiós.
Las fotografías la tome con mi teléfono el cual es un Poco M3, mi publicación fue traducida por Deepl, editada con HTML.
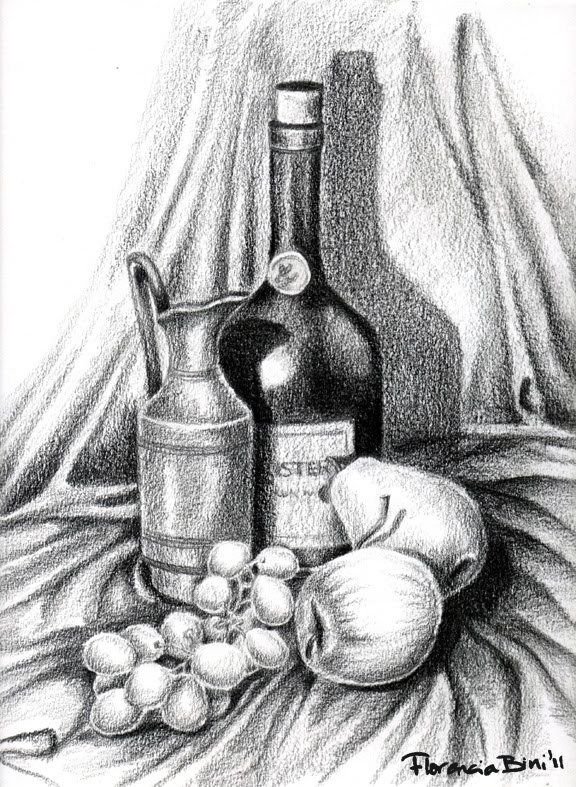
A continuación les dejare la imagen de referencia.
English
Hello friends
I hope you are feeling great, it's been a while since I've shared with you a drawing, the week before I got an order for a job, I was asked to paint a still life with graphite, a still life is an art style that represents objects, animals or flowers, it is also known as still life.
Today I wanted to show you how to paint a still life with graphite step by step, the truth is that this is a very entertaining style of drawing and it is not so complicated and the final results are very nice.
Step number 1
Make the sketch
At the beginning we will have to make the sketch, there are several ways or methods to make the sketch, one that I like to use a lot is the grid method which consists of dividing it in a certain amount of squares, normally I make the squares of 4cm by 4.1cm, this method is of great help when making the sketches because thanks to the squares we can guide us and they can help us to make everything as proportionate as possible, it is important to take the necessary time to make the sketch as good as possible because it is one of the most important parts of the whole drawing.
Step number 2
Select the pencils
Before making the shading of the drawing we have to choose the pencils that we are going to use, normally I use 4 shades of graphite pencils which are (2H, HB, 3B and 6B) each of the drawing pencils have different shades some are darker and others are lighter, the pencils that have the letter (B) are dark tonality pencils and the higher the number next to the letter the darker it will be, on the other hand the pencils that have the letter (H) are light pencils and the higher the number next to the letter the lighter it will be, I highly recommend using the pencils (2H, HB, 3B and 6B) they are the most useful when making a drawing with graphite.
Step number 3
Start shading
At the moment of shading we will have to apply the pencils smoothly, that is to say, we should not sharpen them, we can apply first the dark tones or the light tones depending on the part we are going to shade first, it is advisable to go shading by parts so that the drawing is the best possible.
Step number 4
Blur
To blur we can use a small piece of cotton, also napkin, these two utensils are easy to get and are very useful when working with graphite, the cotton is very useful for parts that are clear and also for small areas and the napkin is quite useful for the dark and large parts because it helps to blur quite fast.
Step number 5
Adding small details
To every drawing you can add small details of textures that will help it to look more realistic and much better, adding these extra details takes more time but they will make the final result look much better.
I hope you like the final result of the drawing, it took about 10 hours to make the drawing completely but the final result was worth every minute of work, if you have any advice or recommendation you can leave it in the comments, I hope you like the explanation, I invite you to make still life drawings the truth is very entertaining to do and very good to pass the time, thank you very much for reading the publication and see you soon with a new drawing bye.
The pictures were taken with my phone which is a Poco M3, my publication was translated by Deepl, edited with HTML.
Here is the reference image.
Wao, maravilloso, quedó hermoso.
Gracias por compartirnos tus técnicas.
Muchas gracias que bueno que te gustó
Un hermos trabajo y explicado de forma magistral. Me gustan mucho los dibujos a grafito y he replicado algunos, pero aún no hago un dibujo de mi propia inspiración
Buen trabajo..
Muchas gracias 🙂🙂🙂🙂🙂
wuao que gran técnica nos has presentado, la cuadrícula es perfecta para que nuestros dibujos queden proporcionados, me encanto, tendré que practicarlo para implementarlo ante mis dibujos.
Si la cuadrícula es súper útil para hacer los dibujos, gracias por comentar 😊😄
Gracias por enseñarnos tus técnicas se entiende muy bien tu explicación, intentaré realizar un bodegón en tamaño grande para decorar un espacio de mi casa que lo necesita. Un abrazo 🤗
Muchas gracias por comentar, me alegra que la explicación te haya gustado
Te felicito realmente te quedó hermoso
!discovery 30
Muchas gracias
Que hermoso! Me encanto tu trabajo👍Felicidades!
Gracias por compartir😉
Muchas gracias por comentar tu comentario me anima 😊
This post was shared and voted inside the discord by the curators team of discovery-it
Join our community! hive-193212
Discovery-it is also a Witness, vote for us here
Delegate to us for passive income. Check our 80% fee-back Program
Your content has been voted as a part of Encouragement program. Keep up the good work!
Use Ecency daily to boost your growth on platform!
Support Ecency
Vote for new Proposal
Delegate HP and earn more
Un hermoso trabajo, siempre he soñado con aprender a dibujar así, es todo un arte, me encanto como nos muestra el paso a paso, un gran trabajo, te felicito, gracias por compartirlo, saludos.
Muchas gracias 😊😊🙂🙂
Estoy impresionada con tu trabajo, es espectacular, gracias por proporcionarnos el tutorial y esos maravillosos tips, estoy segura que serán muy útiles a nuestra comunidad de dibujo. Tienes mucha técnica y grandes avances, muy profesional te felicito.
Muchas gracias por comentar tu comentario me inspira a seguir dibujando