Hola queridos amigos muy buenas noches tengan todos , espero que se encuentren bien , hoy les quiero compartir un lindo burrito que realicé para una actividad escolar , un cierre de proyecto sobre los animales a mi bebé le tocó el burro , bueno está demás decir que el quedó fascinado con ese burro
Hello dear friends, I hope you are all well, today I want to share with you a cute little donkey that I made for a school activity, a closing project about animals, my baby got the donkey, well needless to say that he was fascinated with that donkey.

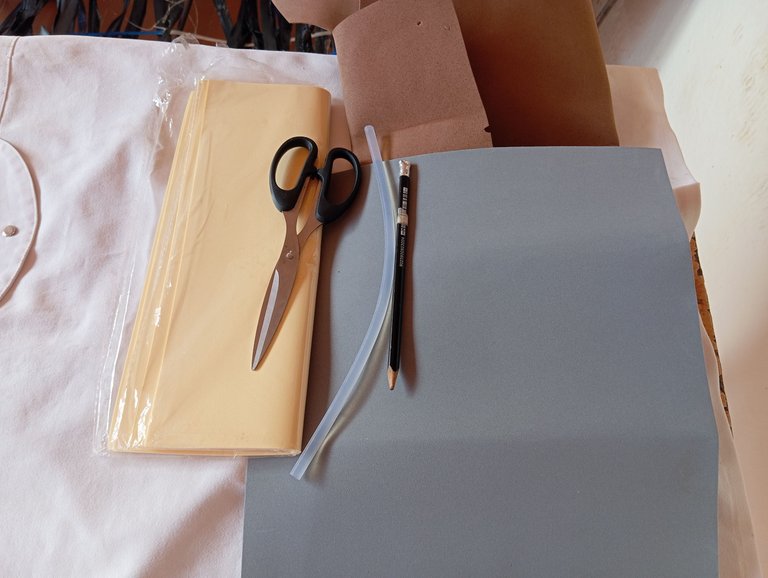
Materiales qué utilice :
-Foamis
-Tijera
-Silicon
-Lapiz y papel
Materials I used:
-Foamis
-Scissors
-Silicon
-Paper and paper
A continuación los pasos a seguir:
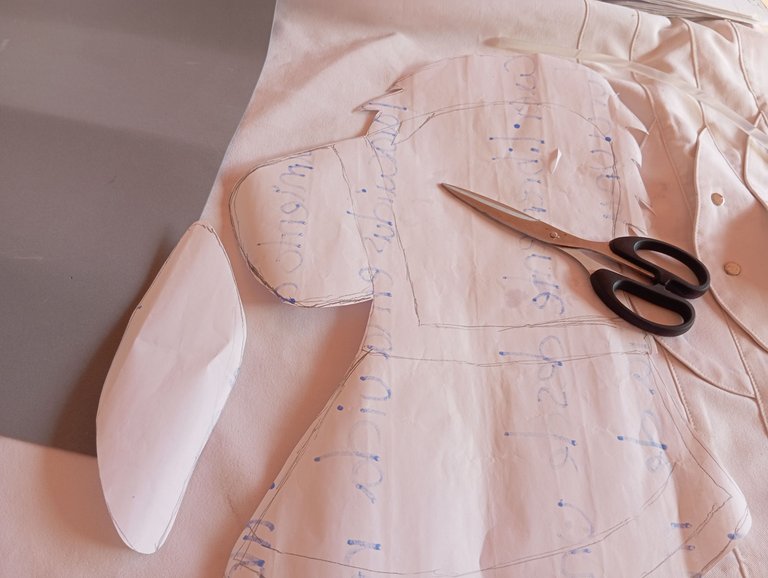
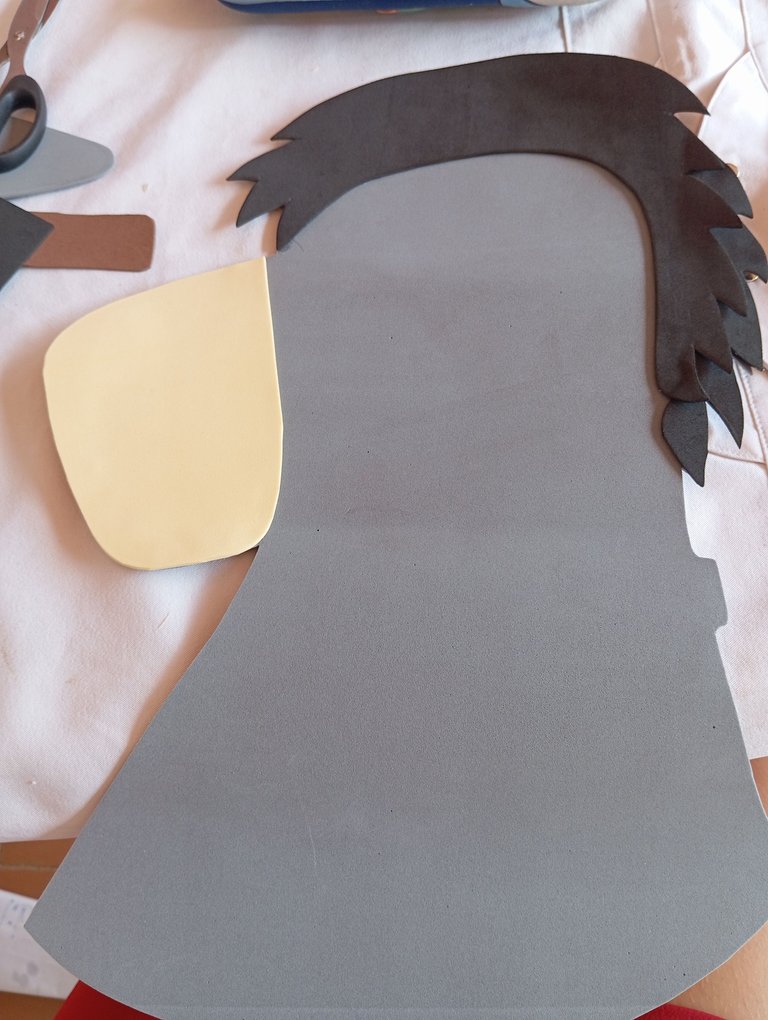
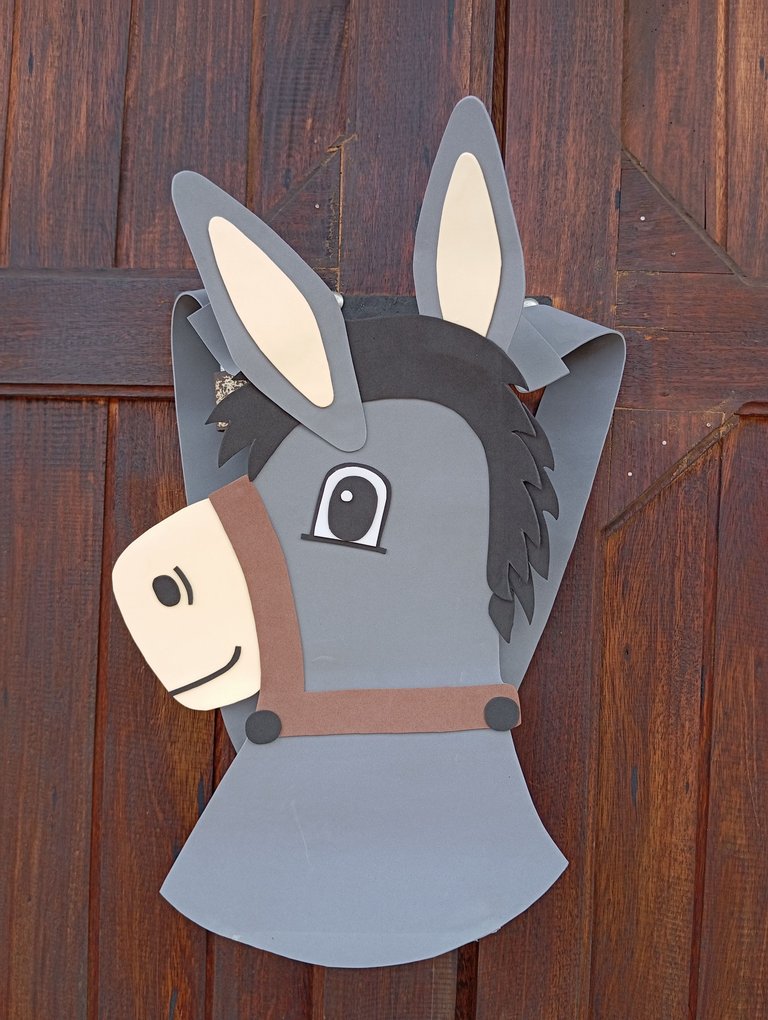
Iniciaremos primeramente realizando y recortando al mismo tiempo un patrón con la temática con la que vamos a trabajar, en este caso dibujé la silueta de un burro , únicamente su cabeza , para el patrón utilicé papel reciclado ,lo que quiero resaltar es que no necesariamente debe ser un papel nuevo
Here are the steps to follow:
First we will start by making and cutting out at the same time a pattern with the theme we are going to work with, in this case I drew the silhouette of a donkey, only its head, for the pattern I used recycled paper, what I want to emphasize is that it does not necessarily have to be a new paper.
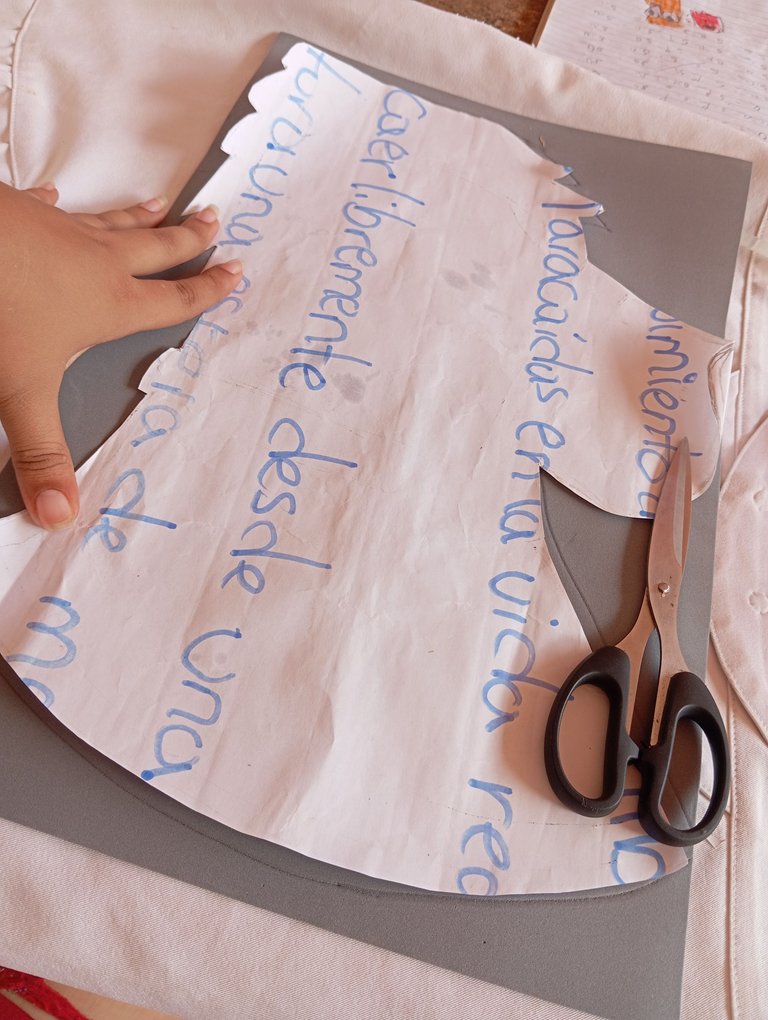
Seguidamente vamos a continuar tomando nuestro patrón y continuaremos marcando en los foamis de nuestra preferencia, comencé por la cabeza y cuello , luego continúe con sus orejas y demás piezas
Next we are going to continue taking our pattern and continue marking on the foamis of our preference, I started with the head and neck, then continue with the ears and other pieces.
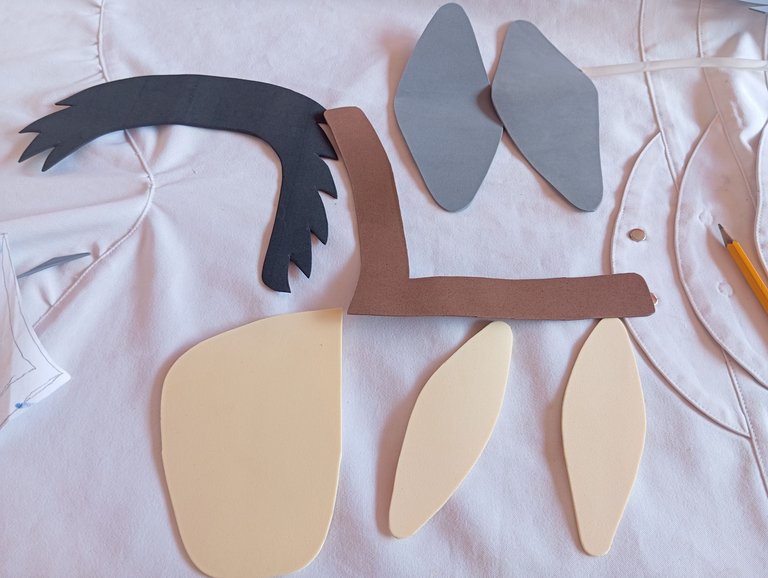
Una vez que marcamos en nuestro paso anterior, continuaremos recortando cada uno con la ayuda de nuestra tijera , comencé con las piezas más pequeñas, luego más adelante continúe con la cabeza del burro
Once we marked in our previous step, we will continue cutting out each one with the help of our scissors, I started with the smallest pieces, then later continue with the donkey's head.
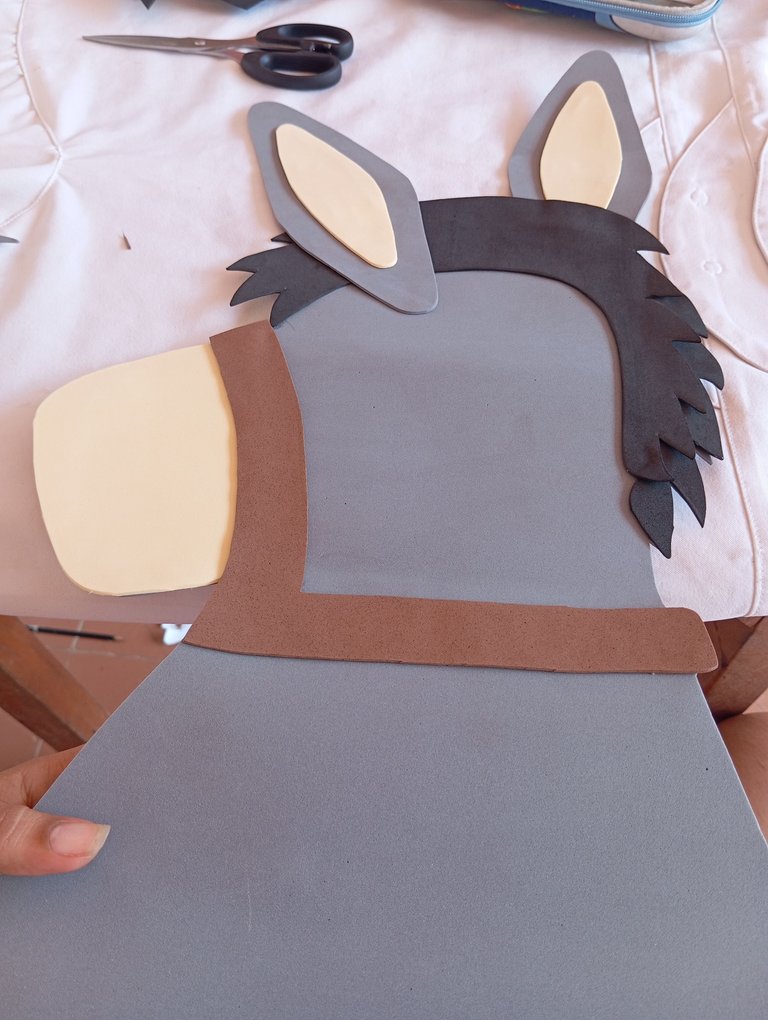
Luego continuaremos pegando , iniciaremos primeramente con la parte de adelante de su trompa o hocico , luego en la parte de arriba su cabellera
Then we will continue gluing, we will start first with the front part of his trunk or snout, then on the top part of his scalp.
Seguidamente vamos a continuar pegando la correa o perchero , en la parte de arriba pegaremos sus orejas , una hacia adelante y la otra hacia atrás como pueden apreciar
Next we will continue gluing the strap or hanger, at the top we will glue his ears, one forward and the other backward as you can see.
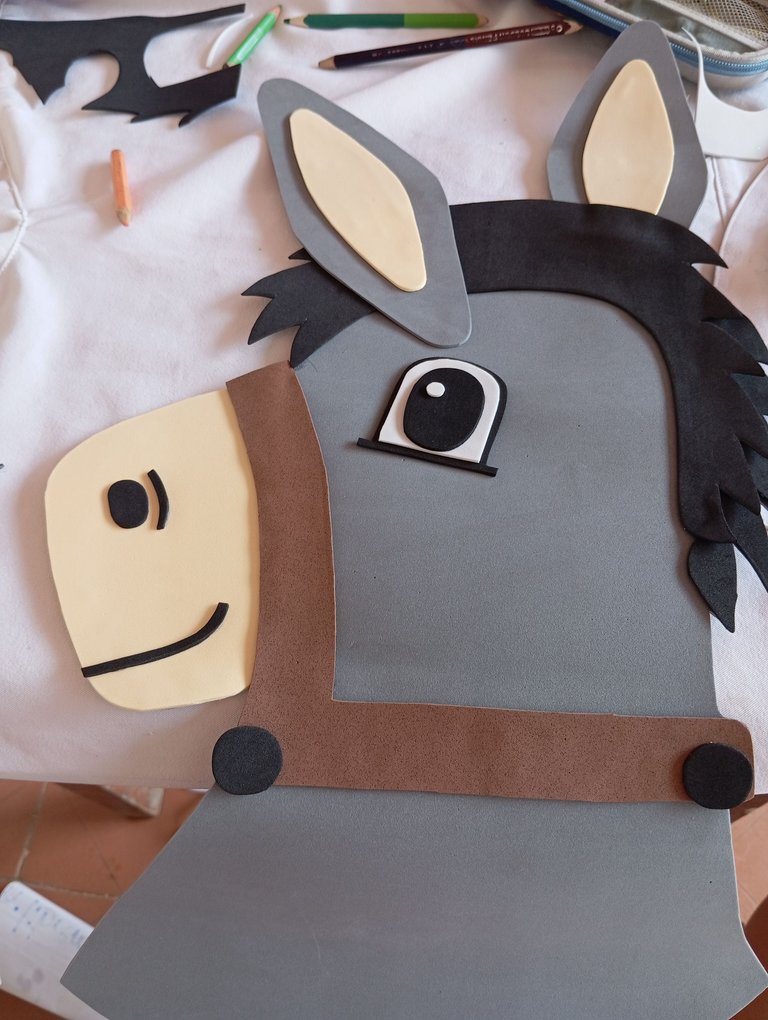
Finalmente vamos a continuar realizando el rostro de nuestro burro , pegué un solo ojo ya que se encuentra en posición de lado , le dibujé la silueta de su trompa y hocico , culminando así nuestro personaje
Finally we are going to continue making the face of our donkey, I glued only one eye as it is in sideways position, I drew the silhouette of his trunk and muzzle, thus culminating our character.
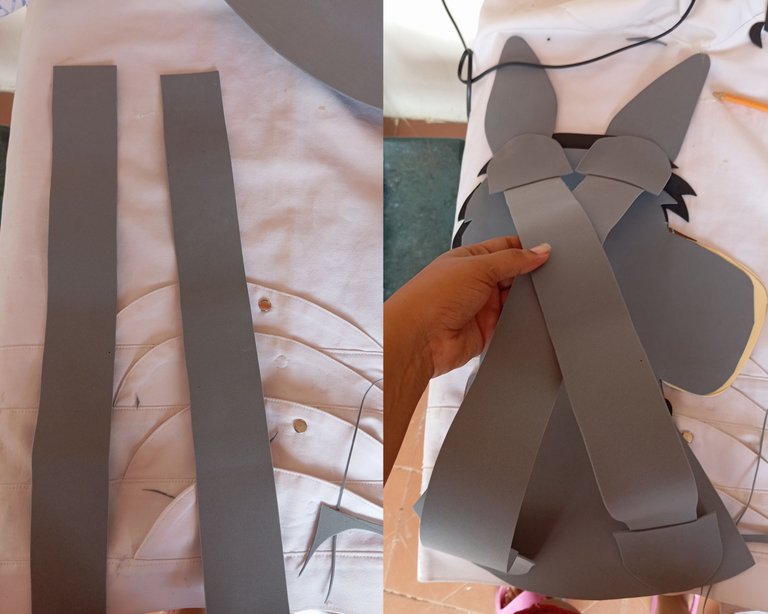
A continuación vamos a proceder recortando dos tiras de foamis del mismo color , estás tiras las vamos a medir que quede bien al bebé , ni apretado ni grande , la vamos a pegar una al lado de la otra en la parte de atrás del burro para que el bebé pueda usuar el traje, culminando así nuestra creación
Next we are going to proceed cutting out two strips of foamis of the same color, we are going to measure these strips to fit the baby, neither tight nor big, we are going to glue one next to the other on the back of the donkey so that the baby can use the suit, thus culminating our creation.
Espero les guste el resultado final , quedó muy hermoso y muy útil para varias temáticas .
Créditos: las fotos las tomé con mi redmi 12 y traduje los textos con el traductor deepl, feliz noche para todos
I hope you like the final result , it was very beautiful and very useful for various themes .
Credits: the photos were taken with my redmi 12 and I translated the texts with the deepl translator, happy night to all.
Que lindo quedó,felíz noche 🤗
Gracias amiga
No solo tu pequeño quedó fascinado, yo también, que bonito trabajo, un burro tierno y bonachón, además me deja admirada qué sea fomy, hiciste un disfraz de burros con fomi, esto es arte del bueno. Felicitaciones
Gracias me alegra que le haya gustado
you have created something amazing, the result is so beautiful. you are great👍 in making it.
A really professional job with a very professional finish, you can see in your son's face the absolute happiness of having his donkey. How great that you have documented and shared it here, lots of success.