Hello dear friends, good afternoon everyone. I hope you are all well. I want to share with you a cute doll organizer made from recycled materials. It is very useful; not only can we organize the girls' hair colors, but also their brushes, combs, and other items, as well as decorating the room.

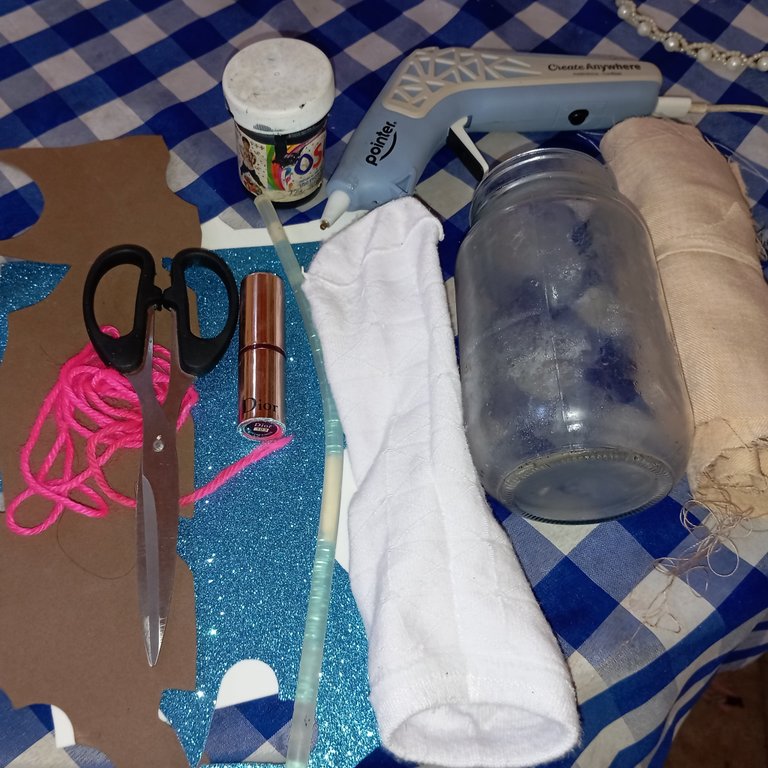
Materials I used to make the organizer:
-Glass mayonnaise jar
-Stockings
-Foam
-Yarn
-Fabric
-White braid
-Silicone
-Thread and needle
-Scissors
-Paints
Here are the steps to follow:
First, we will start by decorating our mayonnaise jar. Use a glass jar because it is smooth. Then take a white stocking (the color is optional) and cover the jar with it. Add silicone to the inside so that the stocking stays in place. I just lost the other stocking (I don't know how, I think it might have been a little mouse, ha ha ha), but I kept this one because I thought it might come in handy.

Next, we will continue making the head of our doll. For this, I used a piece of skin-colored fabric. With the help of a round container, we will mark two circles to make her head later.

Once we have marked our two circles, we will proceed to cut them out with the help of scissors. Then, with a needle and thread, we will sew all around the circle, leaving a small space at the bottom unsewn. Then, we will turn the seam inside out and insert filling to form the face of our 3D doll. Once we have filled it, we will sew the bottom where we left the space so that the filling does not come out.

Next, we will make the doll's hair. At first, I didn't know how to do it because I didn't have enough yarn, but I improvised with what little I had. I came up with the idea of hair with highlights or colors. I used brown foam, pink yarn, and a white braid. First, I made some weaves with them to create the hair.

Then I continued taking the doll's hair and began to glue it to her head, starting at the top in the center. I decided to make some buns that I used to wear a lot to school (buns called "onions"). I first glued the weave in the center, then continued rolling and gluing it to the sides of the head.

Next, we will continue by gluing the doll's head to the center of the container, then I continued by gluing a small bow in one corner, and then I finished with her adorable face, adding black paint and pink lipstick.

To finish our organizer, I took a piece of foam and made a little dress for the doll, which I glued under her head with a border of white plastic balls, thus completing my organizer

This is the final result of my beautiful doll organizer made from recycled materials. I hope you like it. It's very useful for our princesses, and the best part is that we can create it with simple steps and few materials.
Credits: I took the photos with my Redmi 12, made the collages with the GridArt app, and translated the texts with the Deepl translator. Have a great day!

Sending Love and Ecency Curation Vote!

Wow, this organizer looks so cute and adorable. This would make one want to keep stuff safe and tidy. Nice work
selected by @stevenson7
awww! Qué adorable <3 te quedo muy linda.
Muchas gracias querida amiga
Quedó muy lindo y llamativo este porta lápices, y lo mejor es que lo realizaste con materiales reciclables, genial.
!discovery 35
This post was shared and voted inside the discord by the curators team of discovery-it
Join our Community and follow our Curation Trail
Discovery-it is also a Witness, vote for us here
Delegate to us for passive income. Check our 80% fee-back Program