Feliz dia amig@s de Hive blog, un saludo muy especial a mi comunidad favorita de @hivediy.!!
Happy day friends of Hive blog, a very special greeting to my favorite community of @hivediy.!!
Bueno familia, primero es lo primero, y lo primero es darle gracias a Dios por un dia mas de vida, y declarar que hoy sera un dia de victorias y de éxito para todos nosotros, Dios nos bendiga grandemente!!!
Well family, first things first, and the first thing is to thank God for one more day of life, and declare that today will be a day of victories and success for all of us, God bless us greatly!!!
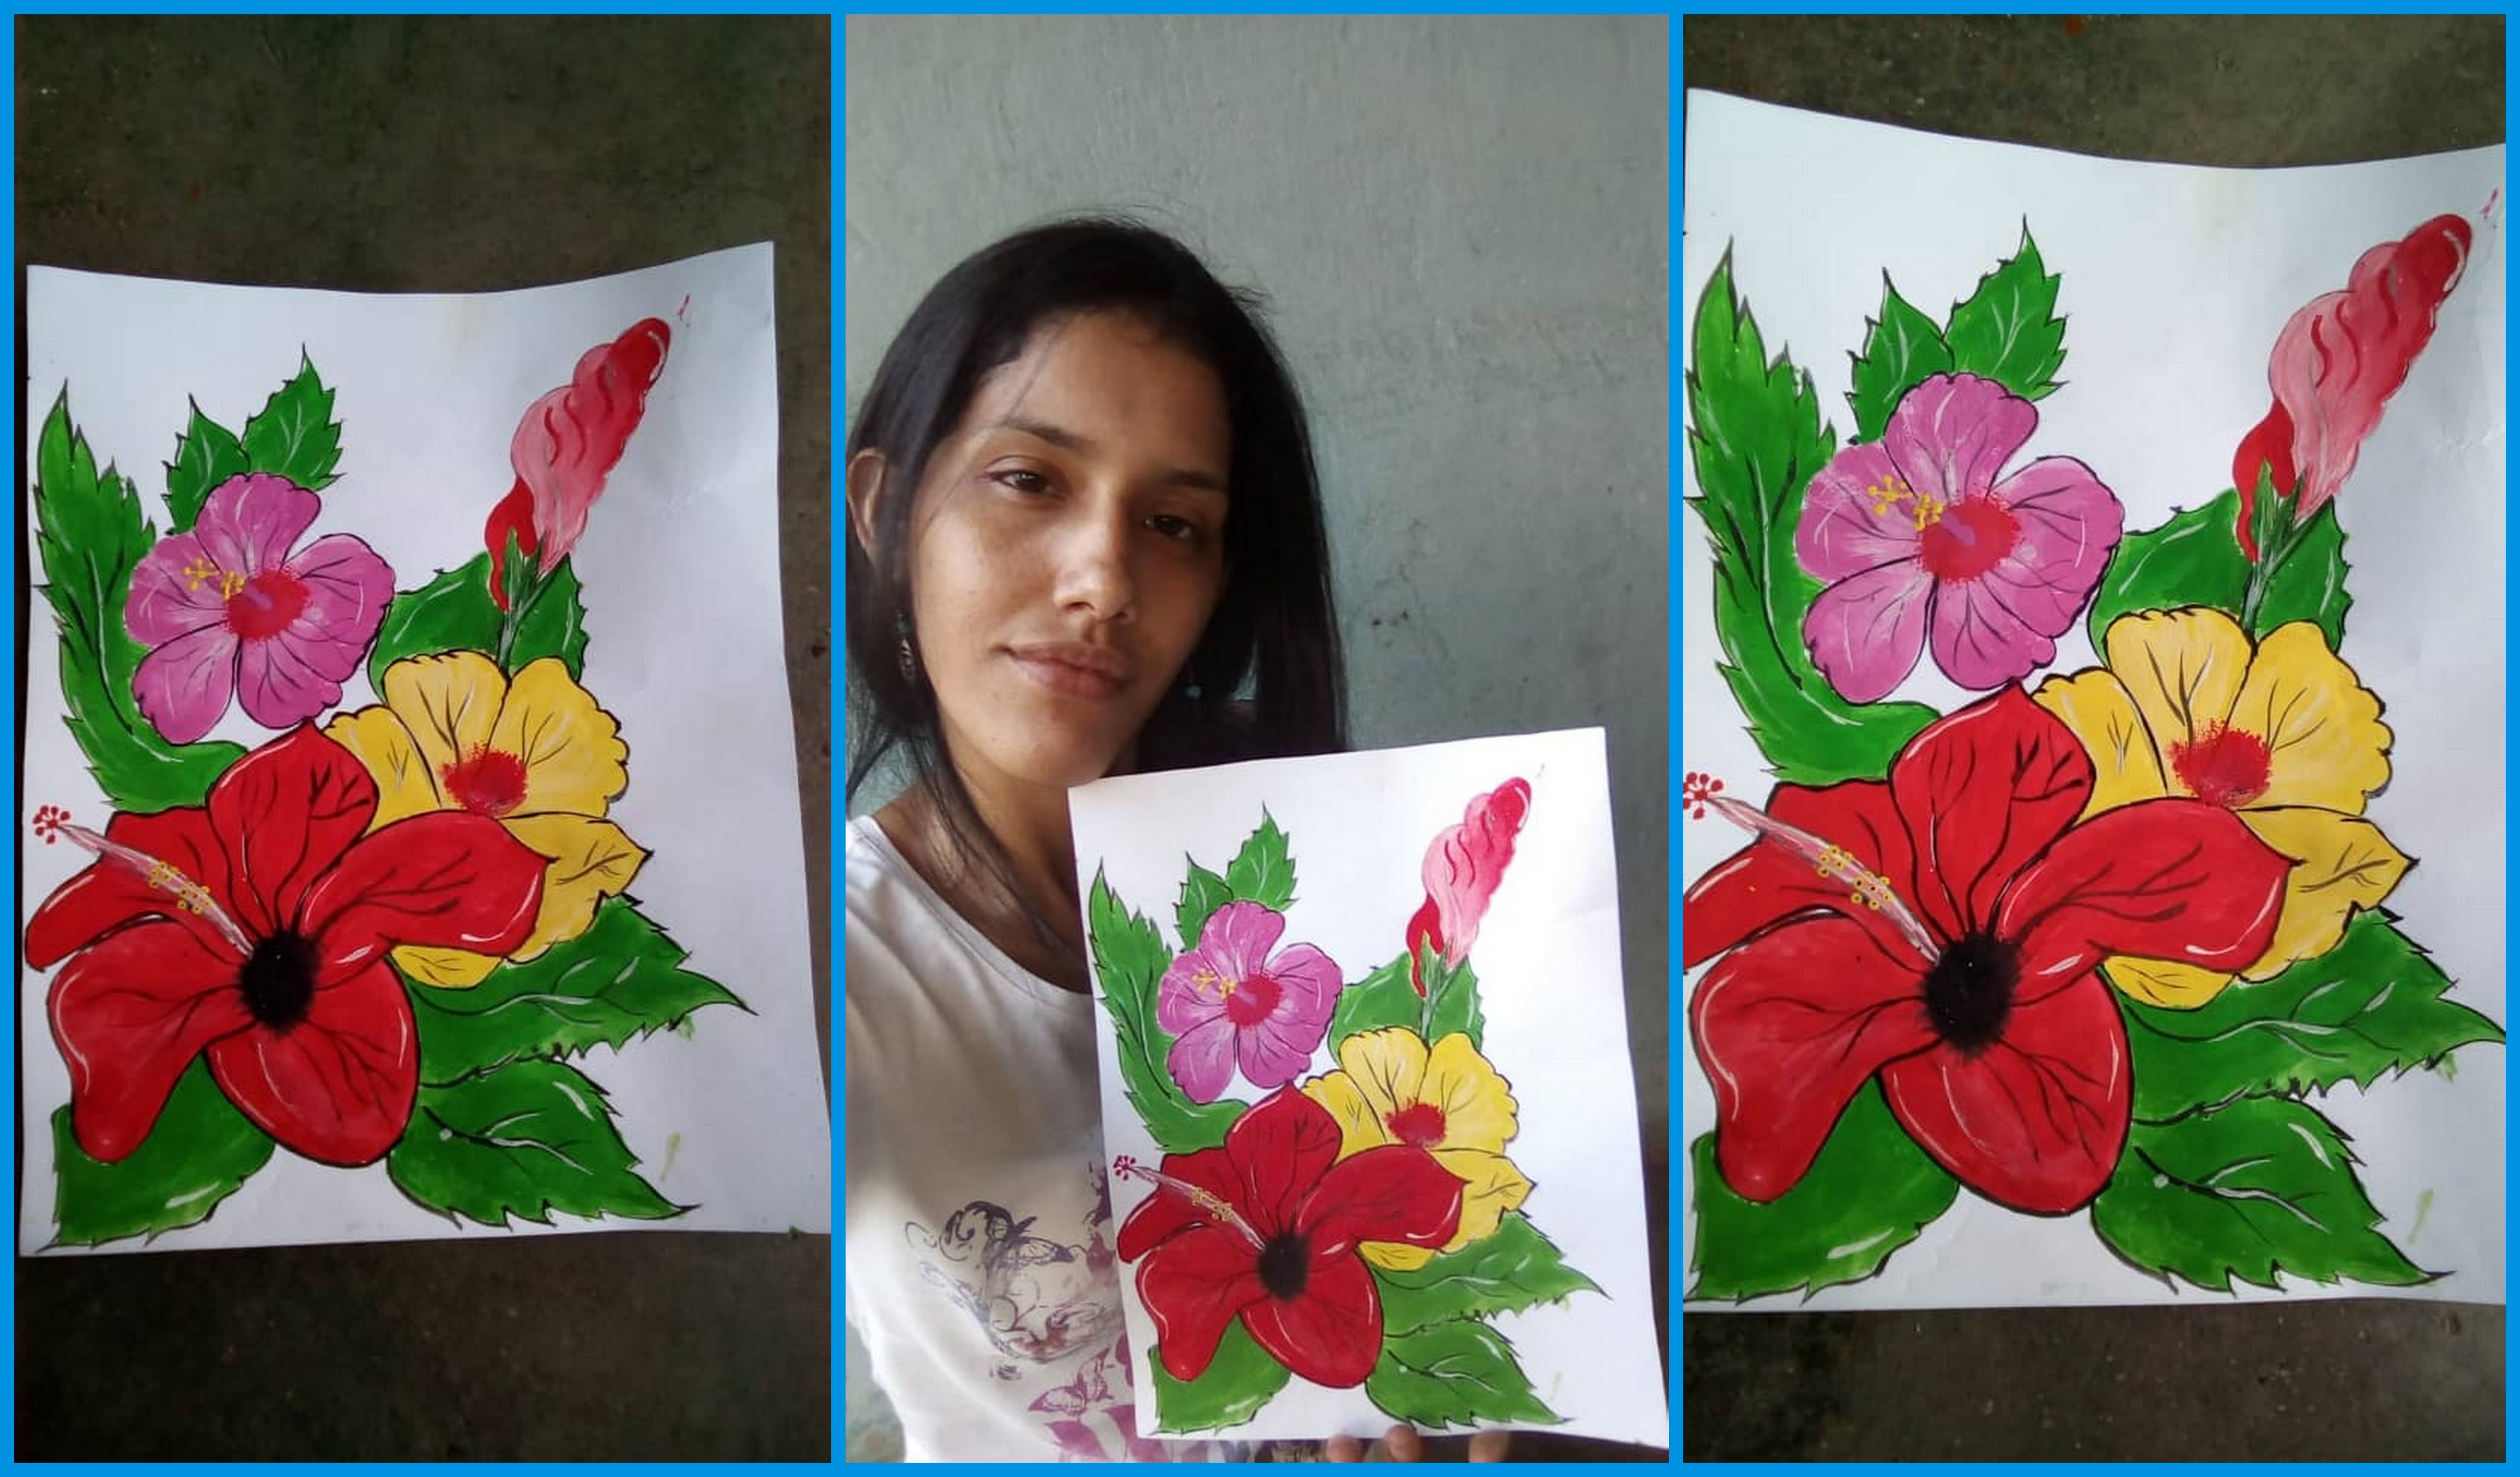
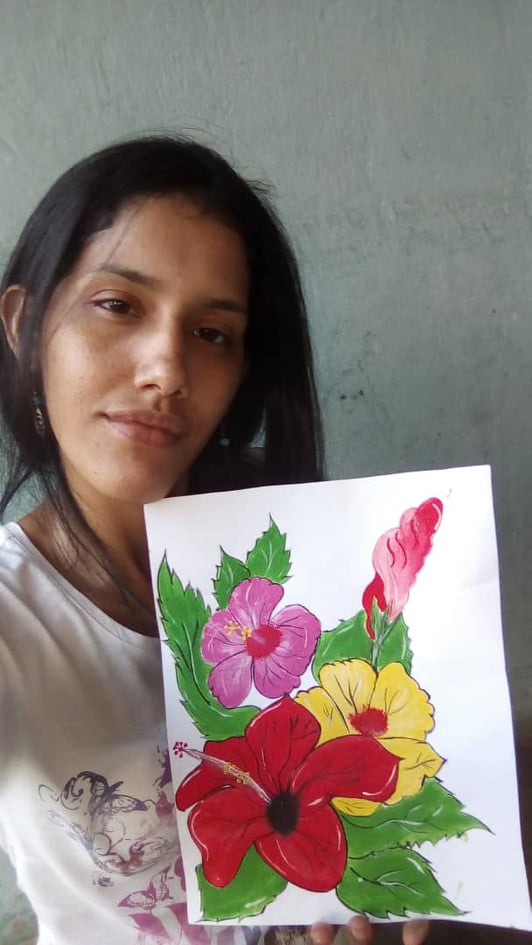
El dia de hoy mi trabajo creativo se trata de una linda pintura que podemos utilizar para decorar nuestro hogar, está inspirada en esa bella flor que nos da tanto beneficios, yo amo la cayena no solo porque es una linda flor sino porque nos aporta tantos beneficios es super buena para la gripe ya que //tiene alto porcentaje de vitamina C, nos ayuda con el insomnio y para las que somos peli negro nos ayuda a mantener nuestro color por tiempo, lo nutre y le da un brillo espectacular.
Today my creative work is about a beautiful painting that we can use to decorate our home, it is inspired by that beautiful flower that gives us so many benefits, I love the cayenne not only because it is a beautiful flower but because it brings us so many benefits it is super good for the flu since //it has a high percentage of vitamin C, it helps us with insomnia and for those of us with black hair it helps us maintain our color over time, nourishes it and gives it a spectacular shine.
Bueno amig@s acompáñenme hasta el final para ver el paso a paso es muy sencillo y queda muy lindo.
Well, friends, come with me until the end to see the step by step, it is very simple and it looks very nice.
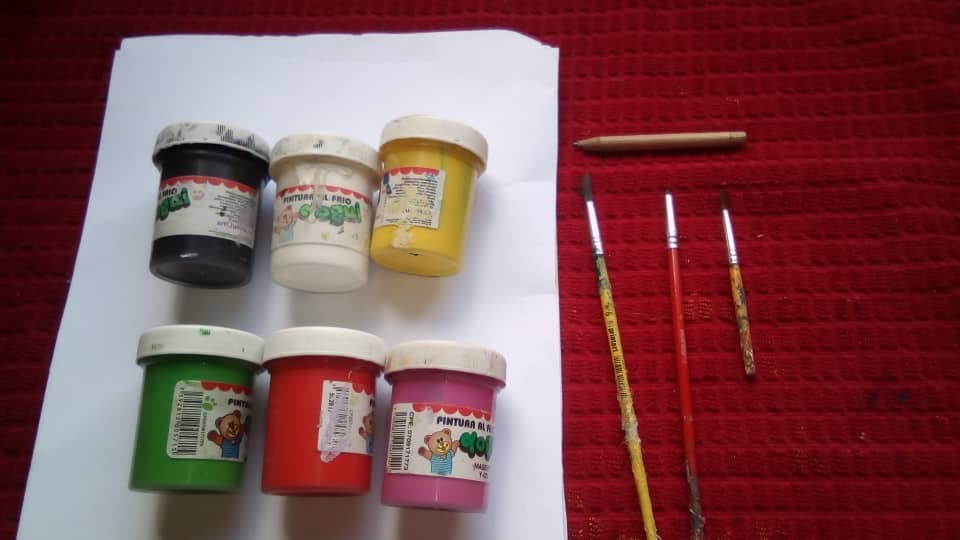
Materiales:
- Pinturas de color roja, fuscia, verde, amarilla y negra.
- Cartulina tamaño carta blanca.
- Pinceles.
Materials:
- Red, fuchsia, green, yellow and black paints.
- White card size card.
- Brushes.
Paso a paso:
Step by Step:
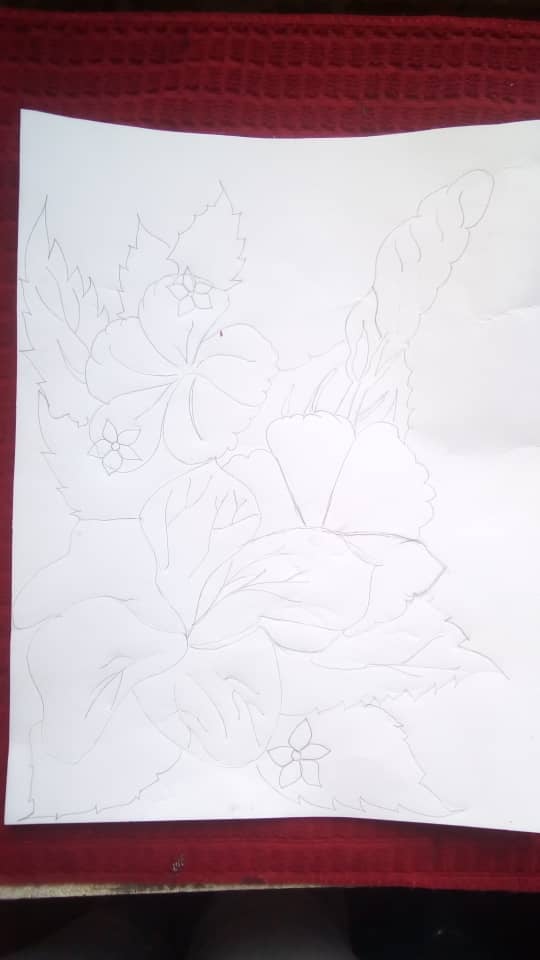
Paso 1
Step 1
Iniciamos nuestro proyecto haciendo sobre la cartulina el boceto del dibujo, con mucha paciencia, con un lápiz ni tan claro ni tan oscuro vamos trazando cada línea que representará nuestro cuadro, una vez que esté listo podemos remarcar.
We start our project by making the sketch of the drawing on the cardboard, with a lot of patience, with a pencil that is neither too light nor too dark, we trace each line that will represent our painting, once it is ready we can highlight it.
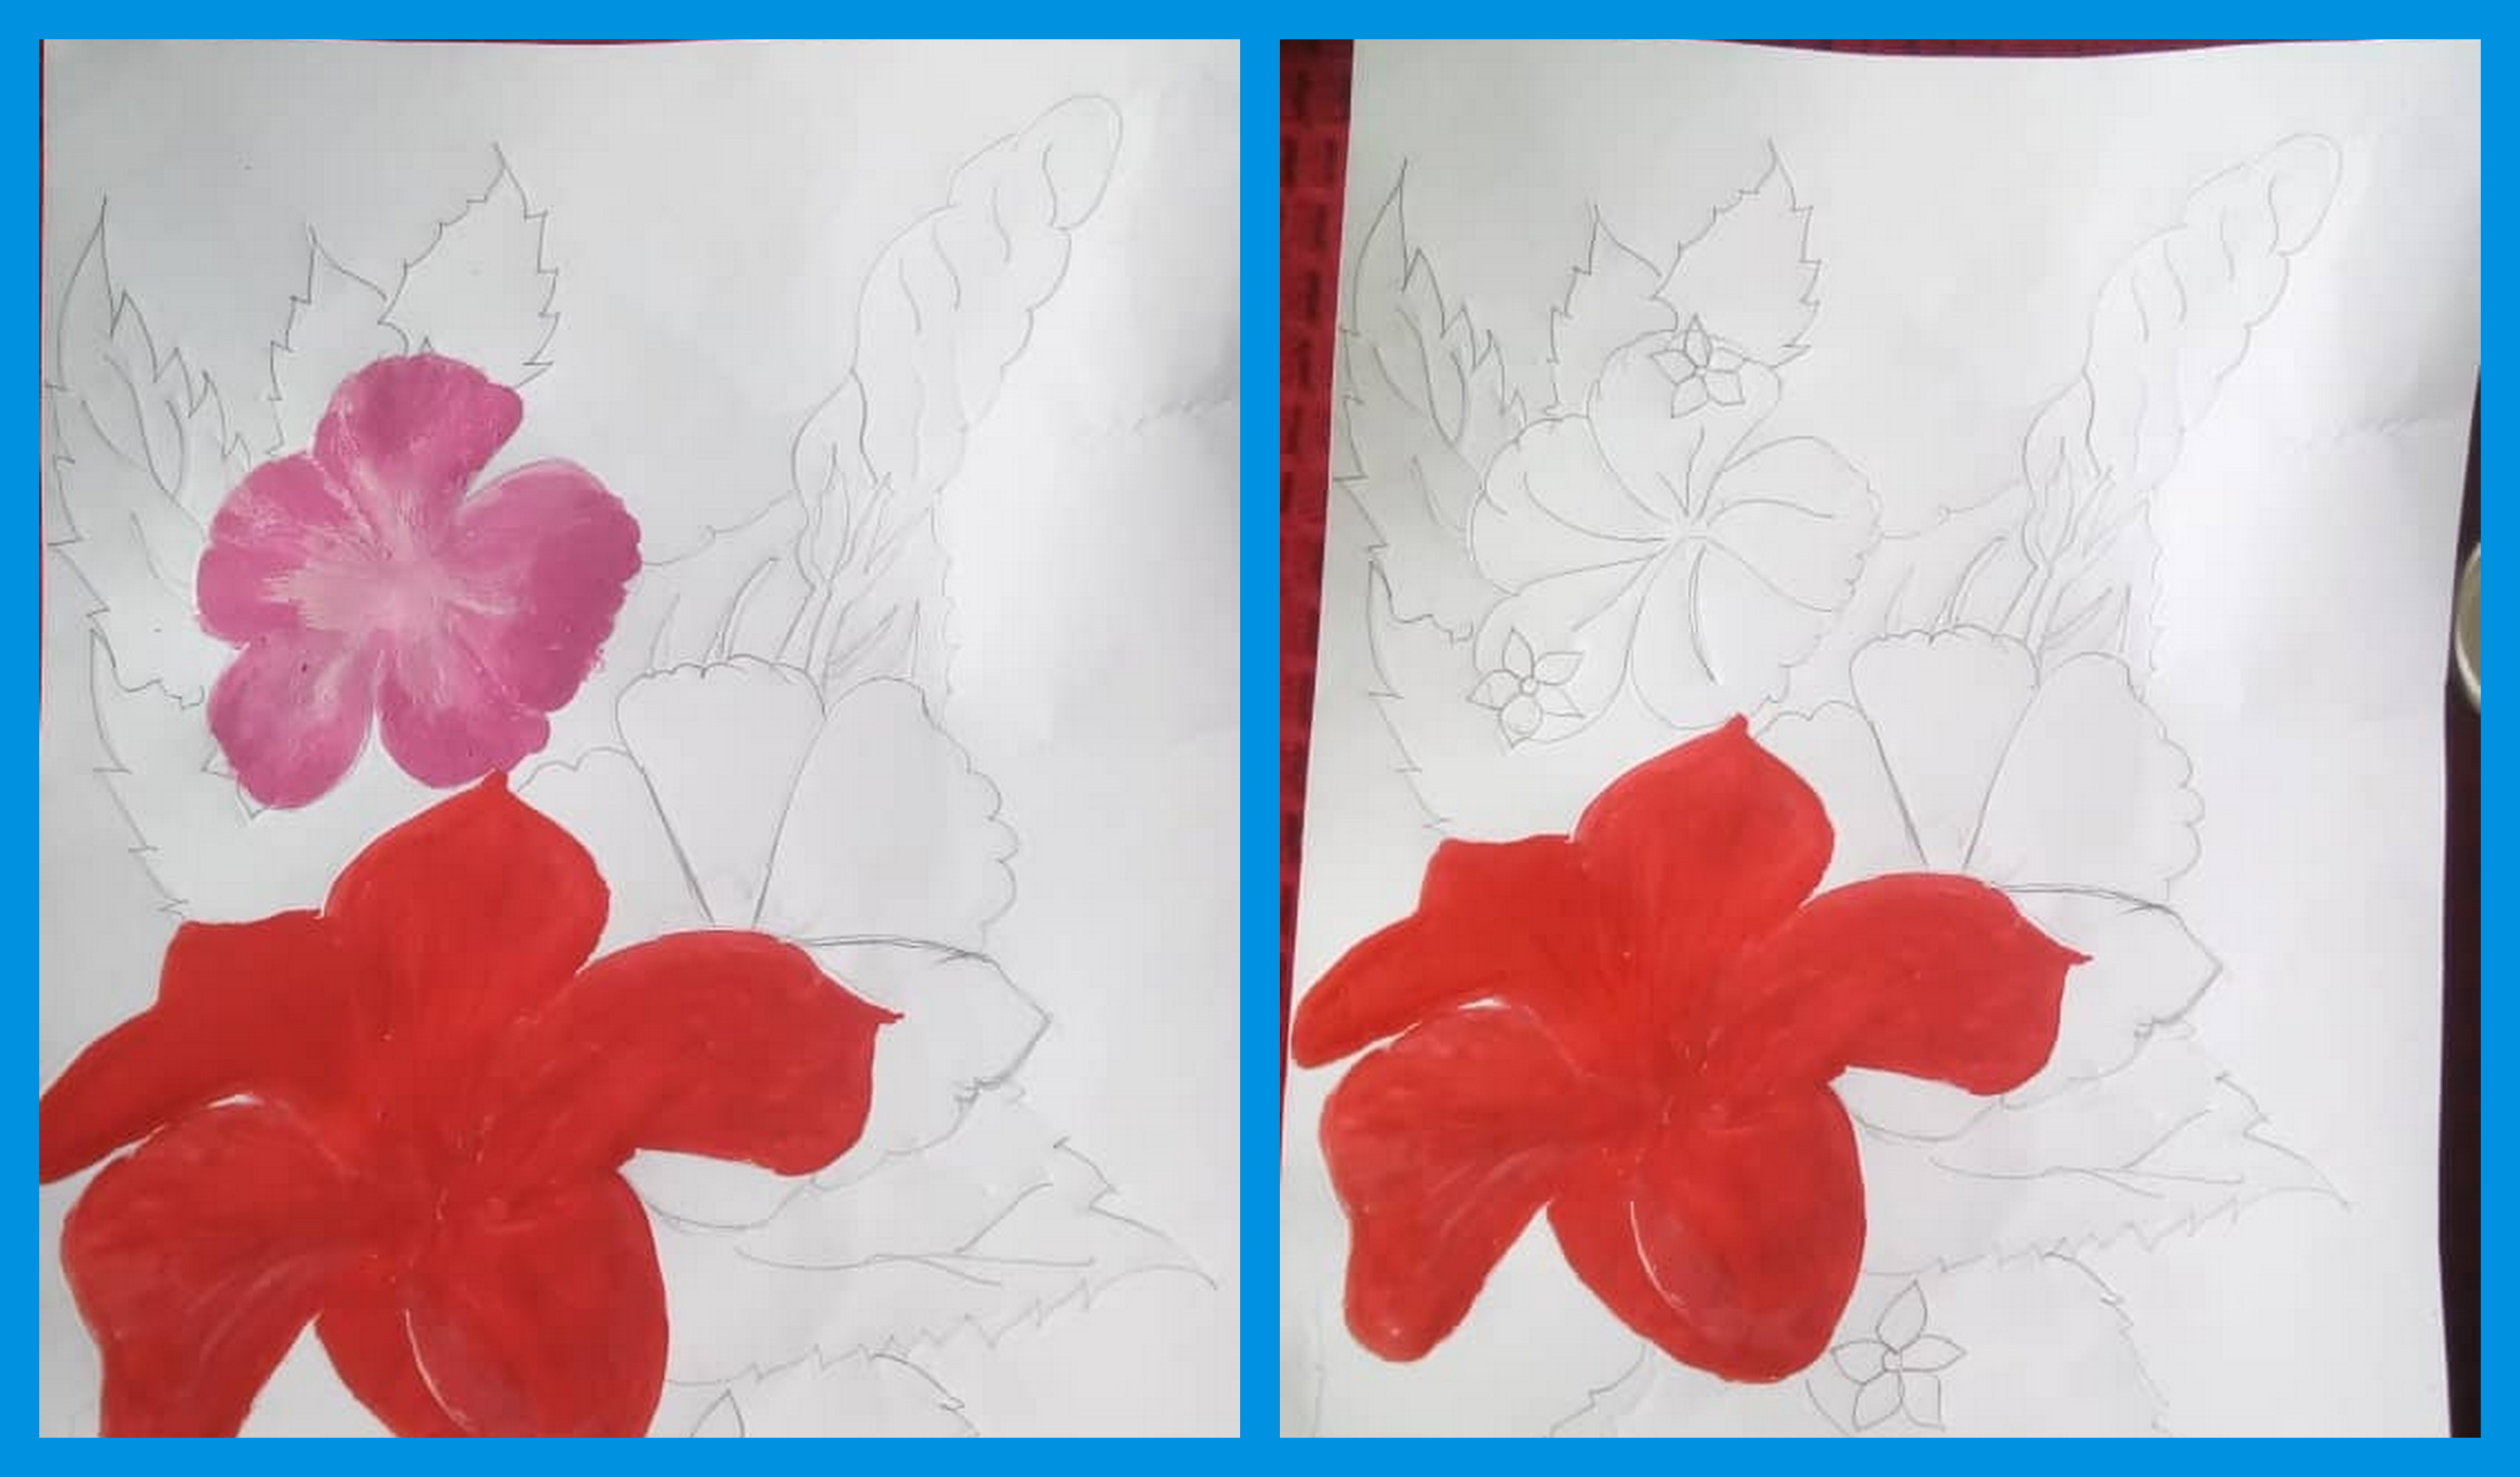
Paso 2
Step 2
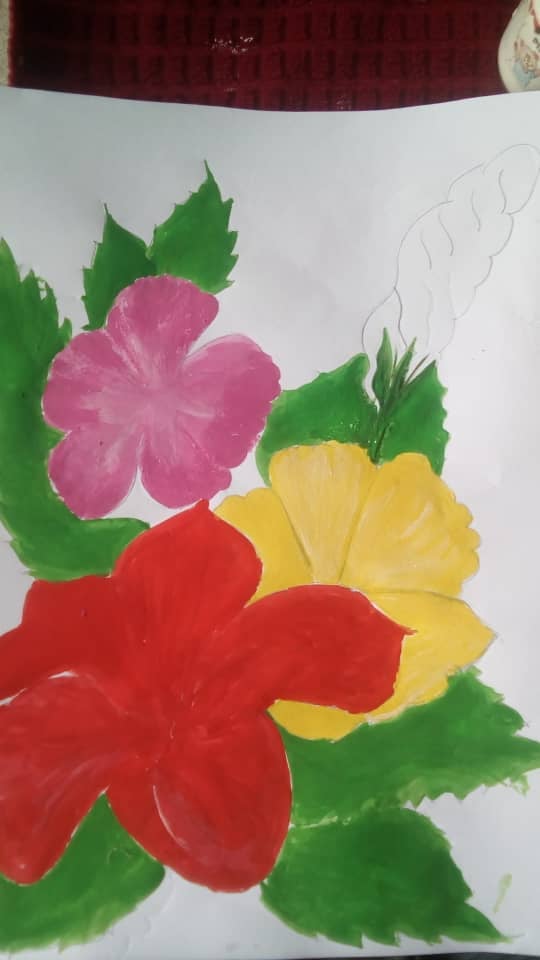
Con pintura de color roja, amarilla, fucsia y un pincel medio grueso comenzamos a pintar las flores.
With red, yellow, fuchsia paint and a thick medium brush we begin to paint the flowers.
Paso 3
Step 3
Con pintura de color verde, pintamos todas las hojas que conforman nuestro dibujo.
With green paint, we paint all the leaves that make up our drawing.
Paso 4:
Step 4:
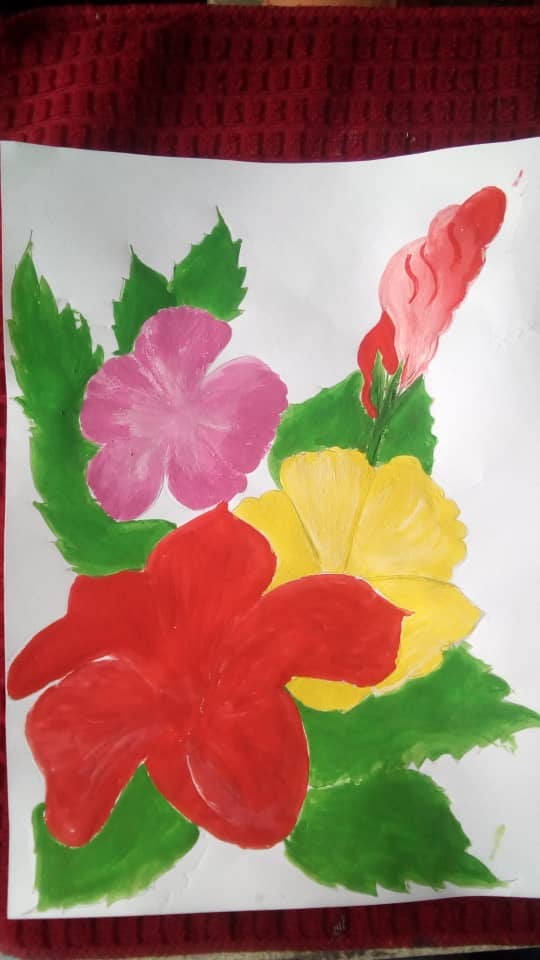
Para dibujar el capullo, pintamos el principio de rojo intenso, luego tomamos pintura blanca y roja y pintamos el medio as nos quedará un contrastes en el medio del capullo, y para finalizar el capullo le ponemos solo pintura roja media intensa.
To draw the cocoon, we paint the beginning of intense red, then we take white and red paint and paint the middle so we will have a contrast in the middle of the cocoon, and to finish the cocoon we put only medium intense red paint.
**Paso 5:
**Step 5:
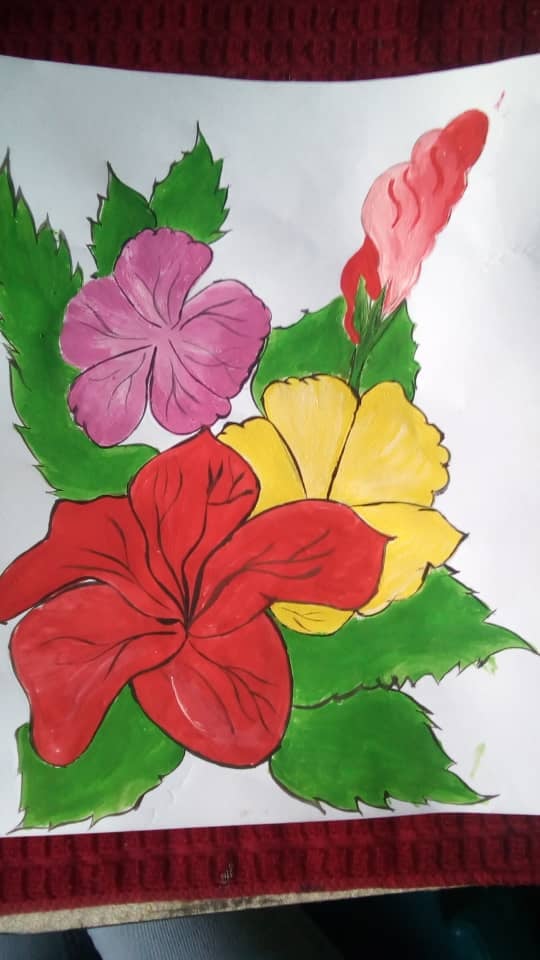
Con Pintura negra y un pincel fino, le damos forma a cada pétalos de las flores y de igual manera delineamos los bordes de las flores.
With black paint and a fine brush, we shape each flower petals and in the same way we outline the edges of the flowers.
**Paso 5:
**Step 5:
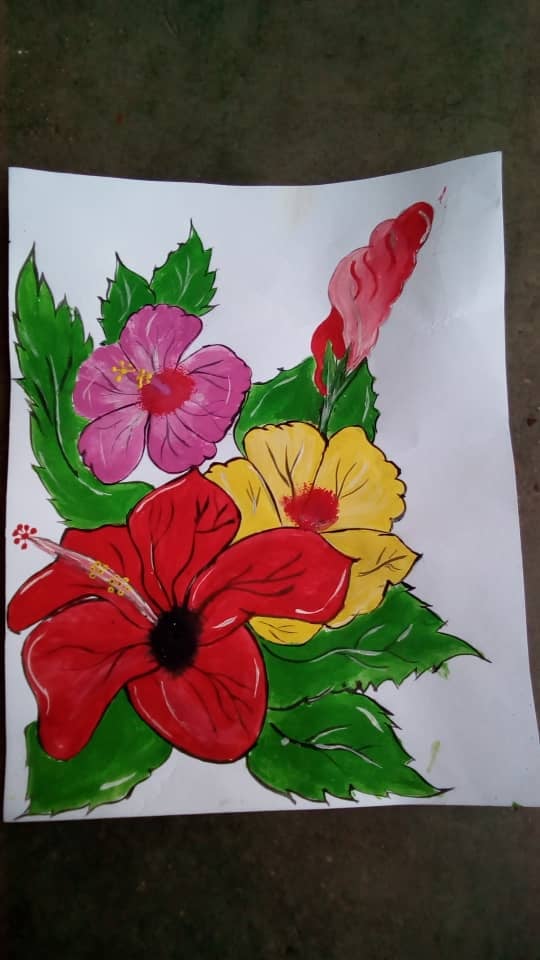
Con la pintura negra le hacemos finas líneas a cada flor y a las hojas, luego que halle secado con un algodon le hacemo s a toques el centro de las flores.
Finalmente le damos luz al dibujo con pintura blanca.
With the black paint we make fine lines to each flower and the leaves, after it is dried with a cotton we make touches to the center of the flowers.
Finally we give light to the drawing with white paint.
Espero y les halla gustado mi publicación del día hoy. Gracias por visitar mi blog.
I hope and you liked my post today. Thank you for visiting my blog.
Hasta mañana.
Until tomorrow.
Todas las fotos fueron tomadas por mi, con la camara de mi telefono BLU ADVANCE A6, y editadas en mi computadora con la app Picasa 3.
All the photos were taken by me, with the camera of my BLU ADVANCE A6 phone, and edited on my computer with the Picasa 3 app.
Congratulations @karolrodriguez! You have completed the following achievement on the Hive blockchain and have been rewarded with new badge(s):
Your next target is to reach 60 posts.
You can view your badges on your board and compare yourself to others in the Ranking
If you no longer want to receive notifications, reply to this comment with the word
STOPTo support your work, I also upvoted your post!
Check out the last post from @hivebuzz:
Support the HiveBuzz project. Vote for our proposal!
Thank you for sharing this amazing post on HIVE!
Your content got selected by our fellow curator @priyanarc & you just received a little thank you via an upvote from our non-profit curation initiative!
You will be featured in one of our recurring curation compilations and on our pinterest boards! Both are aiming to offer you a stage to widen your audience within and outside of the DIY scene of hive.
Join the official DIYHub community on HIVE and show us more of your amazing work and feel free to connect with us and other DIYers via our discord server: https://discord.gg/mY5uCfQ !
If you want to support our goal to motivate other DIY/art/music/homesteading/... creators just delegate to us and earn 100% of your curation rewards!
Stay creative & hive on!