Hola mis amores un saludo a mi familia de Hive Blog y uno muy especial a mi linda comunidad de @Hvediy.
Hello my loves, a greeting to my Hive Blog family and a very special greeting to my beautiful community of @Hvediy.
Welcome to my blog!!!
A new day begins and it is the perfect reason to start thanking God for giving us another day with health and life. Regardless of the place, or the occasion, we must give our most sincere words to God because it is thanks to him that we are happy. And it is thanks to him that we live, breathe and is the one that day by day provides us with everything we need. THANKS GOD !!!
Bueno amig@s el dia de hoy quiero compartir con tod@s ustedes la elaboración de un lindo organizador de accesorios, hecho con botellas plasticas. Tener nuestra casa y en este caso nuestra sitio de descanso, tener organizado nuestro cuarto eso nos trae paz, Cuando comienzas a crecer, entiendes que debes ordenar, organizar y limpiar, para que ese espacio tan sagrado que es tu cuarto se vea lo más decente posible, ordenar nuestras habitaciones y crear un espacio más limpio e íntimo, esto permite tener una mejor actividad del sueño, debido a que si el entorno se ve desorganizado y tenemos cosas por todos lados, inconscientemente comenzamos a sentirnos inquietos y ansiosos
Well friends, today I want to share with all of you the elaboration of a nice accessories organizer, made with plastic bottles. Having our house and in this case our place of rest, having our room organized brings us peace. When you start to grow up, you understand that you must order, organize and clean, so that that sacred space that is your room looks the most decent. possible, order our rooms and create a cleaner and more intimate space, this allows us to have a better sleep activity, because if the environment looks disorganized and we have things everywhere, we unconsciously begin to feel restless and anxious
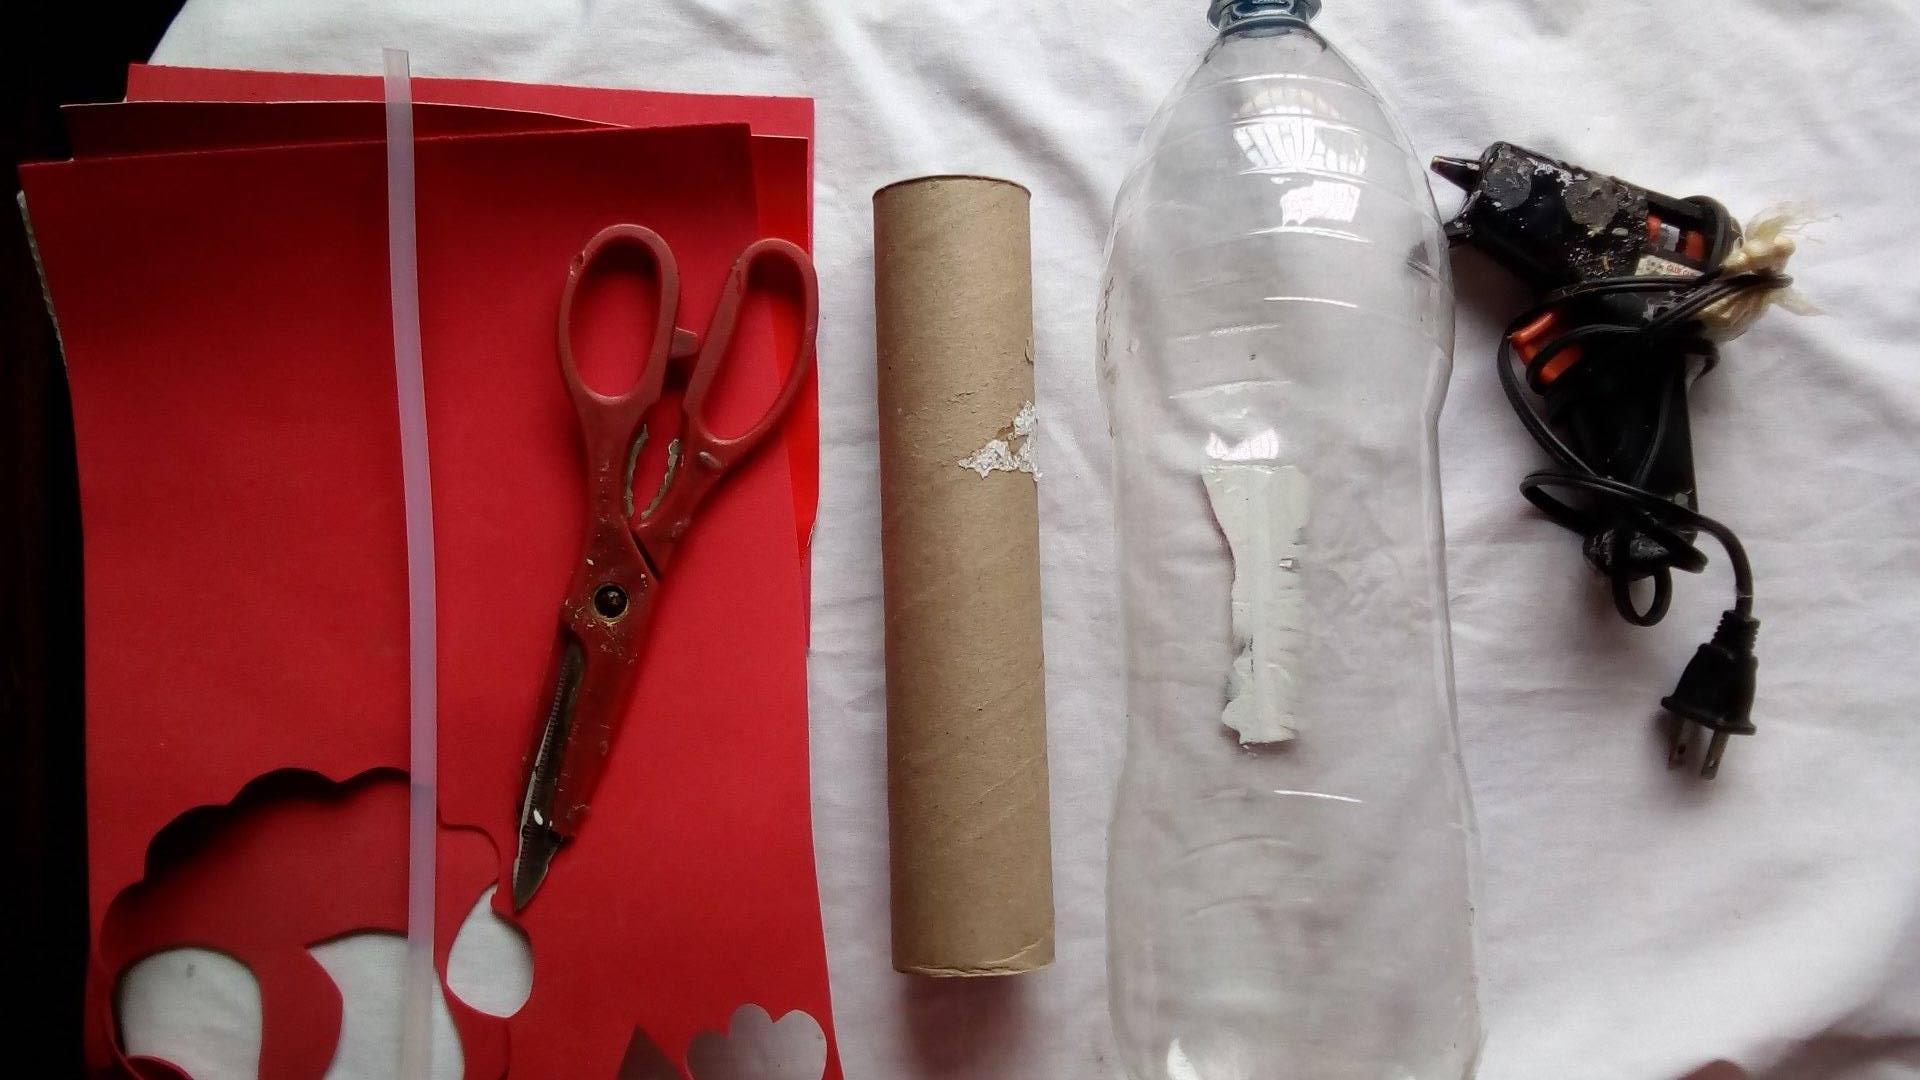
Materiales:
- 5 botellas plasticas.
- 1 rollo de cartón.
- Foami.
- Silicón caliente.
- Tijera y cutter.
Materials:
- 5 plastic bottles.
- 1 roll of cardboard.
- Foami.
- Hot silicone.
- Scissors and cutter.
Paso a paso:
Step by Step:
Paso 1:
Step 1:
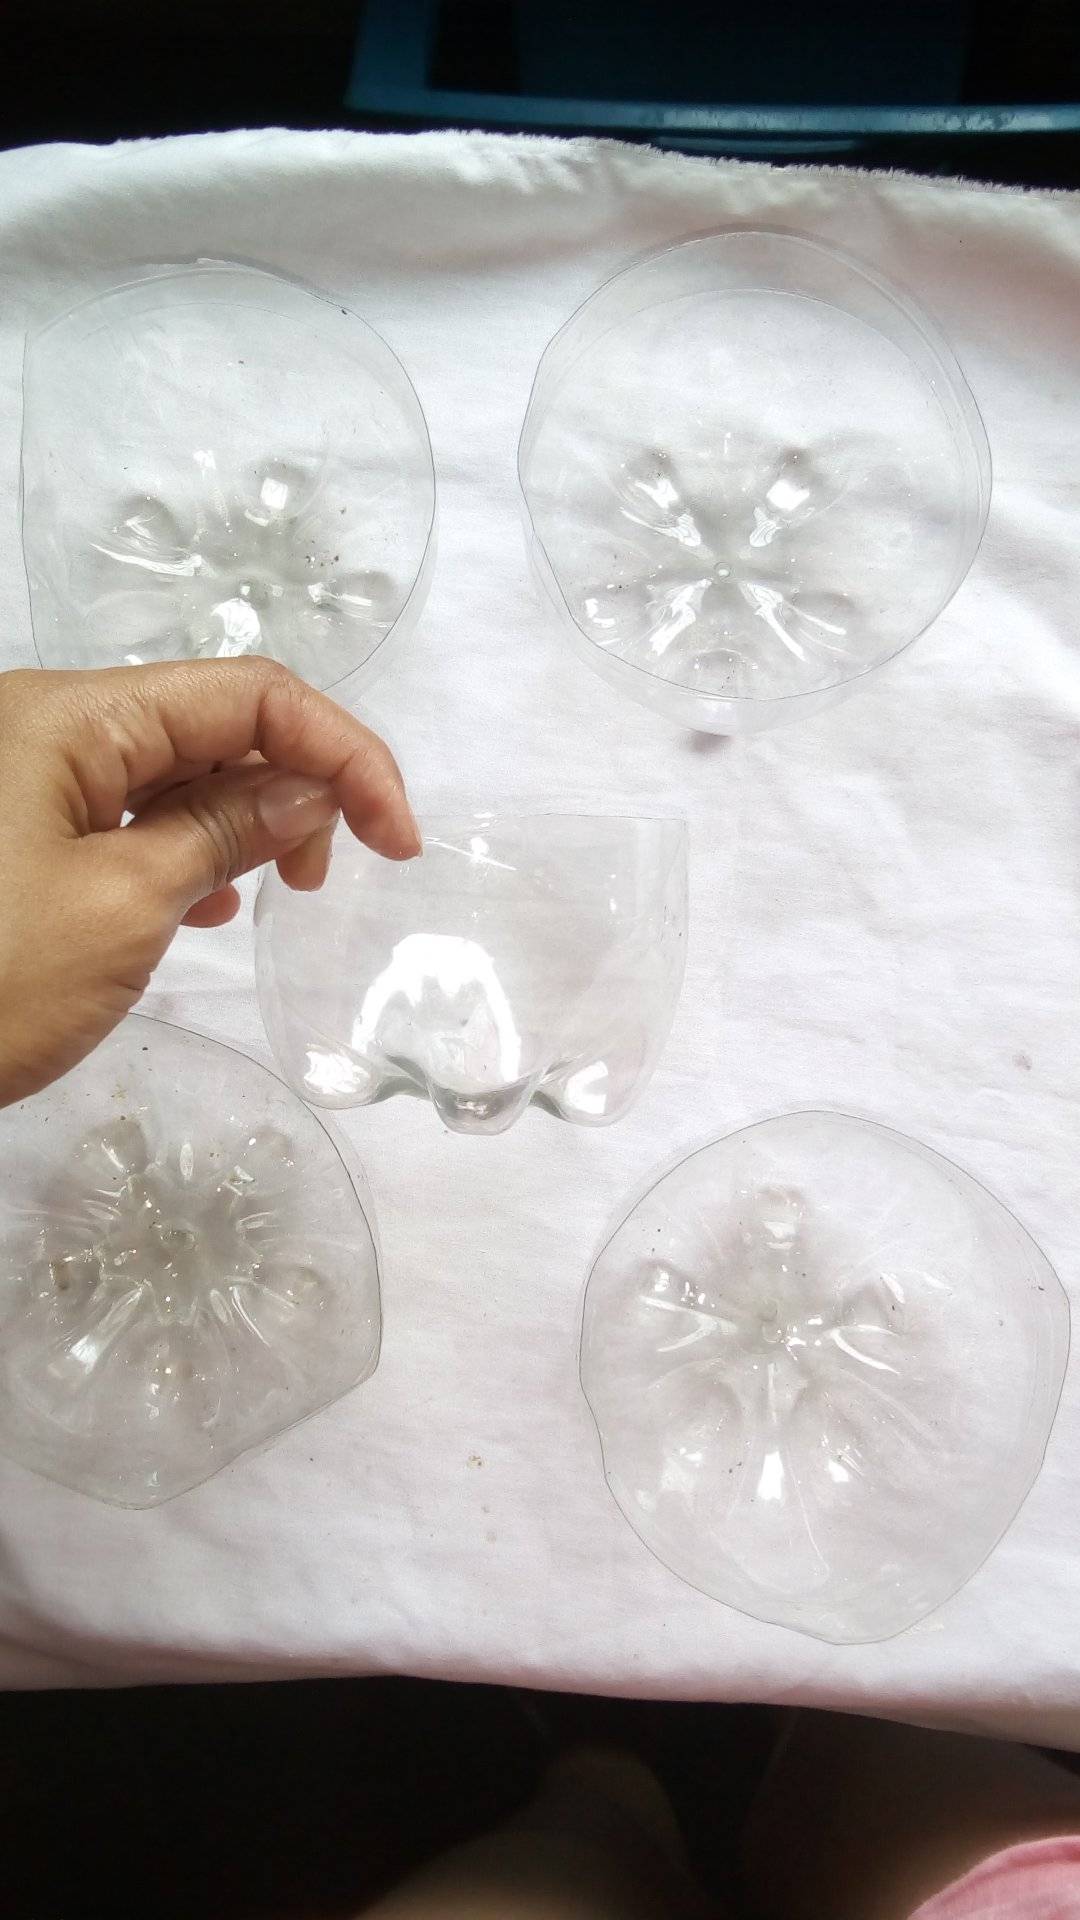
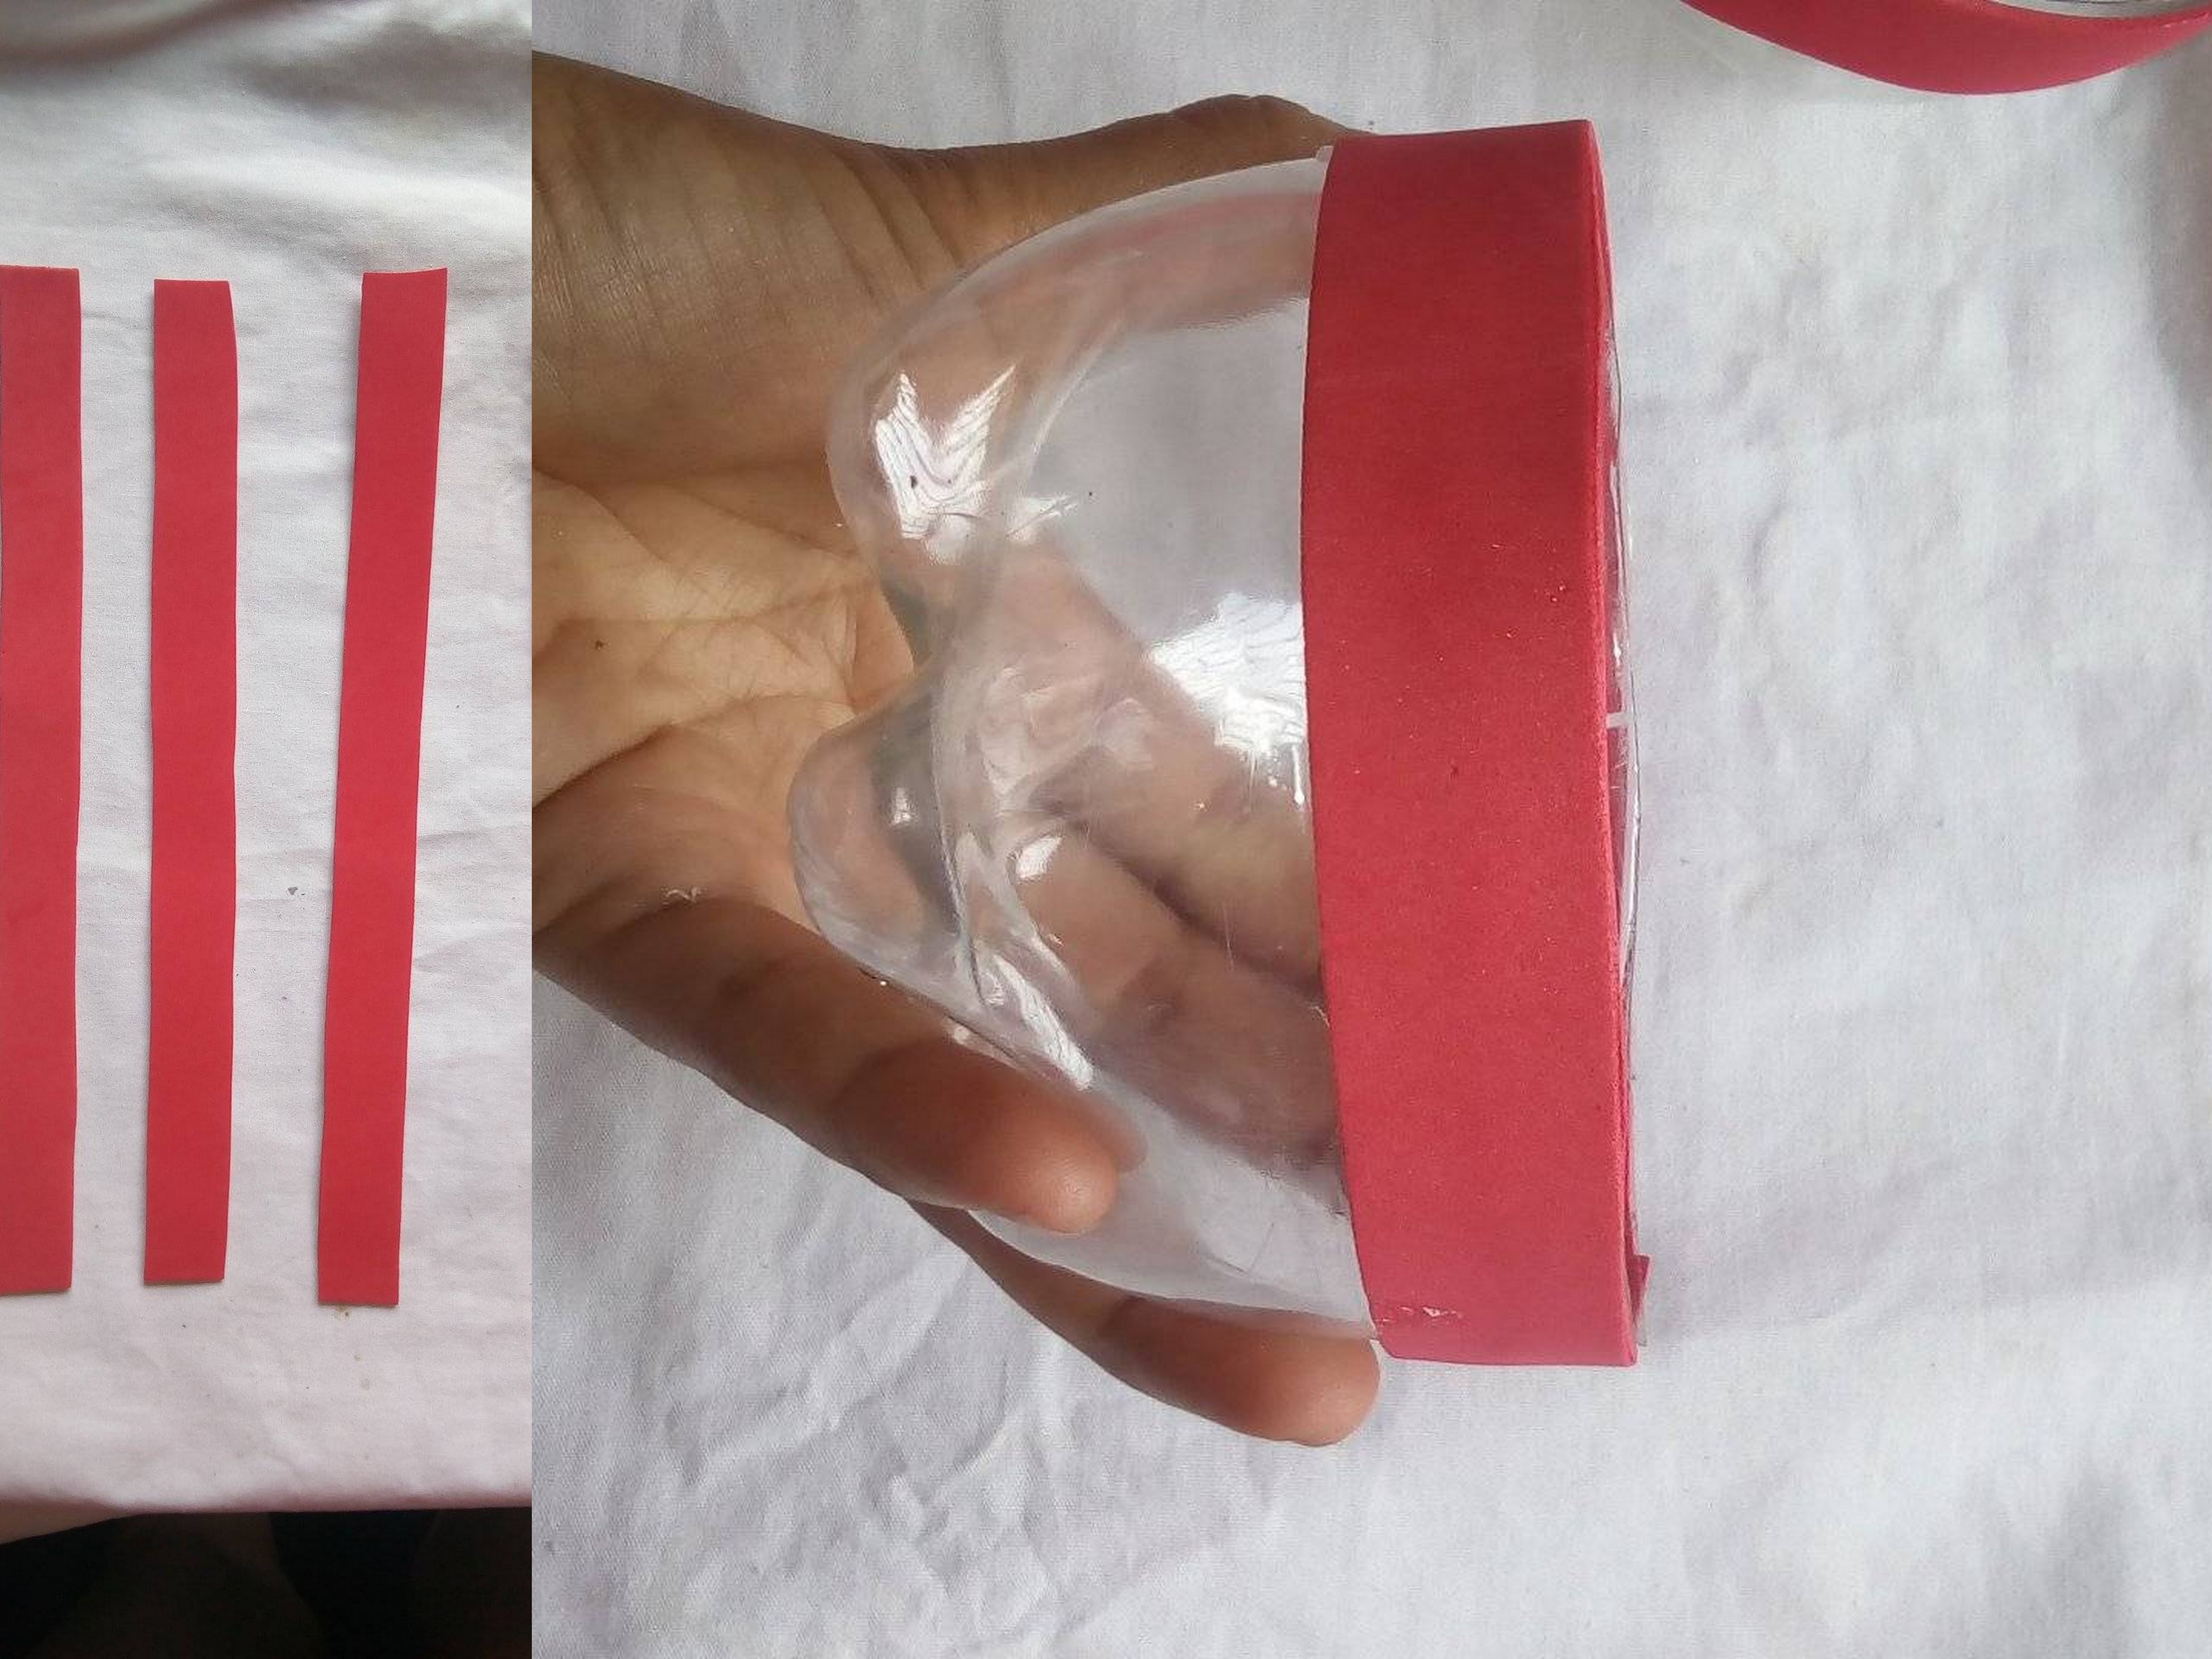
Lo primero que haremos es cortar el envase en la parte de abajo de la botella a una altura de 5 cm, para perforar o iniciar el corte lo hacemos con el cutter y perfeccionamos el corte con la tijera.
The first thing we will do is cut the container at the bottom of the bottle at a height of 5 cm, to perforate or start the cut we do it with the cutter and we perfect the cut with the scissors.
Paso 2:
Step 2:
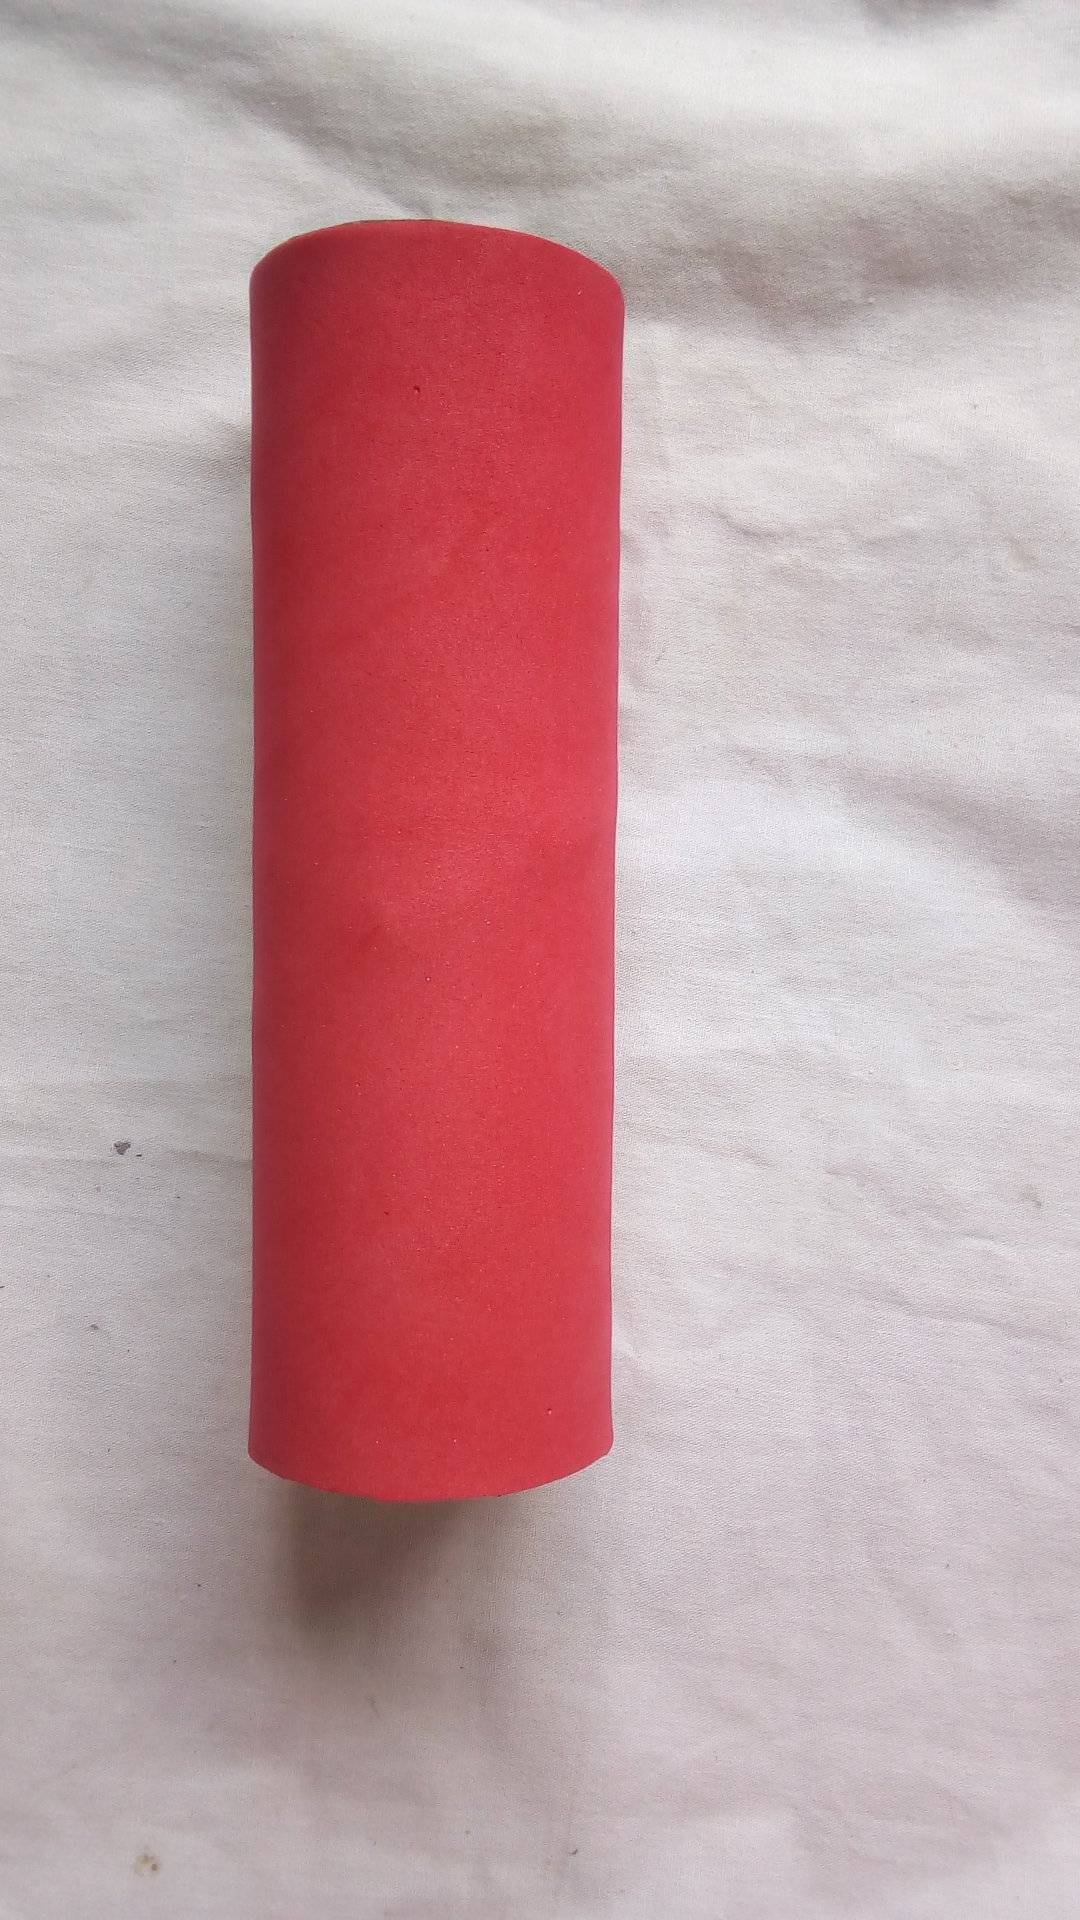
Luego tomamos el tubo de cartón, este tubo que vamos a usar es el que viene en los toallin. Bueno lo que debemos hacer es cubrirlo con foami rojo, este tubo será el centro de nuestro organizador.
Then we take the cardboard tube, this tube that we are going to use is the one that comes in the wipes. Well what we have to do is cover it with red foami, this tube will be the center of our organizer.
Paso 3:
Step 3:
En foami rojo cortamos unas tiras de dos centímetros de ancho por 32 centímetros de largo, y lo pegamos en el borde de cada envase que previamente ya habíamos cortado.
In red foami we cut some strips of two centimeters wide by 32 centimeters long, and we stick it on the edge of each container that we had previously cut.
Paso 4:
Step 4:
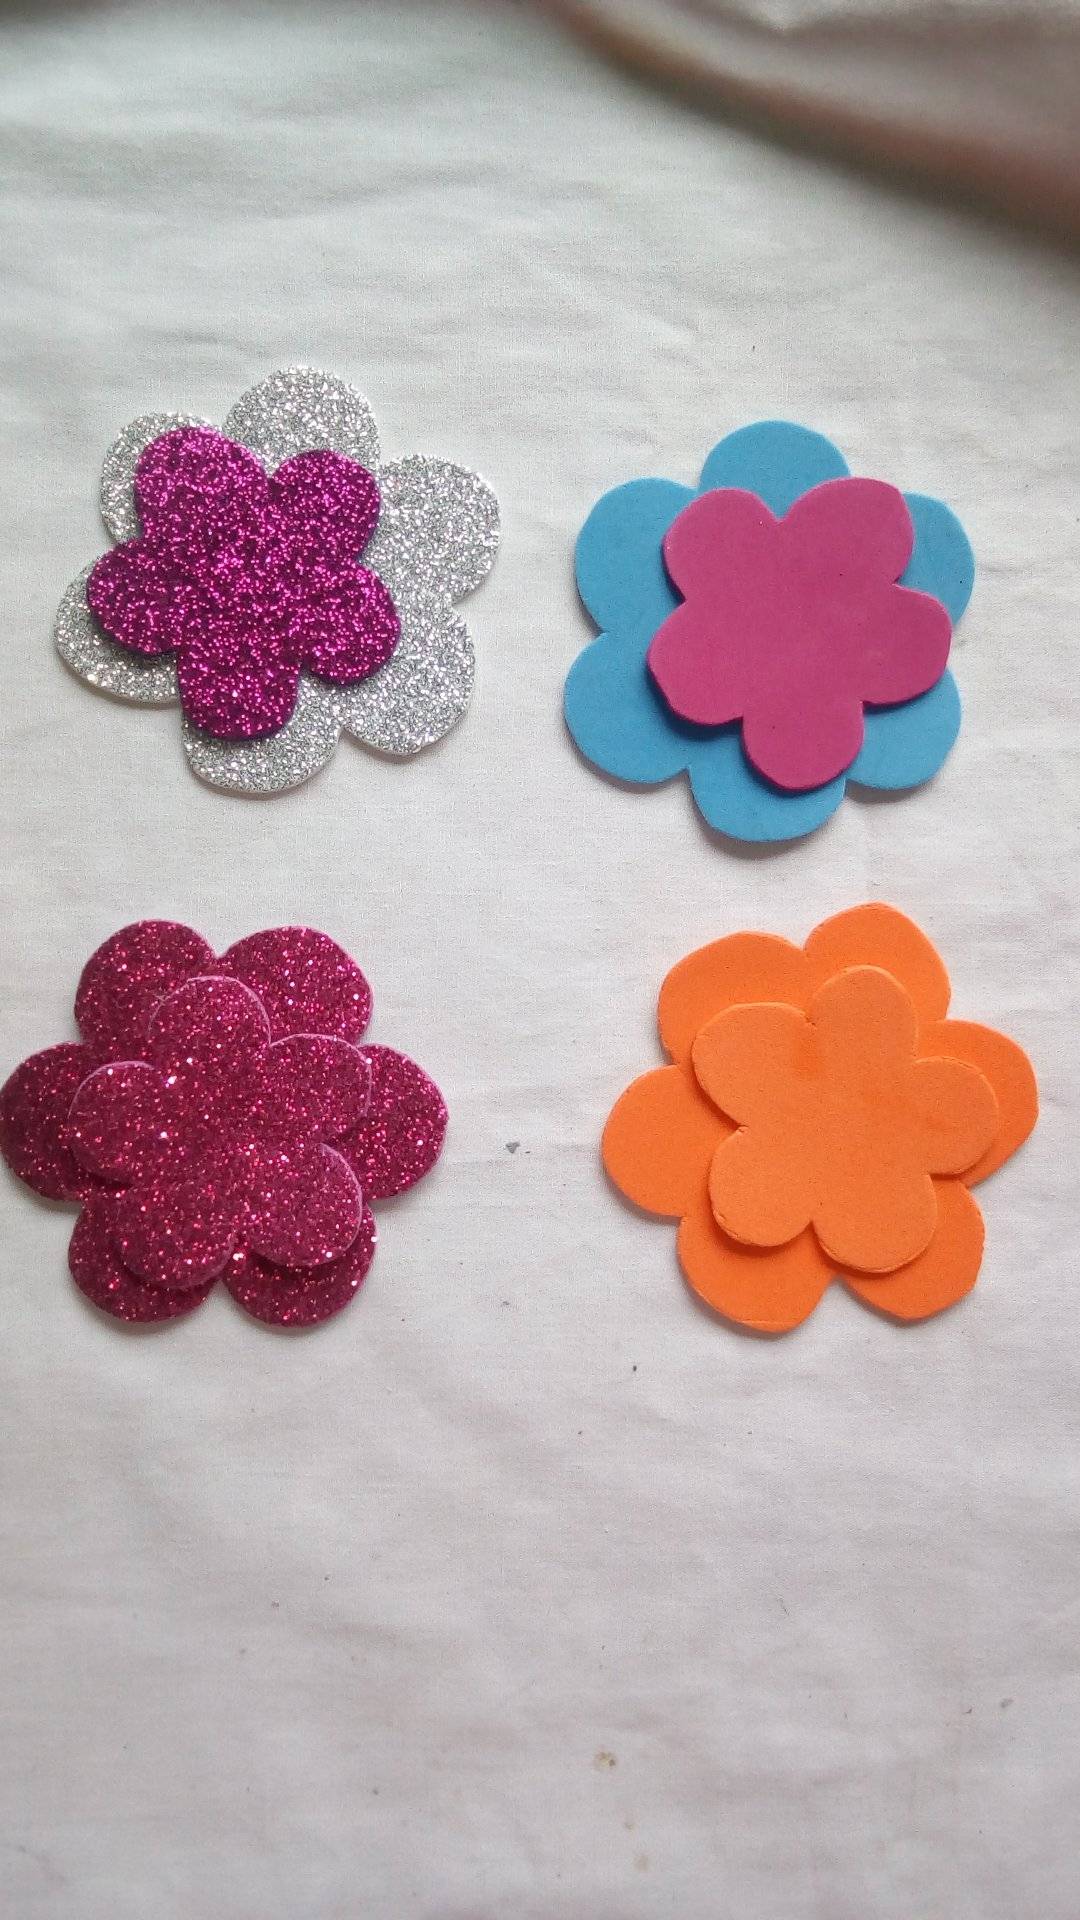
Hacemos unas flores, y aquí jugamos con los colores y usamos también foami brillante, una vez que hayamos recortado la cantidad de flores que vayamos a utilizar, le damos forma a los pétalos con la plancha de ropa.
We make some flowers, and here we play with the colors and we also use bright foami, once we have cut the number of flowers that we are going to use, we shape the petals with the clothes iron.
Paso 5:
Step 5:
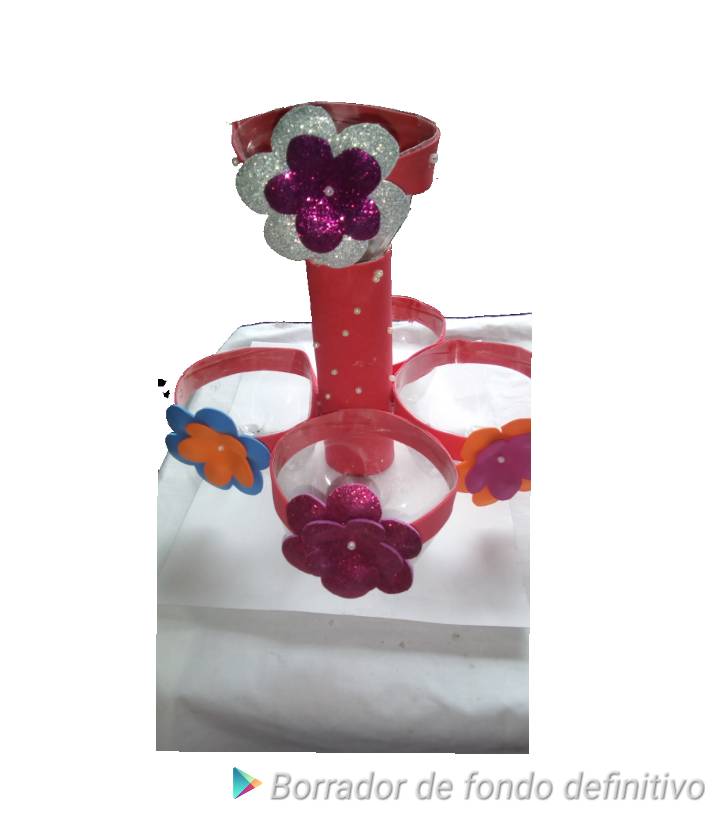
Sobre una cartulina gruesa vamos a pegar con silicon caliente todo el trabajo que hemos hecho en los pasos anteriores , primero pegamos el tubo de cartón y alrededor de él cada envase de plastico y tambien debemos pegar un envase en la parte superior del tubo. Luego pegamos todas las flores.
On a thick cardboard we are going to glue all the work that we have done in the previous steps with hot silicone, first we glue the cardboard tube and around it each plastic container and we must also glue a container on the upper part of the tube. Then we glue all the flowers.
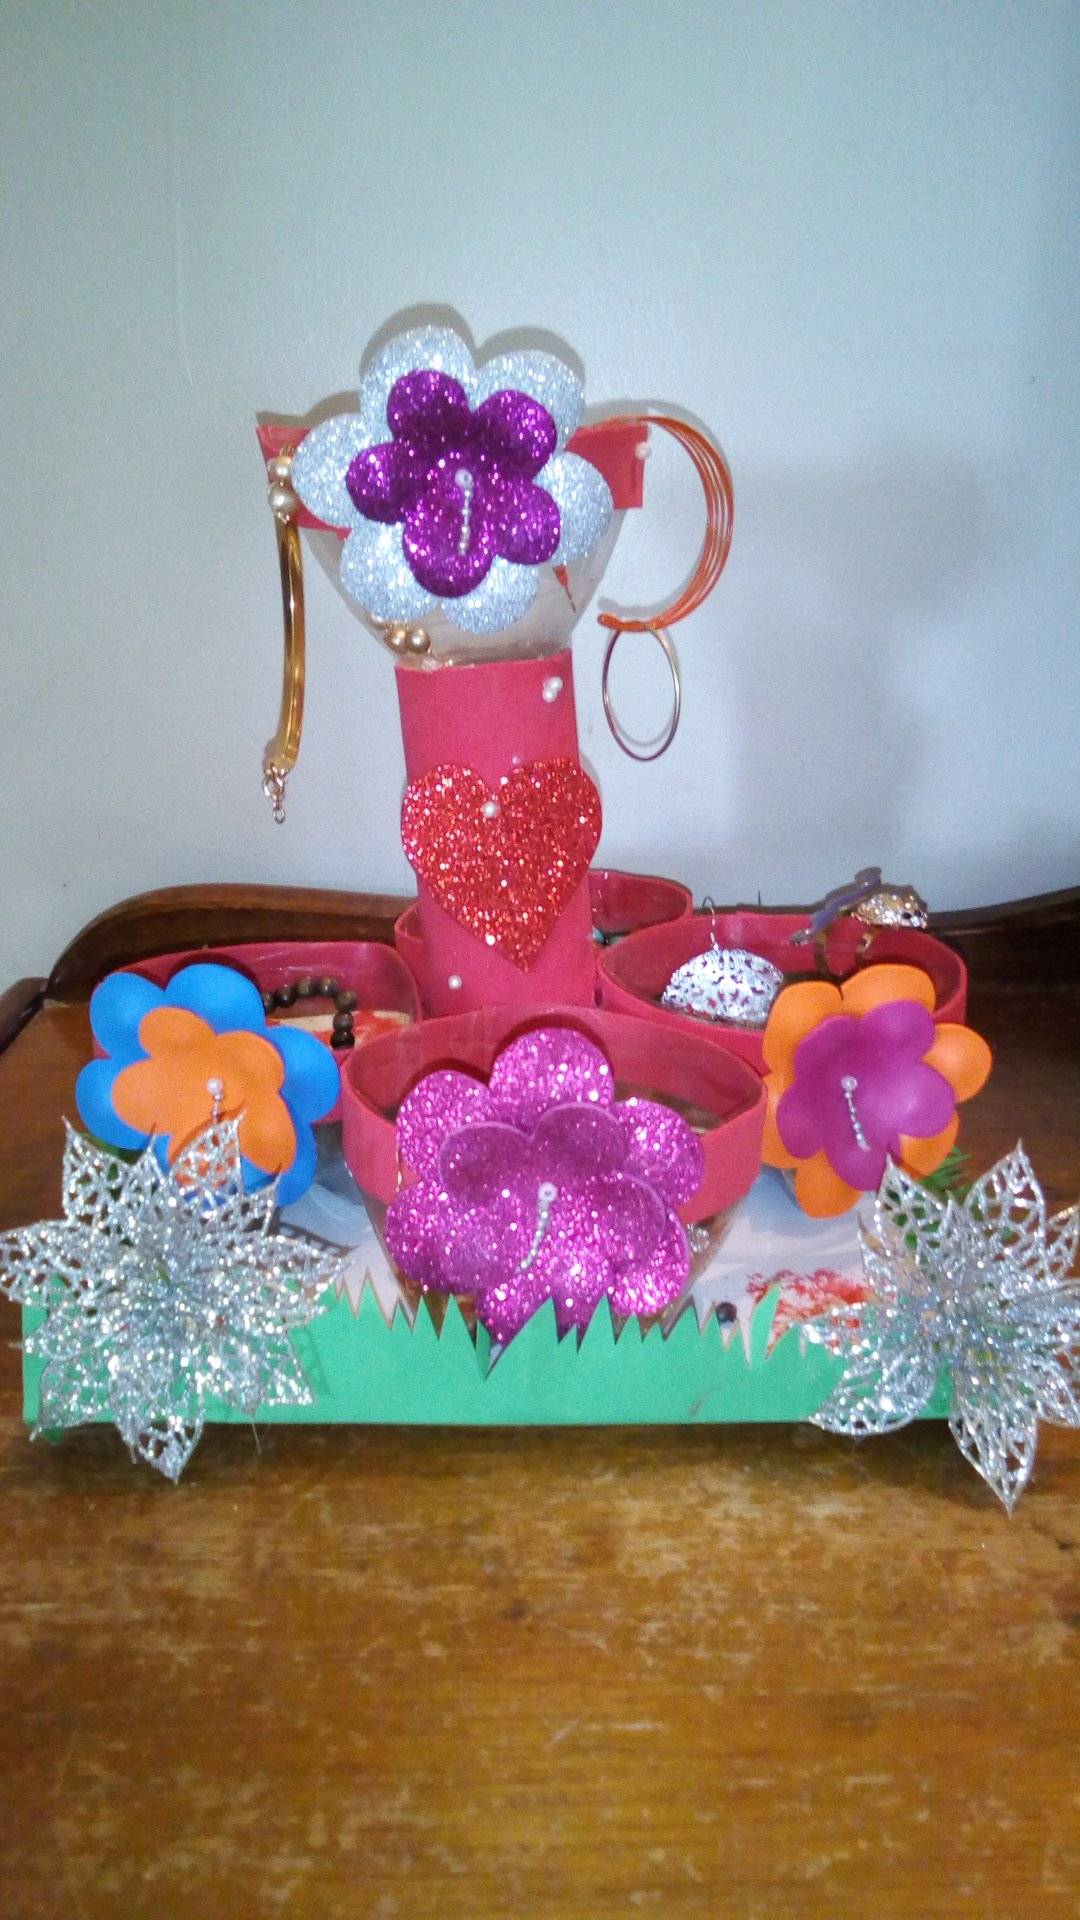
Para finalizar, En cartulina verde hacemos estilo unas hojitas y se lo pegamos alrededor de todo el organizador, con este detalle le daremos volumen, altura y otra presencia a nuestro organizador.
To finish, we make some leaves in green cardboard and stick it around the entire organizer, with this detail we will give volume, height and another presence to our organizer.
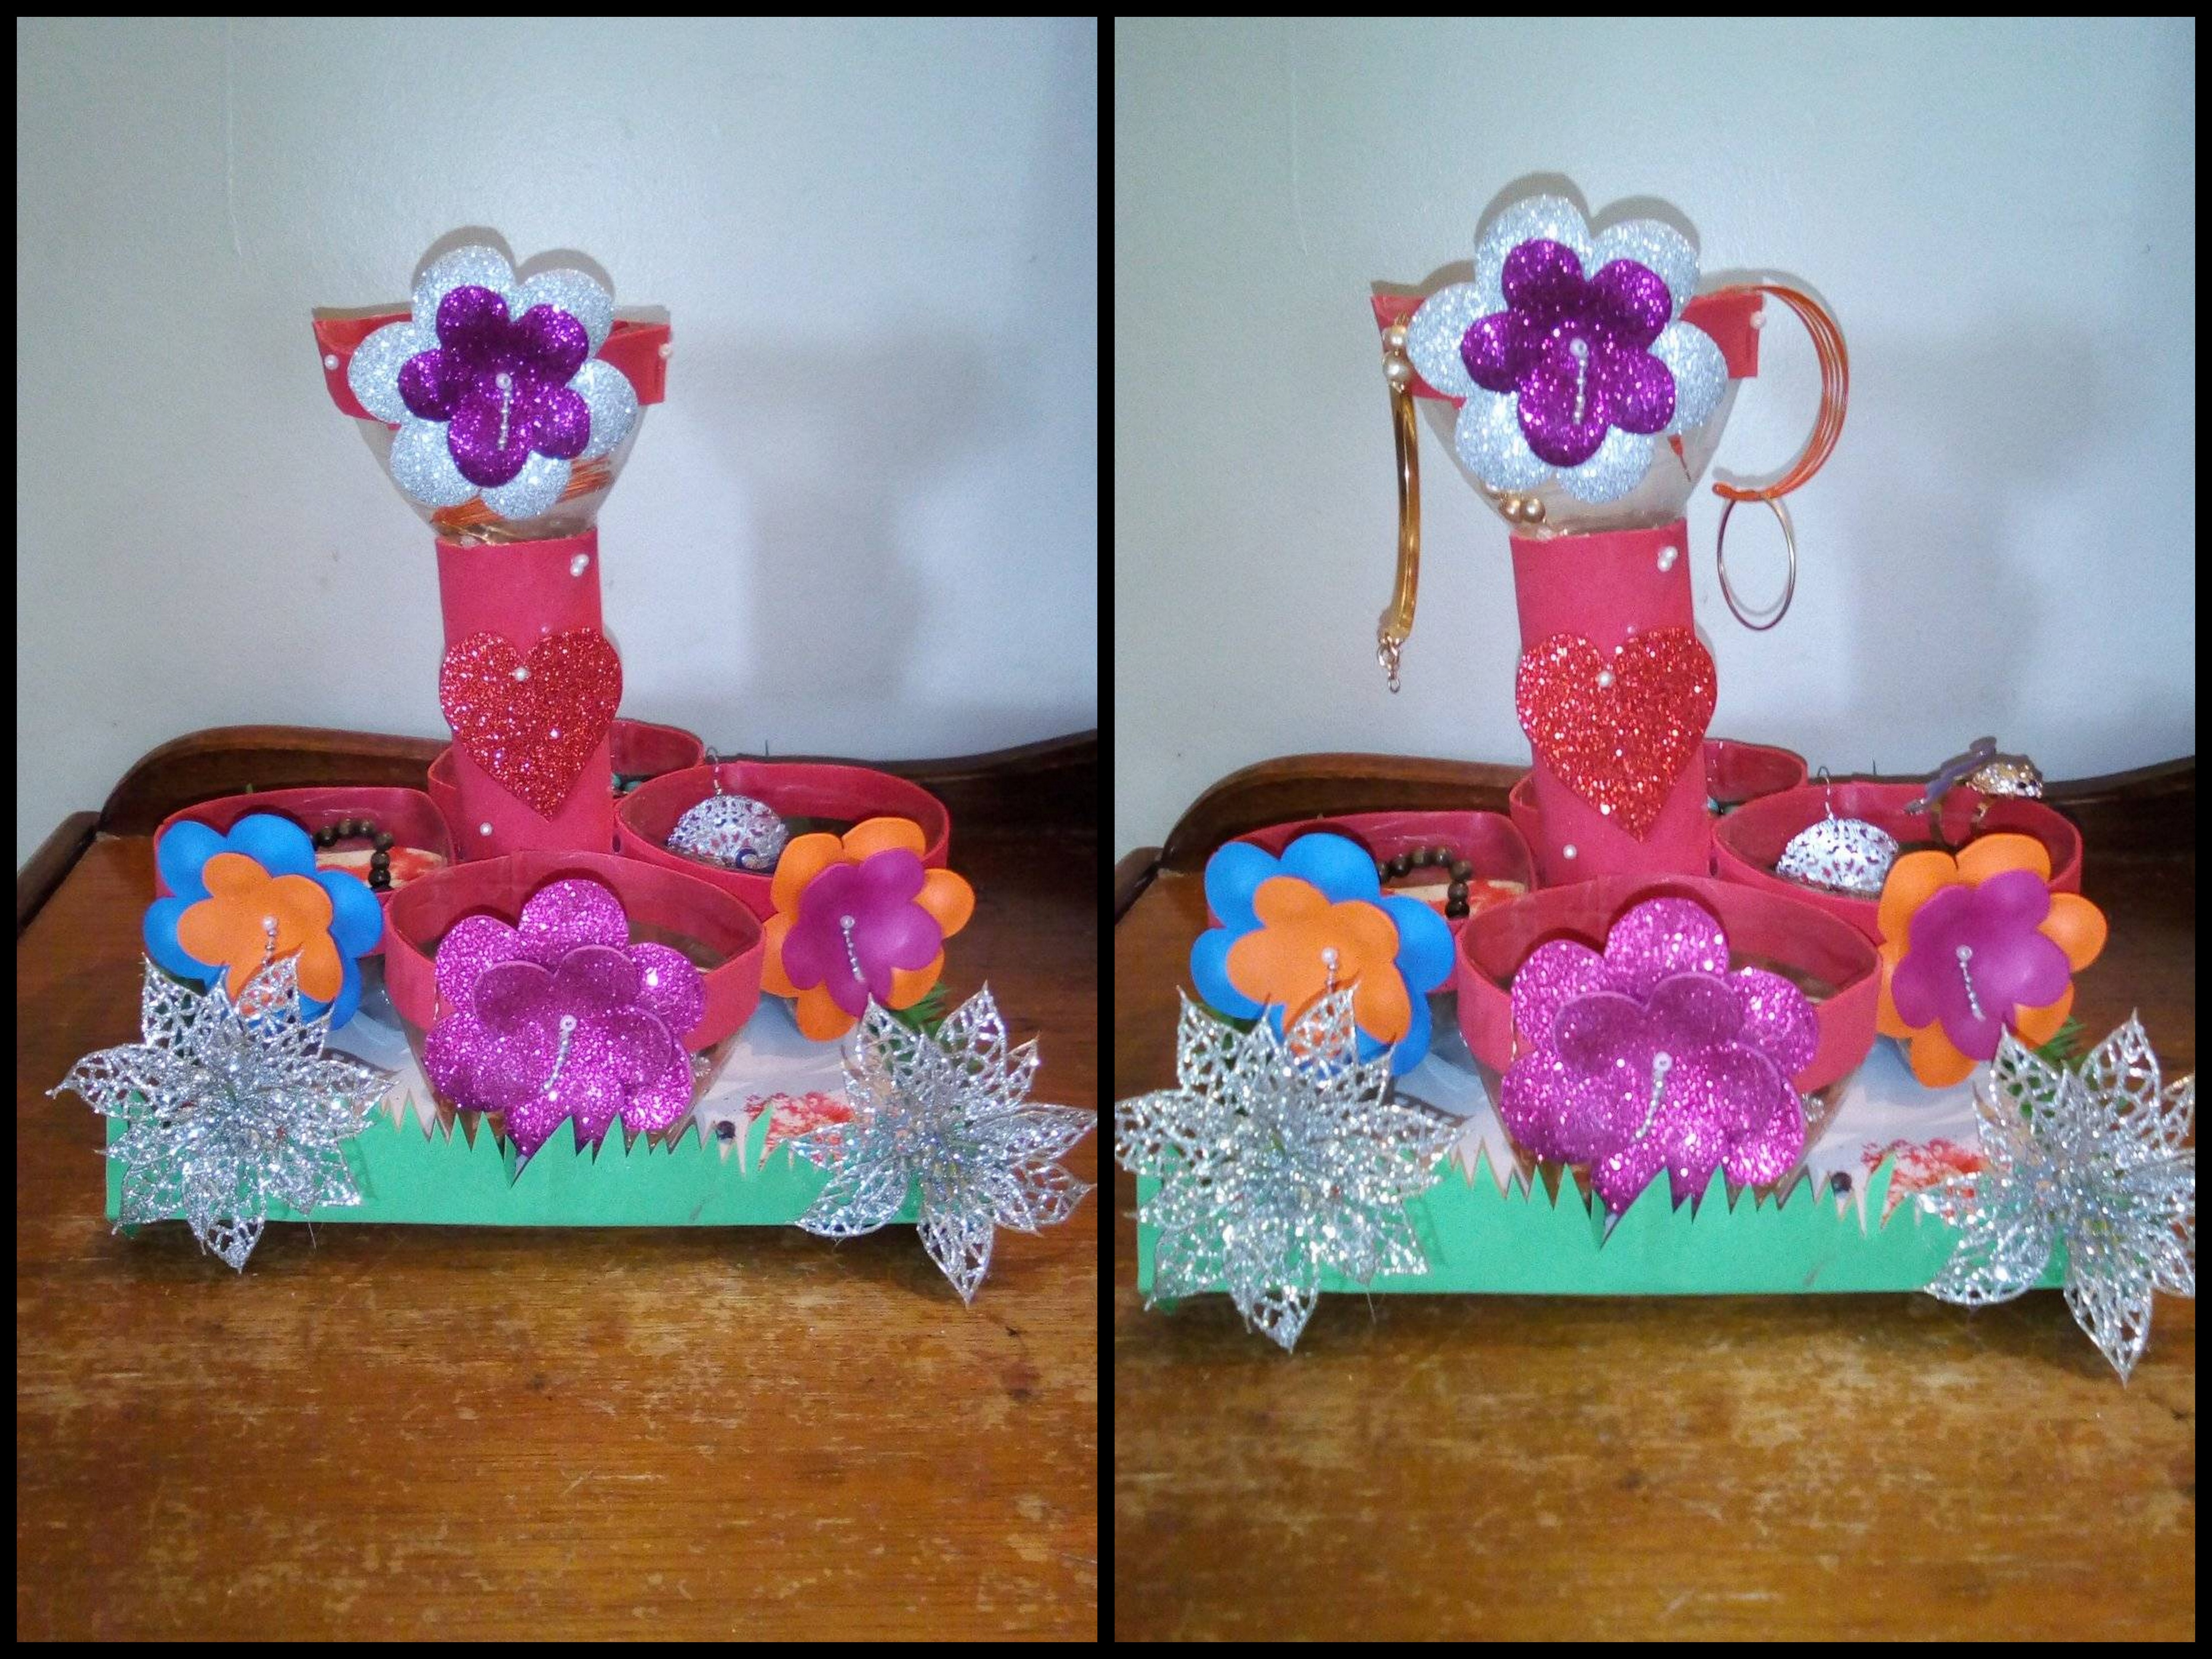
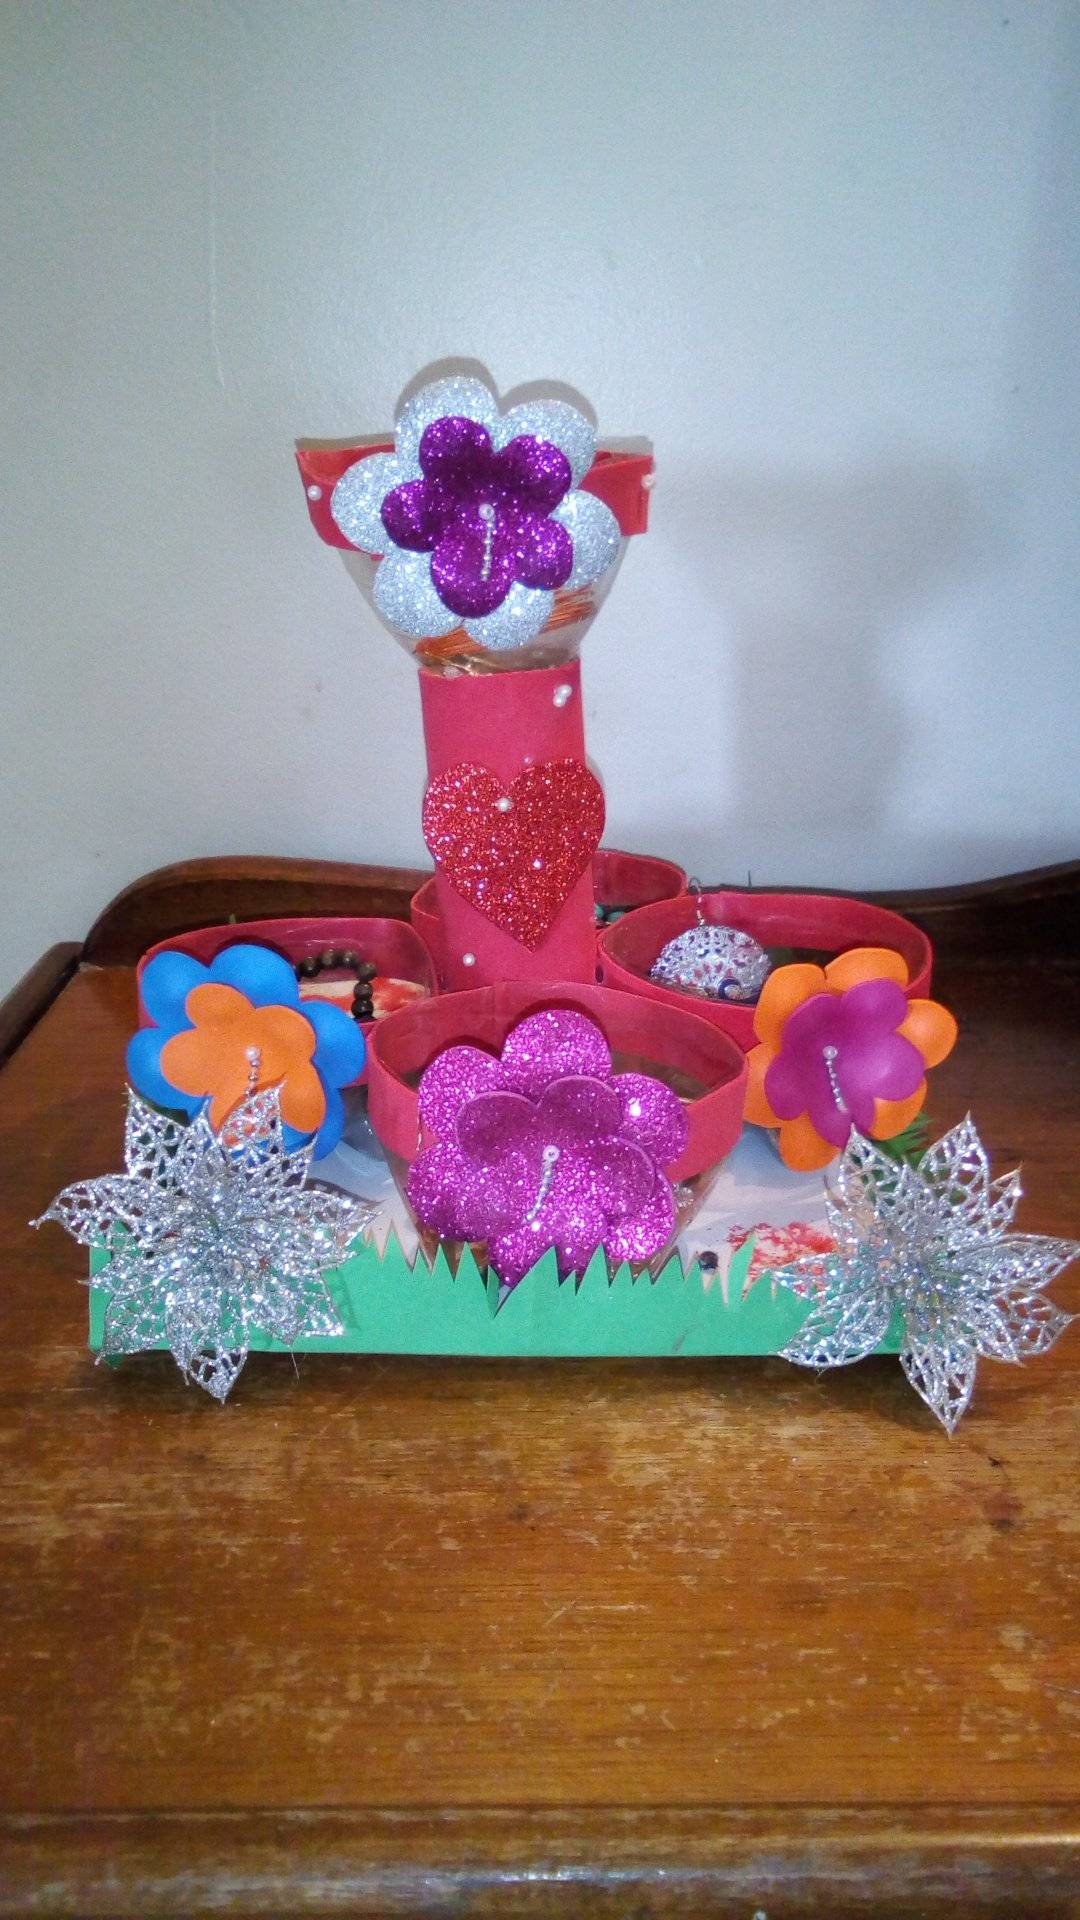
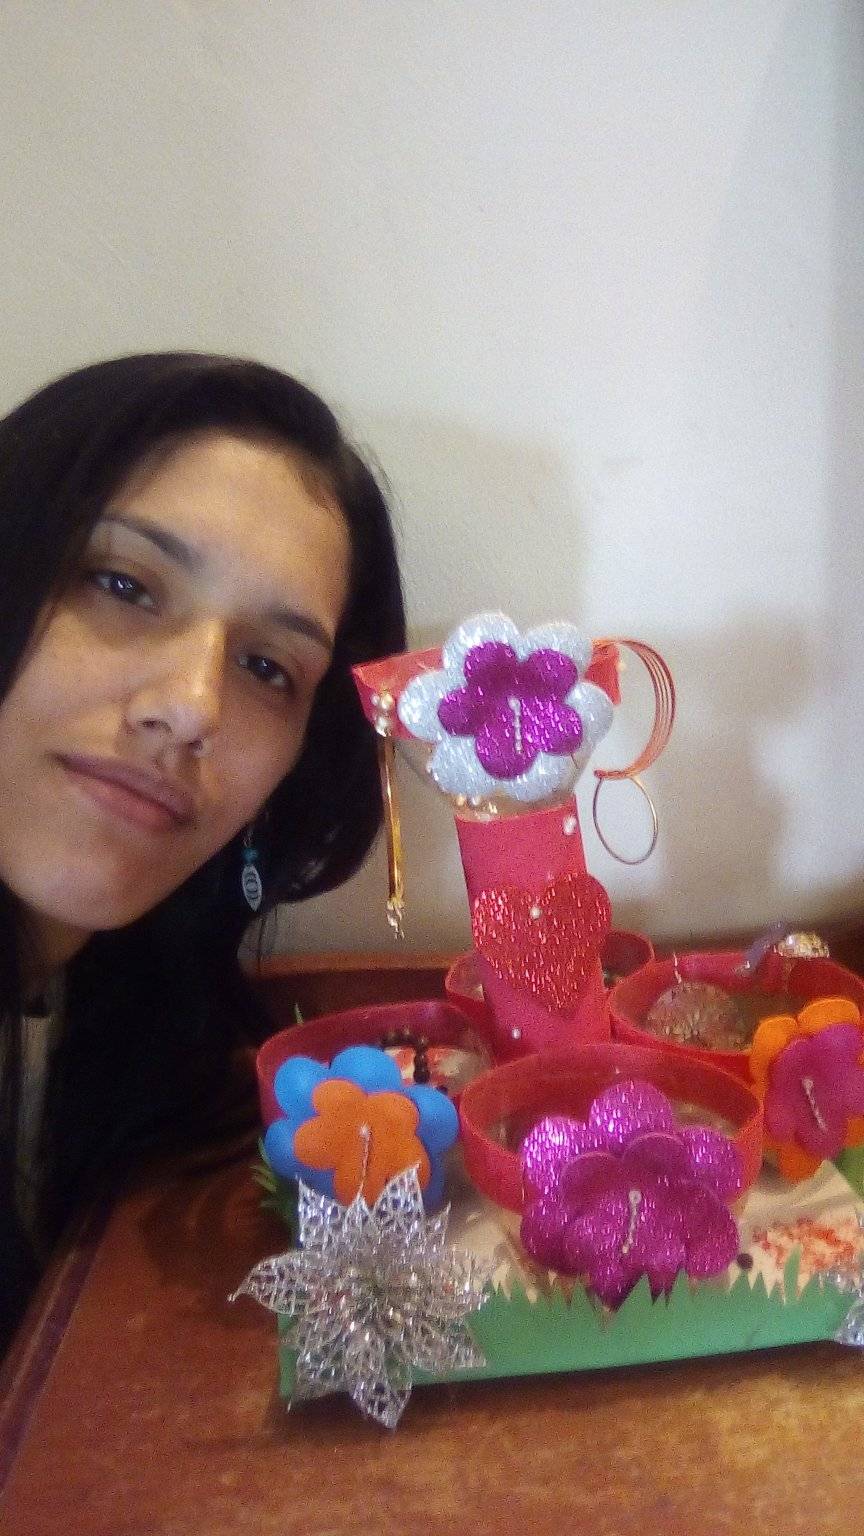
Resultado:
Result:
Mil gracias por leer mi publicacion, les deseo a todos un excelente dia cargado de muchas bendiciones, hasta mañana.
Thank you very much for reading my publication, I wish you all an excellent day full of many blessings, until tomorrow.
Todas las fotos son de mi autoría tomadas con la camara de mi telefono celular BLU ADVANCE A6 y editadas en mi computadora con la aplicación Picasa 3.
All the photos are my own, taken with the camera of my BLU ADVANCE A6 cell phone and edited on my computer with the Picasa 3 application.
Mi texto en español fue traducido al inglés con el traductor Google.
My text in Spanish was translated into English with Google Translate.