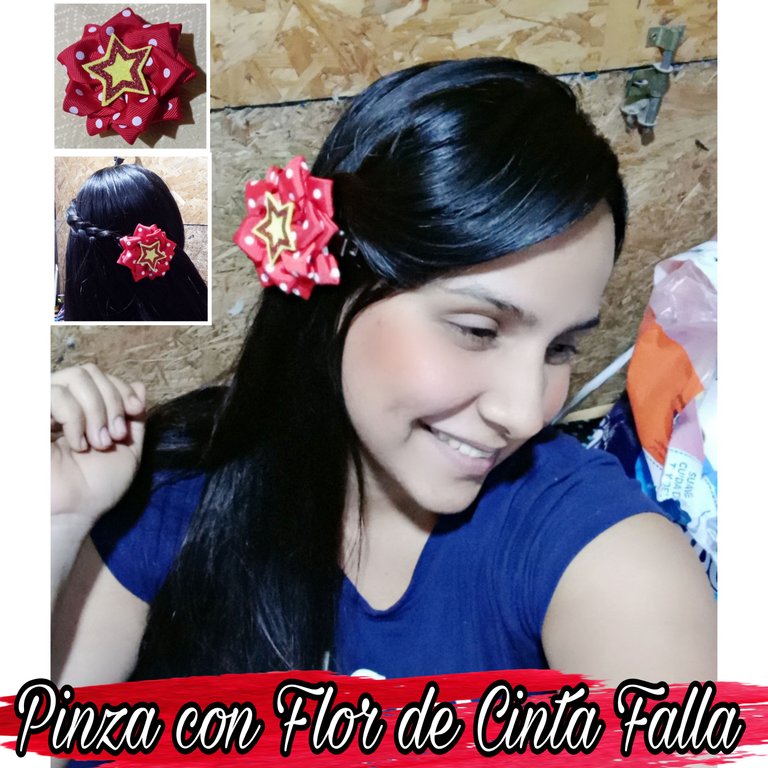
Feliz y bendecido día mi hermosa familia de artesanos, me da mucho gusto estar con ustedes nuevamente compartiendo técnicas e ideas que nos permiten crear cosas hermosas, como la que les quiero compartir en éste tutorial que les traigo; en ésta oportunidad les mostraré cómo realizar Pinzas o Ganchos con Flores de Cinta Falla para niñas.
Happy and blessed day my beautiful family of crafters, it gives me great pleasure to be with you again sharing techniques and ideas that allow us to create beautiful things, like the one I want to share with you in this tutorial that I bring you; this time I will show you how to make Tape Falla Flowers Clips or Hooks for girls.

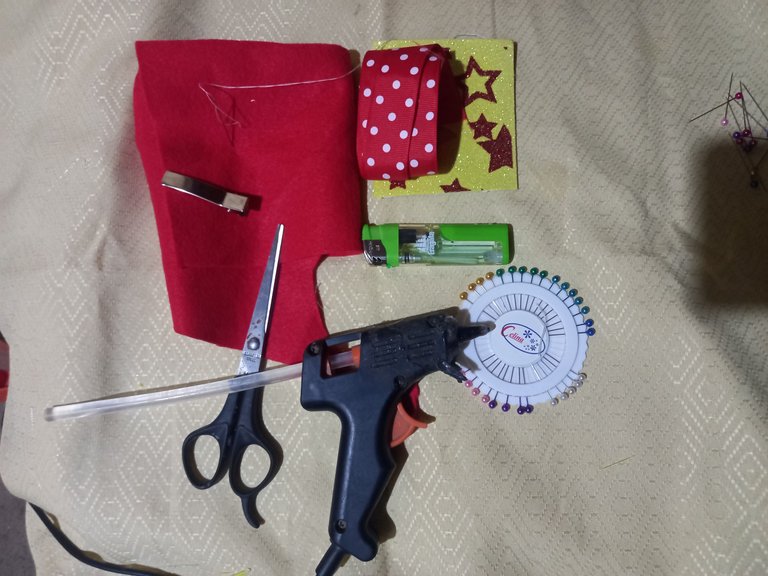
- Cinta falla de 2cm de ancho roja.
- Ganchos.
- Fieltro rojo.
- Foami con diseños de estrellas.
- Alfileres encendedor.
- Hilo y aguja.
- Pistola de silicón caliente.
- Tijeras.
- 2cm wide red failure tape.
- Hooks.
- Red felt.
- Foami with star designs.
- Lighter pins.
- Thread and needle.
- Hot silicone gun.
- Scissors.

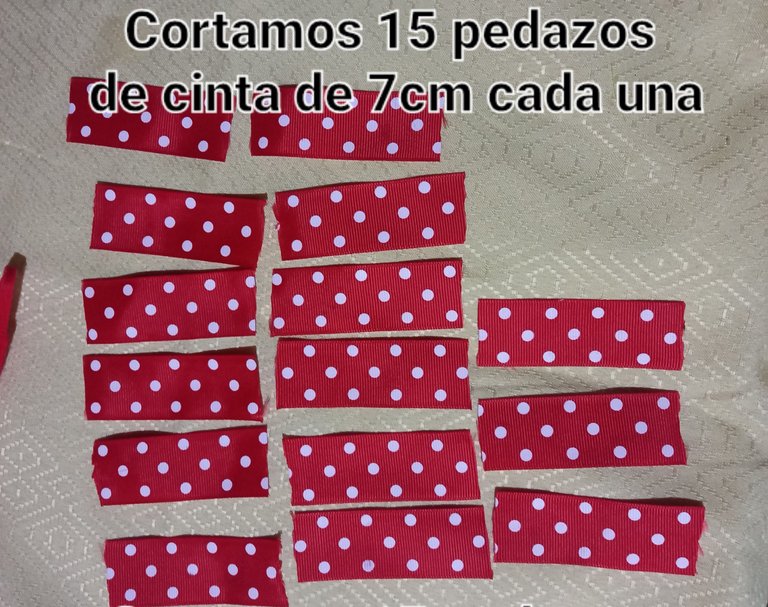
Primero cortaremos 15 pedazos de cinta falla de 7cm de largo cada una.
First, we will cut 15 pieces of ribbon, each 7cm long.
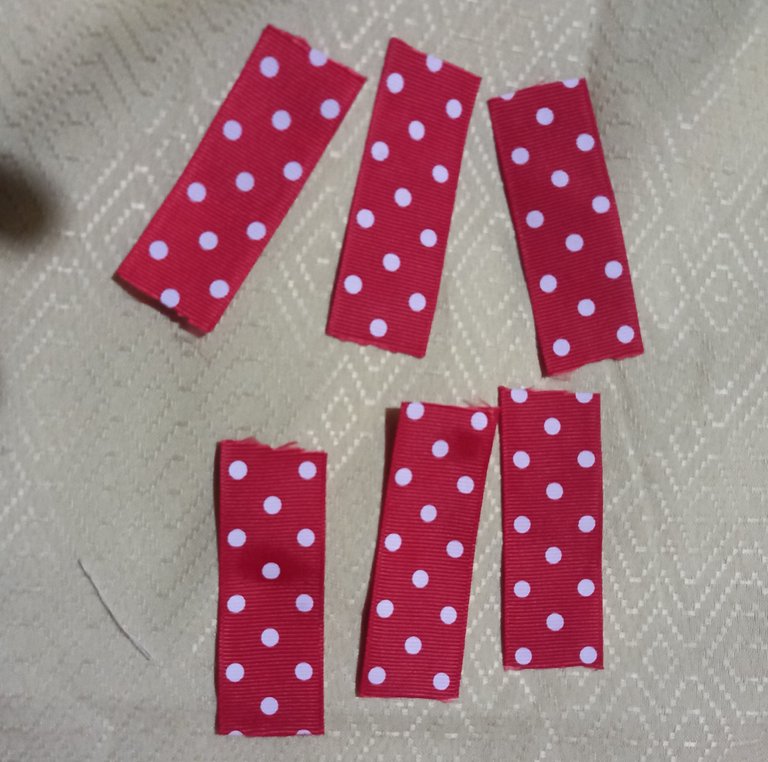
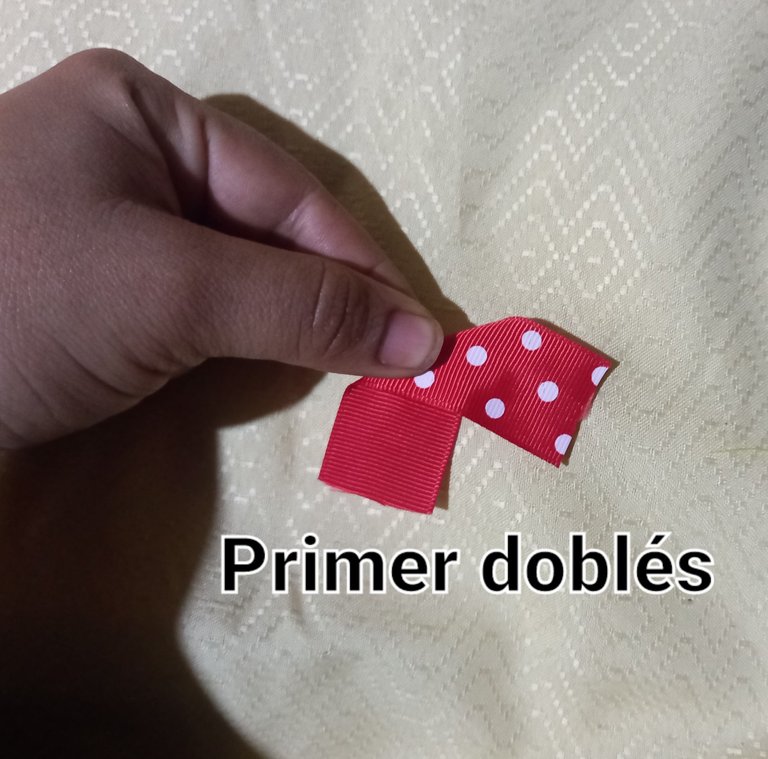
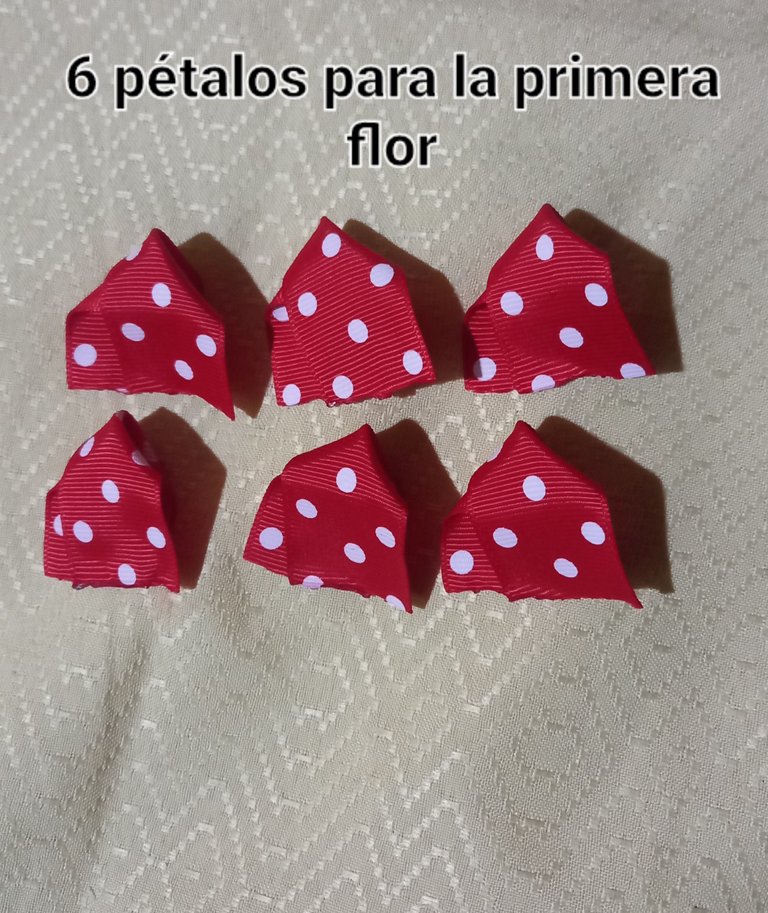
Luego tomaremos 6 pedazos de cinta de los 15 que cortamos y comenzaremos a hacer con ellos la primera flor. Para esto, vamos a doblar una cinta en el centro, que quede las puntas abiertas y luego la volvemos a doblar por la mitad llevando un lado hacia atrás; los extremos van a quedar uno al lado del otro. Esto lo haremos con los 6 pedazos de cintas para obtener los pétalos.
Then we will take 6 pieces of ribbon from the 15 we cut and we will start making the first flower with them. To do this, we are going to fold a ribbon in the center, leaving the ends open and then fold it in half again, taking one side backwards; the ends will be next to each other. We will do this with the 6 pieces of ribbons to obtain the petals.
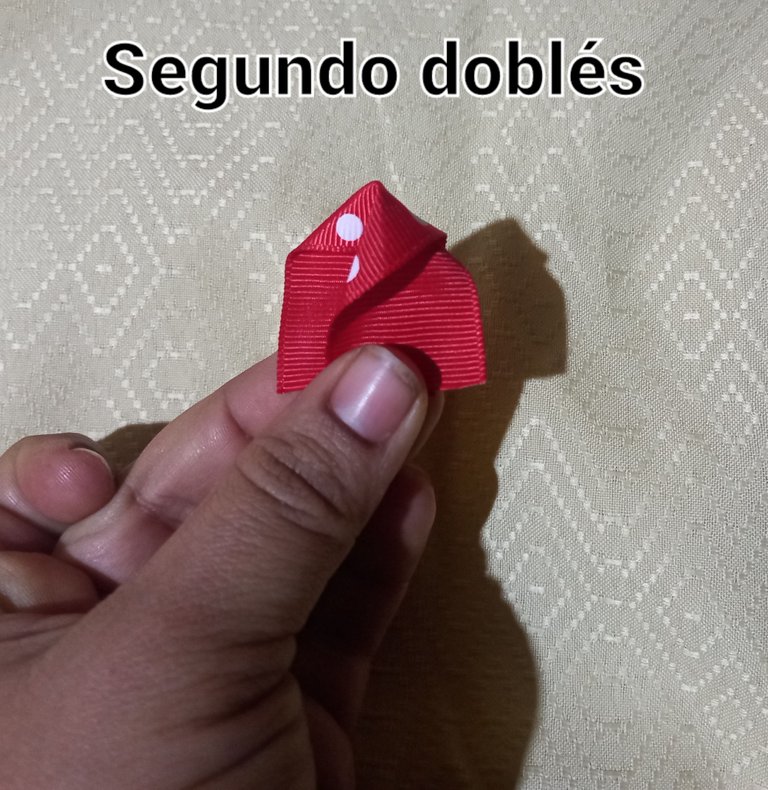
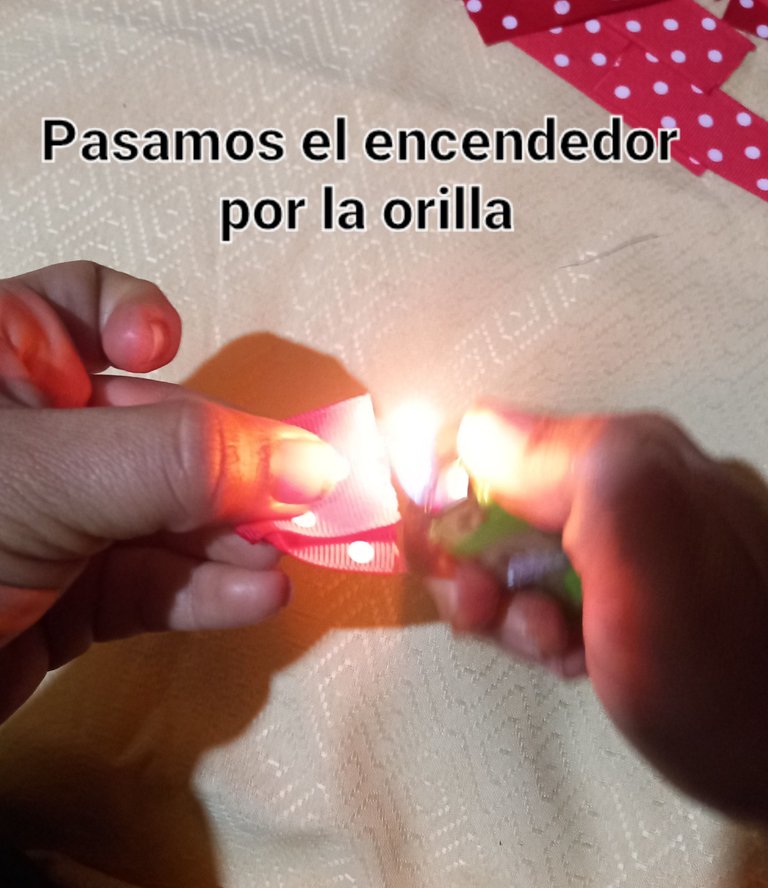
A medida que vayamos haciendo los pétalos, iremos pasando el encendedor por la orilla para que estas queden pegadas y no se suelten.
As we make the petals, we will pass the lighter along the edge of the petals so that they stick together and do not come loose.
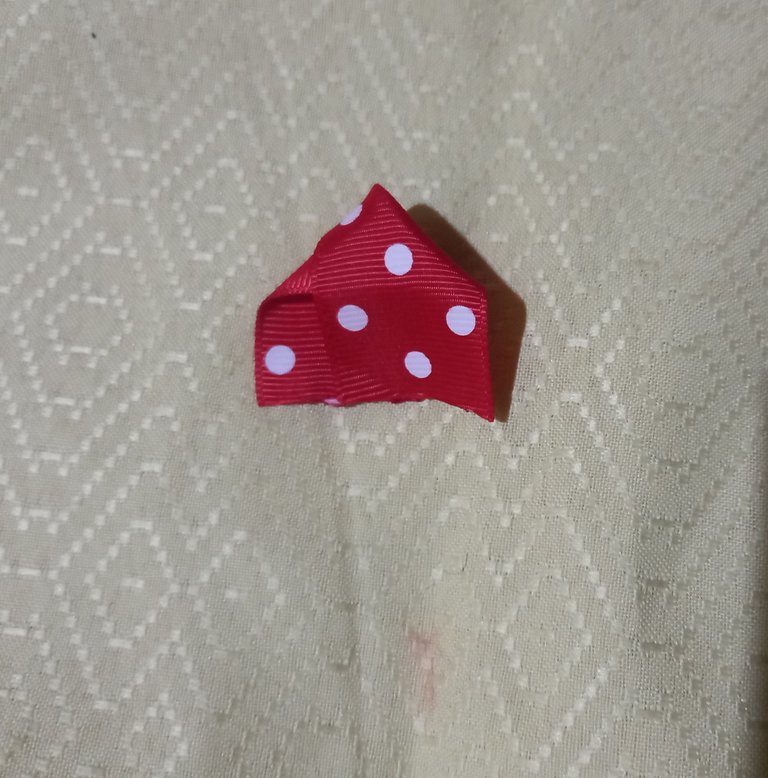
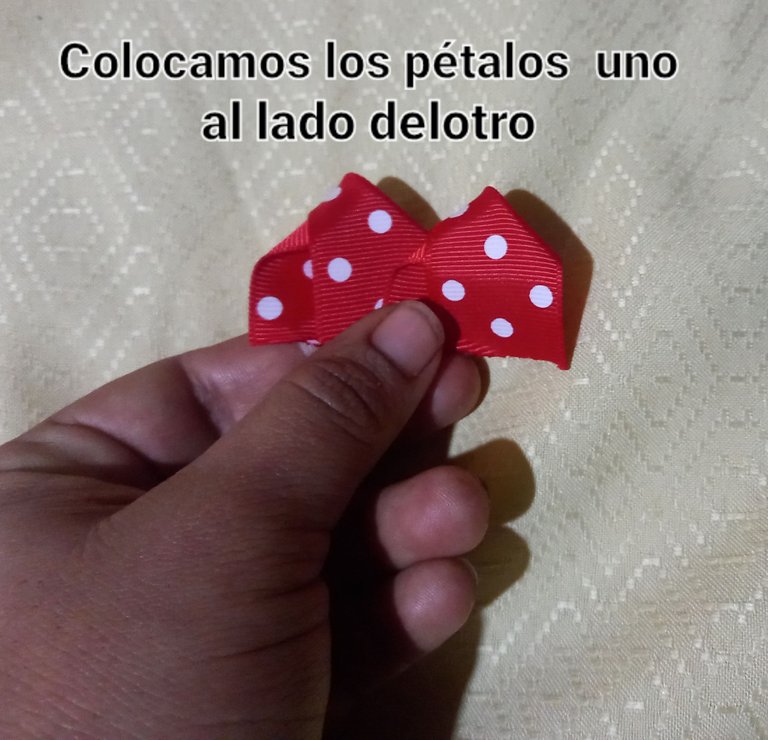
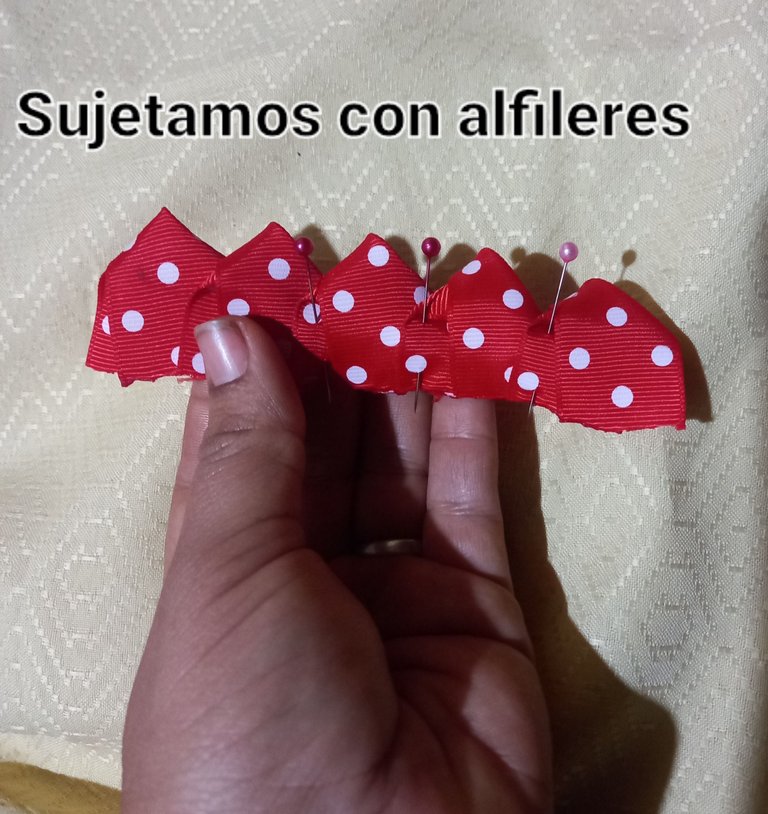
Cuando hayamos terminado todos los pétalos, comenzaremos a unirlos colocándolos uno encima del lateral del otro, sujetandolos con alfileres.
When we have finished all the petals, we will begin to join them by placing them one on top of the side of the other, fastening them with pins.
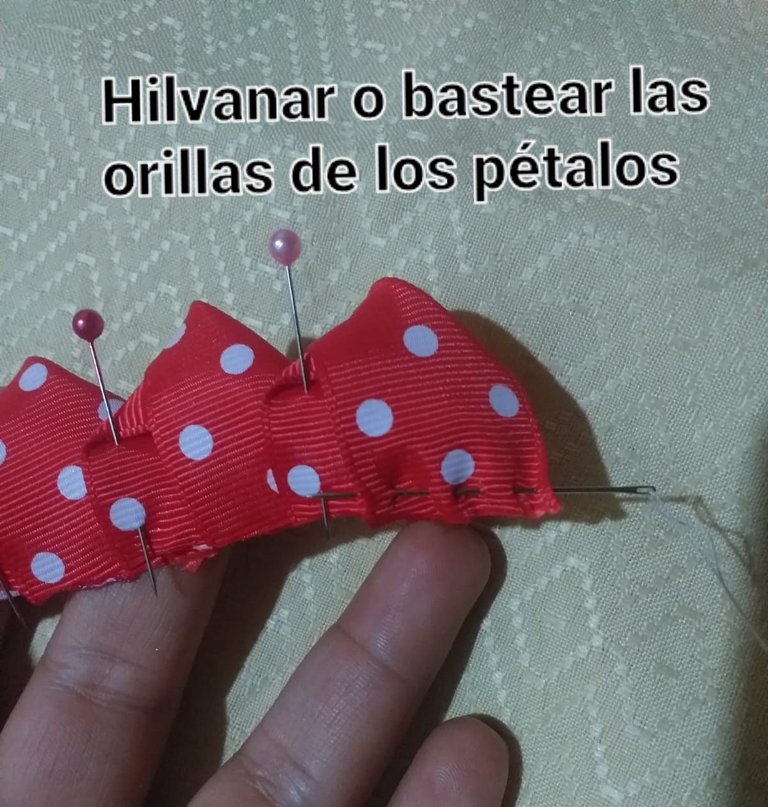
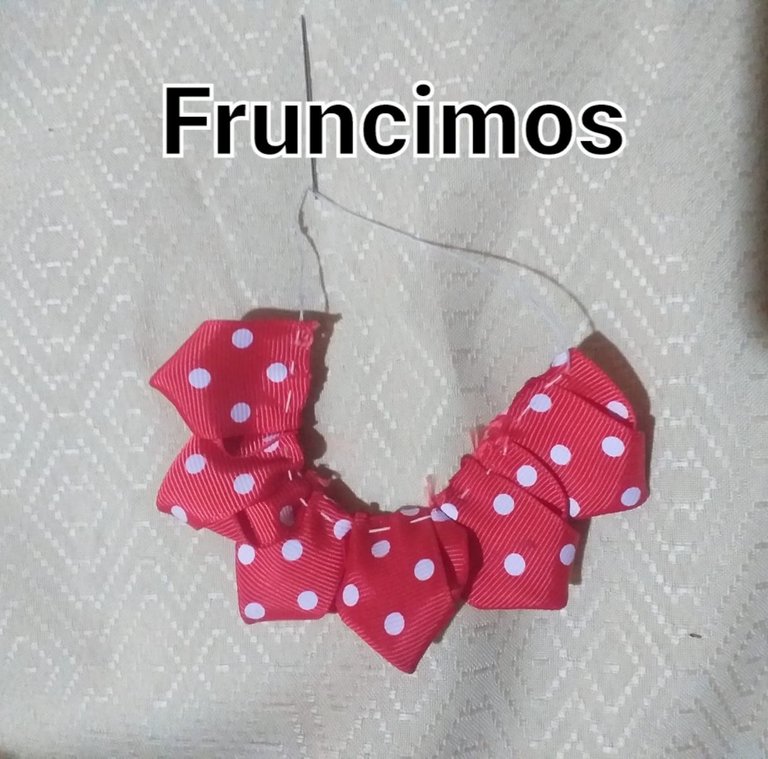
Luego basteamos o hilvanamos todos los pétalos por la orilla.
Then we baste or baste all the petals along the edge.
Fruncimos todo hasta que éstos queden pegaditos en el centro y aseguramos.
We pucker everything until they are stuck together in the center and secure.
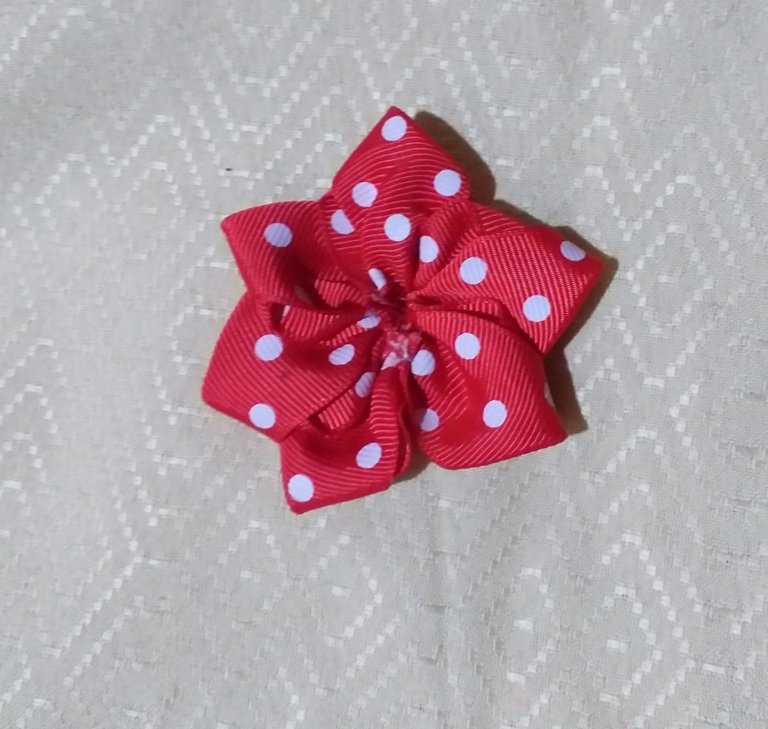
Repetimos éstos mismos pasos para la siguiente flor, pero agregaremos tres pétalos más.
We repeat these same steps for the next flower, but we will add three more petals.

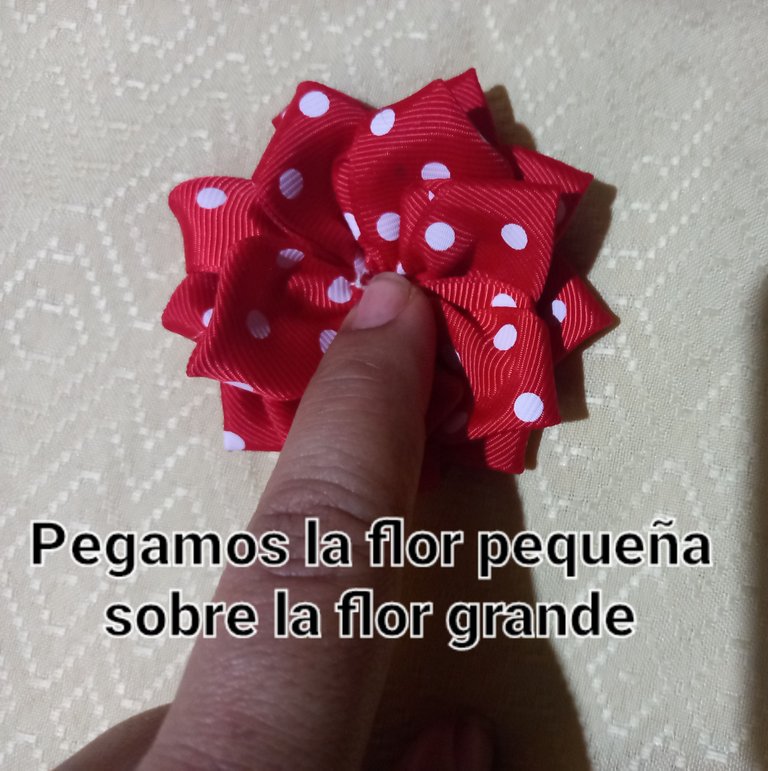
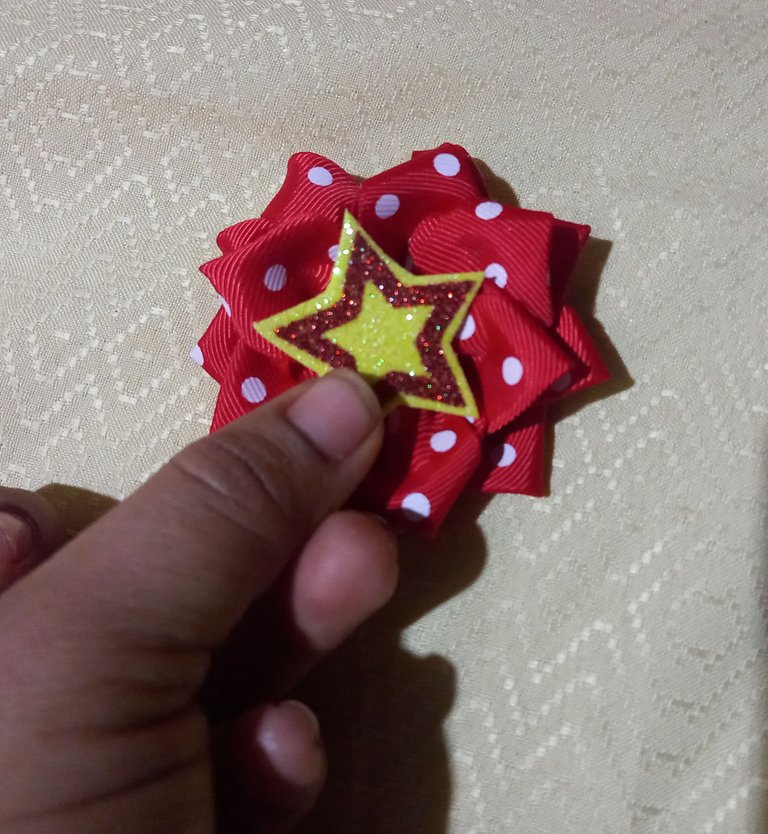
Luego pegamos la flor pequeña sobre la más grande.
Then we glue the small flower on top of the larger one.
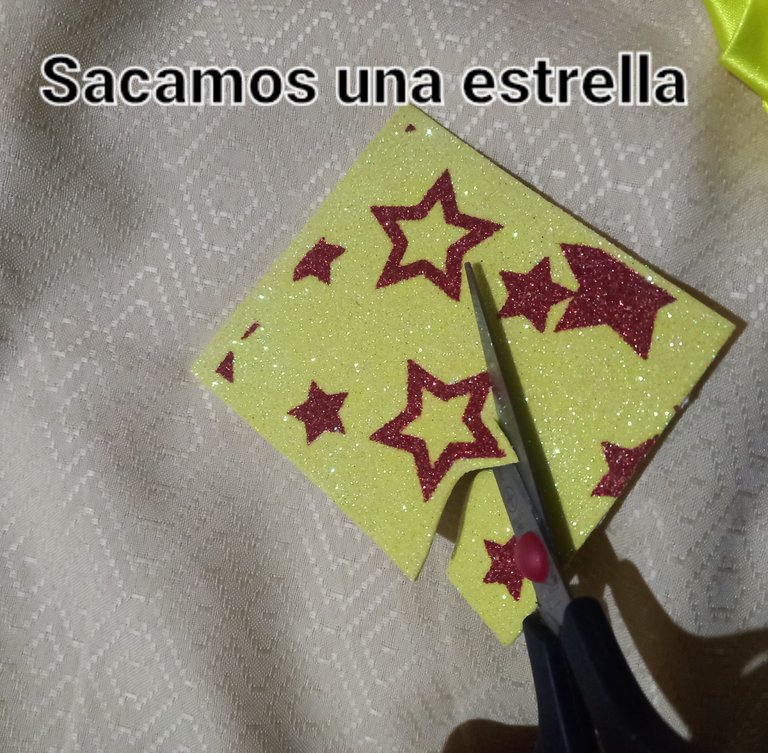
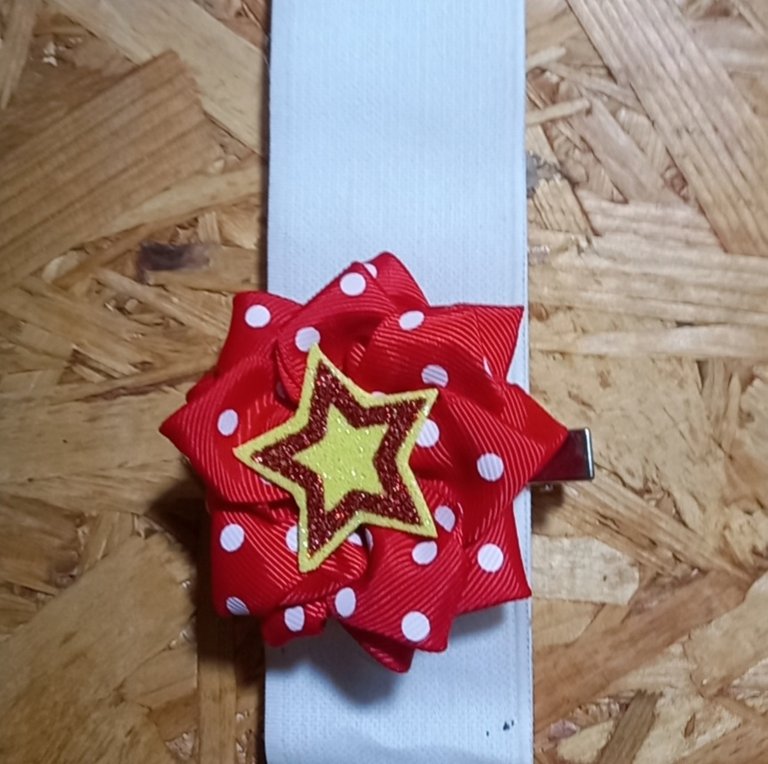
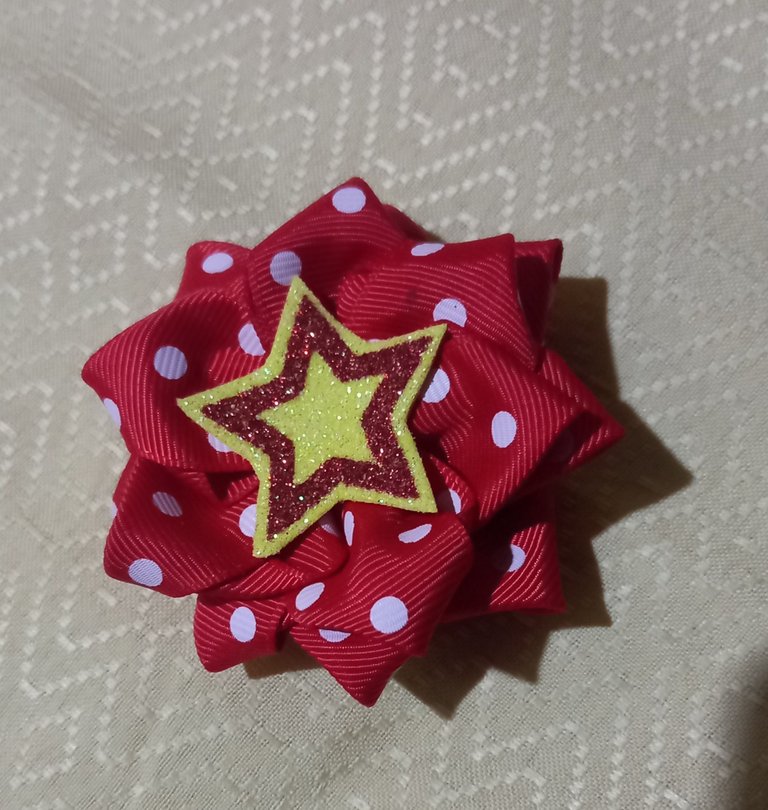
Cortamos una de las estrellas del foami y la fijamos en el centro de la flor.
Cut one of the stars out of the foami and attach it to the center of the flower.
Posteriormente haremos un círculo más pequeño que la flor y en medio haremos dos cortes rectos del ancho de nuestra pinza.
Then we will make a circle smaller than the flower and in the middle we will make two straight cuts of the width of our clamp.
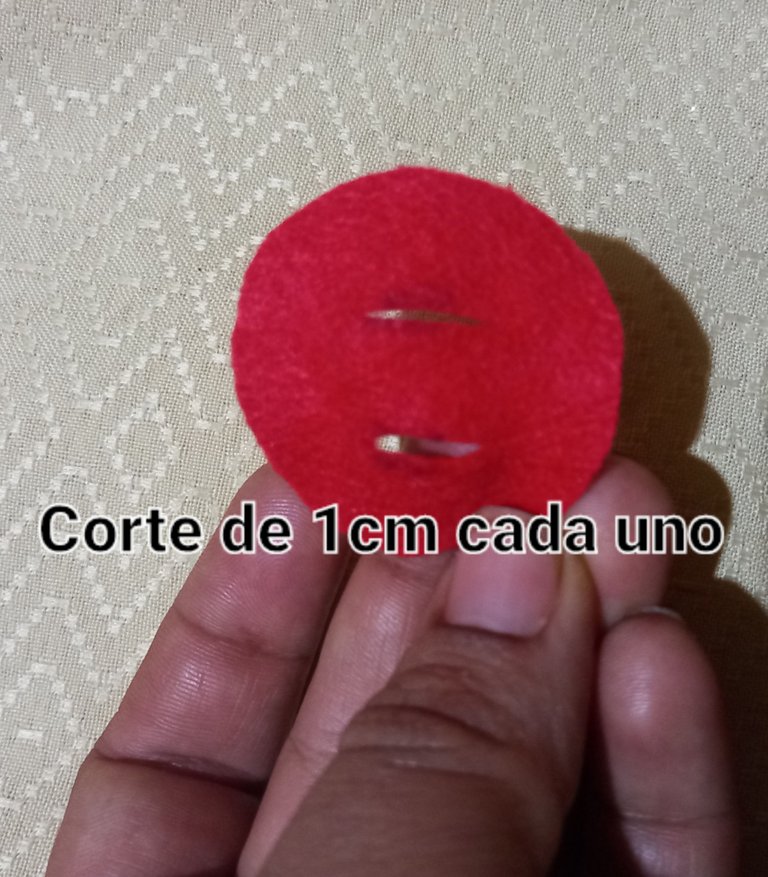
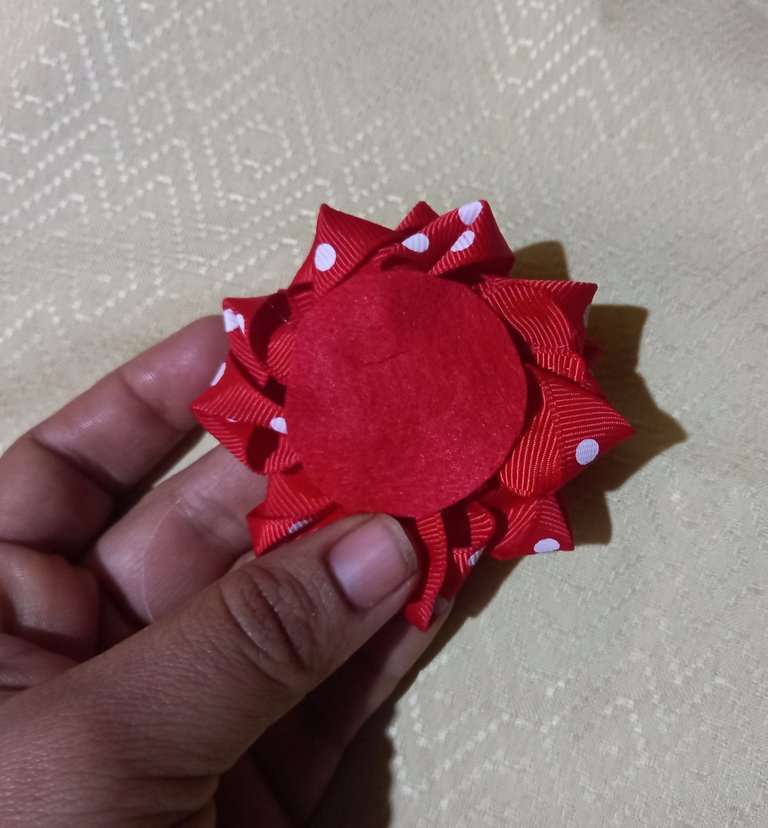
Pegamos el círculo por debajo de la flor sin tapar la abertura por donde introduciremos la pinza.
Glue the circle underneath the flower without covering the opening where we will insert the tweezers.
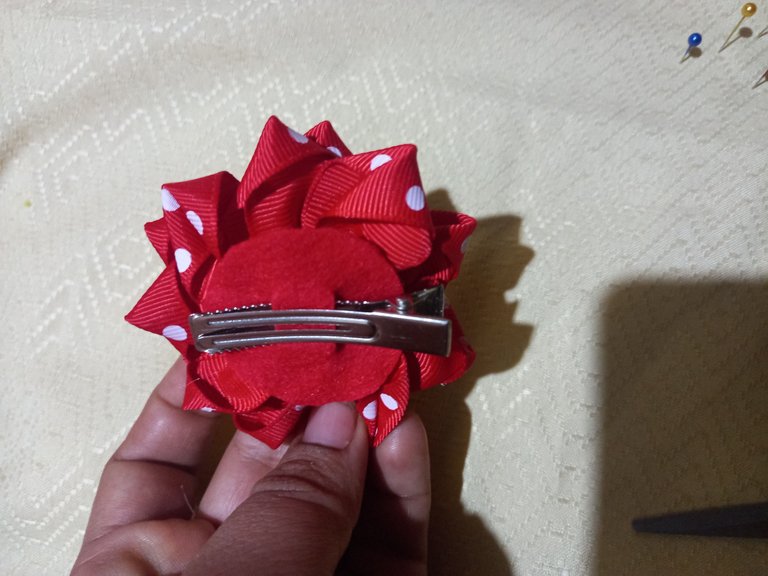
¡Veamos el resultado!
Let's see the result!

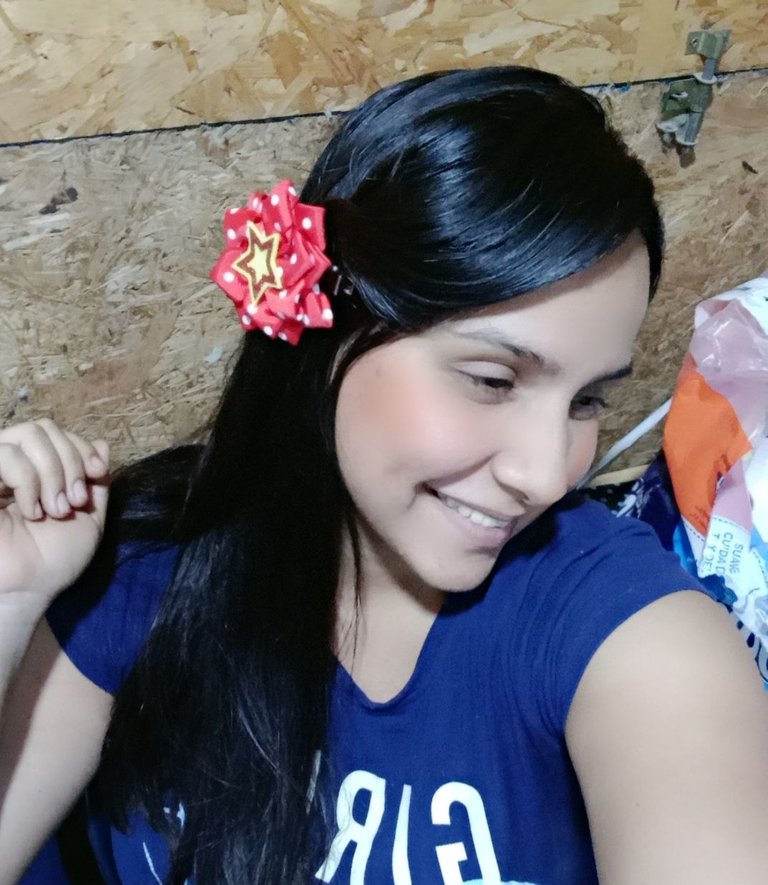
Aplicando estos pasos obtendremos unas hermosas Pinzas o Ganchos para lucir geniales. Espero les haya gustado éste tutorial. Será hasta otra oportunidad. BENDICIONES 🙏🏻 😊🤗.
Applying these steps we will get beautiful Clips or Hooks to look great. I hope you liked this tutorial. Will be until another time. BLESSINGS 🙏🏻 😊🤗.
Que lindo gancho, me gusta el paso a paso, muy bien explicado
Gracias por comentar amiga. Que tengas un lindo día 👍🏻😊