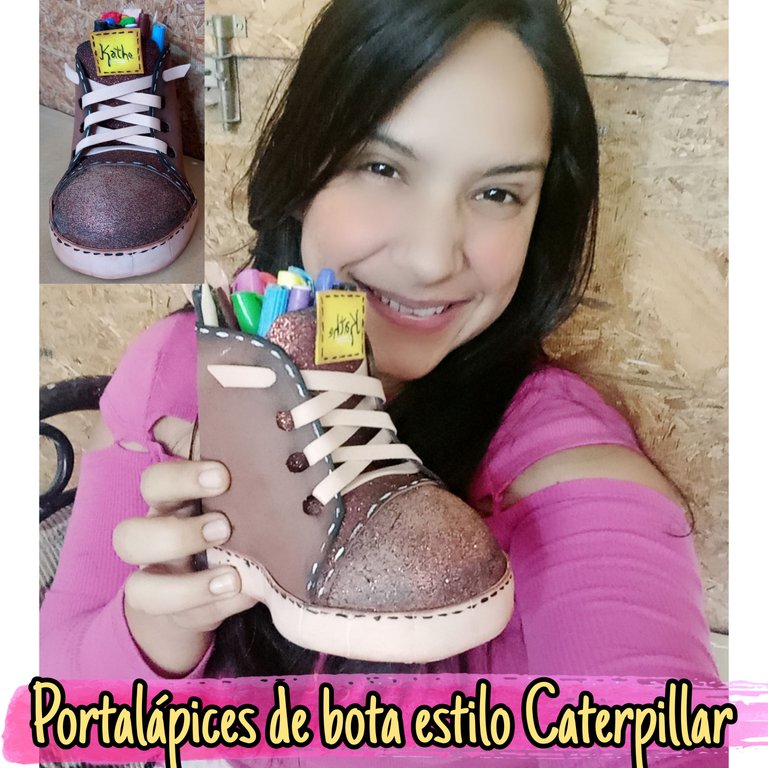
Feliz día mi linda Colmena de artesanos, espero que estén pasando un excelente fin de semana , disfrutando de buena salud, acompañados de la familia y con la bendición de Dios. Hace algunos días atrás compartir con ustedes la elaboración de un llavero en forma de tenis deportivos, ahora, en esta ocasión quiero mostrarle la fabricación de un portalápices en forma de bota estilo Caterpillar, con hermosos difuminados y acabados.
I hope you are having a great weekend, enjoying good health with your family and with God's blessing. A few days ago I shared with you the elaboration of a keychain in the shape of tennis shoes, now, on this occasion I want to show you the manufacture of a pencil holder in the shape of a Caterpillar style boot, with beautiful fades and finishes.

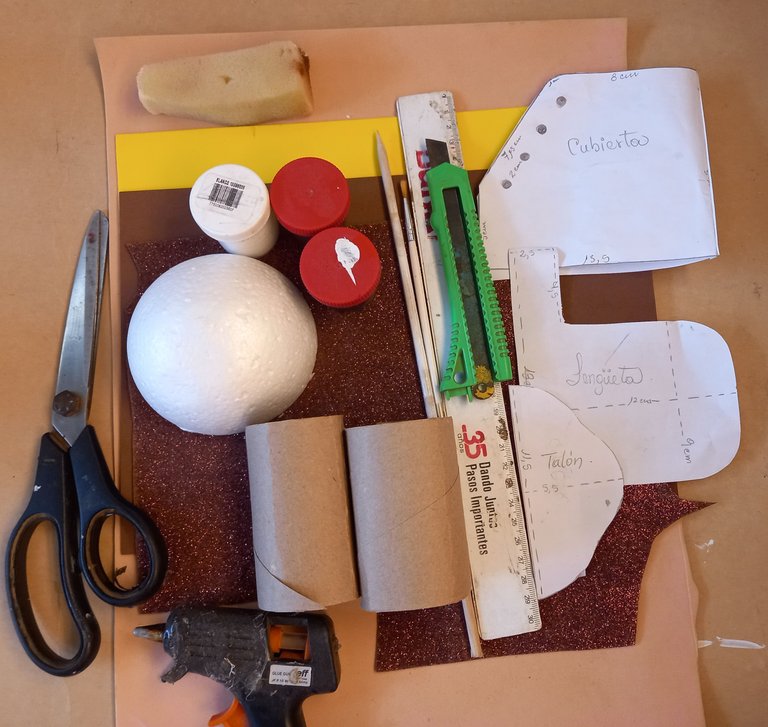
- Foami marrón escarchado y sin escarcha, color beige y amarillo.
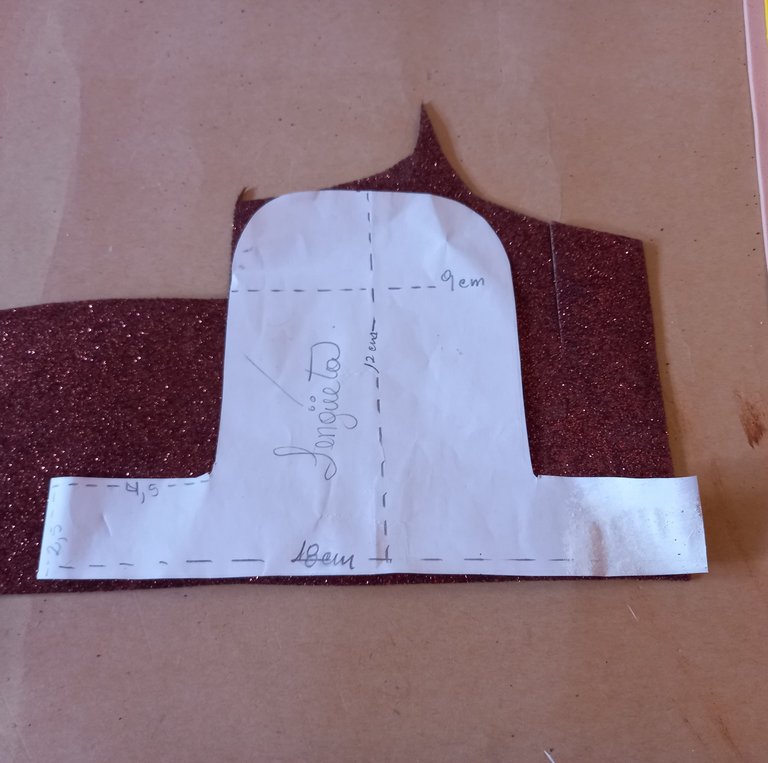
- patrones de la bota (Cubierta, lengüeta y talón.
- 1/2 esfera de icopor o anime #7
- Pintura blanca, negra y marrón.
- 2 tubos de papel higiénico.
- Plancha para ropa.
- Pistola de silicón caliente.
- Esponja.
- Regla.
- Palillo de altura.
- Tijeras.
- Brown frosted and unfrosted foami, beige and yellow.
- Patterns of the boot (Cover, tongue and heel).
- 1/2 sphere of icopor or anime #7.
- White, black and brown paint.
- 2 tubes of toilet paper.
- Clothes iron.
- Hot silicone gun.
- Sponge.
- Ruler.
- Height stick.
- Scissors.

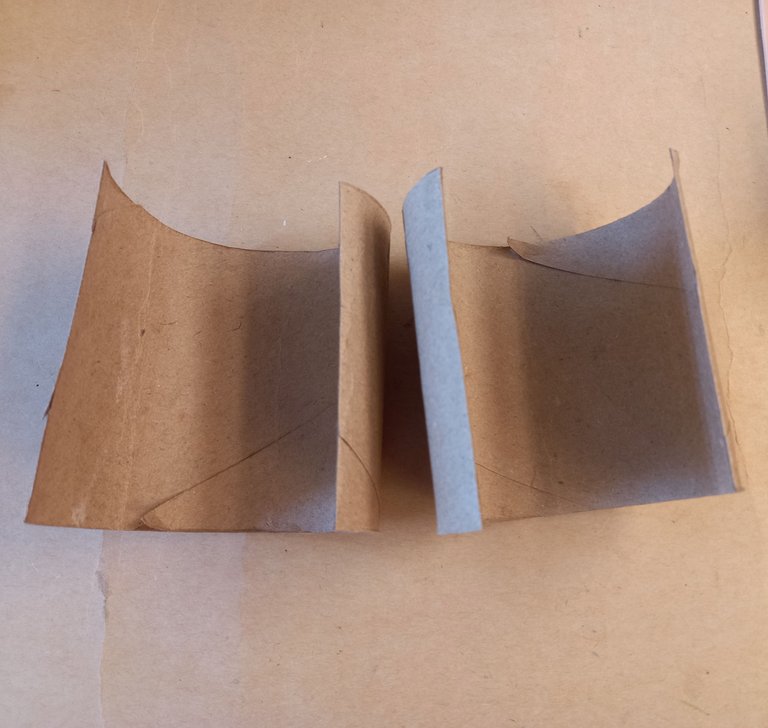
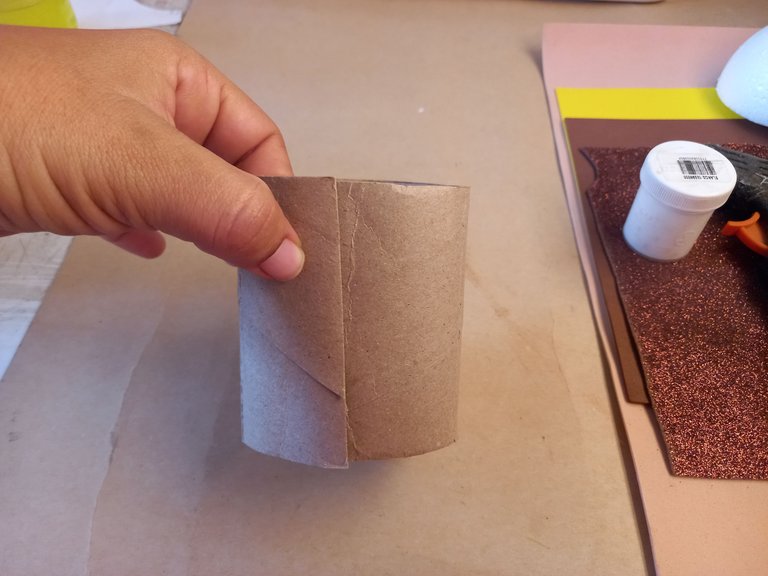
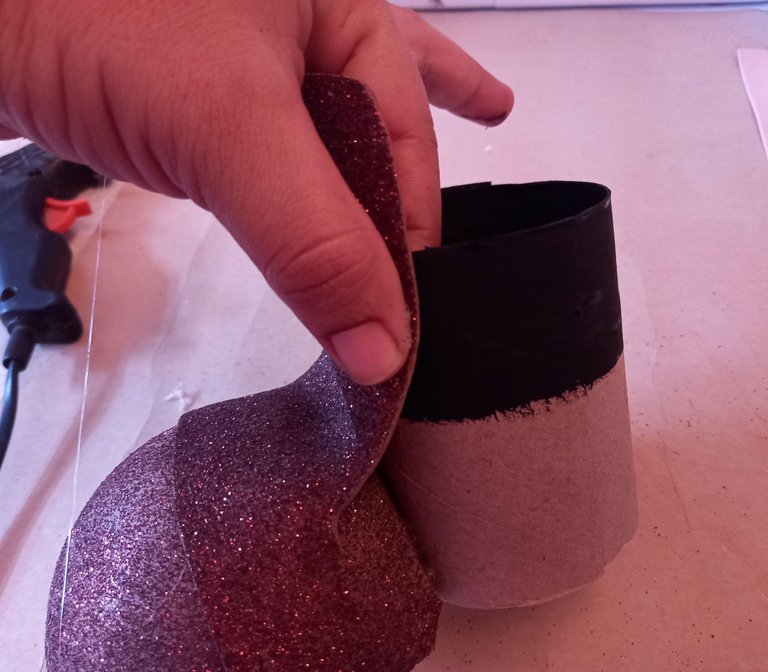
Comenzaremos haciendo un corte recto en cada uno de los tubos, para abrirlos y hacer un tubo más grande, es decir, abrimos y unimos extremos con extremos hasta obtener el tamaño deseado.
We will start by making a straight cut in each of the tubes, to open them and make a larger tube, that is to say, we open and join ends with ends until we obtain the desired size.
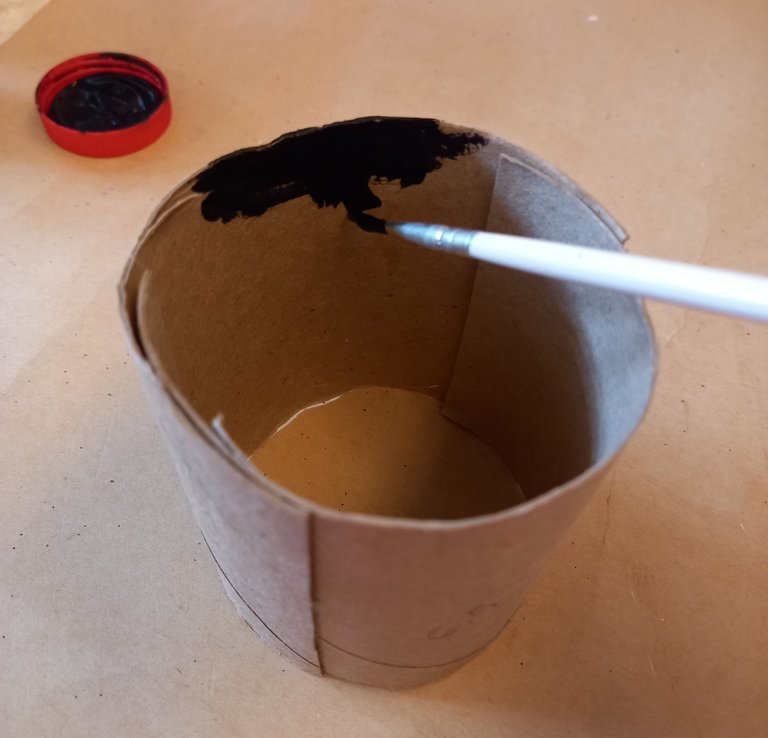
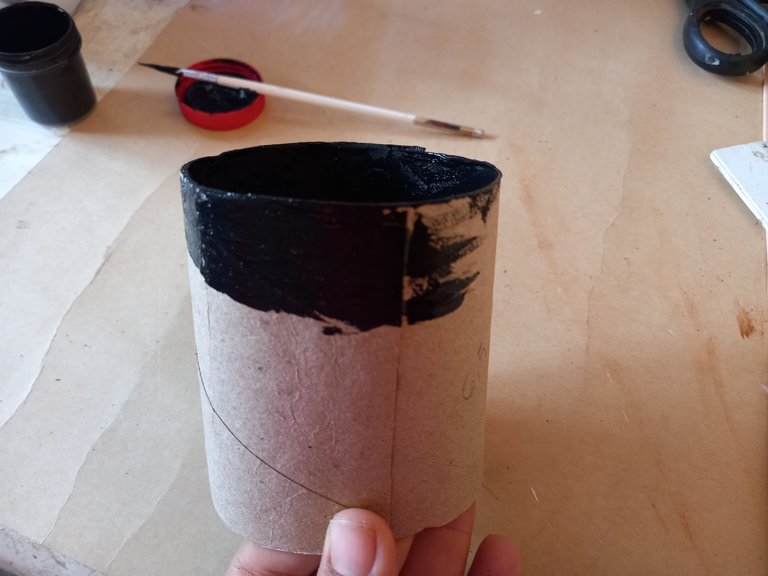
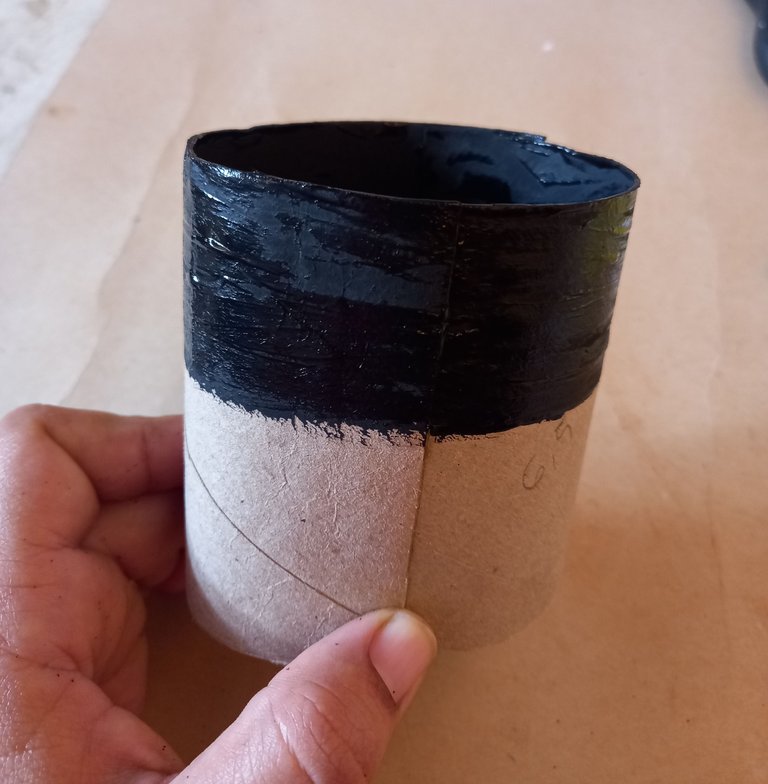
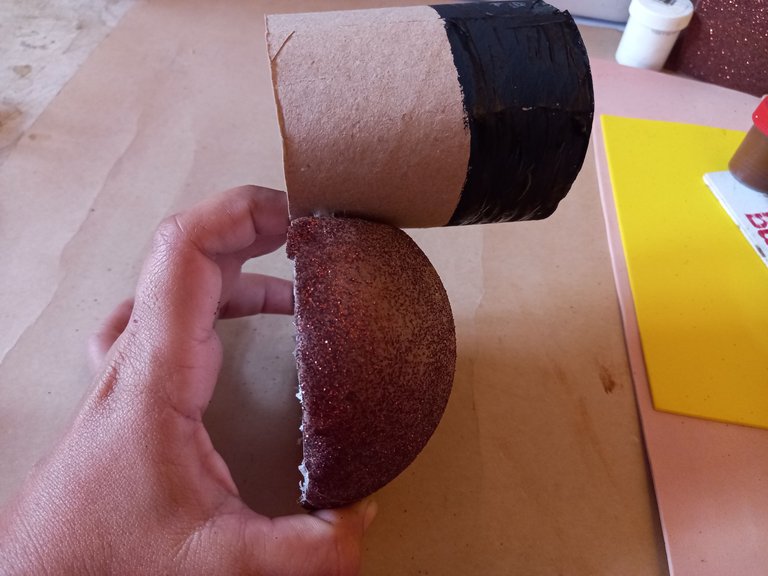
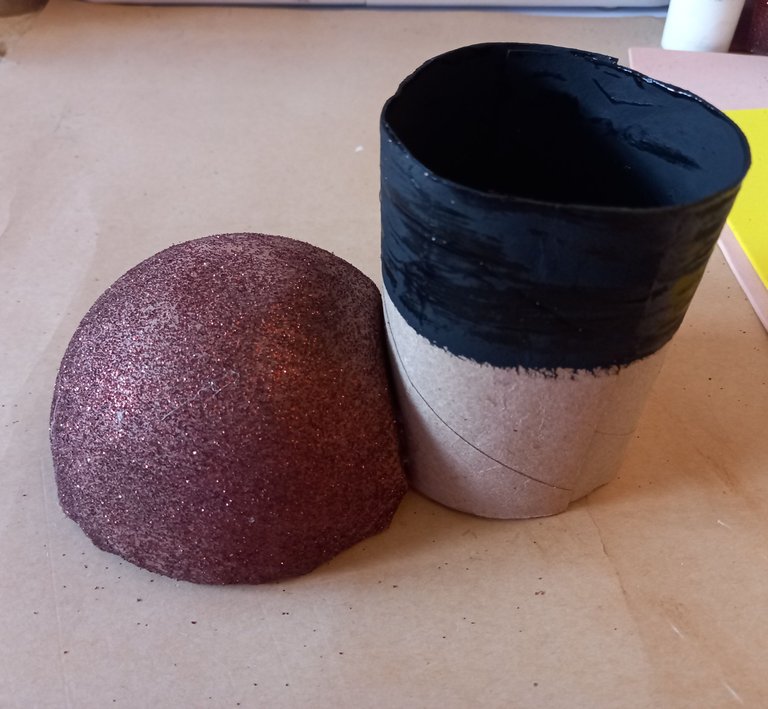
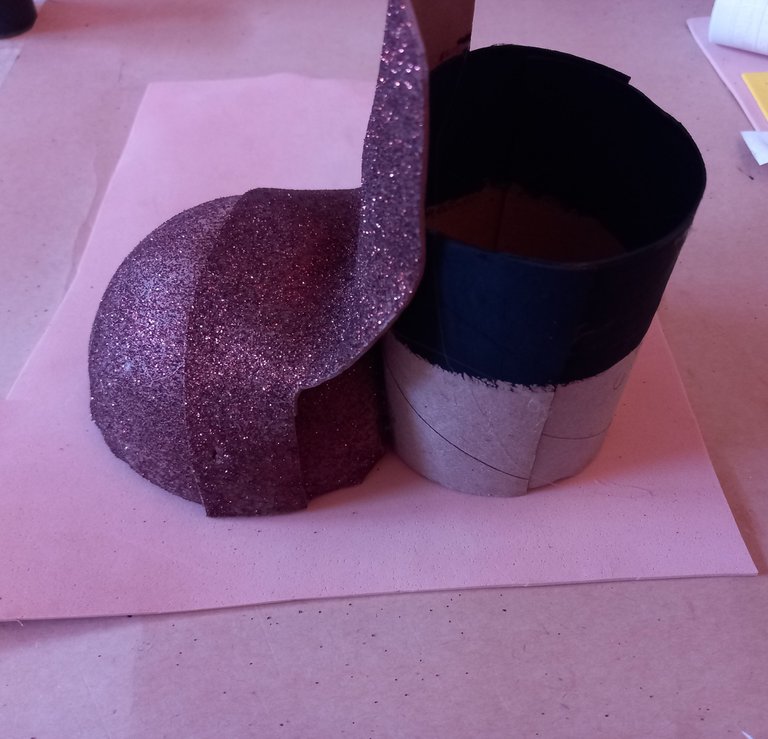
Con pintura negra pintaremos la mitad del tubo por la parte de adentro y un poco menos de la mitad por la parte de afuera. Esto es para no perder tanto tiempo en pintar todo el tubo ya que no se va a ver cuando se cubra con el foami.
With black paint we will paint half of the tube on the inside and a little less than half on the outside. This is to avoid wasting so much time painting the whole tube since it will not be visible when it is covered with the foami.
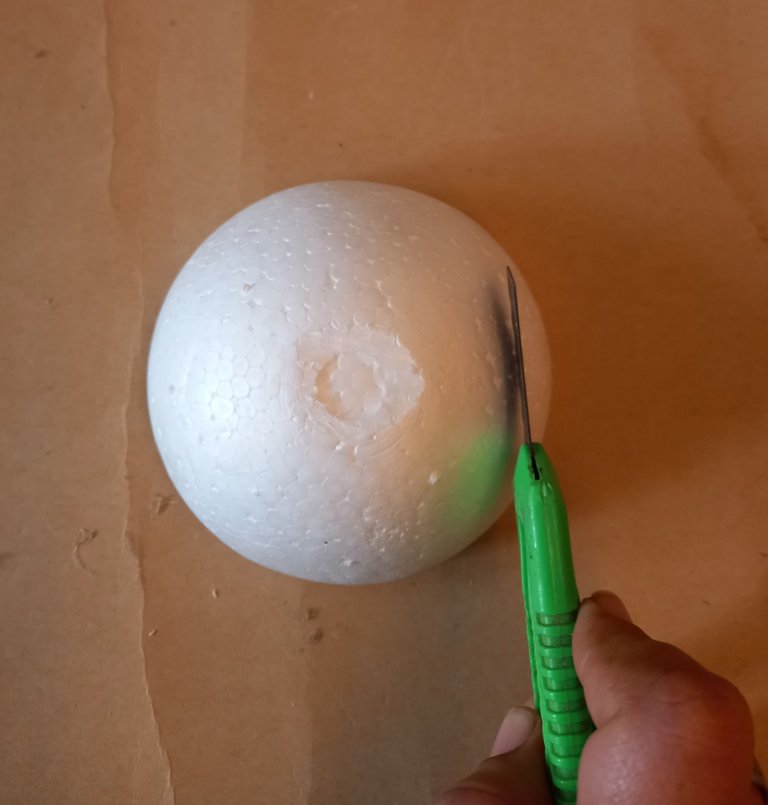
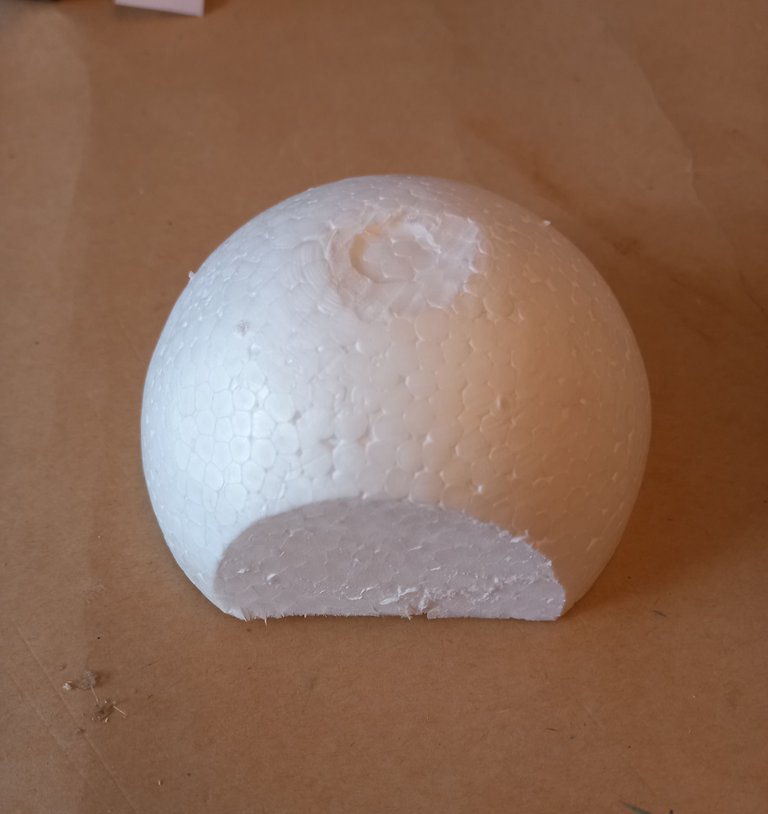
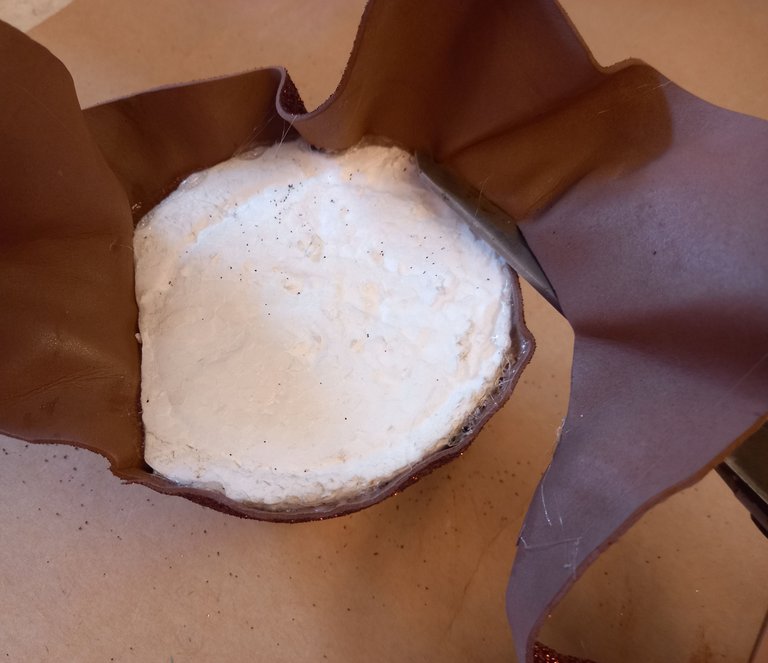
Haremos un pequeño corte vertical en un lado de la media esfera, esto es para poder pegarla del tubo de papel higiénico.
We will make a small vertical cut on one side of the half sphere, this is to be able to glue it to the toilet paper tube.
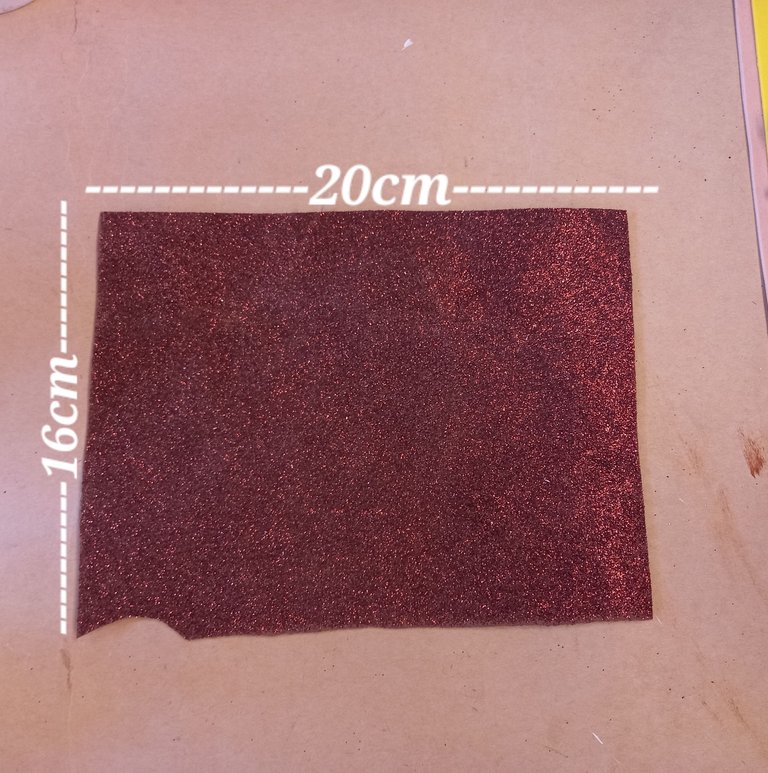
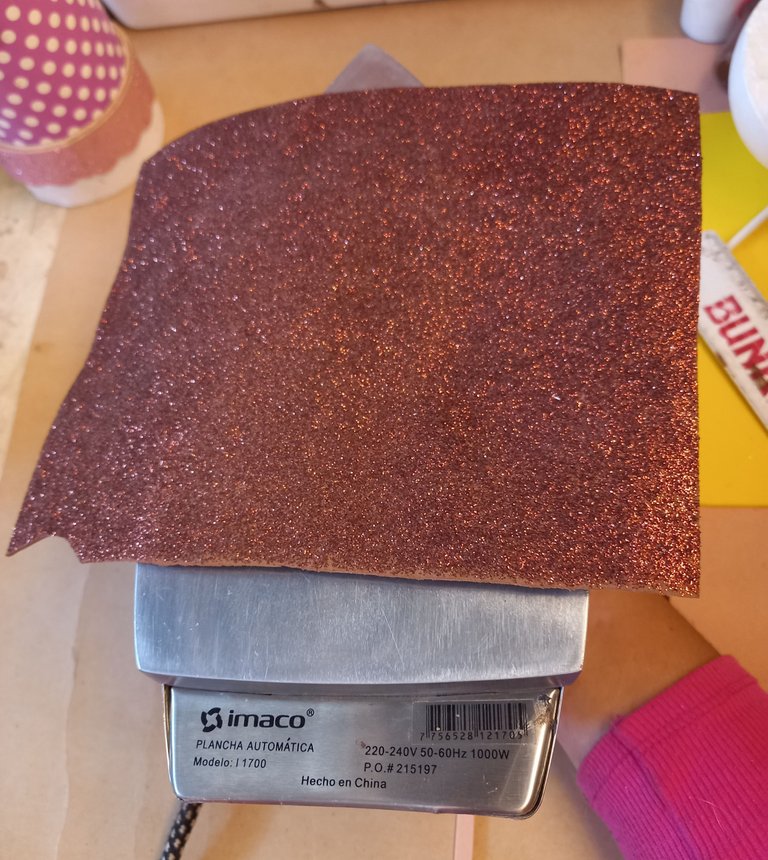
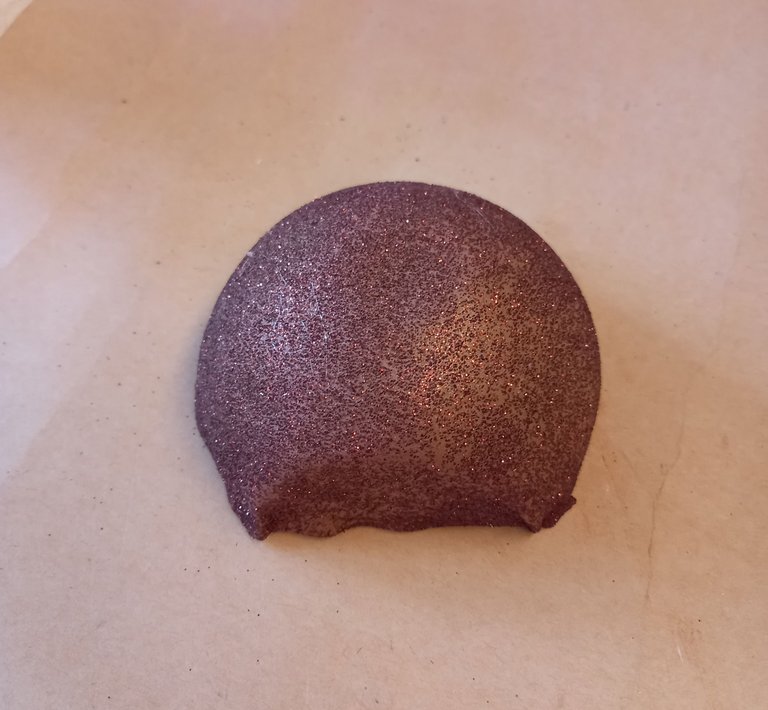
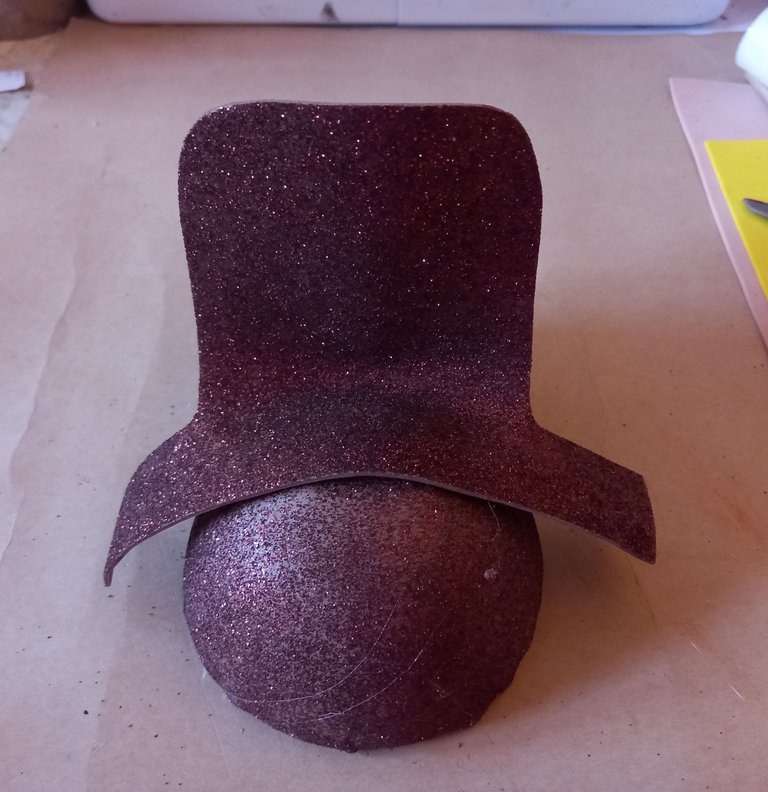
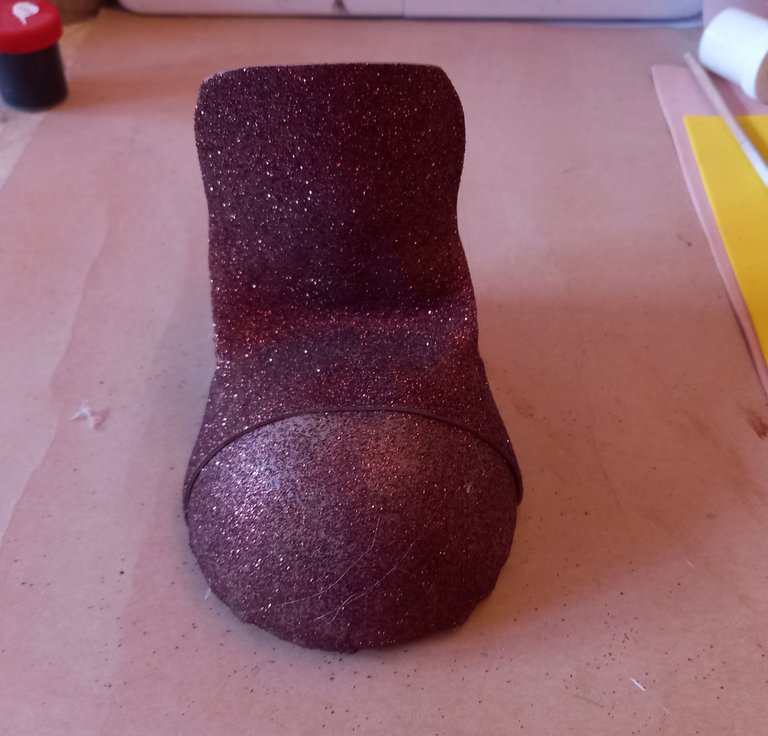
Después cortaremos un rectángulo de foami marrón escarchado de 20×16 cm, no pasamos por la plancha y lo estiramos sobre la media esfera de icopor hasta cubrirlo todo excepto la parte de abajo.
Then we will cut a rectangle of frosted brown foami of 20×16 cm, do not pass through the iron and stretch it over the half sphere of Styrofoam until it covers everything except the bottom.
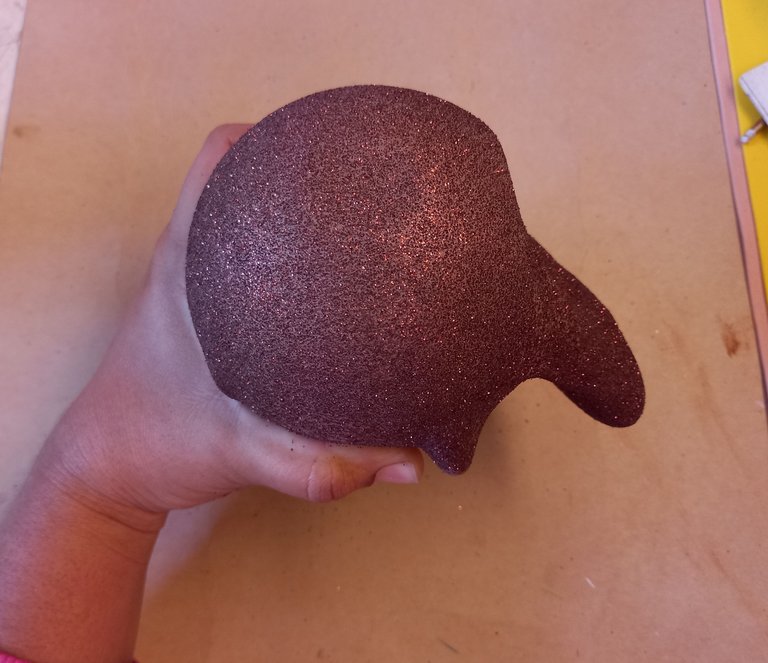
Pegamos el foami por todo el borde de la Esfera y recortamos el excedente.
Glue the foami all around the edge of the Sphere and trim the excess.
Posteriormente unimos la esfera con el tubo de papel higiénico, por la parte del corte recto que hicimos en la esfera.
Then we join the sphere with the toilet paper tube, through the part of the straight cut we made in the sphere.
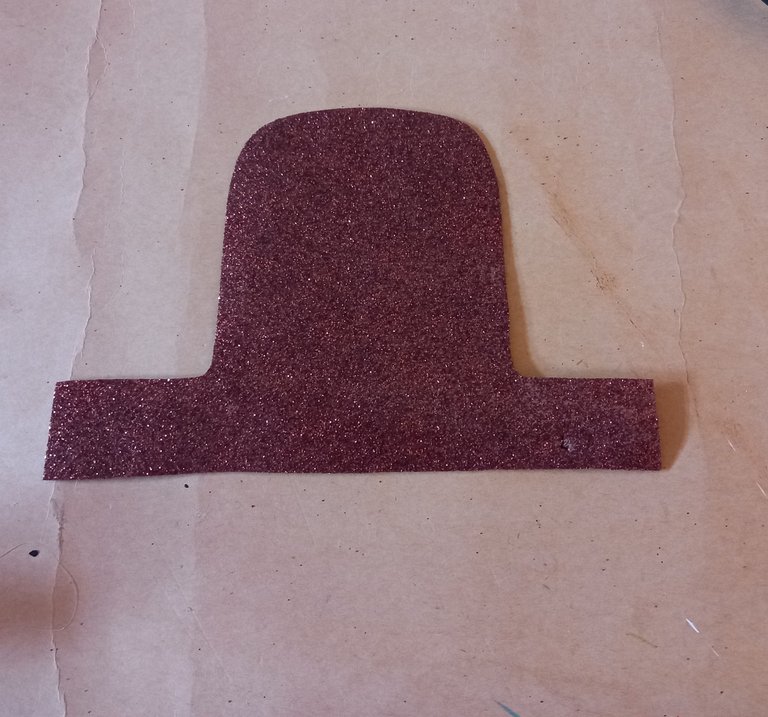
Luego marcamos y cortamos la lengüeta en foami marrón con escarcha.
Then we mark and cut the tongue in brown foami with frosting.
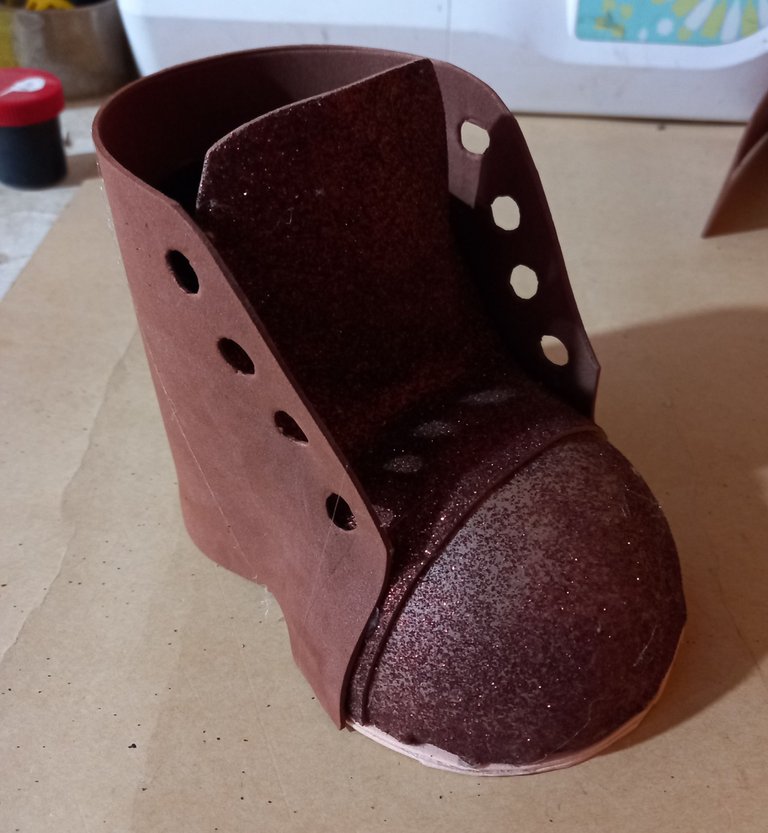
Fijamos la lengüeta un poco menos de la mitad de esfera y a cada lado de la parte superior del tubo de papel higiénico.
We attach the tab a little less than half of the sphere and on each side of the top of the toilet paper tube.
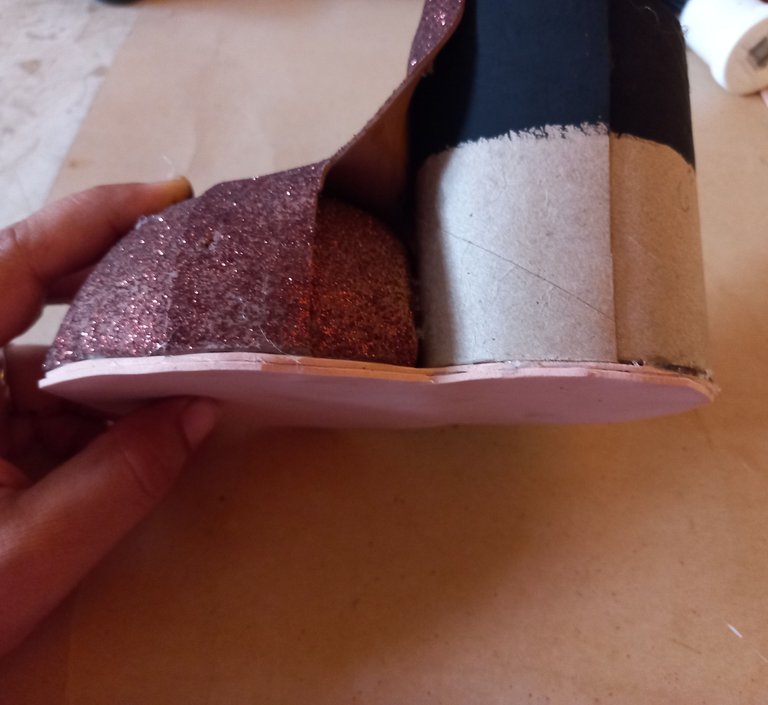
Una vez que hayamos pegado la lengüeta procedemos a montar nuestra pieza completa sobre foami color beige, marcamos siguiendo todo el contorno de la pieza y recortamos para hacer la base o la suela de la bota. Es importante mencionar, que haremos dos capas de esta.
Once we have glued the tongue we proceed to assemble our complete piece on beige foami, we mark following all the contour of the piece and cut to make the base or sole of the boot. It is important to mention that we will make two layers of this.
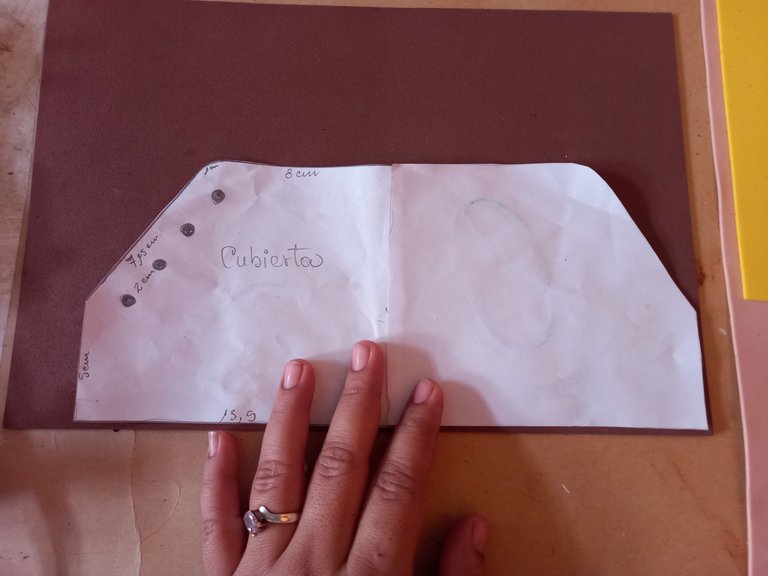
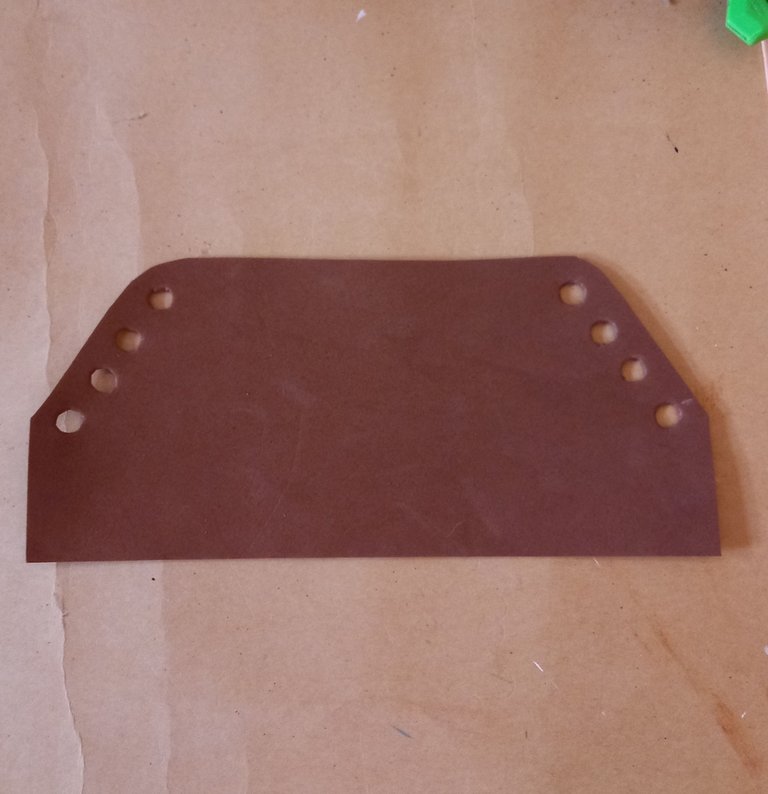
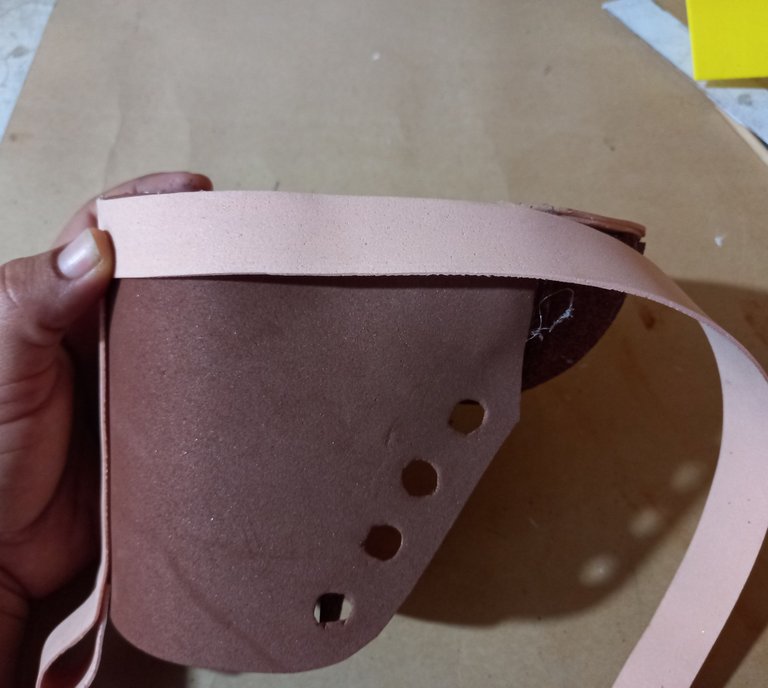
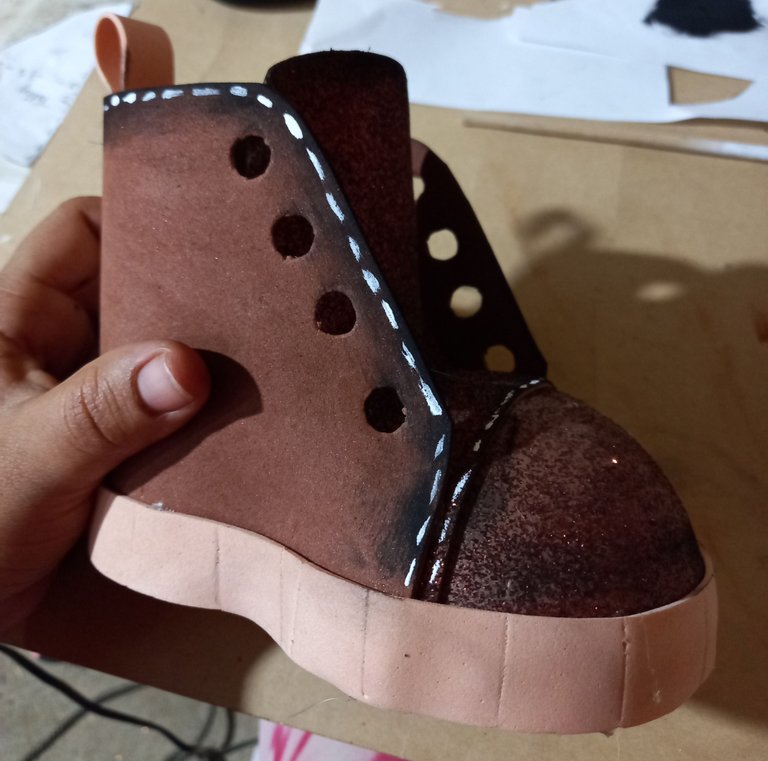
Después marcaremos sobre foami marrón sin escarcha la cubierta de la bota, recortamos y le hacemos los agujeros por donde van las trenzas.
Then we will mark on brown foami without frosting the cover of the boot, cut it out and make the holes for the braids.
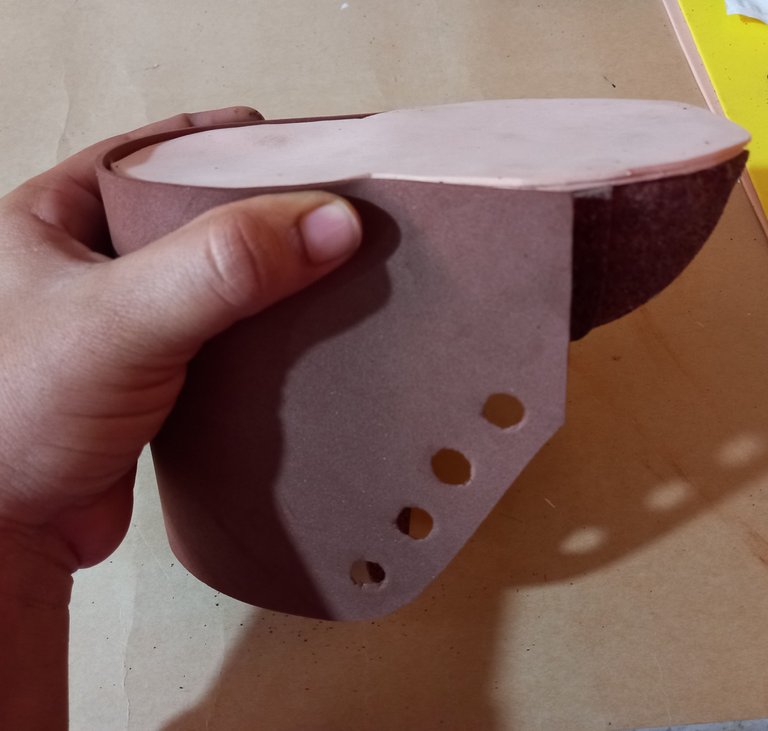
Cuando tengamos nuestra cubierta lista procedemos a pegarla por todo el borde inferior de la bota.
When we have our cover ready, we proceed to glue it all along the lower edge of the boot.
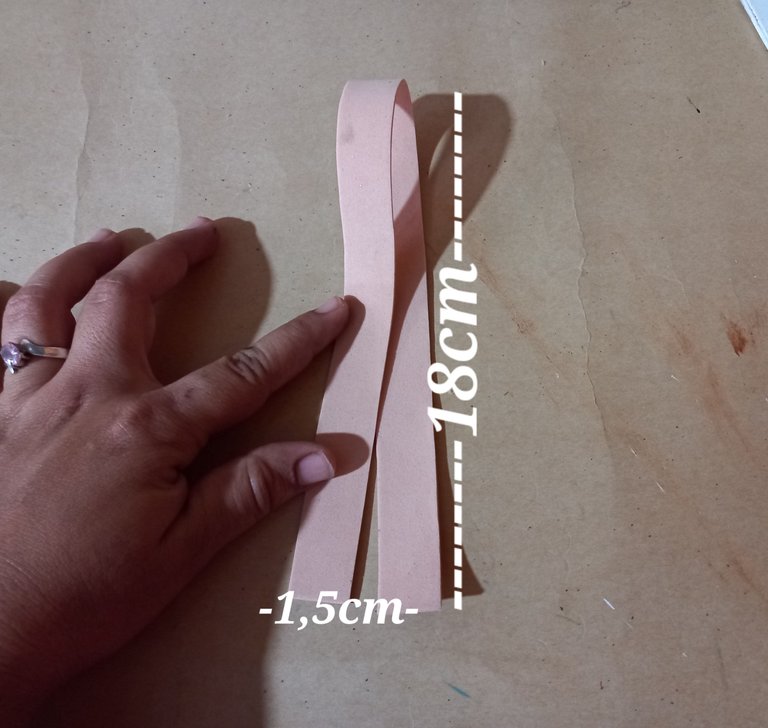
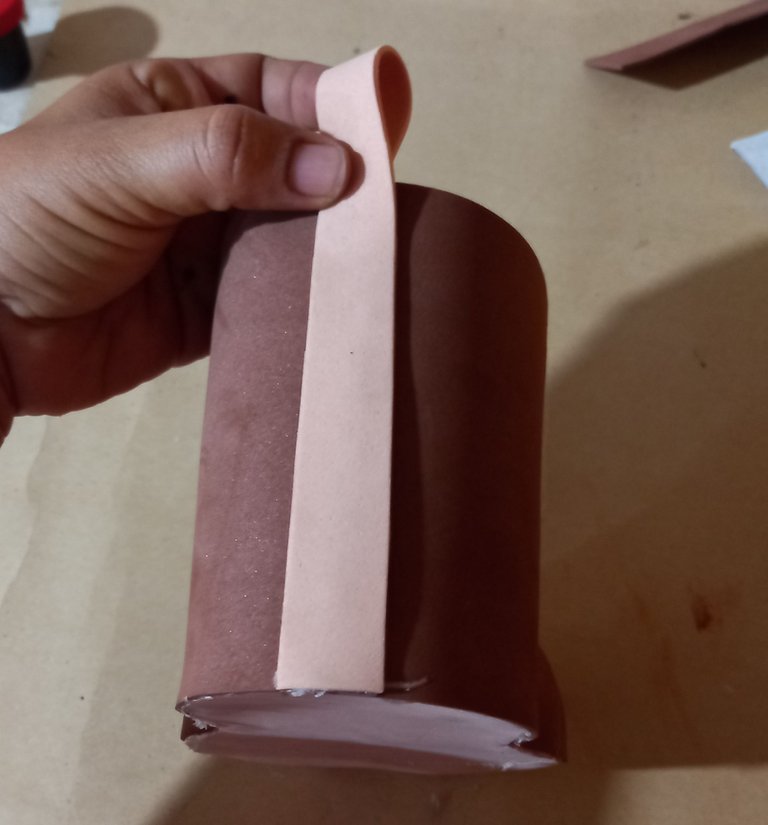
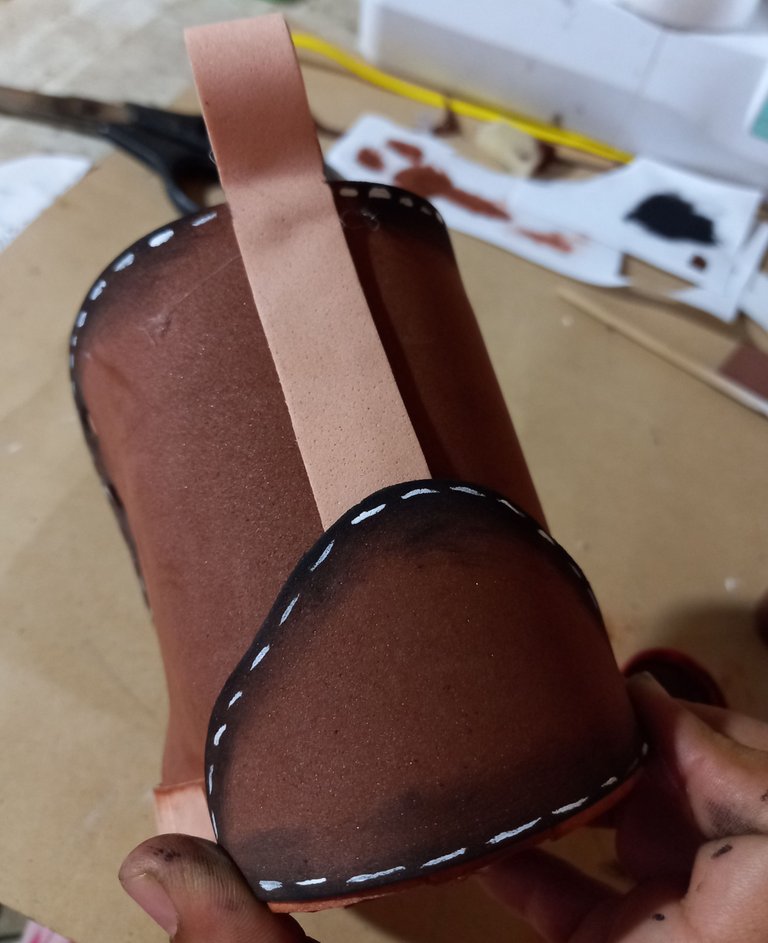
Luego cortamos una tira de foami beige de 18 cm de largo y 1,5 cm de ancho, para pegarla en la parte de atrás de la bota con una orejita arriba.
Then we cut a strip of beige foami, 18 cm long and 1.5 cm wide, to glue on the back of the boot with a little ear on top.
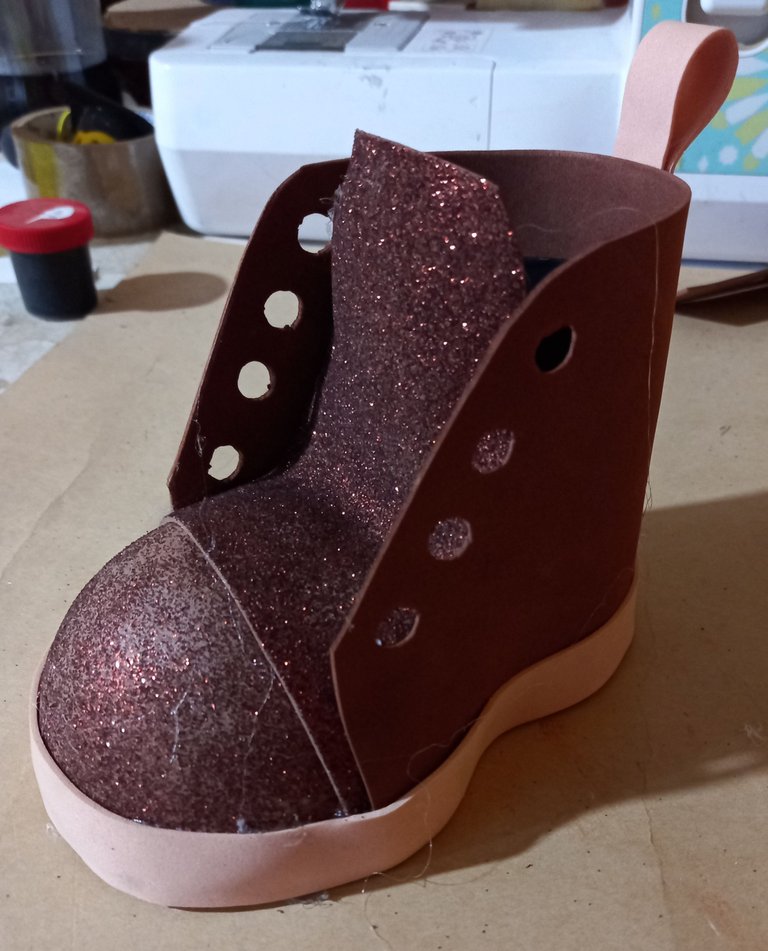
Seguidamente recortamos otra tira de 44 cm de largo y 2 cm de ancho, la cual pegaremos por todo el borde de la parte inferior de la bota.
Then we cut another strip 44 cm long and 2 cm wide, which we will glue all around the edge of the lower part of the boot.

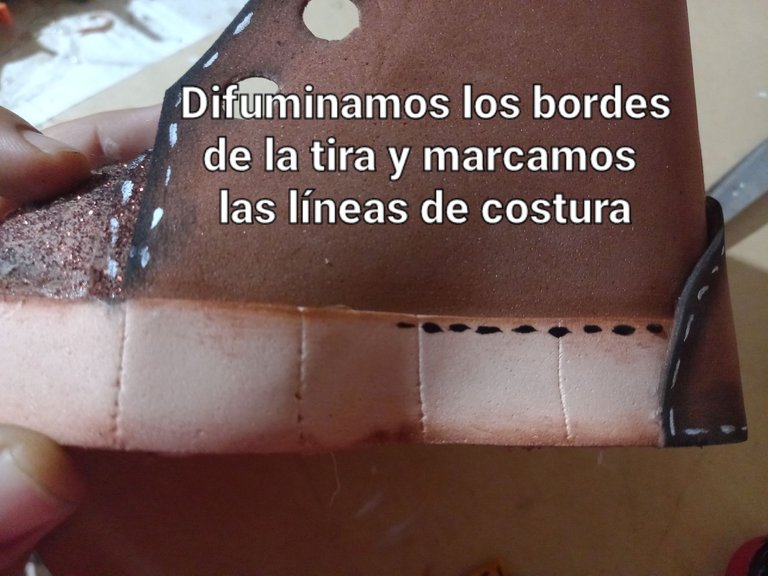
Luego difuminamos todos los bordes superiores de la cubierta de la bota y haremos pequeñas líneas blancas para simular una costura. Este mismo procedimiento lo vamos a aplicar en el borde inferior de la lengüeta.
Then we blur all the upper edges of the boot cover and make small white lines to simulate a seam. We will apply the same procedure to the lower edge of the tongue.
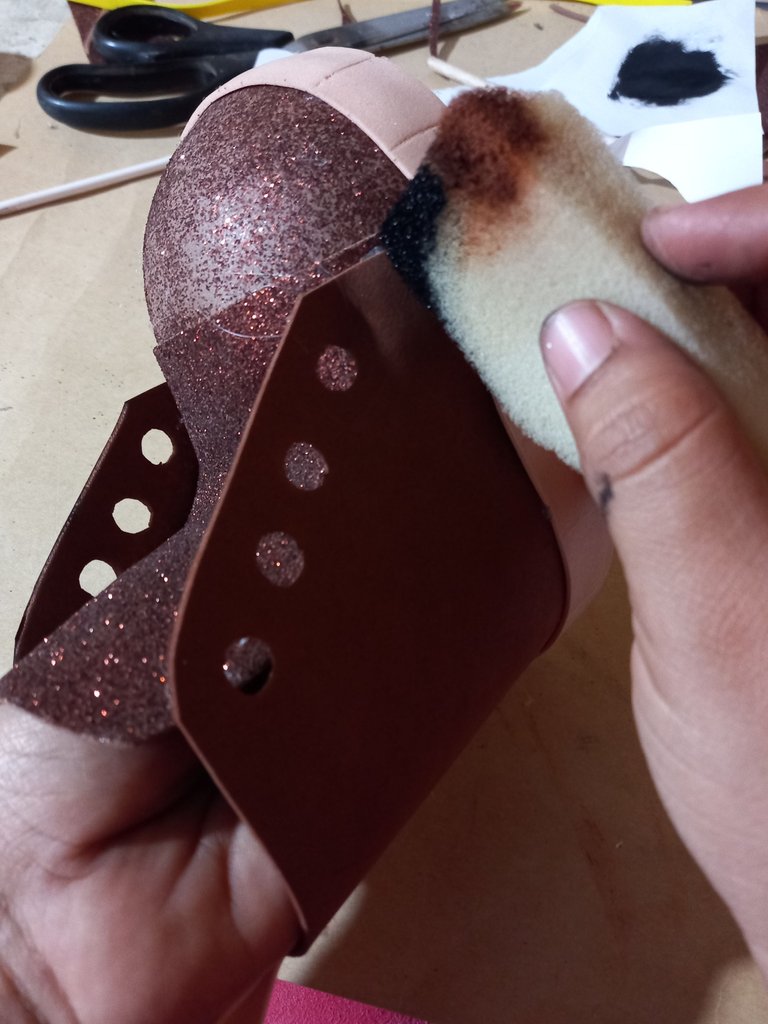
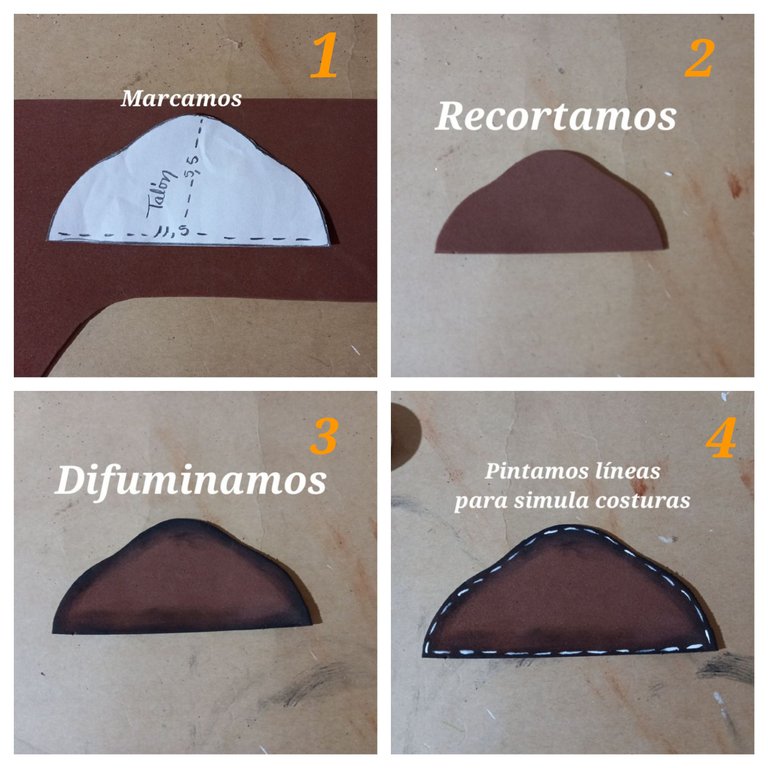
Marcamos el patrón del talón en foami marrón sin escarcha, recortamos, difuminamos con pintura negra todos sus bordes y hacemos pequeñas líneas blancas, simulando una costura.
We mark the pattern of the heel in brown foami without frosting, cut it out, blur with black paint all its edges and make small white lines, simulating a seam.
Cuando tengamos lista nuestra pieza del talón procedemos a pegarla en la parte de atrás de la bota.
When we have our heel piece ready, we proceed to glue it to the back of the boot.
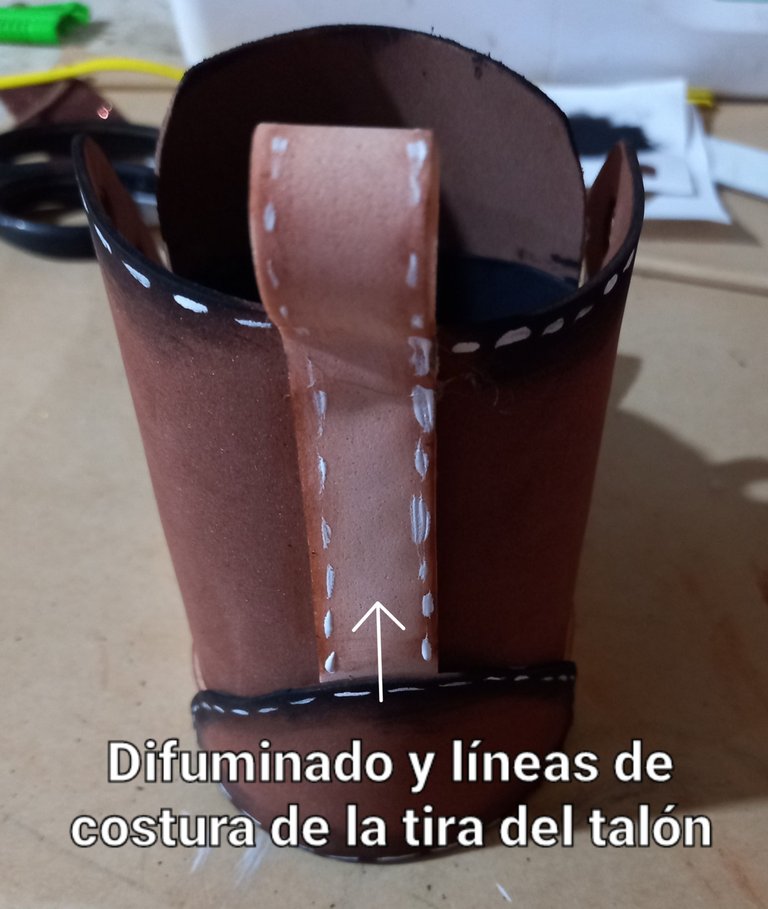
Difuminamos con pintura marrón los bordes inferiores y superiores de la tira que rodea toda la bota Y la tira que está en la parte de atrás del talón, además agregaremos pequeñas líneas para simular la costura.
We blur with brown paint the lower and upper edges of the strip that surrounds the entire boot AND the strip at the back of the heel, and add small lines to simulate the stitching.
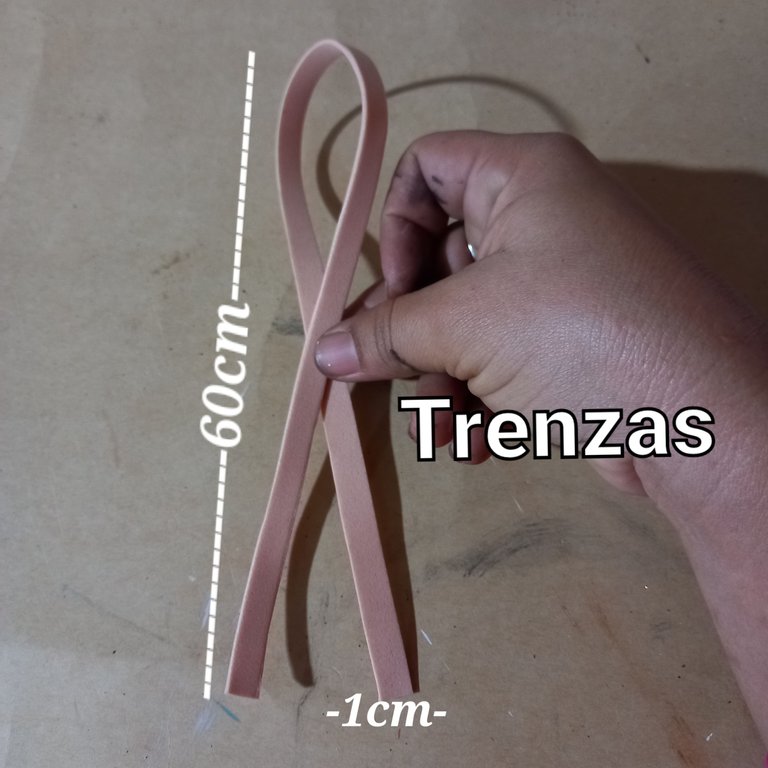
Cortamos una tira de 1cm de ancho y 60cm de largo para hacer la trenza de la bota.
We cut a strip of 1cm wide and 60cm long to make the braid of the boot.
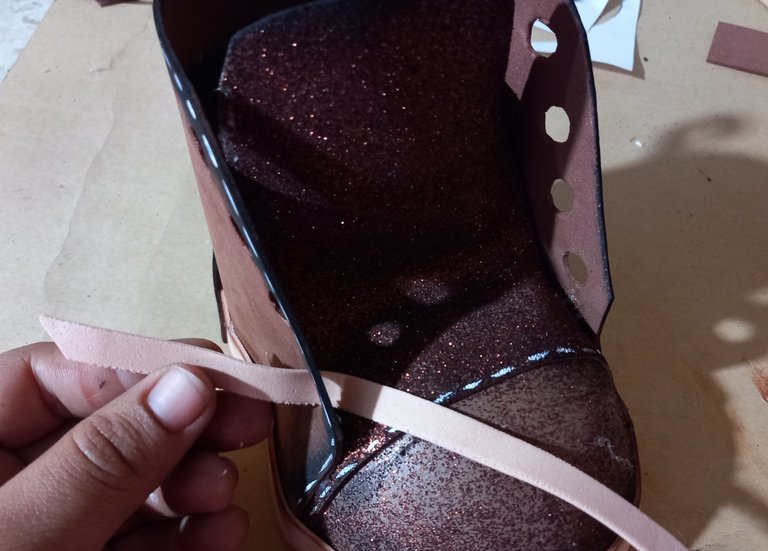
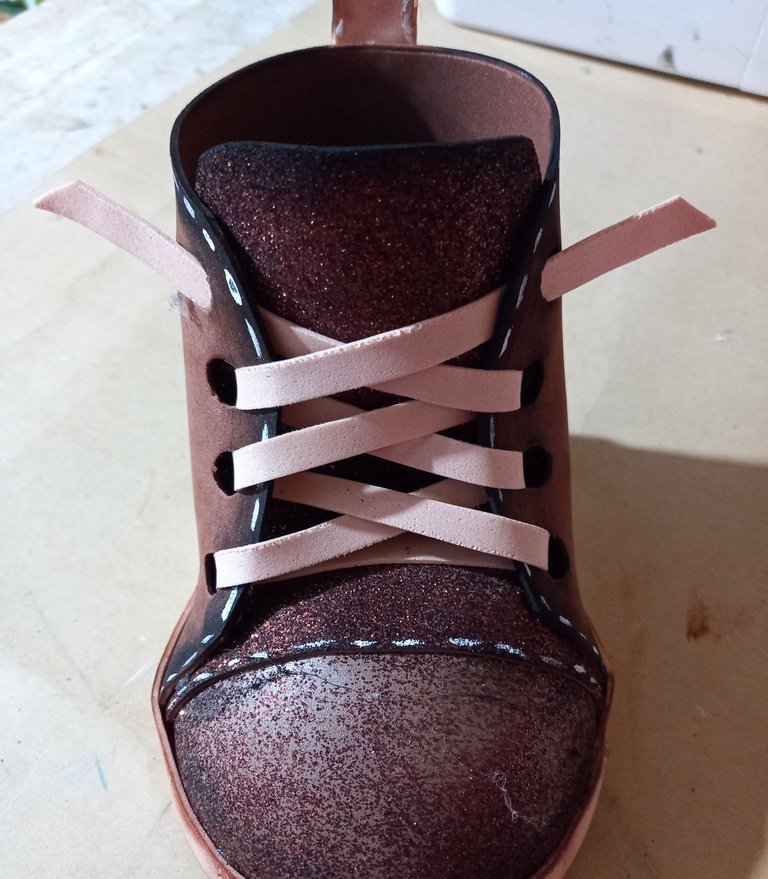
Le colocamos la trenza a la bota.
We put the braid on the boot.
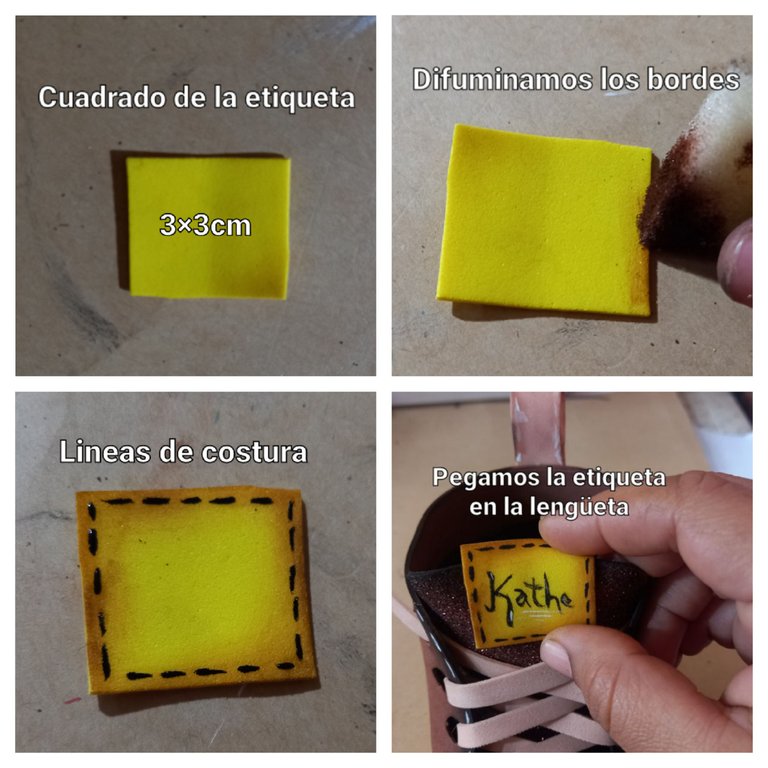
Finalizamos haciendo el último detalle con foami amarillo, se trata de una pequeña etiqueta cuadrada de 3×3 cm, a la cual vamos a difuminar sus bordes, hacerle pequeñas líneas de costura y un escrito en el centro, para pegarla en la parte superior de la lengüeta.
We finish making the last detail with yellow foami, it is a small square label of 3×3 cm, to which we will blur the edges, make small lines of stitching and a writing in the center, to paste it on top of the tab.
NOTA: Puedes hacer el difuminado y las líneas de costura a todas las piezas antes de pegarla, como lo hice con el paso de la pieza del talón.
NOTE: You can do the blurring and stitching lines to all the pieces before gluing, as I did with the heel piece step.
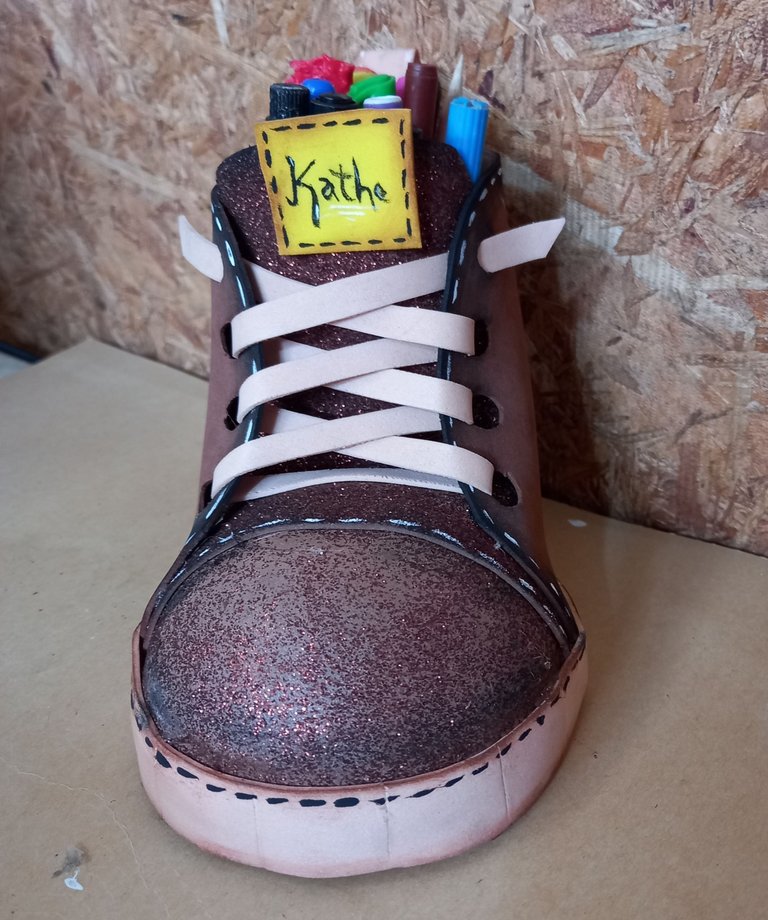
¡Ahora veamos el resultado amigos!
Now let's see the result, friends!

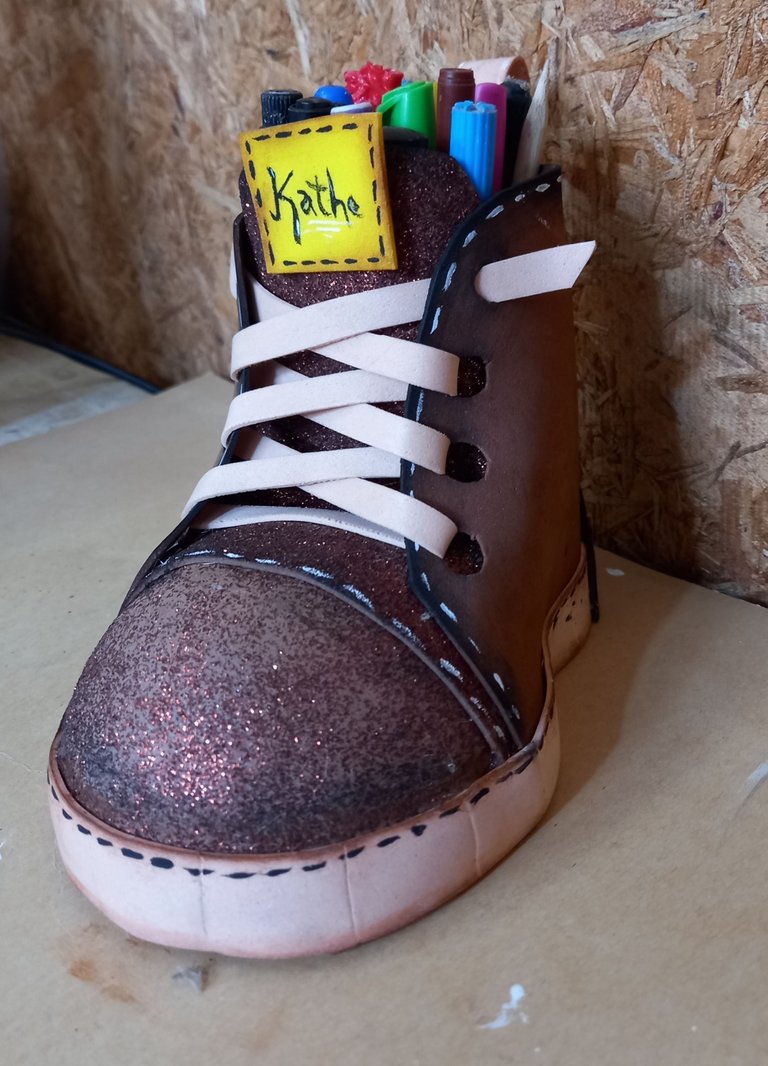
Espero que éste tutorial haya sido de gran utilidad para ti querido amigo lector y lo pongas en práctica. Será hasta otra oportunidad. BENDICIONES 🙏🏻 😊.
I hope this tutorial has been very useful for you dear reader friend and you put it into practice. It will be until another opportunity. BLESSINGS 🙏🏻 😊.
Waooo amiga te felicito quedo realmente hermoso has hecho un gran trabajo reciclando, y mira que bello quedo, me enamore 😍
Hola mi linda amiga @yolimarag, gracias por tu lindo comentario, que bueno saber que éste material ha sido de tu agrado. Que tengas un excelente día amiga 😊
Este trabajo está hermoso.
Muy detayado el paso a paso.
Se lo mostré a mi hija y le entusiasmo la idea para realizarlo.
Gracias por compartir
Gracias amiga, que bueno, me alegra mucho leer comentarios como el tuyo, me animan a seguir dedicando tiempo y amor a cada proyecto que hago, saludos y bendiciones 😊 🙏🏻
Esta muy bella y creativo tu porta lápices, amiga te felicito por tu hermoso trabajo. Saludos
Hola mi linda amiga @janettbrito76, gracias por comentar. Saludos 😊
Muestra de tu gran talento querida, mucho éxito con tu publicación.
Gracias por tu comentario y por enviarme tus buenos deseos amiga @katiuskamata. Saludos 😊
Thank you for sharing this amazing post on HIVE!
Your content got selected by our fellow curator @rezoanulvibes & you just received a little thank you via an upvote from our non-profit curation initiative!
You will be featured in one of our recurring curation compilations and on our pinterest boards! Both are aiming to offer you a stage to widen your audience within and outside of the DIY scene of hive.
Join the official DIYHub community on HIVE and show us more of your amazing work and feel free to connect with us and other DIYers via our discord server: https://discord.gg/mY5uCfQ !
If you want to support our goal to motivate other DIY/art/music/homesteading/... creators just delegate to us and earn 100% of your curation rewards!
Stay creative & hive on!
Feliz inicio de semana mis queridos amigos, gracia a ustedes por su valioso apoyo. Dios los bendiga mucho 🙏🏻 💕
Hola muñeca, que precioso este portalápices.. Un acabado espectacular ✨💕
Hola 👋. Gracias amiga @alizmarpaola, gracias por tu bonito comentario. Saludos 😊