Hola queridos amigos de Hive espero que estén bien. Hoy vengo con un portalápiz de colores que hice con material útil, espero que les guste. Te mostraré mi paso a paso.
Hello dear friends of Hive I hope you are well. Today I come with a colored pencil holder that I made with useful material, I hope you like it. I will show you my step by step.
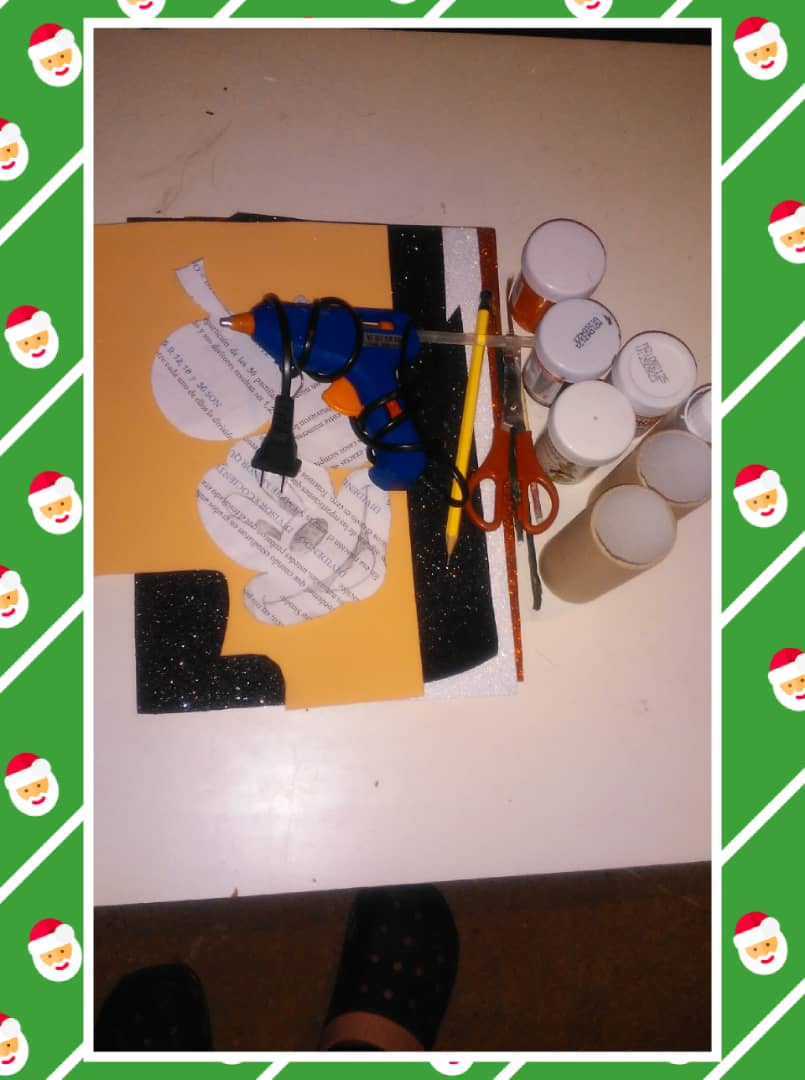
Materiales
- Pintura roja, blanca,negra y verde
- Pincel
- Lápiz y tijera
- Tubos de cartón
- Pistola de silicon caliente
- Foami brillante negro,rojo, blanco y color piel
- Patrón de la cara de mickey mouse
Materials
- Red, white, black and green paint.
- Brush
- Pencil and scissors
- Cardboard tubes
- Hot glue gun
- Black, red, white and skin-colored glossy foam.
- Mickey Mouse face pattern
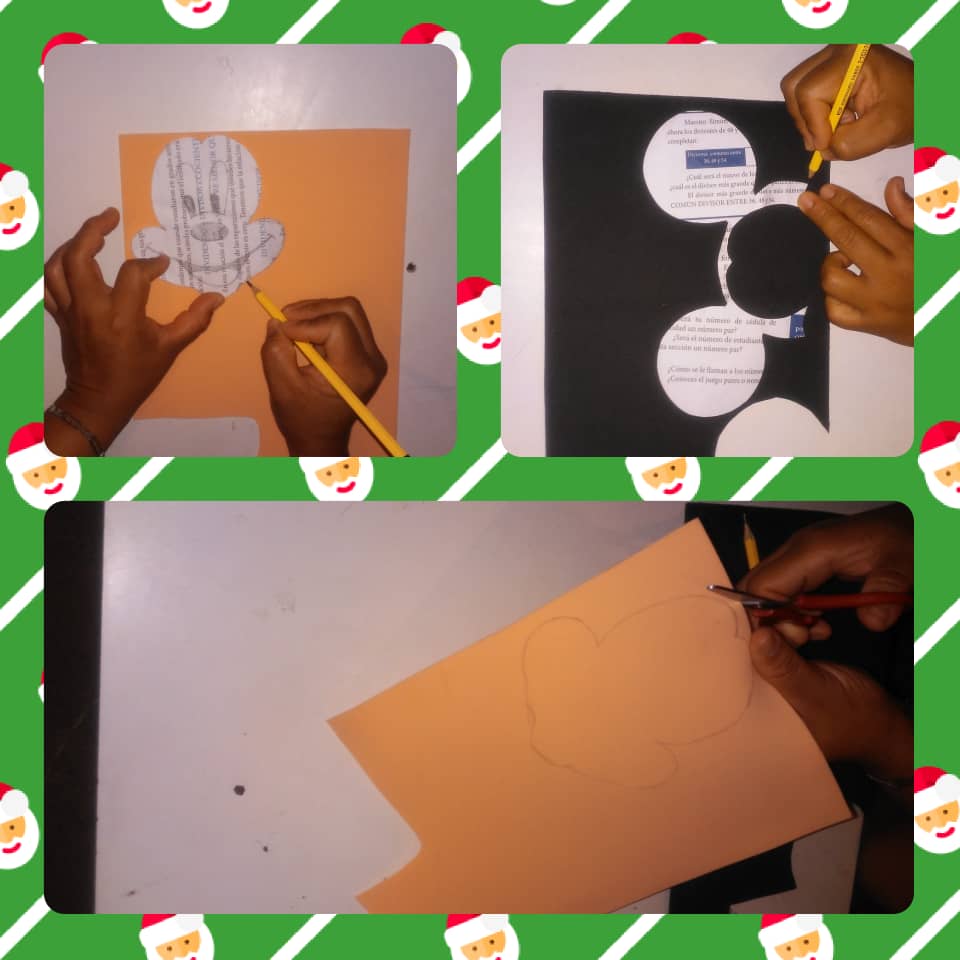
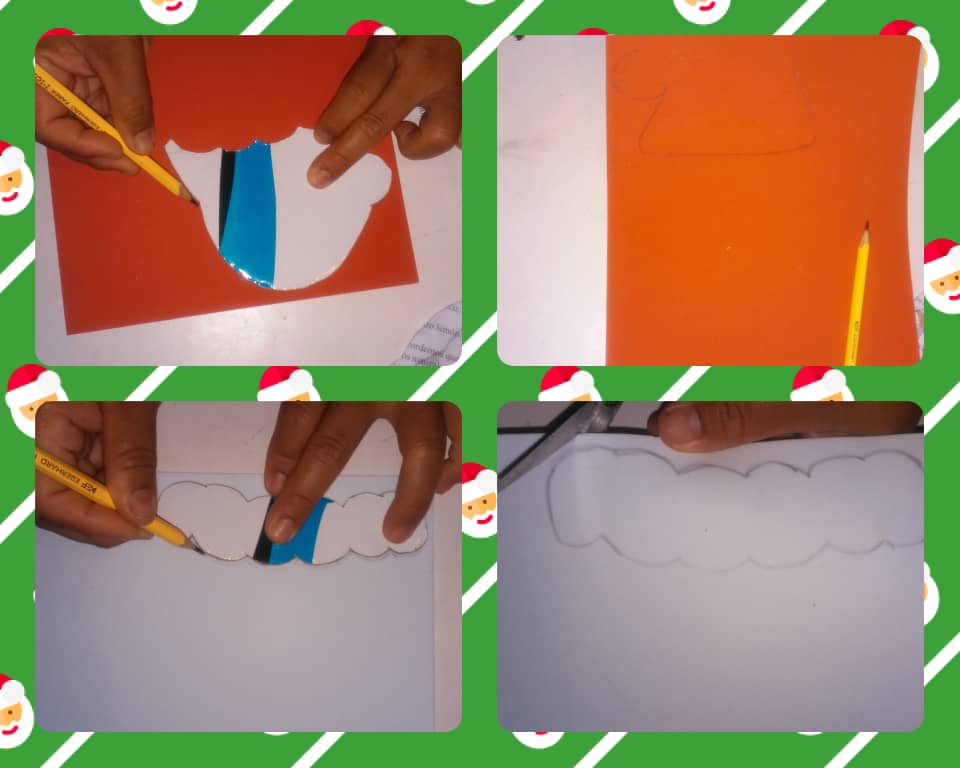
Paso 1: Marcar y cortar las piezas.
Step 1: Mark and cut the pieces.
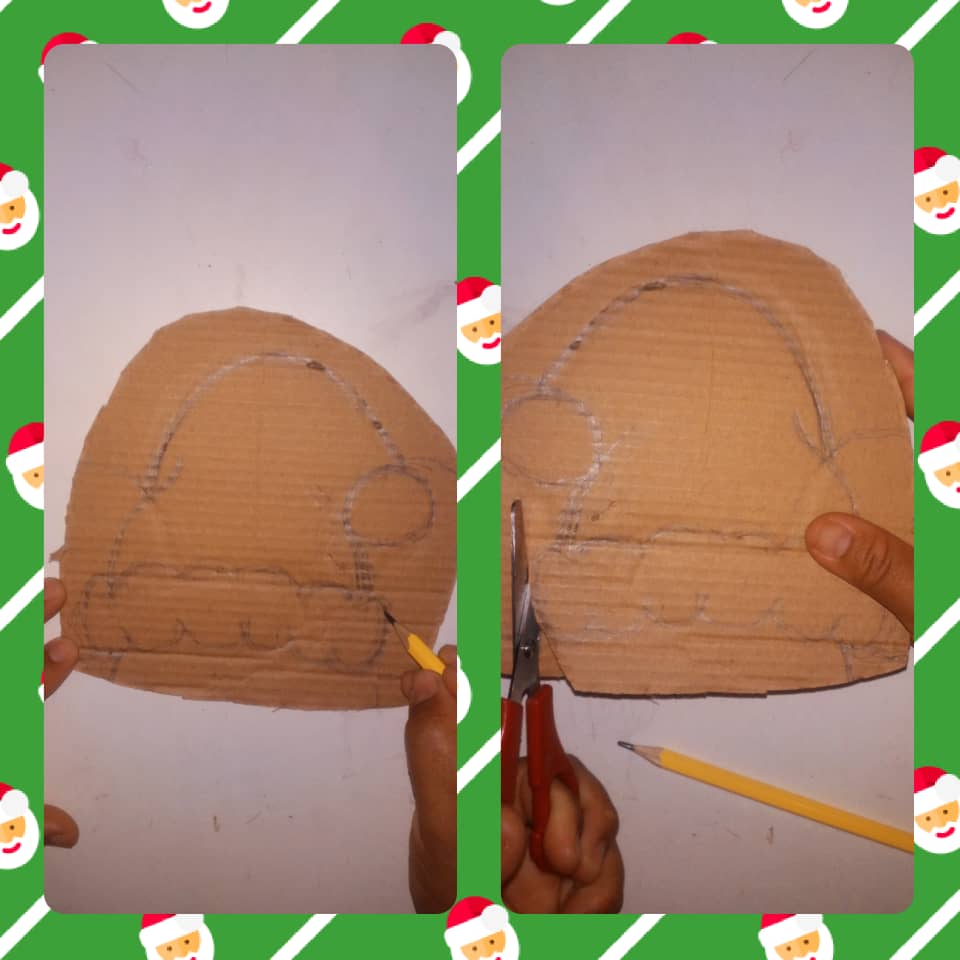
Paso 2: En un cartón dibuja el patrón del gorro y corta.
Step 2: On a cardboard, draw the pattern of the hat and cut out.
Paso 3: Marcar las partes del gorro con el patrón en el foami y cortar.
Step 3: Mark the parts of the hat with the pattern on the foam and cut.
Paso 4: Con las piezas ya terminadas procede a pegarlas y a dibujar los ojos la nariz y boca.
Step 4: With the pieces already finished, proceed to glue them and draw the eyes, nose and mouth.
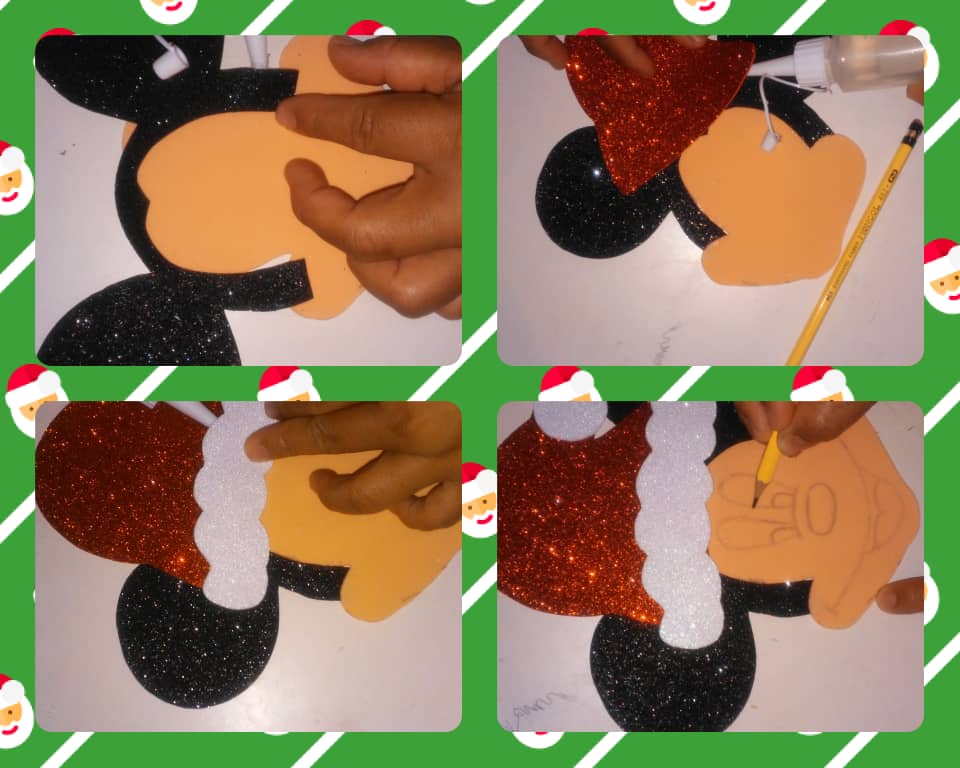
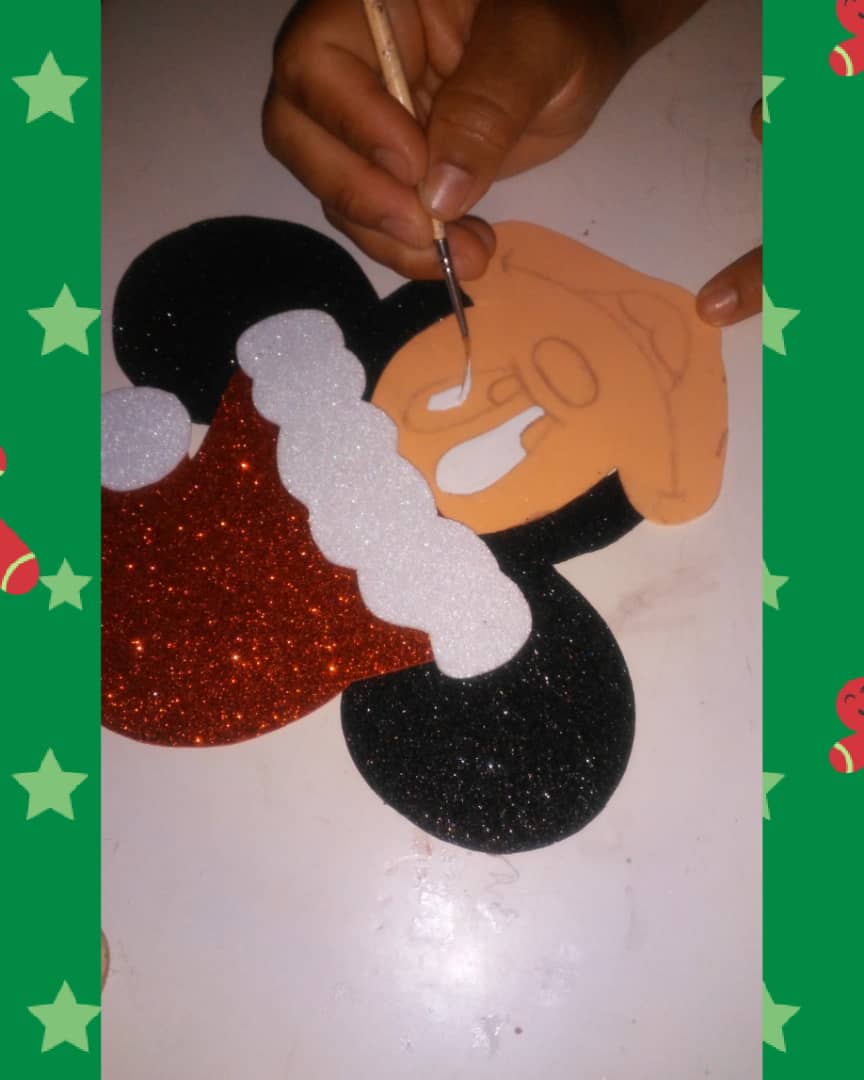
Paso 5: Ya terminada la cara pintar los ojos la nariz y boca.
Step 5: Once the face is finished, paint the eyes, nose and mouth.
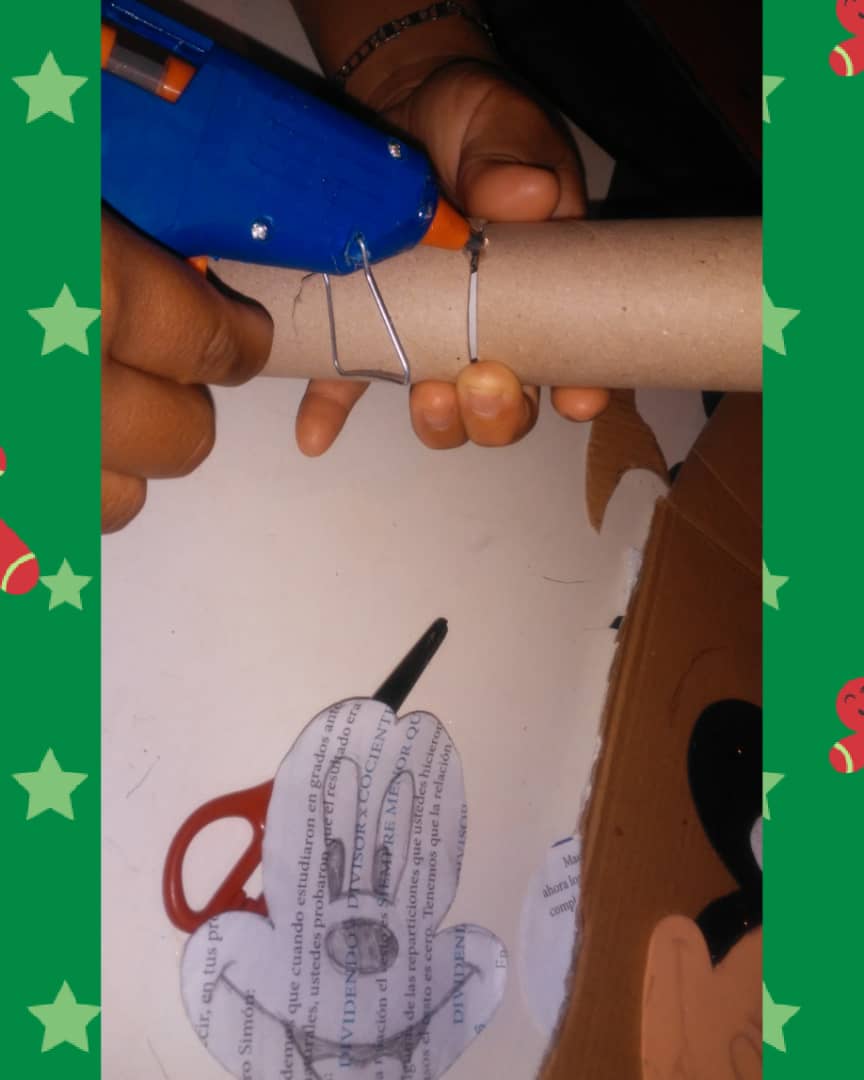
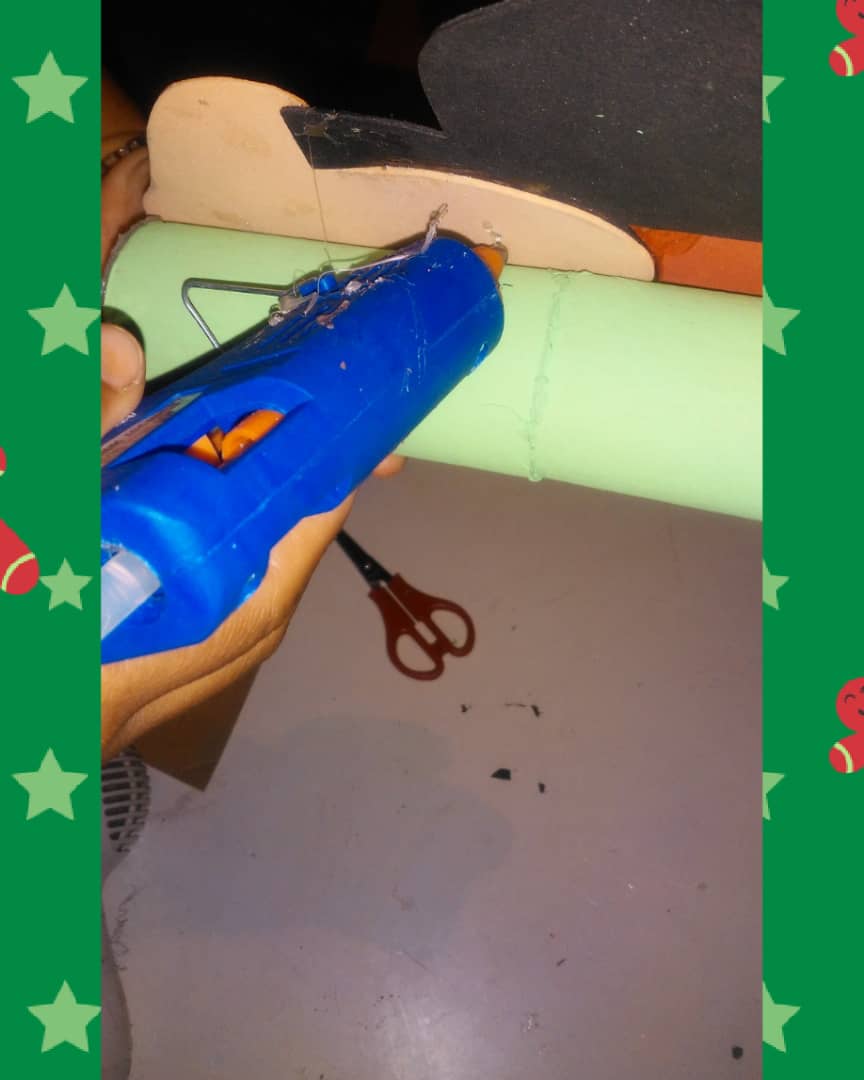
Paso 6: Pegar los tubos de cartón.
Step 6: Glue the cardboard tubes.
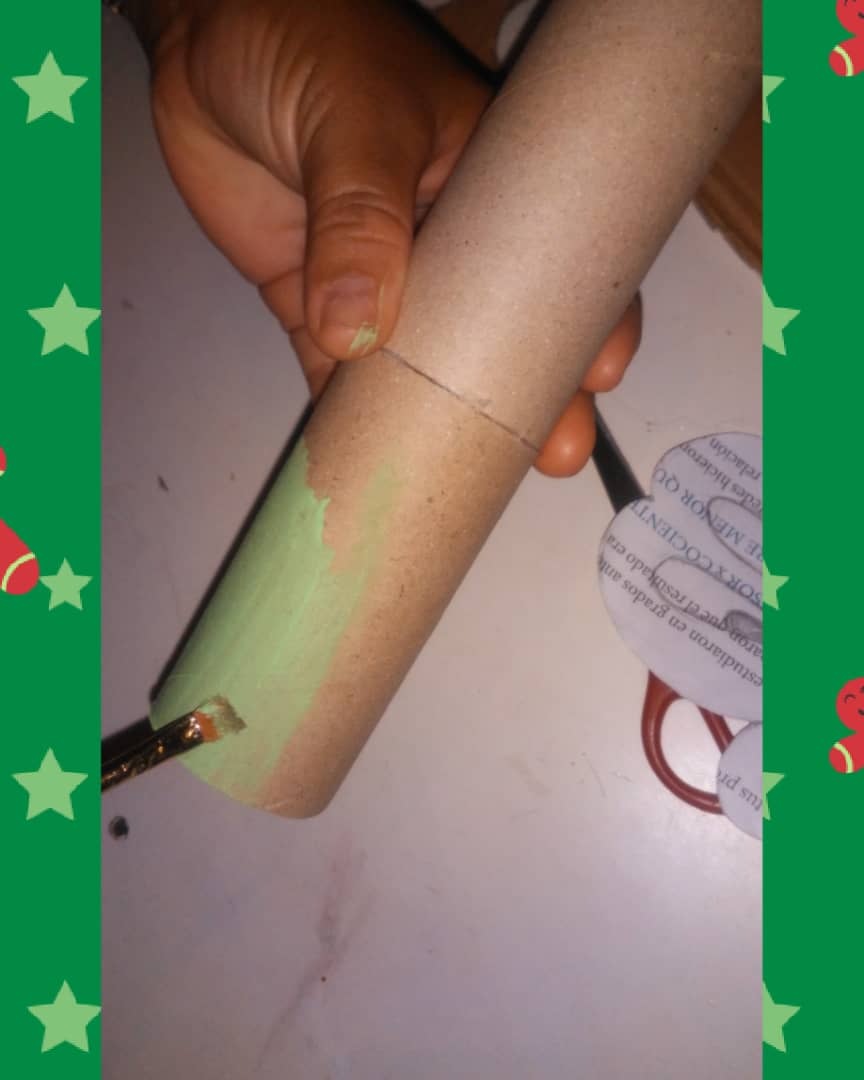
Paso 7: Pintar los tubos.
Step 7: Paint the tubes.
Paso 8: Ya pintado pegar la cara del mickey mouse al tubo.
Step 8: Already painted, glue the face of the mickey mouse to the tube.
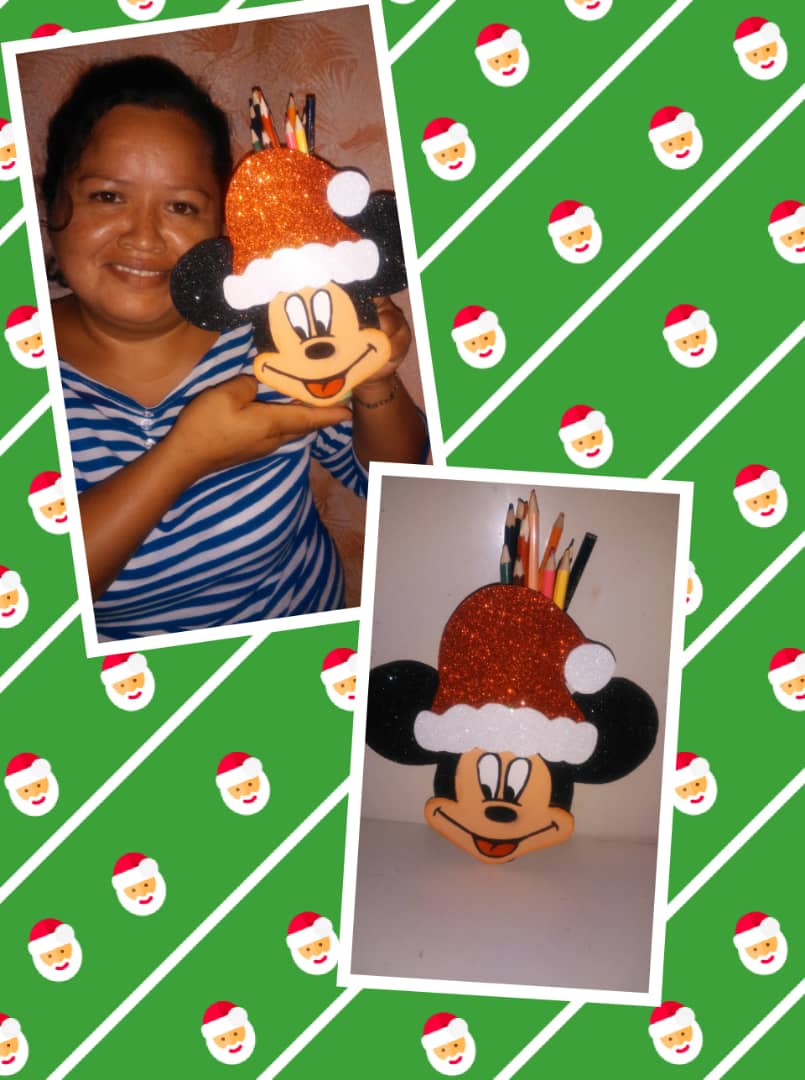
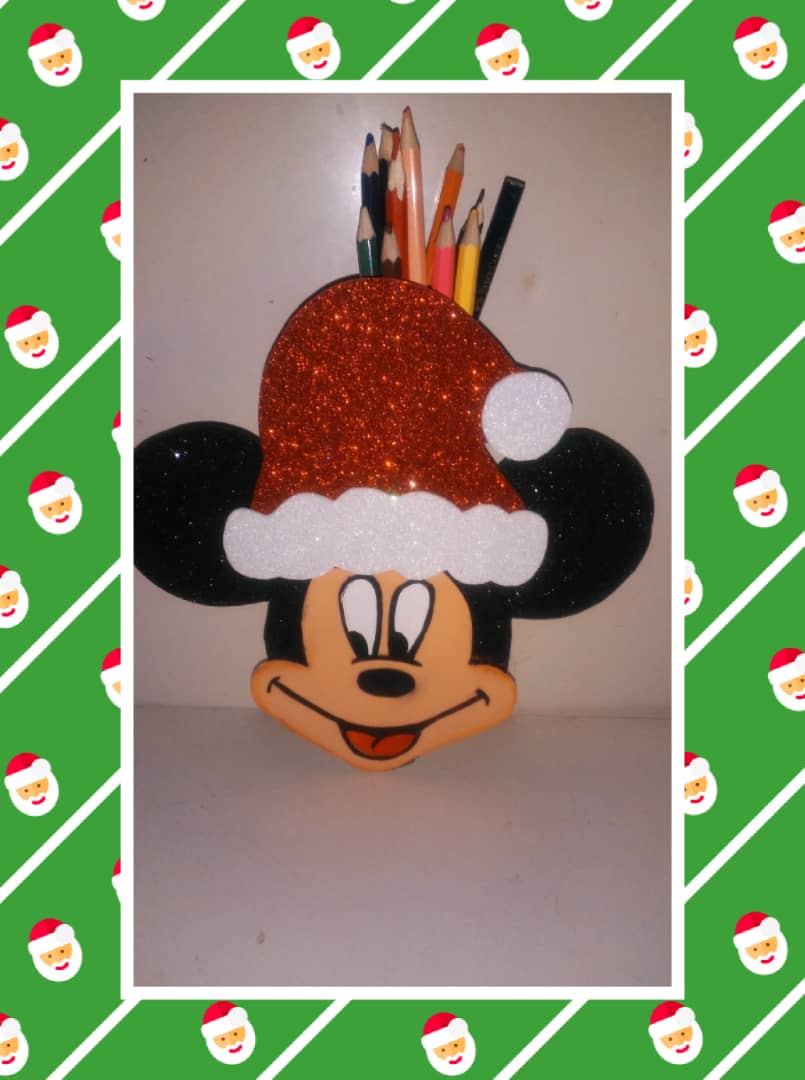
Paso 9: Ya terminado se vera así de lindo.
Step 9: When done, it will look this cute.
Espero les guste sera hasta una nueva oportunidad.
Gracias por visitar mi blog.
I hope you like it, until a new opportunity.
Saludos, ha sido un trabajo bastante bonito y útil. Que tenga un excelente día.
gracias por tu apoyo..
Congratulations @katiuscarub! You have completed the following achievement on the Hive blockchain and have been rewarded with new badge(s):
Your next target is to reach 50 upvotes.
You can view your badges on your board and compare yourself to others in the Ranking
If you no longer want to receive notifications, reply to this comment with the word
STOPTo support your work, I also upvoted your post!
Check out the last post from @hivebuzz: