(ENG)
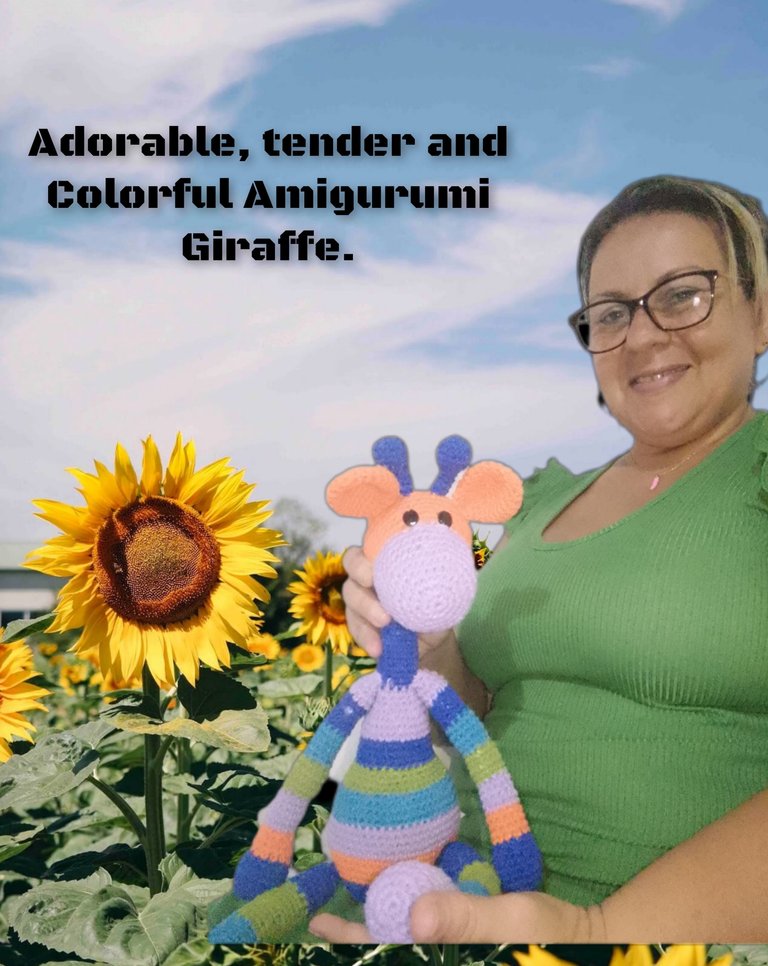
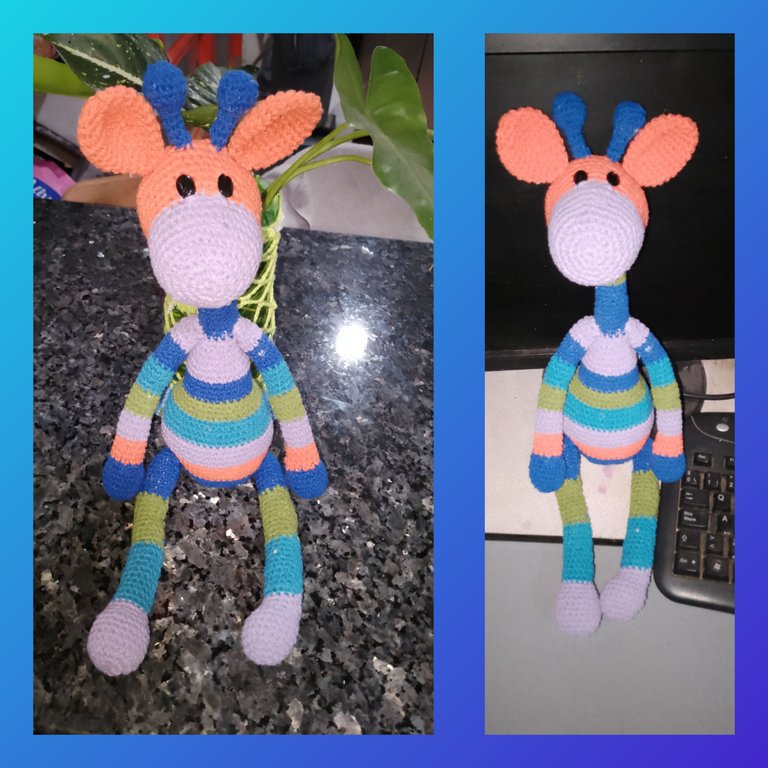
Hello everyone, may this be a blessed day, full of many good things, may you enjoy good spirits and positive energy, may it allow you to give your best, I am pleased to be once again for @hivediy, on this occasion, very happy to show, a little more of what I learned in the amigurumi technique. I always leave a space to practice and learn, on many occasions, encouraged by some free patterns from Facebook. Today I made a happy and very colorful Giraffe, I really enjoyed this process, I hope it has the same effect on you. So, the invitation is to follow me.
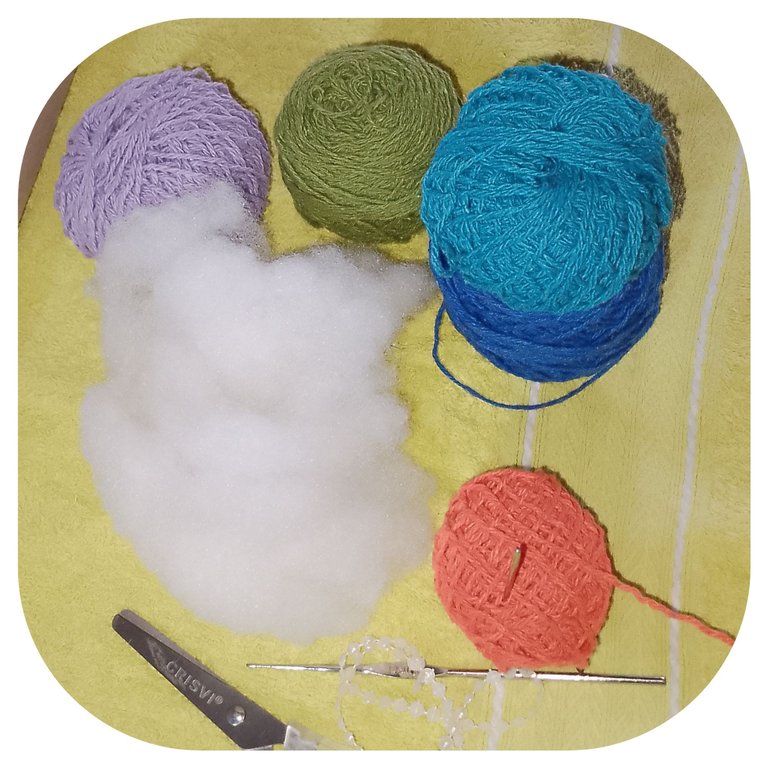
Materials.
. Wick threads, colors (blue: light and dark, orange, apple green, purple)
. Knitting needle.
. wool needle
. Stuffed.
. Plastic eyes.
. Scissors.
STEPS:
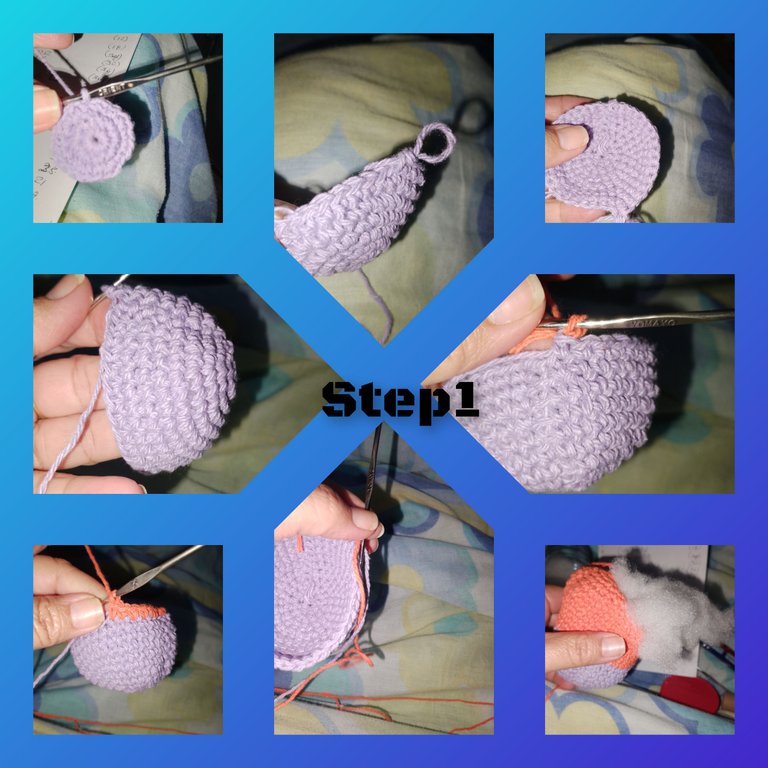
1.) Start, knitting the bear, of the giraffe, so I will knit, a magic ring and inside it, six half stitches, I close the ring and in the next one I will do, six increases, for 12 stitches, this time I will use the purple thread, and I continue the knitting, and I will increase the single crochets before the increase, that is, for the next one, for round four there will be two single crochets before the increase, for the fifth, there will be three single crochets, for the sixth four, and for round seven, four single crochets, reaching a total of 36 single crochets, the next three rounds will be 36 stitches, before finishing round n10, I will make the color change, now I will knit with the thread Orange. Round 11/13 consists of 36 half points. For round 14, after five half stitches, I will knit an increase, for the next one, it will be after six half stitches. For 48 half stitches. I will knit two rounds of 48 half stitches and continue, in ascending ways to make the decreases, before After reaching six decreases, I place the filling as tightly as possible and close.
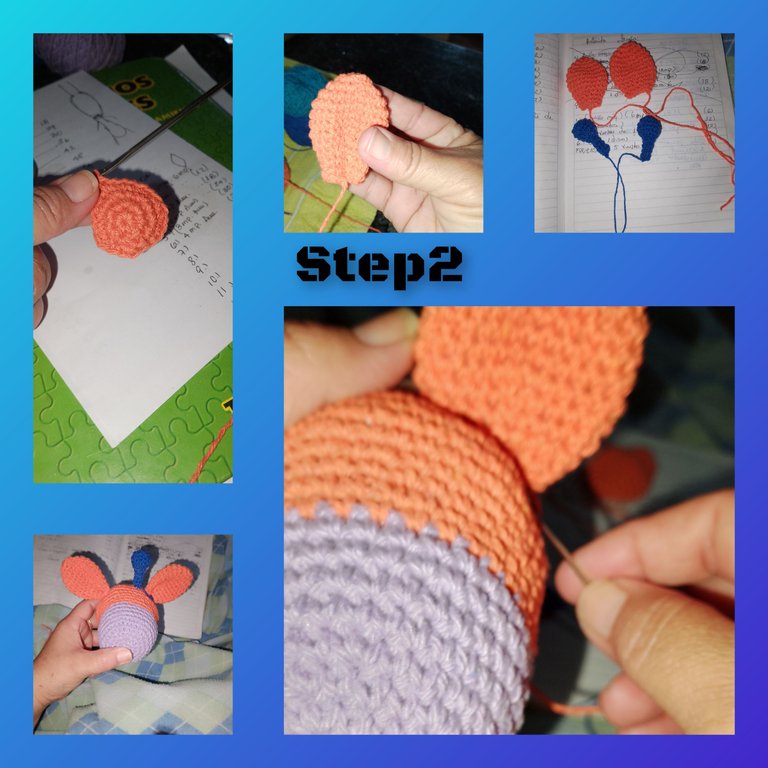
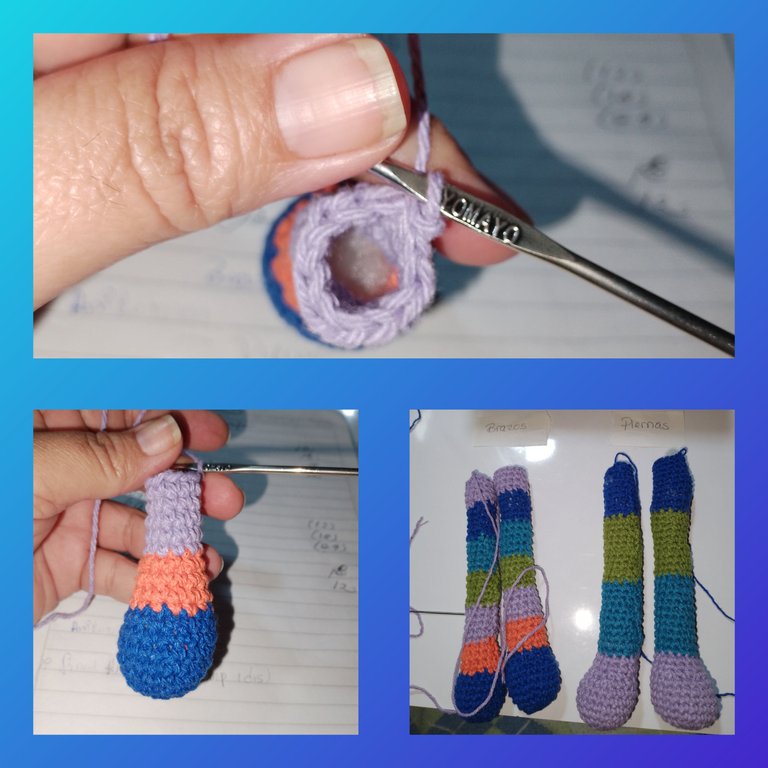
2.) I continue, knitting the head pieces and now I will knit the little ears and the little pieces. In a magic ring, I will knit six half stitches, the next six increases, then I will knit two rows, making an increase after one half stitch and the next two half stitches, in this row I have 24 half stitches, and I knit three rows of 24 half stitches. points, and for the following ones, start the decreases. I repeat for the next ear, this piece does not need filling. For the little pieces I will knit six half stitches in a magic ring, then six increases, in this round, I have 12 half stitches and I will knit three rounds of 12 sc, I start the decreases, so in the next round I will have six half stitches left, in At this moment, I place the filling in the first sphere, and continue knitting six rows of six half stitches. This thin tube, which gives the rows when knitting, I must fill them. Ready the pieces, the next thing will be to sew with the wool needle on the head.
3.) For the body of the giraffe, I will start by making a magic ring, and inside the 6(sc), then I will knit six increases, for 12sc), for the next rounds, I will increase the half stitches in numbers and then the increase , in all the routes, after having reached, when it reached the increase of 7mp) right on lap n9, having a total of (54mp), from the nextround, I will go, making color changes, after five consecutive rounds, with the same color and I will knit (54 sc) from round n10 to n38. Having a total of 28 laps. For round n39, I begin to make the decreases, after (7,6,5,4,3,2sc), taking round n45, (12sc). From here, I will knit 15 rows of (12 sc), reaching the height of the giraffe's neck. I must go, knitting and placing the filling. 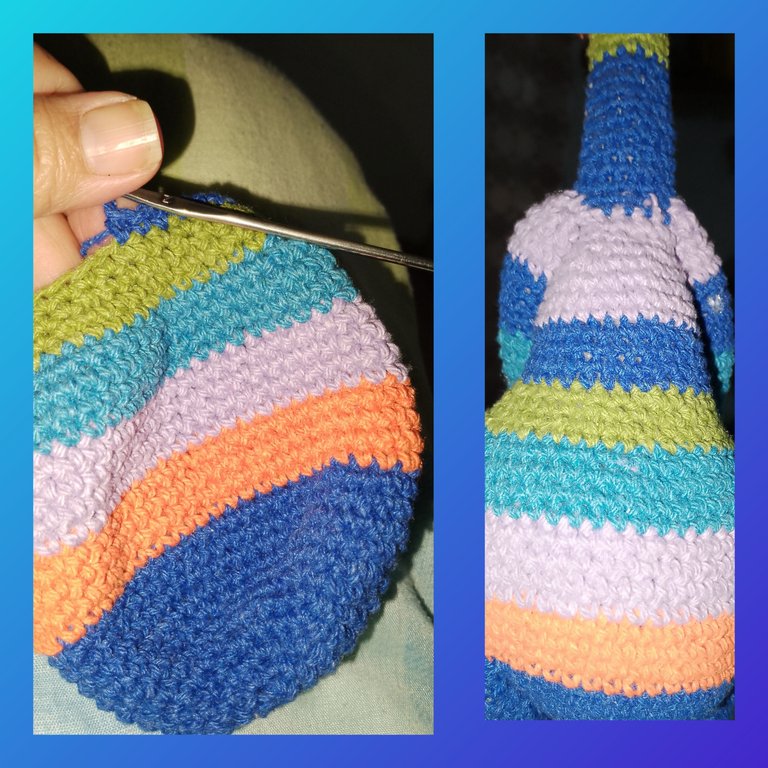 4.) For the arms, I start in a ring; knitting (6 sc), then six increases, for the third round, I will knit (1 sc) and an increase for (18 sc), for the next (2 sc), a half point, to 24 sc), I knit, round 5,6,7, and I begin to make the decreases descendingly, until I reach (12 sc), I continue knitting 30 rounds of (12 sc), I fill, finish off and cut the thread. So I repeat, for the next arm. Just as I have knitted the arms, I start by knitting the legs, but I will do the knitting repetitions, starting with round n (18) and I will knit 20, Rounds of (18 sc). And to say that in addition to being long compared to the arms, it is being thicker.
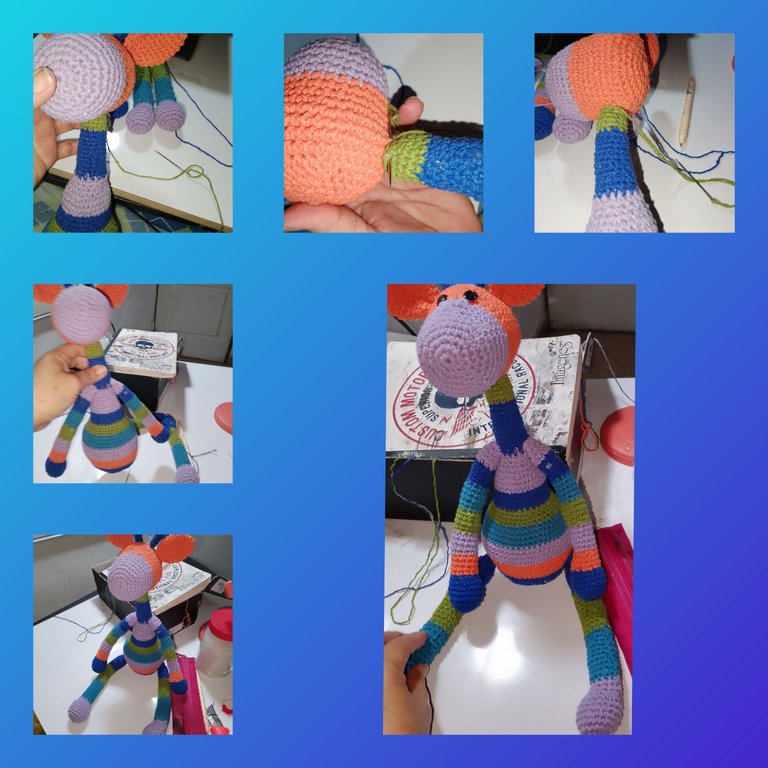
5.) The pieces of the giraffe are ready, now, with the wool needle I begin to glue the pieces together, and form the giraffe.
6.) To finish, I place a stitch of glue, and place the eyes.
. All photos are my property, taken with my smartphone.
. Use incollage to show the steps.
. Use language translator.
It is always a pleasure to show you my most recent publication and I am very pleased, your visit to my blog will be even an opportunity.
(ESP)
Hola a todos, que este sea un bendecido día, lleno de muchas cosas buenas, que gocen de buen ánimo y energía positiva, que les permita dar lo mejor de ustedes, me complace estar una vez más por @hivediy, en esta oportunidad, muy contenta de mostrar, un poco más de lo aprendido en la técnica de amigurumi. Siempre dejo un espacio, para practicar y aprender, en muchas de las ocasiones, animada por algunos patrones gratuitos, de el facebook. Hoy he realizado, una alegre y muy colorida Jirafa, disfrute mucho este proceso, deseo cause el mismo efecto en ustedes. De manera qué, la invitación es a seguirme.
Materiales.
. Hilos pabilos, colores ( azul: claro y oscuro, anaranjado, verde manzana, morado)
. Aguja para tejer.
. Aguja lanera
. Relleno.
. Ojitos plásticos.
. Tijeras.
PASOS:
1.) Inicio, tejiendo el osico, de la jirafa, así que tejere, un anillo mágico y dentro de ella, seis medios puntos, cierro el anillo y en la siguiente haré, seis aumentos, par 12 puntos, en esta oportunidad usaré el hilo de color morado, y continuo el tejido, y iré aumentando los puntos bajos antes de el aumemto, es decir para el siguiente, para la vuelta cuatro serán dos puntos bajos antes de el aumento, par la quinta, seran tres puntos bajos, para la sexta cuatro, y para la vuelta siete, cuatro puntos bajos, alcanzando un total de 36 puntos bajos, loas tres siguientes vueltas, seran de 36 puntos, antes de terminar la vuelta n10, hare el cambio de color, ahora tejere con el hilo color naranja.
La vuelta 11/13, consta de 36 medios puntos. Para la vuelta 14, luego de cinco medios puntos, tejere un aumento, para la siguiente, será luego de seis medios puntos.para 48 medios puntos.tejere dos vueltas de 48 medios puntos y continuo, de maneras ascendente a hacer las disminuciones, antes de llegar a las seis disminuciones, coloco el relleno, lo mas apretado posible y cierro.
2.) Continuo, tejiendo las piezas de la cabeza y ahora tejere, las pequeñas orejas y los cachitos.
En un anillo mágico, tejere seis medios puntos, la siguiente seis aumentos, luego tejere dos vueltas, haciendo un aumento luego de un medios puntos y la siguiente dos medios puntos, en esta vuelta tengo 24 medios puntos, y tejo tres vueltas de 24 medios puntos, y para las siguientes, inicie las disminuciones. Repito para la siguiente oreja, está pieza no necesita relleno.
Para lo cachitos tejere seis medios puntos en un anillo mágico, Lugo seis aumentos, en esta vuelta, tengo 12 medios puntos y tejere tres vueltas de 12 mp, inicio las disminuciones, asi que en la siguiente vuelta me quedarán, seis medios puntos, en este momento, coloco el relleno a la primera esfera, y continuo tejiendo seis vueltas de seis medios puntos, este delgado tubo, que da al tejer está vueltas, debo rellenarlos. Lista las piezas, lo siguiente será, coser con la aguja lanera sobre ya cabeza.
3.) Para el cuerpo de la jirafa, Comenzare haciendo un anillo mágico, y dentro de el 6(mp), luego tejere seis aumentos, para 12mp), para la siguientes vueltas, iré aumentando en números los medios puntos y luego el aumento, en todos los recorridos, luego de haber alcanzado,cuando llegó al aumento de 7mp) justo en la vuelta n9, teniendo un total de (54mp),a partir de la siguiente vuelta, iré, haciendo, cambios de colores, luego de cinco vueltas consecutivas,con el mismo color y tejere (54mp) desde la vuelta n10 a la n38. Teniendo un total de 28vueltas. Para la vuelta n39, comienzo a realizar las disminuciones, luego de (7,6,5,4,3,2mp), teniendo es la vuelta n45, (12mp). A partir de acá, tejere 15vueltas de (12mp), alcanzando la altura de el cuello de la jirafa. Debo ir, tejiendo y colocando el relleno.
4.) Para los brazos, comiezo en un anillo;tejiendo (6mp), luego seis aumentos, para la tercera vuelta, tejere (1mp) y un aumento para (18mp),para la siguiente (2mp), un medio punto, para 24mp), tejo, la vuelta 5,6,7,y comienzo a hacer las disminuciones de manera descendente, hasta llegar a (12mp), continuo tejiendo 30vueltas de (12mp), voy rellenando, remato y recortó el hilo. Así repito, para la siguiente brazo. Tal cual como he tejido los brazos, comienzo tejiendo las piernas, pero las repeticiones de tejidos los haré, a partir de la vuelta n(18) y tejere 20,Vueltas de (18mp). E decir que demás de largas en comparación a los brazos, está ser más gruesa.
5.) Listas las piezas de la jirafa, ahora, con la aguja lanera comienzo a pegar las piezas, y formar la jirafa.
6.) para culminar, coloco una puntada de pegamento, y coloco los ojos.
. Todas las fotos son de mí propiedad, tomadas con mí teléfono inteligente.
. Use incollage para mostrar los pasos.
. Use traductor lenguaje.
Siempre es un gusto, estar mostrando les mi más recientes publicacion y me complace mucho, su visita a mí blog, será hasta un aproxima oportunidad.
Te quedo muy bonito tu Amigurumi de jirafa, una manualidad de ucho trabajo y tecnica, excelente
Hola, realmente agradecida por tu comentario
wow that looks so Adorable, you are amazing keep up the good work.
Hola te quedó muy bonita tu creación me encantó, súper-
Paz completa
Gracias que lindo saber su opinión
Aww que bonito, cuantos colores y que arduo trabajo has hecho con este simpatico amigurumi, esta muy bien hecho y bien prolijo ❤️ a mi me gana la impaciencia jaja 😂
Hermosa jirafa, sin duda tejer es un arte. Tienen un sentido tan especial, felicidades por tu linda jirafa. Bendiciones
Muy agradecida, la bendición para usted también querida @belkysmargarita
Felicidades amiga, has realizado un muy hermoso trabajo, me enamore de esta jirafa 🦒
Es muy linda con esos efectos de ternura, es un trabajo de mucha dedicación y amor.❤️
Wow, está preciosa!