(ENG)
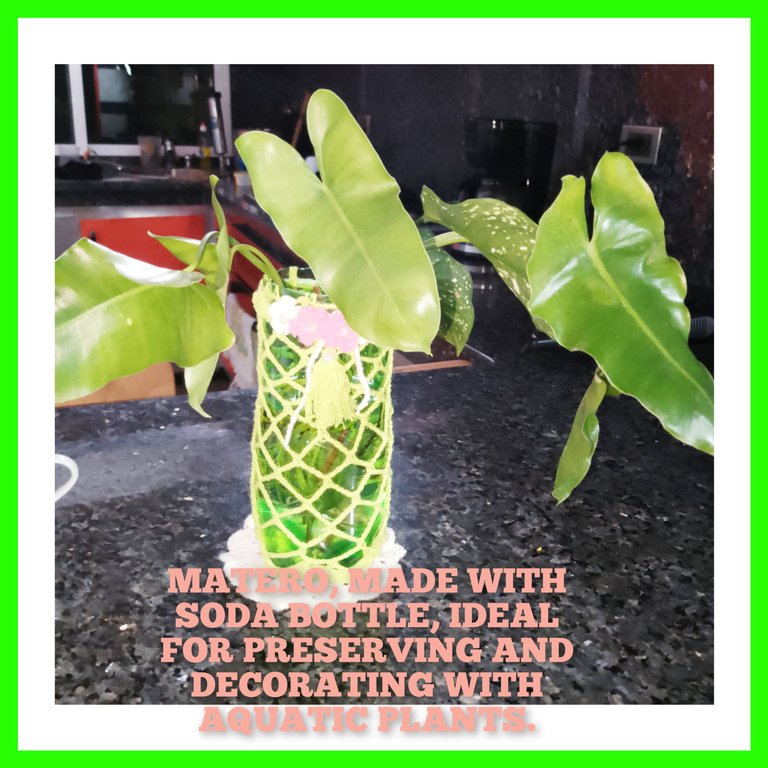
Hello everyone, I hope this is a great day, filled with a lot of rest, so that we can start this week on the right foot in everything we do. I am pleased to be with you, this time I come to show you a simple tutorial on how to make a beautiful and delicate pottery, I will especially use it for a nice aquatic talk, which I have always liked, and I am happy to now have my own, I made this mat with a plastic soda container, and using the technique that transforms and beautifies everything, the crochet technique. Sinas I invite you. Follow me, I hope you enjoy it as much as I do. . All photos are my property. . Use language translator . Use incollage. Thank you for following me until the end, it is always a pleasure to show the most recent of my creations, don't forget you are always welcome to my blog.
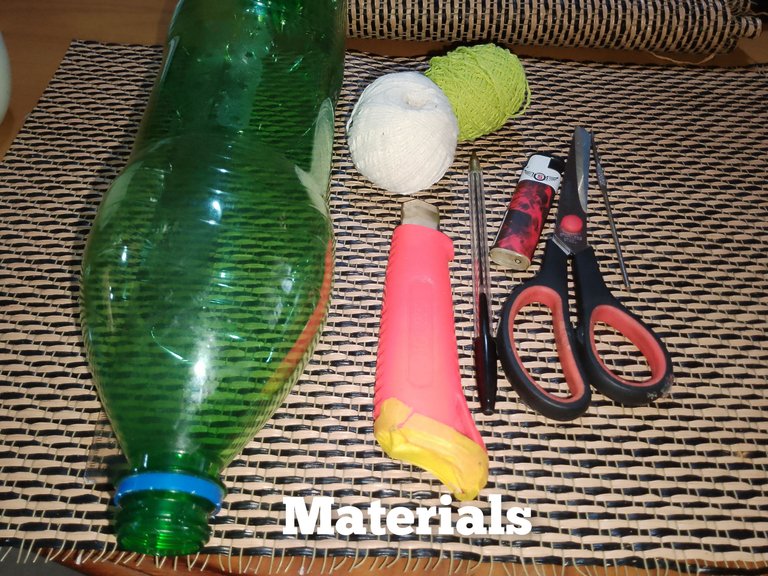
Materials:
. Plastic soft drink bottle, green. . Knitting yarn, colors (white, pink and green)
. Pearls
. Knitting needle.
. Exact
. Pencil
. Ruler
. Scissors
Steps:
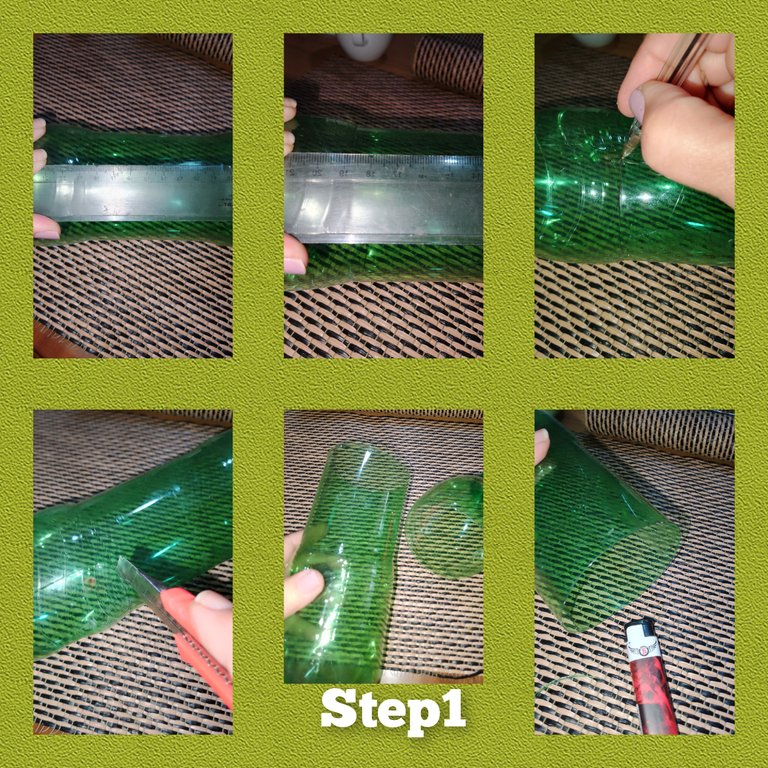
1.) Using the ruler, I measure the straightest part of the container, plastic, it is 18cm long, starting from the bottom of the container, to the top of the middle, so after marking, I make a cut with the exact and short, cut, I put a little fire, to avoid making any cuts.
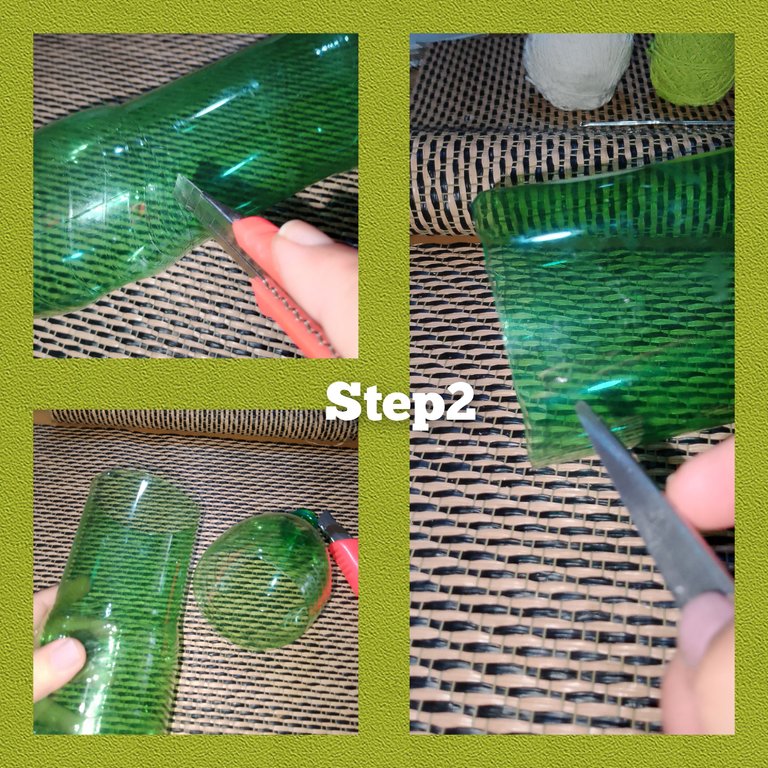
2.) Leaving 1.5cm from the edge of the container, I start making holes, I start by making four holes aligned in the shape of a cross, then inside each of the spaces, I will open two more.
3.) in a ring of 8 chain stitches, I knit, 25 double crochets and close at the end, with a slip stitch, continuous, the next rounds after two double crochets, I will knit an increase, and so on in the next two rounds. This is with the intention of covering the bottom of the pot.
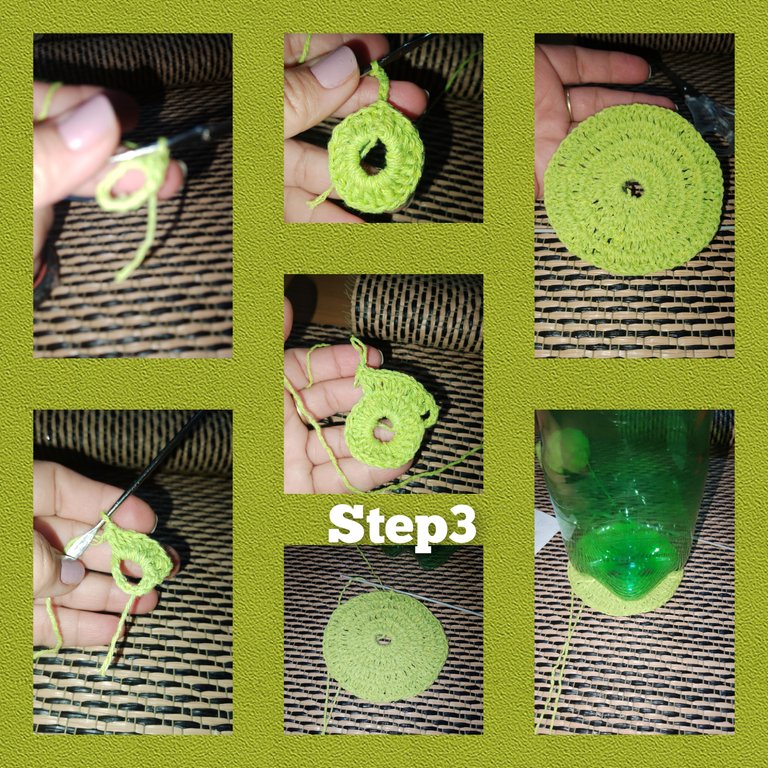
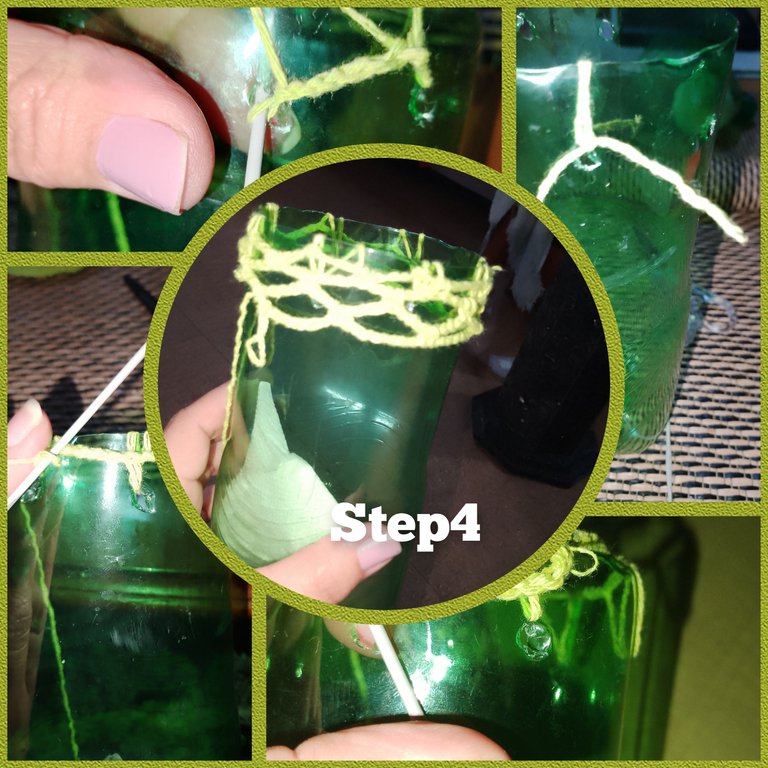
4.) I continue, using the green knitting thread, now I tie in one of the holes, at the top, of the container, I raise 8 chain stitches, and cut to the next hole, in this way, I continue the route until you reach the starting point, where you will knit a running or slipped stitch. I begin to knit 10 chain stitches, and I knit half a stitch in the first space, and so I go around, repeating in the next six rows.
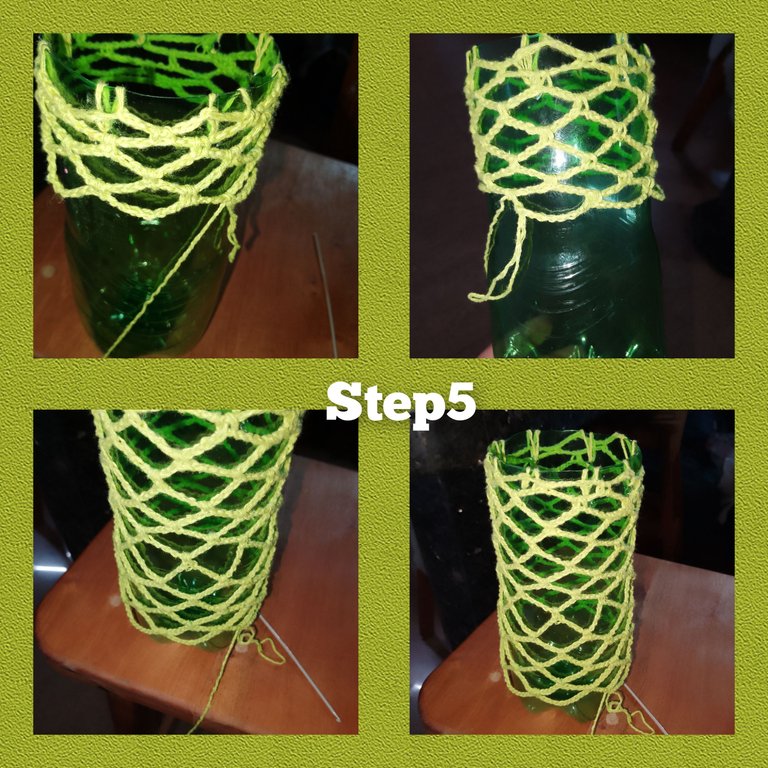
5.) For round n8, I increase the chain stitches since this part of the pot is wider. So I will knit stitches, and continue the process, until I reach the bottom or bottom of the pot.
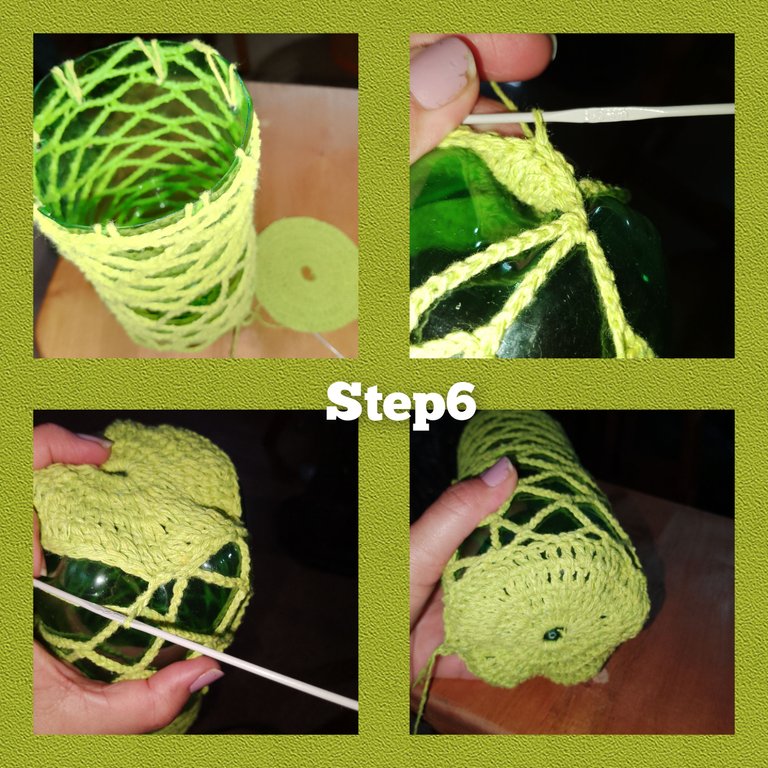
6.) located, the fabric in the lower part of the pot, I begin to involve the small circle, woven in previous steps, so I begin to do it in zic zac, from side to side, that is, from the mesh woven to the small circle, remaining covered, the bottom of theflowerpot.
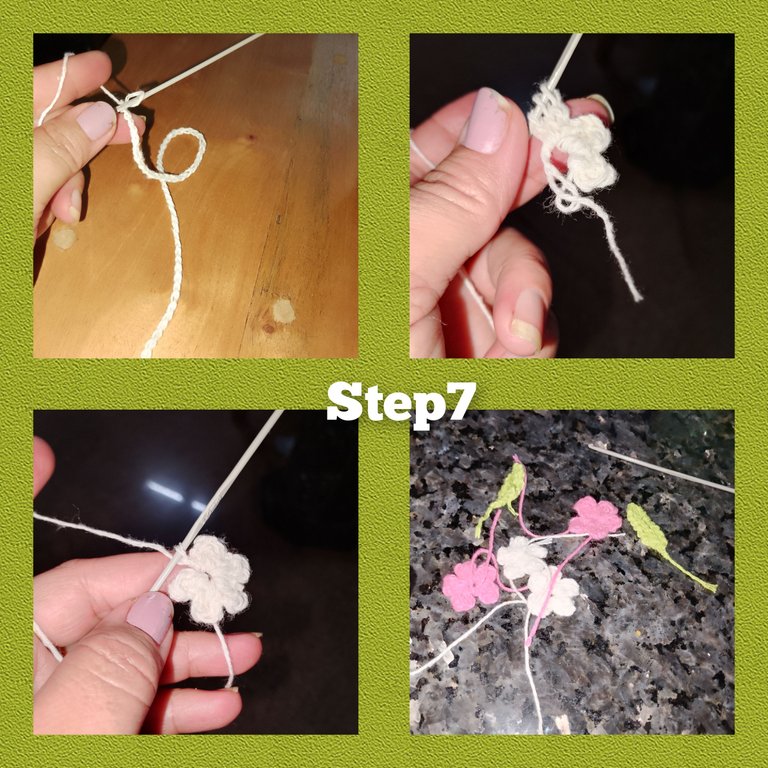
7.) with the colored thread, white, knit 150, chain stitches, to make a cord. And I also knit five groups of three double crochets in a slipped stitch, and I pick up the magic ring. In this way, I knit two white flowers and two pink ones.
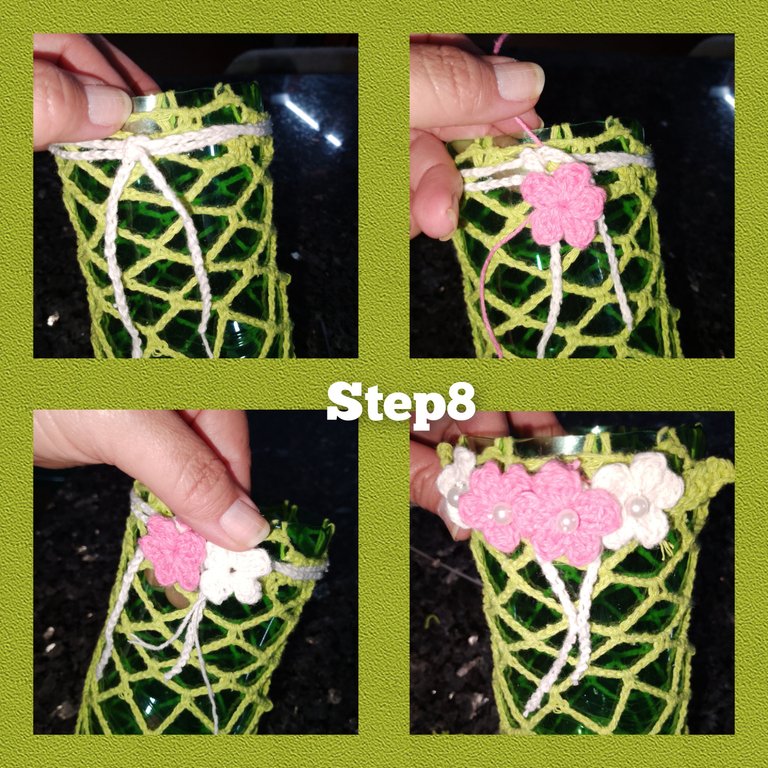
8.) I start to decorate the pot, so with the chain cord, I make two turns at the top of the pot, leaving the tips on what will be the front part. I begin to tie the flowers and with a stitch of glue, to add more light, I place a white pearl.
. All photos are my property.
. Use incollage
. Use language translator.
Grateful for following me until the end, it is always a pleasure to visit my blog, it will be until the next opportunity.
(ESP)
Hola a todos, deseo este este siendo un gran día, lleno de mucho descanso, par que comencemos está semana, con buen pie en todo lo que hagamos. Me complace estar con ustedes, está vez vengo a mostrarles un sencillo tutorial, de como hacer un hermoso y delicado matero, yo en especial lo utilizaré para una, linda plática acuática, que siempre me ha gustado, y feliz de ahora tener la propia, este matero lo realice con un envase de refresco plástico, y usando la técnica que todo lo transforma y embellece, la técnica de crochet. Sinas les invito. Seguirme, deseo lo disfruten tanto como yo.
. Todas las fotos son de mí propiedad.
. Use traductor lenguaje
. Use incollage.
Agradecida me haya, seguido hasta el final, siempre es un gusto mostrar lo más reciente de mis creaciones, no olvides siempre serás bienvenido a mí blog.
Materiales:
. Botella plástico de refresco, color verde.
. Hilo para tejer, colores (blanco, rosado y verde)
. Perlas
. Aguja par tejer.
. Exacto
. Lápiz
. Regla
. Tijeras
Pasos:
1.) usando la regla, mido la parte mas recta de el envase, plástico, está tiene 18cm de largo, iniciando desde la parte inferior de el envase, hasta más alto de la mitad, así que luego de marcado, hago un corte con el exacto y corto, cortado, pongo un poco de fuego, para evitar, hacernos algún corte.
2.) Dejando 1.5cm desde el borde de el envase, comienzo a hacer perforaciones, comienzo haciendo cuatro perforaciones alineadas en forma de cruz, luego dentro de cada uno de los espacios, abriré dos más.
3.) en un anillo de 8puntos cadenas, tejo, 25 puntos altos y cierro en el extremo, con un punto deslizado, continuo, las siguientes vueltas luego de dos puntos altos, tejere un aumento, y así en las siguientes dos vueltas. Esto con la intención de cubrir el fondo de la maceta.
4.) Continuo, usando el hilo de tejer de color verde, ahora ato en uno de los orificios, de la parte superior, de el envase, levanto 8puntos cadenas, y corto a el siguiente orificio, de esta manera, continuo, el recorrido hasta llegar al punto de partida, dónde tejere un punto corrido o deslizado. Comienzo a tejer 10puntos cadenas, y tejo medio punto en el primer espació, y así recorro, repito en las siguientes seis vueltas.
5.) para la vuelta n8, hago un aumento de puntos cadenas ya que est parte de la maceta es mas ancha. Así que tejere dice puntos, y continuo el proceso, hasta llegar hasta el fondo o parte inferior de la maceta.
6.) ubicado,el tejido en l aparte inferior de la maceta,comienzo a involucrar, el pequeño círculo, tejido en pasos anteriores, así que comienzo a hacerlo en zic zac, de lado y lado, es decir de la maya tejida a el pequeño círculo, quedando cubierto, el fondo de la maceta.
7.) con el hilo de color, blanco, tejo 150, puntos cadenas, par hacer un cordón. Y tejo además en un punto deslizado cinco grupos de tres puntos altos,y recojo el anillo mágico. De esta manera, tejo dos flores de color blanco y dos rosados.
8.) Comienzo a decorar la maceta, así que con el cordón de cadenas, doy dos vueltas en la parte superior de la maceta, dejo las puntas en lo que será la parte frontal. Comienzo a atar las flores y con una puntada de pegamento, para dr más luz, coloco una perla de color blanco.
. Todas las fotos son de mí propiedad.
. Use incollage
. Use traductor lenguaje.
Agradecida me hayas seguido hasta el final, siempre es un gusto su visita a mí blog, será hasta una próxima oportunidad.
¡Que bello! Amo cuando se utiliza material reciclable.
Gracias cariño...que bueno le hy gustado.
¡Estupendo qué lindo! Me gusto mucho la técnica para hacer el tejido directamente con los orificios en el mismo envase, es una buena idea para sujetar bien antes de hacer el tejido, buen diseño y bonito detalle de flores de colores suaves, lo que hace que se note un contraste de colores muy agradable.
Gracias cariño, por tu buen comentario. Hermosa noche