(ENG)
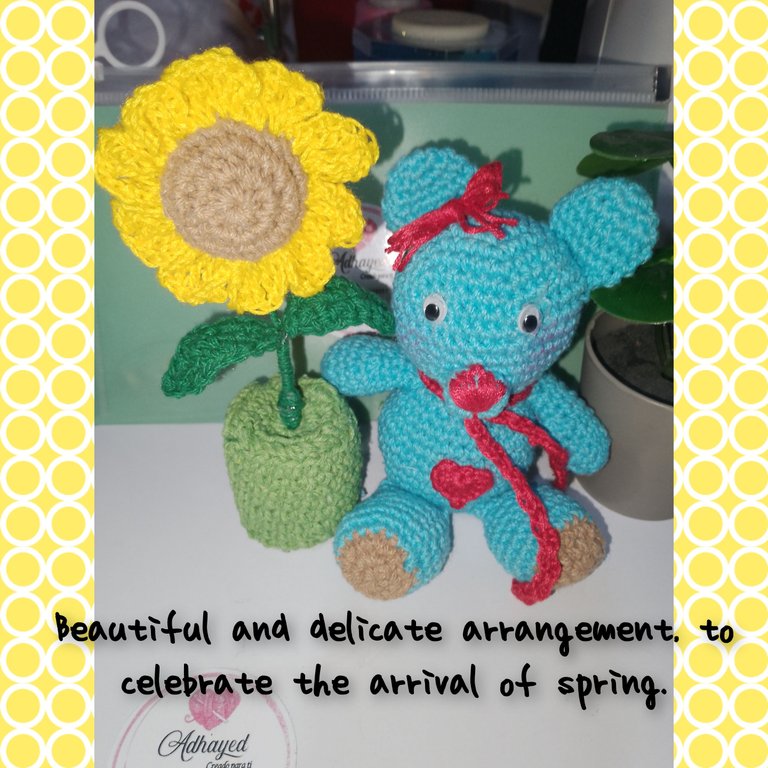
Hello everyone in @HIVEDIY, I am pleased to be with all of you, on this special day, when, give away a yellow flower, symbolizes, joy love and friendship, among loved ones, giving entrance to the beautiful spring. Reason why, I have made a nice arrangement, to give to a very dear being. That although it is a bit far, I will not be able to give it in a timely manner. But at the time I will. To do this, I have had, using the technique of amigurumi a beautiful, blue tone bear, which has a nice sunflower. Without further ado I invite you to follow me and I show them their elaboration process.
!
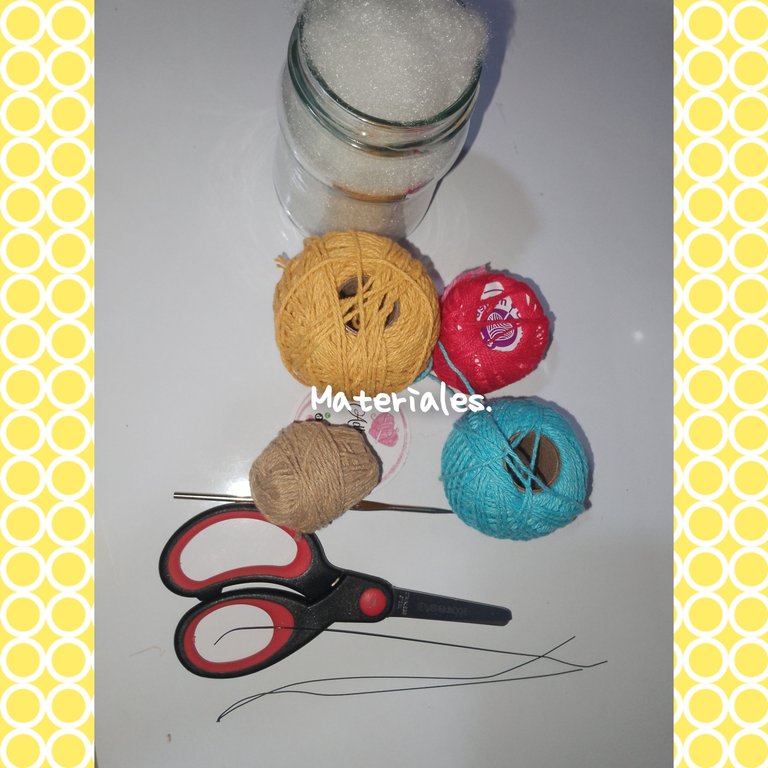
Used materials:
. Thread threads, colors (yellow, green, blue, red)
. 4cm cardboard tube.
. Stuffed.
. Needle to weave.
. Saltones eyes.
. Piece of florist wire.
. Scissors.
. Glue.
Steps to follow.
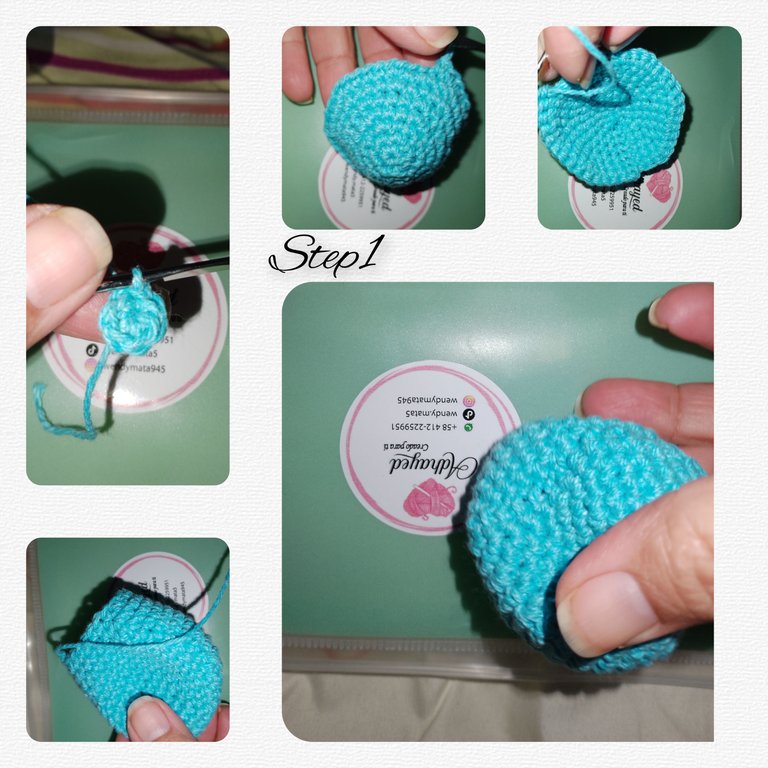
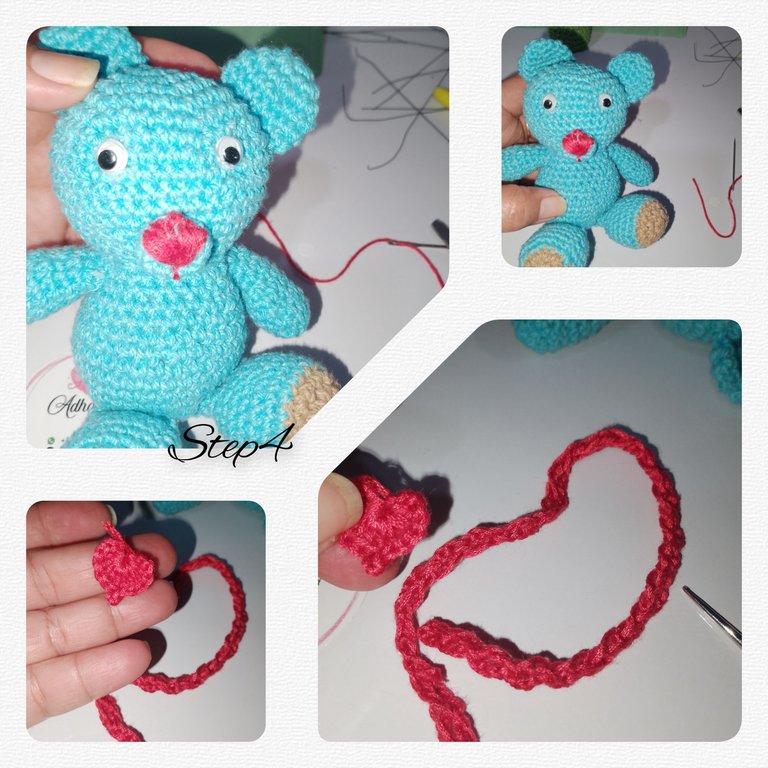
1.) Start weaving the head and body, of a small and striking bear, blue. This being in charge of carrying the sunflower in the pot. So at a sliding points, weigh six half points later in the next round I make a six, increases. To obtain twelve points, from here you weave a next lap making an increase after a half point, after two, three and four media points. To obtain a total of
Thirty -six half points. Weigh two turns of thirty -six and from here I start the countdown to form my first sphere, which I will use for the head of El Oso, stopping, to fill before reaching the last point of decrease.
I continue with the body, but I will take six laps followed by thirty -six points, to obtain a larger sphere, since this will be to simulate the body of the bear.
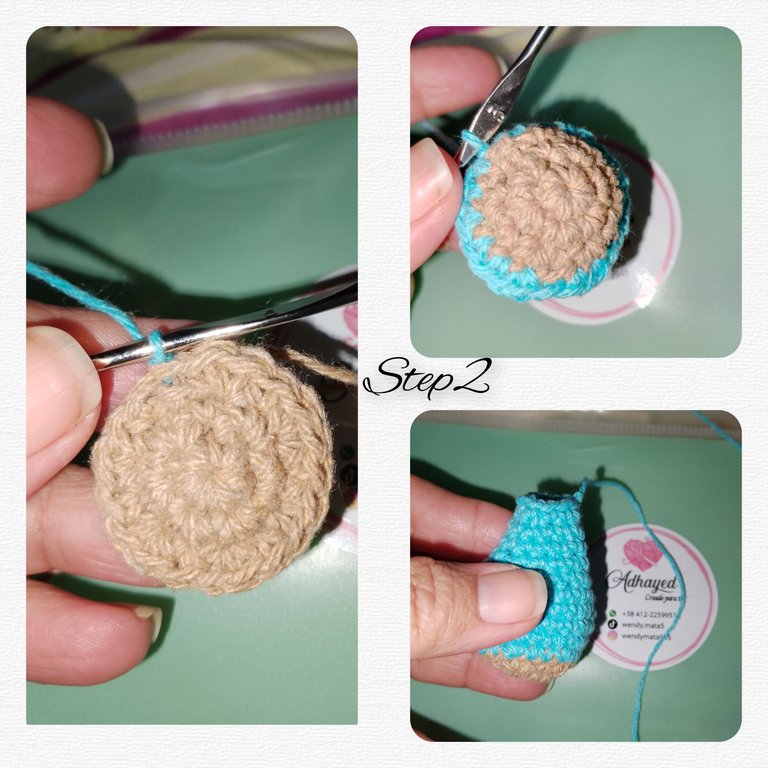
2.) Using the same technique, weave, the legs and the arms, ears and the osico.
3.) After, place filling to each of the pieces, continue to hit the spheres with the lanera needle and the other pieces, to form the bear completely.
4.) I put my eyes, board with red thread the osico. And weed a long scarf of high points. And I also put a small bond in one of the round ears.
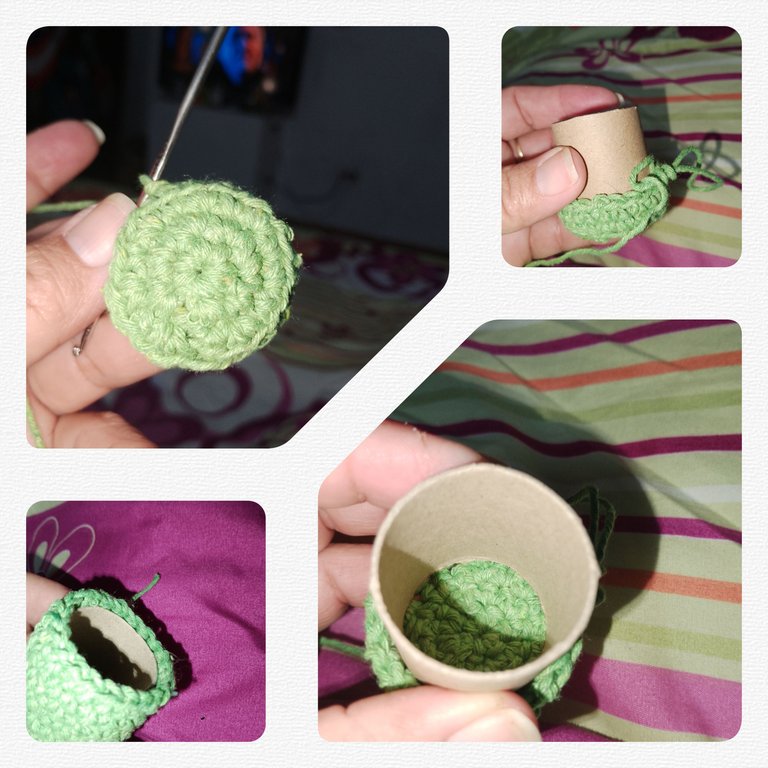
- I begin to weave a circle, at low points, until reaching the circular edge of the small cardboard tube, then weighing half points to reach the height, of it. Weigh a new circle, which I will use as the pot of the pot. Also wears a small sheet.
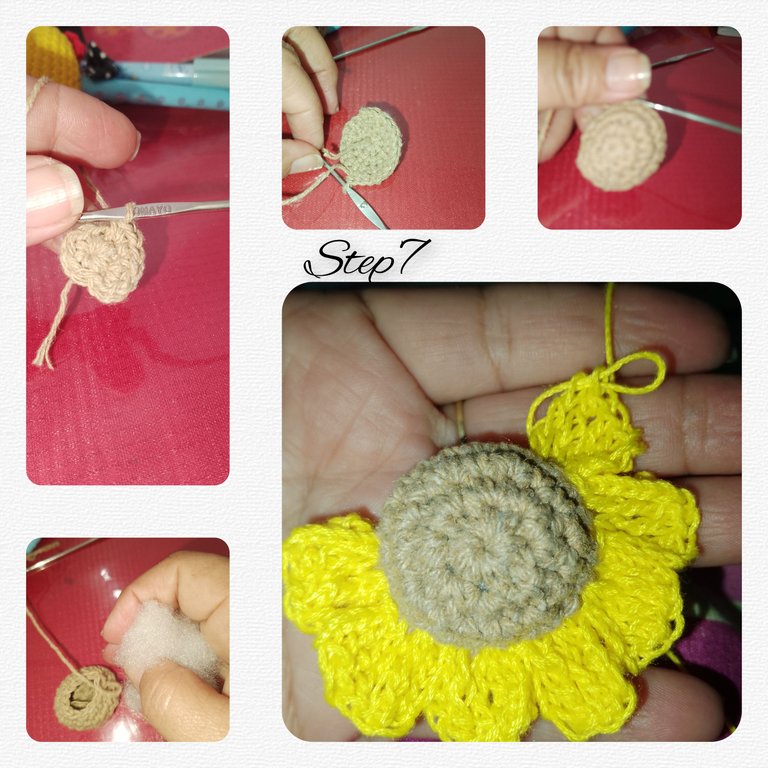
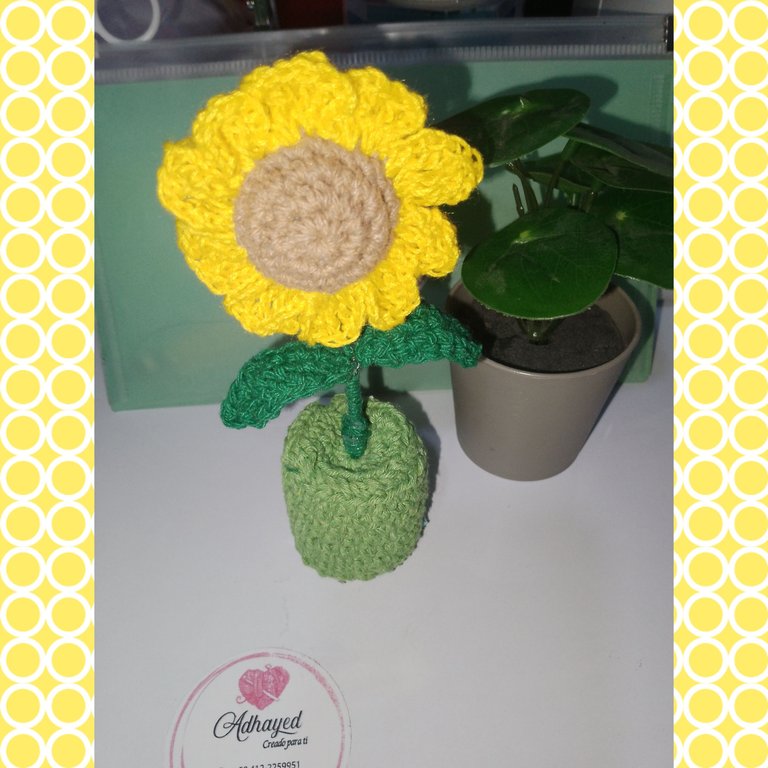
6/7) For the elaboration of the sunflower, a small sphere of twenty -four points will weave, using the same spheres procedure, and then I will close and fill with the filling. I attempted the yellow thread, at one end of the part, more bulky in the sphere, and weave four -point petals, woven in the same half points of the sphere. I repeat until thereTour the entire sphere.
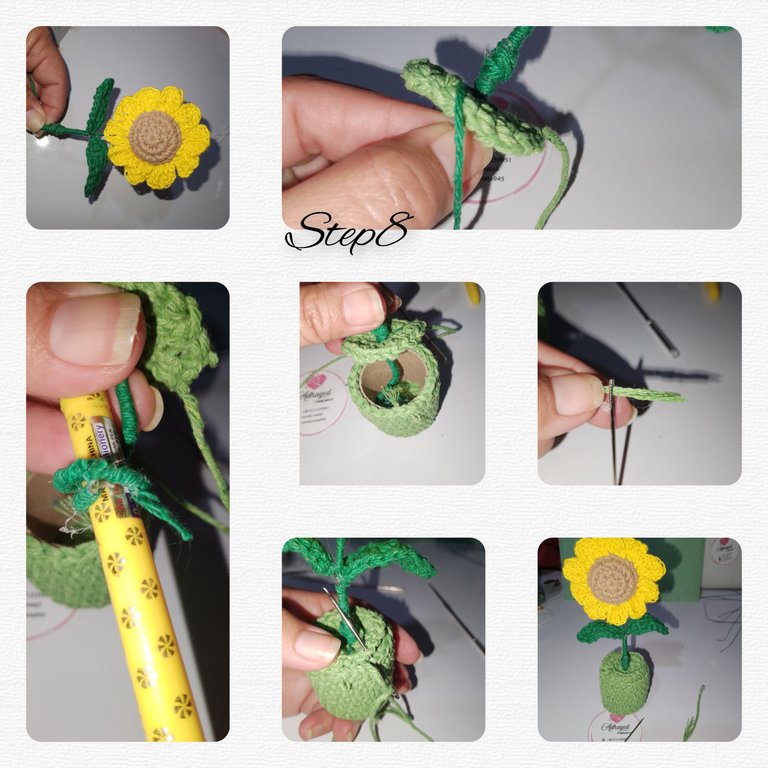
8.) The following will be to cover the florist wire, with the green thread and place the leaves. Placo applied some glue and put the wire inside the sunflower. With the wire of the bottom, I turn with a pencil, to make a small spiral applied glue and introduce into the pot, and with the needle and thread, coso, the pot of the pot for the entire edge.
In this way my yellow sunflower is ready, to give away.
. All photos are from me property.
. Use colorless to show the steps.
. Use language translator.
How I always please being with you and show my manual projects. Thanks for your visit to my blog, see you soon .
( ESP)
Hola a todos en @hivediy, me complace estar con todos ustedes, en este día tan especial, cuando, regalar una flor amarilla, simboliza, la alegría amor y amistad, entre los seres queridos, dando entrada a la hermosa primavera. Razón por la cual, he realizado un lindo arreglo, para regalar a un ser muy querido. Que aunque está un poco lejos, no podré dárselo oportunamente. Pero en su momento lo haré. Para ello, he tenido, usando la técnica de amigurumi un hermos, oso de tono azul, que lleva con sigo un lindo girasol. Sin más les invito a seguirme y les muestro su proceso de elaboración.
Materiales usados:
. Hilos para tejer, colores( amarillo, verde, azul, rojo)
. Tubo de cartón 4cm.
. Relleno.
. Aguja para tejer.
. Ojitos saltones.
. Trozo de alambre de floristería.
. Tijeras.
. Pegamento.
Pasos a Seguir.
1.) Inicio tejiendo la cabeza y el cuerpo, de un pequeño y llamativo oso, de color azul. Siendo este el encargado de llevar en la maceta el girasol. Así que en un puntos deslizado, tejo seis medios puntos luego en la siguiente vuelta hago un seis, aumentos. Para obtener doce medios puntos, a partir de aquí tejere una siguiente vuelta haciendo un aumento luego de un medio punto, luego de dos, tres y cuatro medios puntos. Para obtener un total de
Treinta y seis medios puntos. Tejo dos vueltas de treinta y seis y a partir de aquí comienzo la cuenta regresiva para formar mi primera esfera, que usaré para la cabeza de el oso, haciendo un alto, para rellenar antes de llegar a el último punto de disminución.
Continuo con el cuerpo, Pero daré seis vueltas seguida de treinta y seis puntos, para obtener una esfera de mayor tamaño, ya que está será par simular el cuerpo de el oso.
2.) Usando la misma técnica, tejere, las patitas y los brazos, orejas y el osico.
3.) luego de, colocar relleno a cada una de las piezas, Continuo pegando las esferas con la aguja lanera y las demás piezas, hasta formar completamente el oso.

4.) Coloco los ojos, bordo con hilo de color rojo el osico. Y tejo a crochet una larga bufanda de puntos altos. Y coloco además un pequeño lazo en una de las redondas orejitas.
- Comienzo a tejer un círculo,en puntos bajos, hasta alcanzar el borde circular de el pequeño tubo de cartón, luego tejo medios puntos para alcanzar la altura, de el mismo. Tejo un nuevo círculo, que usaré como la tapa de la maceta. Tejo además una pequeña hoja.
6./7) para la elaboración de el girasol, tejere una esfera pequeña de veinticuatro puntos, usando el mismo procedimiento de las esferas, y luego cerraré y llenare con el relleno. Ato el hilo de color amarillo, en uno de los extremos de la parte, más abultada de la esfera, y tejere pétalos de cuatro puntos, tejido en el mismo medio puntos de la esfera. Repito hasta haber recorrido toda la esfera.
8.) Lo siguiente será cubrir el, alambre de floristería, con el hilo de color verde e ir colocando las hojas. Coloco aplicó un poco de pegamento y coloco el alambre dentro a el girasol. Con el alambre de la parte inferior, doy vueltas con un lápiz, para hacer un pequeño espiral aplicó pegamento e introduzco dentro de la maceta, y con la aguja e hilo, coso, la tapa de la maceta por todo el borde.
De esta manera queda lista mi girasol amarillo, par regalar.
. Todas las fotos son de mí propiedad.
. Use incollage para mostrar los pasos.
. Use traductor lenguaje.
Cómo siempre me complace estar con ustedes y mostrar mis proyectos manuales. Gracias por su visita a mí blog, hasta pronto..
You can check out this post and your own profile on the map. Be part of the Worldmappin Community and join our Discord Channel to get in touch with other travelers, ask questions or just be updated on our latest features.
Felicidades amiga, que bonito te ha quedado este detalle para celebrar este día tan especial. Seguro que cuando tengas la oportunidad de regalárselo a tu ser querido, será un gran momento especial.❤️🌻
Gracias mami, que bueno le haya gustado... Abrazos
Abrazos!!😘 Feliz fin de semana.
Bello Te quedó ese detalle que le hiciste a esa persona especial. Yo también hice mi detalle de las flores amarillas...
!discovery 35
This post was shared and voted inside the discord by the curators team of discovery-it
Join our Community and follow our Curation Trail
Discovery-it is also a Witness, vote for us here
Delegate to us for passive income. Check our 80% fee-back Program
Gradecida enormemente por su poyo. Gracias
Lovely work !!!
Gracias 😌
Hay pero que osito tan hermoso. Lo amé como todo lo tejido con amor. Bendiciones 🤗.
It's Really amazing and it came out very wonderful, nicely done and good job 👍
Gracias ☺️
Amiga esta hermoso, me encanta el girasol y tejido con el oso son muy tiernos.