


Hello my dear readers, I hope you are well and that you are having or have had an excellent day.
We are getting closer every day to the Christmas holidays, but as always we are ahead to make the Christmas decorations, long time before.
There are many people who make the decorations since November, both in homes, streets or stores, you can see the Christmas decorations and every year there are more decorations made by ourselves, because many people like to recycle and the truth is that they save a lot and are very nice, with nothing to envy to the decorations sold in stores and how super expensive.
Today I want to show you how to make a star that I made with recycled material, ideal for changing an ornament that you have already used for many years or simply to complement the ones you already have. Without further ado, I show you the step by step.

STEP BY STEP:
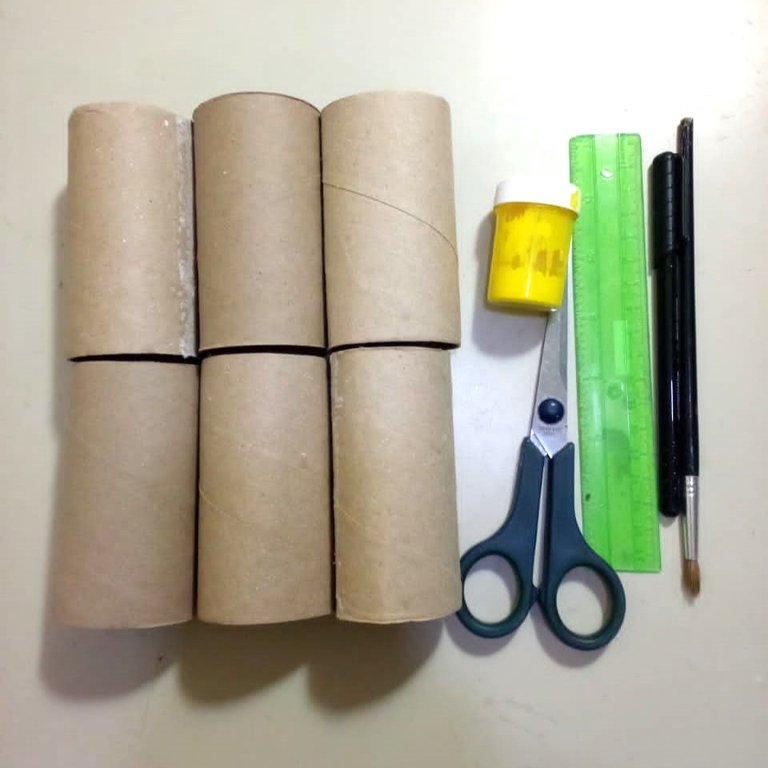
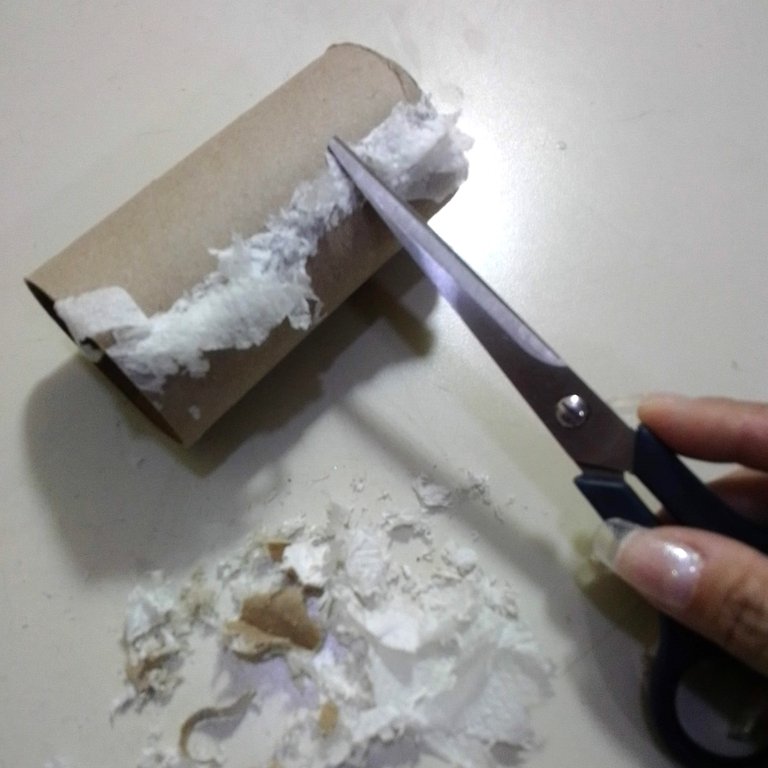
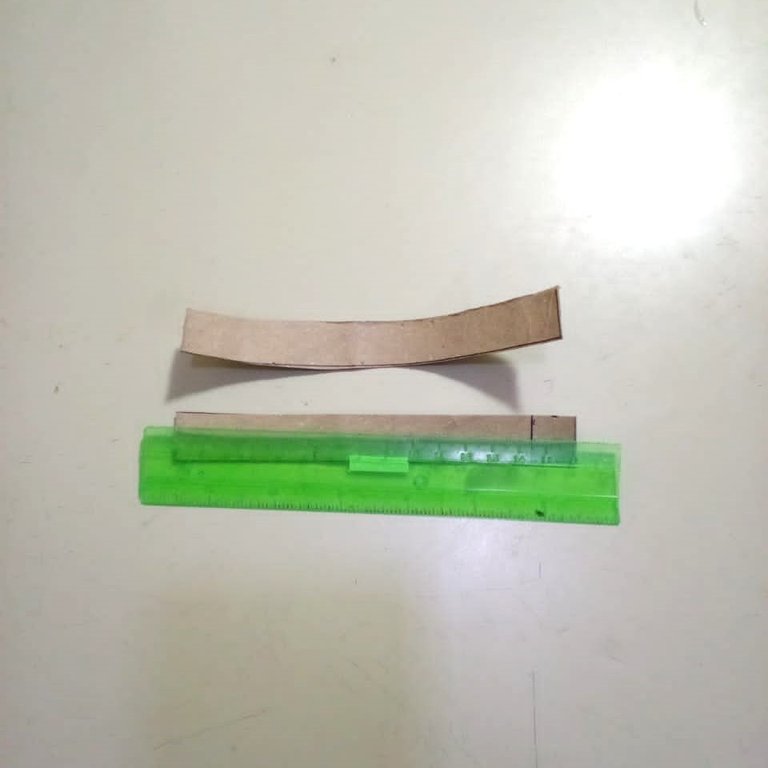
As the material I will use is recycled material, they are cardboard rolls of toilet paper and as you can see, there is always paper remains stuck to the cardboard. With the scissors I will help me to scrape it and remove all the excess paper.
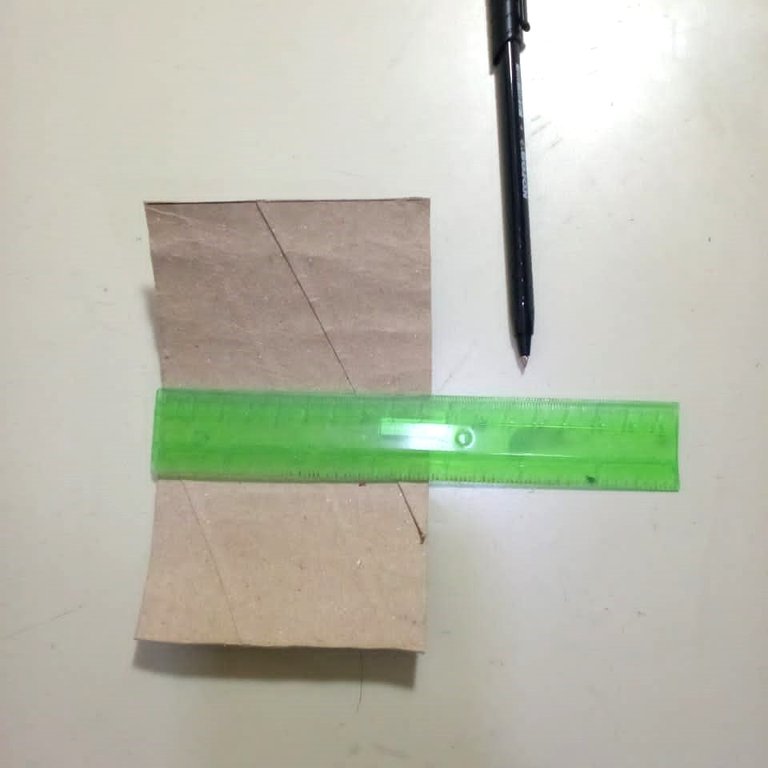
Once I remove all the excess paper, I will make a fold so I can cut it and open the tube.

With the ruler, I will measure the width of the tube so I can mark about five lines. The tube was 9.5 cm, I divided it by 5 and I got 1.9 cm. So I marked them and cut out 5 strips.
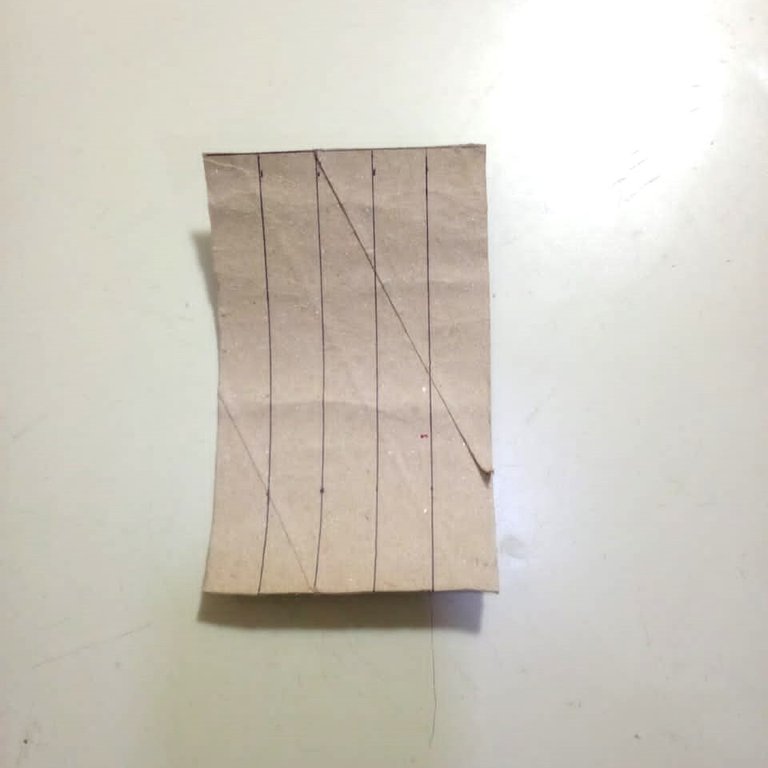
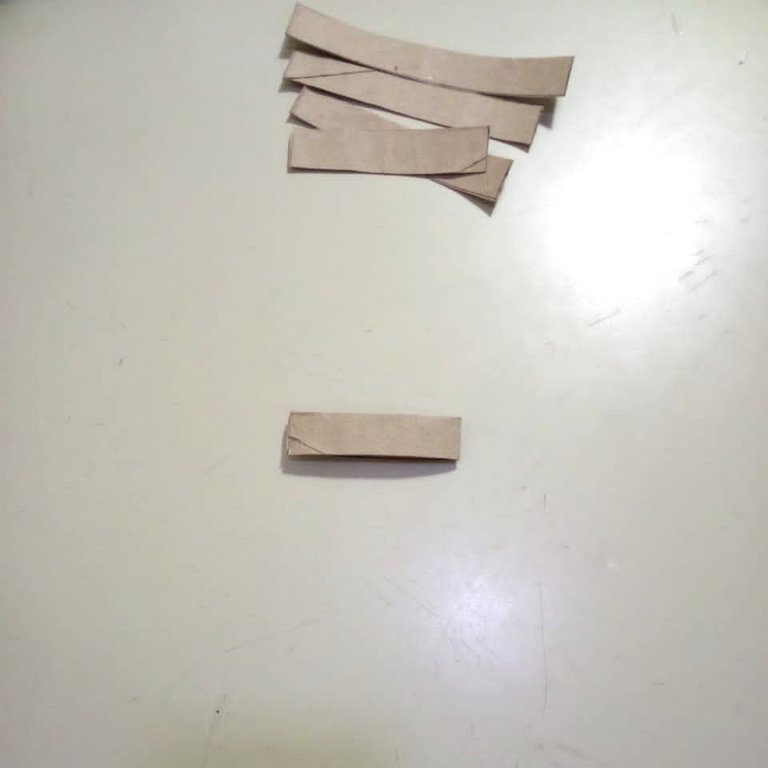
Now that I have the strips, I will leave one uncut and the other strips I will cut, two centimeters less than the previous one. The result will be as shown in the image.

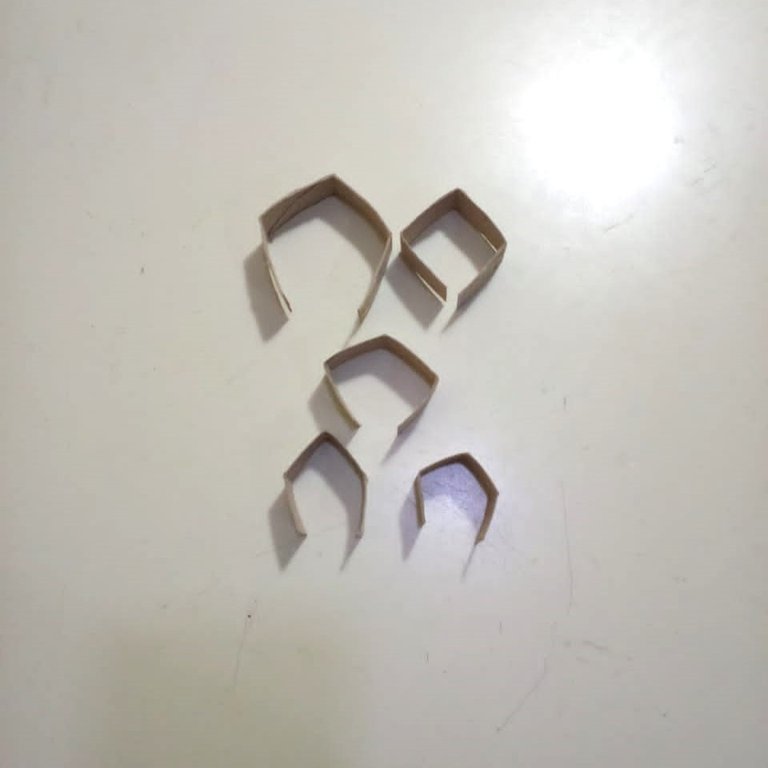
I will start making the folds on each strip. I will fold it in half and then open it again and bring each end to the center. It should look like the frame of a house.
 |  |  |
|---|
I did the same procedure with the other 4 remaining strips.
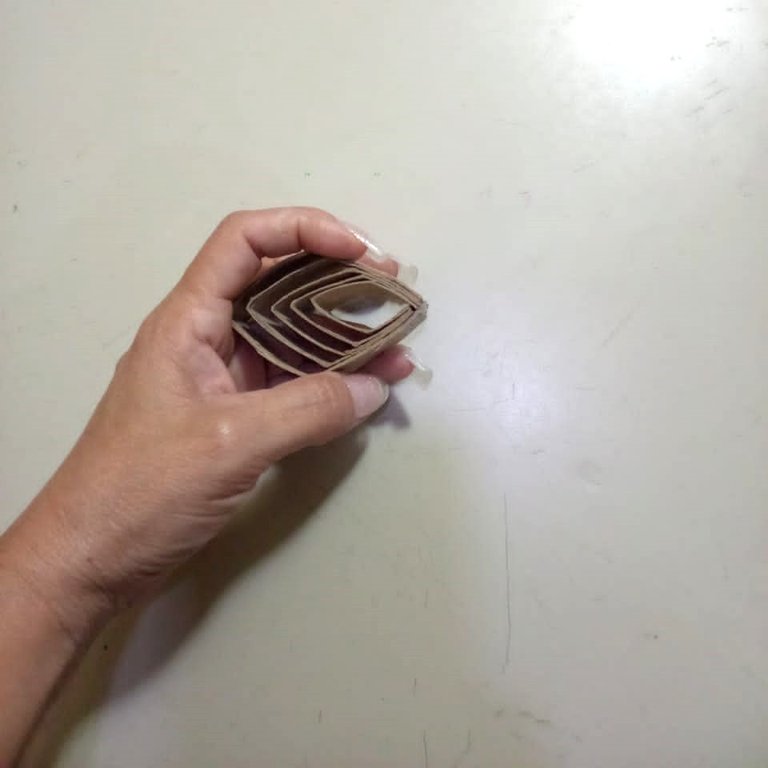
Now I start gluing each strip with white glue. I will glue the ends of each strip, starting from the largest to the smallest.

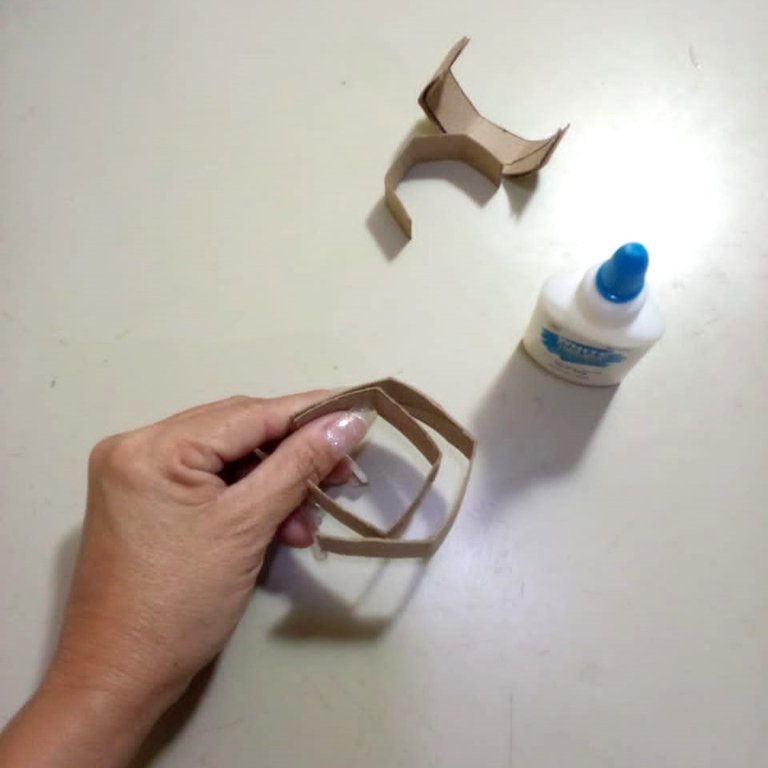

Once they have dried very well, I will join the two ends, as shown in the image.
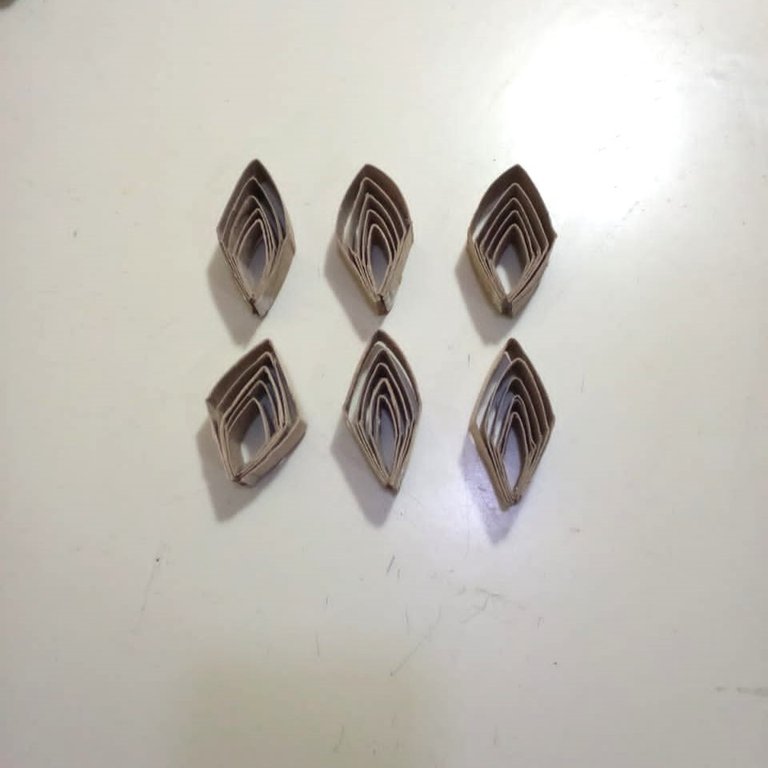
While waiting for it to dry very well, I cut the other strips and joined them together, following the same procedure as before.

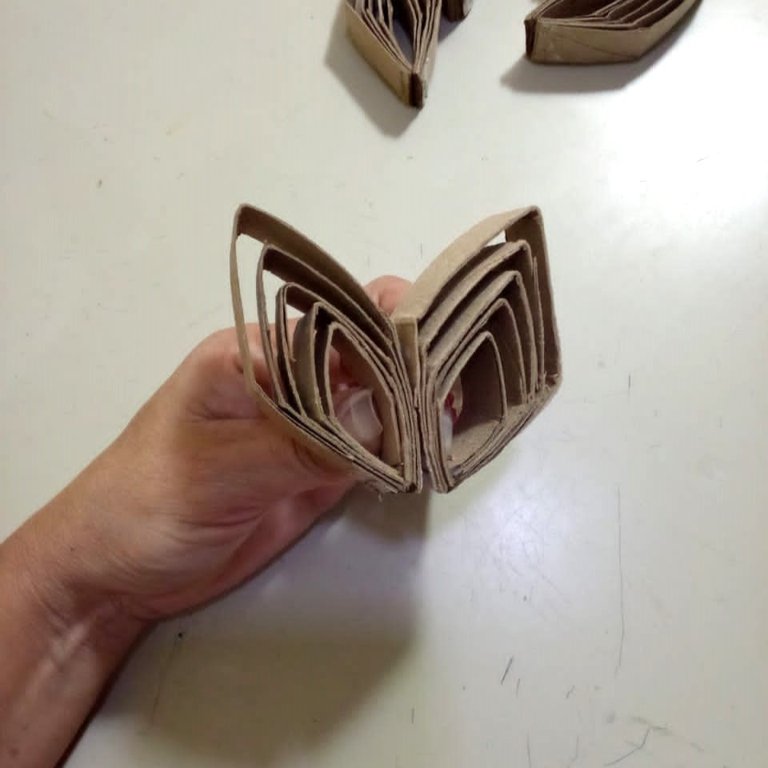
Once the pieces are assembled and well glued, I will proceed to assemble the star. Joining each piece with glue as you can see in the image.

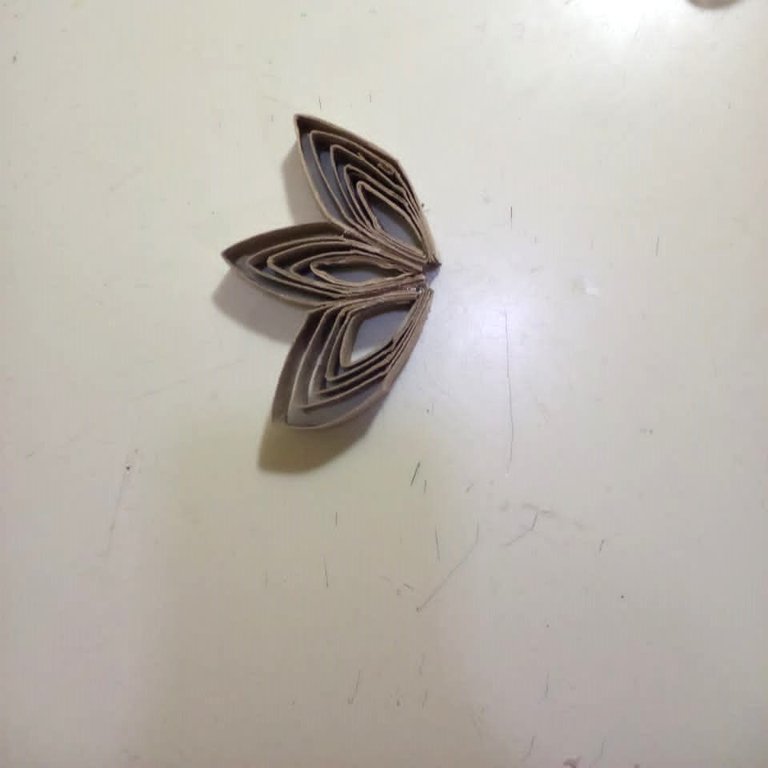
And this way I have already assembled the star.

To make it look prettier, I gave it a little color, with yellow paint, on both sides.

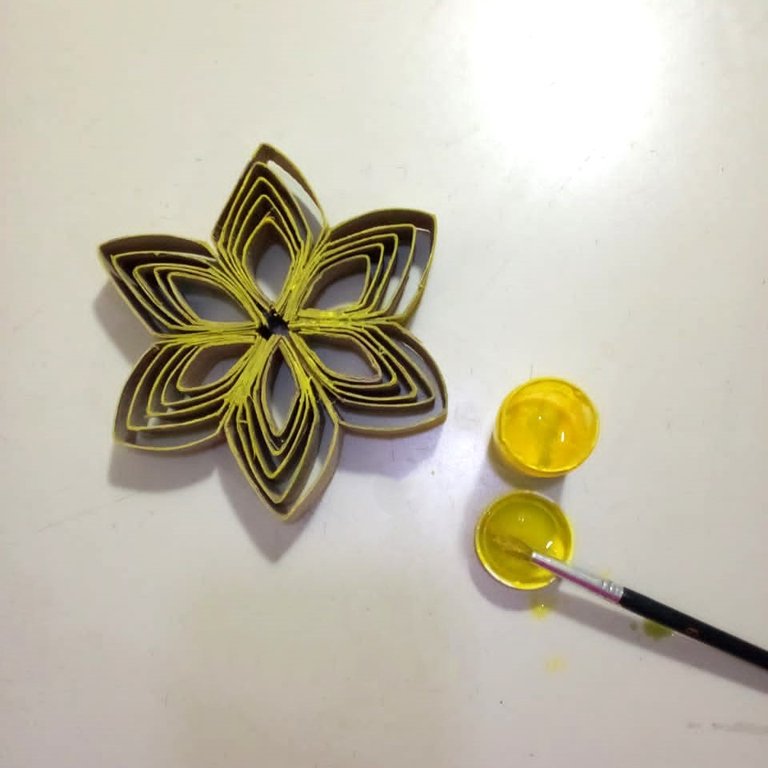
I waited for it to dry and to decorate and cover the union of all the pieces, I put a circle of frosted foami to make it look prettier. As you can see it is quite easy to make and can be used to decorate the Christmas tree or place on the wall or a door, it can be used to decorate many things.

I hope you liked this tutorial that I gladly prepared for you.
I say goodbye as always, but not before thanking you for taking a little of your valuable time to visit my blog and support me. Have a good time and take care of yourselves.

Original creative content:
⭐ All photos are mine taken and edited with my Alcatel phone.
🌟 The cover image, was made with the Canva application and edited by me.
🌠The divider images were taken from the https://www.glitter-graphics.com website.
⭐ The English translation was made with the help of DeepL.
🌟 The letters indicating the languages, were taken from the https://cooltext.com/ page.


Hola mis queridos lectores, espero que se encuentren bien y que estén pasando o hayan tenido un excelente día.
Estamos cada día más cerca a las fiestas decembrinas, pero como siempre nos adelantamos a realizar los adornos navideños, mucho tiempo antes.
Hay mucha gente que hacen las decoraciones desde noviembre, tanto en las casas, calles o tiendas, se pueden ver los adornos navideños y cada año hay más adornos hechos por nosotros mismos, pues a muchos les gusta reciclar y la verdad es que se ahorran mucho y quedan muy bonitos, sin nada que envidiarle a los adornos que venden en las tiendas y qué super caros.
El día de hoy les quiero mostrar como realizar una estrella que realice con material reciclado, ideal para cambiar algún adorno que ya hayas usado por muchos años o para simplemente para complementar los que ya se tiene. Sin más preámbulos, te enseñó el paso a paso.

PASO A PASO:
Como el material que usaré, es material reciclado, son rollos de cartón de papel sanitario y como pueden ver, siempre queda pegado al cartón, restos de papel. Con la tijera me ayudaré a rasparlo y quitar todo el exceso de papel.
Una vez que le quite todo el exceso de papel, hare un doblez para poder cortarlo y abrir el tubo.
Con la regla mediré el ancho del tubo y así poder marcar unas cinco líneas. El tubo media 9.5 cm, lo dividí entre 5 y me dio 1.9 cm. Así los marque y recorte 5 tiras.
Ahora que tengo las tiras, voy a dejar una sin cortar y las demás tiras las cortaré, dos centímetros menos que la anterior. Quedando tal como se muestra en la imagen.
Empezaré hacer los dobleces a cada tira. Doblaré por la mitad para luego abrirla de nuevo y llevar cada punta hasta el centro. Debe de quedar como si fuera el marco de una casa.
| | |
|---|
Y ese mismo procedimiento, lo realicé con las otras 4 tiras restantes.
Ahora empiezo a pegar cada tira con pega blanca. Voy a pegar las puntas de cada tira, empezando de la más grande a la más pequeña.
Una vez que hayan secado muy bien, uniré las dos puntas, tal como es aprecia en la imagen.
Mientras esperaba que secara muy bien, fui cortando las demás tiras y uniéndolas, haciendo el mismo procedimiento que realice anteriormente.
Ya con las piezas armadas y bien pegadas, procederé a armar la estrella. Uniendo cada pieza con pega como pueden ver en la imagen.
Y de esta forma ya tengo armada la estrella.
Para que se vea más bonita, le di un poco de color, con pintura de color amarillo, por ambos lados.
Espere que secara y para decorar y tapar la unión de todas las piezas, le coloque un círculo de foami escarchado y así se vea más bonita. Como pueden ver es bastante fácil de hacer y sirve para decorar el árbol de navidad o colocar en la pared o una puerta, sirve para decorar muchas cosas.
Espero que te haya gustado este tutorial que con mucho gusto preparé para ti.
Me despido como siempre, no sin antes agradecerte por tomarte un poco de tu valioso tiempo para visitar mi blog y apoyarme. Pórtense bien y cuídense mucho.
Contenido de creación original:
⭐ Todas las fotos son mías tomadas y editadas con mi teléfono Alcatel.
🌟 La imagen de portada, fue realizada con la aplicación Canva y editada por mí.
🌠 Las imágenes divisorias fueron tomadas de la página de https://www.glitter-graphics.com.
⭐ La traducción al inglés fue hecha con la ayuda de DeepL.
🌟 Las letras que indican los idiomas, fueron tomadas de la página https://cooltext.com/.
Very creative, I love it! :)
@tipu curate 2
Upvoted 👌 (Mana: 16/56) Liquid rewards.
I'm glad you liked it, thank you very much for your visit and support.
Congratulations @kdelvaeg! You have completed the following achievement on the Hive blockchain And have been rewarded with New badge(s)
Your next target is to reach 90 posts.
You can view your badges on your board and compare yourself to others in the Ranking
If you no longer want to receive notifications, reply to this comment with the word
STOPTo support your work, I also upvoted your post!
Check out our last posts:
!DIY
!discovery 30
This post was shared and voted inside the discord by the curators team of discovery-it
Join our Community and follow our Curation Trail
Discovery-it is also a Witness, vote for us here
Delegate to us for passive income. Check our 80% fee-back Program
Thank you very much for your support.
You can query your personal balance by
!DIYSTATSExcellent, I will put it into practice.
Una manualidad perfecta para adornar el arbolito de navidad, además los materiales están a la mano. Excelente trabajo.
Muchas gracias @rosana6, esa es la parte buena de reciclar, siempre tienes materiales que puedes reusar y hacer algo bonito.
Muy bonita amiga❤️
Gracias a ti por tu visita y apoyo.