


Hello my dear readers, I hope you are well and that you have or have had an excellent and wonderful day.
After a long absence due to the physical loss of my older brother, I did not have much encouragement to upload any kind of content for this page, but soon the Christmas holidays are coming and there are some little people, who are our children and do not understand anything of what we adults go through at times like these, so for them these dates are decorations and gifts and everything is joy and we must not take away that mood.
For that reason I have decided to create Christmas ornaments that I will show you soon, today I want to share with you a little train that I made with recycled material and that would look great to decorate any environment. Without further ado, I show you how I made it.


STEP BY STEP:
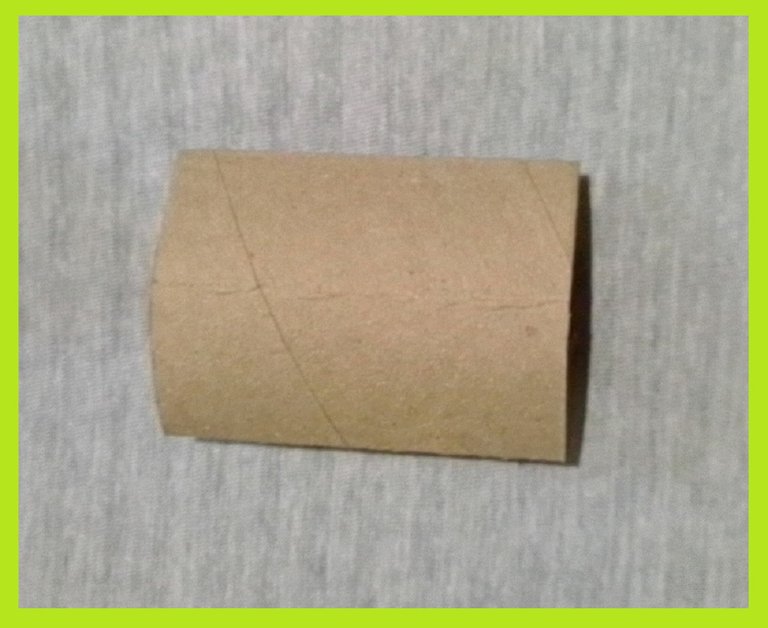
The first thing I will do is to take out all the cardboard pieces that I will use. I will use the soda cap to get the wheels out, so I will mark them on the cardboard, I will need 8 wheels.
I will also make 2 circles the size of the cardboard tube. A square that I will tell you later how to make and a circle about 1 cm larger than the diameter of the cardboard tube.


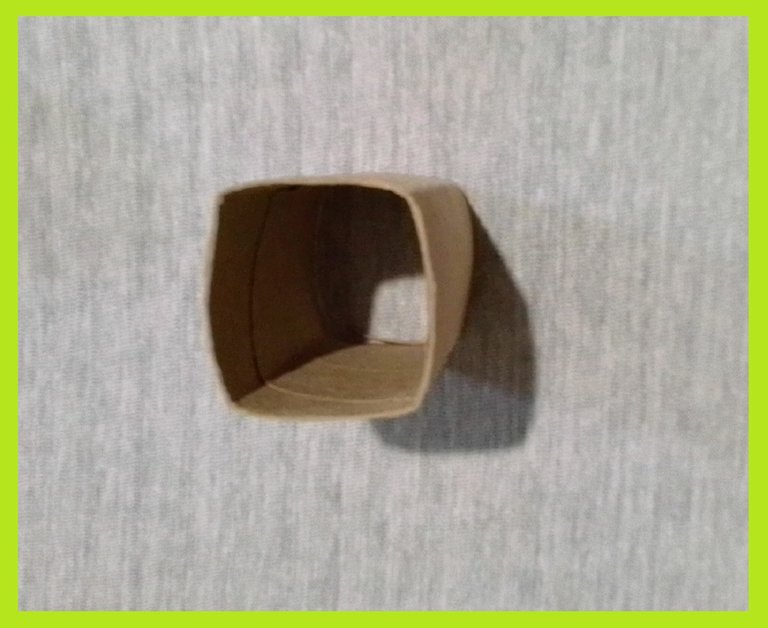
I took a cardboard tube and folded it in half, then I unfolded and joined the parts that were marked by the fold and folded again, that will make an exact square. That is the size I used to make the square piece of cardboard.
With the other tube I cut it to 2.5 cm and with the silicone I glued it to the larger circle I had cut out, as shown in the image.


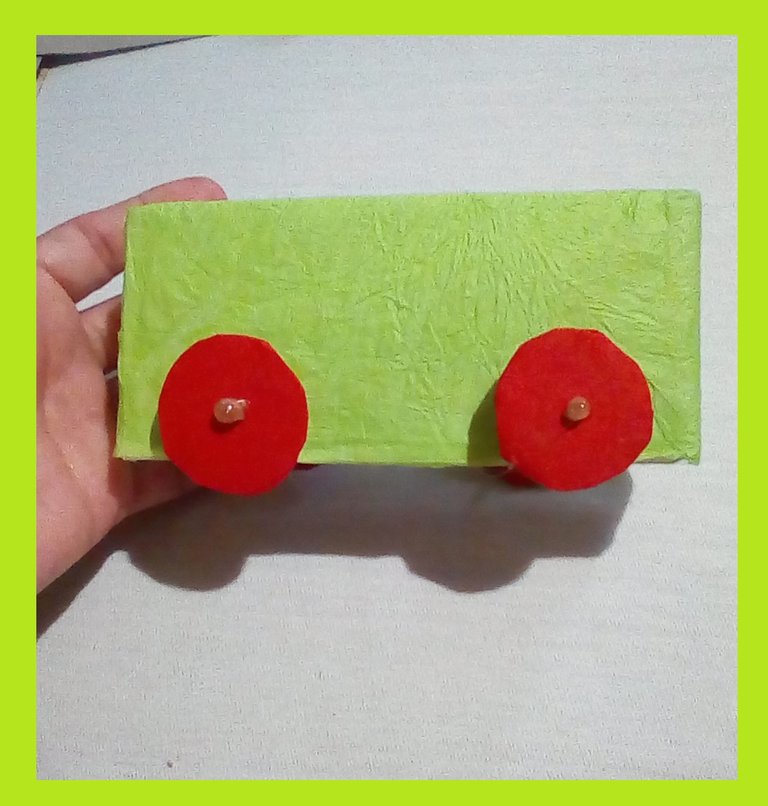
I had a cardboard box that I had ordered in a supermarket, as you can see it is one of those that are easily assembled, so I disassembled it and reduced it and I got a rectangular box of 3 x 10 cm approximately.


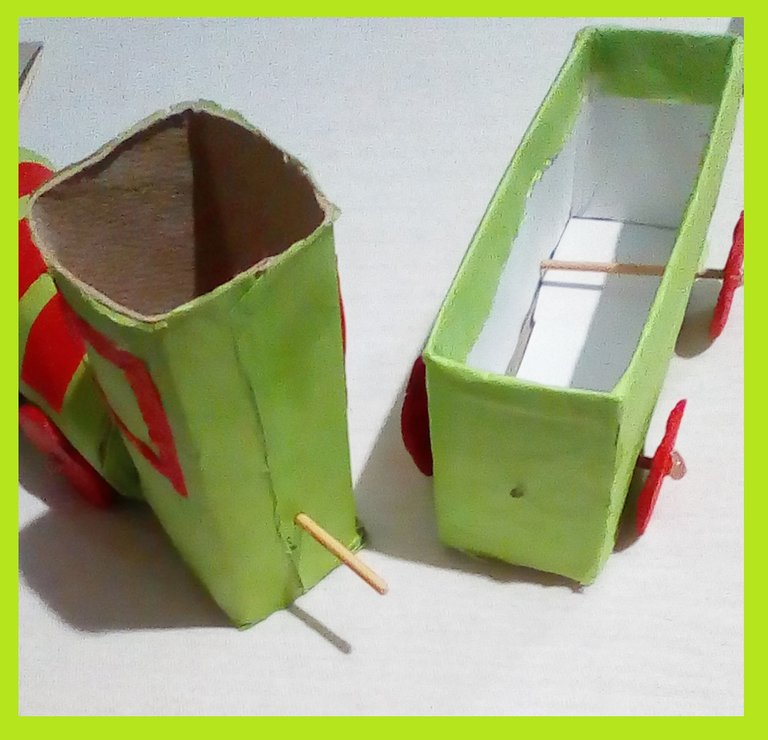
To the cardboard tube I had left, I glued with silicone the 2 circles I had previously cut out. I also glued the square cardboard part to the tube that I had folded, as shown in the image.
 |  |
|---|
 |  |
|---|
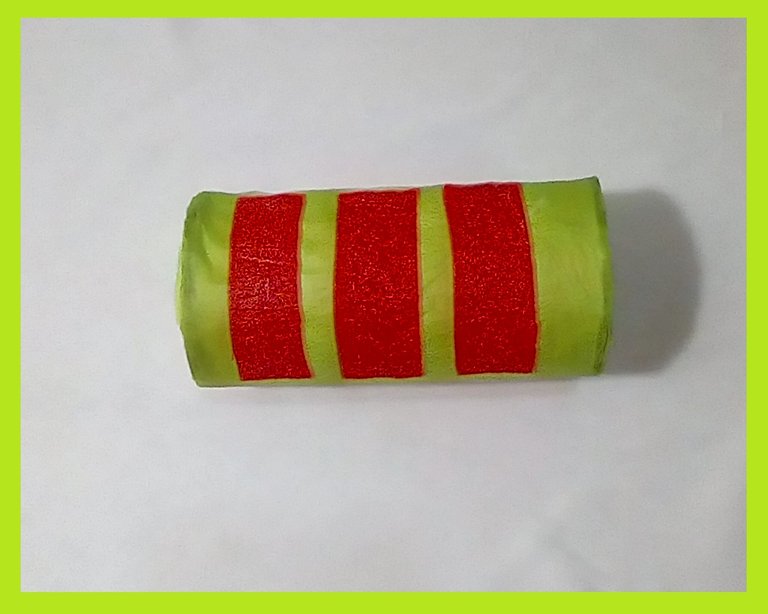
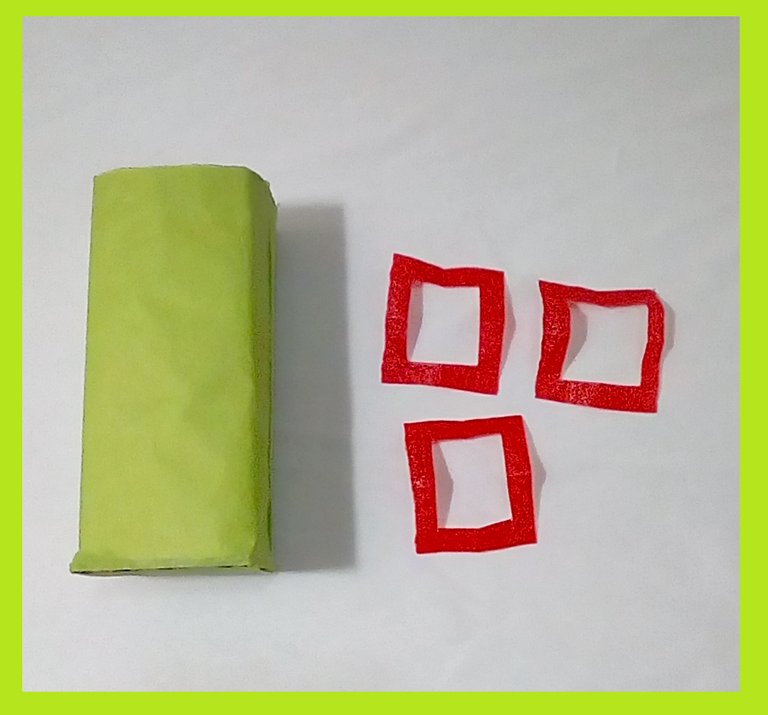
Once all the pieces were glued and assembled, I proceeded to cover them. I had some scraps of tissue paper from previous works, so I lined the tubes, the box and the hat in green, the latter I glued in red what would be the support of the hat, as you can see in the following images.


With the red tissue paper, I will make the decorations that I will show you below. Cut 3 strips of 1 x 3 cm and glue them with the silicone on the round tube.

I also cut out some red windows and glued them to the square tube and once glued, I joined the two tubes as shown in the picture.

I lined the 8 circles in red. With the help of the scissors I made some holes to what would be the locomotive of the train, I introduced the height stick and placed the rubbers in each end, fixing it with a little bit of silicone.
 |  |  |
|---|
 |  |  |
|---|
I did the same procedure to join the two pieces of the train, I made a hole to introduce the height stick and join them with the silicone.
To make the hat fit the square tube, cut out a strip of cardboard and glue it to the inside of the hat, as shown in the picture. Finish by decorating the train with some hearts.

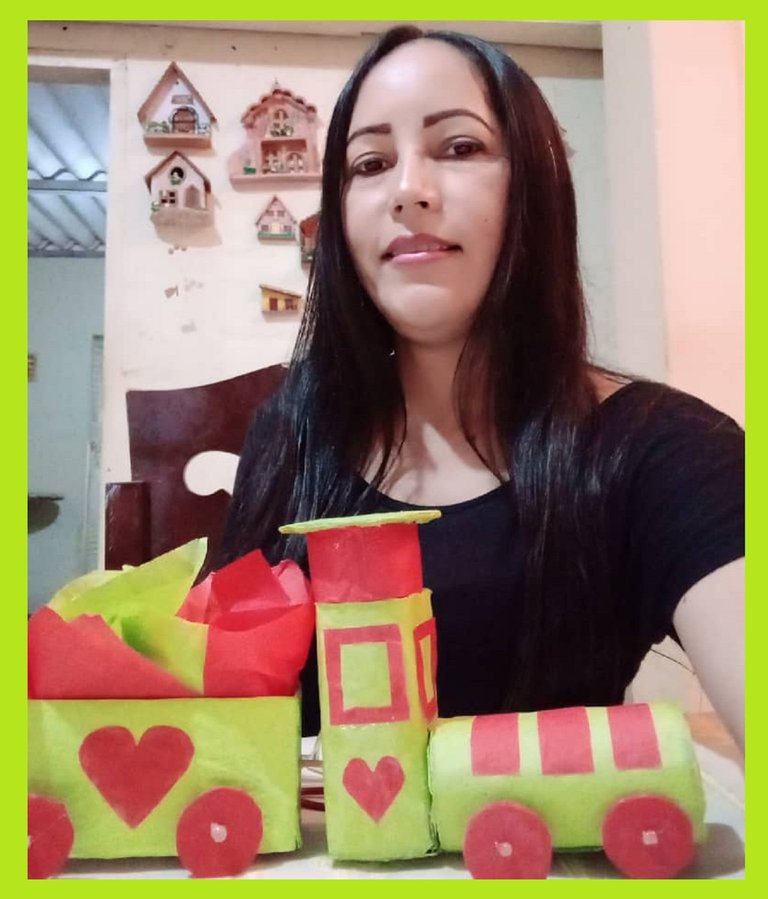
And as you can see, I have my train ready to decorate any special place. You can put it under the tree, or place it on the table with some candy or just to give it to the kids to play with, they will have fun for sure.

I hope you liked it and that you can make it too. I say goodbye as always, but not before thanking you for giving me a little bit of your valuable time. I hope to see you in my next publication, be good and take care of yourselves.
Original creation content:
🔸 All photos are my own taken and edited with my Alcatel cell phone.
🚂 The cover image was made with the Canva application and edited by me.
🔹 The divider images were taken from Canva and edited by me in Paint.
🚂 The English translation was done with the help of DeepL.
🔸 The letters indicating the languages, were taken from the Cooltext page.

Hola mis queridos lectores, espero que se encuentren bien y que tengan o hayan tenido un excelente y maravilloso día.
Después de una larga ausencia por la perdida física de mi hermano mayor, pues no tenia muchos ánimos de subir ningún tipo de contenido para esta pagina, pero ya pronto se acerca las fiestas navideñas y hay unas personitas, que son nuestros hijos y que no entienden nada de lo que los mayores pasamos en momentos como estos, así que para ellos estas fechas son de decoraciones y regalos y todo es alegría y no hay que quitarles ese ánimo.
Por ese motivo me he decidido crear adornos navideños que iré mostrando poco, hoy les quiero compartir un trencito que realice con material reciclado y que quedaría muy bien para decorar cualquier ambiente. Sin mas preámbulos, les muestro como lo realice.

PASO A PASO:
Lo primero que haré será sacar todas las piezas en cartón que utilizare. Usare la tapa de refresco para sacar las ruedas, por lo tanto las marcaré en el cartón, necesitare 8 ruedas.
También sacaré 2 círculos del tamaño del tubo de cartón. Un cuadrado que mas adelante le diré cómo lo saque y un círculo más grande como de 1 cm más que el diámetro del tubo de cartón.
Agarre un tubo de cartón y lo doble por la mitad, luego desdoble y uní las partes que quedó marcada por el doblez y volví a doblar, eso hará que me quede un cuadrado exacto. Ese es el tamaño que utilice para sacar la pieza cuadrada en cartón.
Con el otro tubo lo corte de 2,5 cm y con el silicón lo pegue a al círculo más grande que había recortado, tal como se muestra en la imagen.
Tenía una caja de cartón que había pedido en un supermercado, como pueden ver es de esas que se arman fácilmente, así que la desarme y la reduje y me quedo una caja rectangular de 3 x 10 cm aproximadamente.
Al tubo de cartón que me quedo, le pegue con silicón, los 2 círculos que había recortado anteriormente. Aproveche y pegué también la parte cuadrada de cartón al tubo que había doblado, tal como se muestra en la imagen.
| |
|---|
| |
|---|
Ya con todas las piezas pegadas y armadas, procedí a forrarlas. Tenía de trabajos anteriores, unos retazos de papel de seda, así que forre los tubos, la caja y el sombrero en color verde, este último le pegue color rojo lo que sería el soporte del sombrero, como pueden apreciar en las siguientes imágenes.
Con el papel de seda en color rojo, hare las decoraciones que les mostraré a continuación. Recorte 3 tiras de 1 x 3 cm y las pegue con el silicón en el tubo redondo.
También recorte especie de unas ventanas en rojo y las pegue al tubo cuadrado y una vez que las pegue, uní los dos tubos como se muestra en la imagen.
Forre los 8 círculos en rojo. Con la ayuda de la tijera le hice unos agujeros a lo que sería la locomotora del tren, le introduje el palito de altura y le coloque los cauchos en cada punta, fijándolo con un poco de silicón.
| | |
|---|
| | |
|---|
Hice el mismo procedimiento para unir las dos piezas del tren, le hice un agujero para poder introducir el palito de altura y unirlas con el silicón.
Para que el sombrero pueda encajar en el tubo cuadrado, recorte una tira de cartón y la pegue por dentro del sombrero, tal como se ve en la imagen. Termine decorando el tren con unos corazones.
Y como pueden ver, ya tengo mi tren listo para partir a decorar cualquier lugar especial. Se puede colocar debajo del arbolito, o colocarlo en la mesa colocando alguna chuchería o simplemente para dárselo a los niños para que jueguen, de seguro se van a divertir.
Espero que les haya gustado y que lo puedan realizar también. Me despido como siempre, no sin antes agradecerles, por dedicarme un poquito de su valioso tiempo. Los espero en mi próxima publicación, pórtense bien y cuídense mucho.
Contenido de creación original:
🔸 Todas las fotos son de mi propiedad tomada y editadas con mi celular Alcatel.
🚂 La imagen de portada fue realizada con la aplicación Canva y editada por mi.
🔹 Las imágenes del separador fueron tomadas de la página Canva y editado por mí en Paint.
🚂 La traducción al idioma inglés fue realizada con ayuda de DeepL.
🔸 Las letras de indicación de los idiomas, fueron tomadas de la página Cooltext.
</div
Está hermoso 🤩, un bello tren para los niños, muy fácil y económico de hacer. Gracias por compartir 👍
Gracias a ti por visitarme y apoyarme. ☺️