Español
Hola amigos espero se encuentren muy bien, tenia tiempo sin publicar en la comunidad que más amo @hivediy, pero hoy estoy muy feliz de estar de vuelta. Quiero decirles tengo muchos trabajos por mostrarles así que espero ponerme al día pronto.
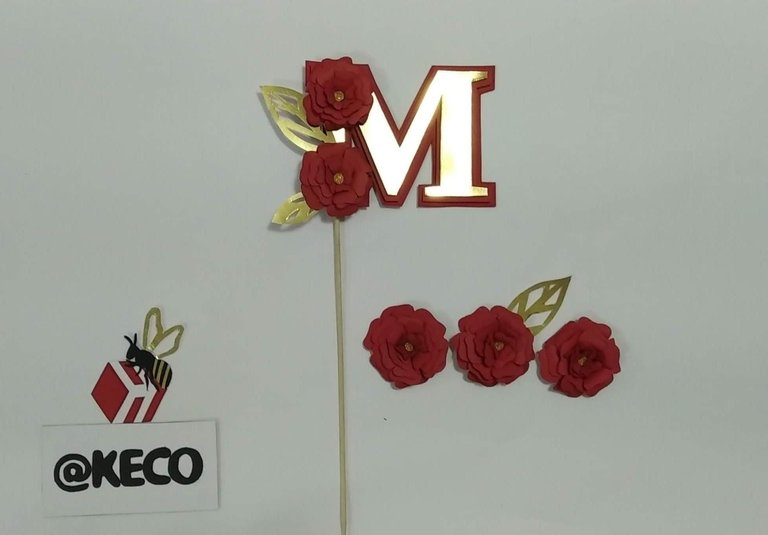
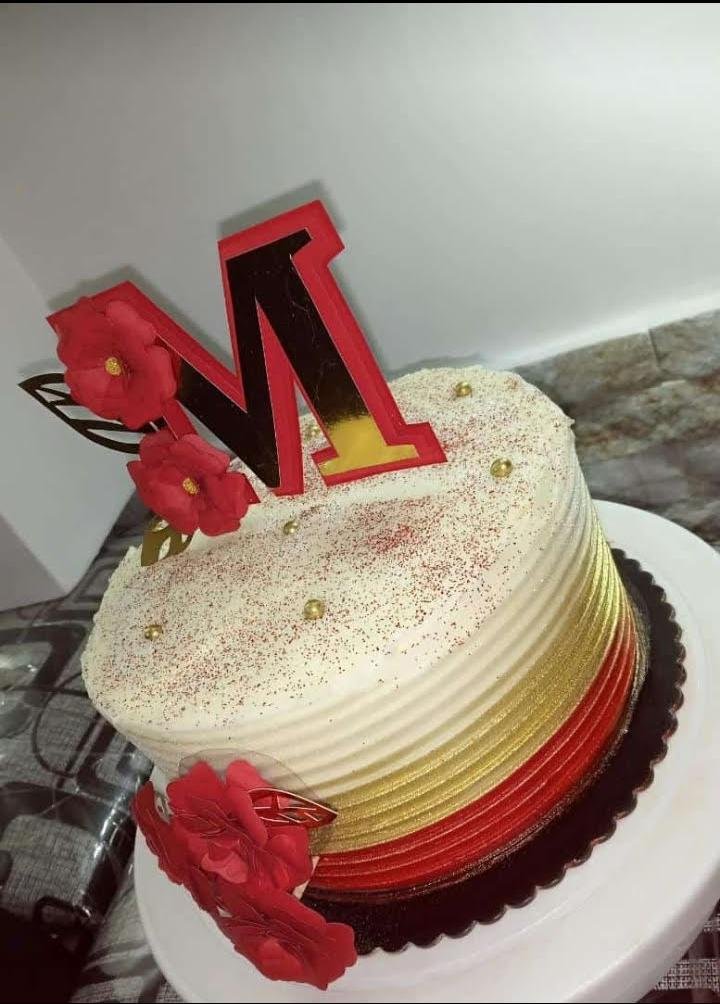
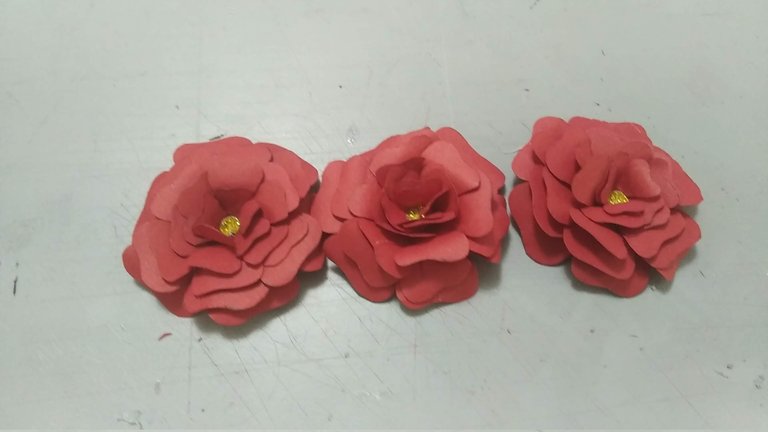
A los que me conocen, saben adoro hacer decoraciones para pasteles y el trabajo que hoy les muestro es uno de ellos. Es un topper sencillo y fácil de realizar, fue hecho con amor e hizo lucir hermoso el pastel realizado por la mejor repostera Mayda.
Sin más, y esperando disfruten del trabajo realizado les dejo los materiales utilizados, el proceso y las imágenes del trabajo.
- Cartulina roja
- Cartulina dorada tipo espejo
- Silicón frío
- Silicón Caliente
- Foami rojo plano
- Palito de madera (de altura)
- Acetato transparente
- Cutter
- Tijera
English
Hello friends I hope you are doing well, I had some time without posting in the community that I love the most @hivediy, but today I am very happy to be back. I want to tell you I have a lot of work to show you so I hope to catch up soon.
To those of you who know me, you know I love making cake decorations and the work I'm showing you today is one of them. It is a simple and easy to make topper, it was made with love and it made the cake made by the best pastry chef Mayda look beautiful.
Without further ado, and hoping you enjoy the work done I leave you the materials used, the process and the images of the work.
- Red cardboard
- Gold mirror cardboard
- Cold Silicone
- Hot Silicone
- Flat red Foami
- Wooden stick (height)
- Transparent acetate
- Cutter
- Scissors
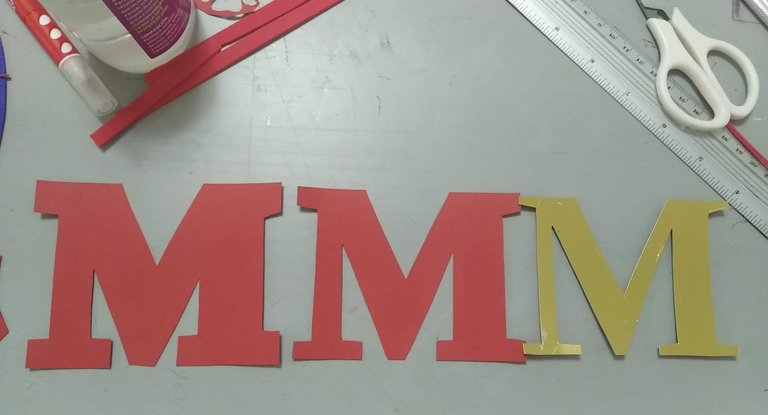
1.- Se diseña en papel la letra “M” según el alto y el ancho deseado.
1.- The letter "M" is designed on paper according to the desired height and width.
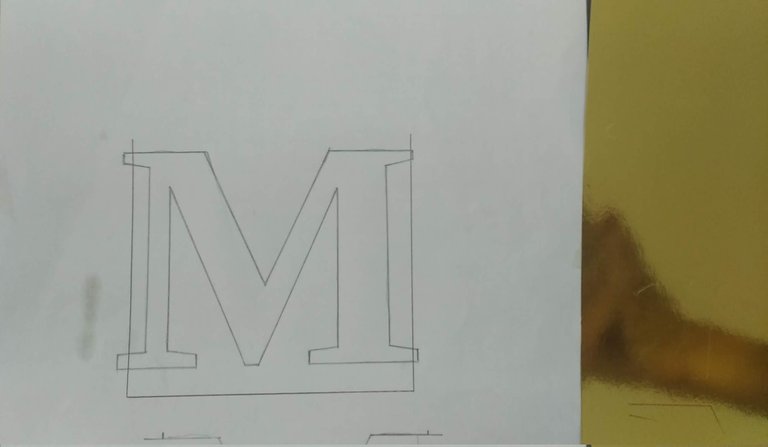
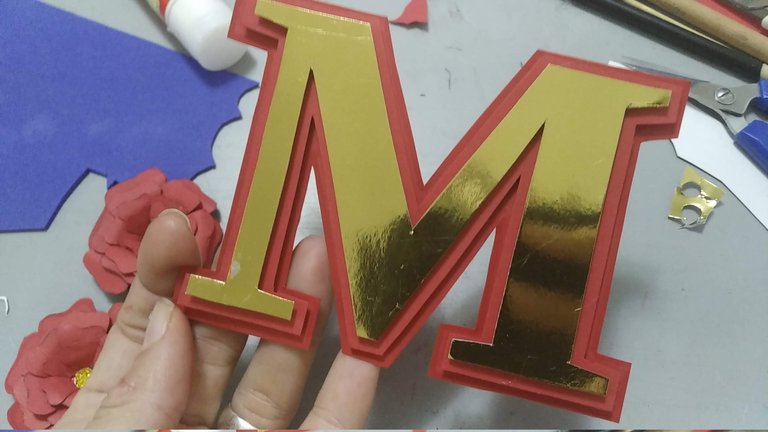
2.- El diseño creado de la letra “M” transferirla a la cartulina dorada tipo espejo, para transferir bastara con colocar el papel encima y remarcar, la cartulina dorada es delicada y se marca fácilmente, así que hay que tener cuidado al trabajarla. Luego recortar.
2.- The created design of the letter "M" transfer it to the gold mirror cardboard, to transfer just place the paper on top and highlight, the gold cardboard is delicate and easily marked, so you have to be careful when working with it. Then cut out.

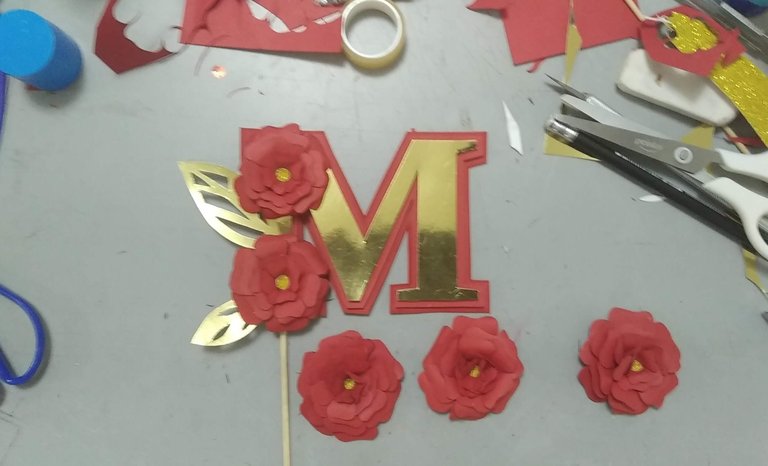
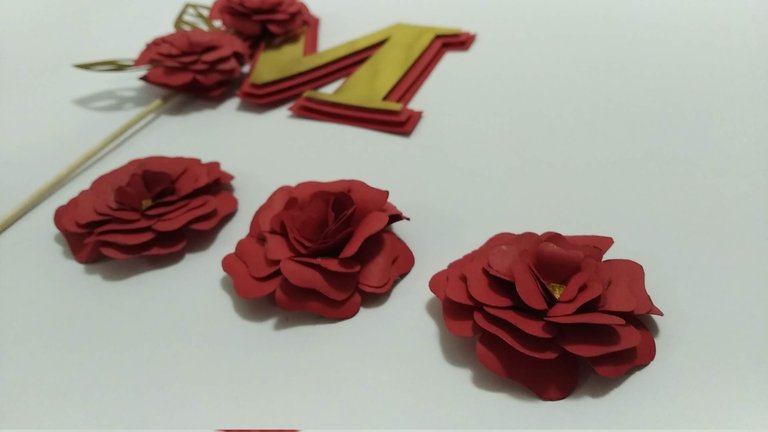
3.- Para la realización de las flores, sacar un patrón en cuatro medidas de acuerdo al diseño deseado. Luego marcar y recortar la cartulina roja de acuerdo al diseño. Utilizando la borra de un lápiz o un decorador con punta redonda hacer presión de forma circular en el centro para darle forma.
3.- To make the flowers, draw a pattern in four sizes according to the desired design. Then mark and cut out the red cardboard according to the design. Using the eraser of a pencil or a decorator with a round tip, apply circular pressure in the center to give it shape.
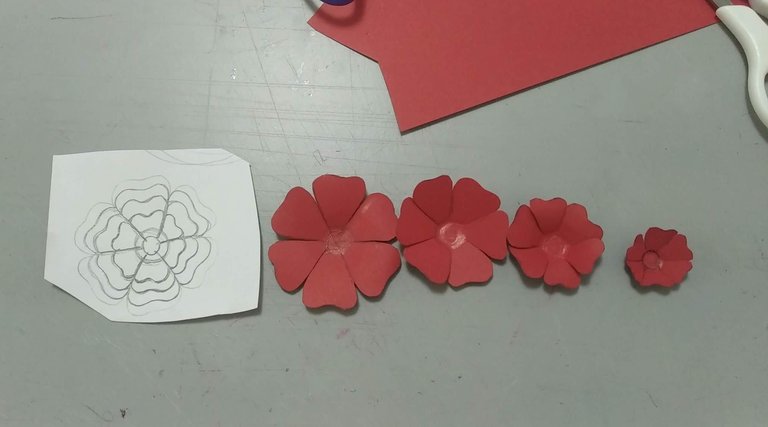
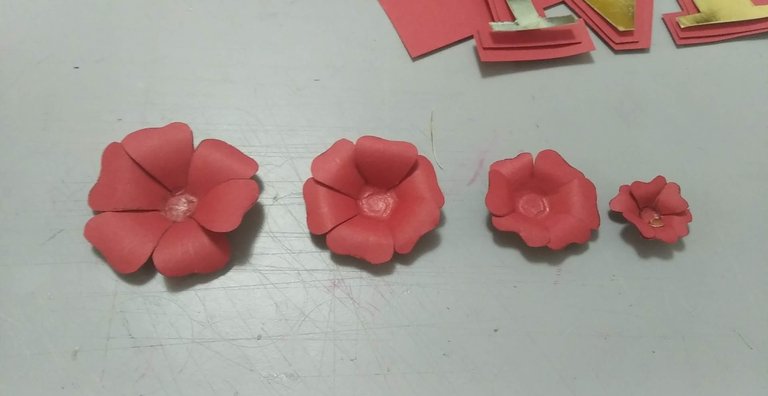
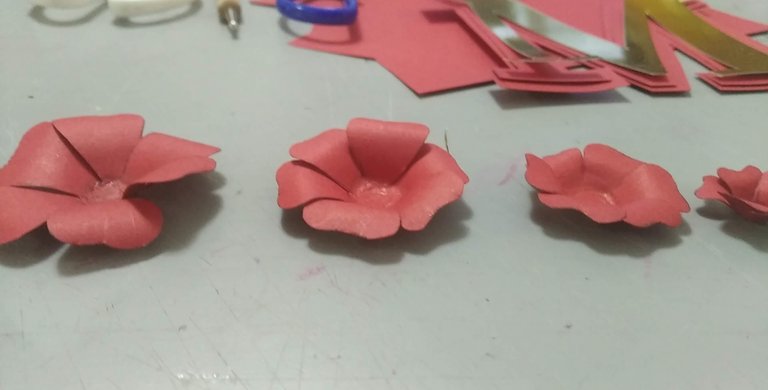
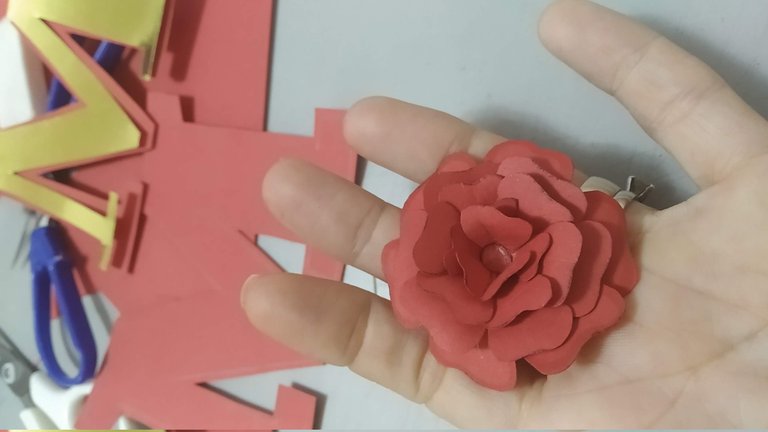
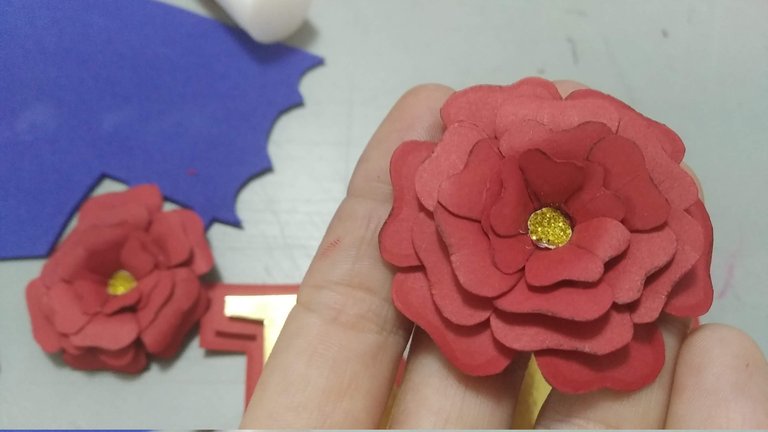
4.- Luego que se tengan todos los recortes de pétalos con el centro marcado, ir pegando con silicón caliente, de los pétalos más pequeños a los más grandes. Luego pegarle en el centro de cada flor pegar un pedacito de cartulina dorada escarchada (opcional).
4.- Once you have all the petal cutouts with the center marked, glue with hot silicone, from the smallest petals to the largest ones. Then glue a small piece of frosted gold cardboard in the center of each flower (optional).
5.- Continuar elaborando la letra “M”. Ya con el molde en cartulina dorada, marcar y cortar otras dos “M” en distintos tamaños, para que se pueda ver el efecto en capas.
5.- Continue making the letter "M". Now with the mold on gold cardboard, mark and cut two more "M "s in different sizes, so that the layered effect can be seen.
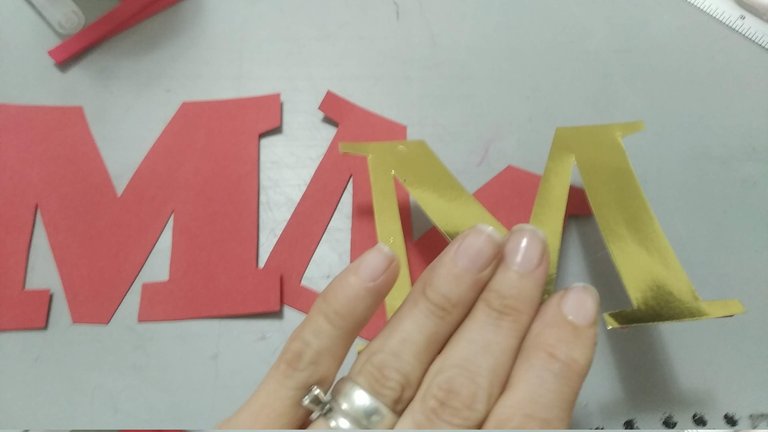
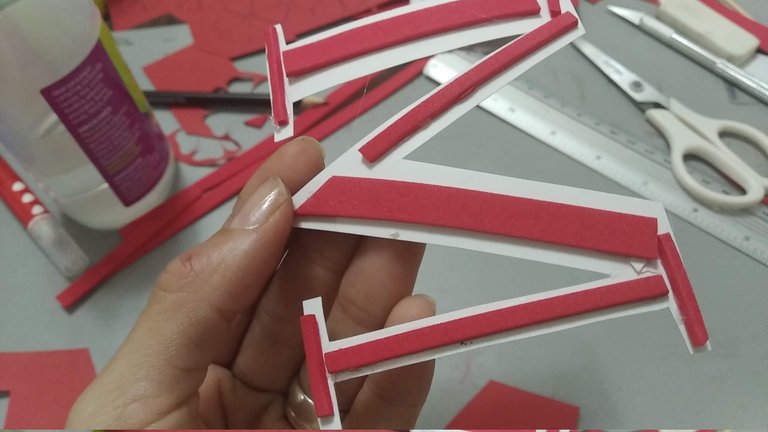
6.- A cada letra, por la parte posterior, pegar pequeños trozos de foami plano rojo para dar el relieve necesario entre capa y capa. Luego pegar las capas en orden de tamaño.
6.- To each letter, on the back, glue small pieces of flat red foami to give the necessary relief between each layer. Then glue the layers in order of size.
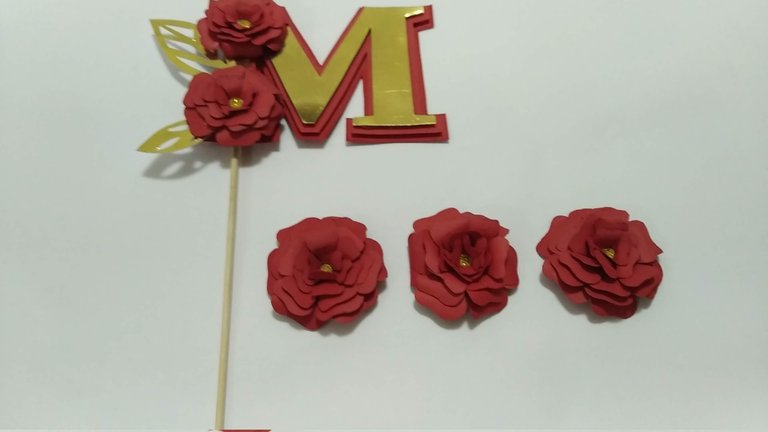
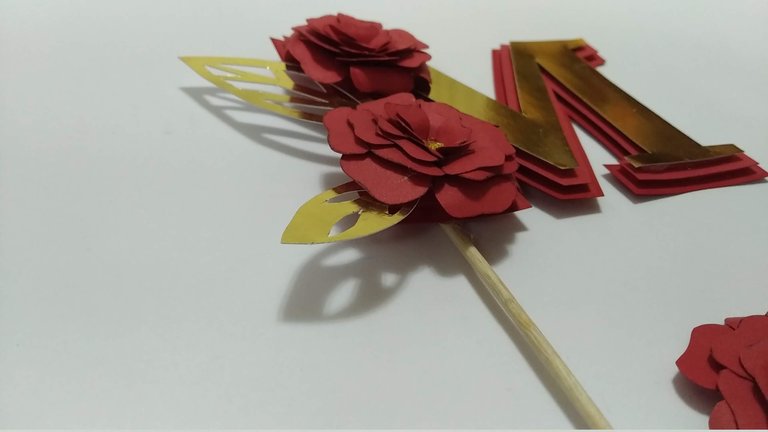
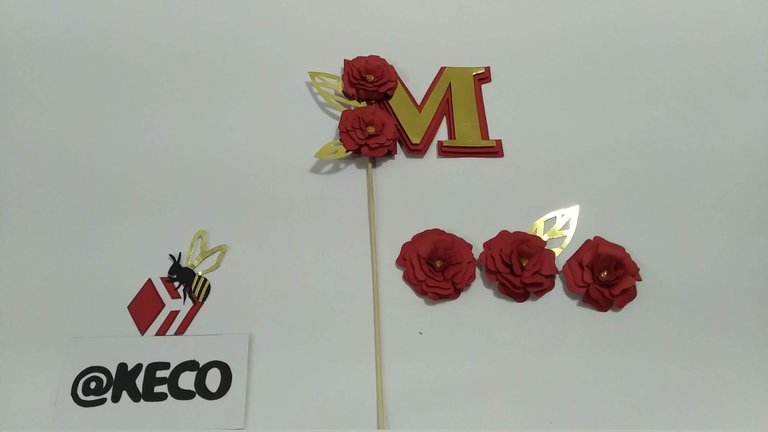
7.- De las cinco flores creadas, pegar dos en el lado izquierdo de la letra “M”, y al resto de las flores ponerle una base de acetato, para que lo húmedo del pastel no las dañe; para terminar la decoración crear pequeñas hojas con la cartulina dorada y colocar a los lados de las flores.
7.- Of the five flowers created, glue two on the left side of the letter "M", and to the rest of the flowers put an acetate base, so that the humidity of the cake does not damage them; to finish the decoration create small leaves with the golden cardboard and place them on the sides of the flowers.

8.- Listo, decoración completa para enaltecer de forma sencilla un rico pastel de cumpleaños.
8.- Ready, complete decoration to enhance in a simple way a delicious birthday cake.
Espero les haya gustado y sobre todo se entusiasmen a crear algo parecido para sorprender a familiares y amigos.
I hope you liked it and, above all, I hope you get excited to create something similar to surprise your family and friends.
SALUDOS / REGARDS
Todas las Fotos fueron tomadas con mi teléfono Redmi 7A.
Contenido original de @keco (fotos y texto) - Todos los derechos reservados Publicado en HIVE así como en mi instagram : http://instagram.com/carton_pintura_algo_mas
All Photos were taken with my Redmi 7A phone.
Original content from @keco (photos and text) - All rights reserved Posted on HIVE as well as on my instagram: http://instagram.com/carton_pintura_algo_mas
Congratulations @keco! You have completed the following achievement on the Hive blockchain and have been rewarded with new badge(s):
Your next target is to reach 200 posts.
You can view your badges on your board and compare yourself to others in the Ranking
If you no longer want to receive notifications, reply to this comment with the word
STOPTo support your work, I also upvoted your post!
Amigaaa 🤗 tiempo sin visitarte, me gustó mucho el efecto de la letra se ve genial como resalta y sencillo de elaborar, gracias por el aporte 😊
Hola @edwing357 que alegría leer tu comentario. Estuve ausente por varios meses pero he vuelto, gracias por seguir presente en esta magnifica plataforma.
Saludos, bendiciones y éxitos.
Bienvenida 🤗 aquí seguimos amiga poniendo siempre un granito cada día
Hermosos y elegante
Gracias @jorgelissanchez por visitar y comentar, es un placer leerte.
Saludos, bendiciones y éxitos.
Felicitaciones @keco, un trabajo minucioso y con clase...sigue adelante
Gracias mi hermoso @xavierdleon, es un gusto enorme verte por acá, espero ver pronto tu gran talento cosechando éxitos.
un fuerte abrazo.
Que lindo... Me encanta la forma tridimensional que adoptan las letras. Y las rositas muy hermosas también
Hola @mariavargas un placer saludarte y leer tu comentario, me alegra te guste mi trabajo.
Saludos, bendiciones y éxitos.
🌻