Español
Feliz y bendecido 8 de Marzo, día importante para las mujeres a nivel mundial.
A ver mis estimados lectores, hoy les muestro como hacer un topper a capas a partir de una impresión a color, esta vez el personaje es la mágica Sirenita. Si, adoro los cumpleaños y me encanta crear toppers para que los pasteles y las fotos del recuerdo queden hermosas.
Si han tenido la oportunidad de ver mis publicaciones anteriores, sabrán adoro crear los personajes en cartulina de colores, sin embargo, a veces suele pasar que el tiempo es muy corto para crearlos, así que me toca recurrir a la impresión a color para ofrecer a Mayda mi pastelera favorita, un topper lindo hermoso realizado en un tiempo muy corto.
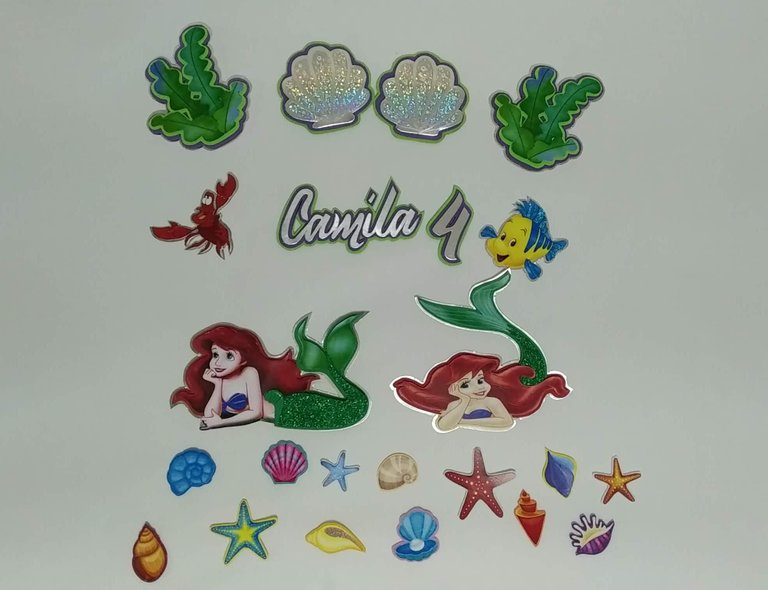
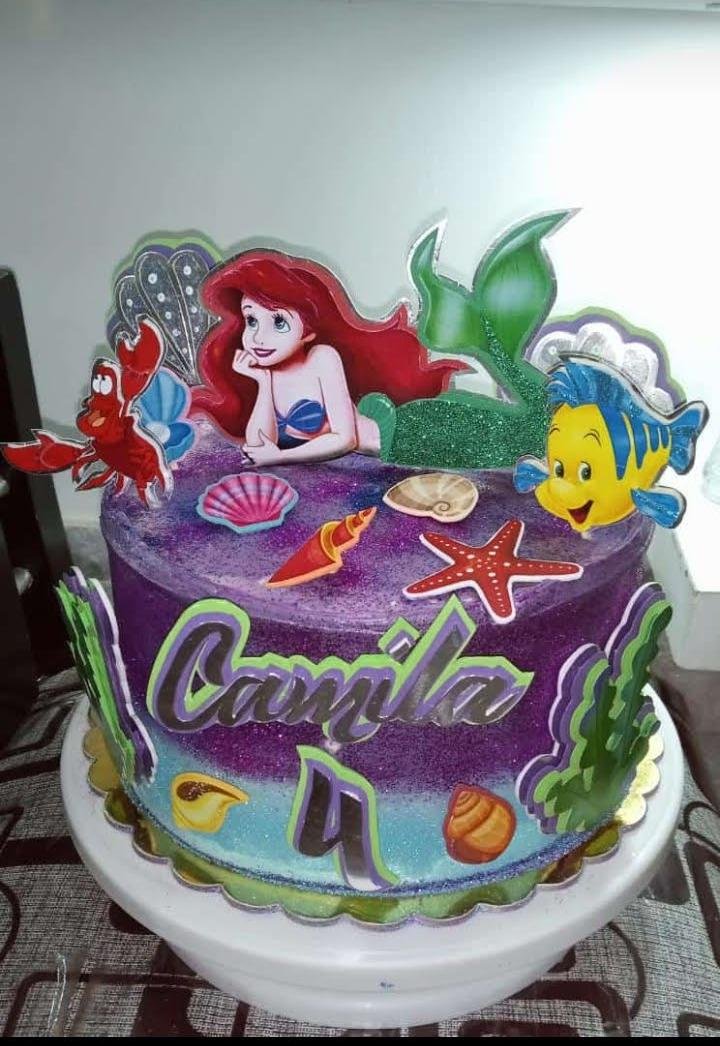
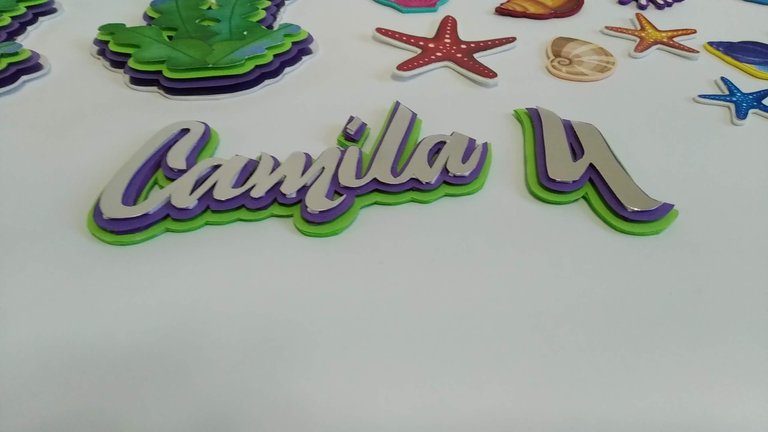
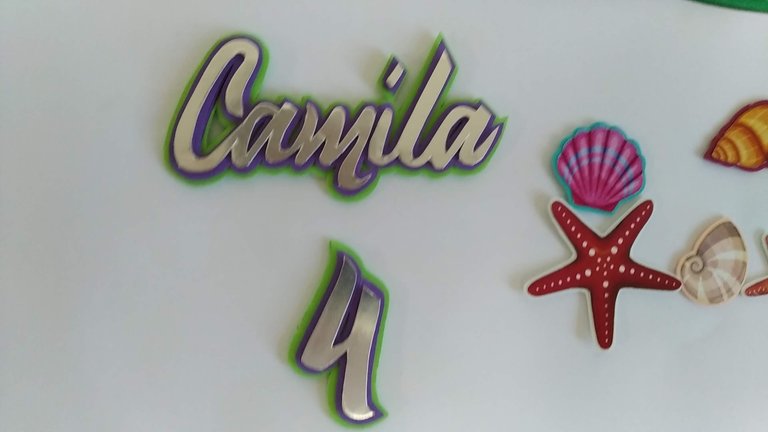
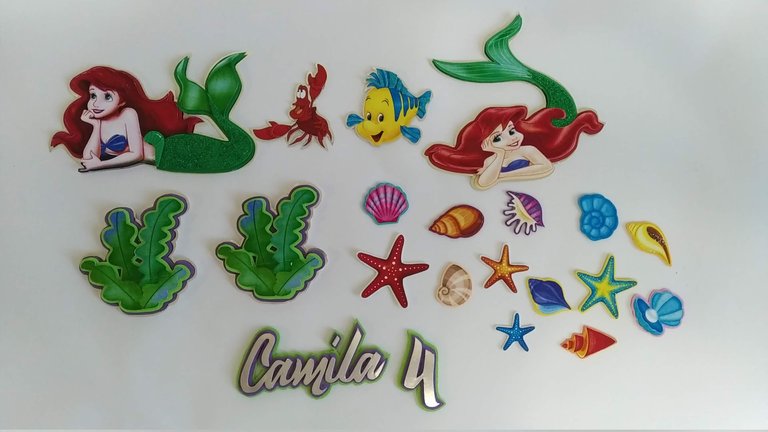
Es un topper sencillo, cargado de color y capas que alegró el corazón a Camila en la celebración de sus 4 añitos. Sin más, y esperando disfruten del trabajo realizado les dejo los materiales utilizados, el proceso y las imágenes del trabajo.
- Impresión a color de los personajes a utilizar ( impresión en cartulina de preferencia).
- Cartulina de colores: verde manzana y morado.
- Cartulina Plateada tipo espejo.
- Cartulina holográfica plateada.
- Foami verde escarchado.
- Foami plano de acuerdo a los colores de los dibujos impresos (azul, amarillo, blanco, marrón, morado, etc.)
- Palitos de madera.
- Silicón frío.
- Silicón caliente.
- Tijera.
- Cutter.
English
Happy and blessed March 8th, an important day for women worldwide.
Let's see my dear readers, today I show you how to make a layered topper from a color print, this time the character is the magical Little Mermaid. Yes, I love birthdays and I love to create toppers so that the cakes and the photos of the memory are beautiful.
If you have had the opportunity to see my previous publications, you will know that I love to create the characters in colored cardboard, however, sometimes it happens that the time is too short to create them, so I have to resort to color printing to offer to Mayda my favorite baker, a beautiful and cute topper made in a very short time.
It is a simple topper, full of color and layers that made Camila's heart happy for her 4th birthday celebration. Without further ado, and hoping you enjoy the work done, here are the materials used, the process and the images of the work.
- Color printing of the characters to be used (preferably printed on cardboard).
- Color cardboard: apple green and purple.
- Silver mirror cardboard.
- Silver holographic cardboard.
- Green frosted Foami.
- Flat Foami according to the colors of the printed drawings (blue, yellow, white, brown, purple, etc.).
- Wooden sticks.
- Cold silicone.
- Hot glue.
- Scissors.
- Cutter.
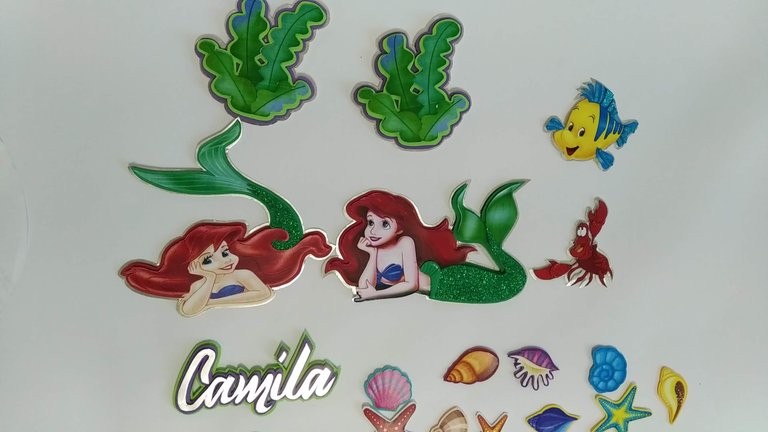
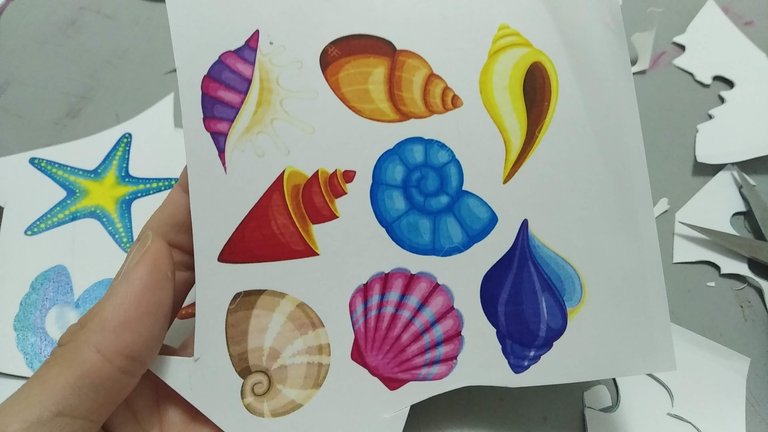
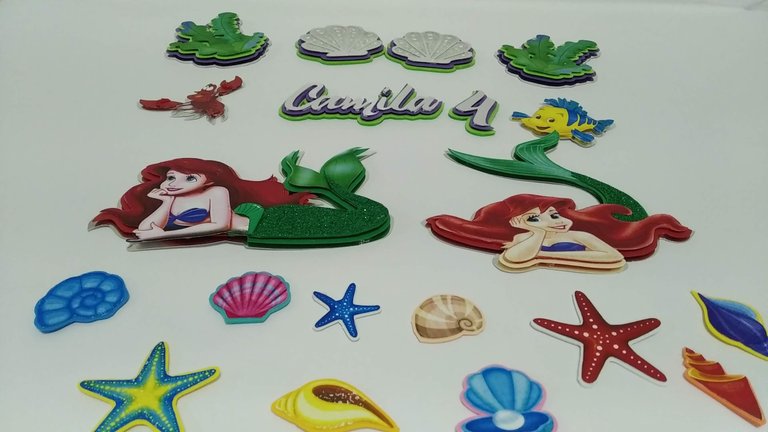
1.- Imprimir los diseños a utilizar, según su gusto. Para este trabajo se utilizó la impresión de dos (2) Ariel, un (1) cangrejo, un (1) pez, dos (2) algas y trece (13) elementos marinos para decoración. Todo se imprimió en cartulina blanca para mejor firmeza a la hora de recortar.
1.- Print the designs to be used, according to your taste. For this work we used the printing of two (2) Ariel, one (1) crab, one (1) fish, two (2) seaweed and thirteen (13) marine elements for decoration. Everything was printed on white cardboard for a better firmness when cutting out.

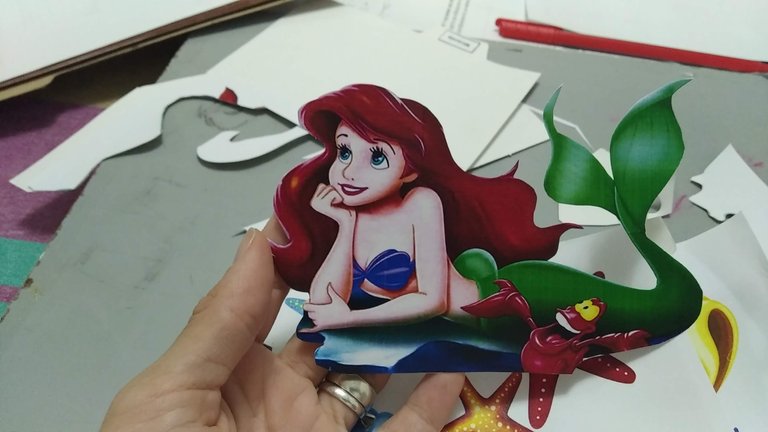
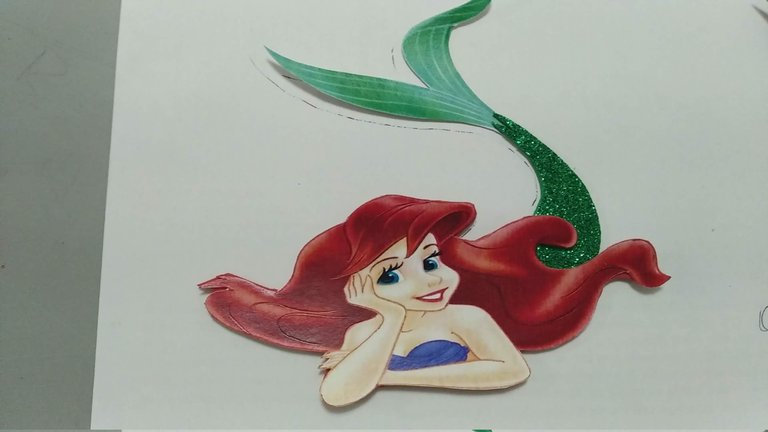
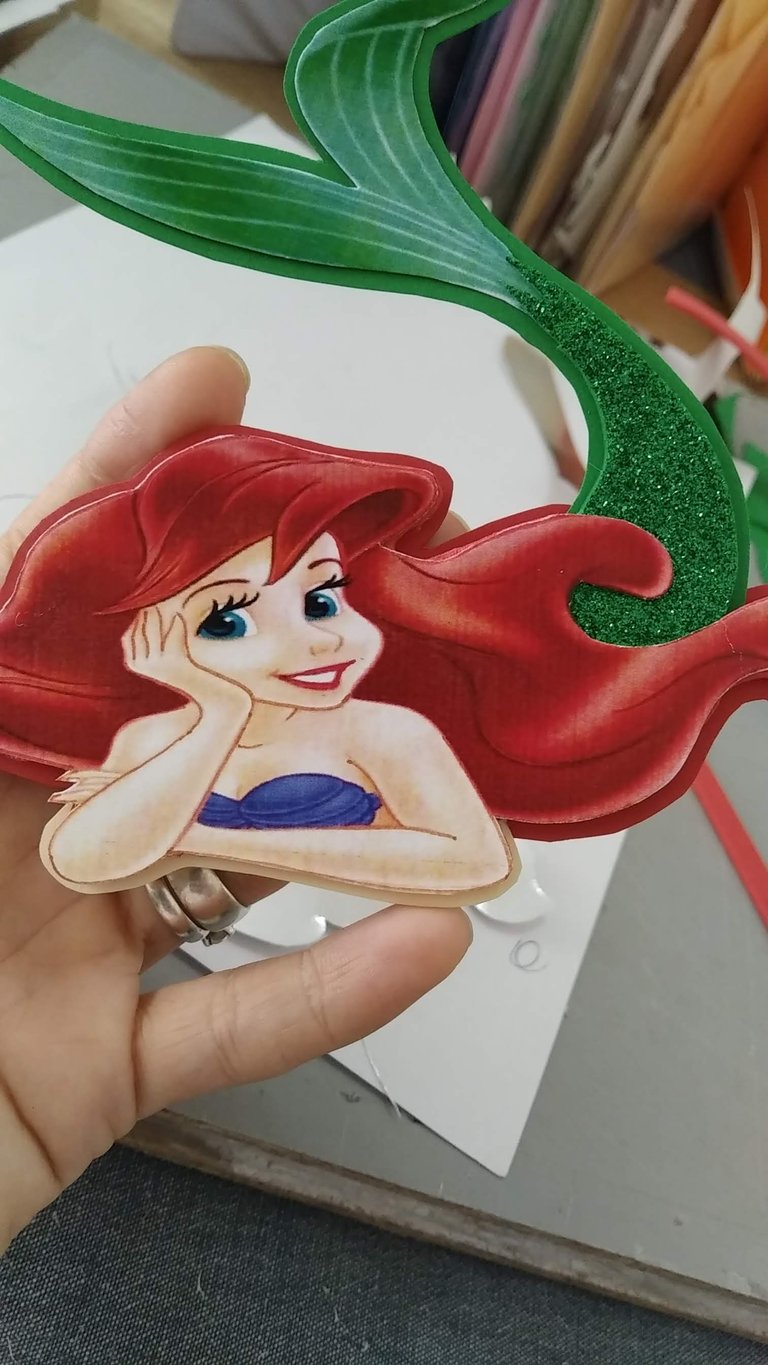
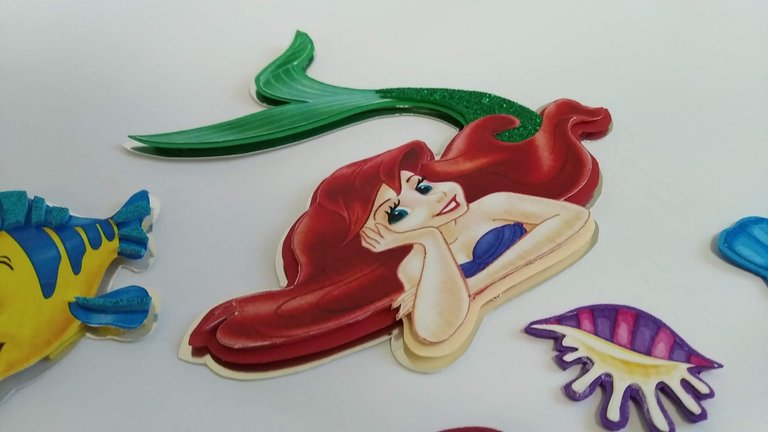
2.- Recortar todas las piezas siguiendo las siluetas de las mismas. Se debe cuidar de no dejar partes blancas que no correspondan al diseño. Tener cuidado especial con las Sirenitas, ya que son la parte central de la decoración.
2.- Cut out all the pieces following the silhouettes of the pieces. Be careful not to leave white parts that do not correspond to the design. Take special care with the Mermaids, as they are the central part of the decoration.
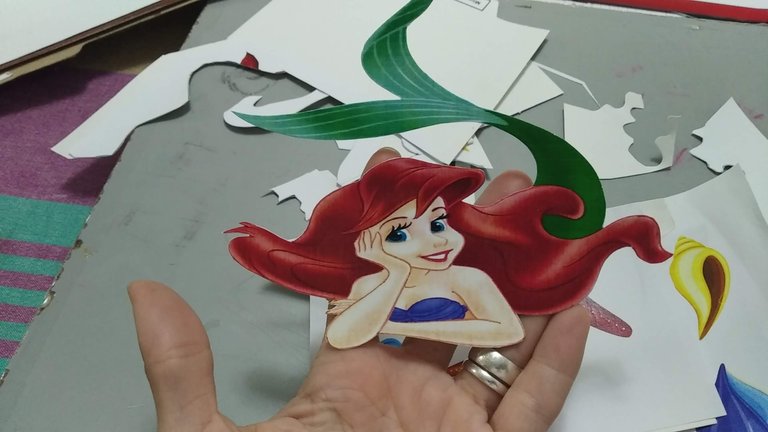
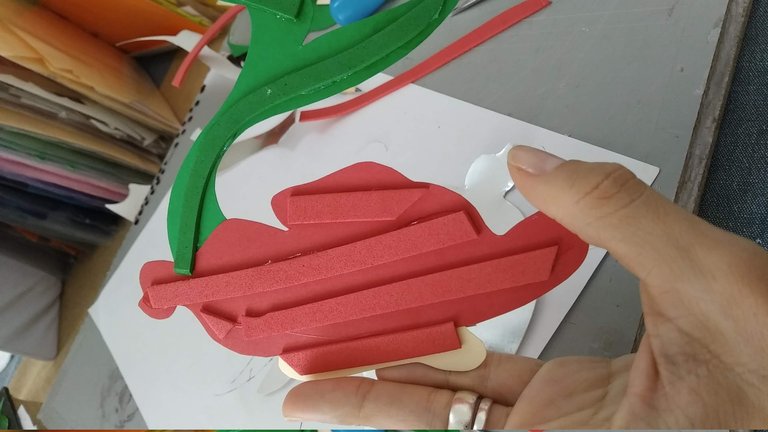
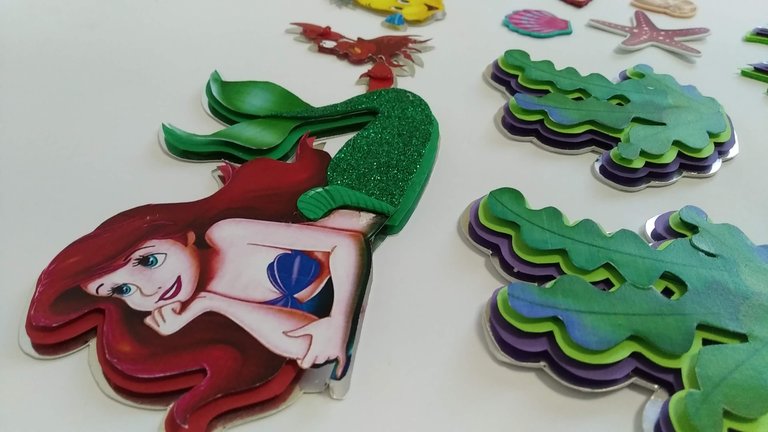
3.- Como las sirenas serán la pieza mas grande y la central deberán destacarse; para esto, se hará destacar la cola, utilizando foami verde escarchado. Se deberá recortar la pieza correspondiente a la cola y sacar ese mismo diseño en el foami, luego pegar a la pieza.
3.- As the mermaids will be the largest and the central piece, they should be highlighted; for this, the tail will be highlighted, using frosted green foami. The piece corresponding to the tail should be cut out and the same design should be drawn on the foami, then glued to the piece.
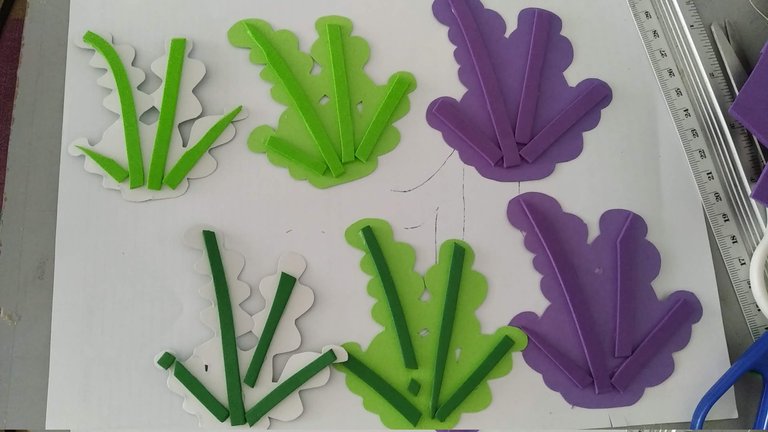
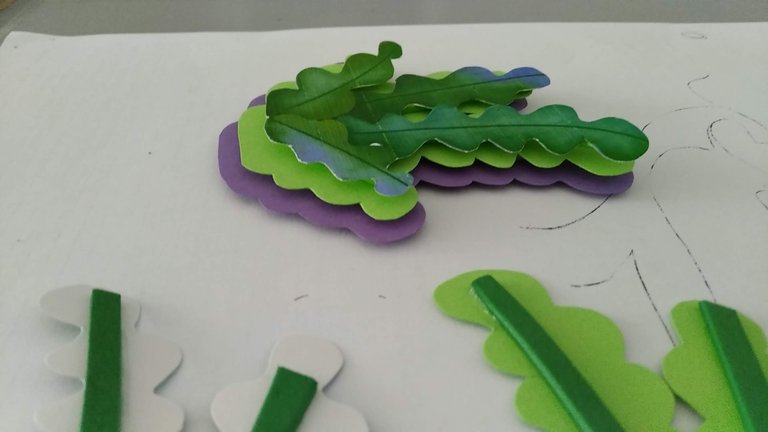
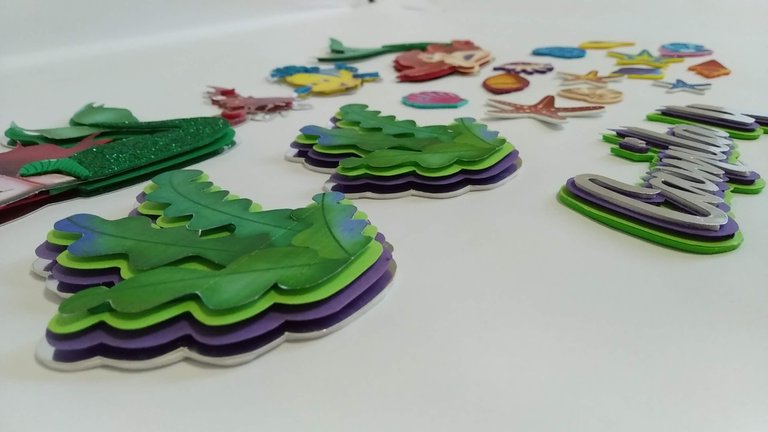
4.- A las algas impresas, para darle mayor vivacidad, se le harán capas en cartulina de color verde, morado y plateado. Estas capas deben ser de distintos tamaños y para darle la separación entre capa y capa se debe pegar pequeños trozos de foami en la parte posterior. El foami puede ser de cualquier color, sin embargo, yo recomiendo se usen colores iguales o parecidos a la cartulinas en uso.
4.- To make the printed seaweed more vivid, we will make layers in green, purple and silver cardboard. These layers should be of different sizes and to give the separation between layers, small pieces of foami should be glued on the back. The foami can be of any color, however, I recommend using the same or similar colors to the cardboard in use.

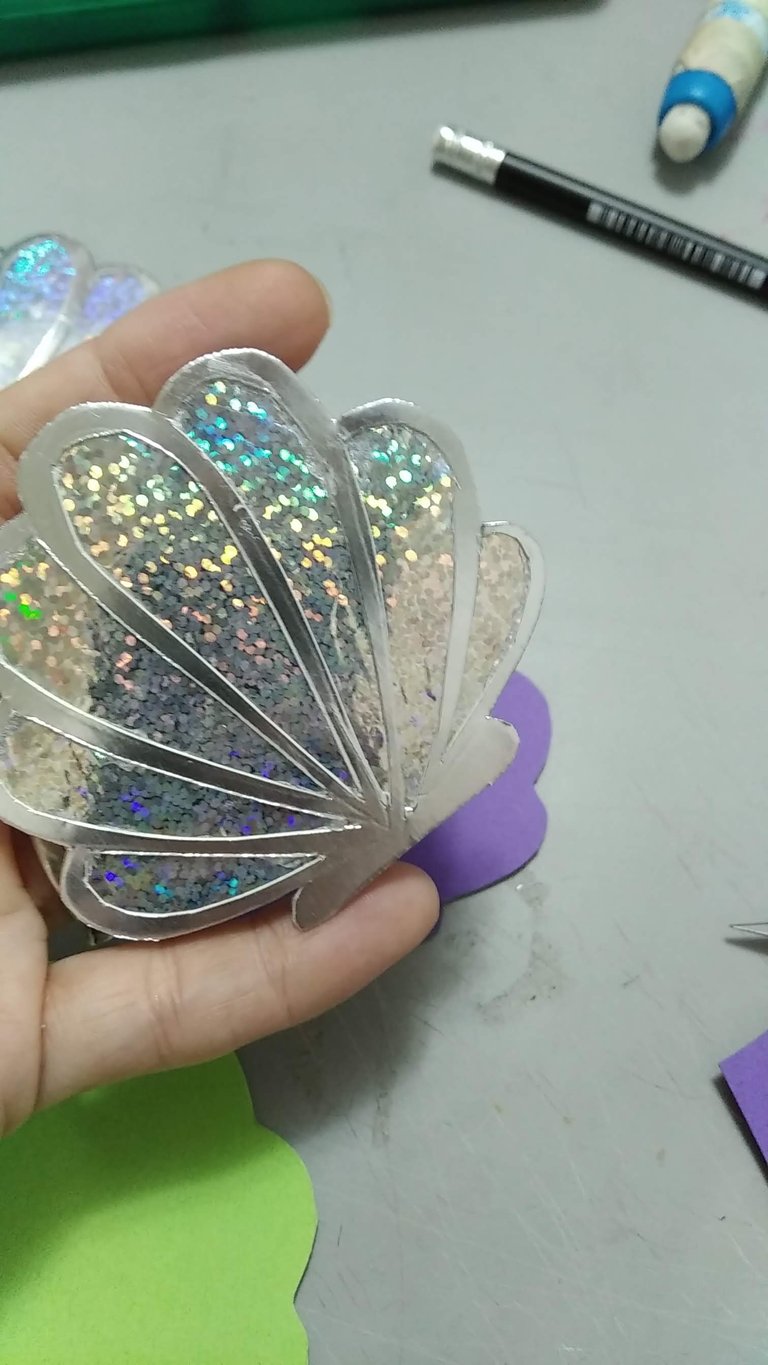
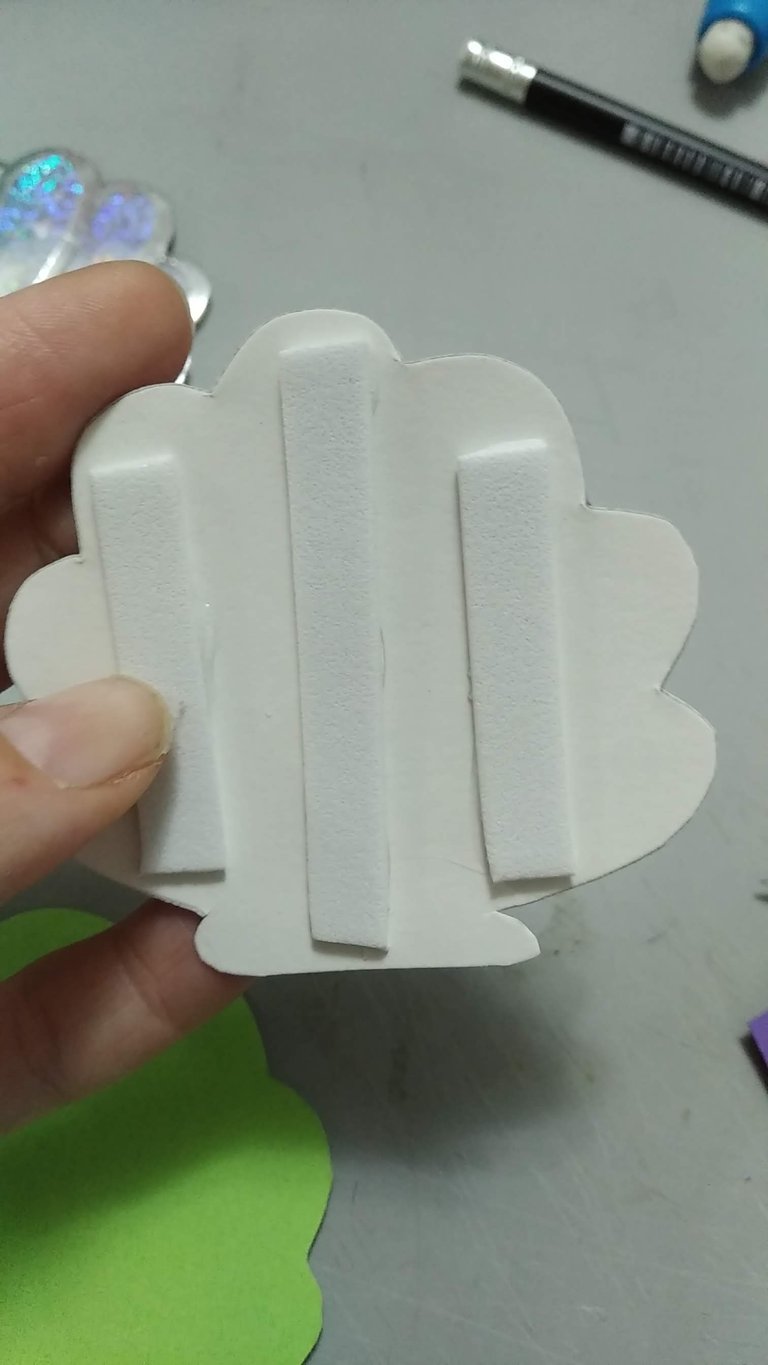
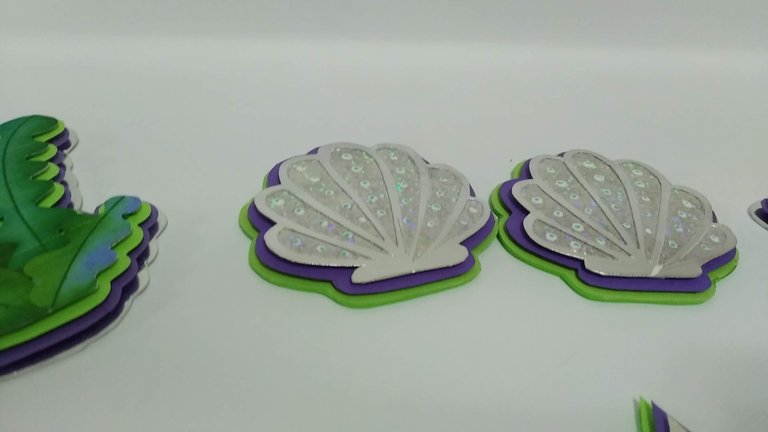
5.- Para realizar las conchas marinas (las únicas que no son impresas) se deberá marcar y recortar el diseño sobre la cartulina holográfica , luego se le harán los bordes con cartulina plateada y se le harán las capas correspondientes en color verde y morado. Al igual que las algas las capas se separan con tiras de foami plano.
5.- To make the seashells (the only ones that are not printed), mark and cut out the design on the holographic cardboard, then make the borders with silver cardboard and make the corresponding layers in green and purple. Like the seaweed, the layers are separated with strips of flat foami.

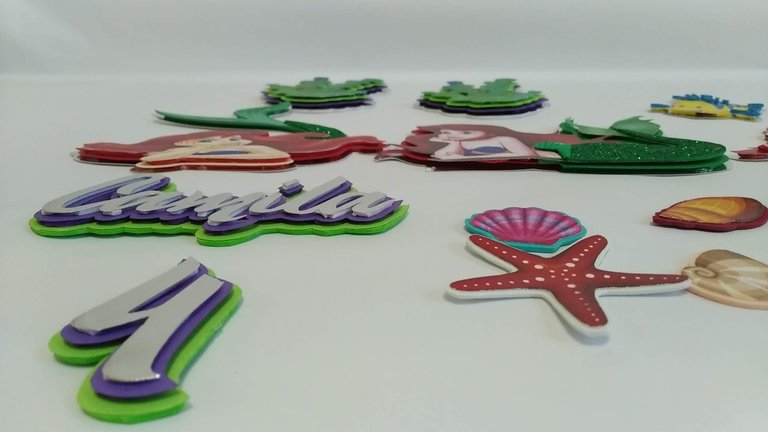
6.- Para realizar el nombre y la edad, se deberá marcar y recortar sobre la cartulina plateada tipo espejo, y luego de recortar el nombre por todos los bordes. Para el efecto en capas marcar y recortar las cartulinas de color morado y verde , dejando cada color un poco mas grande al otro, luego pegar en la parte posterior del nombre y las capas trozos de foami plano para realizar la separación que corresponde.
6.- To make the name and age, mark and cut out the name on the silver mirror cardboard, and then cut out the name all around the edges. For the layered effect, mark and cut out the purple and green cardboard, leaving each color a little larger than the other, then glue pieces of flat foami on the back of the name and the layers to make the corresponding separation.
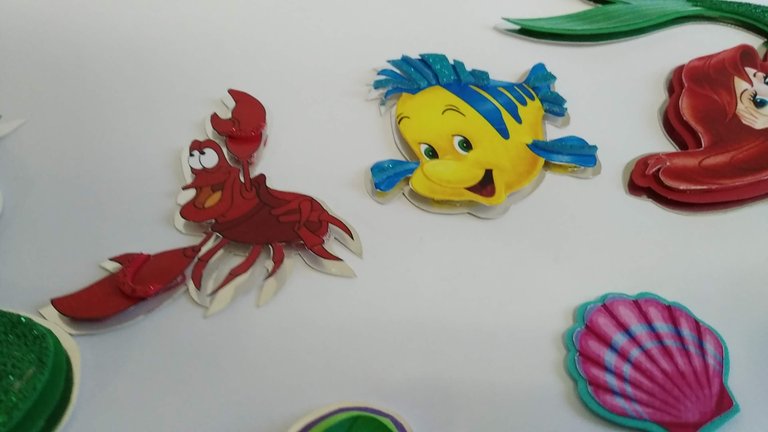
7.- A los personajes centrales (sirena, cangrejo y pez) aplicar capas también de acuerdo a los colores de los personajes. A los elementos marinos (conchas y estrellas) solo se deberán pegar sobre foami plano del color que más se le asemeje o que le haga contraste, y luego al recortar dejar un pequeño borde que sobresalga.
7.- To the central characters (mermaid, crab and fish) apply layers also according to the colors of the characters. The marine elements (shells and stars) should only be glued on flat foami in the color that most closely resembles or contrasts them, and then when cutting out, leave a small border that sticks out.
8.- Para terminar la presentación se les coloca a los personajes centrales, algas y conchas, palitos de madera para poder luego anclar al pastel. Espero les haya gustado y sobre todo se entusiasmen a crear algo parecido para sorprender a familiares y amigos.
8.- To finish the presentation, the central characters, seaweed and shells, are placed on wooden sticks to be able to anchor them to the cake. I hope you liked it and above all I hope you get excited to create something similar to surprise your family and friends.
Para la traducción de esta publicación se utilizó el Traductor Deepl en su versión gratuita.
The Deepl Translator was used for the translation of this publication in its free version.
SALUDOS / REGARDS
Todas las Fotos fueron tomadas con mi teléfono Redmi 7A.
Contenido original de @keco (fotos y texto) - Todos los derechos reservados Publicado en HIVE así como en mi instagram : http://instagram.com/carton_pintura_algo_mas
All Photos were taken with my Redmi 7A phone.
Original content from @keco (photos and text) - All rights reserved Posted on HIVE as well as on my instagram: http://instagram.com/carton_pintura_algo_mas
@keco
Wow :)
bringing great memories from my childhood...
One of the Tv shows/animes that we use to watch :)
Namaste
Muy bonito trabajo e ingenioso, una excelente opción para quienes hacemos pasteles decorados, me gustó tu propuesta, gracias por compartir 🤗
ohhh que lindo, y no sabía que eran tan fáciles de hacer, bueno no dudo que tenga su dificultad, pero lo haces parecer sencillo!, para ue cualquiera pueda intentarlo
¡Wow! Impresionada, la verdad es que cambiaron un montón con todo lo que le añadiste, se ven preciosas.