!Hola amigos!
Ya le entregue la tarjeta a mi hermana, estoy demasiado feliz que estemos de nuevo juntas, la entrañaba muchísimo.
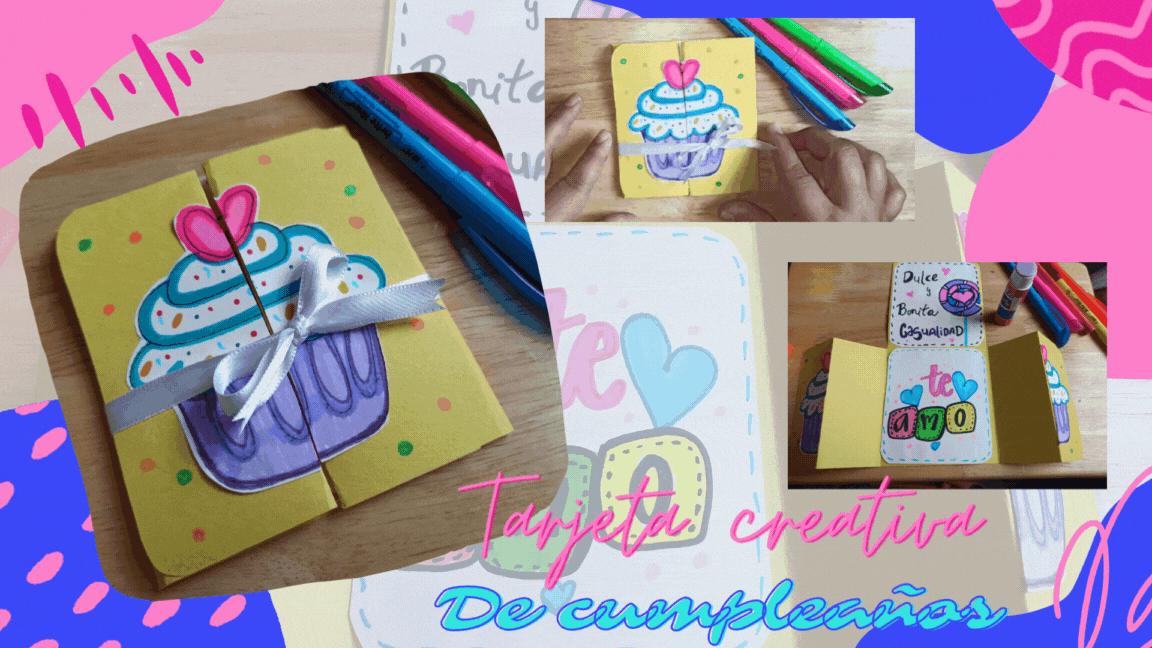
Si no saben de cual tarjeta hablo, aqui la pueden ver.
Mi hermana, esta proxima a cumplir años y su novio que quedó en Venezuela me contacto y me hizo un pedido, me pidio el favor de hacerle un detalle para mi hermana. Él sabe que siempre me ando inventando cualquier cosa creativa para regalar, asi que dejo en mis manos para hacerle llegar un detalle a mi hermana.
Les comparto el proceso para realizar una tarjeta creativa especial para cumpleaños.
Hello friends!
I have already given the card to my sister, I am so happy that we are back together, I was very fond of her.
If you don't know which card I'm talking about, here you can see it.
My sister is about to have her birthday and her boyfriend who is in Venezuela contacted me and made a request, he asked me to make a gift for my sister. He knows that I'm always coming up with creative gifts, so he left it in my hands to make a gift for my sister.
I share with you the process to make a special creative card for birthdays.

- Cartulina de color
- Cartulina blanca
- Marcadores
- Tijera
- Pega
- Regla
- Colored cardboard
- White cardboard
- markers
- Scissors
- Glue
- Ruler

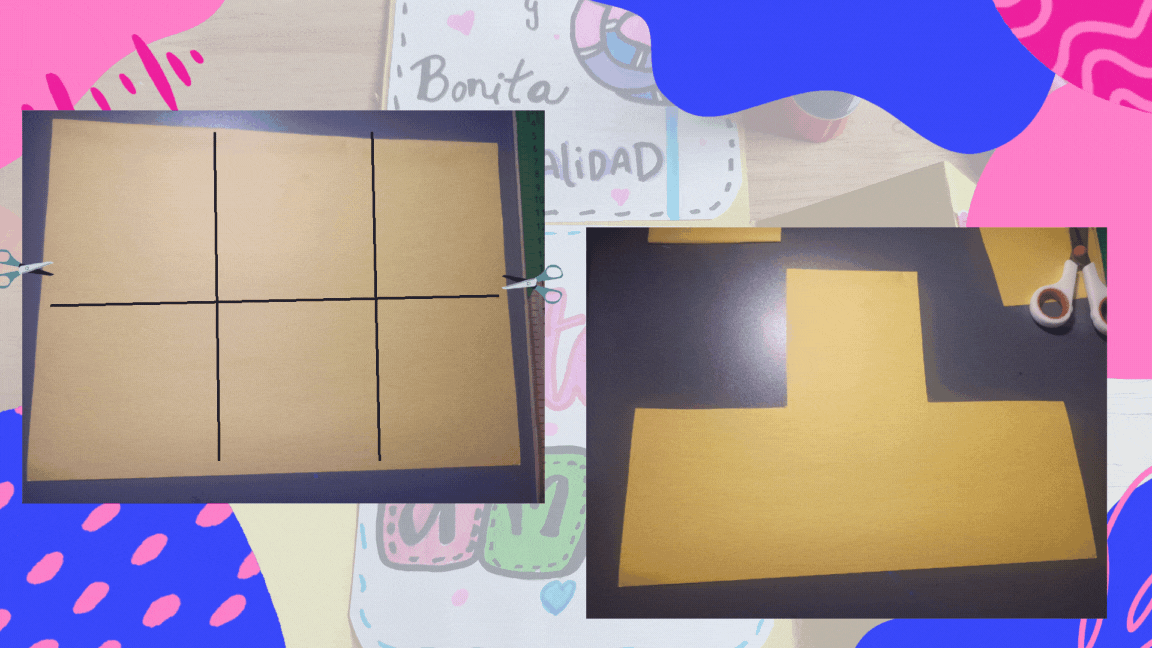
En la cartulina de color de 22 cm de largo por 30 cm de ancho la divido de la siguiente manera: a lo ancho 3 cuadros de 10 cm y los largo 2 cuadros de 11 cm
Corto los cuadros de cada punta de la parte de arriba y quedaría un cuadro en el centro en la parte de arriba y tres abajo.
On the colored cardboard 22 cm long by 30 cm wide I divide it as follows: 3 squares of 10 cm wide and 2 squares of 11 cm long.
I cut the squares at each end of the top and there would be one square in the center at the top and three at the bottom.
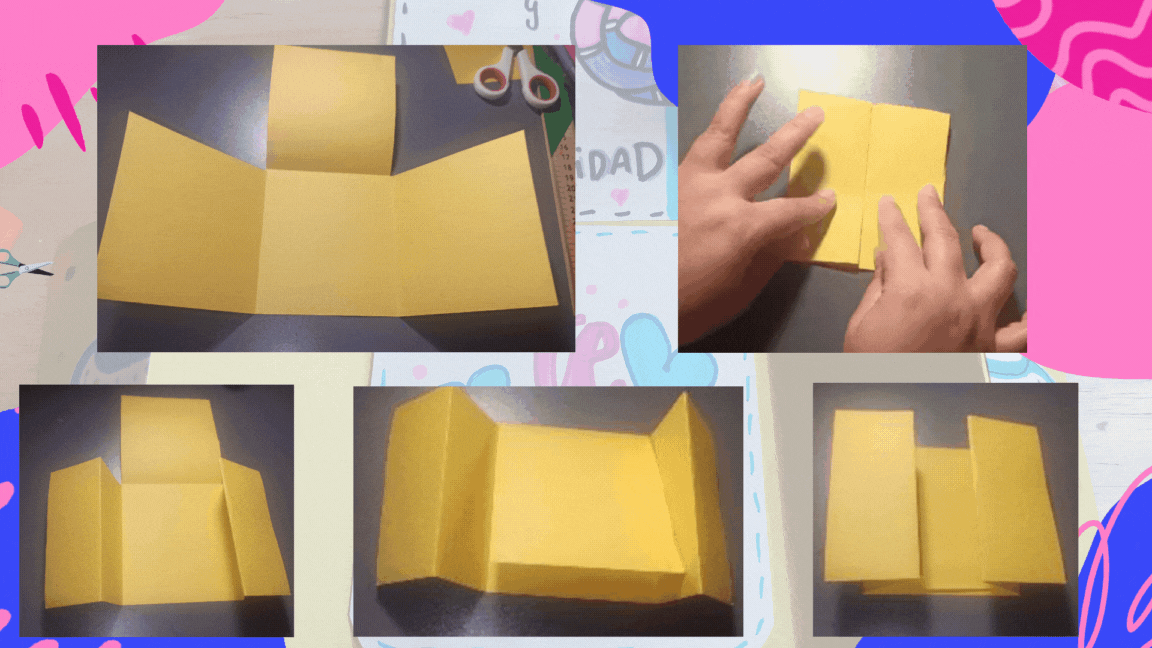
Hago los pliegues en las lineas para darle forma a la tarjeta.
En las cuadrillas de los extremos las doblo a la mitad, quedando las pestañas hacia afuera.
En las imagenes pueden apreciar muy bien como queda la tarjeta.
I make the folds on the lines to shape the card.
In the squares at the ends I fold them in half, leaving the tabs facing outward.
In the pictures you can see very well how the card looks like.
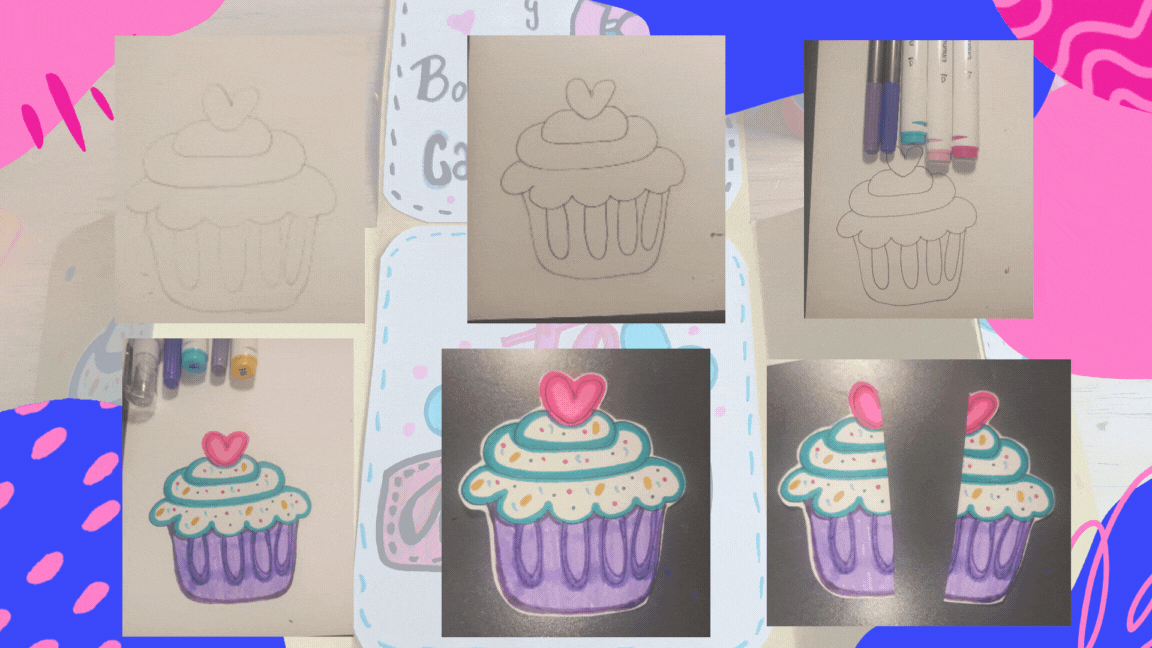
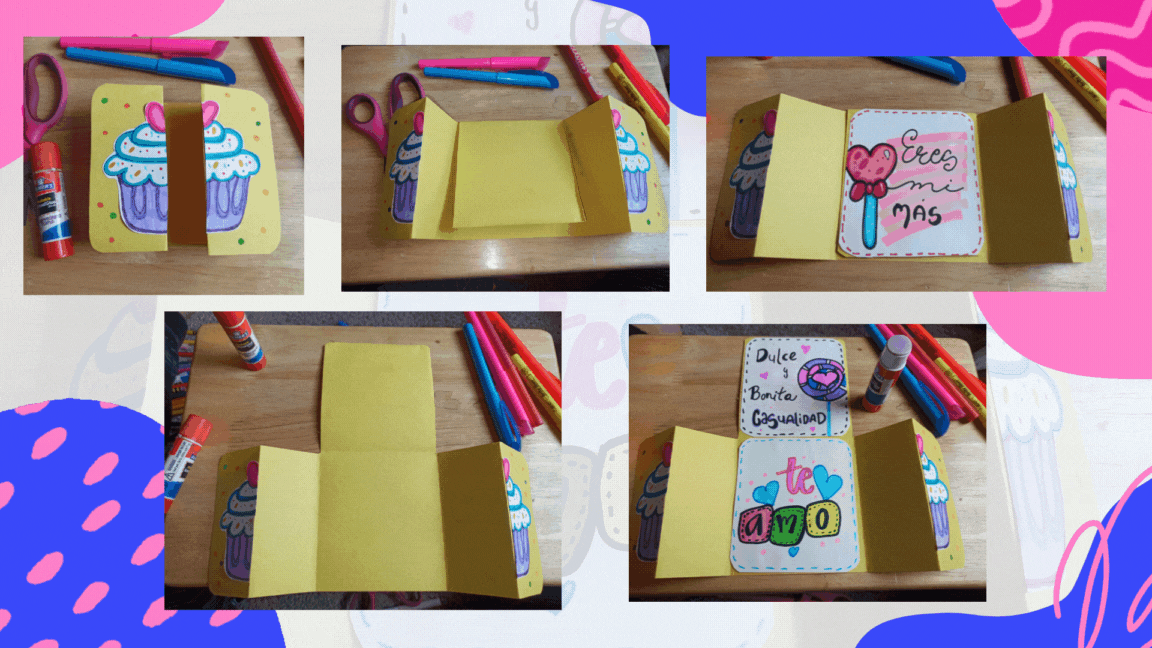
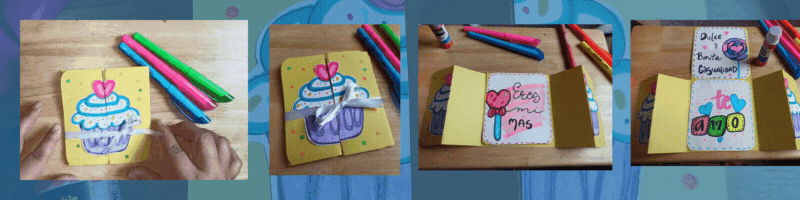
- En la cartulina dibujo un cupcakes, en las fotos les dejo el dibujo. Coloreo con marcadores bien llamativo. Recorto el dibujo por todo el borde y después corto el cupcakes a la mitad.
- On the cardboard I draw a cupcakes, in the pictures I leave the drawing. I color with bright markers. I cut the drawing all around the edge and then cut the cupcake in half.
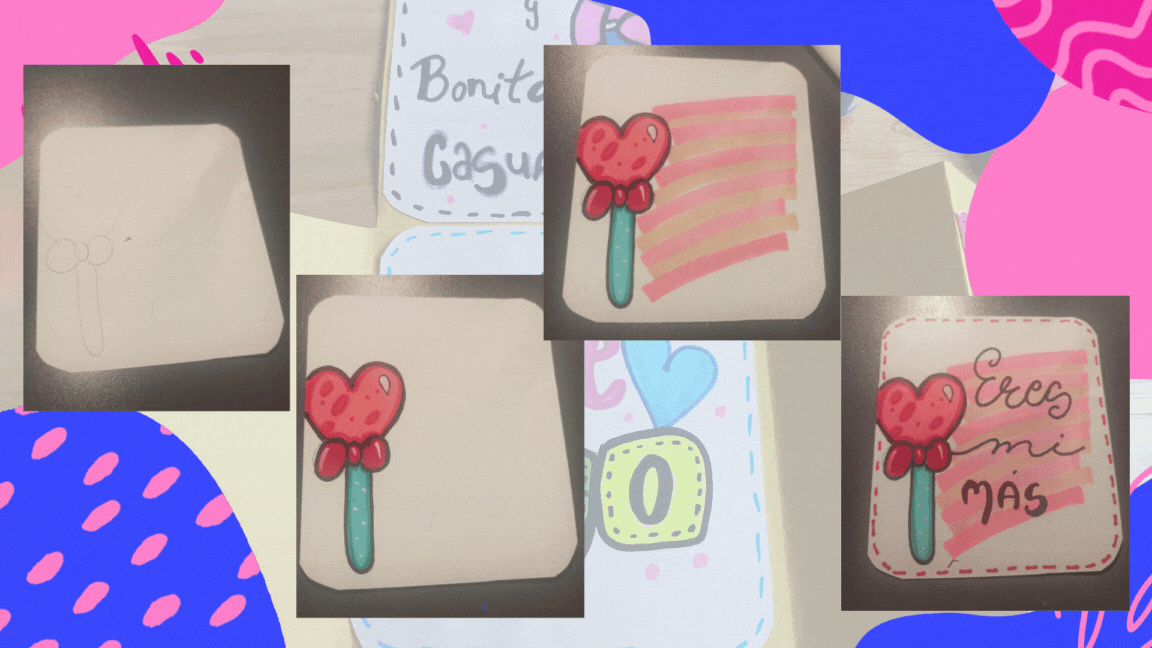
- Con la cartulina blanca hice tres cuadrados de 9 x 9. En el primero hice una piruleta con forma de corazón que coloreé con fucsia y azul, perfilé el borde de todos los dibujos con negro. Hice unas líneas horizontales con dos tonos de rosa para luego escribir con letras bonitas las palabras " Eres mi más"
- From the white cardboard I made three 9 x 9 squares. On the first one I made a heart-shaped lollipop that I colored with fuchsia and blue, I outlined the border of all the drawings with black. I made some horizontal lines with two shades of pink to then write with beautiful letters the words "You are my most".
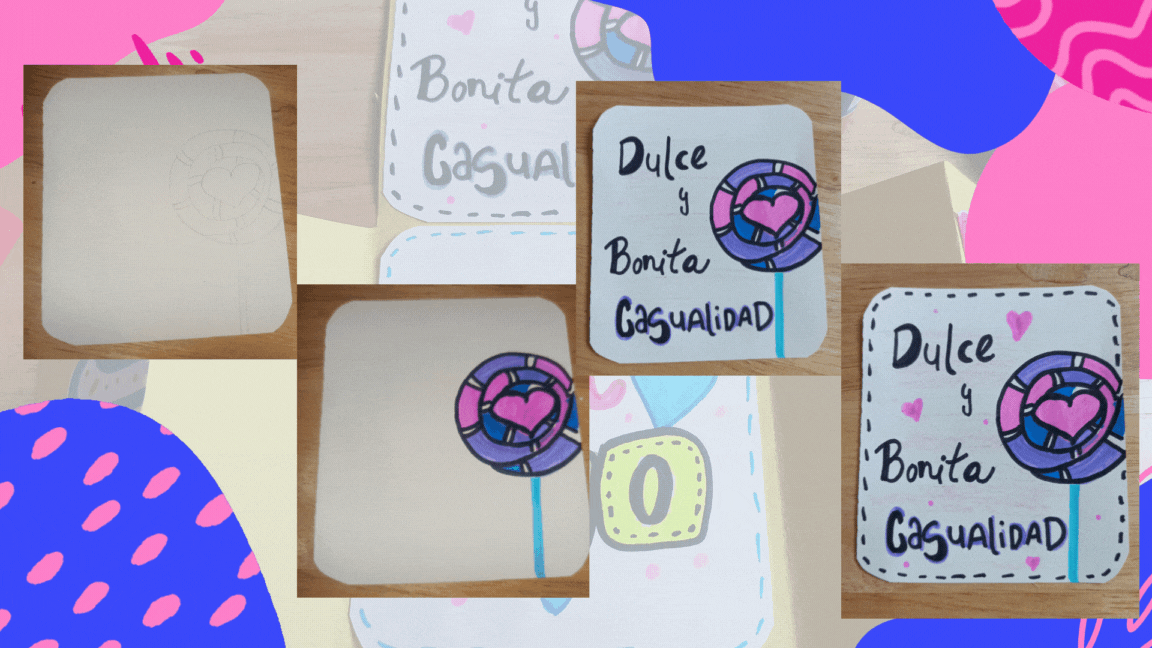
- En el segundo cuadrado hice otra piruleta en forma de espiral con un corazón en el centro. Luego escribí "Dulce y bonita casualidad". Coloqué otros detalles como corazones alrededor de las letras y pequeñas rayas alrededor del marco.
- On the second square I made another lollipop in the shape of a spiral with a heart in the middle. Then I wrote "Sweet and nice chance". I placed other details like hearts around the letters and small stripes around the frame.
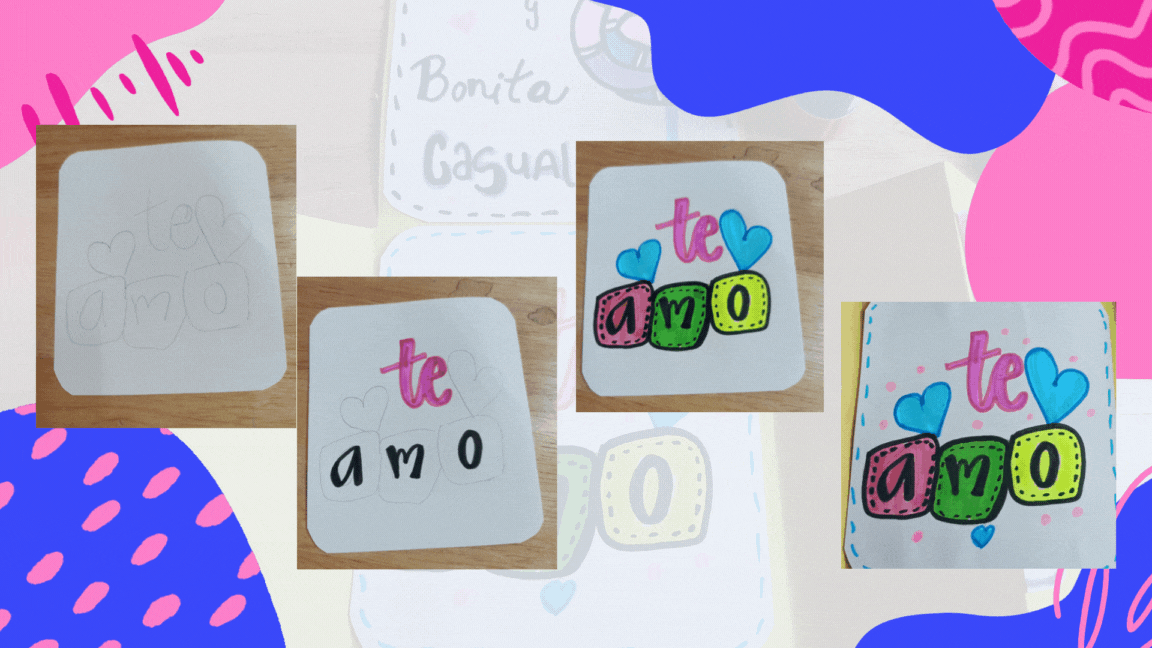
- Para la tercera y última foto escribí "Te Amo" de una forma muy bonita y colorida.
- For the third and last picture I wrote "I love you" in a very nice and colorful way.
- Procedo a pegarlos en la tarjeta. El cupcakes va en la portada , cada pedazo en una pasteña. Al abrir la tarjeta pegué " Eres mi más", al levantar esa pestaña pegué " Dulce y bonita casualidad y abajo " Te amo".
- I proceed to glue them on the card. The cupcakes go on the cover , each piece on a tab. When I opened the card I glued "You are my most", when I lifted that tab I glued "Sweet and beautiful chance and below "I love you".
-- La tarjeta por sí sola no permanece cerrada, así que con una cinta que la rodee, permanecerá cerrada.
- The card by itself does not stay closed, so with a ribbon passing around it and making a loop, it will stay closed.
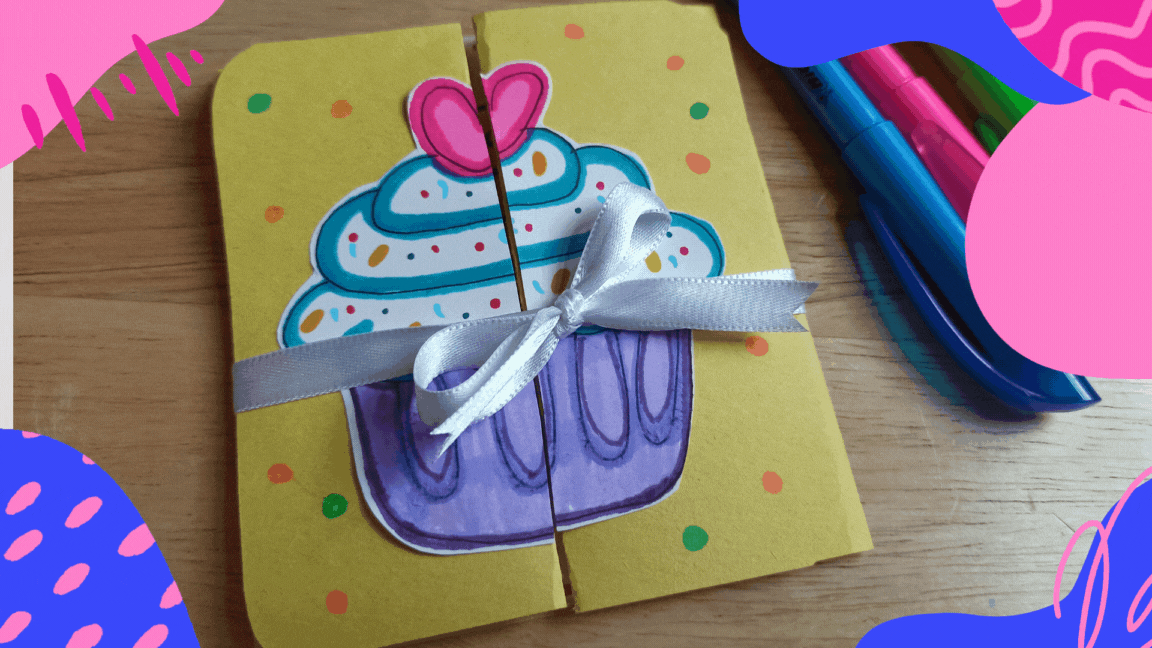
El resultado es una tarjeta creativa, original y llena de color.
The result is a creative, original and colorful card.
🧁 💜 🧁 💜 🧁 💜 🧁 💜 🧁 💜 🧁 💜 🧁 💜 🧁 💜 🧁 💜 🧁 💜 🧁 💜 🧁 💜 🧁 💜 🧁 💜 🧁 💜 🧁 💜 🧁 💜 🧁 💜 🧁 💜 🧁 💜 🧁 💜 🧁 💜 🧁 💜 🧁 💜
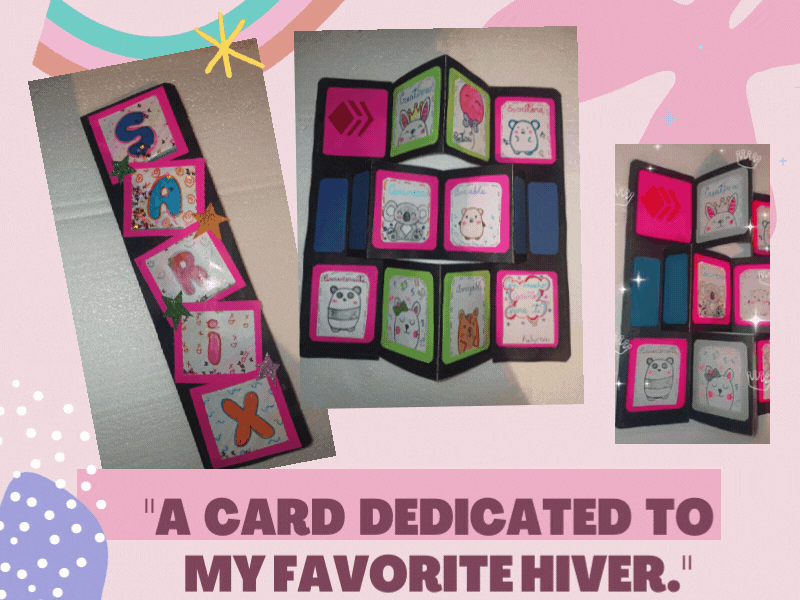
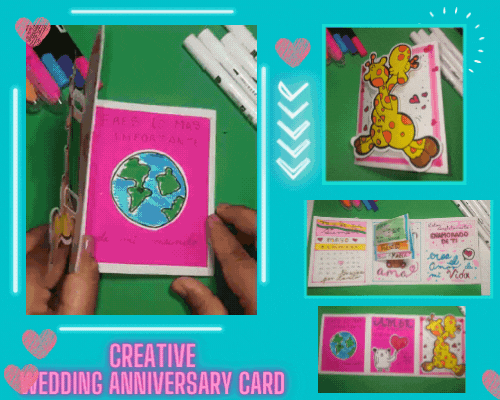
Otros trabajos similares :
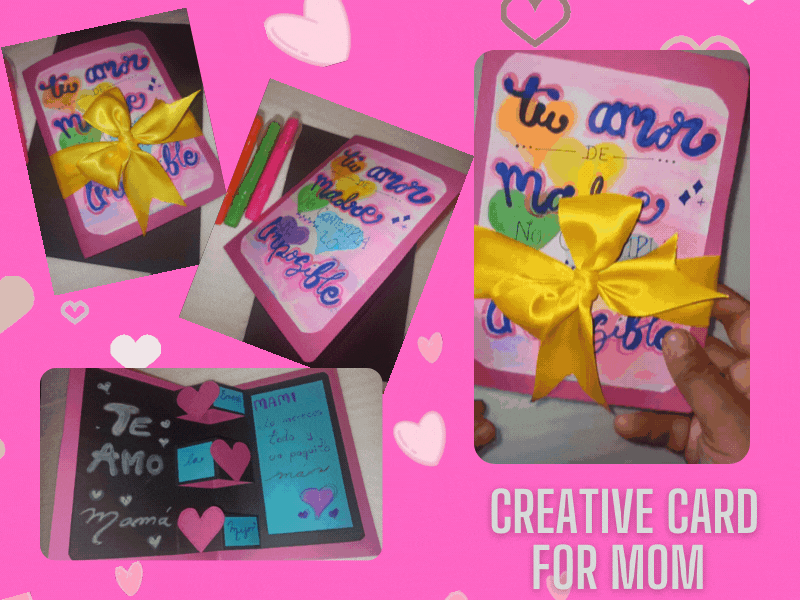
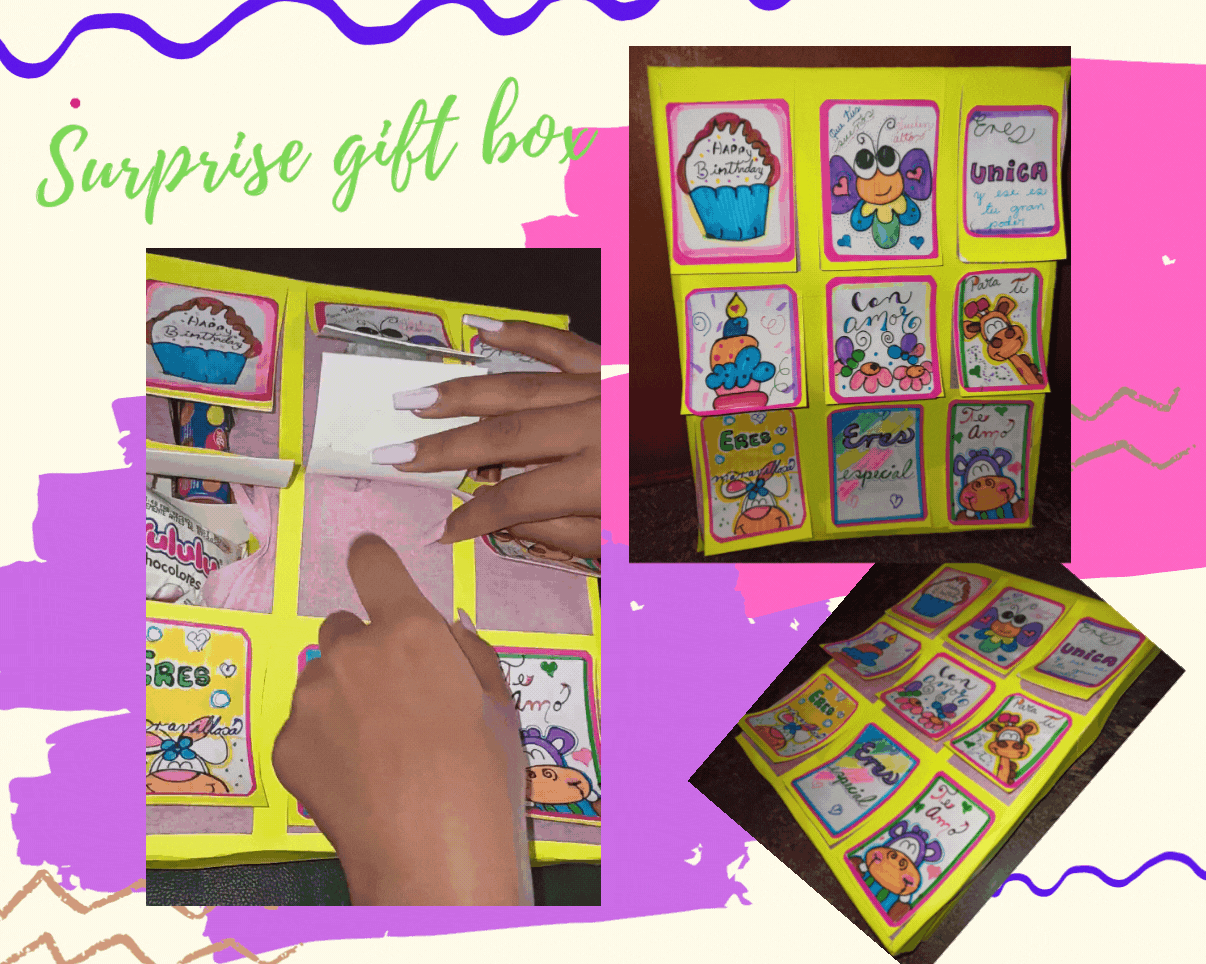
| DIY - Creative card for mom ENG/SPA | DIY - Surprise gift box ENG/ESP | DIY "A card dedicated to my favorite hiver " ENG/ESP | Creative wedding anniversary card ENG/SPA |
|---|---|---|---|
 |  |  |  |

Fotografías de mi propiedad tomadas con el celular Redmi note 8 pro, editadas en canva
Traducción realizada con la versión gratuita del
traductor DeepL
Todos los diseños fueron creados en canva
Photographs of my property taken with the Redmi note 8 pro cell phone, edited in canva
Translation made with the free version of
translator DeepL
All designs were created in canva
Thank you for sharing this post on HIVE!
Your content got selected by our fellow curator ashikstd & you just received a little thank you upvote from us for your great work! Your post will be featured in one of our recurring compilations which are aiming to offer you a stage to widen your audience within the DIY scene of Hive. Stay creative & HIVE ON!
Please vote for our hive witness <3
Hola amiga, te quedo muy hermosa la tarjeta de tu hermana, gracias por compartir. Un abrazo.
Holaa 💐🎉 mañana es el día de entregarla 🙊🙊
Muchas gracias ☺️
Muy guay. Es una tarjeta de felicitación estupenda y muy bien hecha.
Holaa. Gracias, gracias. Mañana toca entregarla 🙊🙊🎉🎉 ya veremos qué le parece a la festejada
Esto me ha parecido algo muy tierno. GRACIAS por enseñarnos.