INTRODUCTION
Good day Bee hives its really a wonderful day here and really I am enjoying the festive periods and most importantly the fact that the holiday allows me to explore and do some things I have been longing for.
Without boring you with many stories, let us go straight to the business of the day.
Today, I will be doing a tutorial on how to make a SPARKLE BALL
I know you are already wondering what a sparkle ball is, well, worry-less, I will tell you and I will even teach you how to make it perfect. and trust me it is fun to do and less stressful.
And to top it all, you can use it to beautify anywhere, and most importantly, it allows you to be creative.
A sparkling ball is what I always refer to as a magical ornament handmade from plastic cups and mini-lights
Which is almost or usually displayed during Christmas or excursion time.
Maybe you do not understand yet, it is like a form of design that you can make from disposable cups, led light, to form an ornament kind of in other to beautify and lighten up the occasion.
THE PROCESS
THINGS NEEDED
- 67 Disposable cups
- Stapler
- A drill
- Led light
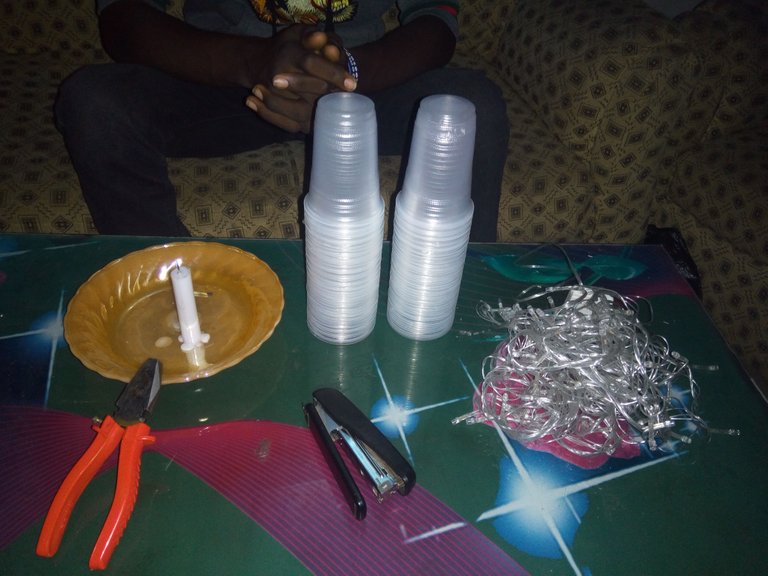
NOTE: I will be substituting DRILL from the above things needed and I will be replacing it with a plier, screw, and candle and that is why there is no drill in the picture above. The reason I will be doing this is that drill is not readily available and since the above mentioned is capable of doing the same work a drill will do in this case then I can substitute
What I am saying invariably is that it would be easier when there is a driller or you can use a soldering iron too. and after all, it is about creativity and also using what you have to achieve the desired result.
So now, let's get to business proper.
STEP 1 - Making a hole
Ok, the first thing you need to do is get the disposable cups and then drill them or rather make a hole in the bottom, well since I won't be using a driller and I am alternating it, below are pictures of me using a candle, plier and screw to make a hole in the bottom of the disposable cups
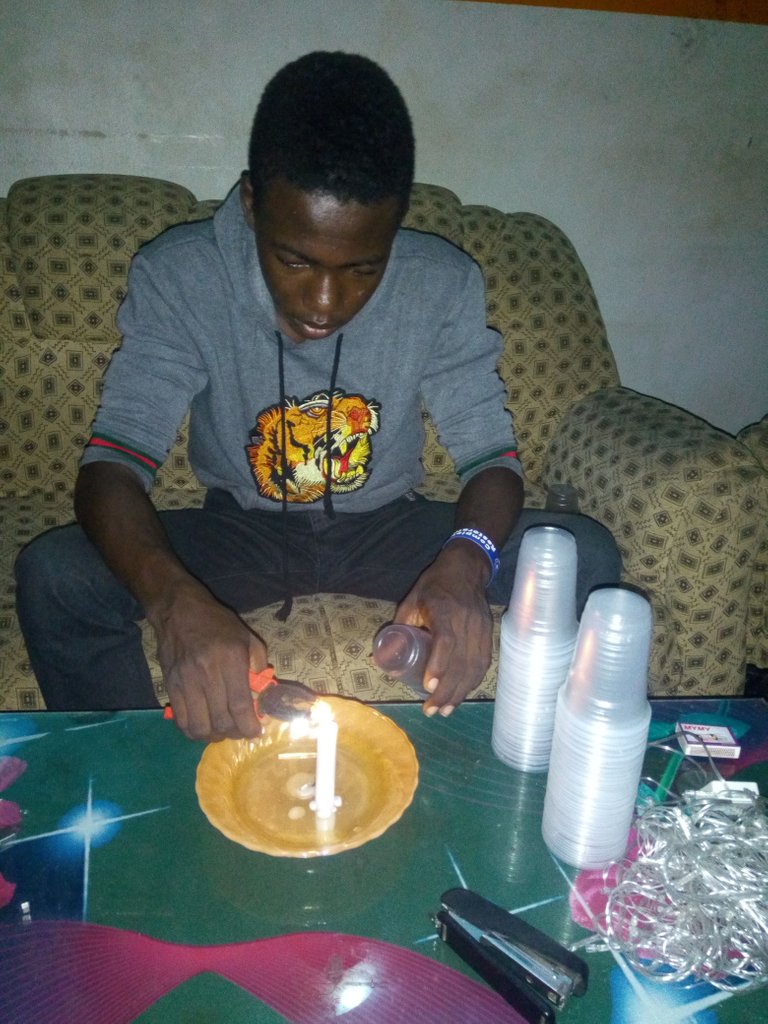
The picture above was when I was heating up the screw, after which I will then insert the screw when heated in the disposable cup so that I will have a hole under the cups.
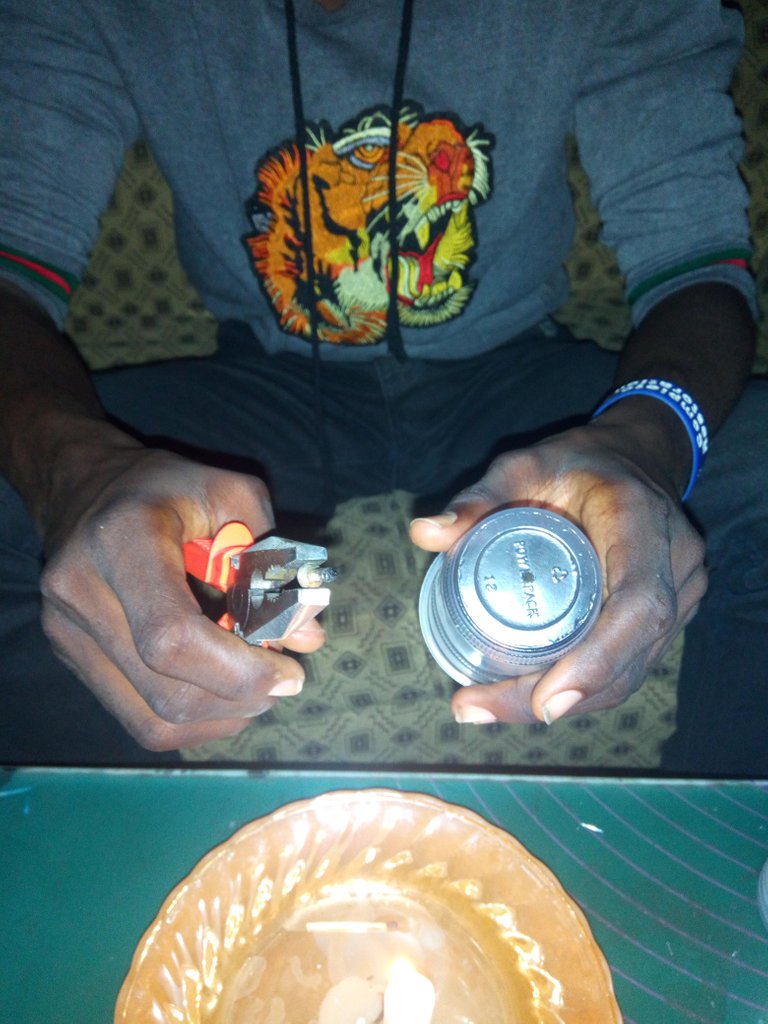
The picture above was after I have made the hole under the cup.
So the next thing to do now is to repeat the process above for all the cups. The reason why we have to do this is that we will be inserting the led light into those holes.
STEP 2 - Merging the cups
Now that I have successfully drilled the holes, the next thing to do is to start putting or rather joining the disposable cup together, this stage requires you to be very tactical, I used 20 disposable cups for this stage. check the picture below.
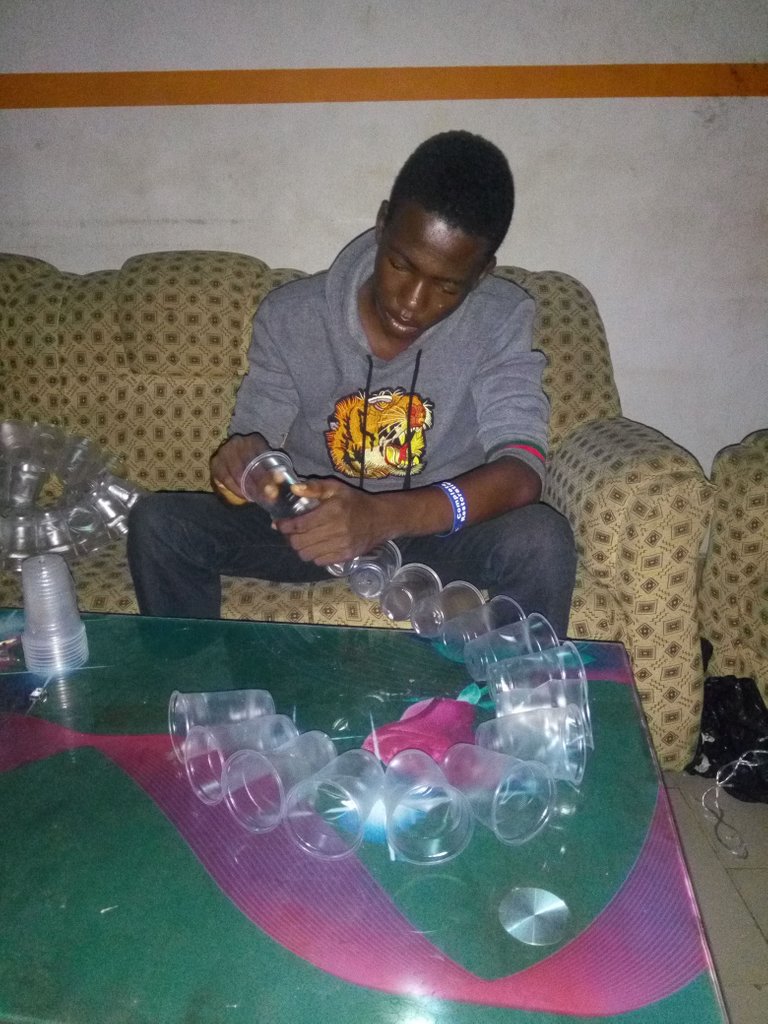
As you can see above, I have been able to put about 17 cups in a circle. the way I did this was to
Connect each and every CUP to the CUPS by using a staple pin and a stapler. But when stapling them together ensure that you do not staple it too close to the top or too close to the bottom of the cup make sure it's in the middle so the plastic cup can be easily maneuvered.
STEP 3 - Merging the cups
In this stage, it is like repeating the same process you have been through in step 1 above, but this time, it requires you to be more specific and to concentrate on achieving the desired result. See the picture below.
Going by this picture, you will see that I have successfully put the cups together to make another layer. The way to do this is by:
One cup on top of Layer One. But when doing this, You need to connect it to the cup making sure it sits in between 2cups from the first layer.. . Connect it to the cup it sits on high of. When all 18 cups are situated on high of Layer One, forming Layer Two-- then join every cup to those on either part.
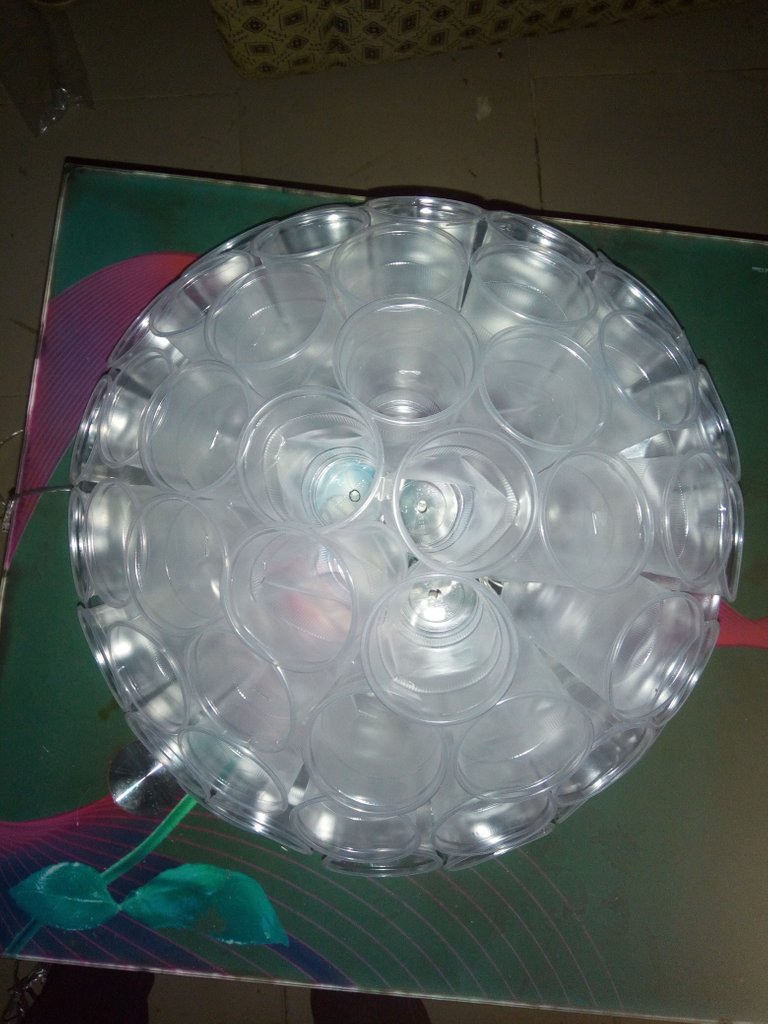
STEP FOUR - Merging the cups
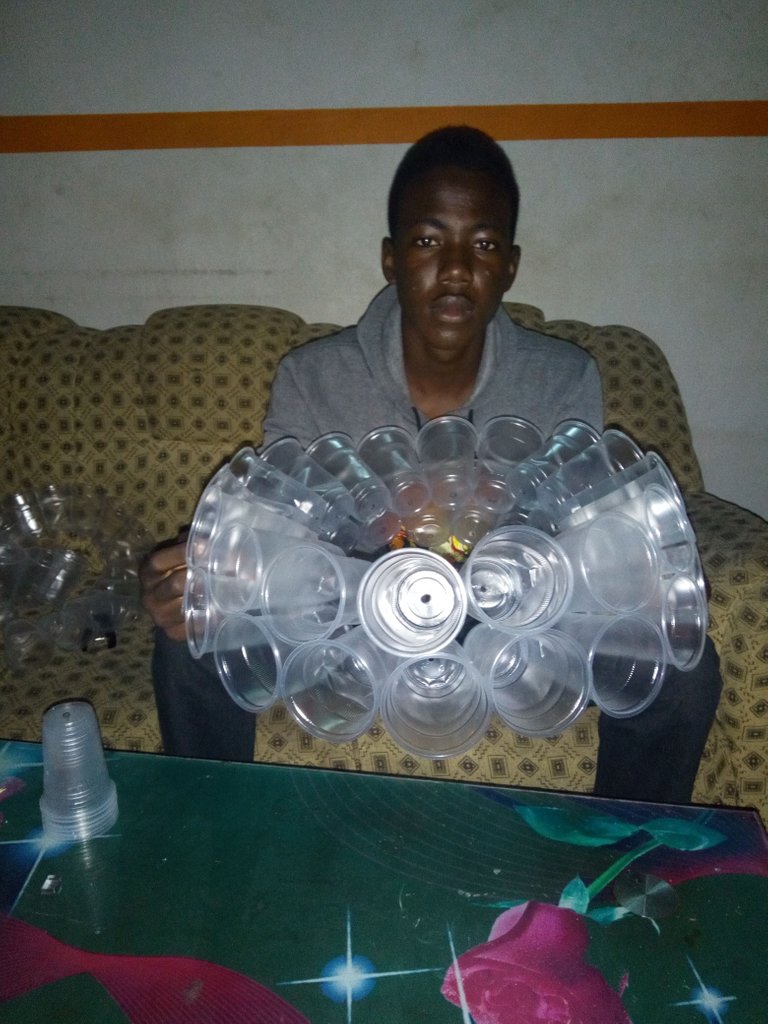
This stage is more or less repeating what we have been able to put together from step 3 above. If you look closely based on the picture below, you will see that I have been able to cover the gaps.
As you can see in the picture above, I am almost true with merging the cups. in other to do this, you are required to do the following, but less I forget, There are 15 cups in Layer Three.
Match the 15 cups into the distance left at the high of the sparkle ball-half. After they fit neatly, then begin attaching the 15 cups to one another and to the cups in Layer Two.
STEP 5 - Merging the cups
This stage requires you to do the almost same thing as I did in step 4 above. The picture below shows when I have successfully merged all the 9 cups required for this stage.
In other to put the 9 cups together at this stage, you need to do the following:
Match the 9 cups into the distance left at the high of the sparkle ball-half. After they fit perfectly, then begin attaching the 9 cups to one another and to the cups in Layer Three.
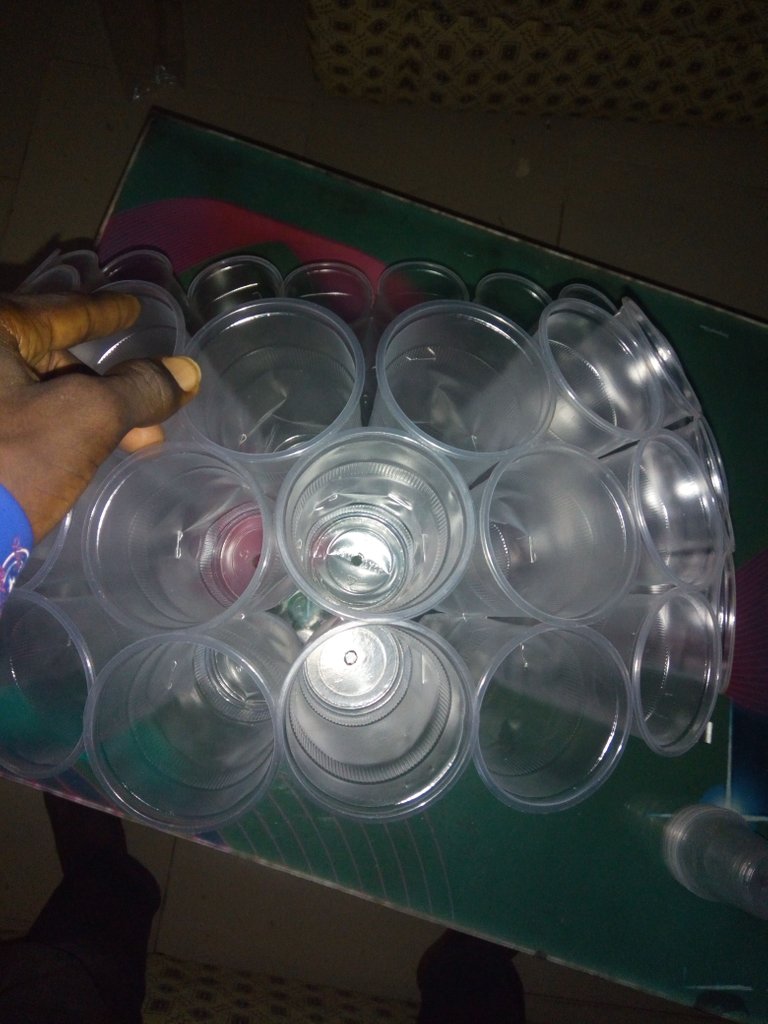
STEP 6 -Closing the gaps
This is the final stage in merging the cups, and at this stage, you will need only 5 cups to finish up.
The picture above shows the final result after bringing the 5 cups together to close the gap on the last layer. In other to achieve this, you need to do the following:
Fit the last 5 cups perfectly on the last layer and staple them one after the other. After they fit neatly, then begin attaching the 5 cups to one another and to the cups on the 4th layer.
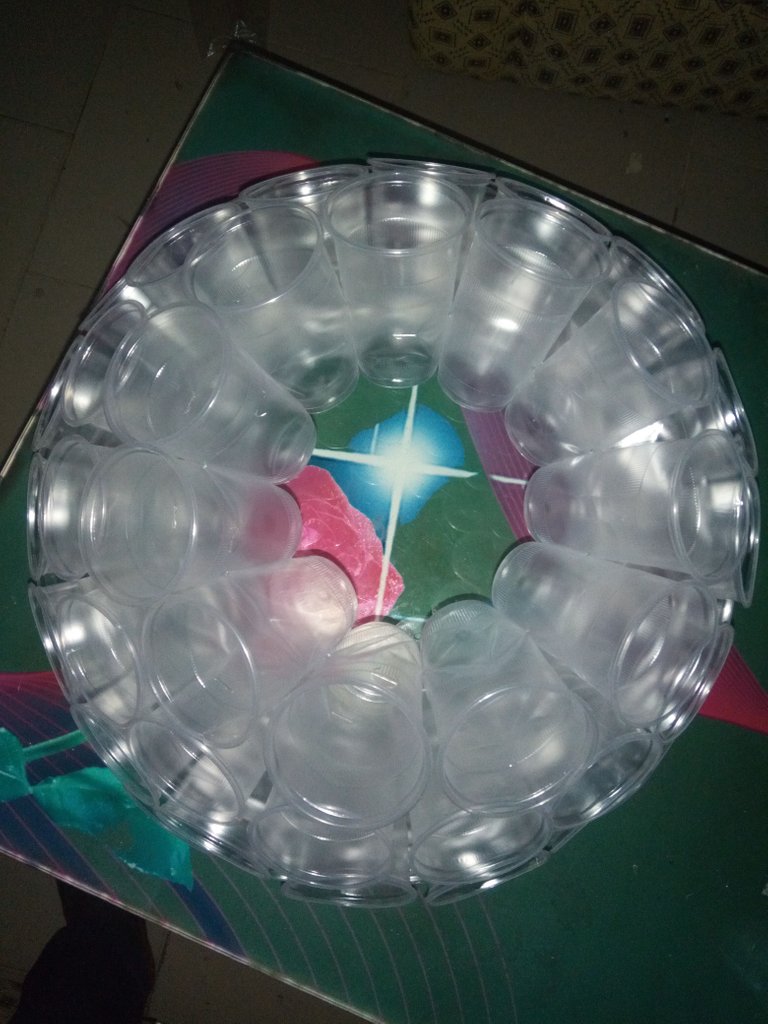
STEP 7 - Inserting Lights
We are almost done, this stage is the easiest yet it requires you to pay attention. the picture below was when I turned the half ball upside down so that I can fit in perfectly the led lights

IMPORTANT NOTICE: Test LIGHTS before you INSERT THEM.
To insert lights:
Begin on the prong end of the wire. Insert the two lights closest to the prong into a cup at the outside rim.
Put 1 or 2 lights in each cup. Work your way around the ball 1/2, zigzagging from outer cups to inside cups and back. You need to become on the outer rim, at the cup next to 1 you started with.
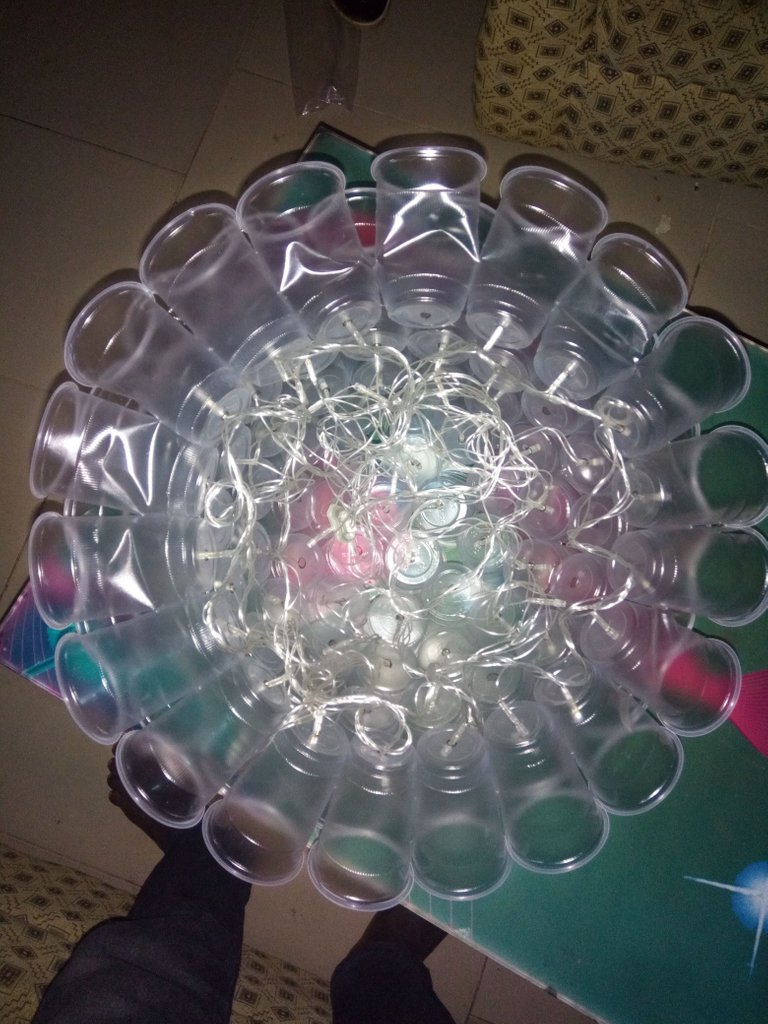
Work slowly. It can be predominant to not skip a cup or pass over gently. If you crack a cup, that's ok.
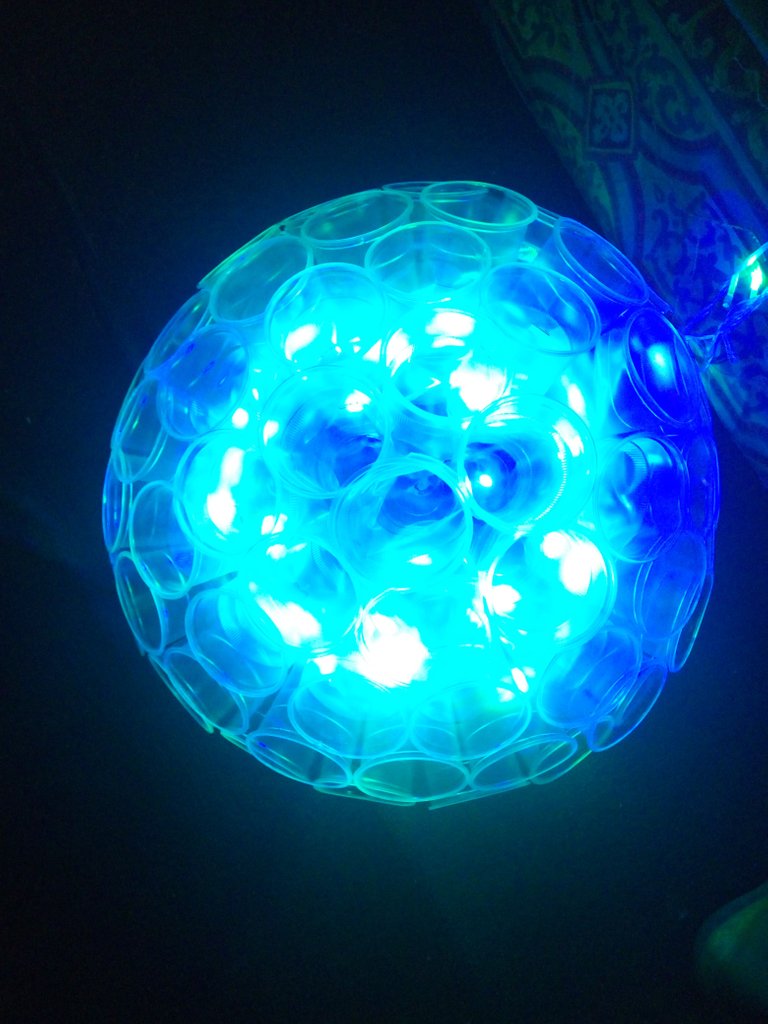
So guys here's the result of what we've been making since...The light is multicolored so here are some amazing mixture of the colors
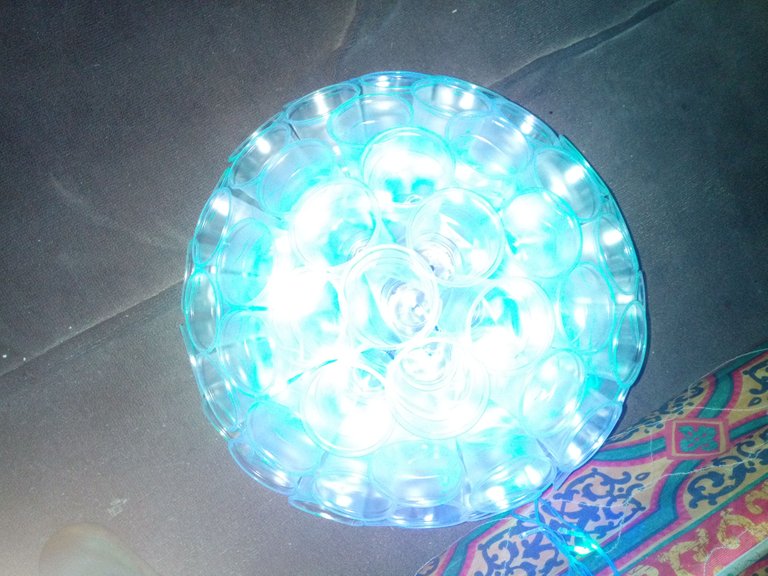
WHITE AND BLUE VIEW
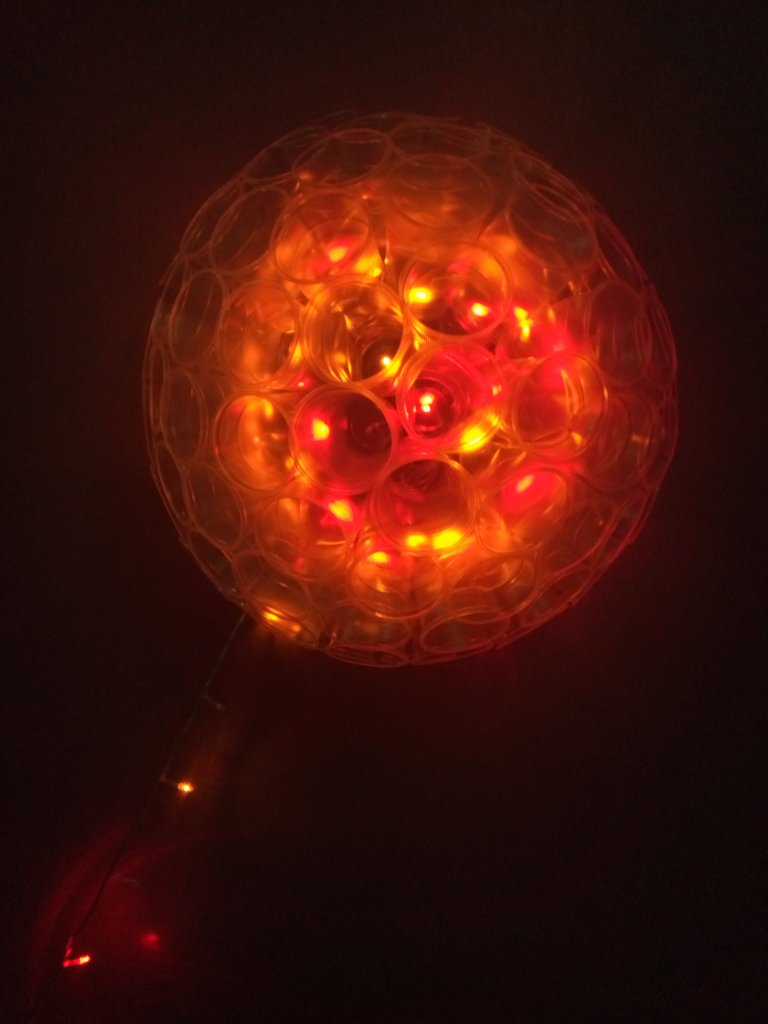
RED AND YELLOW
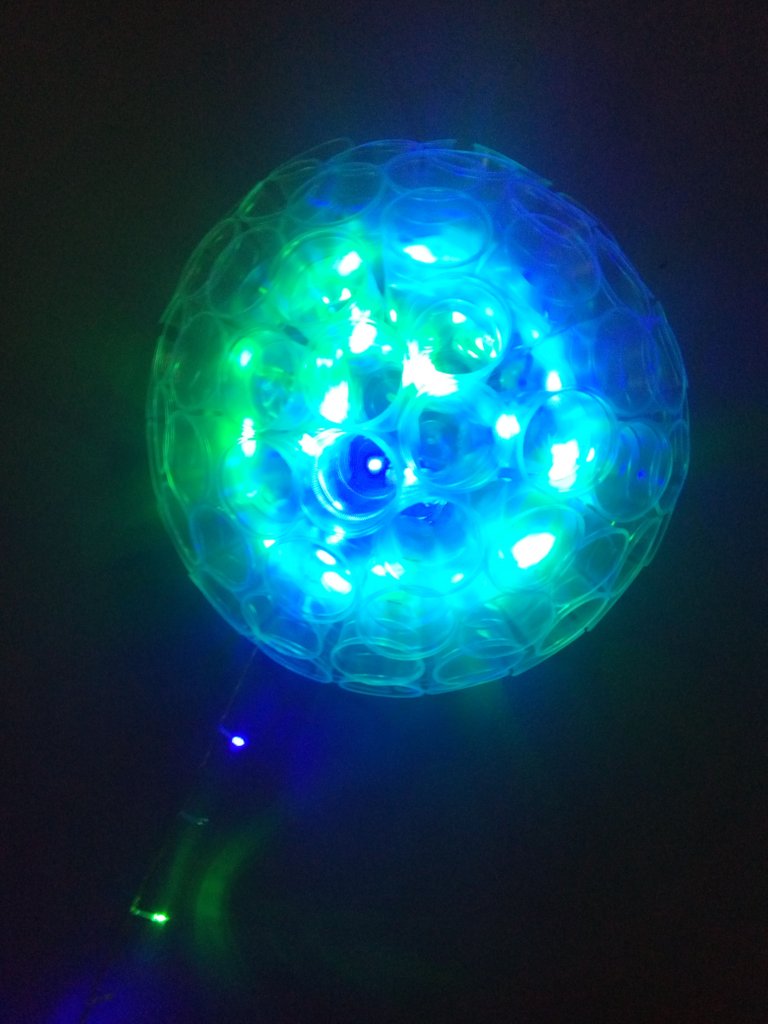
GREEN AND BLUE
BLUE
So Thanks guys for reading till the end. Do stay glued to my blog for more tutorials and Do it yourself...
Congratulations @kvngpanda! You have completed the following achievement on the Hive blockchain and have been rewarded with new badge(s) :
Your next target is to reach 20 posts.
You can view your badges on your board and compare yourself to others in the Ranking
If you no longer want to receive notifications, reply to this comment with the word
STOPTo support your work, I also upvoted your post!