Saluditos gente bonita de
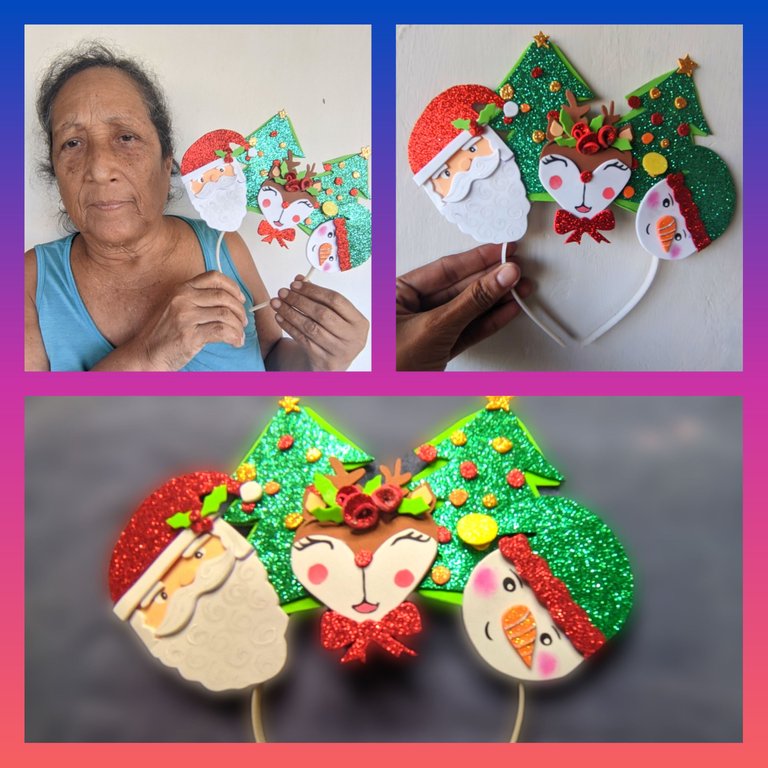
#hive espero que la estén pasando de maravilla, ya casi se acerca la noche buena y seguimos trabajando para que nuestros espacios estén llenos de colorido y de detalles increíbles y sobretodo para nuestros pequeños y que mejor que sean elaborados por nosotros mismos, así que hoy les traje este trabajo que hice y que espero sea de su agrado.
🎄 MATERIALES 🎄
🎄 Foami verde, piel, rojo, blanco, marrón, amarillo y naranja.
🎄 Silicón líquido.
🎄 Cintillo.
🎄 Tijera.
🎄 Lápiz.
🎄 pinturas al frío.
🎄 Pincel fino.
🎄Paso a paso🎄
🎄 Paso 1:
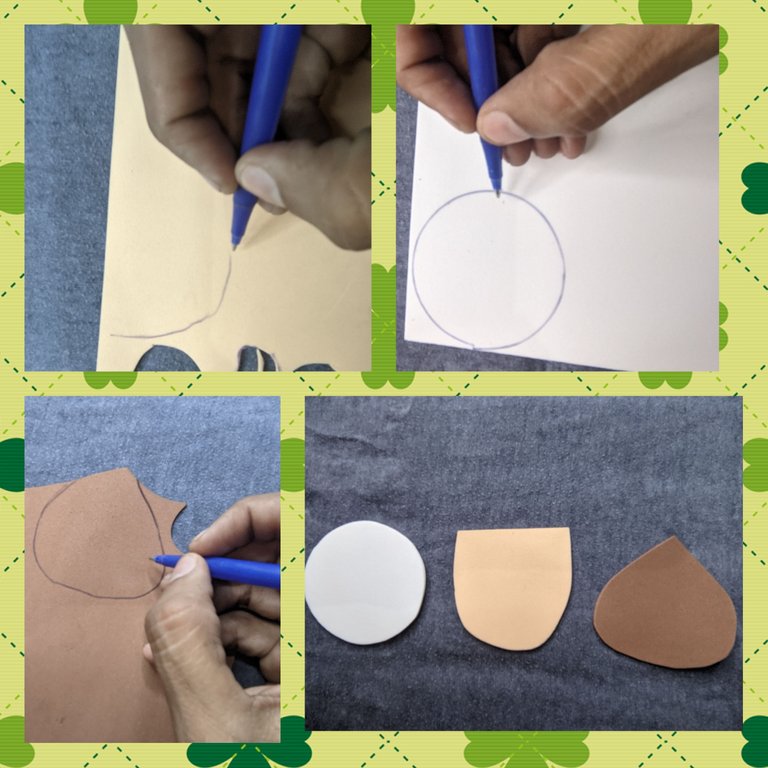
Primero dibujé y recorté del foami color piel el rostro de santa, luego del foami blanco recorte un círculo que será el rostro de nuestro muñeco de nieve y finalmente en el foami marrón saque el rostro del reno.
🎄 Paso 2:
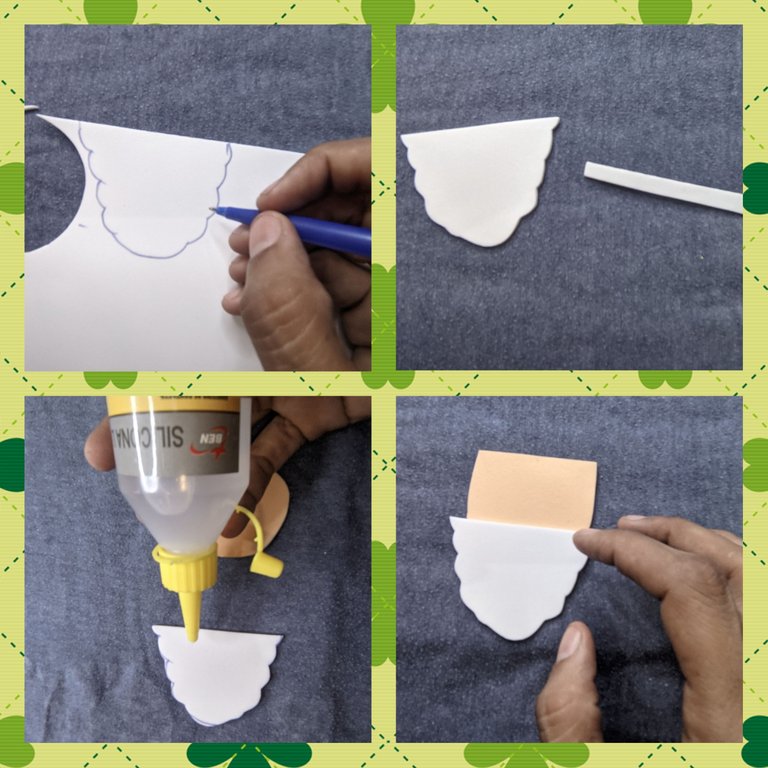
Vamos a tomar el foami blanco y dibujamos y recortamos la barba de santa y una tira pequeña, luego con el silicón líquido pegamos al rostro de santa.
🎄 Paso 3:
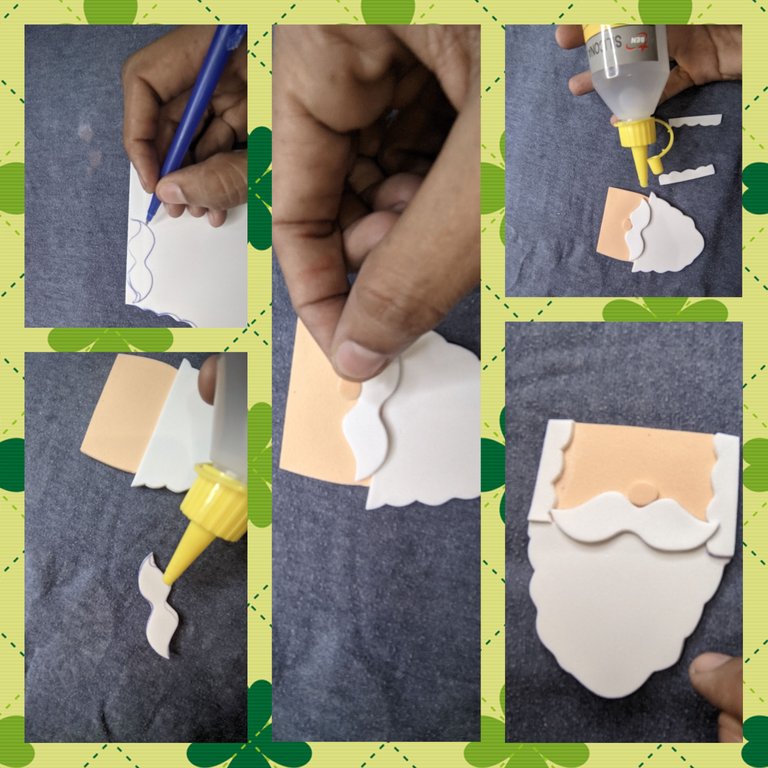
Luego dibujé y recorté los bigotes, y también los pegamos con el silicón líquido, luego de foami color piel recorté un pequeño círculo que pegamos encima del bigote y será nuestra nariz.
🎄 Paso 4:
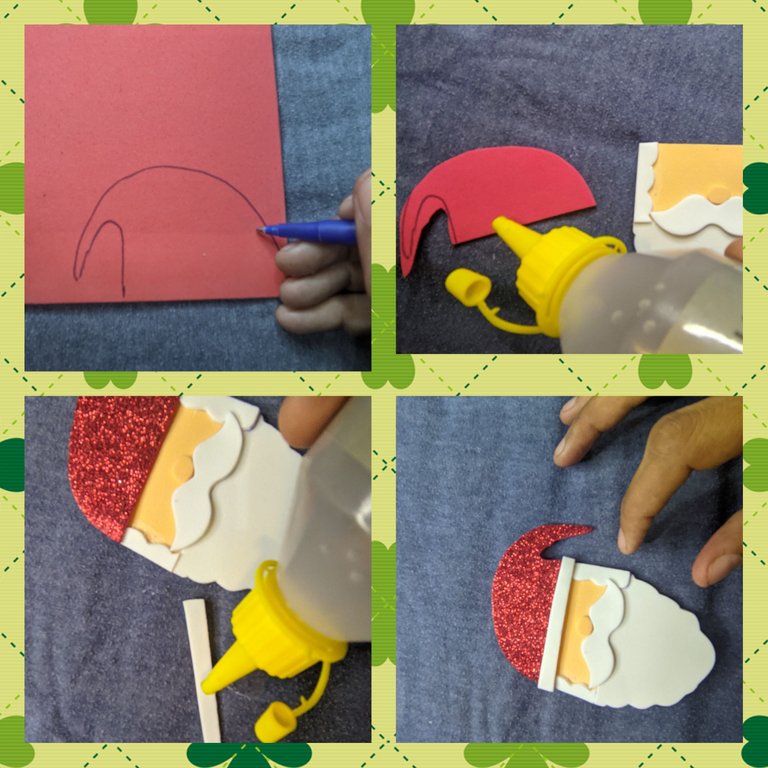
Ahora en el foami rojo escarchado dibujé y recorté el gorrito de Santa, al que le aplicó silicón líquido y pegamos así como también la pequeña tira que recortamos anteriormente.
🎄 Paso 5:
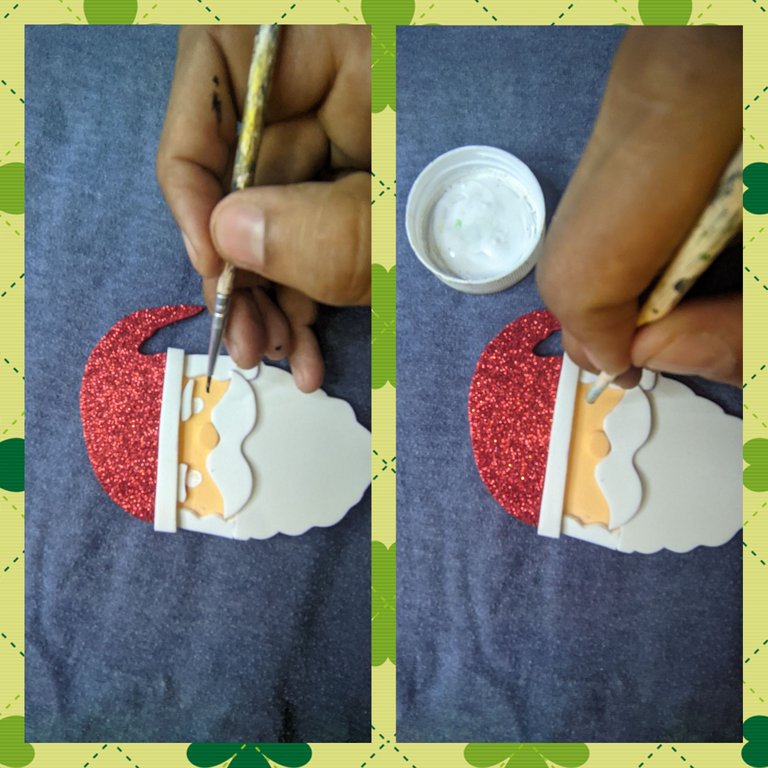
Tome un poco de pintura al frío blanca y negra y dibuje los ojitos de santa y recorté dos pequeños rectángulos y pegamos encima de los ojos que serán las cejas.
🎄 Paso 6:
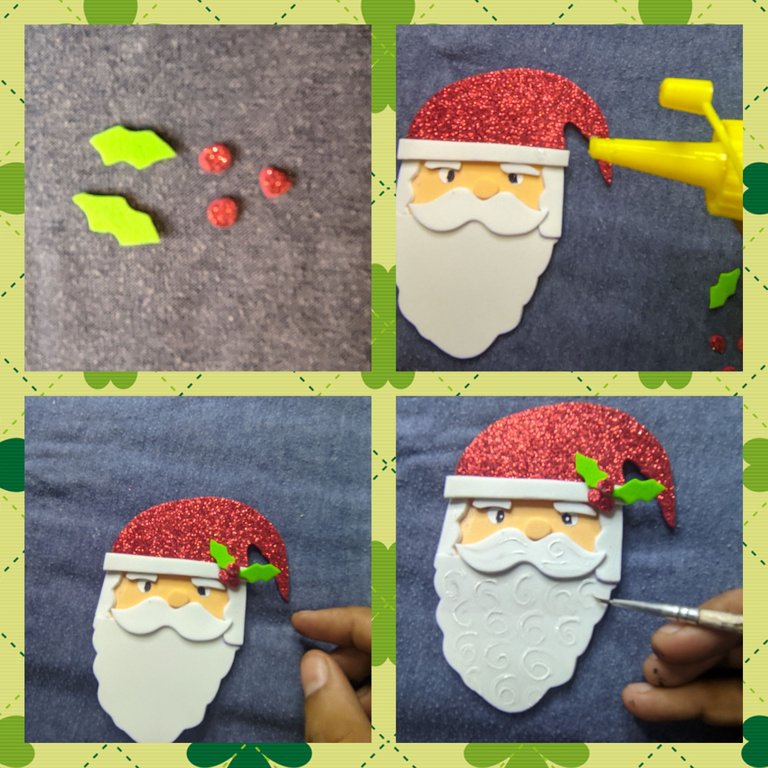
De los retazos que sobran sacamos tres círculos rojos y dos hojitas y pegamos en el gorro de Santa, luego pintamos detalles en la barba y el cabello y está listo nuestro primer personaje.
🎄 Paso 7:
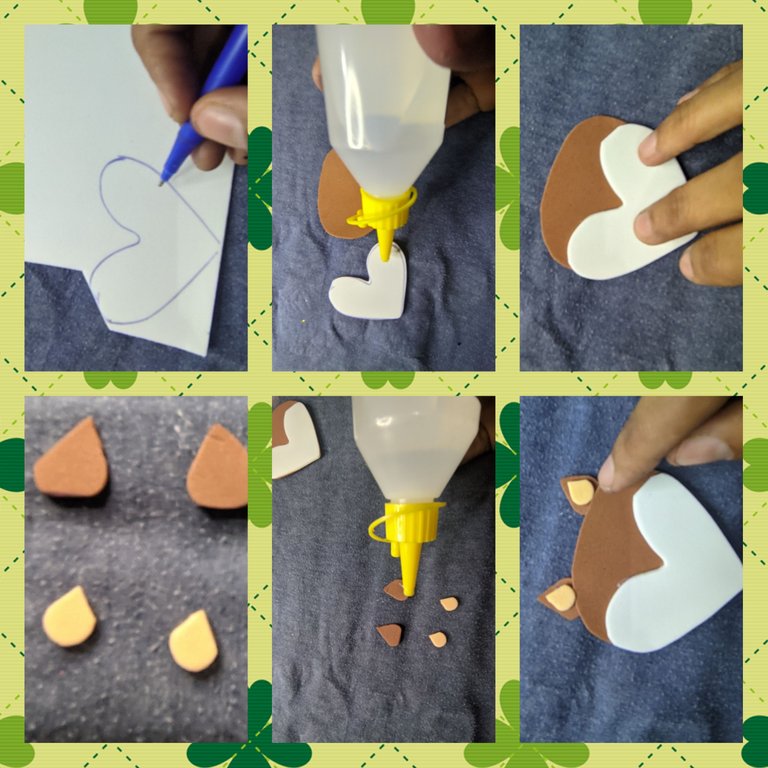
Vamos ahora a trabajar con nuestros segundo personaje, recorte del foami blanco una especie de corazón, y del foami marrón y piel sacamos las orejitas y pegamos del rostro que sacamos antes.
🎄 Paso 8:

Recortamos los cachos del reno y los pegamos con silicón líquido, también hicimos una pequeñas flores que luego pegamos junto con unas hojitas y la nariz de foami rojo, y luego dibujamos los ojos, boca y mejillas y listo nuestro segundo personaje.
🎄 Paso 9:
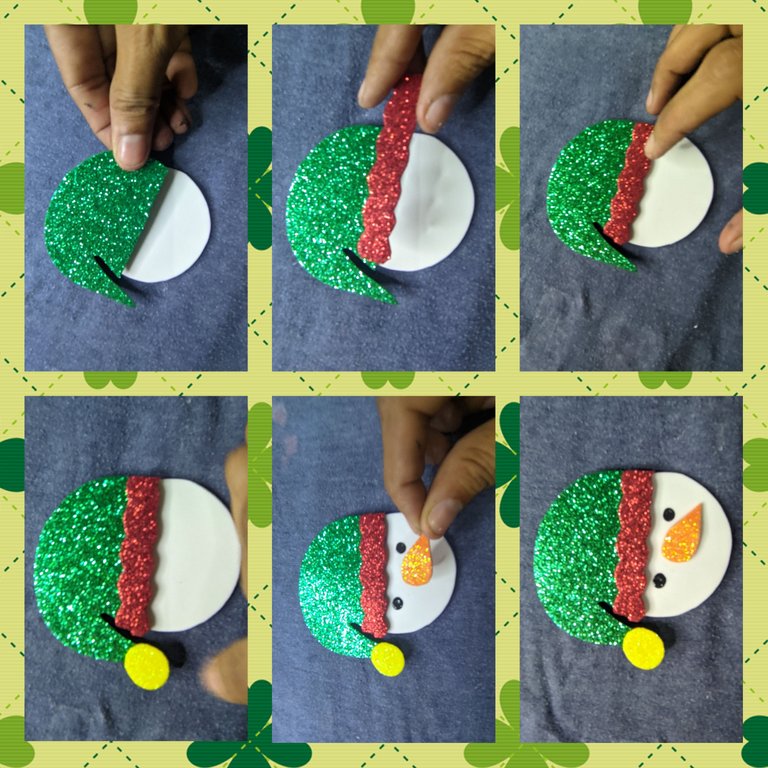
Del foami verde escarchado dibujé y recorté el gorrito, y del foami rojo recorte lo que será el borde de el gorro, también recorte del foami amarillo un pequeño círculo, y del foami naranja recorte una pequeña zanahoria que va hacer nuestra nariz, cuando ya tenemos todas las piezas, pegamos con el silicón líquido, pintamos los ojos y listo nuestro tercer personaje.
🎄 Paso 10:
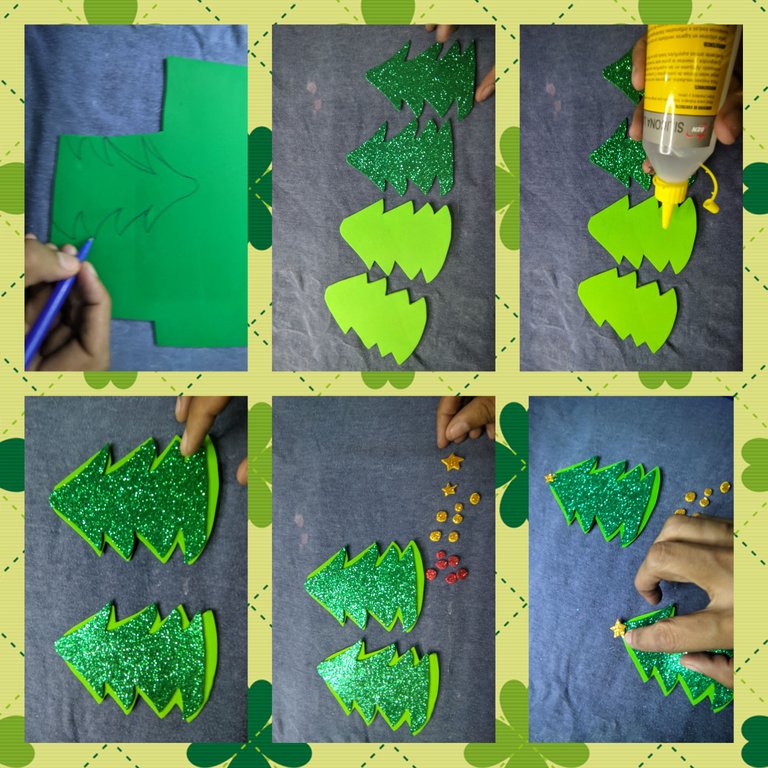
Ahora vamos a dibujar y recortar dos pinos de navidad del foami verde manzana y dos del foami verde escarchado, los del verde manzana deben ser más grande, y con el silicón líquido pegamos uno encima del otro y decoramos con pequeños círculos de foami que quedan de los recortes.
🎄 Paso 11:
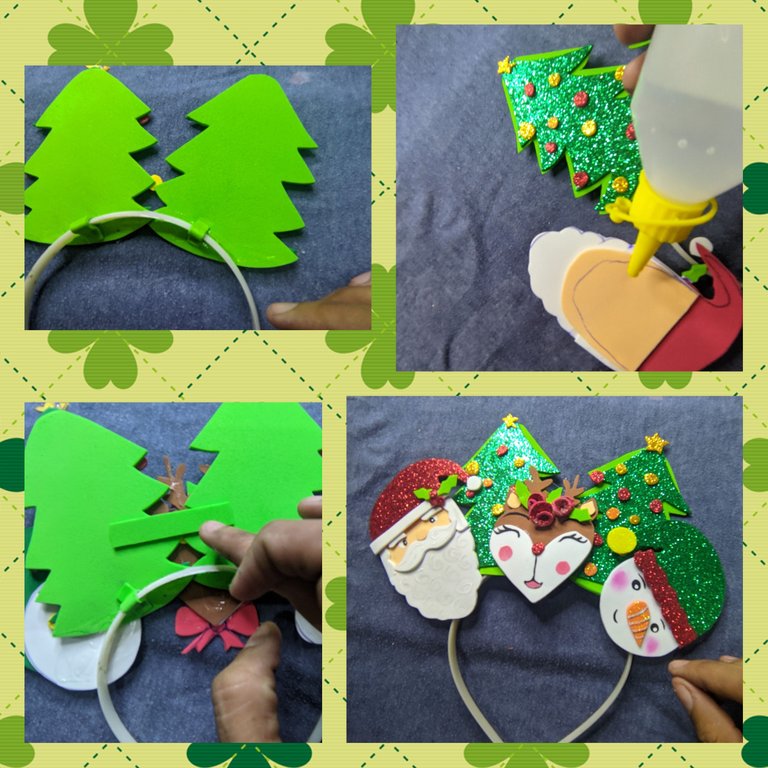
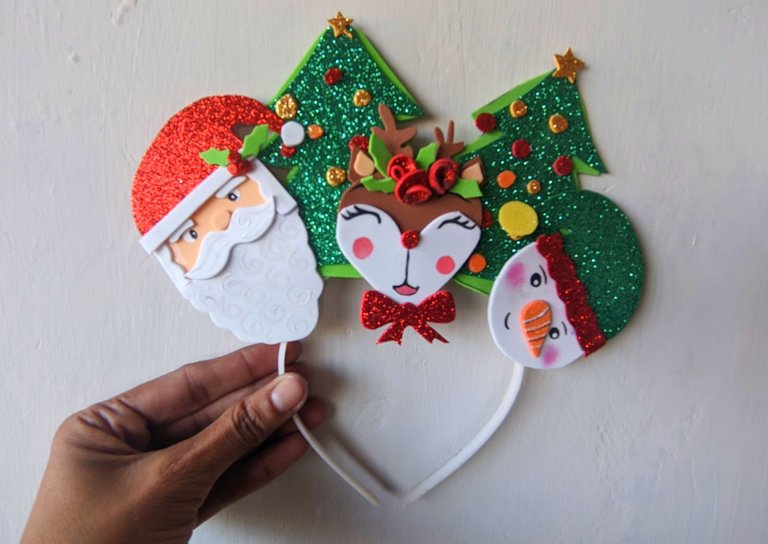
Cómo ya tenemos todas piezas con las que vamos a trabajar, vamos ahora a ensamblar, aplicó suficiente silicón líquido en los pinos y pegamos del cintillo, cuando ya esté seco, procedemos a pegar los tres personajes y dejamos secar un poco, luego recorté un rectángulo que pegué entre los pinos para darle un poco de firmeza, y listo hemos terminado nuestro hermoso detalle para las más pequeñas de la casa.
🎄 Fotos finales 🎄
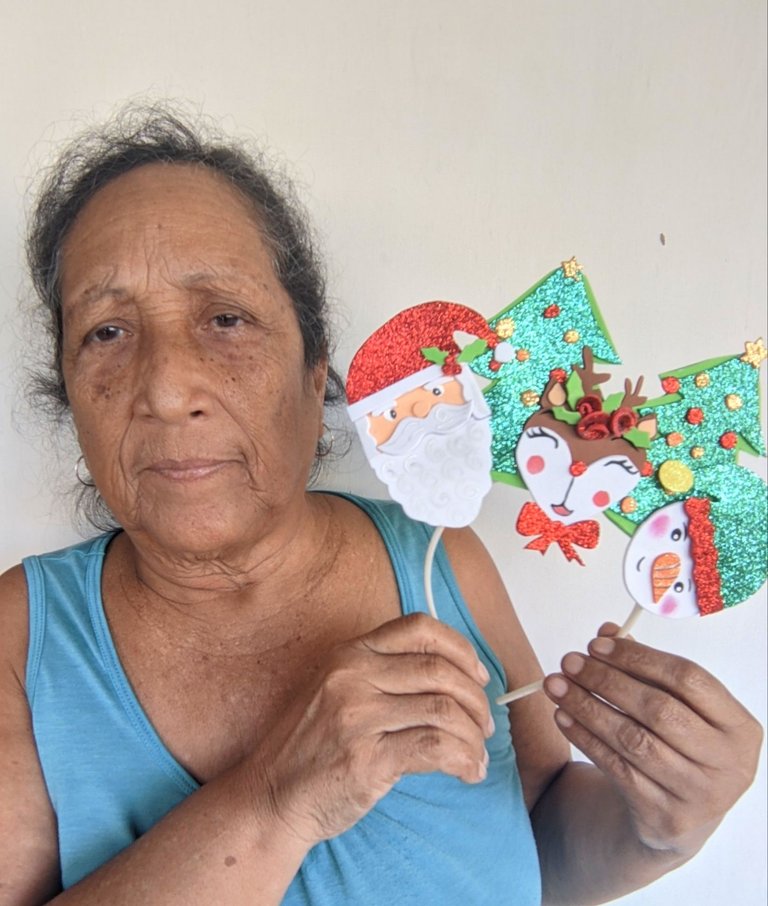
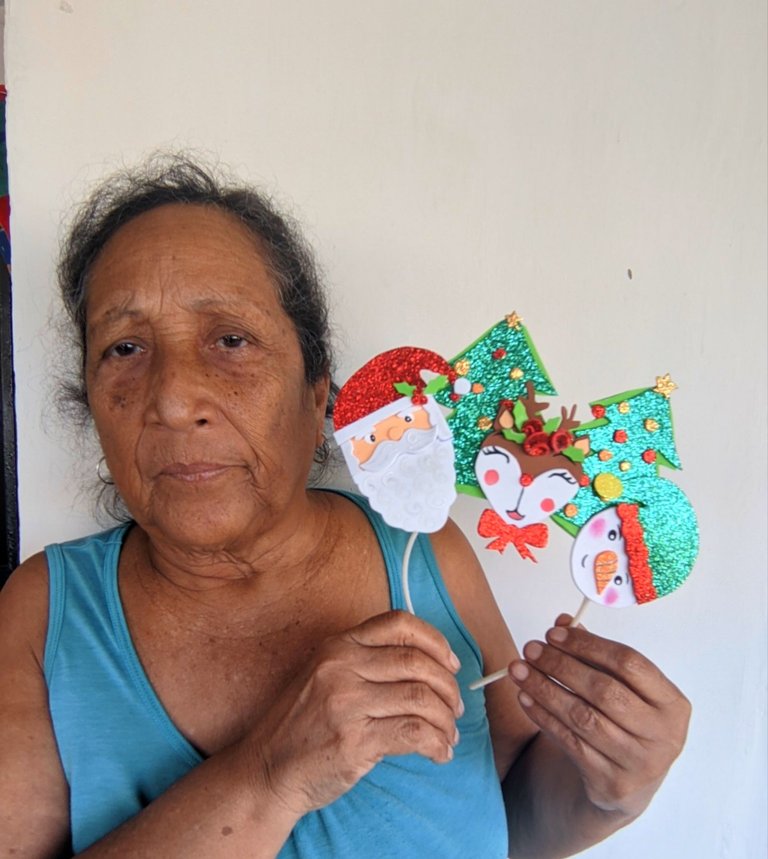

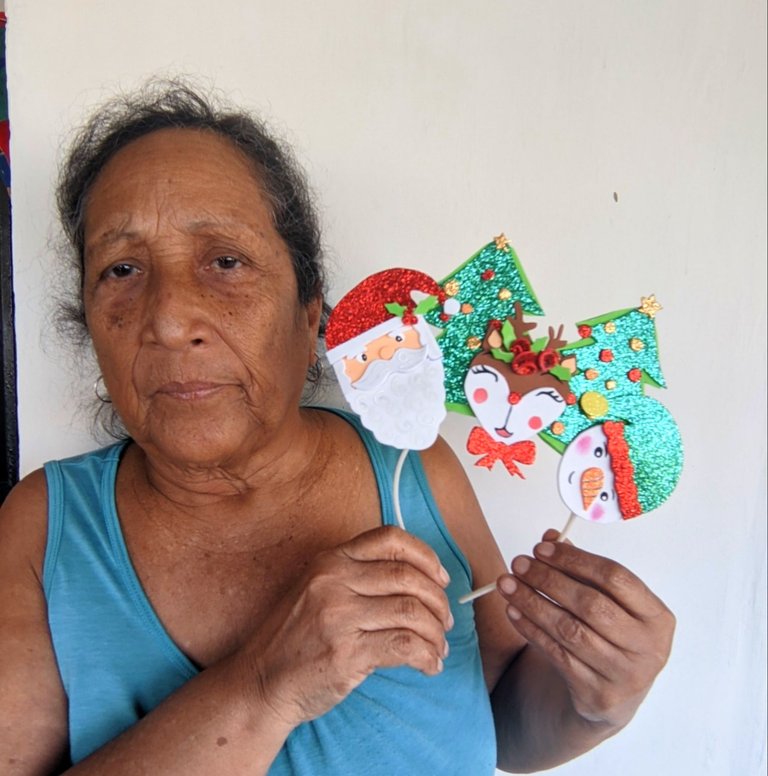

Que les pareció este divertido cintillo navideño, que luce genial con cualquier tipo de vestimenta, pero que les haya gustado, para este post utilice el programa polish y el traductor deepl versión gratis y todas las fotos fueron tomadas con mi teléfono Xiaomi, saludos y nos vemos en el siguiente post, y que Dios me los bendiga siempre.

🎄 ENGLISH 🎄
Hello beautiful people of
#hive I hope you are having a wonderful time, it's almost approaching the good night and we continue working so that our spaces are full of colour and incredible details and especially for our little ones and what better to be made by ourselves, so today I brought you this work that I did and I hope you like it.
🎄 MATERIALS 🎄
🎄 Green, leather, red, white, brown, brown, yellow and orange foami.
🎄 Liquid silicone.
🎄 Headband.
🎄 Scissors.
🎄 Pencil.
🎄 cold paints.
🎄 Fine brush.
🎄Step by step🎄
🎄 Step 1:
First I drew and cut out of the skin-coloured foami the face of Santa, then from the white foami I cut out a circle which will be the face of our snowman and finally from the brown foami I cut out the face of the reindeer.
🎄 Step 2:
We will take the white foami and draw and cut out Santa's beard and a small strip, then with the liquid silicone we glue it to Santa's face.
🎄 Step 3:
Then I drew and cut out the moustaches, and we also glued them with the liquid silicone, then from skin coloured foami I cut out a small circle that we glued on top of the moustache and it will be our nose.
🎄 Step 4:
Now on the frosted red foami I drew and cut out Santa's little hat, applied liquid silicone to it and glued it and the little strip we cut out previously.
🎄 Step 5:
Take some black and white cold paint and draw the little santa's eyes and cut out two small rectangles and glue them on top of the eyes which will be the eyebrows.
🎄 Step 6:
From the leftover scraps we take three red circles and two little leaves and glue them on Santa's hat, then we paint details on the beard and hair and our first character is ready.
🎄 Step 7:
Now let's work with our second character, cut out a kind of heart from the white foami, and from the brown foami and skin we cut out the little ears and glue on the face we cut out before.
🎄 Step 8:
We cut out the reindeer's horns and glued them with liquid silicone, we also made small flowers that we then glued together with some leaves and the nose in red foami, and then we drew the eyes, mouth and cheeks and our second character was ready.
🎄 Step 9:
From the frosted green foami I drew and cut out the little hat, and from the red foami I cut out what will be the edge of the hat, I also cut out from the yellow foami a small circle, and from the orange foami I cut out a small carrot that will make our nose, when we have all the pieces, we glue with liquid silicone, paint the eyes and our third character is ready.
🎄 Step 10:
Now we are going to draw and cut out two christmas pines from apple green foami and two from frosted green foami, the apple green ones should be bigger, and with the liquid silicone we stick one on top of the other and decorate with small circles of foami left over from the cut-outs.
🎄 Step 11:
As we already have all the pieces we are going to work with, we are now going to assemble, I applied enough liquid silicone on the pines and glued the headband, when it is dry, we proceed to glue the three characters and let dry a little, then I cut a rectangle that I glued between the pines to give it a little firmness, and ready we have finished our beautiful detail for the smallest of the house.
🎄 Final photos 🎄
What do you think about this funny christmas headband, it looks great with any kind of outfit, but I hope you liked it, for this post I used the polish program and deepl translator free version and all the pictures were taken with my Xiaomi phone, greetings and see you in the next post, and God bless you always.
Abuelita! Una preciosura como siempre!!
Muchísimas gracias
Simplemente hermoso.. ideal para los más chiquititos de la casa, y los no tan chiquitos jajaja
Saludos
Gracias
Gracias
Ho Ho Ho! @laabuelita, one of your Hive friends wishes you a Merry Christmas and asked us to give you a new badge!
The HiveBuzz team wish you a Merry Christmas!
May you have good health, abundance and everlasting joy in your life.
To find out who wanted you to receive this special gift, click here!
You can view your badges on your board and compare yourself to others in the Ranking
Check out our last posts: