
Saludos para todos mis queridos amigos, sean bienvenidos a mi publicación.
El día de hoy comparto con ustedes un hermoso flamingo con colores muy llamativos, recomendados por un amigo de las redes sociales, anteriormente estaba utilizando colores corrientes escolares, estos colores son muy suaves y me han dado excelentes resultados.
A medida que vayan observando el proceso, notaran como resulta la mezcla de colores, los Famingos son unas aves que actualmente están muy de moda para cualquier tipo de arte, actualmente los he visto en telas, en cuadros, adornos, entre otros.
Las fotografías que verán a continuación, fueron tomadas con mi teléfono modelo Alcatel_5044R.
A continuación, les presentaré el proceso de elaboración que implemente para realizar este dibujo.

Greetings to all my dear friends, welcome to my publication.
Today I share with you a beautiful flamingo with very bright colors, recommended by a friend of the social networks, previously I was using ordinary school colors, these colors are very soft and have given me excellent results.
As you observe the process, you will notice how the mixture of colors, the Famingos are birds that are currently very fashionable for any type of art, I have seen them in fabrics, paintings, ornaments, among others.
The pictures you will see below were taken with my Alcatel_5044R model phone.
Next, I will show you the elaboration process that I implemented to make this drawing.

Paso 1
PRIMER PASO PARA REALIZAR MI DIBUJO
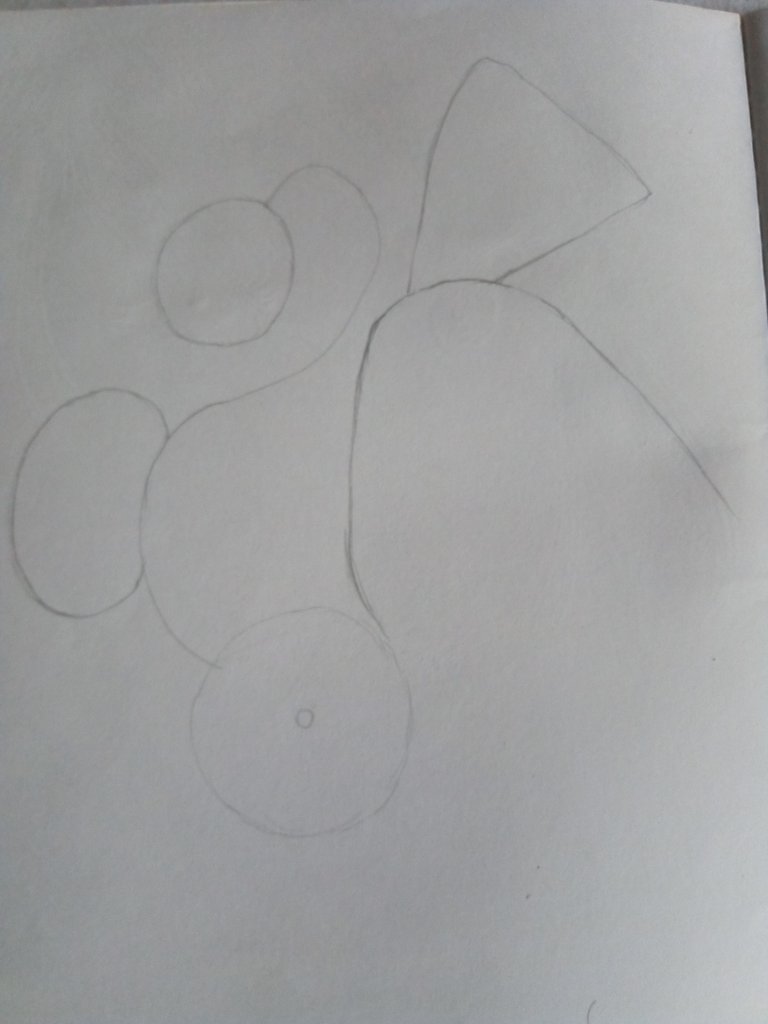
Para iniciar realice una figura en forma de un número dos, por los extremos agregue unas figuras circulares rectangulares, otras figuras semi óvalos y semi círculos.
PASO 2
FORMA DEL DIBUJO
Complete el número dos con otra línea igual a la de inicio para poder hacer el cuerpo del Flamingo, en la parte izquierda en el cuerpo del flamingo fui haciendo la forma de la cabeza afinando un poco la forma dentro del círculo, luego realice una línea curva ovalada para hacer el pico que cae sobre el cuerpo.
Después realice las plumas que son en forma de hojas con unas líneas verticales sobre ellas, seguidamente empecé a realizar las flores y las hojas juntos con algunas flores adicionales que le agregue.
Al terminar la forma del dibujo, con el uso del borrador eliminaré todas las líneas guías.
Step 1
FIRST STEP TO MAKE MY DRAWING.
To start, make a figure in the shape of a number two, add some rectangular circular figures at the ends, other half oval figures and half circles.
STEP 2
SHAPE OF THE DRAWING.
Complete the number two with another line equal to the beginning to make the body of the Flamingo, on the left side on the body of the flamingo I was making the shape of the head by refining the shape a little inside the circle, then make a curved oval line to make the beak that falls on the body.
Then I made the feathers that are in the shape of leaves with some vertical lines on them, then I started to make the flowers and the leaves together with some additional flowers that I added.
When I finished the shape of the drawing, using the eraser I will remove all the guide lines.

PASO 3
ACLARANDO EL DIBUJO
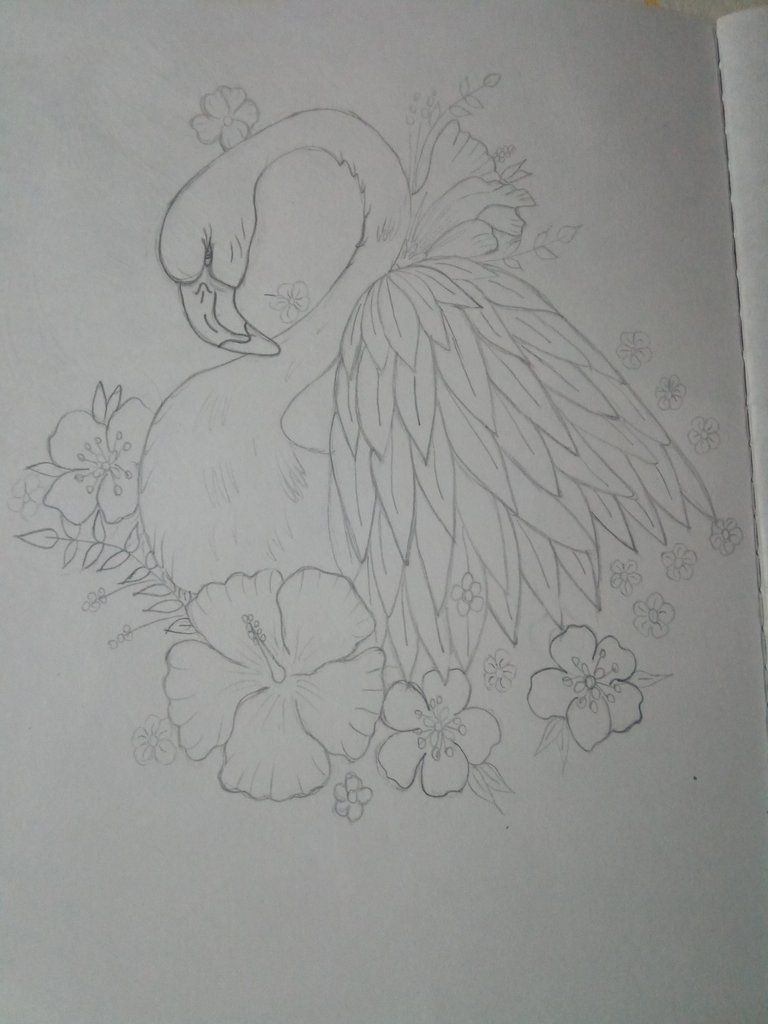
En este paso, luego de haber usado el borrador para limpiar las líneas que utilice como guía, procedí a darle algunos detalles para darle forma a mi dibujo, en la parte de la cabeza coloque algunas líneas en el pico, también ajuste el ojo para después ajustar las líneas de las flores, también coloque algunas rugosidades por la parte del cuello y coloque algunos trazos en el cuerpo para simular el plumaje del flamingo.
STEP 3
CLARIFYING THE DRAWING.
In this step, after having used the eraser to clean the lines that I used as a guide, I proceeded to give some details to give shape to my drawing, in the part of the head I placed some lines in the beak, I also adjusted the eye to later adjust the lines of the flowers, I also placed some roughness in the part of the neck and I placed some strokes in the body to simulate the plumage of the flamingo.
PASO 4
PRIMERA CAPA DE COLOR
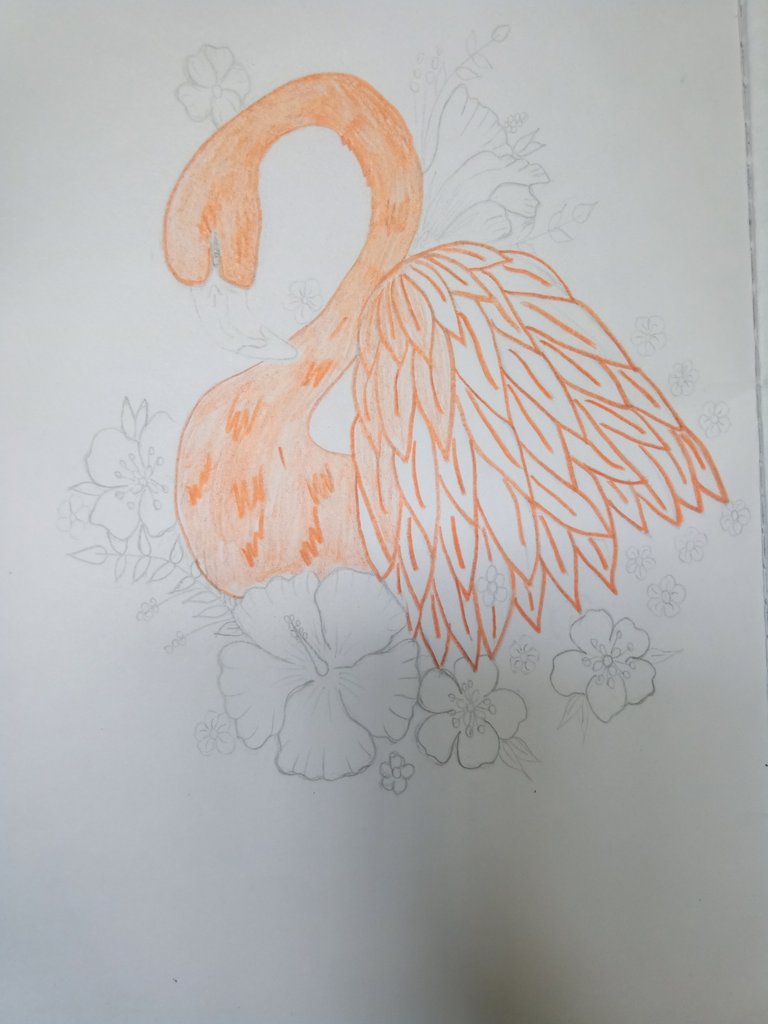
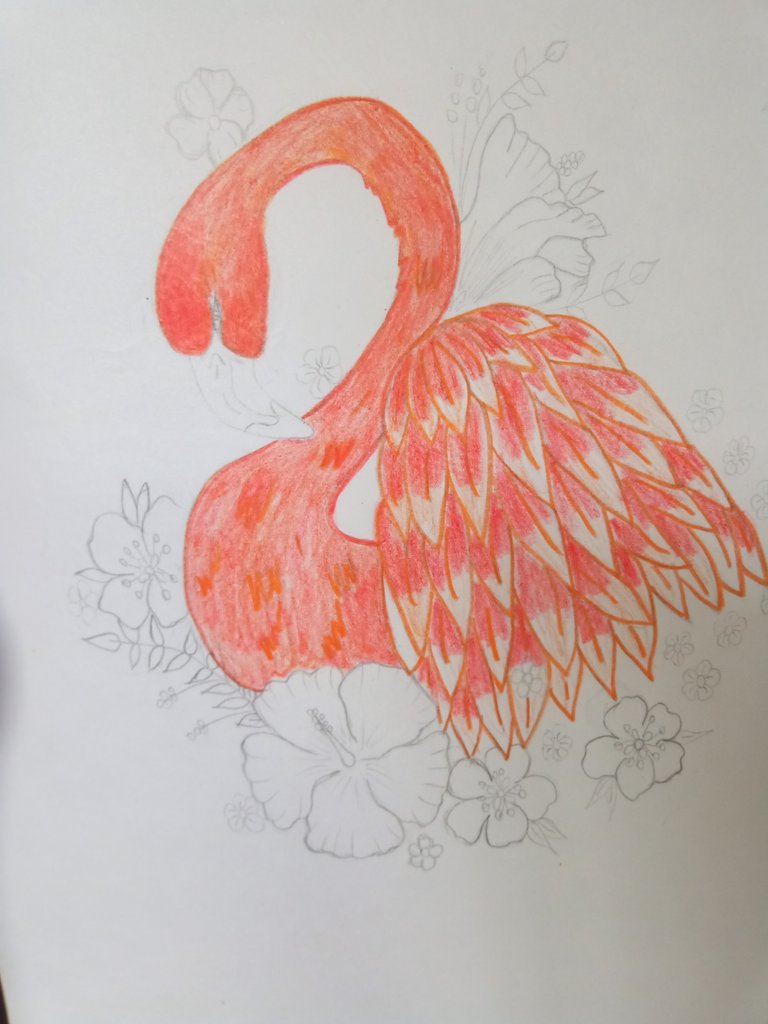
Antes de aplicar la primera capa de color, necesite eliminar un poco del grafito de mi dibujo para evitar tonos desagradables en el mismo, luego utilice el color anaranjado en todo el flamingo excepto en el pico, culminando con el color anaranjado, aplique una capa de color rojo para ir mezclando los colores que necesito para este flamingo, dejando en las plumas de las alas algunos espacios sin aplicar el color rojo.
STEP 4.
FIRST COAT OF COLOR
Before applying the first layer of color, I need to remove some of the graphite from my drawing to avoid unpleasant tones in it, then use the orange color in all the flamingo except in the beak, culminating with the orange color, apply a layer of red color to mix the colors I need for this flamingo, leaving in the feathers of the wings some spaces without applying the red color.
PASO 5
REAFIRMANDO LOS COLORES
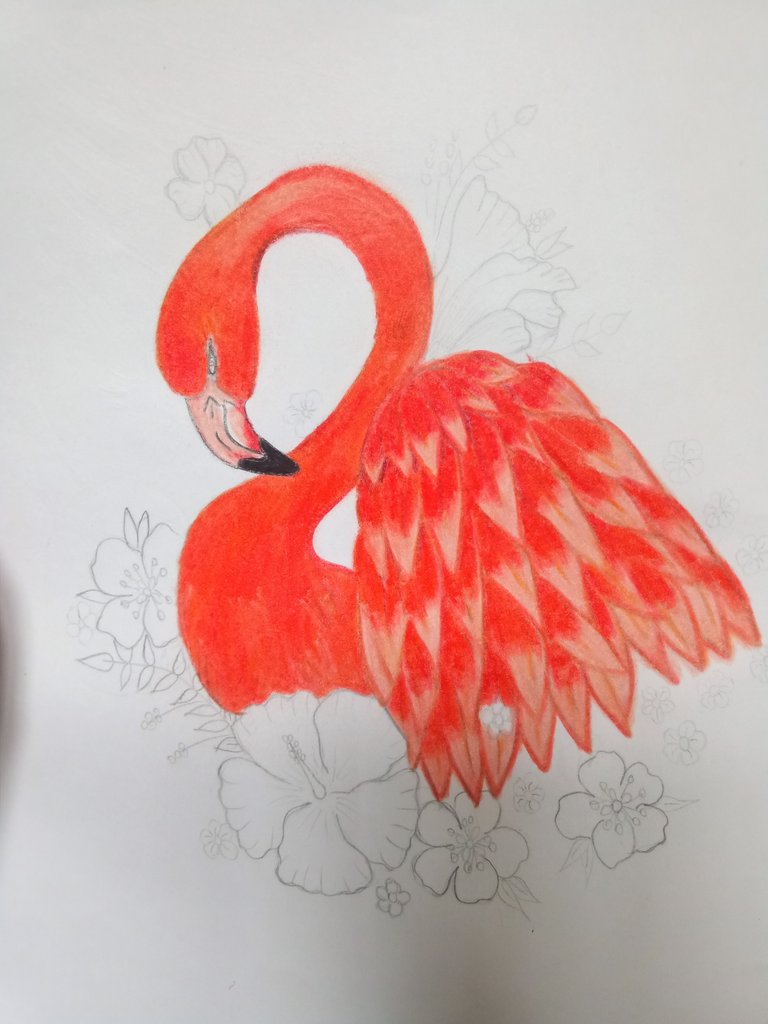
Sobre estos dos colores anteriormente nombrados, aplicaremos nuevamente un anaranjado más oscuro y sobre este aplique el color rojo para darle máximo color.
Finalizando con las cuatro capas de color aplique en las puntas de las alas, el color carne y sobre este aplique un poco de blanco para hacer algunos destellos en las alas del flamingo.
En el pico podemos notar que también utilice el color carne con un pequeño toque del anaranjado para hacer que el pico sea mucho más claro que el pelaje del flamingo, por la punta del pico use el color negro y blanco para darle un pequeño toque de iluminación sobre este.
Por la parte del cuerpo también utilicé el blanco para darle un efecto de iluminación en nuestro flamingo.
Amigos me he dado cuenta de que durante mi proceso de dibujo, uno de los colores más importantes para darle vida a nuestro dibujo es el color blanco y el negro, a demás que son uno de mis colores preferidos porque combinan con todos los tonos.
STEP 5.
REAFFIRMING THE COLORS
Over these two colors previously mentioned, we will apply again a darker orange color and over this one apply the red color to give it maximum color.
Finishing with the four layers of color apply on the tips of the wings, the flesh color and on this apply a little white to make some flashes on the wings of the flamingo.
On the beak we can notice that I also used the flesh color with a little touch of orange to make the beak much lighter than the flamingo's fur, on the tip of the beak I used black and white to give it a little touch of illumination.
For the body part I also used white to give a lighting effect on our flamingo.
Friends I have realized that during my drawing process, one of the most important colors to give life to our drawing is black and white, besides they are one of my favorite colors because they combine with all tones.
PASO 7
LAS FLORES
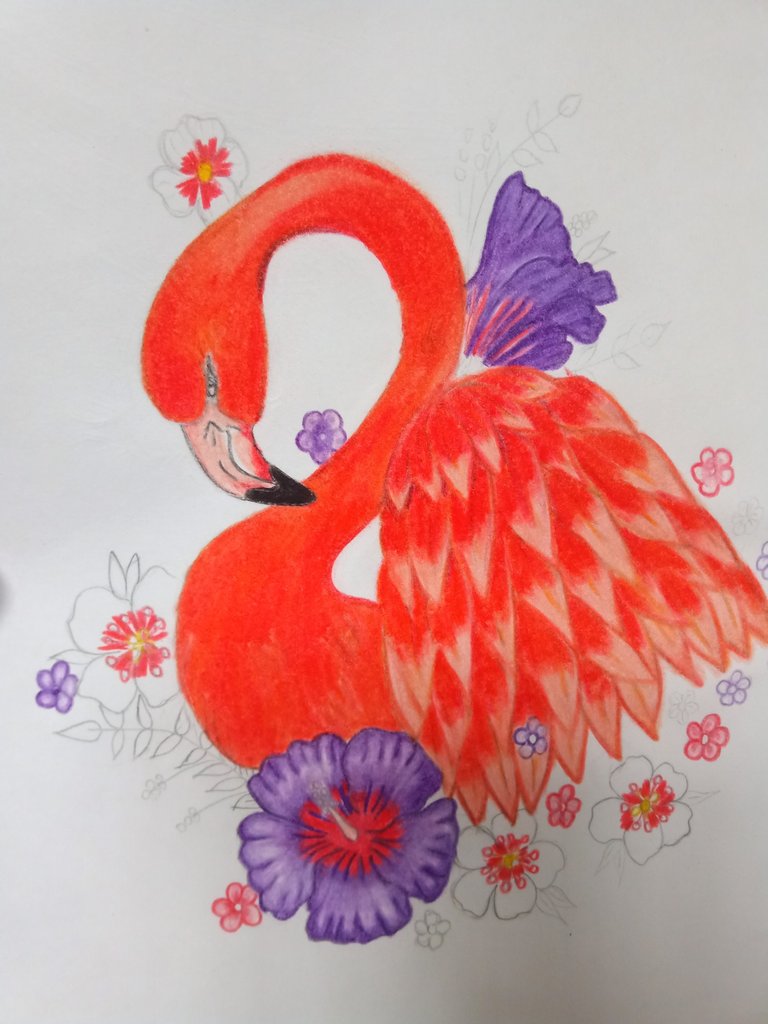
Para las primeras flores, utilice el color morado, rojo y amarillo para algunas partes, el color rojo lo utilice en la parte céntrica de la flor más grande, para posteriormente utiliza el color morado, también en la parte que está antes de la punta de las flores deje un pequeño espacio en blanco para darle un efecto como si la hoja se estuviera doblando hacia el flamingo.
PASO 7
THE FLOWERS
For the first flowers, use purple, red and yellow for some parts, use the red color in the central part of the largest flower, then use the purple color, also in the part that is before the tip of the flowers leave a small blank space to give an effect as if the leaf was bending towards the flamingo.
PASO 8
DETALLES FINALES
Para finalizar con el coloreado de las hojas y las flores amarillas, ya teniendo el centro de las flores con el color rojo, aplique el color amarillo y sobre estos agregue el color blanco.
También realicé algunas pequeñas flores adicionales. Para pintar las hojas utilice dos tonos de color, un verde primavera como base y sobre este agregue los detalles con un verde amarillo y verde, de esta manera finaliza la mezcla de colores de este flamingo.
No olvidemos que antes de colorear con colores claros, debemos eliminar las líneas de nuestro dibujo dejando lo más claro que podamos ver, para evitar que nuestro color se manche con el residuo del lápiz de dibujo.
STEP 8.
FINAL DETAILS.
To finish with the coloring of the leaves and the yellow flowers, already having the center of the flowers with the red color, I applied the yellow color and over these I added the white color.
I also made some additional small flowers. To paint the leaves I used two tones of color, a spring green as a base and on this I added the details with a yellow green and green, this way the color mixture of this flamingo is finished.
Let's not forget that before coloring with light colors, we must eliminate the lines of our drawing leaving as light as we can see, to avoid that our color is stained with the residue of the drawing pencil.
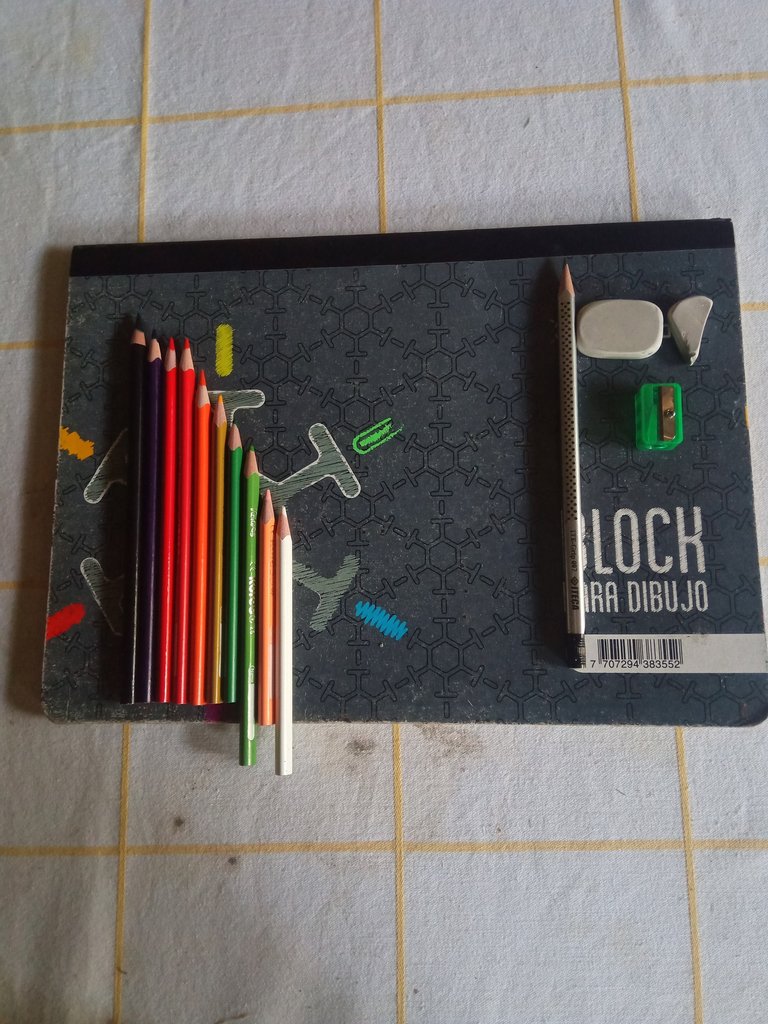
MATERIALES
BLOC DE DIBUJO.
BORRADOR.
SACAPUNTAS.
LÁPIZ DE DIBUJO.
PAÑUELO.
También es importante el uso de un pañuelo como soporte para colocar nuestra mano sobre él para evitar manchar nuestro dibujo.
Los colores que use para mi dibujo son los siguientes:
Rojo.
Naranja.
Bermellón o anaranjado oscuro.
Carne.
Morado.
Blanco.
Negro.
Verde amarillo.
Verde.
Amarillo.
La imagen que utilice en referencia posee su fuente, puesto que es una imagen sacada de Pinterest, de donde estoy sacando todas las imágenes que uso para realizar mis dibujos.
Así culmino mi publicación amigos, espero que te haya gustado y hayas aprendido algo nuevo el día de hoy.
Nos veremos en otra publicación basada en el hermoso mundo del arte del dibujo.
MATERIALS.
SKETCH PAD.
DRAFT
SACAPUNTS
DRAWING PENCIL.
SCARF
It is also important to use a handkerchief as a support to place our hand on it to avoid staining our drawing.
The colors I used for my drawing are the following:
Red.
Orange.
Vermilion or dark orange.
Flesh.
Purple.
White.
Black.
Yellow green.
Green.
Yellow.
The image I used in reference has its source, since it is an image taken from Pinterest, where I am getting all the images I use to make my drawings.
This is the end of my post friends, I hope you liked it and learned something new today.
See you in another publication based on the beautiful world of the art of drawing.

social networks / redes sociales
![]()
![]()
Traductor Deepl
Translated Deepl
Ediciones Canva
Editions Canva
Muy hermoso trabajo amiga, te felicito. 👍🏻😊
Gracias amiga, me alegro que te haya gustado.