
Saludos queridos artesanos, espero que tengan un día fantástico.
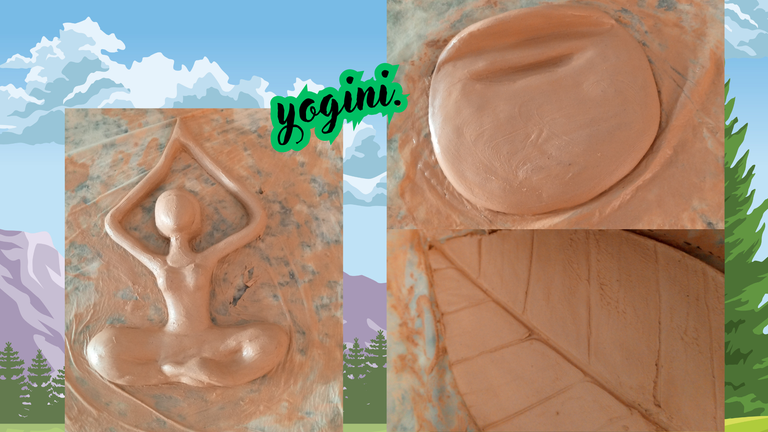
Ayer una gran amiga artesana me sorprendió con una buena cantidad de arcilla para realizar mis próximos proyectos creativos, y una de las primeras ideas como parte de mi reacción expresada en arte fue hacer una manifestación de ese sentimiento por el momento. Una simple escultura de una yogini , una mujer practicando yoga, me encanta hacer yoga, quiero ser una yogini jajaja.
Me sentí tan relajada porque siempre me ha gustado hacer esculturas de barro, pero no lo conseguía, así que me puse a meditar cuantas cosas iba a ser capaz de hacer.
Trabajar con arcilla es sinónimo de motivación, atención y concentración, para los artistas que se atreven a meter las manos en la arcilla, al hacerlo viajaremos en la época de los niños que siempre suelen tener preferencia a la hora de jugar si les pones tierra la mayoría se verán tentados a jugar jajajaja siempre me pasó con mi hija.
Sin más preámbulos les comparto mi experiencia con esta escultura.
Las fotografías que verán a continuación, fueron tomadas con mi teléfono modelo TECNO SPARK GO 2023.

Greetings dear artisans, I hope you have a fantastic day.
Yesterday a great artisan friend surprised me with a good amount of clay to make my next creative projects, and one of the first ideas as part of my reaction expressed in art was to make a manifestation of that feeling for the moment. A simple sculpture of a yogini , a woman practicing yoga, I love doing yoga, I want to be a yogini hahaha.
I felt so relaxed because I have always loved making clay sculptures, but I couldn't get it, so I started to mediate on how many things I was going to be able to make.
Working with clay is synonymous of motivation, attention and concentration, for the artists who dares to put their hands in the clay, when doing so we will travel in the time of children who always tend to have a preference when playing if you put dirt most will be tempted to play hahahaha it always happened to me with my daughter.
Without further ado I share with you my experience with this sculpture.

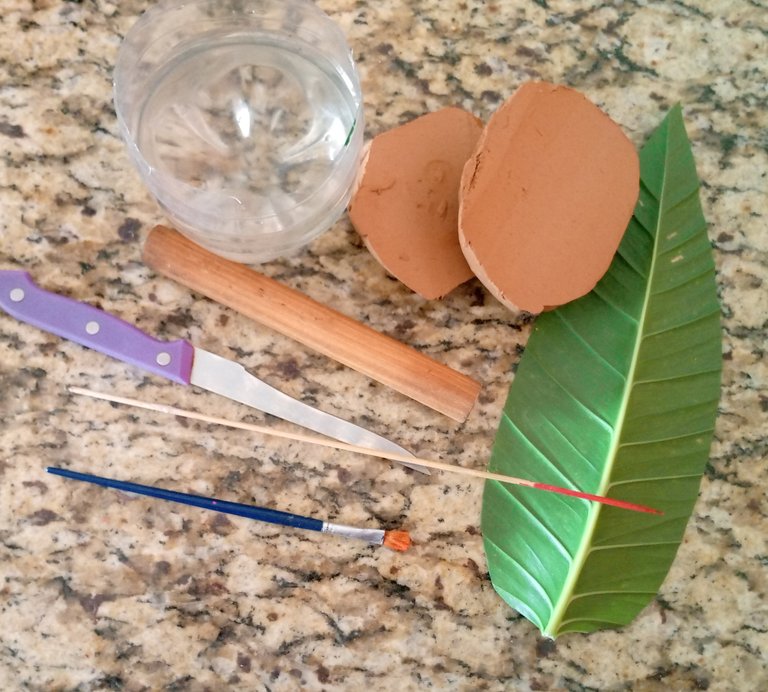
Materiales:
- Arcilla roja
- 1 Hoja natural
- 1 Pote con agua limpia
- 1 Paño para limpiar las superficies
- 1 Palo de madera
- 1 Cuchillo fino
- 1 Palo de brocheta
- 1 Pincel
- Bolsa de plástico
Materials:
- Red clay
- 1 natural leaf
- 1 Pot with clean water
- 1 Cloth to clean the surfaces
- 1 Wooden stick
- 1 thin knife
- 1 Skewer stick
- 1 Brush
- Plastic bag
 |  |  |
|---|
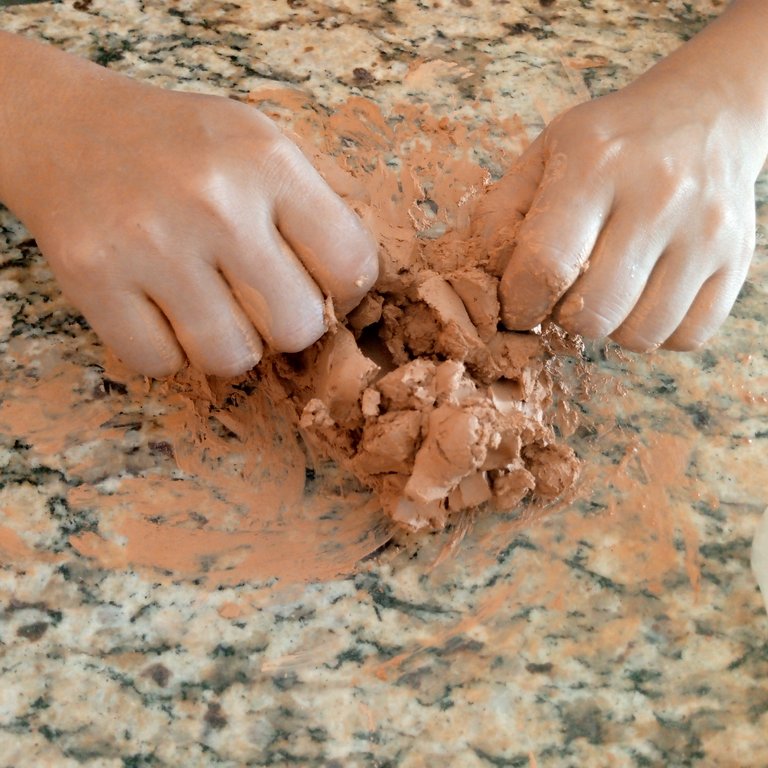
Para comenzar, agarre un trozo de arcilla y algunas herramientas, comencé amasar un poco la arcilla para empezar a moldear.
Como la superficie donde comencé amasar la arcilla no me funciono porque la arcilla se quedaba pegada y era muy incómodo, tuve que ingeniarme algo, y fue colocar bolsa de plástico como primera opción que se me ocurrió y si funciono.
La arcilla se trabaja sobre una superficie de yeso, para evitar que se pegue y como hacía un buen tiempo que no trabajaba este material no cuento con esa superficie de yeso, así que pensé que iba a poder hacerlo en otra superficie, no estaba segura.
Enseguida coloqué una parte de la arcilla sobre la superficie que tenía la bolsa y allí si pude continuar.
To begin, I grabbed a piece of clay and some tools, I started to knead the clay a little to start molding.
As the surface where I started kneading the clay did not work because the clay stuck and it was very uncomfortable, I had to figure something out, and I had to put a plastic bag as the first option that came to my mind and it worked.
The clay is worked on a plaster surface, to prevent it from sticking and as I had not worked with this material for a long time I do not have that plaster surface, so I thought I could do it on another surface, I was not sure.
I immediately placed a part of the clay on the surface that had the bag and there I could continue.
 |  |  |
|---|
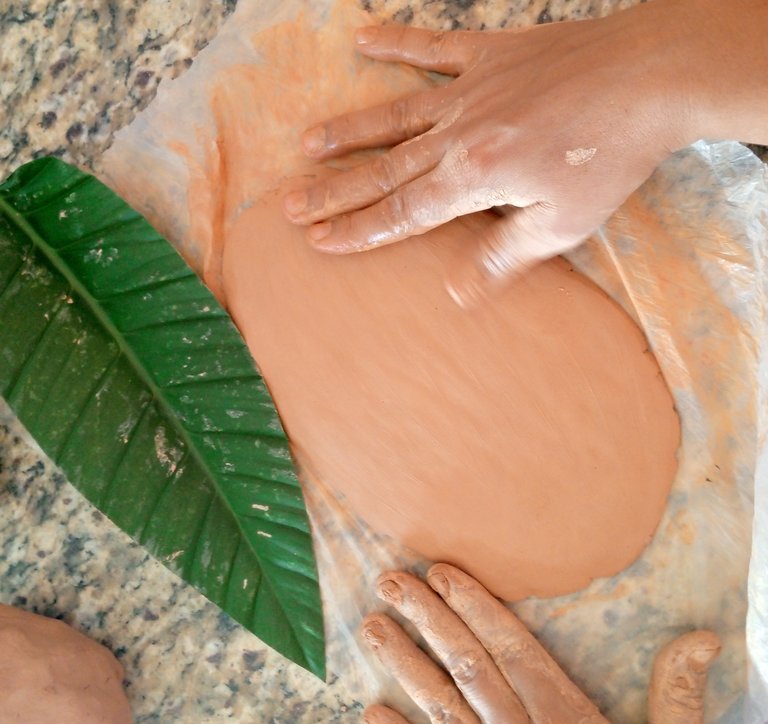
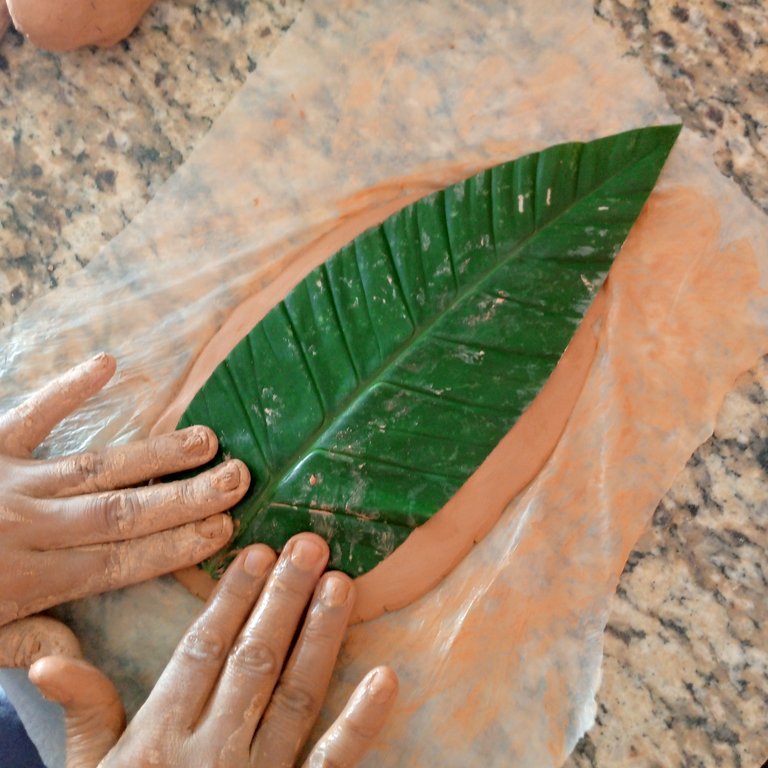
Despues de haber hecho una superficie lisa y fina en arcilla, coloque sobre ella una hoja que habia recortado previamente, porque la hoja era muy grande, sin embargo, para la superficie que hice todavia era grande, asi que tuve que cortar un poco mas.
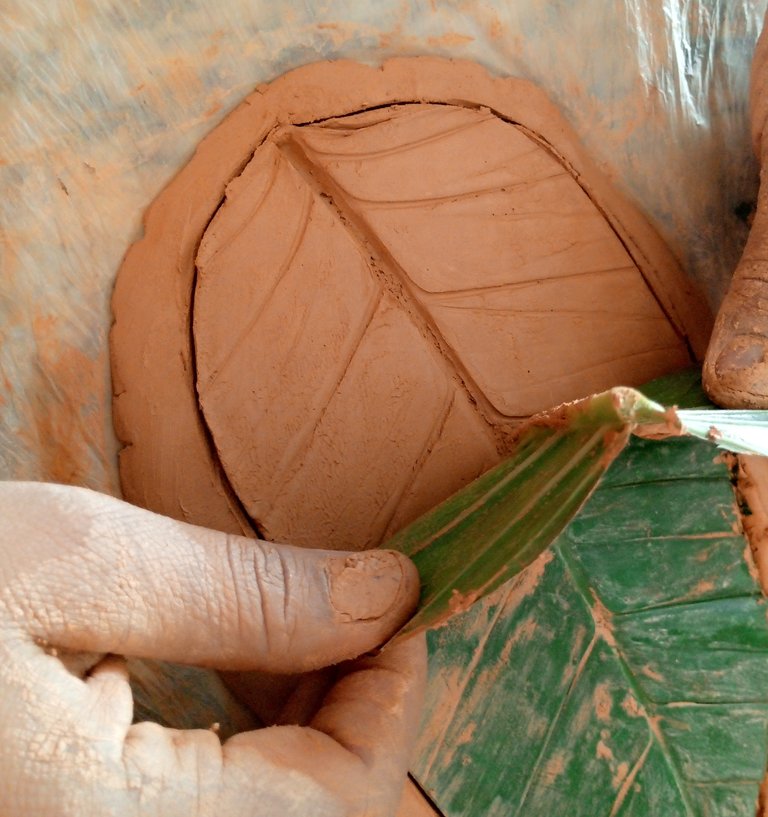
La hoja la coloque sobre la arcilla por el reverso para marcar bien la nervacion.
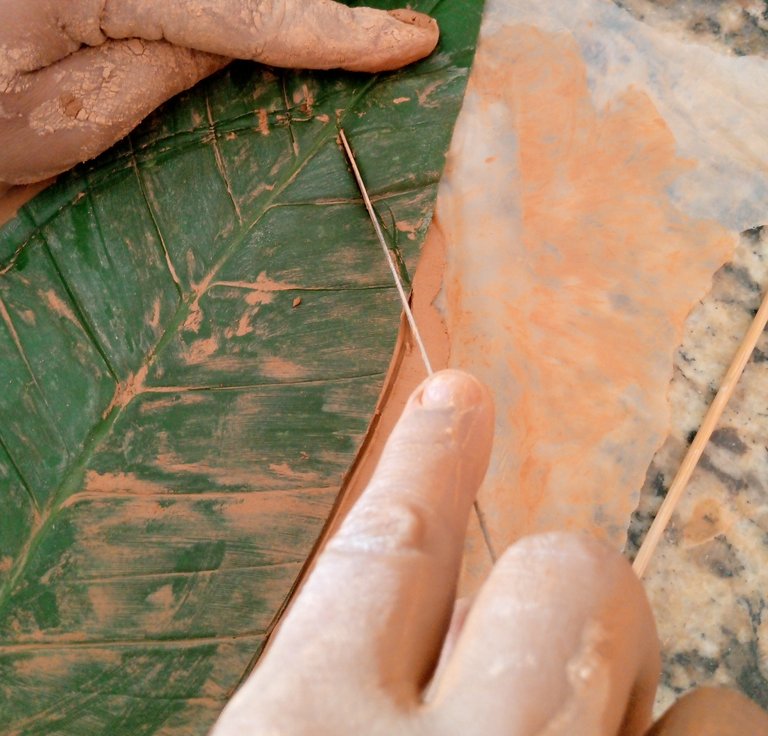
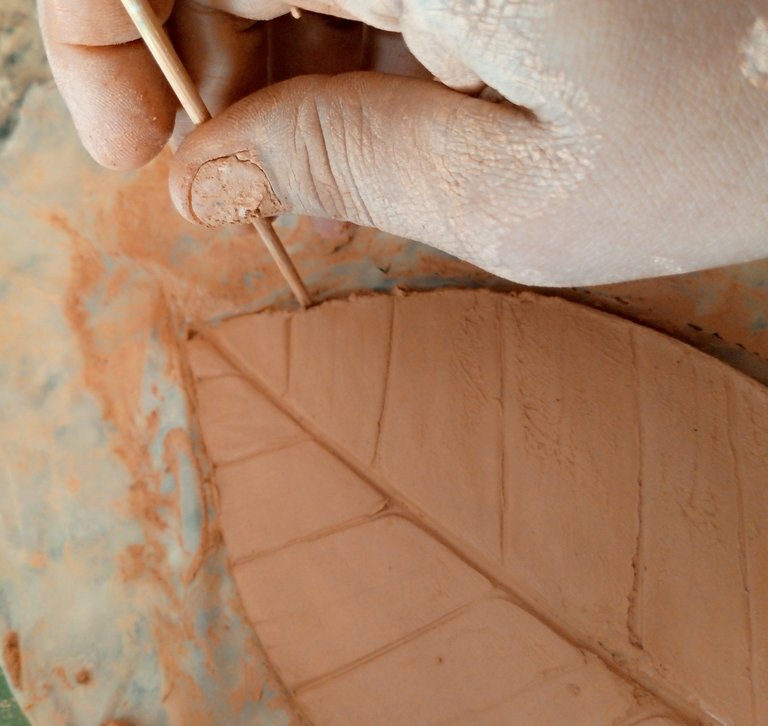
Luego hice presion sobre la hoja para fijar mas las lineas, corte con el cuchillo fino la forma de la hoja, retire la hoja y los sobrantes de los lados, luego con el palo de brocheta empece a tallar los bordes para estilizar bien esta hoja.
After having made a smooth and thin surface in clay, place on it a sheet that I had previously cut out, because the sheet was very large, however, for the surface I made it was still large, so I had to cut a little more.
The sheet should be placed on the clay on the reverse side to mark the nervacion well.
Then I put pressure on the leaf to fix the lines more, cut with the thin knife the shape of the leaf, remove the leaf and the leftovers from the sides, then with the skewer stick I started to carve the edges to stylize this leaf well.
 |  |  |
|---|
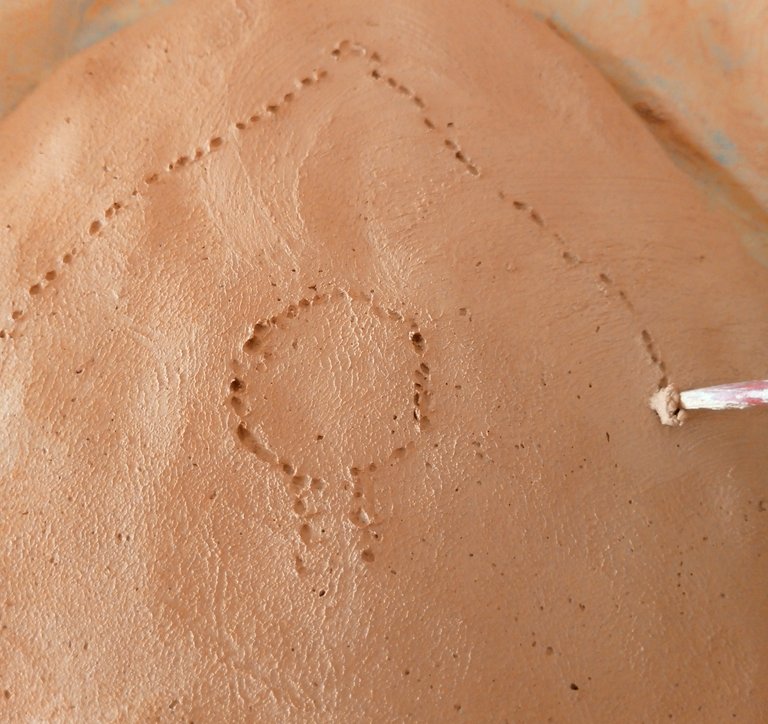
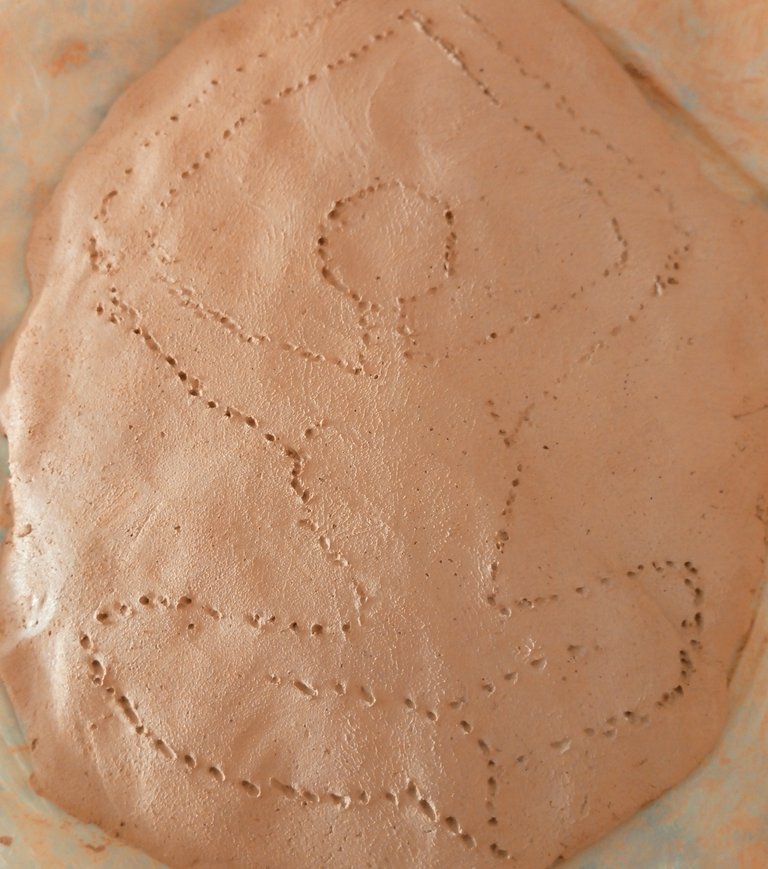
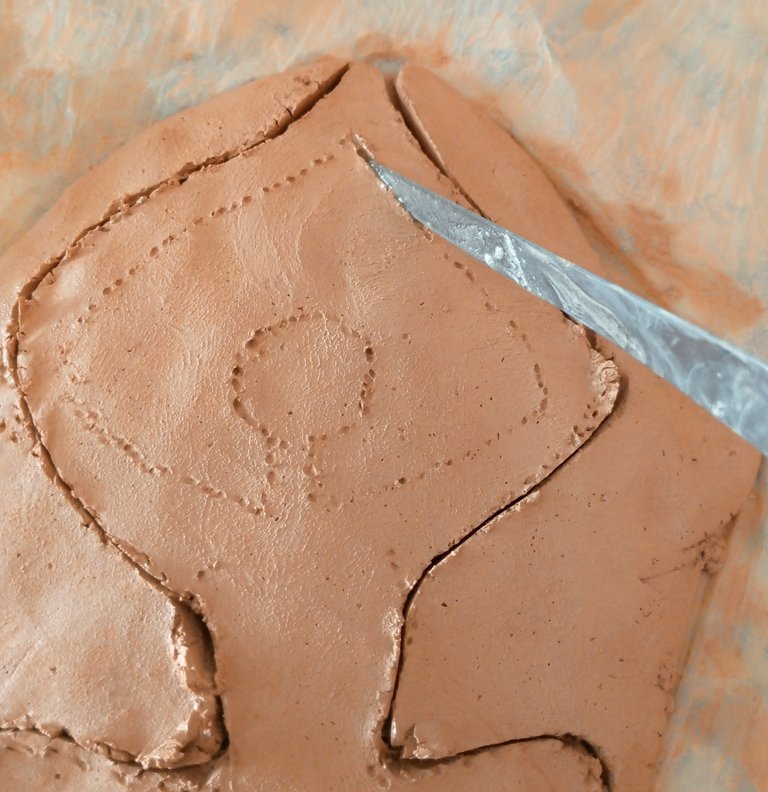
Al terminar de hacer la hoja, repetí nuevamente el paso que utilice anteriormente, las mismas características que la que hice para la hoja, luego con el palo de brocheta, dibuje sobre la superficie de arcilla y con puntos la figura de la yogini , seguido corte la forma, con la punta del cuchillo, y saque la figura que luego comenzaría a esculpir.
When I finished making the leaf, I repeated again the step I used before, the same characteristics as the one I did for the leaf, then with the skewer stick, I drew on the clay surface and with dots the figure of the yogini, then I cut the shape, with the tip of the knife, and took out the figure that I would then begin to sculpt.
 |  |  |
|---|
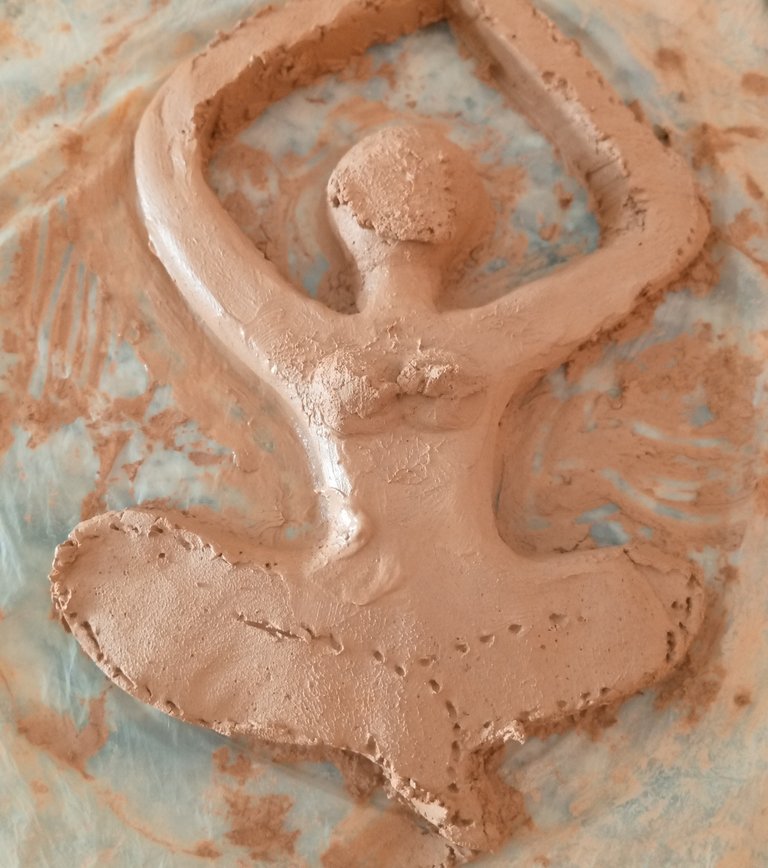
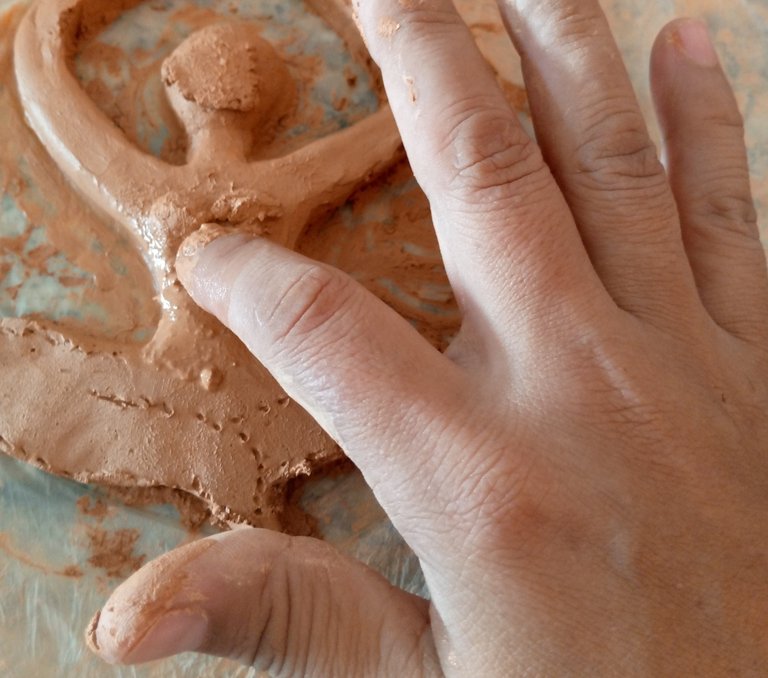
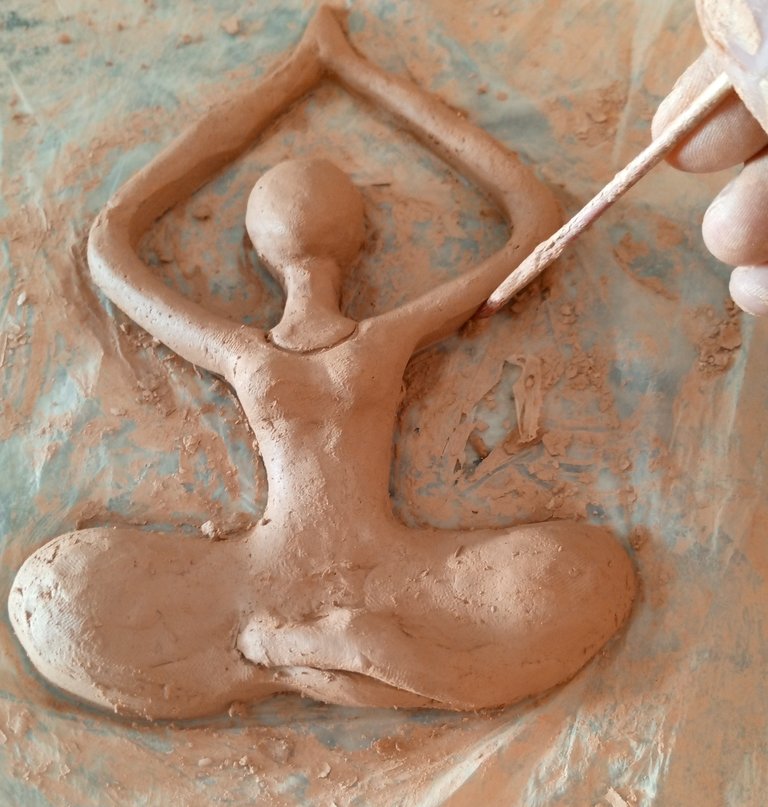
En este punto comienzo a darle forma a esta figura plana, a rellenar y a esculpir con los dedos húmedos, colocando las partes sobresalientes y con el palo de brocheta moldeando las orillas.
At this point I start shaping this flat figure, filling and sculpting with wet fingers, placing the protruding parts and with the skewer stick molding the edges.
 |  |  |
|---|
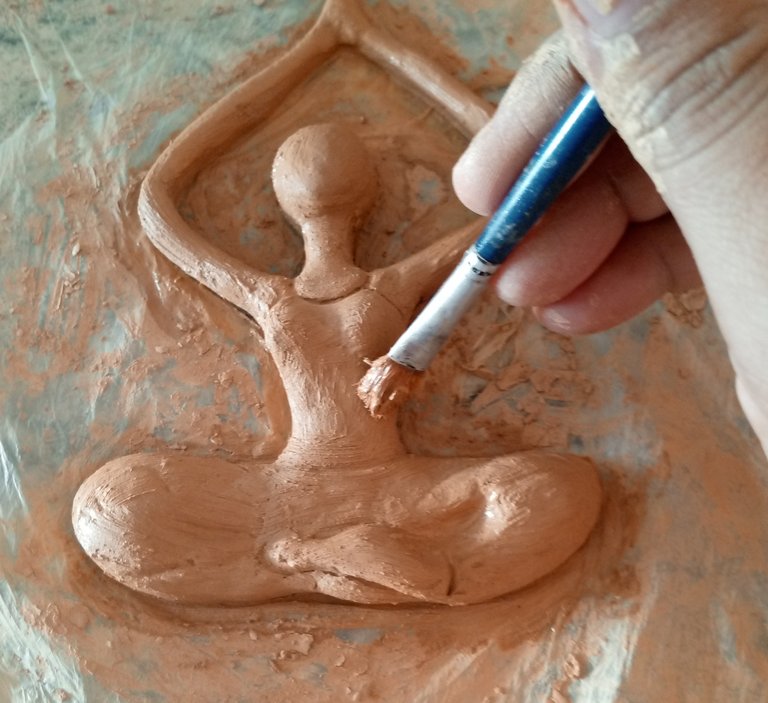
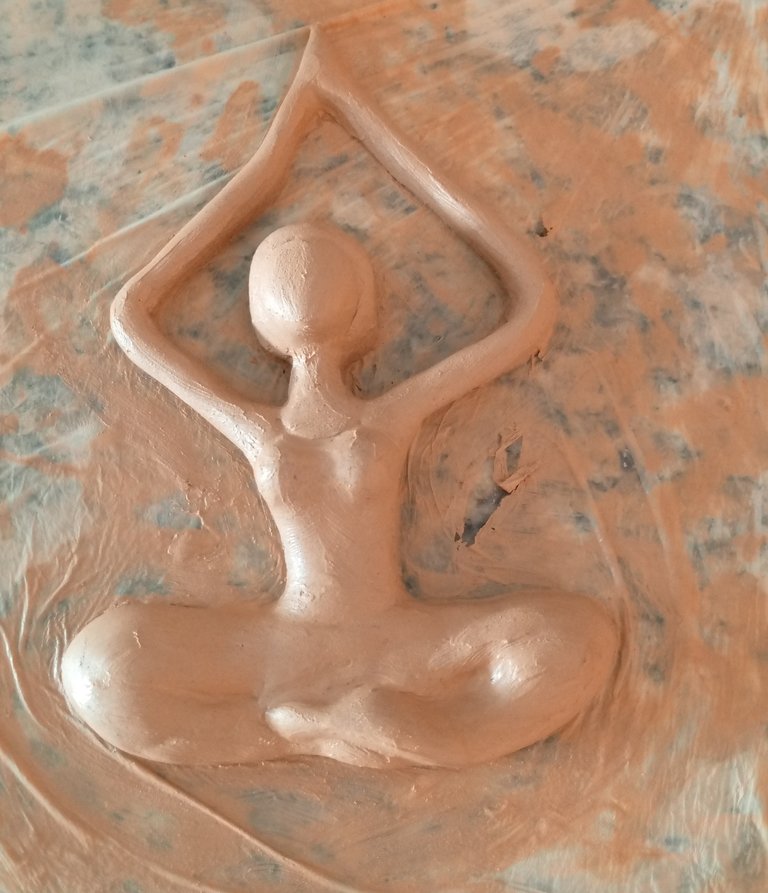
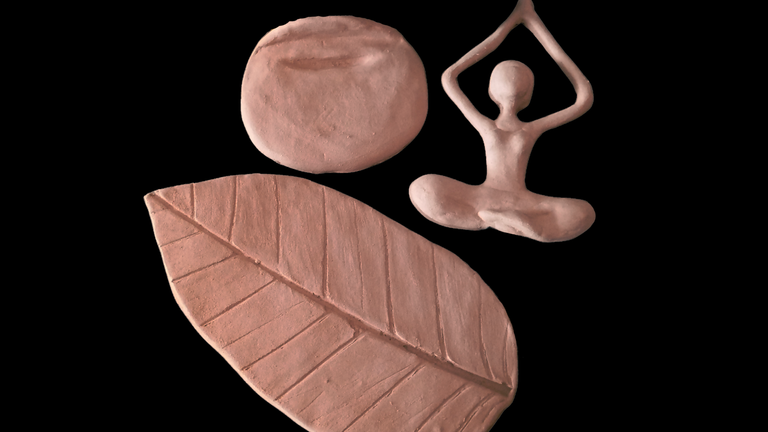
Luego de haberle colocado el cabello, los pechos y moldeado bien pase un pincel húmedo para darle un mejor acabado, luego para terminar de darle mayor terminación le pase los dedos húmedos y quedo completamente lisa y lista.
Después hice un semicírculo que doble de un lado, este me servirá para sostener la hoja, también en ese punto le hice un pequeño canal donde va a ir pegada la escultura.
Pero para continuar con el paso a paso y demás proceso, debo esperar unos 5 días dependiendo del clima a que seque muy bien para pintar y luego colocar cada pieza en su lugar.
After having placed the hair, the breasts and molded well, I passed a wet brush to give it a better finish, then to give it a better finish I passed the wet fingers and it was completely smooth and ready.
Then I made a semicircle that I folded on one side, this will serve to hold the leaf, also at that point I made a small channel where the sculpture will be glued.
But to continue with the step by step and other process, I must wait about 5 days depending on the weather to dry very well to paint and then place each piece in place.
Finalizando con este genial trabajo me despido deseando vernos en el próximo paso de pintura a esta escultura de yoga.
Un fuerte abrazo para todos, espero que les haya gustado y me sigan acompañando en mis próximos trabajos.
Ending with this great work I say goodbye wishing to see us in the next step of painting this yoga sculpture.
A big hug to all of you, I hope you liked it and continue to join me in my next works.
social networks / redes sociales
![]()
![]()
Traductor Deepl
Translated Deepl
Ediciones Canva
Editions Canva

Wow se ve que fue una experiencia relajante, nada más de ver las imágenes transmiten la concentración y la inspiración que tuvisteis para ello te felicito, me encantaría probar espero conseguir un taller cercano a casa o al menos cerca de mi localidad.
Hola querida @gladymar1973 abrazos para ti, es una buena experiencia te la recomiendo, relajante y práctica, esta técnica es bastante fácil de hacer y puedes crear muchos adornos ojalá pronto consigas un taller para comenzar tus prácticas, de todas formas puedes intentarlo y a medida que lo vayas haciendo mejorarás las técnicas 🙂 .
They turned out great, I love rustic and country, they would look great on a round table with some square scented candles.
@sagarkothari88 vote
Gracias amiga, si se vería muy bonitas en ese escenario me gustaría poder decorarlo así. Me gusta mucho las velas aromáticas siempre serán una buena forma de sentir un ambiente transparente y relajado.
Es n trabajo muy bonito.
Me pregunto como quedará si le agregas pintura al frió.
Amiga gracias por comentar, aprecio mucho que te haya gustado, estoy esperando que seque, para aplicarle pintura pronto podrás ver el resultado 😁🫂❤️
It's so beautiful and delicate!
Te invitamos conocer y apoyar nuestro Microproyecto: Fondos de ayuda a los Artesanos.
En la siguiente publicación puedes conocer los detalles.
https://peakd.com/hive-130560/@hivediy/microproject-artisans-aid-funds-microproyecto-fondosde-ayuda-a-los-artesanos-espeng