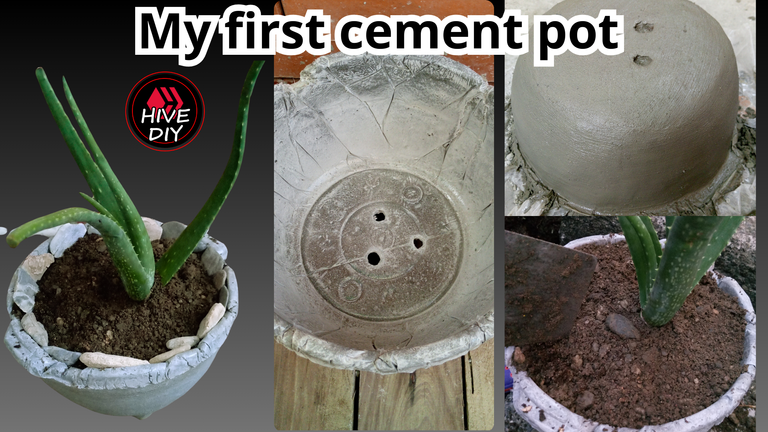

Bienvenidos, mis queridos artesanos amantes del arte y artistas.
El día de hoy les comparto mi primera maceta de cemento que hice hace poco para una de las plantas más importantes de la vida, aunque creas que es solo una planta insignificante y con pinchos, esta planta tiene potentes propiedades para salud y que ningún otro medicamento te pueda quitar cualquier problema que presentes de salud como el estómago.
Sinceramente, antes veía que esta planta no tenía ningún tipo de utilidad, que simplemente era una planta decorativa, pero mis ideales hacia esta hermosa planta cambiaron cuando me enferme gravemente del estómago, la cura era esta planta, aunque su sabor no era dulce, era extremadamente amargo y créeme que era totalmente desagradable, pero gracias a esta planta me he curado del estómago y me siento mucho mejor, efectivamente les estoy hablando de la Sábila.
Welcome, my dear art-loving artisans and artists.
Today I share with you my first cement pot that I recently made for one of the most important plants in life, even if you think it is just an insignificant and spiky plant, this plant has powerful properties for health and that no other medicine can take away any health problem you have such as stomach.
Honestly, before I saw that this plant had no use, it was simply a decorative plant, but my ideals towards this beautiful plant changed when I got seriously sick in my stomach, the cure was this plant, although its taste was not sweet, it was extremely bitter and believe me it was totally unpleasant, but thanks to this plant I have healed my stomach and I feel much better, indeed I am talking about Sábila.
 |  |
|---|
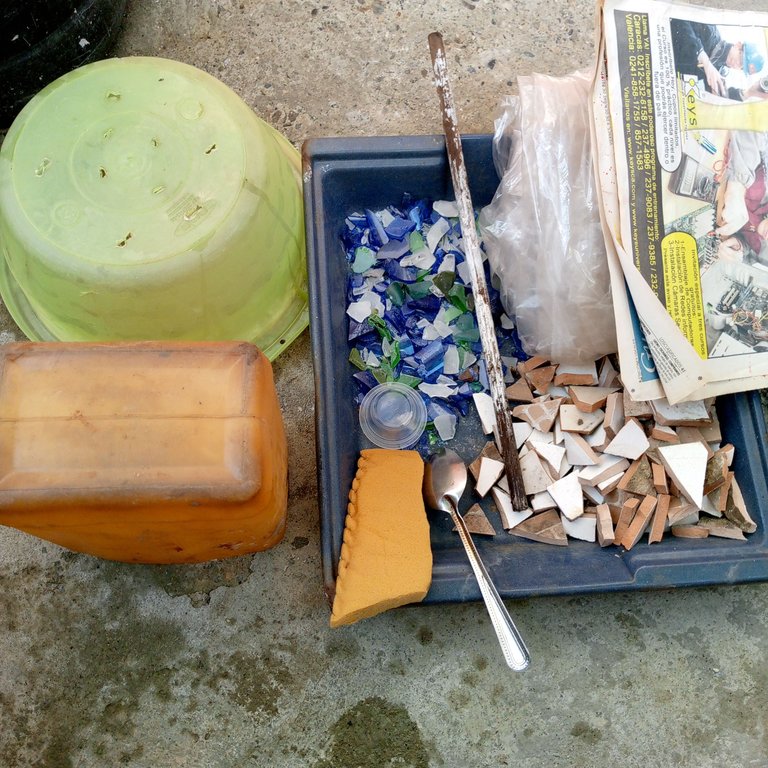
Los materiales que use a crear la maceta son los siguientes.
- Cucharilla
- Vasos de plásticos pequeños número 17 11/2 Oz
- Cemento
- Palo de madera pequeño
- Bolsas plásticas
- Periódico
- Taza de plástico como molde
- Arena cernida
- Esponja
- Cuchara de Albañilería
- Agua
- Gravilla
The materials used to create the planter are as follows.
- Spoon
- Small plastic cups number 17 11/2 Oz.
- Cement
- Small wooden stick
- Plastic bags
- Newspaper
- Plastic cup as mold
- Sifted sand
- Sponge
- Masonry spoon
- Water
- Gravel
 |  |  |
|---|
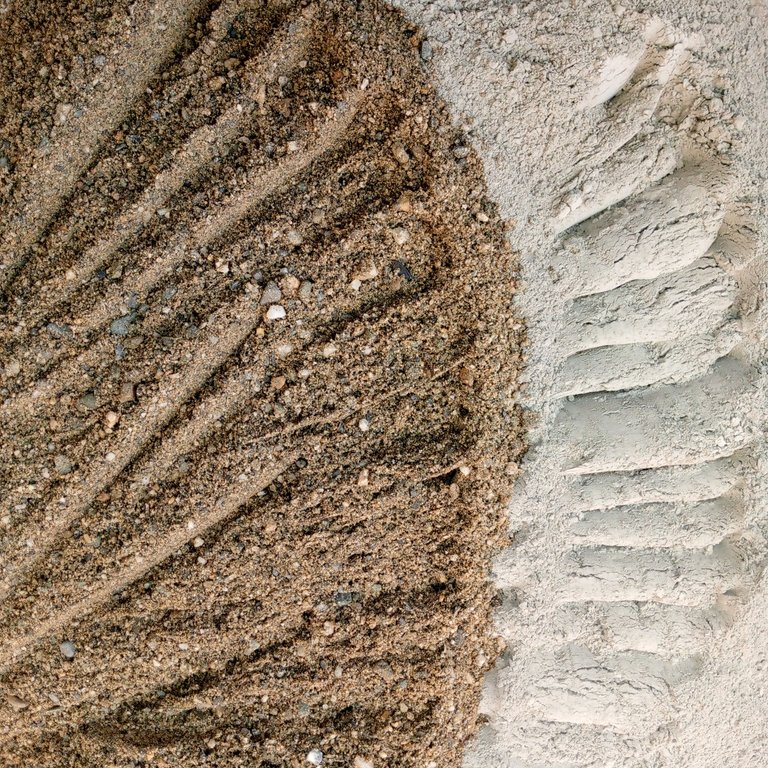
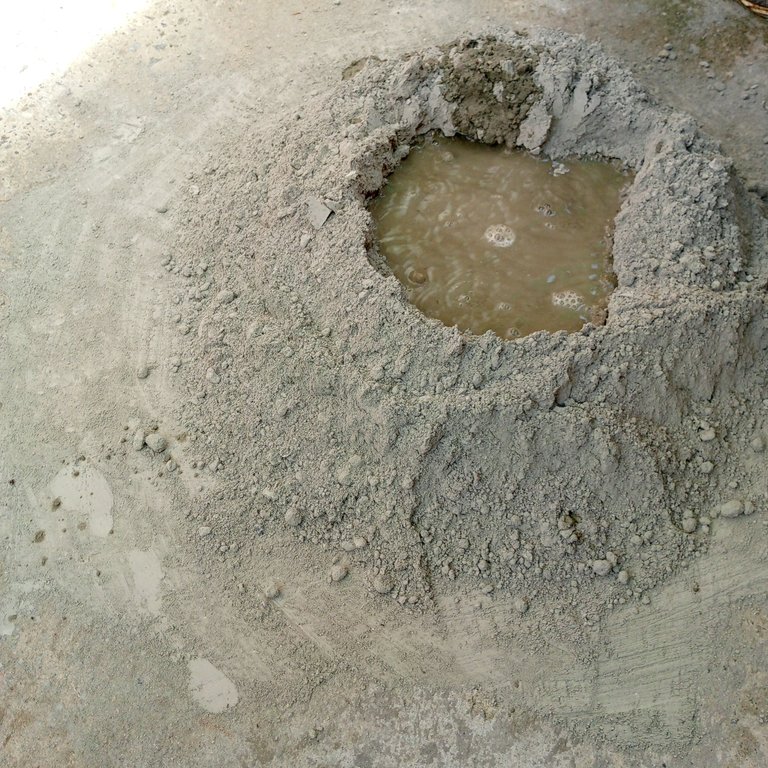
Para comenzar a elaborar la maceta para mi planta, primero hice la mezcla del cemento con la arena, tuve que moverlo poco a poco para no provocar mucho polvo por el cemento, al momento de mezclarlos con la ayuda de la cuchara de albañilería, la misma es especial para este tipo de trabajos.
La cantidad que use para la arena fueron 5 cucharas de albañilería y 6 de cemento, en realidad no tengo experiencia en este tipo de trabajos, pero aun así sentí que la mezcla era la apropiada para poder hacerlo, lo suficientemente espesa para poder mantenerle luego de darle la forma más adelante.
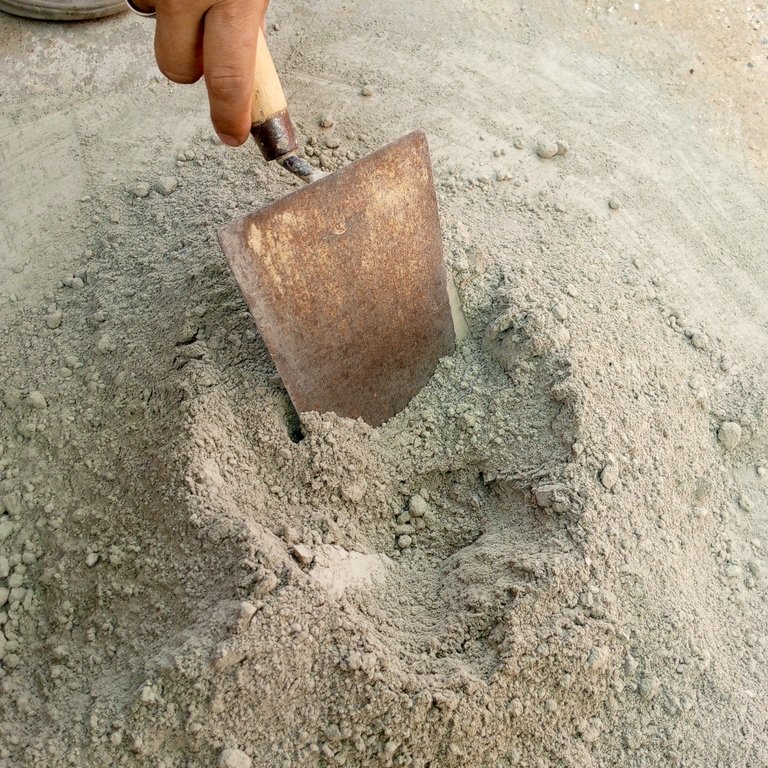
Luego comencé a hacerle un agujero en medio de la mezcla para agregarle agua y comenzar a preparar la mezcla del cemento, la cantidad de agua que le agregue fue incalculable, debido a mi falta de experiencia, simplemente fui agregándole el agua hasta que me quedara la mezcla espesa, en este proceso tuve que tener mucho cuidado para que el agua no se me perdiera en conjunto del agua, ya que al momento de que el cemento toque el agua este tiende a ser muy sólido.
To start making the pot for my plant, first I mixed the cement with the sand, I had to move it little by little so as not to cause too much dust by the cement, at the time of mixing them with the help of the masonry spoon, the same is special for this type of work.
The amount I used for the sand was 5 spoons of masonry and 6 spoons of cement, actually I have no experience in this type of work, but still I felt that the mixture was appropriate to do it, thick enough to be able to keep it after shaping it later.
Then I began to make a hole in the middle of the mixture to add water and begin to prepare the cement mixture, the amount of water I added was incalculable, due to my lack of experience, I just kept adding water until I had a thick mixture, in this process I had to be very careful so that the water was not lost in the water, because when the cement touches the water it tends to be very solid.
 |  |  |
|---|
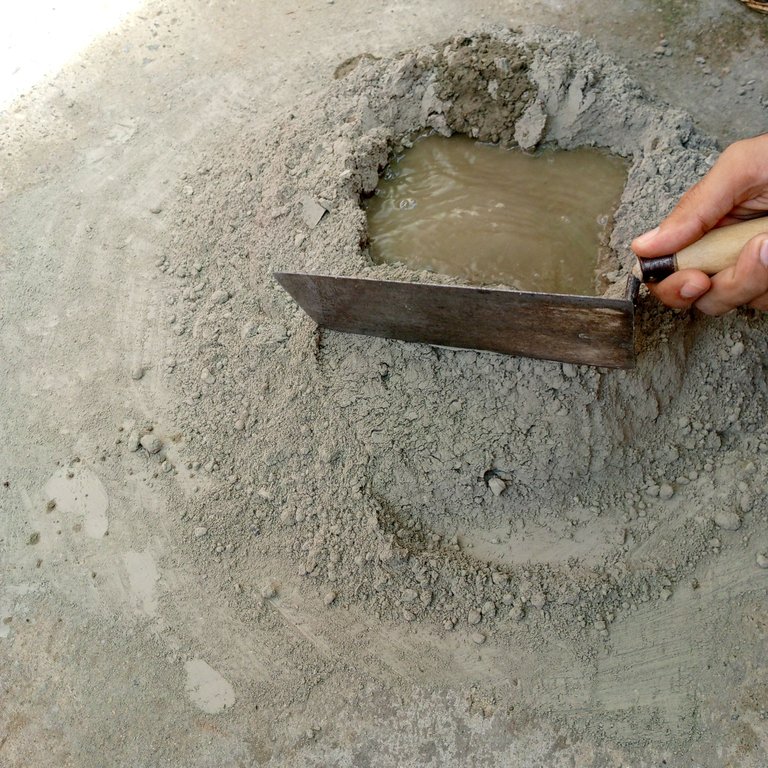
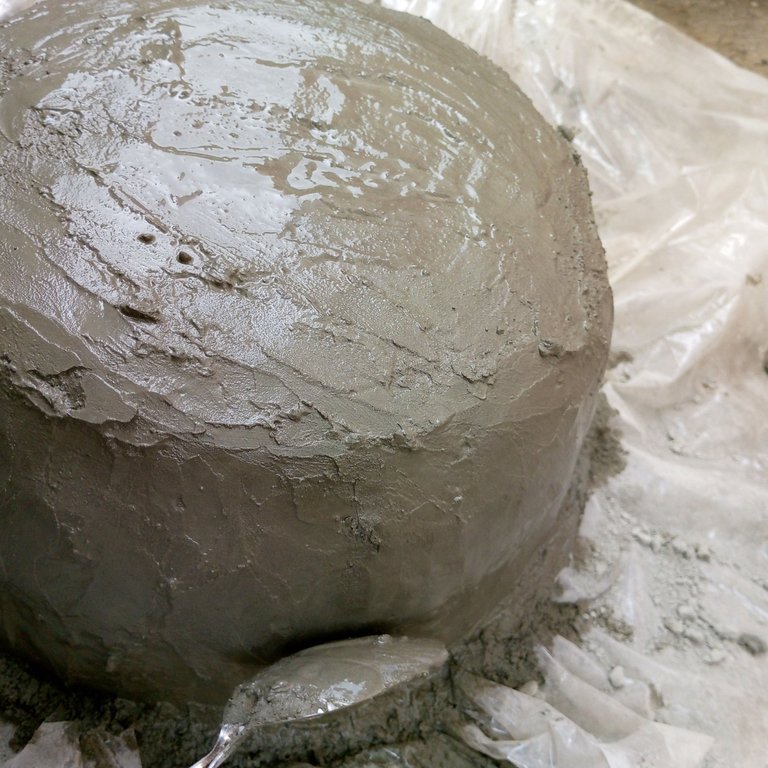
Una vez de tener la mezcla ya preparada, con la ayuda de la bolsa plástica y el periódico, envolví la taza de plástico para que al momento de agregar el cemento por alrededor del mismo para que al secarse el cemento la taza no se quede pegada a la mezcla.
Después, con la ayuda de una cucharilla, fui agregando el cemento por todo el contorno de la taza para darle la forma, en este paso tuve que tener mucha paciencia, ya que todo hay que agregarlo poco a poco para este pueda quedar bien adherido de la bolsa, después espere unos 5 minutos para que el cemento se secara un poco para poder acomodar las imperfecciones.
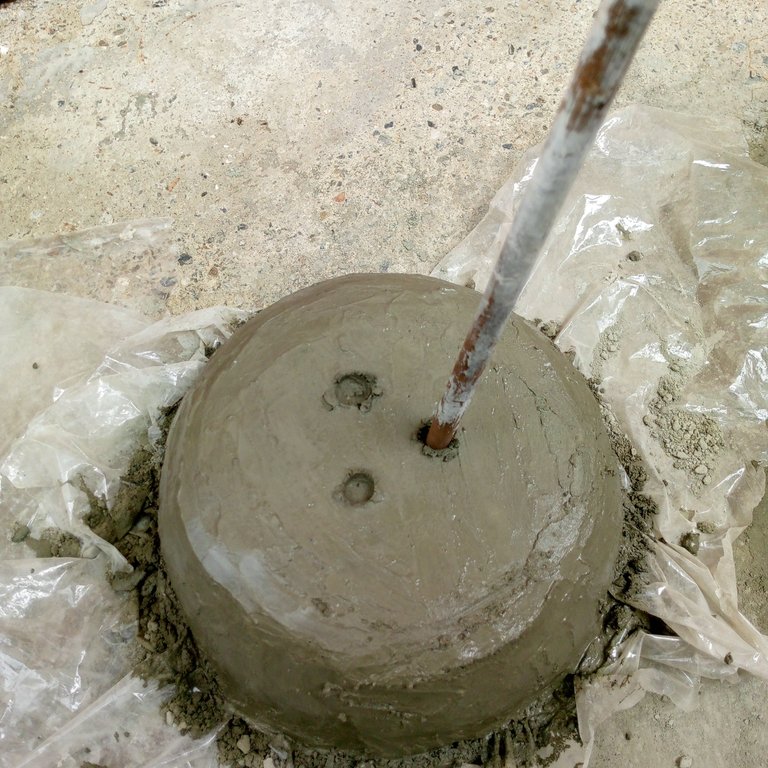
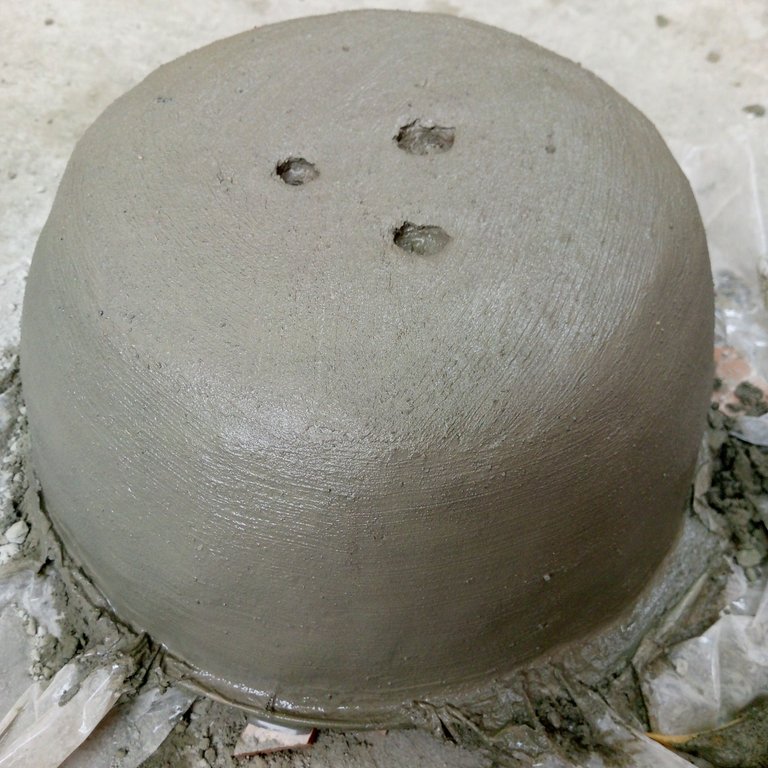
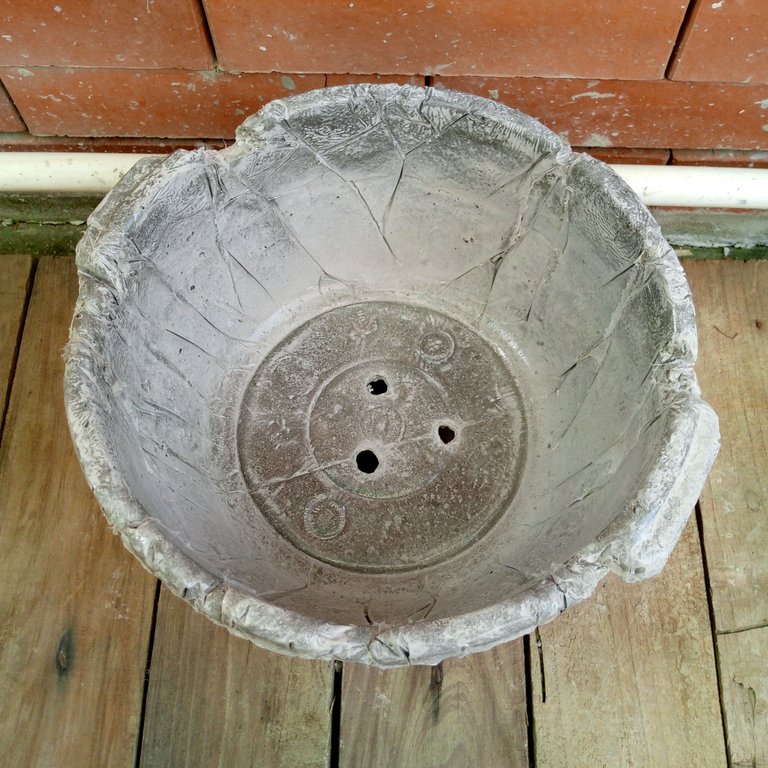
Después, por la parte de abajo de la maceta, usé un palo de madera para crear 3 orificios para que al momento de regarle agua a la planta, el agua tuviera una salida para que así pueda estar bien regada y no se ahogue la planta.
Once I had the mixture already prepared, with the help of the plastic bag and the newspaper, I wrapped the plastic cup so that when I added the surrounding cement, the cup would not get stuck to the mixture when the cement dries.
Then, with the help of a spoon, I added the cement all around the cup to give it the shape, in this step I had to be very patient, since everything must be added little by little so it can be well adhered to the bag, then wait about 5 minutes for the cement to dry a little to accommodate the imperfections.
Then, at the bottom of the pot, I used a wooden stick to create 3 holes so that when watering the plant, the water would have an exit so that it could be well watered and the plant would not drown.
 |  |  |
|---|
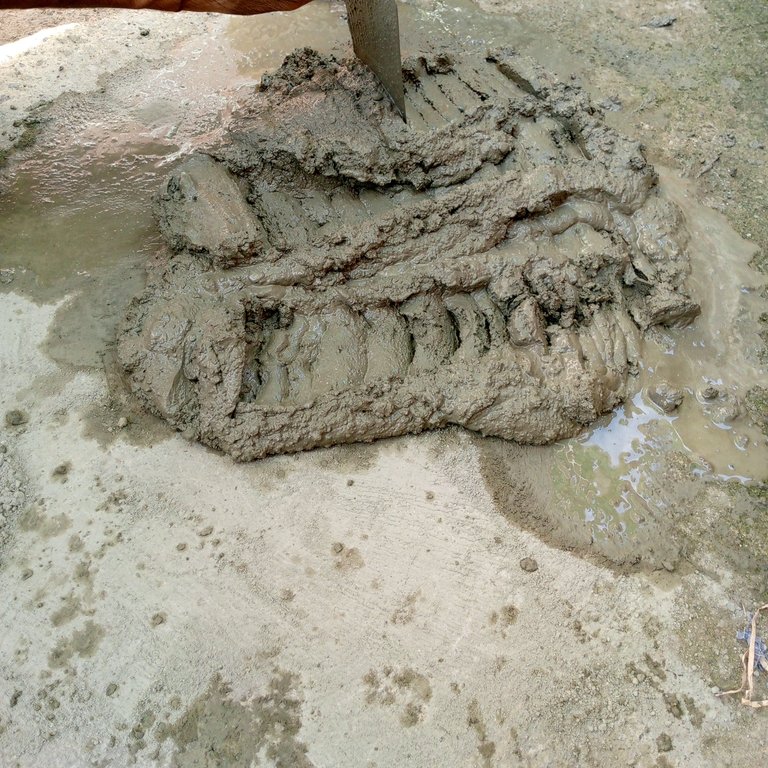
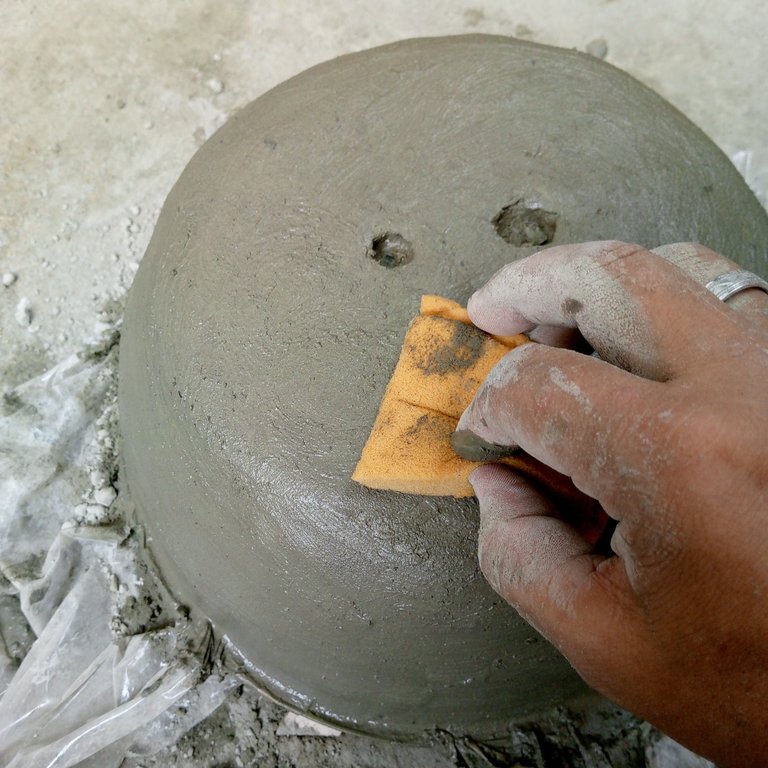
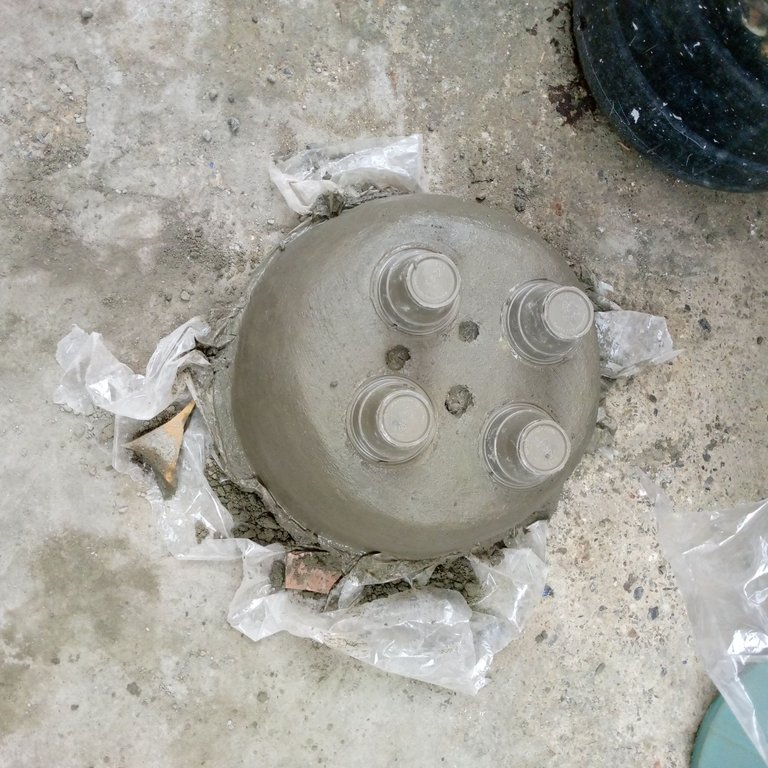
Después de haber preparado todo el molde y esperar otros 5 minutos en que el cemento se secara un poco más, comencé a usar una esponja humedecida para frotarla por todo el contorno de la maceta para alisarla y no quedara grumos, una vez hecho esto, comencé a usar los vasos de plástico número 17 11/2 oz para usarlas como soporte de la maceta, después lo deje secar durante 2 días aproximadamente.
After preparing the entire mold and waiting another 5 minutes for the cement to dry a little more, I started to use a damp sponge to rub it all around the pot to smooth it and not leave lumps, once this was done, I started to use the plastic cups number 17 11/2 oz to use them as support for the pot, then I let it dry for about 2 days.
 |  |  |
|---|
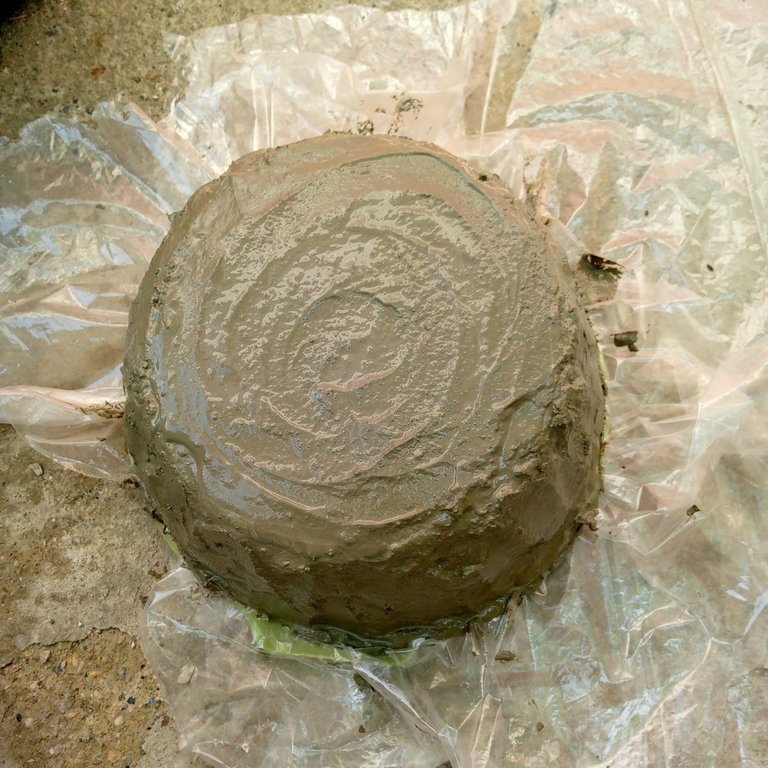
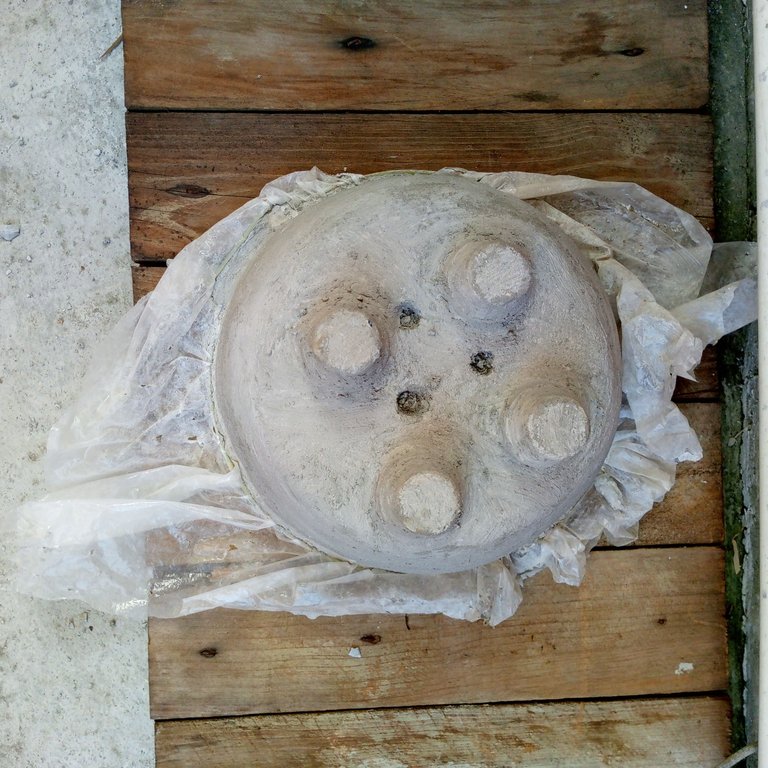
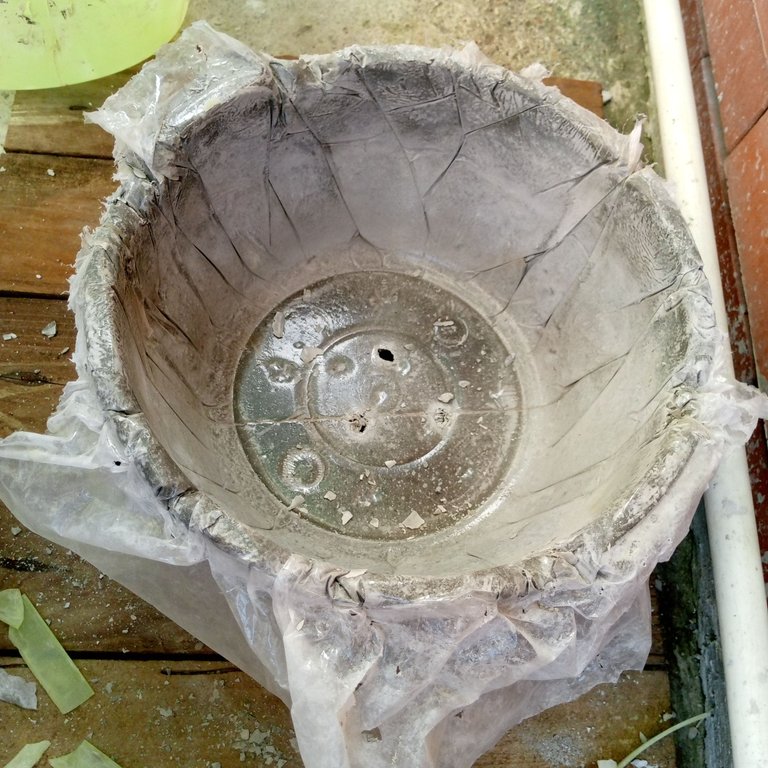
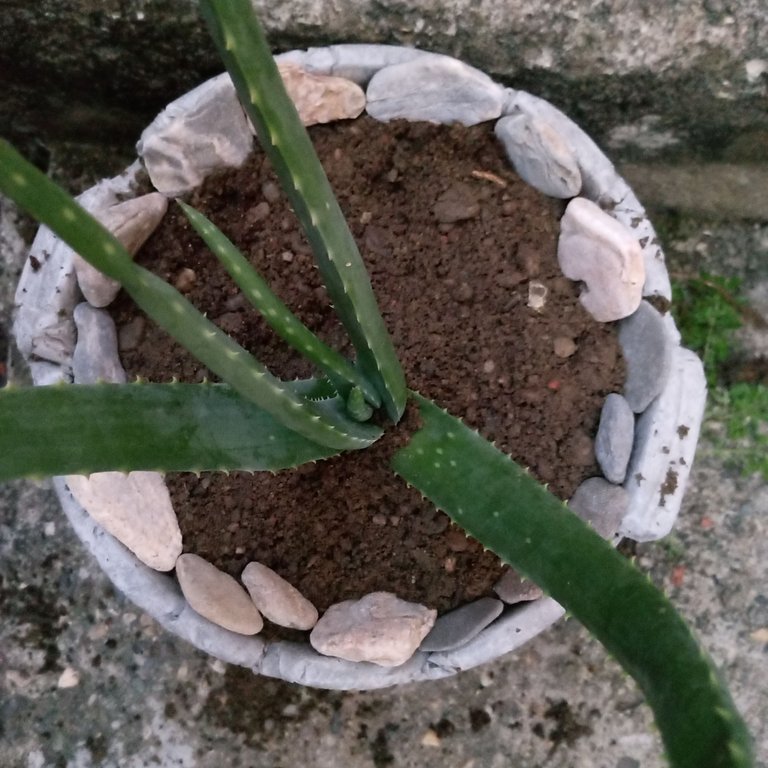
Una vez transcurridos los días, estaba entusiasmado de ver como me había quedado la maceta, así que comencé a quitar la taza de plástico, la misma se encontraba un poco deteriorada, donde al momento de sacarla del molde de cemento esta se le rompieron algunos lugares, pero aun así me importaba más la maceta de cemento que la taza, ya que es un poco antigua y era evidente que se rompería en cualquier momento.
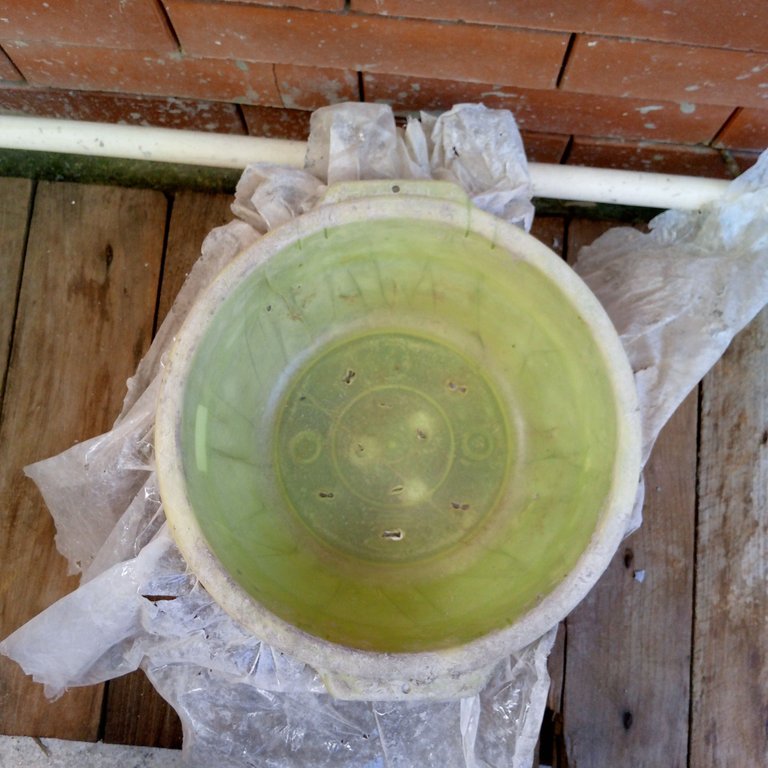
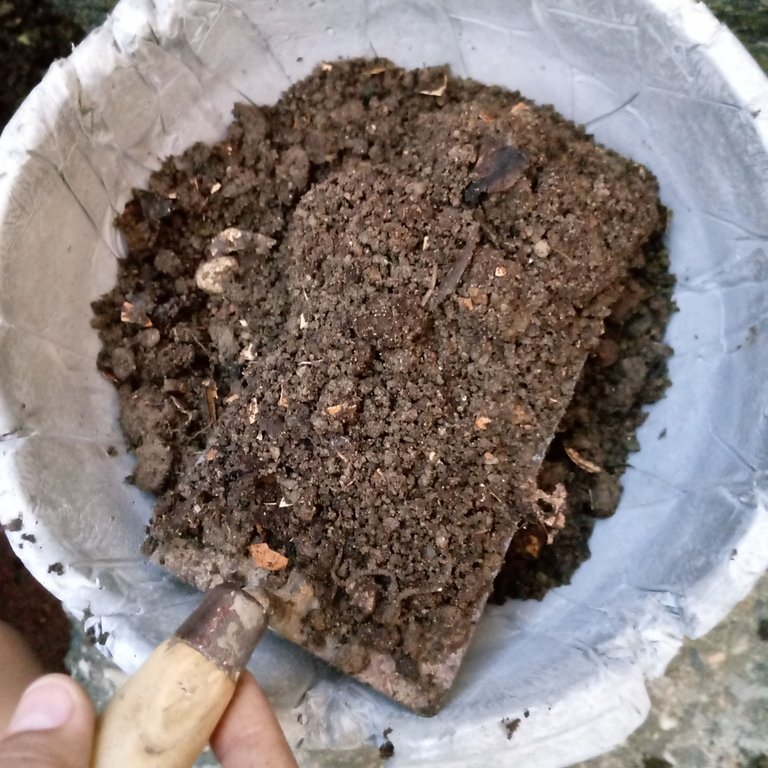
Después procedí a quitar la bolsa de plástico, es natural que me hayan quedado líneas en la parte interna de la maceta, ya que esto lo produjo la bolsa al momento de agregarle el cemento sobre ella, por fortuna no tenía ninguna grieta, así que llego la hora de trasplantar mi Sábila
Once the days had passed, I was excited to see how the pot had turned out, so I began to remove the plastic cup, it was a little deteriorated, and when I took it out of the cement mold it broke in some places, but even so I cared more about the cement pot than the cup, since it is a little old and it was evident that it would break at any moment.
Then I proceeded to remove the plastic bag, it is natural that I had lines on the inside of the pot, as this was produced by the bag at the time of adding the cement on it, fortunately I had no cracks, so it was time to transplant my Aloe Vera.
 |  |  |
|---|
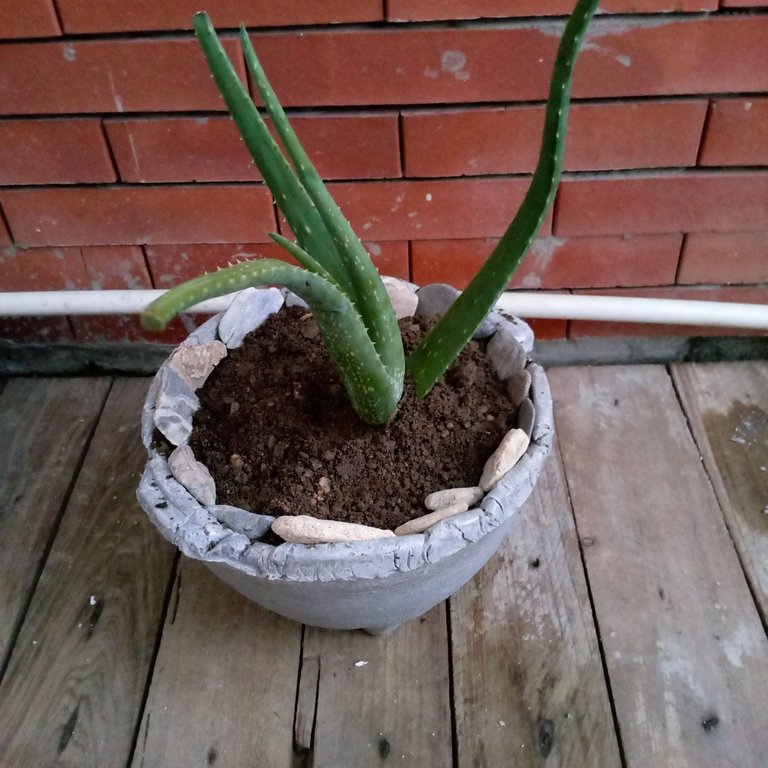
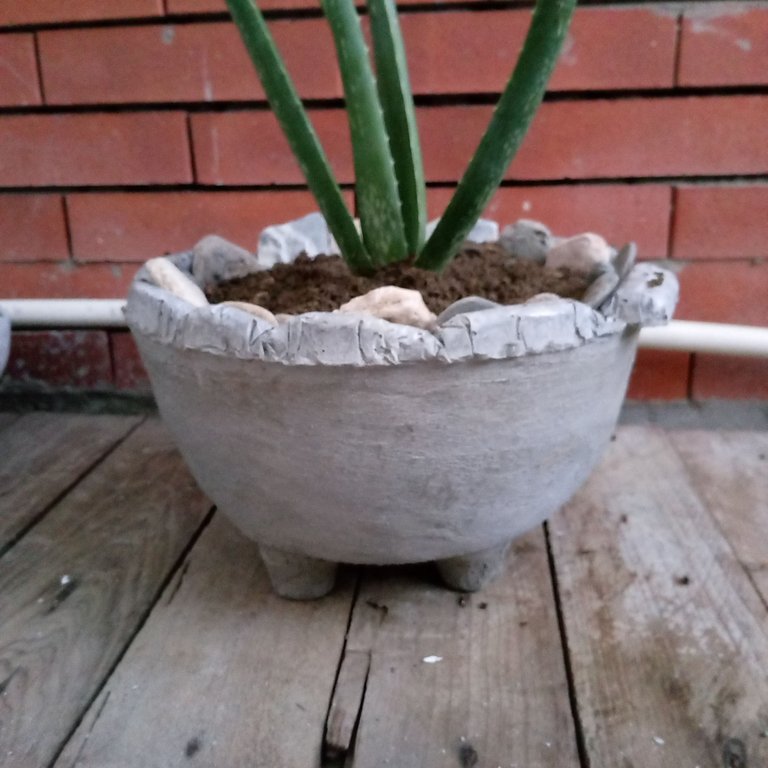
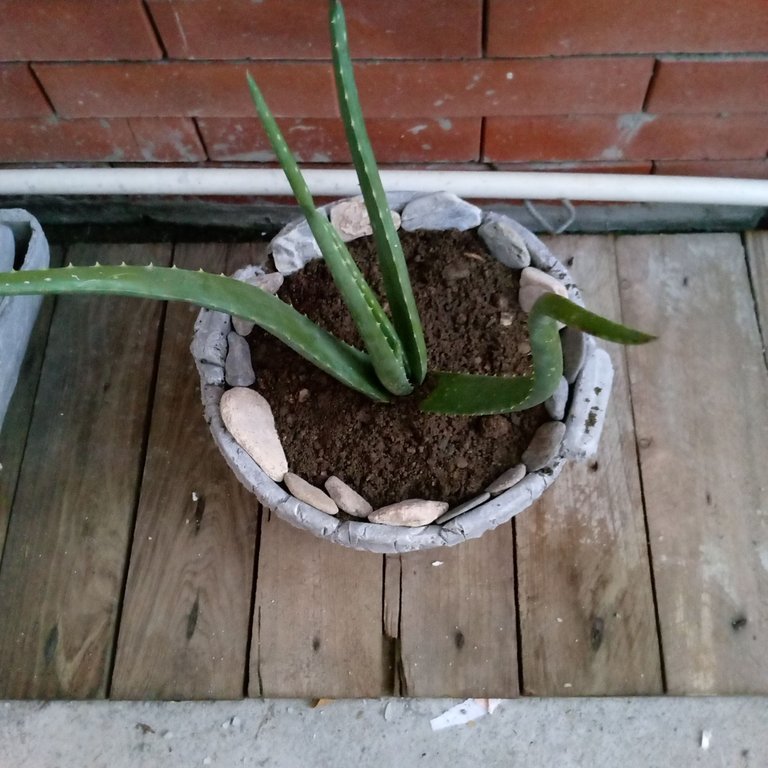
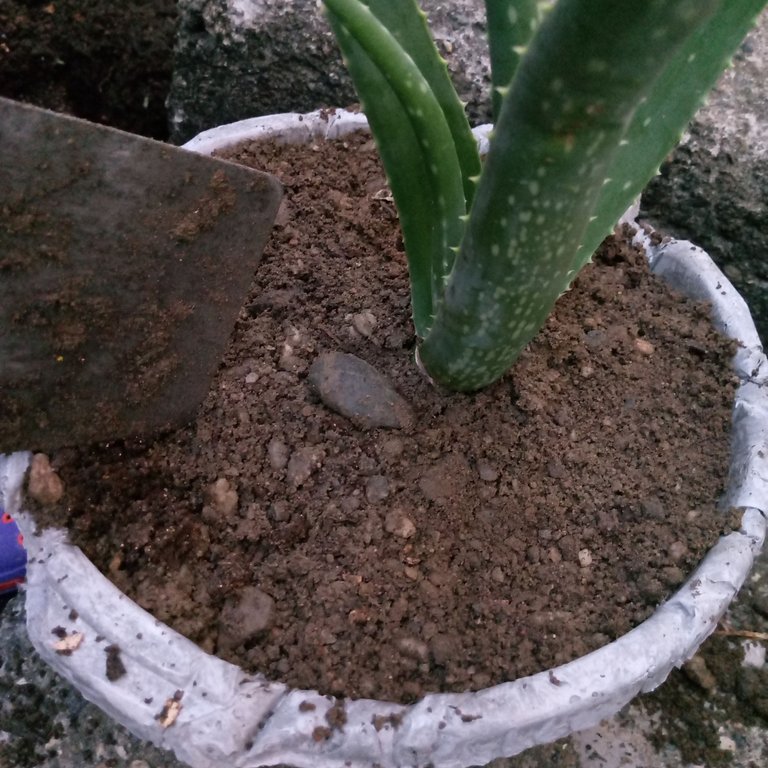
Y así quedo mi hermosa planta en su maceta, siento que ahora mucho más contenta gracias al trabajo que le hice, aunque no solamente hice para ella, también hice otras para algunas plantas que tenía que trasplantar.
Muchas gracias llegar hasta aquí en mi publicación, espero les sea de su agrado, hasta la próxima.
And this is how my beautiful plant stayed in its pot, I feel that now I am much happier thanks to the work I did, although I did not only do it for her, I also did others for some plants that I had to transplant.
Thank you very much for coming this far in my publication, I hope you like it, see you next time.

![]()

Discord LionSaturBix#7545

Source / Fuente Castle of Castlevania
Source / Fuente Terra Blade of Terraria
Los separadores son de mi autoría, las fotografías fueron tomadas con la ayuda de mi teléfono Bison X Umidigi, las ediciones del GIF son creados por mí.
The separators are of my authorship, the pictures were taken with the help of my Bison X Umidigi phone, the GIF edits are created by me.
Programas que utilicé para crear mi diseño es este:
This is the program I used to create my design:
Gif y portada cortesía de Canva
Gif and cover courtesy of Canva
Traducido por Deepl


Ah it turned out great! What a great method to work with concrete! When I was in college we did sculpture with concrete where we poured it in a box until it would hold the box shape but wasn't all the way dry, so it was more like clay, and then we scraped away to make our shapes. It was a lot of fun, I want to do it again. Maybe I will make some plant pots!
!BEER
View or trade
BEER.BEERHey @lionsaturbix, here is a little bit of from @phoenixwren for you. Enjoy it!HIVE and on HIVE Engine.If you like BEER and want to support us please consider voting @louis.witness on
It turned out great!
Me gustó mucho la maceta que hiciste, desde hace un tiempo he tenido ganas de hacer algunas para las plantitas de mi casa y ahora con tu post me sentí más motivada. ♥
Excelente trabajo amigo, te quedo genial la maceta, a mi me encantan las cosas de ese estilo rusticas, lucen espectaculares.
Aunque vivo en un apartamento también tengo plantas de Sábila, sus poderes curativos y de toda índole son impresionantes.
Gracias por regalarnos tu proceso creativo. Saludos @lionsaturbix ✨
!DIY
You can query your personal balance by
@dayadam just sent you a DIY token as a little appreciation for your post dear @lionsaturbix! Feel free to multiply it by sending someone else !DIY in a comment :) You can do that x times a day depending on your balance so:!DIYSTATSCongratulations @lionsaturbix! You have completed the following achievement on the Hive blockchain And have been rewarded with New badge(s)
Your next target is to reach 3500 replies.
You can view your badges on your board and compare yourself to others in the Ranking
If you no longer want to receive notifications, reply to this comment with the word
STOPCheck out our last posts:
Yay! 🤗
Your content has been boosted with Ecency Points
Use Ecency daily to boost your growth on platform!
, by @hive-130560.
I have stomach ulcers too and I eat it with some honey so don't feel any bitterness)