
Bienvenidos mis queridos amigos amantes del arte y artistas.
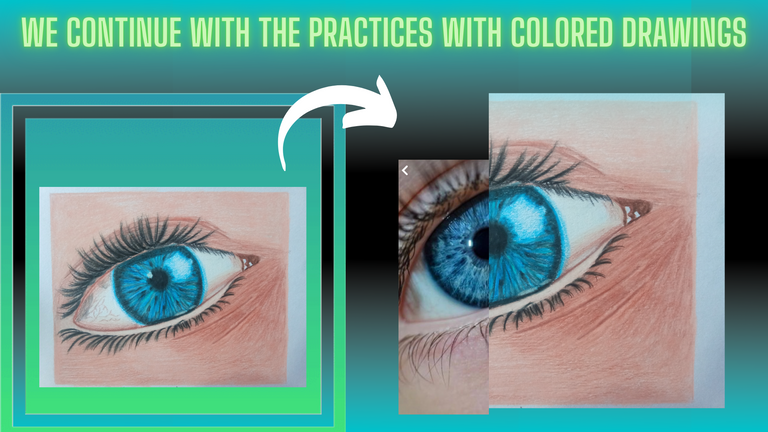
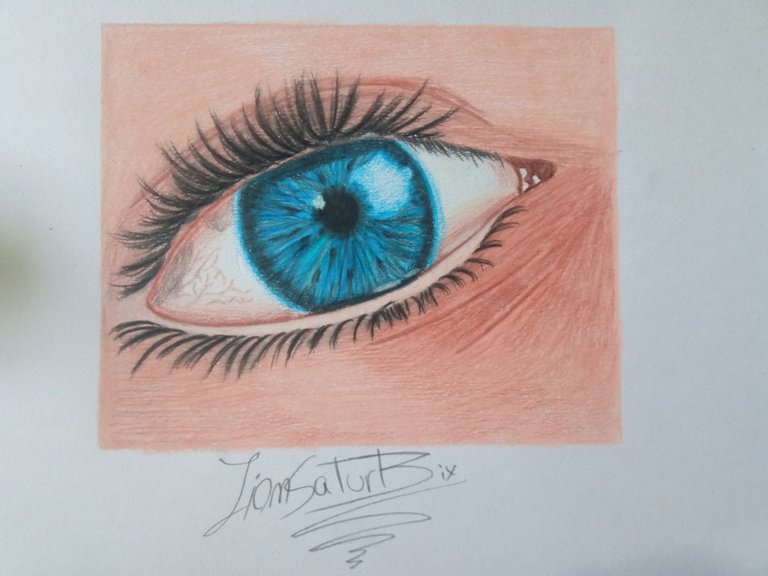
El día de hoy les vengo a presentar un dibujo que he realizado de un ojo a color, puesto que implementaremos una técnica muy útil para elaborar una estructura de un ojo, saber como colorearlo y hacer que se asemeje a nuestra imagen de referencia.
Dibujar un ojo no es solo dibujarlo y ya, sino que hay que comprender muchas cosas antes de dibujarlo, recuerden que los ojos es el reflejo de nuestra alma, si cualquiera de la imagen en referencia que vayamos a utilizar trasmite algún tipo de sentimiento, hay que hacerlo tal cual, ya que de lo contrario el dibujo no quedara como deseamos.
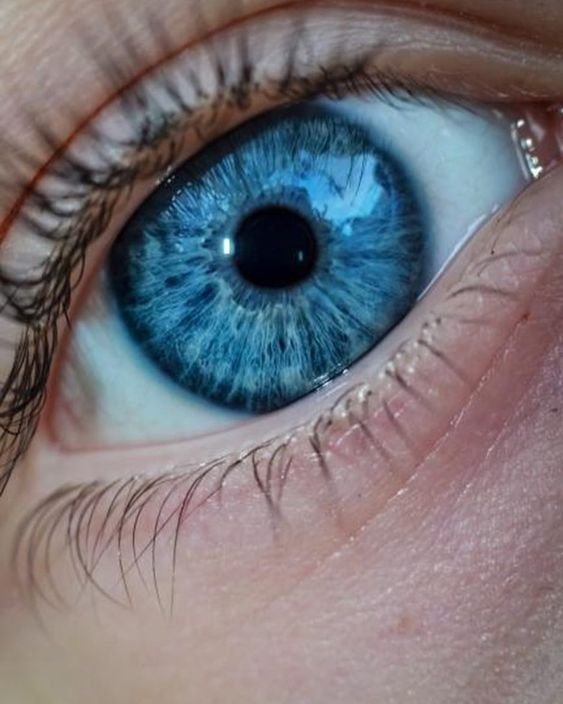
En esta ocasión el ojo que voy a dibujar tramite un sentimiento de asombro, puesto que al saber que sentimiento trasmite ya sabremos como debemos hacer nuestro dibujo.
Al igual que en la mayoría de mis dibujos, las imágenes que utilizo en referencia son sacados de una gran página de ideas y diseños llamada Pinterest.
Welcome my dear friends, art lovers and artists.
Today I come to present a drawing that I have made of an eye in color, since we will implement a very useful technique to develop a structure of an eye, to know how to color it and make it resemble our reference image.
To draw an eye is not only to draw it and already, but it is necessary to understand many things before drawing it, remember that the eyes are the reflection of our soul, if any of the image in reference that we are going to use transmits some type of feeling, it is necessary to do it as it is, since otherwise the drawing will not be as we wish.
In this occasion the eye that I am going to draw will convey a feeling of astonishment, since when knowing what feeling it transmits we will already know how we should make our drawing.
As in most of my drawings, the images I use in reference are taken from a great page of ideas and designs called Pinterest.
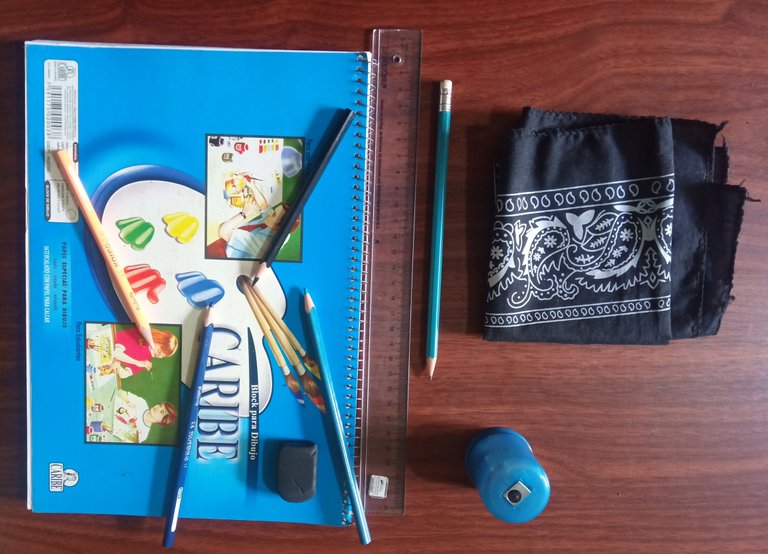
Los materiales que vamos a utilizar para crear nuestro dibujo son pocos, puesto que necesitaremos de:
*Un block de dibujo marca Caribe.
*Lápiz de grafito 2B.
*Pañuelo.
*Sacapuntas con depósito.
*Regla.
*Colores.
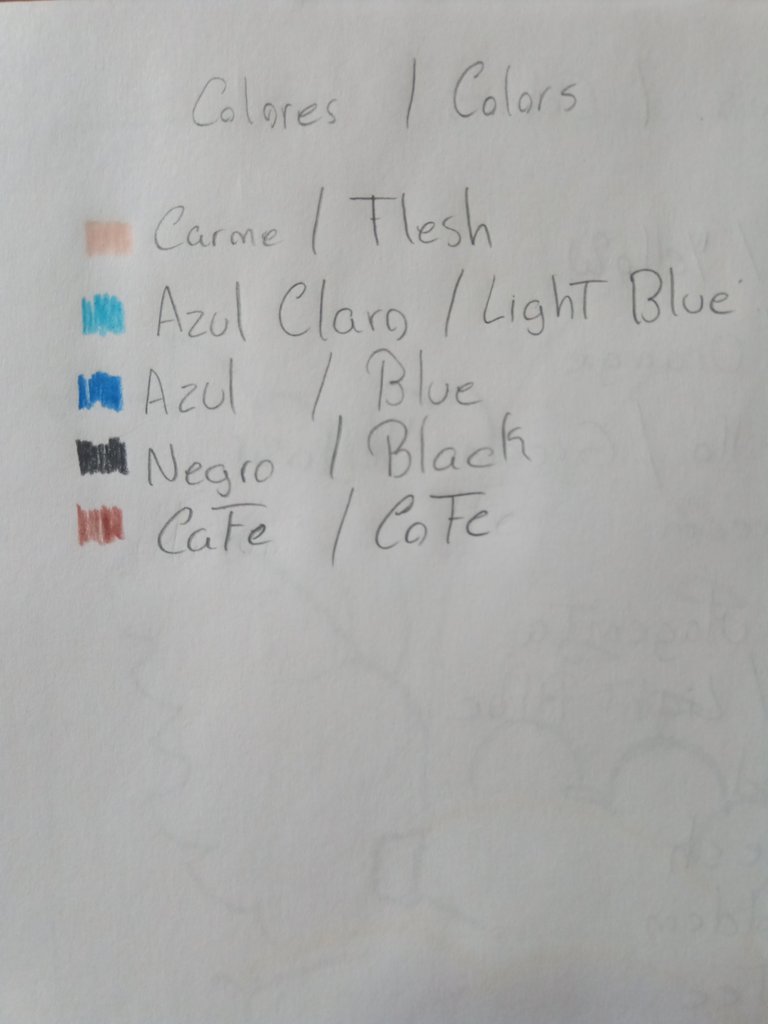
Los tonos de colores que vamos a utilizar son:
*Carne.
*Azul claro.
*Azul.
*Negro.
*Café.
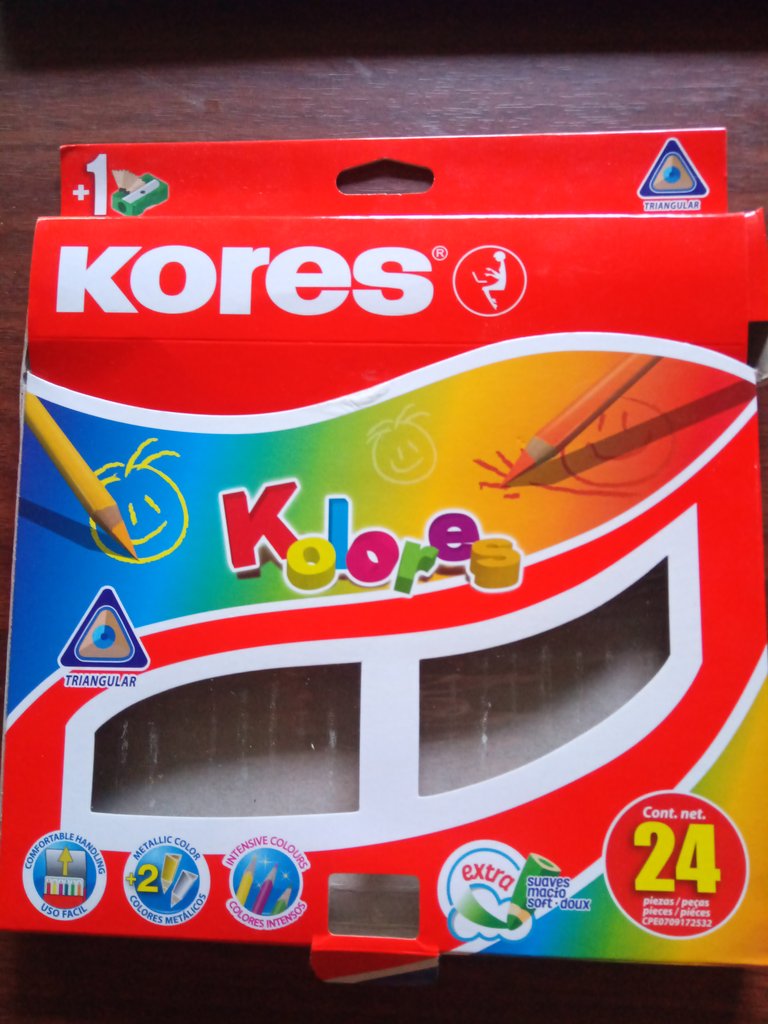
Hasta los momentos continuaré utilizando la marca de colores Kores, ya que aún no me he podido comprar los Prisma color y hacer una comparación de estos.
The materials that we are going to use to create our drawing are few, since we will need:
*A Caribe brand sketch pad.
*Graphite pencil 2B.
*Handkerchief.
*Pencil sharpener with reservoir.
*Ruler.
*Colors.
The shades of colors that we are going to use are:
*Flesh.
*Light blue.
*Blue.
*Black.
*Coffee.
So far I will continue to use the Kores brand of colors, as I have not yet been able to buy the Prisma colors and make a comparison of these.
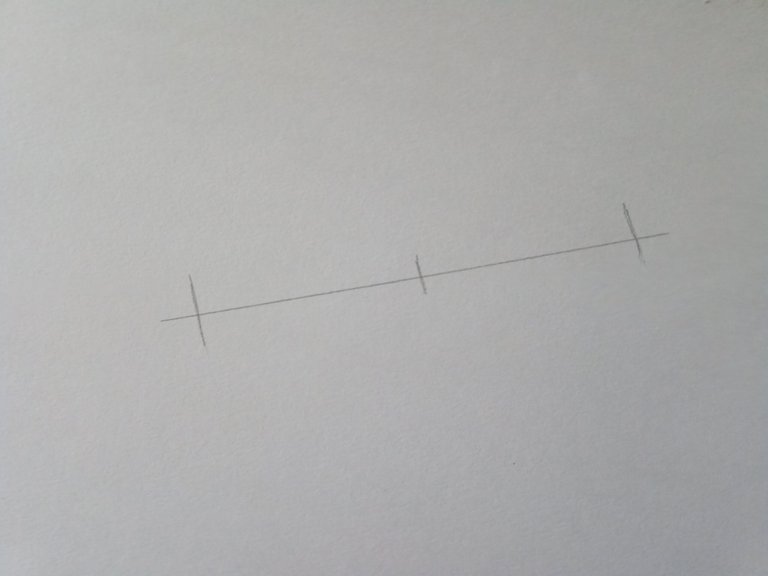
Lo primero que debemos hacer antes de realizar nuestro ojo es crear una línea que utilizaremos como base.
Como el ojo de nuestra imagen de referencia está un poco inclinado, lo aremos tal cual como nos presenta nuestra imagen de referencia, luego de trazar nuestra línea guía, la partiremos por la mitad, asegurémonos que ambas partes tengan la misma separación, ya que esto nos ayudara a colocar el iris, puesto que está en el centro del ojo.
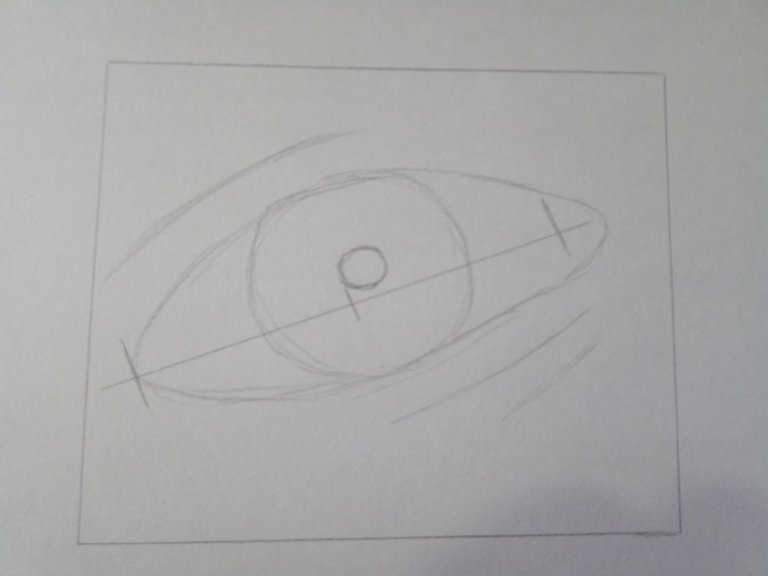
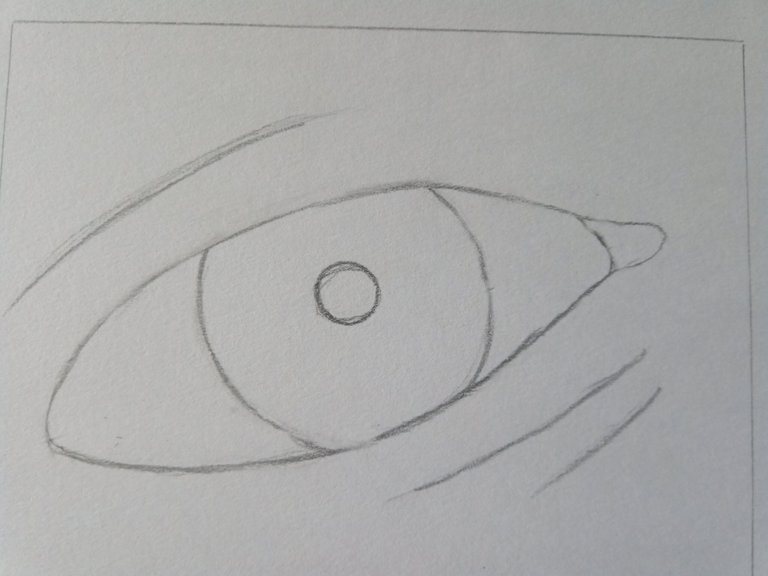
Después comenzamos a darle la forma con la ayuda de nuestro lápiz de grafito 2B, podemos notar que también posee algunas arrugas, los cuales lo trabajaremos con los colores más adelante.
Luego comenzamos a remarcar nuestro dibujo, puesto que también debemos eliminar la línea base que habíamos trazado anteriormente.
The first thing we must do before making our eye is to create a line that we will use as a base.
As the eye of our reference image is a little bit inclined, we will do it as our reference image presents us, after drawing our guide line, we will split it in half, make sure that both parts have the same separation, as this will help us to place the iris, since it is in the center of the eye.
Then we start to shape it with the help of our 2B graphite pencil, we can notice that it also has some wrinkles, which we will work with the colors later.
Then we start to highlight our drawing, since we also have to eliminate the base line that we had previously drawn.
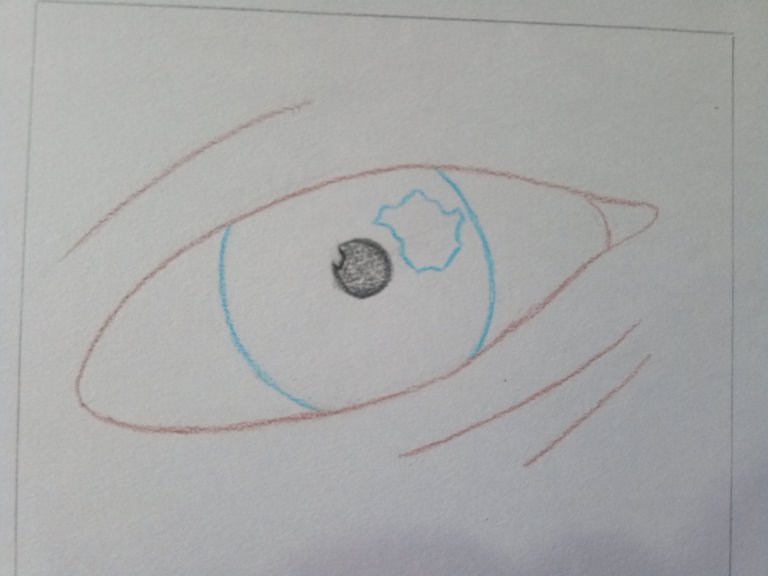
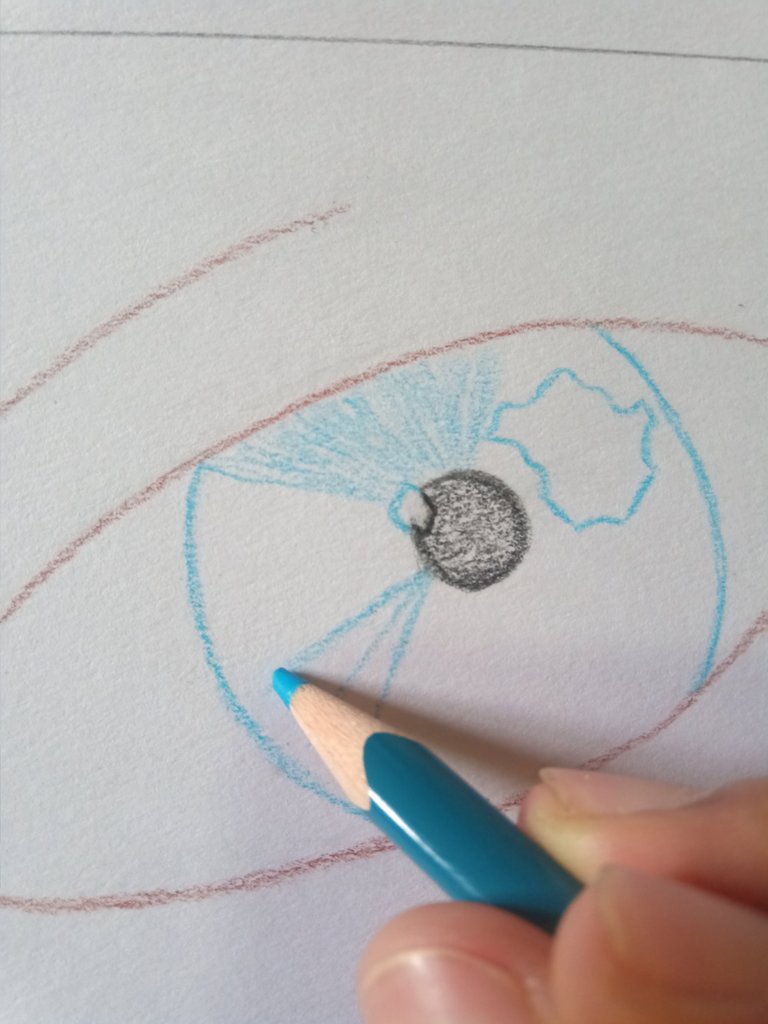
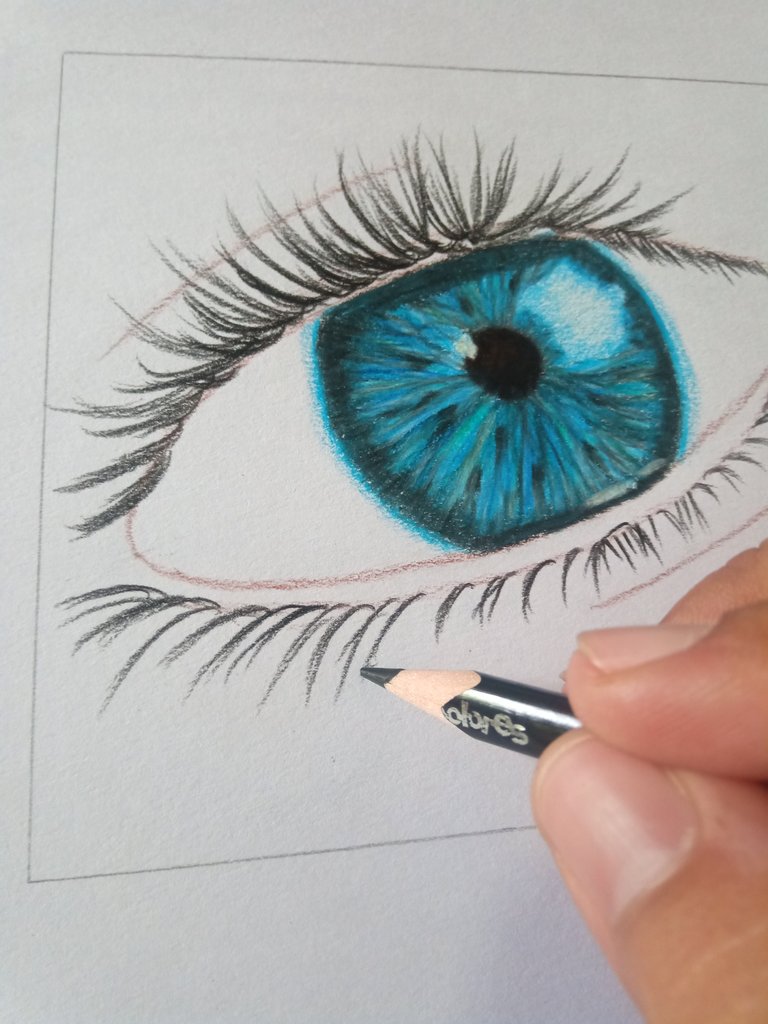
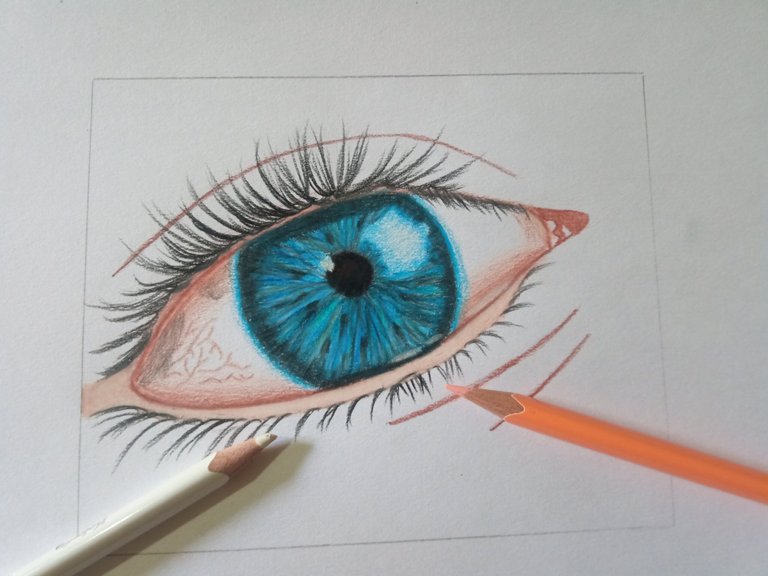
Luego de tener la estructura de nuestro ojo ya realizado, comenzamos a utilizar los colores, primero para marcar los bordes del ojo, utilizaremos él colore Café, para la pupila usamos el tono Negro, para los bordes del ojo utilizaremos el color azul claro, ya que según nos muestra la imagen de referencia, el color del ojo es azul, respetando también los espacios de iluminación que tendrá nuestro ojo.
Ahora comenzaremos a trabajar con el ojo interno de primero, así que utilizaremos el color azul para posteriormente trazar pequeñas líneas casi visibles del ojo, ya que el ojo internamente posee pequeñas líneas muy delgadas casi visibles, esto lo aremos de adentro hacia afuera, es decir desde la pupila hasta el borde del ojo.
Debemos dejarle pequeños espacios en blanco al ojo para poderle agregar otros colores como observaran a continuación.
After having the structure of our eye already made, we begin to use the colors, first to mark the edges of the eye, we will use the color Brown, for the pupil we use the tone Black, for the edges of the eye we will use the color light blue, since as the reference image shows us, the color of the eye is blue, respecting also the spaces of illumination that will have our eye.
Now we will begin to work with the inner eye first, so we will use the blue color to later draw small almost visible lines of the eye, since the eye internally has small very thin almost visible lines, we will do this from inside to outside, that is to say from the pupil to the edge of the eye.
We must leave small blank spaces to the eye to be able to add other colors as you will see below.
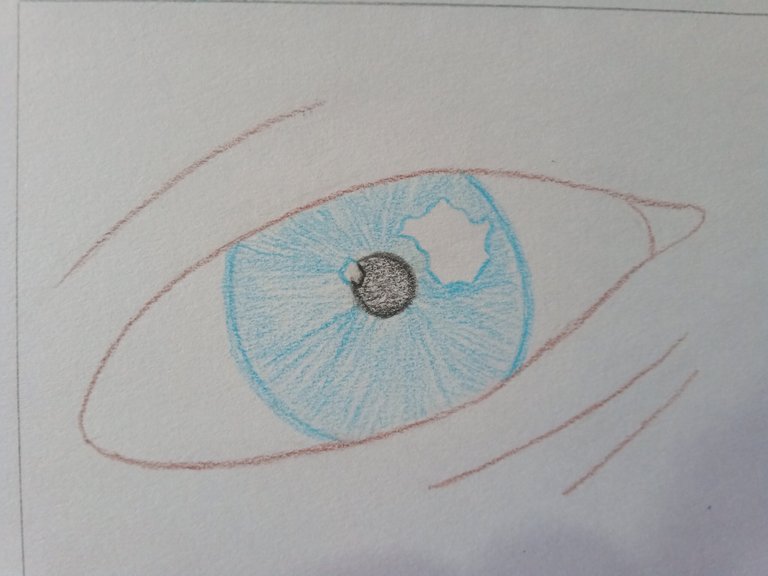
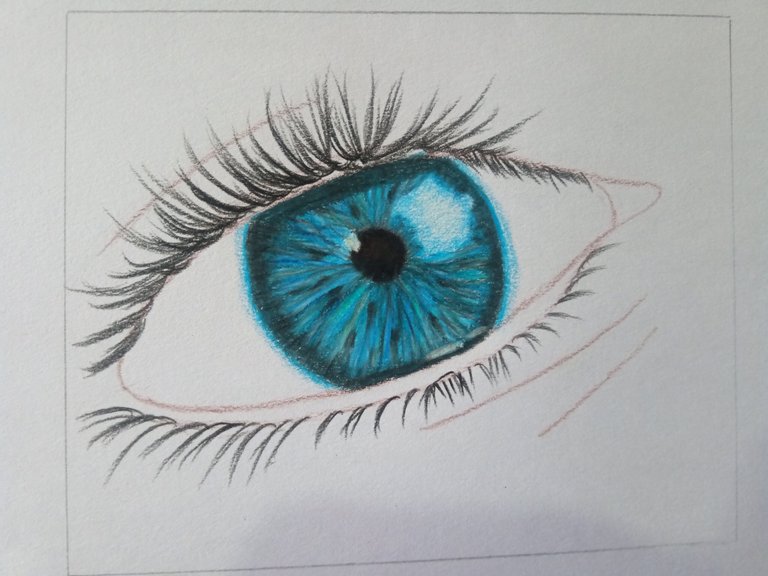
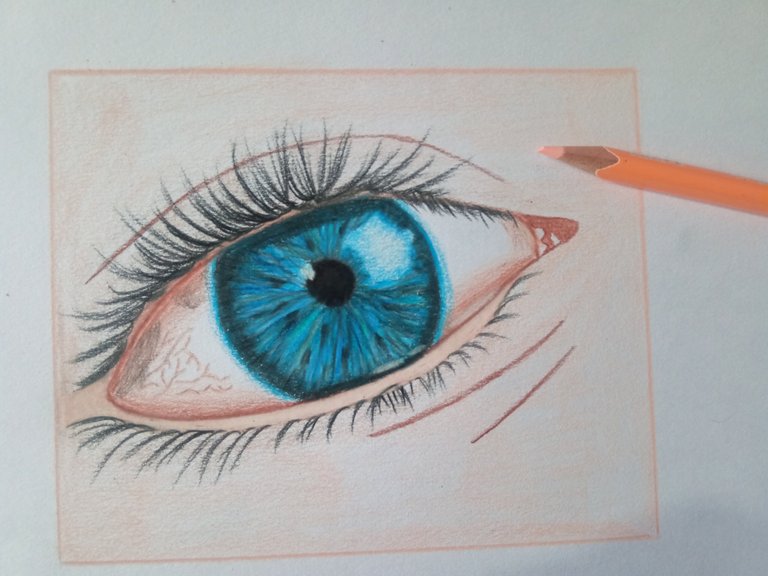
Después comenzaremos a utilizar el color negro, ya que hay pequeñas líneas de negro en el ojo, esto simboliza la sombra, aunque originalmente no es del todo negro, sino que es el mismo azul, pero mucho más oscuro.
Luego comenzamos a remarcar la pupila del ojo, recuerden que, en la gran mayoría del dibujo, el tono negro no es el único color implementado para los dibujos, sino que es una mezcla de colores entre el negro y el color café, también comenzamos a utilizar el color azul oscuro para trazar más líneas en el ojo en la misma dirección como explique anteriormente.
Más adelante repetimos el mismo proceso una y otra vez con los colores azul claro y azul oscuro junto con el negro, a medida que lo vayamos haciendo iremos afincando nuestro crayón para ir rellenando los poros de nuestra hoja de trabajo, también podemos utilizar el color negro para hacer las pestañas de nuestro dibujo, para eso debemos hacer pequeños trazos de adentro hacia afuera, las pestañas tienen una curvatura, puesto que debemos hacerlo tanto en la parte superior del ojo como en la parte inferior.
Then we will begin to use the black color, since there are small lines of black in the eye, this symbolizes the shadow, although originally it is not entirely black, but it is the same blue, but much darker.
Then we begin to highlight the pupil of the eye, remember that, in the vast majority of the drawing, the black tone is not the only color implemented for the drawings, but it is a mixture of colors between black and brown, we also begin to use the dark blue color to draw more lines in the eye in the same direction as explained above.
Later we repeat the same process over and over again with the light blue and dark blue colors together with the black, as we do it we will be sharpening our crayon to fill the pores of our work sheet, we can also use the black color to make the eyelashes of our drawing, for that we must make small strokes from inside to outside, the eyelashes have a curvature, since we must do it in the upper part of the eye as well as in the lower part.

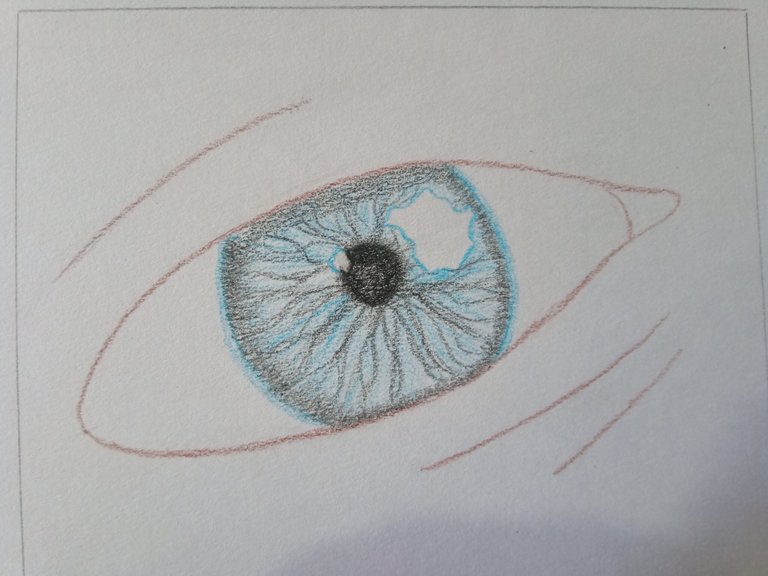
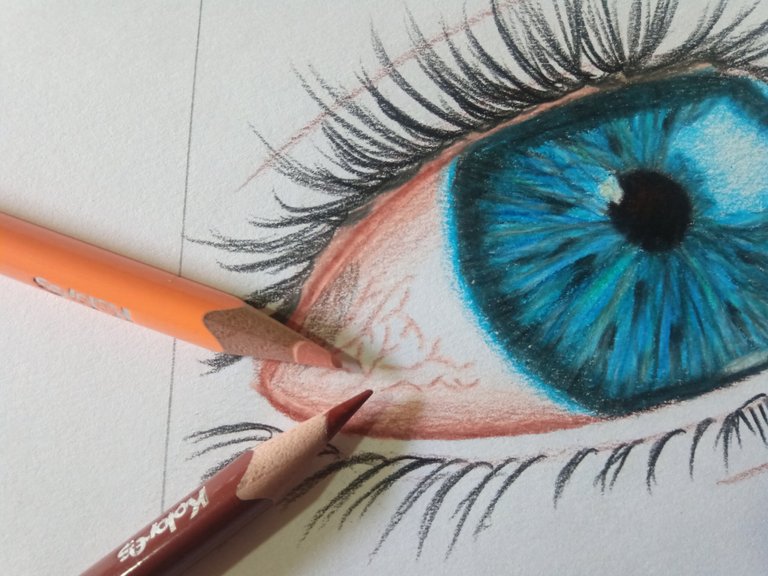
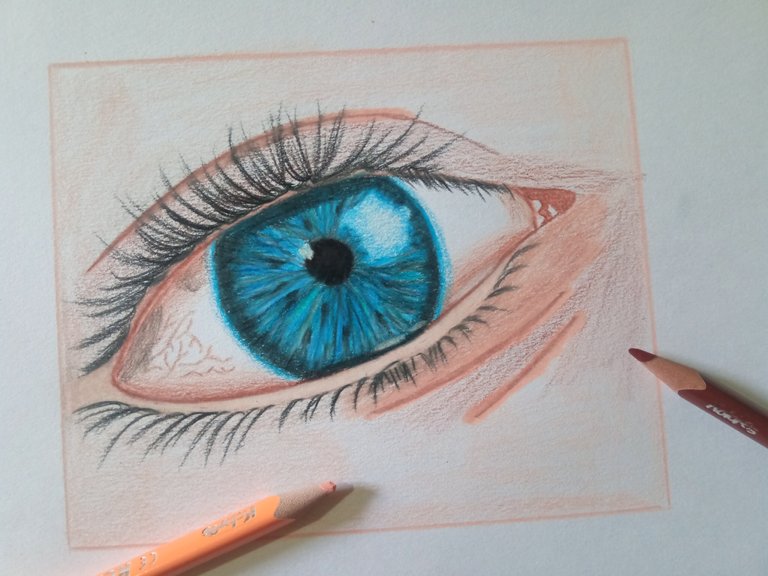
Veremos que nuestro dibujo está comenzando a agarrar forma, si queremos podemos utilizar el color verde para mezclarlo con el azul, pero eso es solo si queremos tampoco es necesario.
Para los bordes de la esclerótica de nuestro ojo podemos mezclar el color café junto con el color carne, así para crear un tono mucho más oscuro en estos bordes.
También debemos difuminarla un poco, pero no con el algodón, sino con el mismo color, crearemos pequeños trazos unos más claros que el otro hasta hacerlos desaparecer, pueden notar que hay algunas venas, podemos usar el mismo color café.
We will see that our drawing is starting to take shape, if we want we can use the green color to mix it with the blue, but that is only if we want it is not necessary either.
For the edges of the sclera of our eye we can mix the brown color together with the flesh color, so to create a much darker tone on these edges.
We must also blur it a little, but not with the cotton, but with the same color, we will create small strokes some lighter than the other until we make them disappear, you can notice that there are some veins, we can use the same brown color.
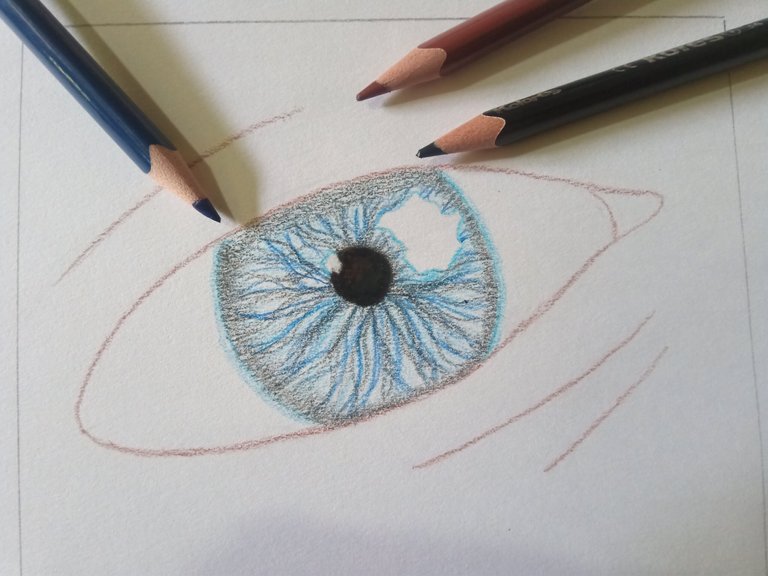
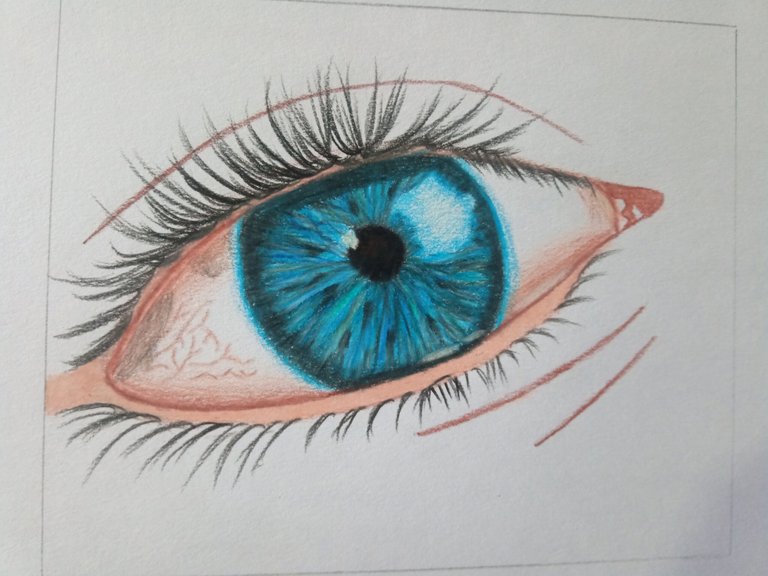
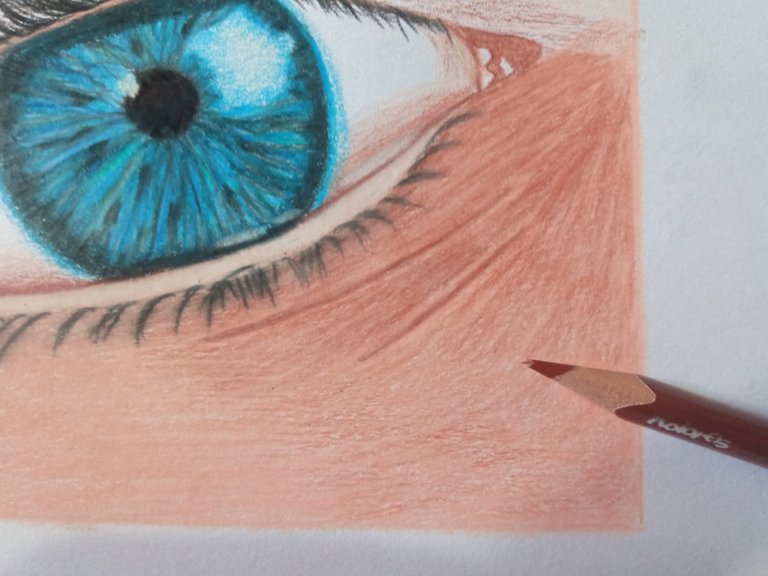
Luego comenzamos a trabajar con el lagrimal del ojo y la parte donde se encuentran las pestañas, el mismo esta en la parte inferior del ojo. Para el lagrimal podemos usar el color café, luego sobre él podemos usar el color carne, así que como esta parte es más oscura debemos hacer que se vea oscura también, así que utilizaremos más el color café que el color carne, después podemos colorear la parte de las pestañas inferiores, luego podemos usar el color blanco para aclararlo un poco.
Por último podemos darle la primera capa del fondo, el mismo es el color de la carne, pero no solamente es ese color, hay que mezclarlo un poco con el color café.
Then we start to work with the tear trough of the eye and the part where the eyelashes are, the same is at the bottom of the eye. For the lacrimal we can use the brown color, then over it we can use the flesh color, so as this part is darker we must make it look dark too, so we will use more the brown color than the flesh color, then we can color the part of the lower eyelashes, then we can use the white color to lighten it a little bit.
Finally we can give it the first layer of the background, the same is the flesh color, but it is not only that color, we have to mix it a little bit with the brown color.
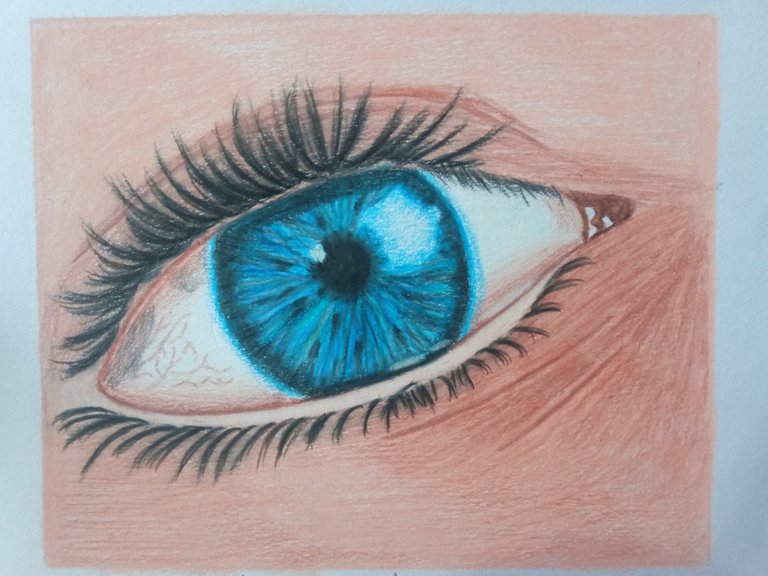
Ahora Podemos utilizar el color café para darle las partes de profundidad a nuestro dibujo, para eso debemos colorear las partes donde se encuentra la profundidad del ojo, como por ejemplo la parte superior e inferior.
Más adelante comenzamos a afincar un poco más nuestro color carne para posteriormente usar el color café, podemos notar que quedan algunos espacios en los que el color café no logra rellenar, estos son los poros de la hoja, y podemos usarlo a nuestro favor, ya que esto también servirá para darle el efecto de poros a la piel.
Y de esta forma terminaremos nuestro dibujo, amigos artistas, estoy totalmente satisfecho con mi dibujo, honestamente no me costó mucho realizarlo, ya que tengo esta experiencia, la gran mayoría de los dibujos no me están costando de tanto de hacer.
Las fotos fueron tomadas con la ayuda de mi teléfono Bison X Designed By Umidigi.
La imagen de referencia se encuentra en la parte inferior de este texto, debajo de ella podrán encontrar la fuente de la misma, el cual los llevara a la página que utilizo para encontrar las imágenes en referencia que uso para dibujar.
Y Así finaliza la publicación de hoy amigos, espero les sea de su agrado y que hayan aprendido algo nuevo el día de hoy con mi publicación, hasta la próxima.
Now we can use the brown color to give the parts of depth to our drawing, for that we must color the parts where the depth of the eye is, for example the upper and lower part.
Later we begin to refine a little more our flesh color to later use the brown color, we can notice that there are some spaces in which the brown color does not manage to fill, these are the pores of the leaf, and we can use it to our advantage, since this will also serve to give the effect of pores to the skin.
And this way we will finish our drawing, artist friends, I am totally satisfied with my drawing, honestly it did not cost me much to make it, since I have this experience, the great majority of the drawings are not costing me so much to make.
The pictures were taken with the help of my Bison X Designed By Umidigi phone.
The reference image is at the bottom of this text, below it you can find the source of it, which will take you to the page I use to find the reference images I use to draw.
And so ends today's publication friends, I hope you like it and that you have learned something new today with my publication, until next time.
Source / Fuente Castle of Castlevania
Source / Fuente Terra Blade of Terraria
Los separadores son de mi autoría, las fotos fueron tomadas con mi telefono Bison X Designed By Umidigi, las ediciones del GIF son creados por mí.
The separators are of my authorship, the photos were taken with my Bison X Designed By Umidigi phone, the GIF edits are created by me.
Programas que utilicé para crear mi diseño es este:
This is the program I used to create my design:
Gif y portada cortesía de Canva
Gif and cover courtesy of Canva
Traducido por Deepl

Lleva bastante detalle, quedo muy bien. Siga así, ira perfeccionándose cada vez más.
Wow! You are so talented. And you explained very well how to draw this. Thank you♥️