Good morning, friends of Hive DIY, how are you? I haven't been able to create many things for a while due to health reasons, however it's time to resume and show you how to make this decorative ribbon, which in this particular case is used as decoration at the top of the galley, but if you use another size of ribbon, you can make pendants, necklaces, key chains, and then let your imagination run wild. Here we go!
SPANISH VERSION (click here!)
Buen día, amigos de Hive DIY, ¿Cómo se encuentran? Hace un tiempo estoy sin poder crear muchas cosas por razones de salud, sin embargo es momento de retomar y mostrarles cómo se realiza esta cinta decorativa, que en este caso particular es usada como decoración a lo alto de la galera, pero si usas otro tamaño de cinta, puedes hacer colgantes, collares, llaveros, y luego ya dejar volar tu imaginación. Allá vamos!!

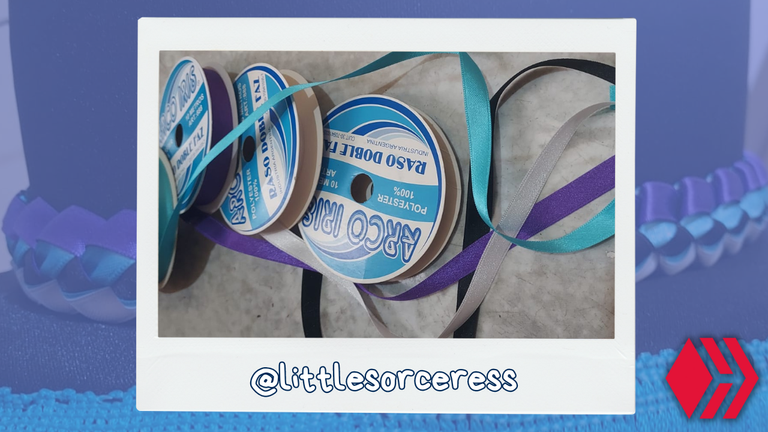
Like any tutorial, which is also an experience, we will start with the materials:
We will use ribbons, I chose the Nº2 which is 1cm wide, but it looks very nice and delicate if you use the Nº1 which is 0,5cm.
SPANISH VERSION (click here!)
Como todo tutorial, que además es experiencia, comenzaremos con los materiales:
Usaremos cintas, yo elegí la Nº2 que es de 1cm de ancho, pero queda muy bonito y delicado si usas la Nº1 que es de 0,5cm.
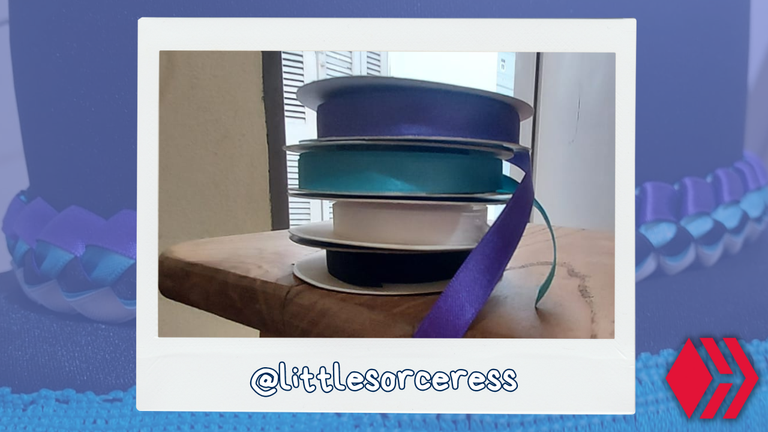
This beauty can be achieved in two colors, or four colors. That is, two ribbons, or four to give more relief. You can also use two ribbons of the same color and in this case you would have a final object of a unique delicacy. I am using 4 colors, which are the distinctive ones of the Murga Zarabanda Arrabalera del Sur de Capital. They are: black, turquoise, white and violet.
SPANISH VERSION (click here!)
Esta belleza se puede lograr de a dos colores, o de a cuatro. Es decir, dos cintas, o cuatro para dar mayor imágen de relieve. También puedes usar dos cintas del mismo color y en este caso tendrías un objeto final de una delicadeza única. Yo estoy usando 4 colores, que son los distintivos de la Murga Zarabanda Arrabalera del Sur de Capital. Son: negro, turquesa, blanco y violeta.
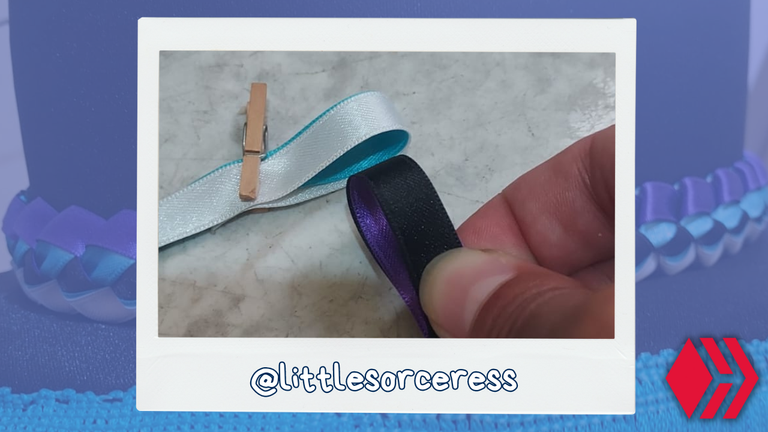
The first thing to do is to join the ribbons two by two, either by burning a little bit the ends or holding them with a little hook as I did, like this:
Then we start to make this kind of "little curl" where the other pair of ribbons must pass, and in this way we start without further ado. It gets more complicated when you want to take some speed, because in itself is easy, but if you use more than one tape, it is likely to move and you should be very attentive to this detail to avoid damage to the final result.
SPANISH VERSION (click here!)
Lo primero es unir las cintas de dos en dos, así sea quemando un poquito las puntas o sujetándolas con un ganchito como hice yo, así :
Luego comenzamos a hacer esta especie de “rulito” por donde debe pasar el otro par de cintas, y de esta manera comenzamos sin más. Ya se pone más complicado cuando quieres tomar algo de velocidad, porque en sí es fácil, pero si usas más de una cinta, es probable que se muevan y debas estar muy pendiente de este detalle para evitar desperfectos en el resultado final.
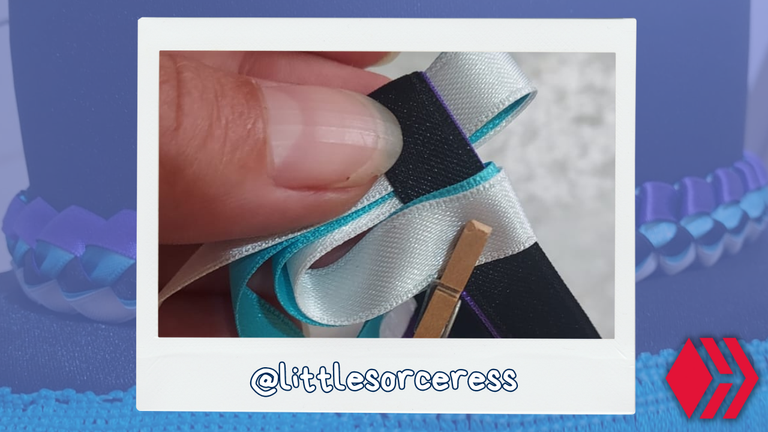
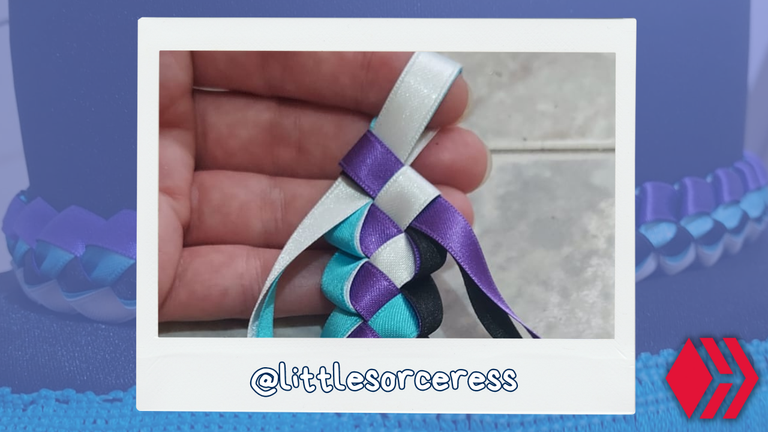
Then you pass the opposite colors through a small roll, and adjust, then with the new assembled roll, you pass the opposite color, and so on.
The truth is that from here it is totally repetitive, but when we are not yet experienced we need to try again and again, the good thing about this technique is that there are no knots, so you can always undo and redo. Practice enough before closing a job. I even recommend you to try with only two ribbons before trying to work with four, because it can get even more difficult if you use on each side, a wide ribbon and a thinner one on top of it, the touch is spectacular, but the level of precision must also be spectacular.
SPANISH VERSION (click here!)
Entonces pasas por un rulito los colores contrarios, y ajustas, luego con el nuevo rulito armado, pasas el color contrapuesto, y así sucesivamente.
La verdad que desde aquí ya es totalmente repetitivo, pero cuando aún no estamos experimentados necesitamos probar una y otra vez, lo bueno de esta técnica es que no lleva nudos, entonces siempre puedes deshacer y volver a hacer. Practica lo suficiente antes de dar por cerrado un trabajo. Incluso te recomiendo probar solo con dos cintas antes de intentar el trabajo con cuatro, porque puede ponerse incluso más difícil si usas en cada lado, una cinta ancha y una más finita sobre ella, el toque es espectacular, pero el nivel de precisión también debe serlo.
When you reach the desired length, proceed to the closure, for this you must be clear about what you will use it, if it is a necklace or keychain, a knot will be fine, in my case as it is pure decoration I tried to make a closure with glue and the idea is to add on this union a shiny pendant to cover the flaws. I trust you with the best decision at this moment, artisan!
SPANISH VERSION (click here!)
Cuando alcances el largo deseado, procedemos al cierre, para esto deberás tener claro en qué lo usarás, si es collar o llavero, un nudo estará bien, en mi caso como es pura decoración traté de hacer un cierre con pegamento y la idea es añadir sobre esta unión un dije brillante que cubra los desperfectos. Te confío la mejor decisión en este momento, artesano!
Finally I want to tell you that I prepared an explanatory gif, which I could not upload under any circumstances, no matter the size, type of file, or where to download it, or edit it. So after trying for several hours, thinking that I was doing something wrong, I decided to look for a simple and coherent solution and uploaded the .gif to this platform so you can have access to it whenever necessary. It is very practical to be able to see how it is done in video, so it seems to me that without this file, the tutorial / Diy would not be understood or be complete enough.
SPANISH VERSION (click here!)
Por último quiero contarles que preparé un gif explicativo, que no pude subir bajo ninguna circunstancia, no importaba el tamaño, tipo de archivo, o de dónde lo baje, o edite. Asique luego de probar por varias horas, de pensar que estaba haciendo algo mal, decidí buscar una solución sencilla y coherente y subí el .gif a esta plataforma para que puedan tener acceso a él cuando sea necesario. Es muy práctico poder ver cómo se realiza en video, por eso me parece que sin este archivo, el tutorial/ Diy no iba a entenderse ni ser lo suficientemente completo.

I hope you liked it, that it is understandable and that if you have any questions please let me know in the comments section. I'll say goodbye for today with a big hug! See you soon, friends!
SPANISH VERSION (click here!)
Espero que les haya gustado, que sea entendible y que si tienen alguna duda me lo hagan saber en el sector de comentarios. ¡Me despido por hoy con un abrazo grande! Hasta pronto, amigos!
--->LINK AL GIF <---
Thanks for reading me, Kiki✨
Gracias por leerme, Kiki ✨

I own the rights to all the photos I used in this post Soy la propietaria de todas las fotos que he usado hoy Pictures taken with a Samsung A42 & Nikon D3200📷 Traducido con DeepLearning Let's talk on Discord: littlesorceress #8877 Imágenes editadas con Canva

Saludos espero que siga mejorando tu salud, el proyecto es hermoso, me gustaron los colores se ven espectaculares quedan muy bien en el fondo negro; tal como lo mencionas se puede usar para diferentes creaciones, una diadema para bebé quedaría hermosa.
Feliz día!
Muchas gracias por tu comentario tan bonito y tus deseos a mi salud. Sigo mejorando, despacio y con constancia. No se me hubiera ocurrido el uso para una diadema de bebé, es una idea bellísima, cuando tenga la posibilidad, le haré uno a un bebito <3
Te dejo un beso enorme!