
Hola a todos mis amigos creativos de Hive, espero que tengan un lindo día, hoy les mostrare como realice esta linda corona con tematica de sirena para el cumpleaños número 5 de mi hija que sera en dos dias.
Ya que me gustan las manualidades y aprovechando algunos materiales que ya tenia en casa que otra manera de realizarlo, si no con mis propias manos ya que mi hija se merece lo mejor 😊.
Pues comencemos.
Hello to all my Hive friends, I hope you have a nice day, today I will show you how I made this cute mermaid-themed crown for my daughter's 5th birthday, which will be these days.
Since I like crafts and taking advantage of some materials that I already had at home, what other way to do it, if not with my own hands since my daughter deserves the best 😊.
Well let's get started.
| Materiales |
|---|
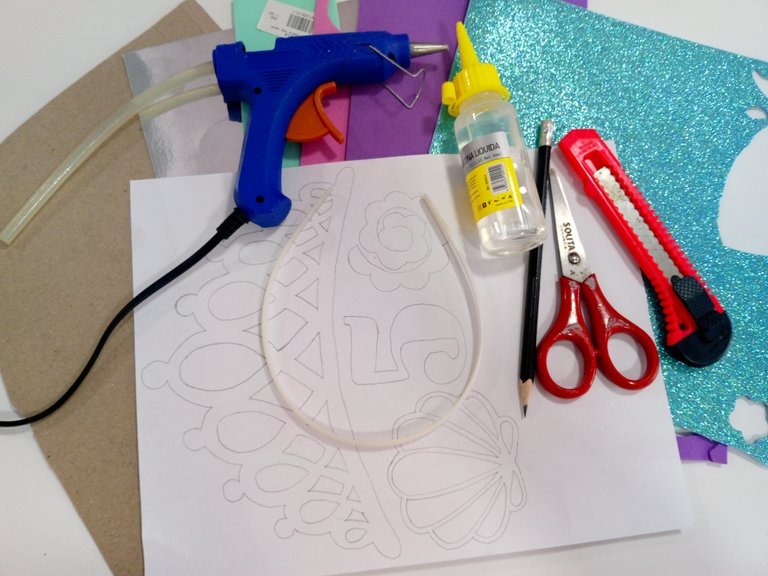 |
| Materiales | Materials |
|---|---|
| 1 Cintillo | 1 Headband |
| Carton 3 en kilo | Cardboard 3 in kilo |
| Foami lila liso | Smooth lilac foami |
| Foami rosado liso | Smooth pink foam |
| Foami verde agua liso | Smooth water green foam |
| Foami verde agua escarchado | Frosty water green foam |
| Foami dorado escarchado | Frosted gold foam |
| Cartulina metalizada plateada | Silver metallic cardstock |
| Lapiz | Pencil |
| Tijera | scissors |
| Pistola de silicon y silocon frio | Silicone gun and cold silicone |
| Cutter | Cutter |
| Hoja con patrones | Patterned sheet |
| Paso 1 | Step 1 |
|---|---|
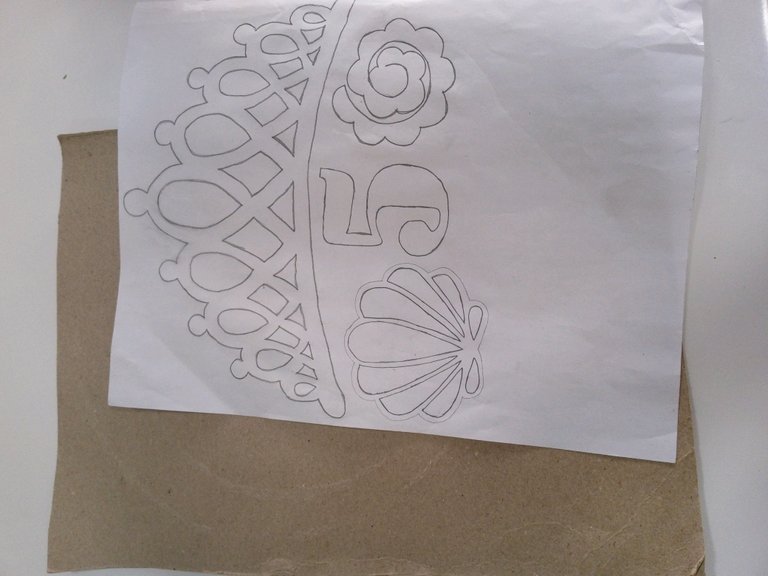 | 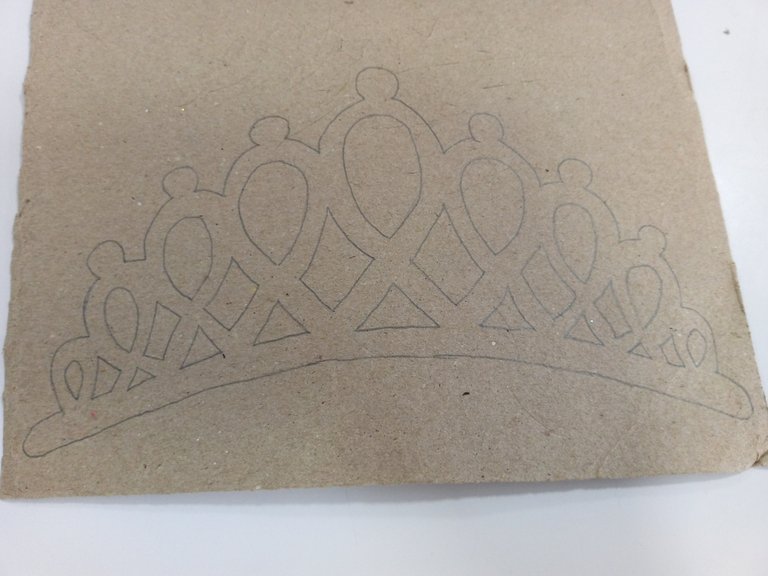 |
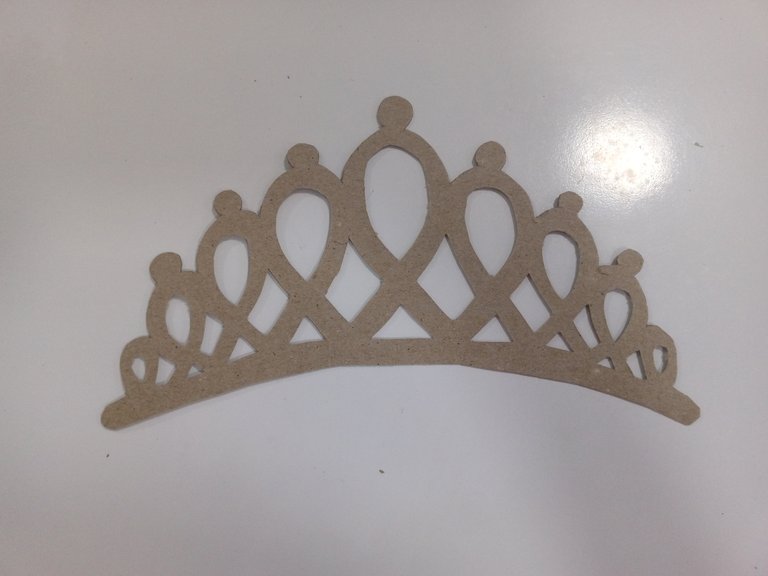 |
Paso 1: Tomo la hoja con patrones y traspaso el molde de la corona al carton con un punson, y luego de haberlo marcado procedo a cartar las orillas con la tijera y las partes pequeñas de adentro las corto con el cutter.
Step 1: I take the sheet with patterns and transfer the crown mold to the cardboard with a punch, and after having marked it I proceed to cut the edges with the scissors and cut the small parts inside with the cutter.
| Paso 2 | Step 2 |
|---|---|
 | 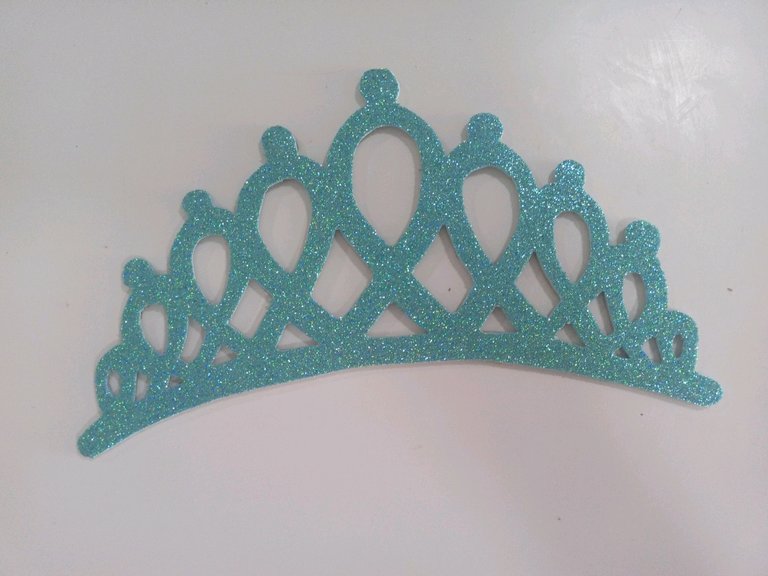 |
Paso 2: Una vez ya recortada la corona en el carton, procedí a pesar con silicon frio al foami verde agua escarchado, para luego recortar todas las orillas y las partes de adentro con el cutter para que me quede con mejor acabado.
Step 2: Once the crown was cut out of the cardboard, I proceeded to weigh the frosty water green foam with cold silicone, and then cut out all the edges and the inside parts with the cutter so that I had a better finish.
| Paso 3 | Step 3 |
|---|---|
 |  |
 |  |
 |
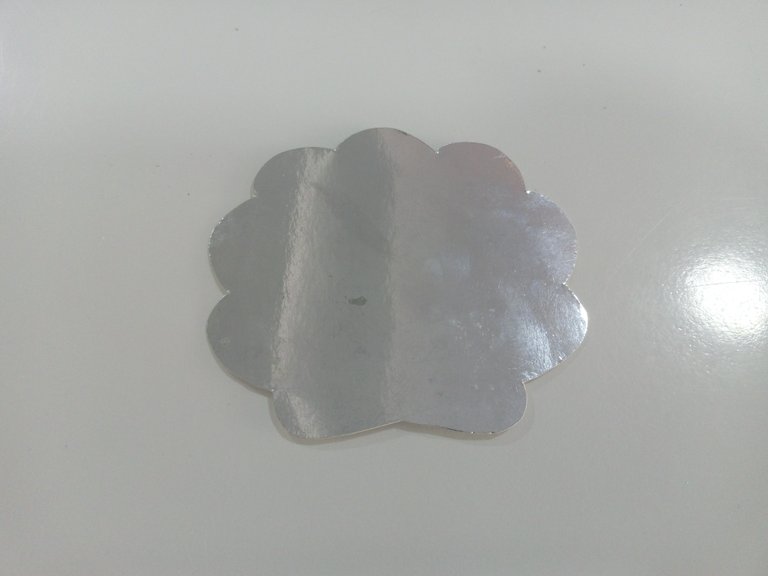
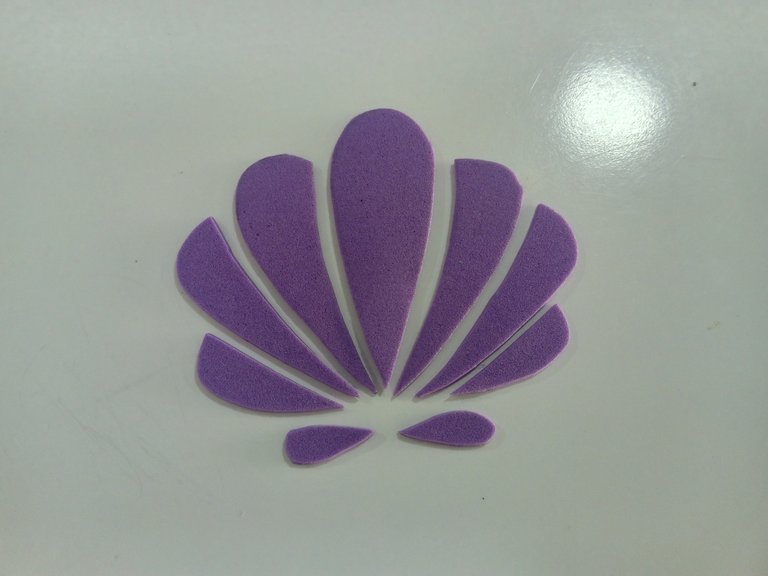
Paso 3: Marque la situela de la conchita de mar en la cartulina plateada y recorto. Luego marco en el foami lila la parte de adentro de la conchita y procedo a pegar en la cartulina en su respectivo lugar.
Step 3: Mark the location of the sea shell on the silver cardboard and cut out. Then I mark the inside of the shell on the lilac foam and proceed to glue it to the cardboard in its respective place.
| Paso 4 | Step 4 |
|---|---|
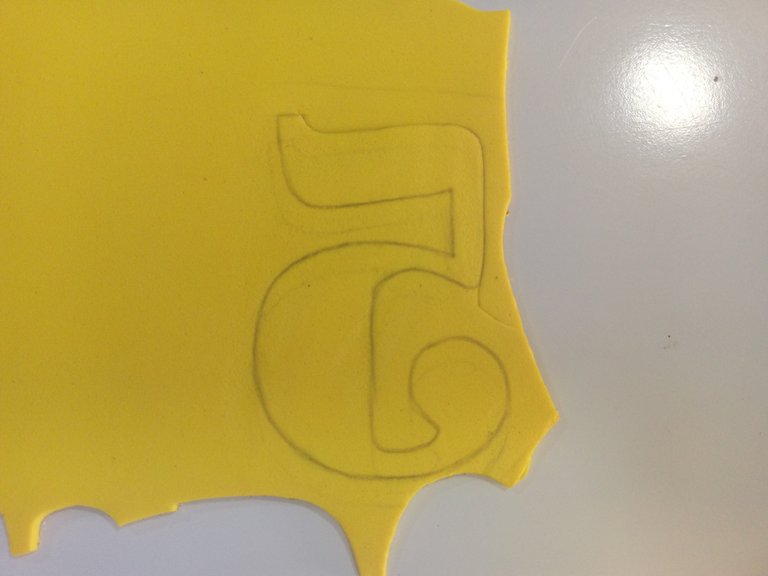 | 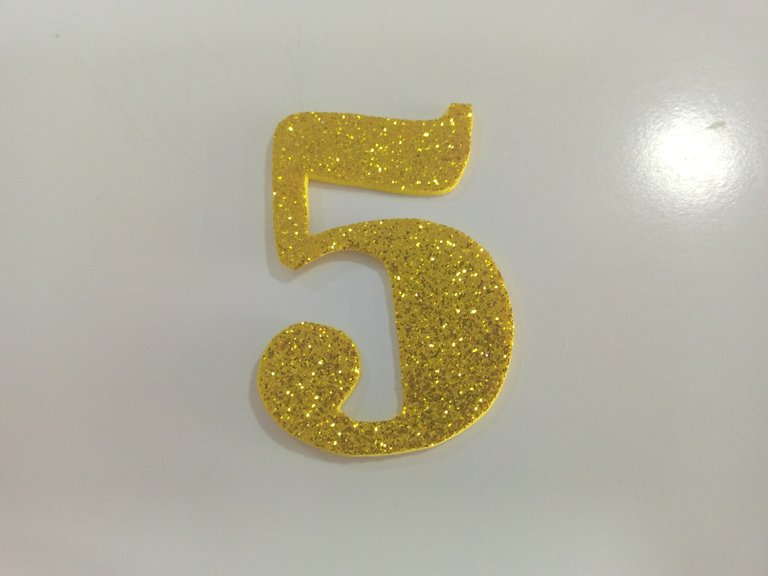 |
Paso 4: Marque el número 5 en el foami dorado escarchado y procedo a recortar.
Step 4: Mark the number 5 on the frosted gold foam and proceed to cut out.
| Paso 5 | Step 5 |
|---|---|
 |  |
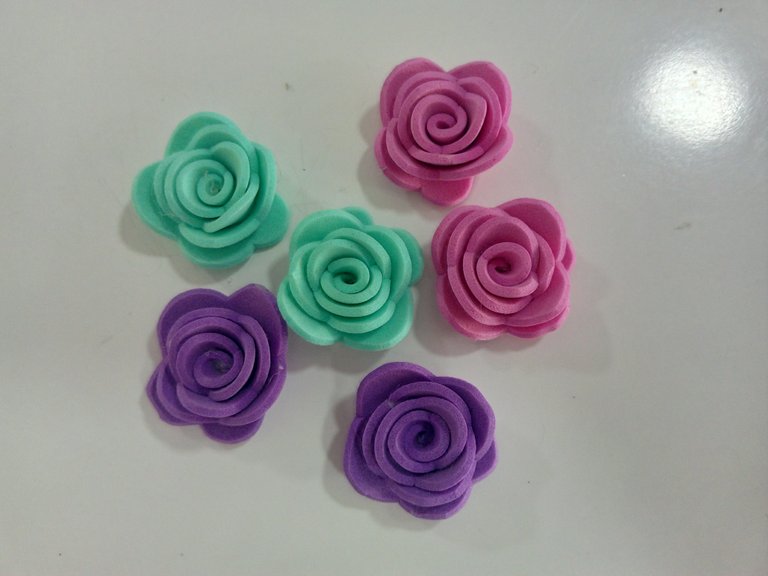 |
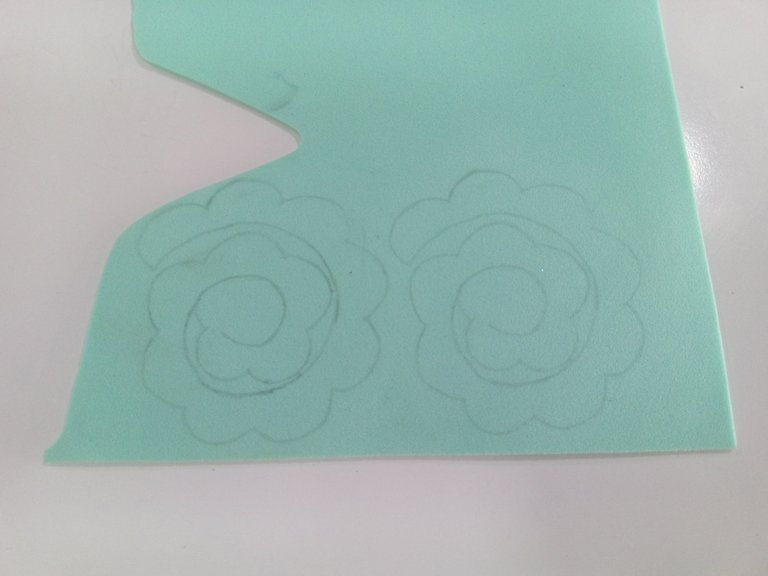
Paso 5: Marque la silueta con forma de espiral en los foamis lila, verde agua y rosado, y proceso a recortar. Una vez ya recortados tomo la punta de afuera y le hecho un punto de silicón caliente y comienzo a enrollar hacia dentro y hechando silicon casa vez que le doy una vuelta hasta llegar al final para formar una linda rosa.
Step 5: Mark the spiral-shaped silhouette on the lilac, aqua green and pink foams, and process to cut out. Once they have been cut out, I take the outside tip and put a dot of hot silicone on it and begin to roll it inwards and adding silicone every time I go around it until I reach the end to form a pretty rose.
| Paso 6 | Step 6 |
|---|---|
 |  |
 |  |
 |
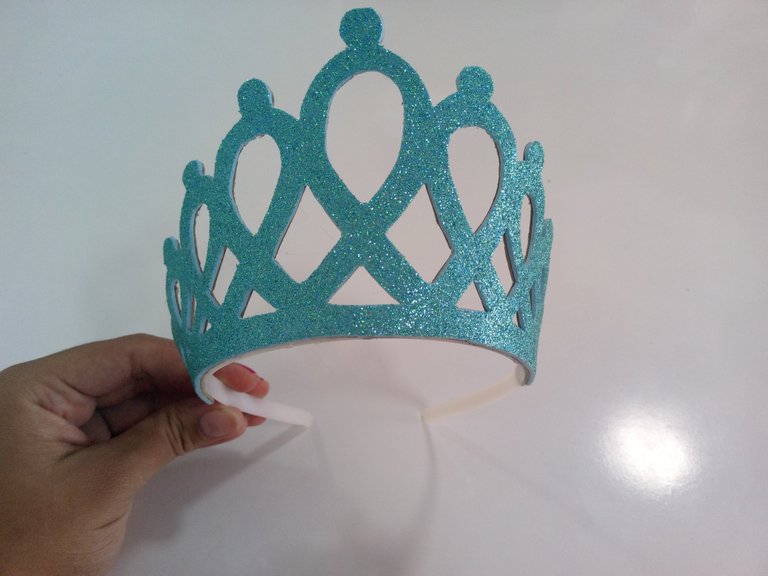
Paso 6: Ya con todas la figuras listas agarro la corona y la pego con silicon calienta al cintillo tratando de que me quede lo mas derecha posible. Despues pego todas las rosas a la parte de abajo en línea recta. Para terminar pego el número 5 a la conchita de mar y luego a la corona en la parte del centro y listo tenemos una linda corona hecha por nosotros mismos.
Step 6: With all the figures ready, I take the crown and glue it with hot silicone to the headband, trying to make it stand as straight as possible. Then I glue all the roses to the bottom in a straight line. To finish, I glue the number 5 to the sea shell and then to the crown in the center and that's it, we have a beautiful crown made by ourselves.
Espero les haya gustado y les sirva en algun momento. Gracias por leer nos vemos y mi siguiente post. 😘😘
I hope you liked it and it will be useful to you at some point. Thanks for reading, see you and my next post. 😘😘
Contratada para el cumple de Helen 🤭😂
Muy linda la coronita que le realizaste a tu hija para su cumpleaños, definitivamente nuestros hijos merecen lo mejor y mejor aun si esta hecho con amor y nuestras propias manos. Saludos,,,
!DIY
Así mismo es amiga, muchas gracias 😊
Nice work with lots of love for your daughter on her birthday. Best wishes
¡¡¡Buen trabajo!!! Gracias por publicar tu excelente contenido en Hive Diy, un trabajo muy lindo y tierno, a mi hija le encantara un arte manual como este
Te invitamos a conocer nuestros proyectos: https://peakd.com/hive-130560/@hivediy/microproject-artisans-aid-funds-microproyecto-fondosde-ayuda-a-los-artesanos-espeng
Apoya a tu comunidad comentando y votando y con tu voto de witness
Tu comunidad artesana ahora es testigo
