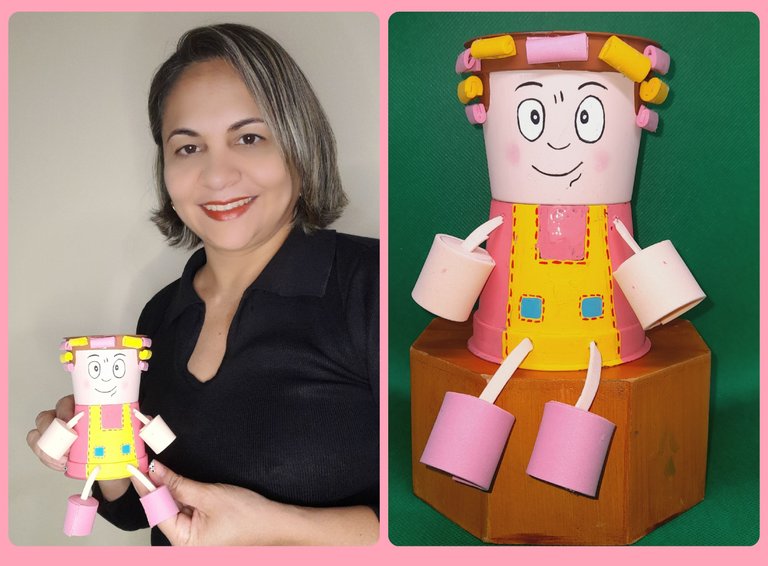
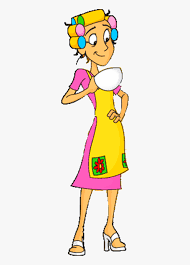
Saludos amigos de hivediy. Espero que hayan disfrutado de una excelente semana y se estén preparando para un fin de semana de descanso y compartir con la familia. Mi proyecto de hoy esta inspirado en la famosa Doña Florinda de la serie de tv el Chavo del 8, una doña que defendía y consentía a su hijo en todo y el pobre Don Ramón era el que siempre salía perdiendo, esta serie nos hacia reir con sus ocurrencia. Esta elaborado con material de provecho, vasos plásticos y foami.Te invito a seguir este paso a paso para que veas los fácil, rápido y sencillo que es de elaborar este adorno.
Greetings hivediy friends. I hope you had a great week and are getting ready for a weekend of relaxation and family time. My project today is inspired by the famous Doña Florinda from the TV series El Chavo del 8, a lady who defended and pampered her son in everything and poor Don Ramón was the one who always lost out, this series made us laugh with their occurrences. It is made with useful material, plastic cups and foami. I invite you to follow this step by step so you can see how easy, fast and simple it is to make this ornament.
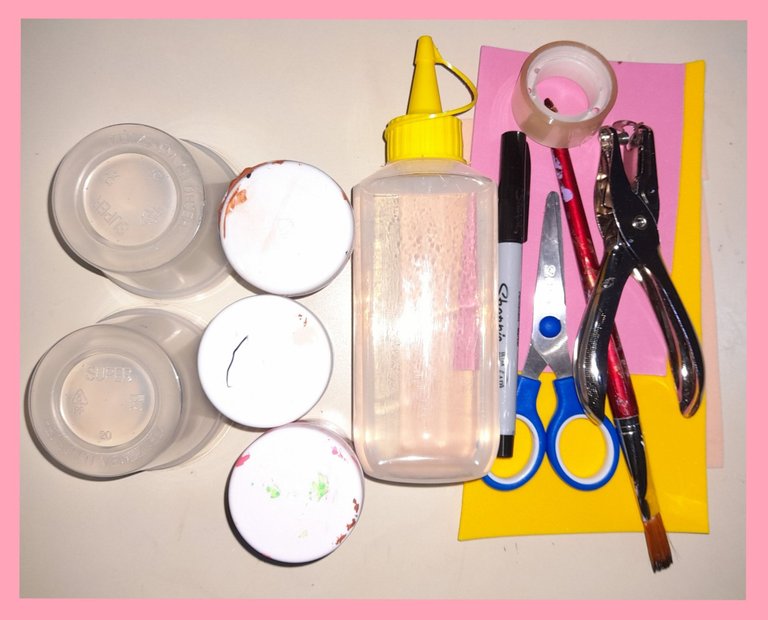
Materiales:
- Foami de los colores: Piel, amarillo y rosado.
- Pintura al frío rosada, negra, blanca, amarilla, verde y roja.
- Vasos plásticos.
- Lápiz.
- Tijeras.
- Pincel.
- Silicón frío.
- Perforador.
Materials:
- Foami of the colors: Skin, yellow and pink.
- Pink, black, white, yellow, green and red cold paint.
- Plastic cups.
- Pencil.
- Pair of scissors.
- Brush.
- Cold sylicon.
- Driller.
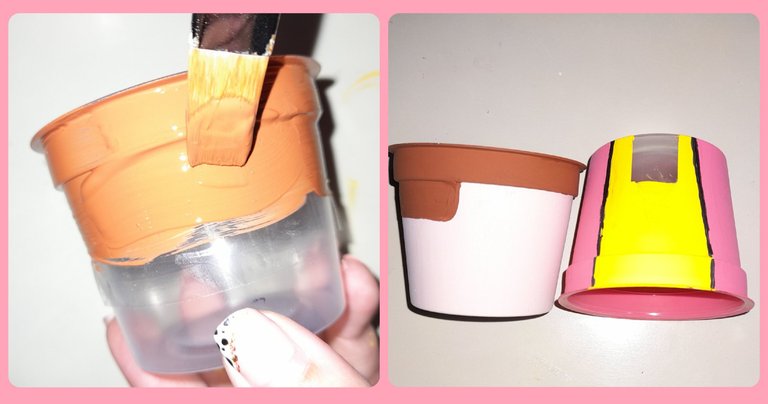
Paso a paso:
Para elaborar este adorno lo primero que hacemos es pintar los vasos, uno de los vaso será la cabeza y el otro el cuerpo. La cabeza la pintaremos en la parte superior con pintura al frío marrón para simular el cabello y el rostro lo pintamos de color piel. En el otro vaso pintaremos el vestido de color rosado y el delantal de amarillo.
Step by Step:
To make this ornament, the first thing we do is paint the glasses, one of the glasses will be the head and the other the body. We will paint the head in the upper part with brown cold paint to simulate the hair and we will paint the face in skin color. In the other glass we will paint the dress in pink and the apron in yellow.
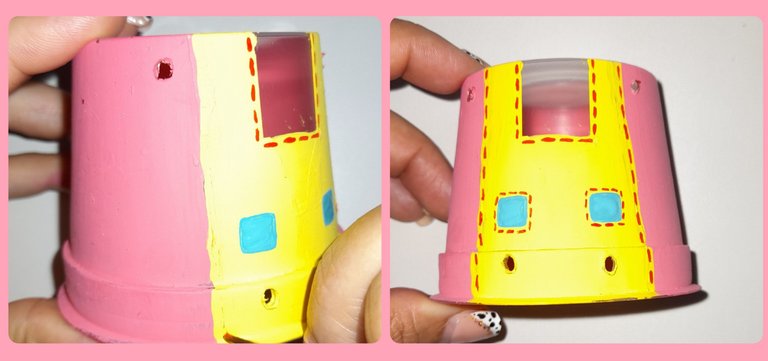
En el vaso que simula el vestido abrimos cuatro orificios, dos a cada lado del delantal que serán para colocar las manos y otros dos en la parte inferior del delantal para colocar los pies. Luego pintamos los bolsillos de verde y pasamos líneas punteadas por toda la orilla de los bolsillos y el delantal.
In the glass that simulates the dress we open four holes, two on each side of the apron that will be to place the hands and another two in the lower part of the apron to place the feet. We then painted the pockets green and ran dotted lines all the way around the edge of the pockets and the apron.
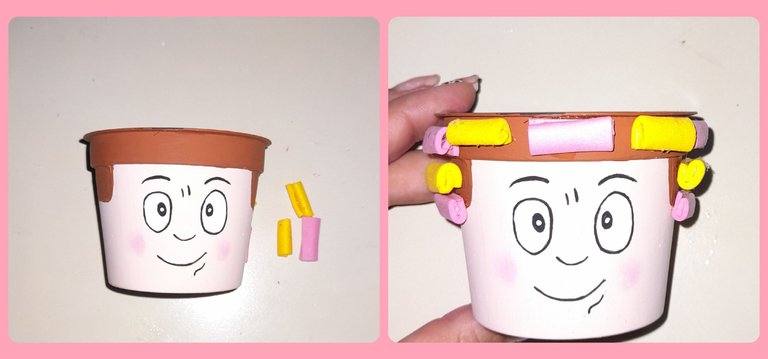
En esta paso definimos las facciones de la cara, para esto marcamos con el lápiz las cejas, arrugas, ojos y boca de la figura. Luego con la pintura blanca pintamos el fondo de los ojos.
In this step we define the features of the face, for this we mark with the pencil the eyebrows, wrinkles, eyes and mouth of the figure. Then with the white paint we paint the bottom of the eyes.
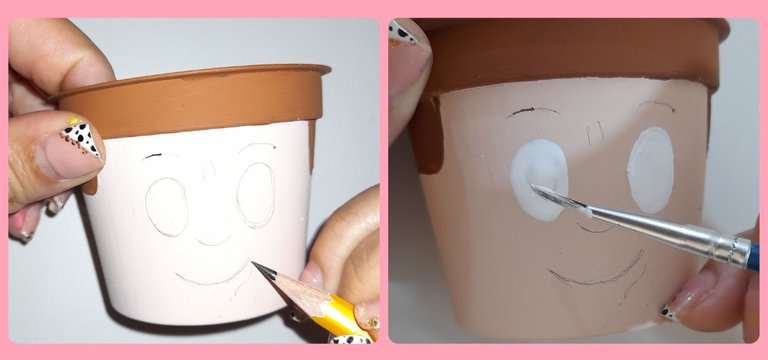
Luego pintamos con la pintura al frío las cejas, las arrugas, la nariz, la boca y el punto negro en los ojos, para luminosidad a los ojos con la pintura blanca pintamos dos puntitos blancos en cada ojo.
Then we paint the eyebrows, the wrinkles, the nose, the mouth and the black dot in the eyes with the cold paint, to give light to the eyes with the white paint we paint two white dots in each eye.

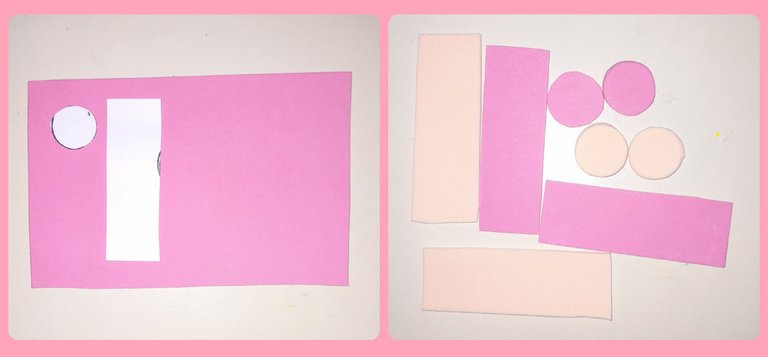
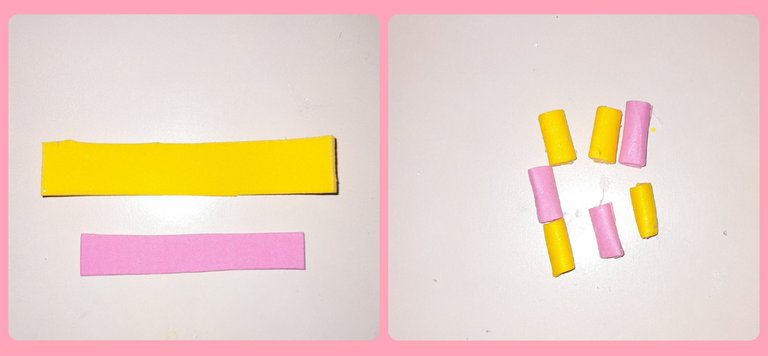
Para elaborar los pies y las manos recortamos dos círculos y dos rectángulos rosados y dos círculos y dos rectángulos color piel.
To make the feet and hands, we cut out two circles and two pink rectangles and two circles and two skin-colored rectangles.
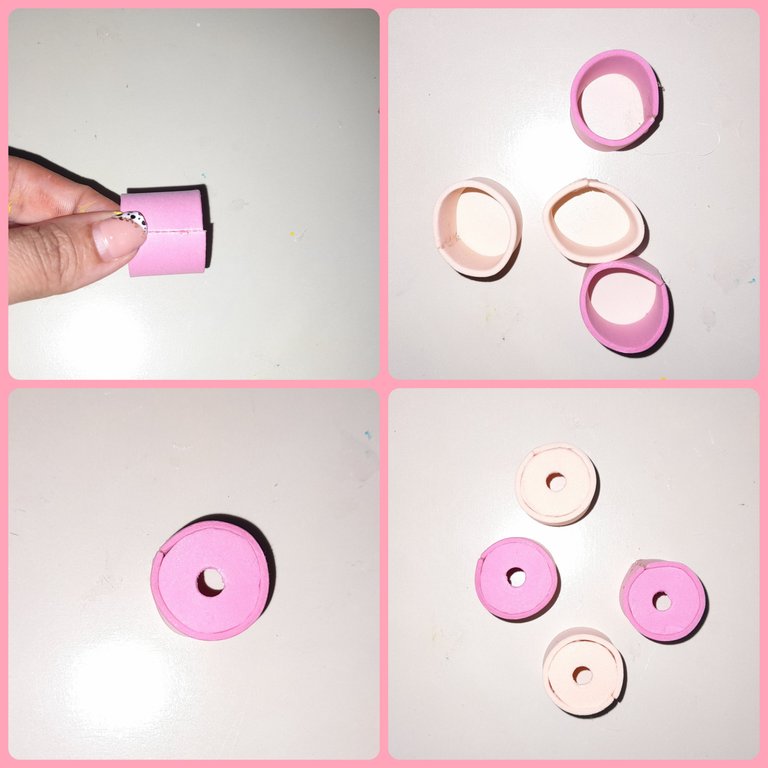
Luego pegamos los rectángulos uniendo ambos extremos para formar pequeños cilindros. A los círculos con el perforador le abrimos un orificio een el centro y los pegamos en cada uno de los círculos.
Then we glue the rectangles joining both ends to form small cylinders. To the circles with the perforator we open a hole in the center and we stick them in each of the circles.
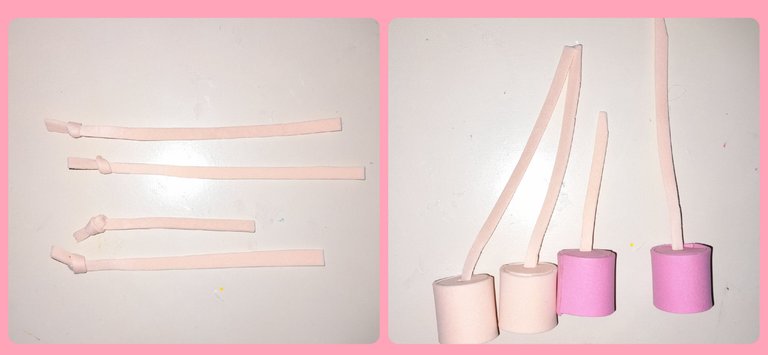
Luego cortamos delgadas tiras de foami color piel y atamos un nudo en uno de los extremos y los pasamos por el orificio de los cilindros de esta manera tenemos las manos y pies listos.
Then we cut thin strips of skin-colored foami and tie a knot at one end and pass them through the hole of the cylinders in this way we have the hands and feet ready.
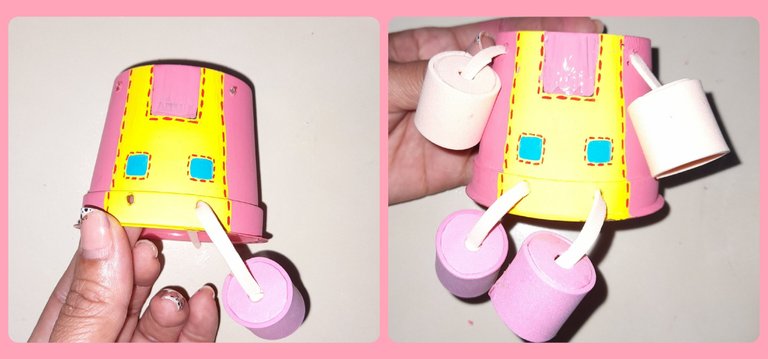
En este paso colocamos las manos y los pies pasando el otro extremos de los cilindros elaborados en el paso anterior, por los orificios que están en el vaso que simula el vestido, tal como lo indica la figura.
In this step we place the hands and feet passing the other ends of the cylinders made in the previous step, through the holes that are in the glass that simulates the dress, as indicated in the figure.
Para elaborar los rollos que lleva en el cabello Doña Florinda cortamos dos rectángulos de foami uno amarillo y otro rosado y vamos enrrollando dándole dos vuelta y pegando con el silicón.
To make the rolls that Doña Florinda wears in her hair, we cut two rectangles of foami, one yellow and the other pink, and we roll them up, turning them twice and sticking with the silicone.
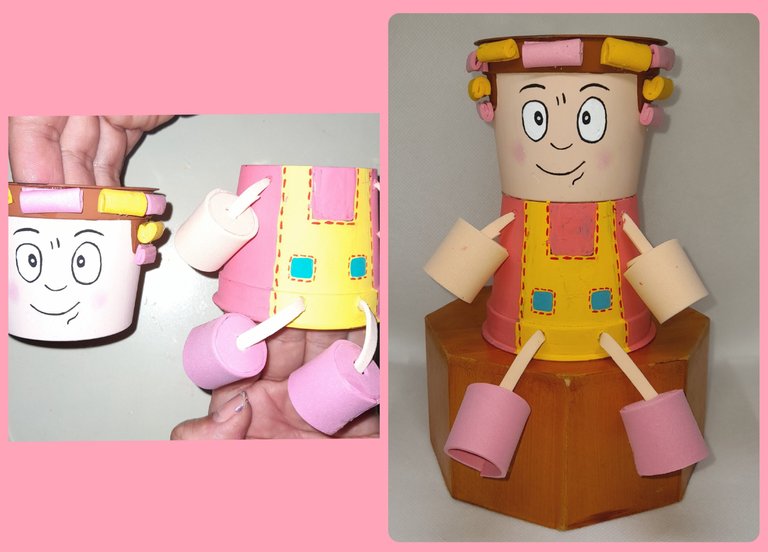
Luego vamos pegando cada uno de los rollos alrededor del cabello de Doña Florinda.
Then we stick each of the rolls around Doña Florinda's hair.
Por último pegamos ambos vasos uno sobre de otro y de esta manera hemos culminado este paso a paso, espero que te haya gustado, lo buenos es que puedes ponerlo en práctica con el personaje que prefieras.
Finally we glue both glasses one on top of the other and in this way we have completed this step by step, I hope you liked it, the good thing is that you can put it into practice with the character you prefer.
-Las fotos son de mi propiedad, tomadas un Samsung A21S,cámara de 48MP.
-Para la traduccion Google Traductor.
-The photos are my property, taken with a Samsung A21S, 48MP camera.
-For Google Translate translation.
[Imagen de referencia]
[Reference image]

Me gustó mucho, me hiciste reír. saludos 😘
Gracias @lorennys me alegro que te haya gustado 😊
Oh Dios cuantos recuerdos con esta serie, recuerdo que mi papá cuando las veía siempre reía con cada ocurrencia así repitieran el capitulo 100 veces, gracias por tan bello trabajo
Hola muchas gracias a mi también me encantaba esta serie.
Que hermosa creación de doña florinda es muy original y lo mejor usando material reclidado. Suerte
Hola, gracias 🙂
Que lindo le quedó felicidades me gustó bastante muy creativa!!
Gracias, saludos 🤗