¡Hola, Mundo!
Queda poco más de un mes para que lleguen las vacaciones de verano y este año nuestra clase se despide del curso, del ciclo de Educación Infantil, de su pequeño Colegio y de su maestra. Muchos cambios para unos pequeños graduados. Así que ya estamos organizando la fiesta de fin de curso y pensando en el regalo de la profe. Este año será algo especial y participaremos todas las familias en el regalo para la seño. Sin embargo, el año pasado en casa decidimos tener un pequeño detalle con ella, para desearle feliz verano. Es un trabajo muy fácil de hacer, que podéis elaborar con materiales y herramientas que seguro tenéis por casa.
Hi, World!
The summer holidays are just over a month away and this year our class is saying goodbye to the school year, to the Infant Education cycle, to their little school and to their teacher. A lot of changes for some little graduates. So we are already organising the end of year party and thinking about the teacher's present. This year it will be something special and all the families will participate in the gift for the teacher. However, last year at home we decided to have a little gift for her, to wish her a happy summer. It is very easy to do, and you can make it with materials and tools that you probably have at home.

Os voy a dar unas indicaciones, pero son orientativas, pues podéis hacerla de las medidas que queráis. Como yo usé un pliego de papel de scrapbooking de doce pulgadas, os voy a presentar el esquema de cortes y plegados, basándome en esas medidas. Recordad que podéis adaptarlo como queráis.
I'm going to give you some indications, but they are for guidance only, as you can make it in any size you want. As I used a twelve-inch sheet of scrapbooking paper, I'm going to show you the cutting and folding scheme, based on those measurements. Remember that you can adapt it as you wish.

Herramientas necesarias:
En realidad es suficiente con unas tijeras. También podéis hacer uso de una cizalla para los cortes rectos y de troqueladoras, si queréis recortar formas para los elementos decorativos.
Materiales necesarios:
Papel con cierto gramaje (al menos 130 gramos por centímetro cuadrado, como una cartulina escolar). Podéis usar papeles decorados, cartulinas,...o aprovechar, por ejemplo, las bolsas de cartón de los comercios.
Adhesivo para montar la tapa de la caja: puede ser cola blanca, cinta adhesiva de doble cara, celo, washitape,...
En realidad no necesitaríais nada más, porque la decoración puede ser simplemente colorear o escribir en los espacios que se van a formar al plegar. Aunque lo bonito de este trabajo es llenarlo de detalles: pueden ser fotos, imágenes recortadas, elementos que encontréis por casa como botones, cintas, pegatinas,... dibujos, trocitos de papel bonitos de etiquetas, por ejemplo,...
Necessary tools:
Actually, a pair of scissors is enough. You can also use shears for straight cuts and die-cutters if you want to cut out shapes for the decorative elements.
Materials needed:
- Paper with a certain grammage (at least 130 grams per square centimetre, such as school card). You can use decorated paper, cardboard,... or use, for example, cardboard bags from shops.
- Adhesive to mount the lid of the box: it can be white glue, double-sided adhesive tape, sticky tape, washi tape,...
- You don't really need anything else, because the decoration can be done by simply colouring or writing in the spaces that will form when folding. Although the beauty of this work is to fill it with details: they can be photos, cut out images, elements that you find around the house such as buttons, ribbons, stickers,... drawings, pretty pieces of paper from labels, for example,...
Procedimiento para realizar la estructura:
Lo primero es tener en nuestras manos un pliego de papel de forma cuadrada, de medidas aproximadas a las de la imagen (30x30cm).
Vamos a trazar con la plegadera líneas rectas que van a dividir el papel en tres filas y tres columnas.
Después trazaremos las diagonales, sin pasar por el cuadrado central. Cuidado con esto, porque es la base de la caja, y no queremos que se deforme, así que no debe tener marcas de plegado.
Plegar con cuidado cada una de las marcas.
Para realizar la tapa de la caja tomaremos como referencia la medida del cuadrado central de la caja (en este caso es de 10x10cm) y le añadiremos unos milímetros más. A esa medida hay que añadirle un perímetro de al menos centímetro y medio, que será el faldón de la tapa. En este caso el faldón tendrá centímetro y medio, así que si sumamos los faldones más el cuadrado central de la tapa nos daría un total de trece centímetros y medio.
Plegamos por las marcas y pegamos para fijar los laterales del faldón.
Procedure for making the structure:
- The first thing to do is to have a square sheet of paper in your hands, measuring approximately as shown in the image (30x30cm).
- We are going to draw straight lines with the folding knife that will divide the paper into three rows and three columns.
- Then we will draw the diagonals, without going through the central square. Be careful with this, because it is the base of the box, and we don't want it to be deformed, so it must not have any folding marks.
- Carefully fold each of the marks.- To make the lid of the box, take as a reference the size of the central square of the box (in this case it is 10x10cm) and add a few millimetres more. To this measurement we must add a perimeter of at least one and a half centimetres, which will be the skirt of the lid. In this case the skirt will be a centimetre and a half, so if we add the skirts plus the central square of the lid, it will give us a total of thirteen and a half centimetres.
- Fold along the marks and glue to fix the sides of the skirt.
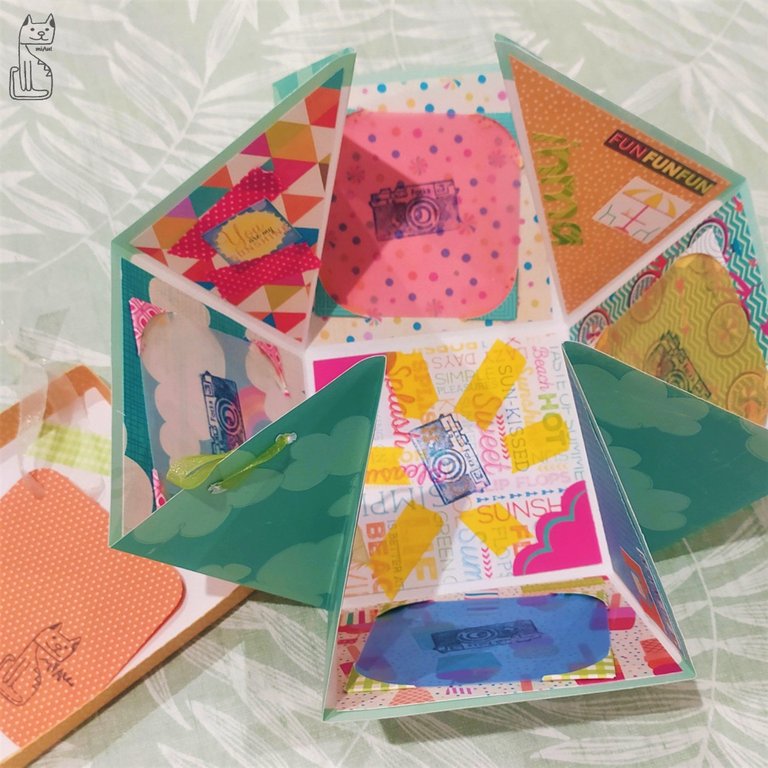
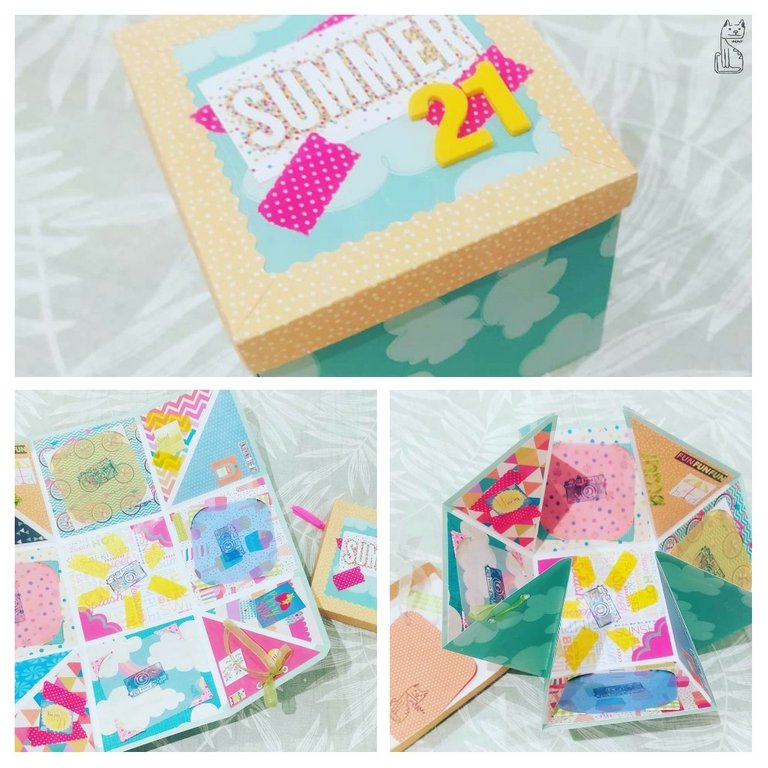
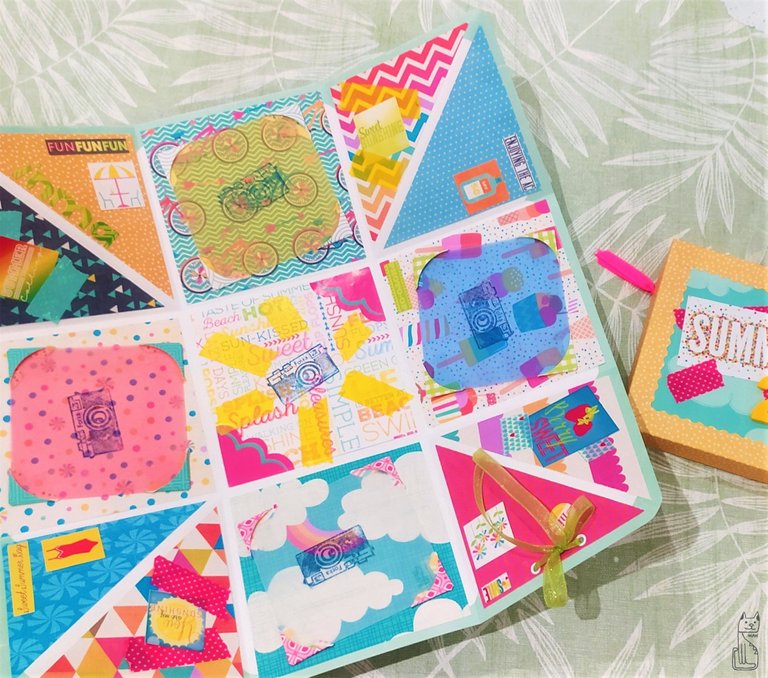
Finalizada la estructura, sólo nos queda la decoración: podemos añadir en los cuadrados y triángulos resultantes del plegado lo que nos apetezca. Yo he pegado washitapes, papeles decorados y pegatinas; he estampado sellos; he dejado espacios para poner fotos; he colgado lazos de ojales,...
La tapa de la caja también lleva una pegatina con la palabra "summer" y unos números de goma EVA con el año en curso.
Once the structure is finished, all that remains is the decoration: we can add whatever we like to the squares and triangles resulting from the folding. I have stuck washitapes, decorated papers and stickers; I have stamped stamps; I have left spaces to put photos; I have hung eyelet bows,...
The lid of the box also has a sticker with the word "summer" and some EVA numbers with the current year.
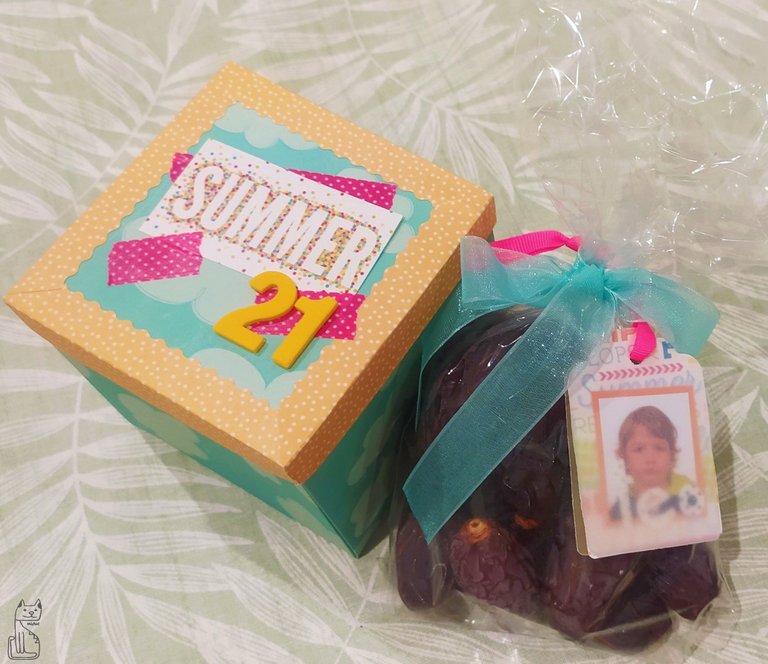
Como a la seño le encantan los dátiles, les metimos unos medjoul en una bolsita de plástico (para que no manchase el papel y tuviera una presentación adecuada) y la cerramos con un lazo de tul a juego y una etiqueta con una dedicatoria y la foto de mi niño.
De esta manera, cuando abriese la caja, esta se desplegaría y se encontraría el regalo y la caja que lo alberga será un pequeño álbum para las fotos veraniegas.
¿Te animarías a hacer esta manualidad? En el mundo del scrapbooking se le conoce como "caja explosiva".
As the teacher loves dates, we put some medjoul in a little plastic bag (so that it wouldn't stain the paper and would look good) and we closed it with a matching tulle bow and a label with a dedication and a photo of my child.
This way, when I opened the box, it would unfold to reveal the gift and the box would be a little album for summer photos.Would you like to do this craft? In the world of scrapbooking it is known as an "exploding box".
Gracias por leerme. Encantada de tenerte por aquí 💛
Te doy la bienvenida a miAu!
Traducido gracias a la versión gratuita de DeepL
Imágenes editadas con la versión libre de Canva
Fotografías capturadas con mi teléfono móvil Xiaomi Redmi Note 8T
Thank you for reading me. Nice to have you around 💛
I welcome you to miAu!Translated with the free version of DeepL
Images edited with the free version of Canva
Pictures taken with my mobile phone Xiaomi Redmi Note 8T.
Gracias, @sancho.panza. Un voto vuestro es siempre una gran satisfacción :)
Qué alegría ver que mi publicación ha llegado hasta vosotros y os ha gustado. ¡Gracias por vuestro apoyo!