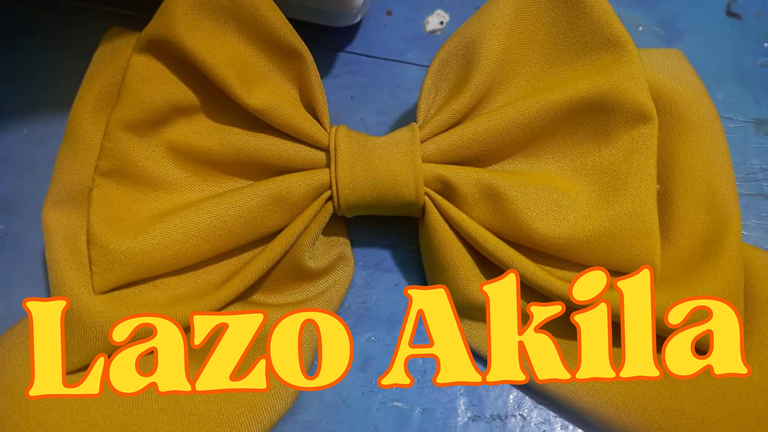
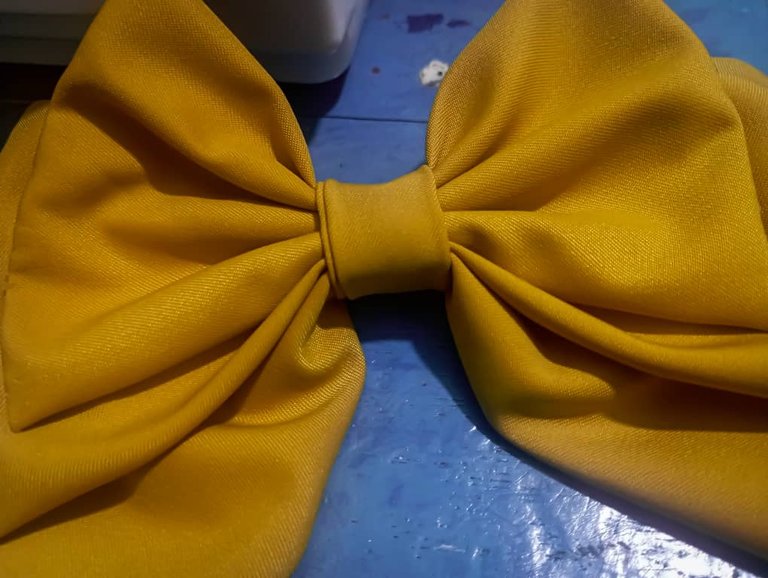
Hello everyone welcome to a more creative post, I tell you that with my friend @keritroberts we went to the castle a place in San Cristobal that sell fabrics, we want to give a touch to our venture and taking advantage that we both have sewing machines, we decided to add other things, so today I will teach you how to make the Akila Bow, so I call it is an Egyptian name that means smart.
Los materiales a utilizar son:
- Tela (la que te guste)
- Regla
- Tijera
- Máquina de coser (opcional)
- Gancho
- Hilo
- Tiza de tela
- Alfileres
The materials to use are:
- Fabric (the one you like).
- Ruler
- Scissors
- Sewing machine (optional)
- Hook
- Thread
- Fabric chalk
- Pins
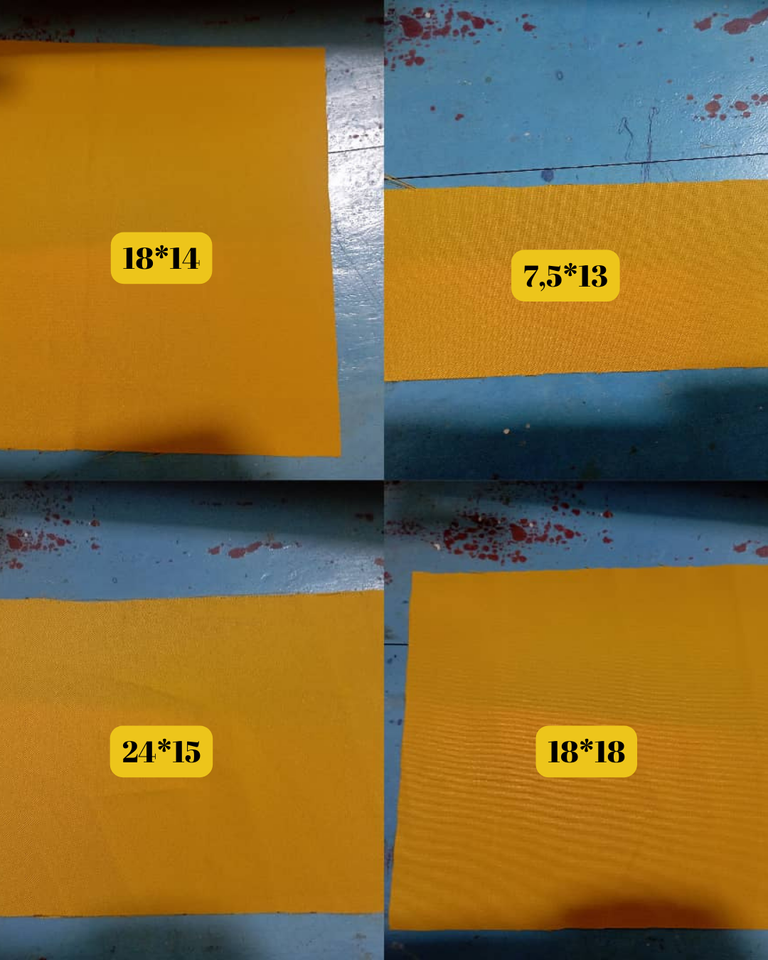
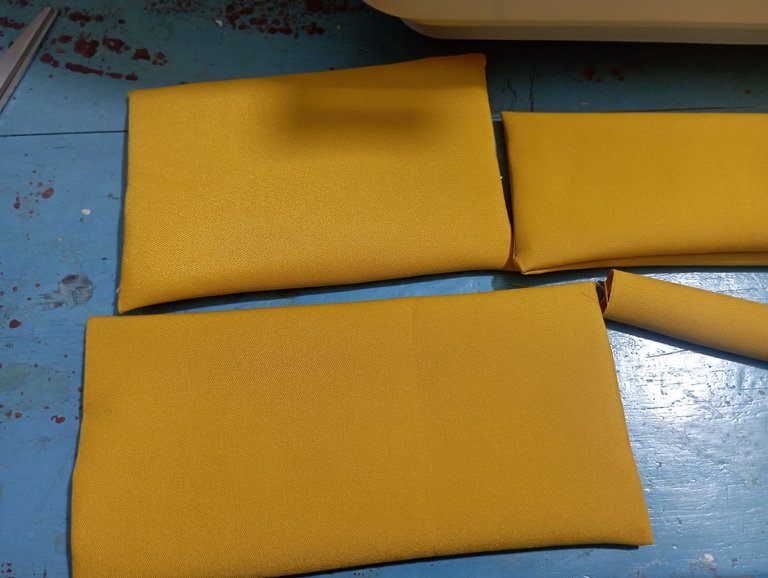
The first thing to do is to mark four rectangles on the fabric, the first one of 18x14 centimeters, the second one of 18x18 centimeters, the other one of 24x15 centimeters and the last one of 7.5x13 centimeters, as shown in the image.
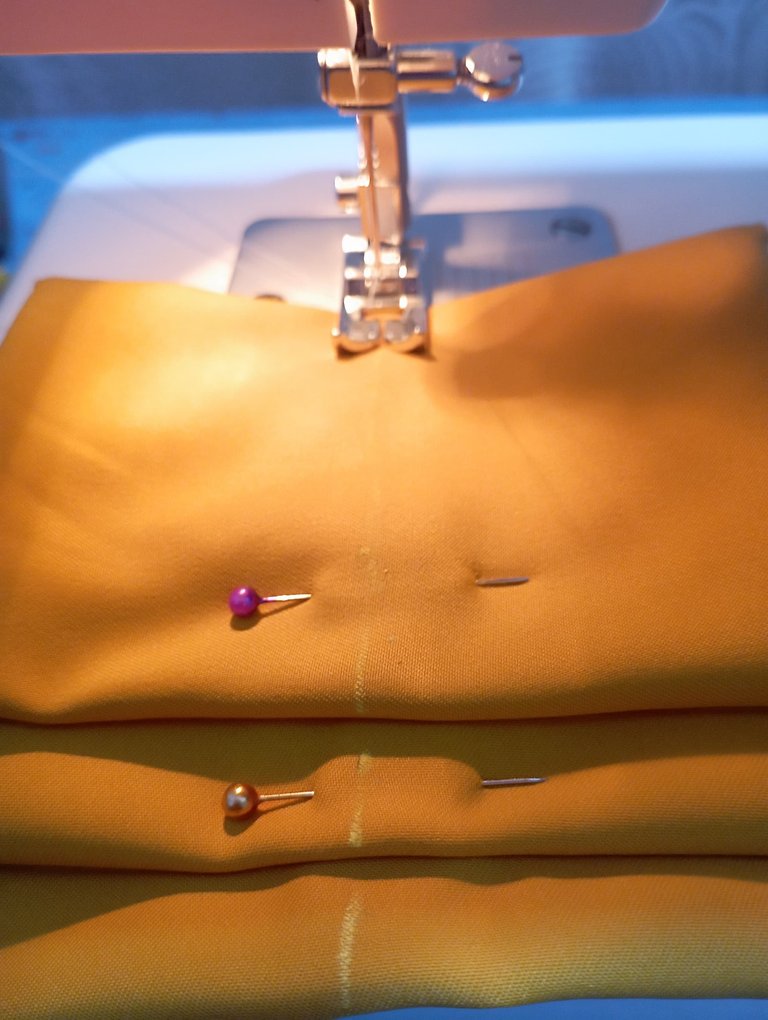
Then we are going to sew the 18x14 rectangle, which we are going to sew by the side of 18 cm bumping right to right of the fabric leaving a side without sewing as shown in the image, this same procedure is done with the 18x18 rectangle. Then we flatten and sew the sides of both rectangles, and we turn them over the space we left unsewn in the above step.
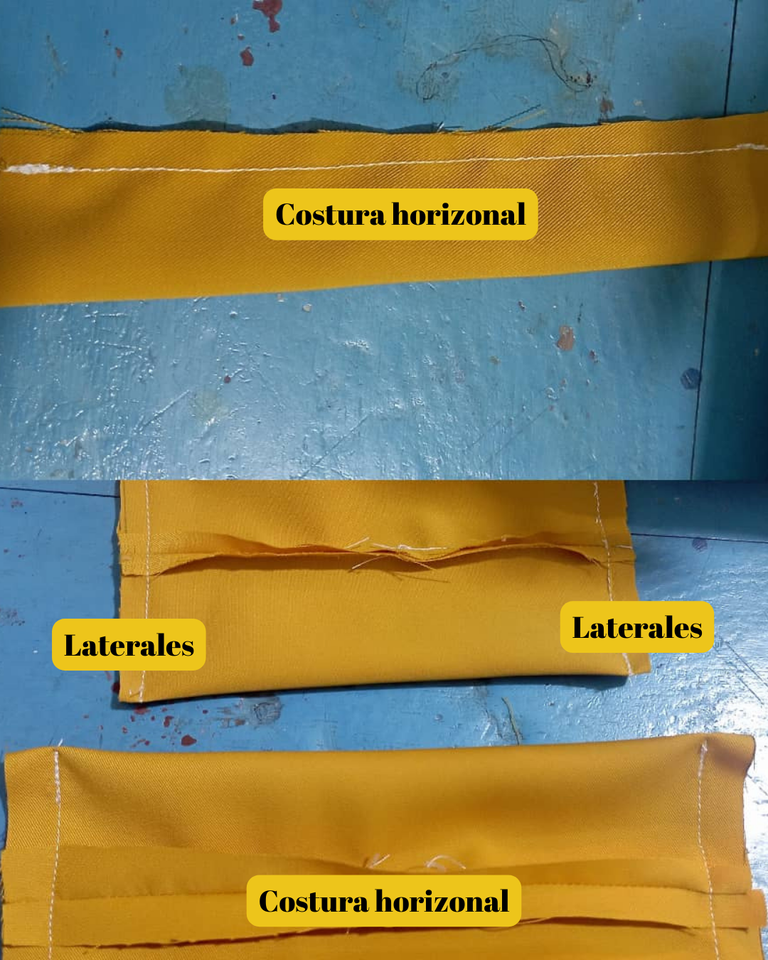
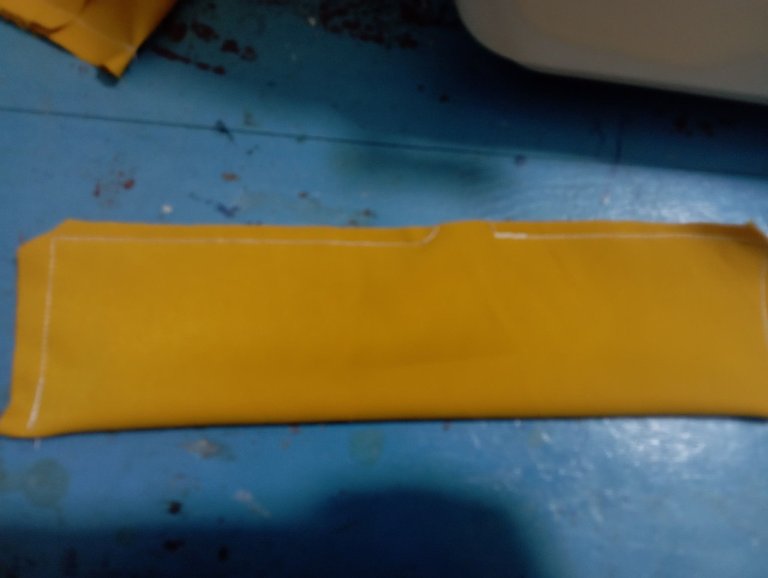
When the 24x15 rectangle is folded in half matching right side to right side of the fabric and sew all around leaving a space to flip it over just as shown in the image, and with the small rectangle we place right side to right side and sew to then place flip it right side up.
Now we are going to join the pieces, to do this to place first the rectangle of 24 and 2 centimeters above the 18 and in the same way with the 14, all that in half, with pins you keep them fixed and with the ruler and chalk draw a straight line, and proceed to sew so that they do not move, After sewing, folds are made to form the loop and with a little bit of thread you tie it until it is fixed, finally we take the small rectangle to place it in the middle and sew it and turn it around to hide the seam and add the hook.


I hope you can understand me, I am not a seamstress and I don't know if these are the correct terms, but I hope you are encouraged to do it, see you in a future post.
Feliz fin de semana|Happy weekend
Fotos tomadas de REDMI 10|Photos taken from REDMI 10
Traducción realizada en DeelP|Translation done at DeelP
The result has a cute shape. Did you add a something to put that thing on hair or blouse?
Hi friend, I have added a hook to attach it to the hair.
Thank you for commenting
Ese lazo quedó bellísimo! Me encanta! ✨
Quiero más de tus tutoriales! 💛
El color es Top amiga, espero ver los tuyos.
Waaaaaw me encantó, sin duda guardaré este tutorial para hacerle nuevos lazos a mi princesa y más ahora que viene el regreso a Clases! 🎀😍
Hola @alizmarpaola que genial que te gustara, espero ver los de tu bebe pronto, gracias por pasarte.
😃está genial, quedó muy bonito!
Asi es @venusl19, quedan espectaculares
https://leofinance.io/threads/view/hive-130560/re-leothreads-2d5hugrnx

Te invitamos cordialmente a unirte a nuestro servidor de Discord, para participar en las actividades y conectarte con otros miembros de la comunidad DIY.
https://discord.gg/EVPnrUaJVd