¡Saludos Comunidad Creativa! | ¡Greetings Creative Community!
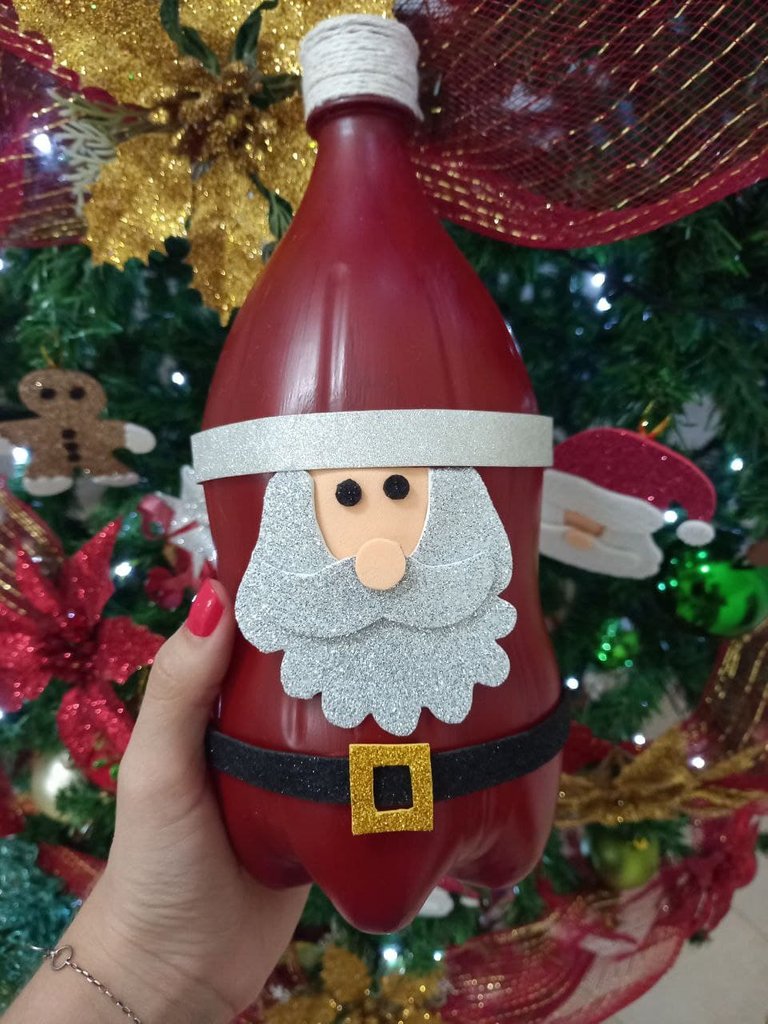
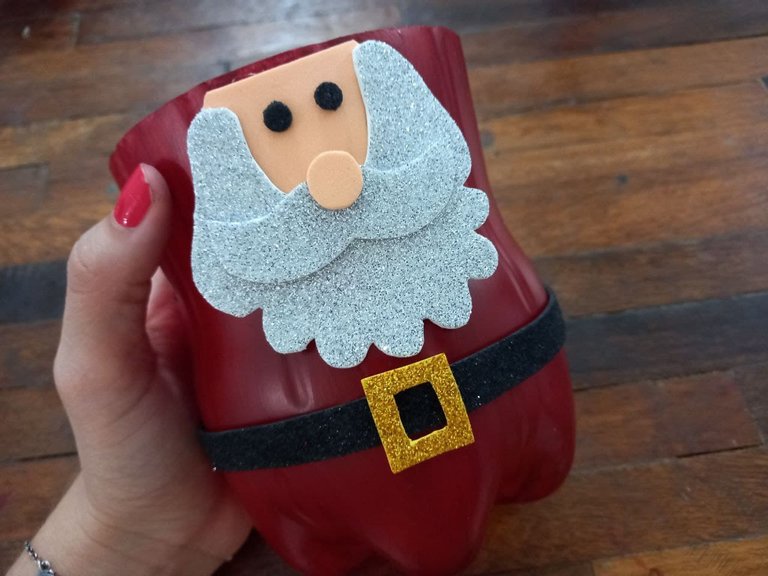
¡Feliz fin de semana para todos! El día de hoy les presento un mi entrada al Creative Recycling Challenge para el cual he preparado un tutorial para hacer un lindo dulcero con forma de Santa Claus utilizando como base una botella plástica de refresco, al tener muchas de estas botellas se me ocurrió utilizar una para esta manualidad y de esta forma reciclarla en lugar de desecharla, así que aquí les dejo mi entrada, espero que les guste.
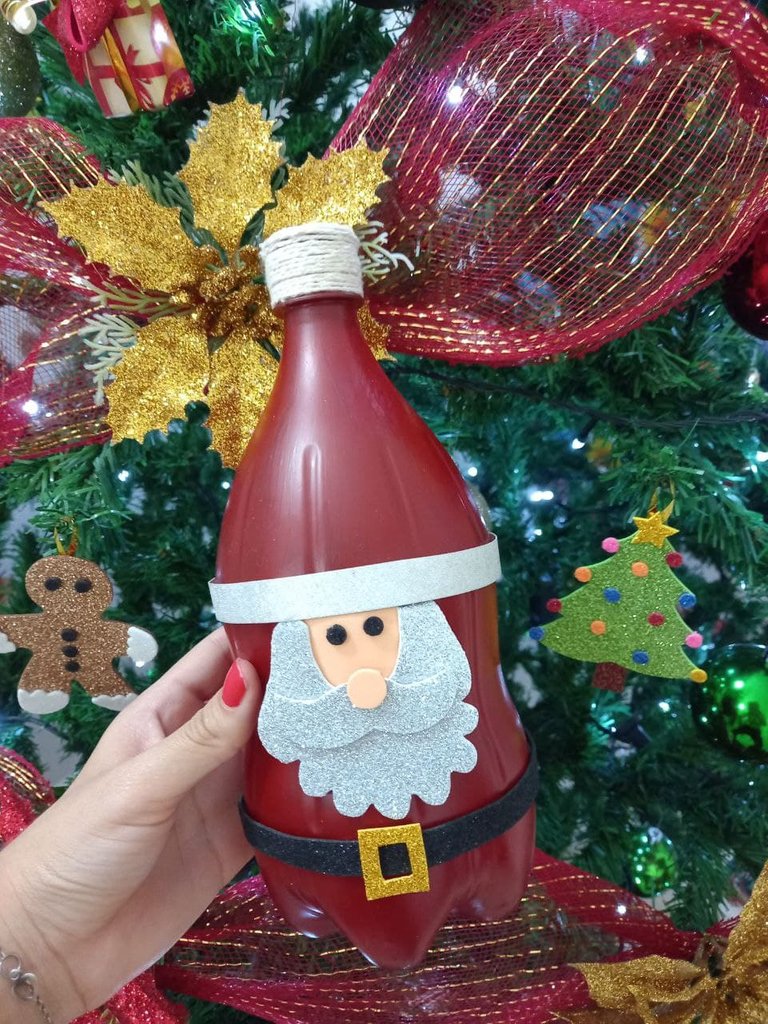
¡Happy weekend to all! Today I present my entry to the Creative Recycling Challenge for which I have prepared a tutorial to make a cute candy box in the shape of Santa Claus using a plastic soda bottle as a base, having many of these bottles it occurred to me to use one for this craft and in this way recycle it instead of discarding it, so here is my entry, I hope you like it.

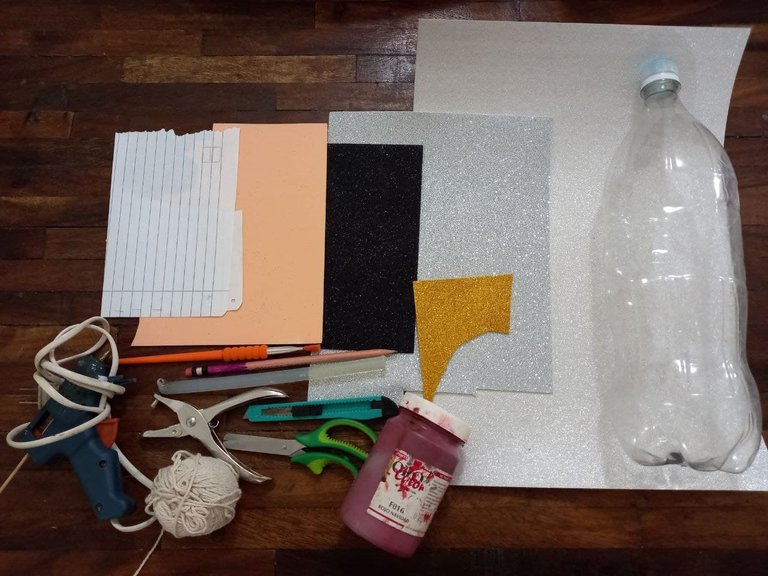
- 1 Botella plástica de refresco.
- Foami color piel.
- Foami escarchado plateado.
- Foami escarchado negro.
- Foami escarchado dorado.
- Cartulina escarchada plateada.
- Cutter.
- Silicón.
- Pistola de silicón.
- Tijera.
- Abrehuecos.
- Pintura o tempera roja.
- Pincel.
- Lápiz.
- Pabilo.
- Hoja de papel.
- 1 Plastic bottle of soda.
- Skin color foam.
- Silver frosted foam.
- Black frosted foam.
- Golden frosted foam.
- Silver frosted cardstock.
- Cutter.
- Silicone.
- Silicone gun.
- Scissor.
- Open holes.
- Red paint or tempera.
- Brush.
- Pencil.
- Wick.
- Paper sheet.

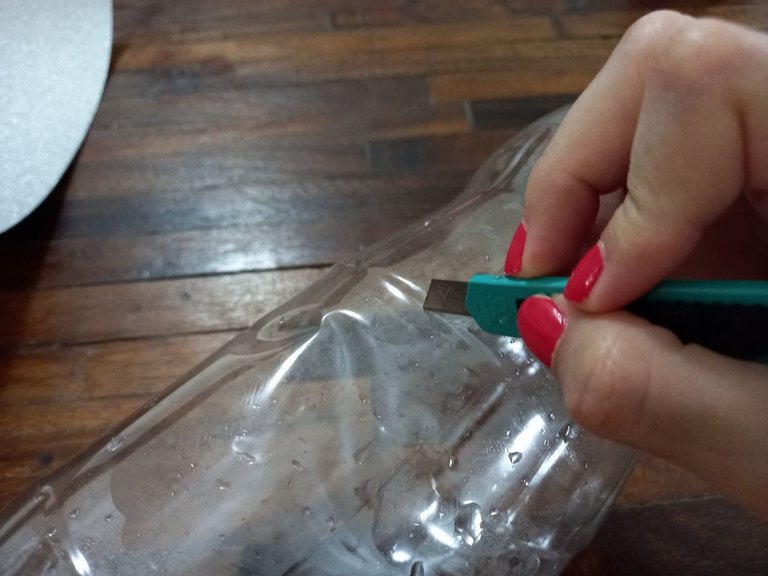
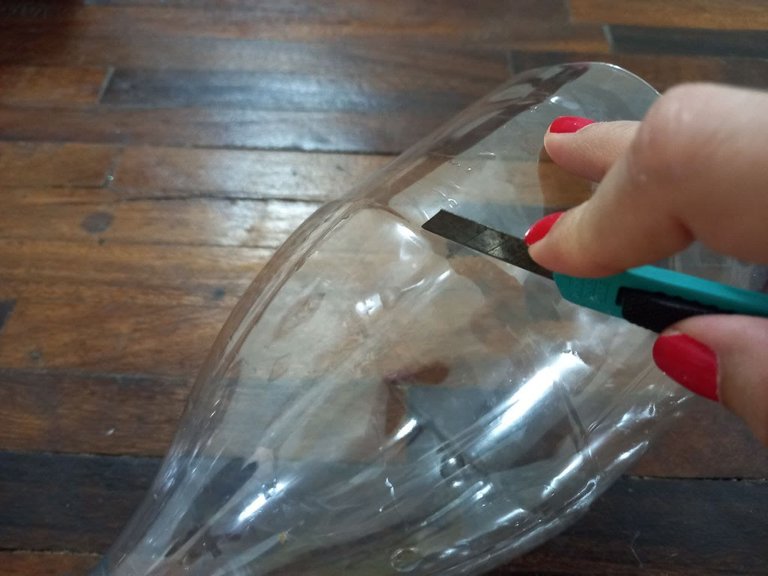
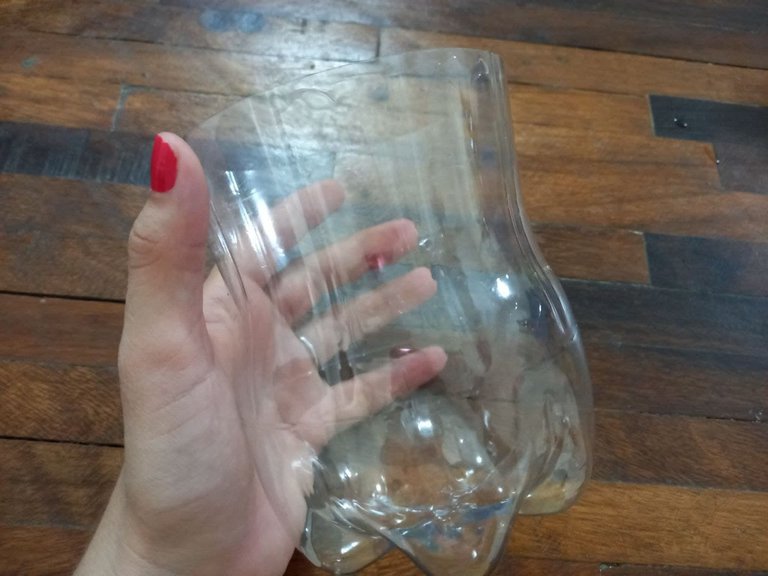
🎄 PASO 1. Iniciamos cortando la botella de refresco con el cutter, cortamos en las 2 líneas que tiene hasta separar en 2 piezas, vamos a necesitar solo 2, la de arriba que es la que tiene la tapa y la de abajo y vamos a desechar la parte del centro, luego con la tijera recortamos las orillas hasta quedar completamente derecho.
🎄 STEP 1. We start by cutting the soda bottle with the cutter, we cut in the 2 lines that it has to separate into 2 pieces, we will need only 2, the one above which is the one with the lid and the one with down and we are going to discard the part of the center, then with the scissors we cut the edges until it is completely straight.


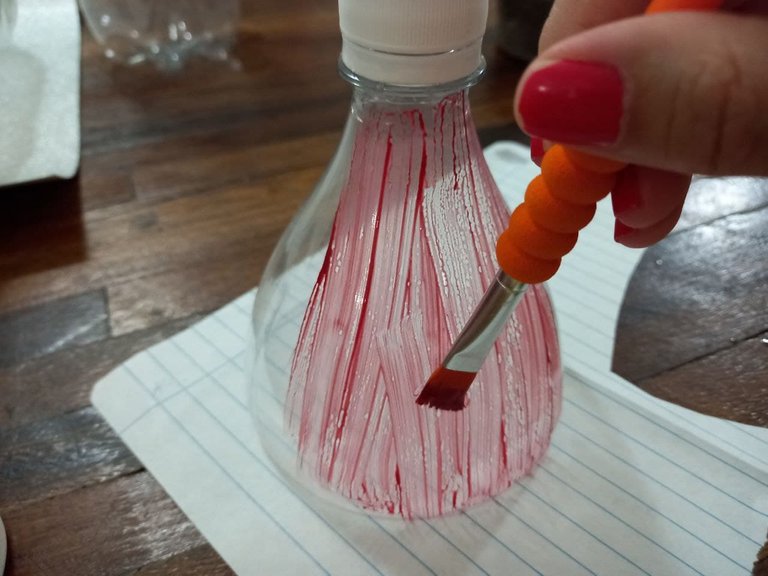
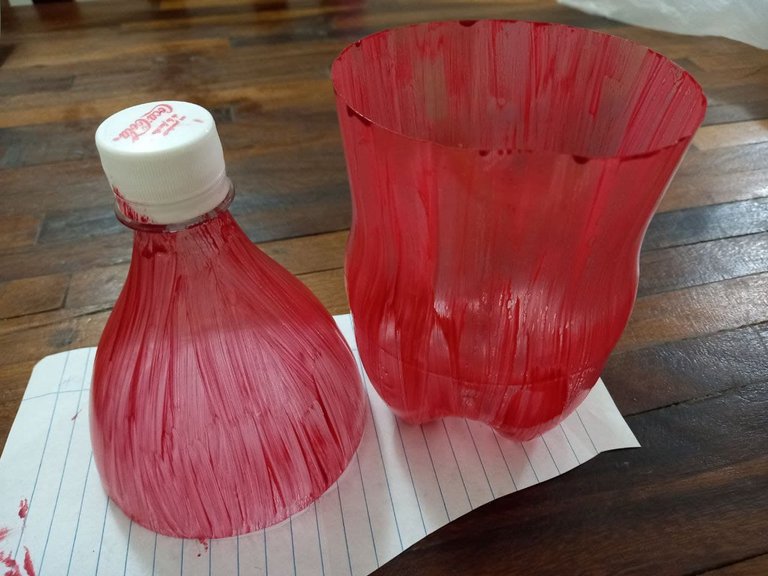
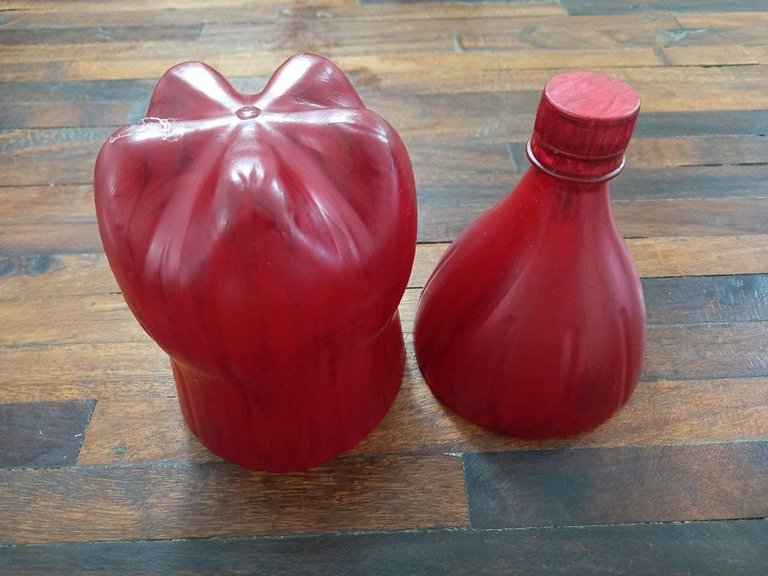
🎄 PASO 2. Una vez que tengamos las piezas a utilizar de la botella plástica es momento de comenzar a pintarlas, colocamos las piezas sobre una hoja de papel y pintamos con ayuda del pincel, al tratarse de una botella plástica esta suele ser muy lisa ocasionando que la pintura sea difícil de adherir, pero podemos evitar esto pasado una lija fina a la botella ya que formará una superficie un poco rugosa que hará más fácil que la pintura pueda cubrir el plástico, al momento de hacer este pequeño trabajo no tenía lija pero les dejo ese tip para cuando quieran trabajar con este material. Debemos pasar varias manos de pintura hasta lograr cubrir las piezas por completo pero debemos dejar secar muy bien cada pasada antes de continuar o de lo contrario se caerá a pintura, una vez que logremos cubrir las piezas de plástico por completo con pintura podemos seguir con la elaboración del dulcero.
🎄 STEP 2. Once we have the pieces to use from the plastic bottle it is time to start painting them, we place the pieces on a sheet of paper and paint with the help of the brush, as it is a plastic bottle this usually be very smooth causing the paint to be difficult to adhere, but we can avoid this by applying a fine sandpaper to the bottle as it will form a slightly rough surface that will make it easier for the paint to cover the plastic, when doing this small job I did not have sandpaper but I leave that tip for when you want to work with this material. We must pass several coats of paint until we cover the pieces completely but we must let each pass dry very well before continuing or else it will fall to paint, once we manage to cover the plastic pieces completely with paint we can continue with the elaboration of the confectionery.
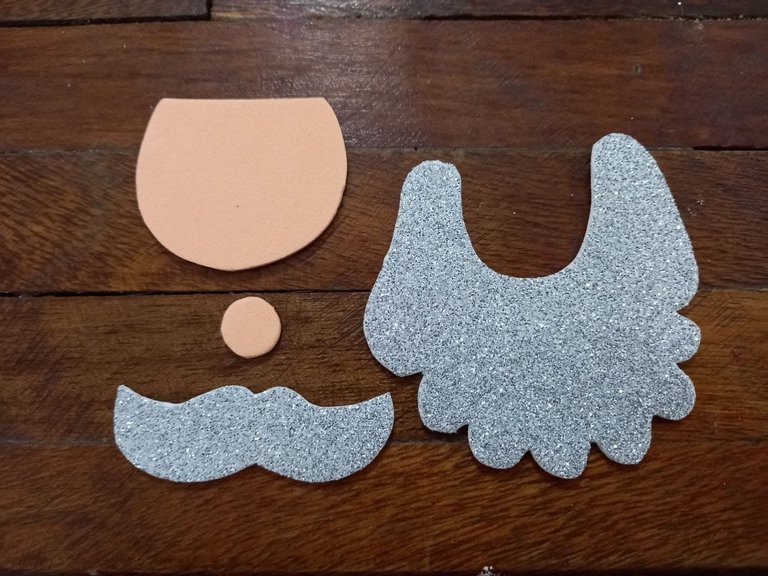
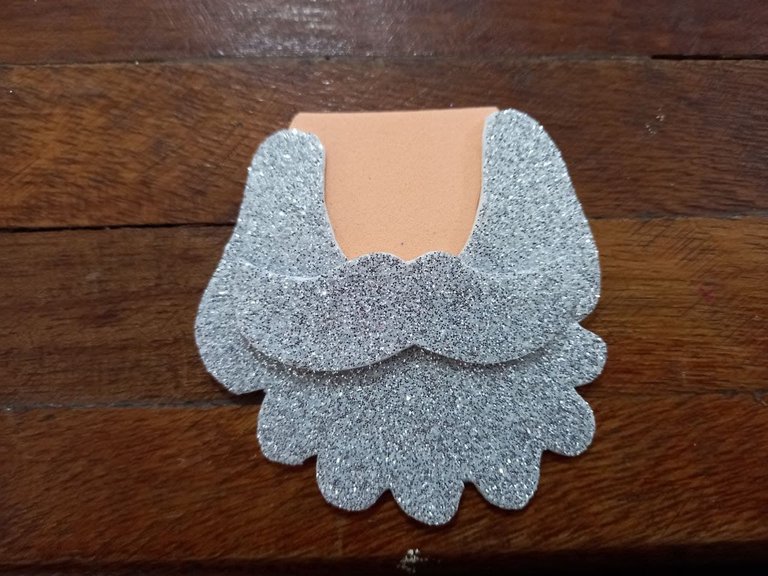
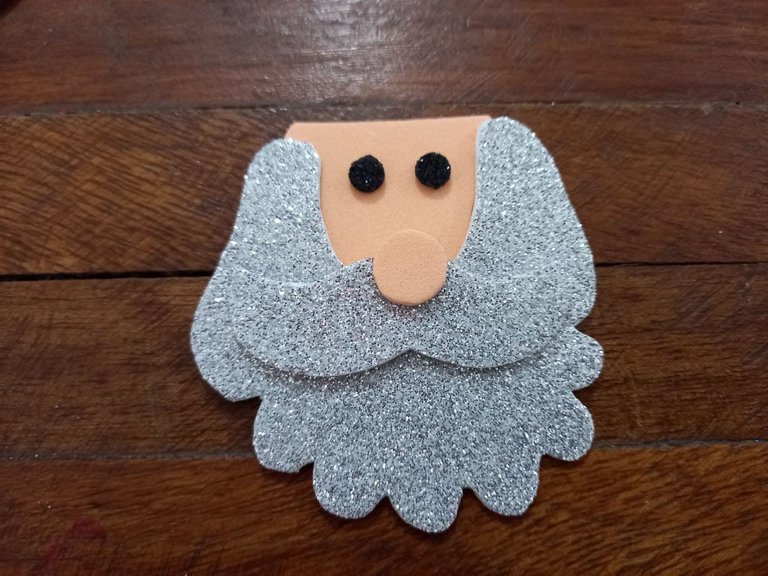
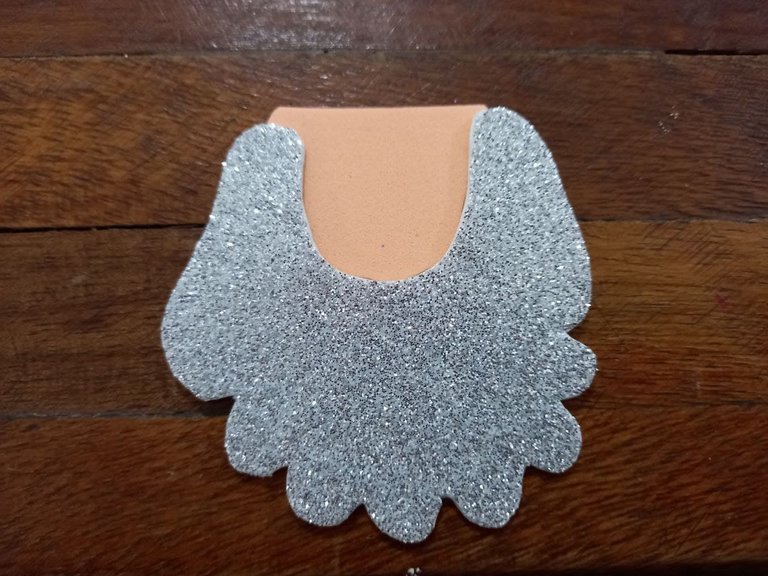
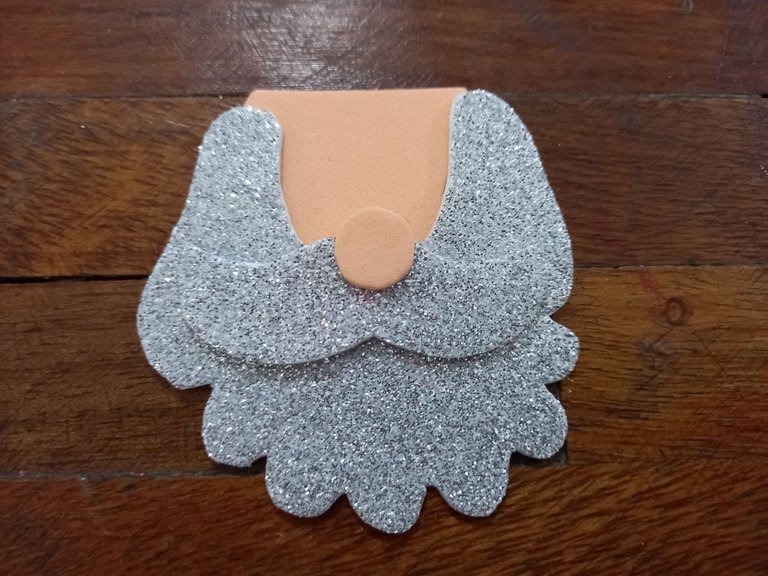
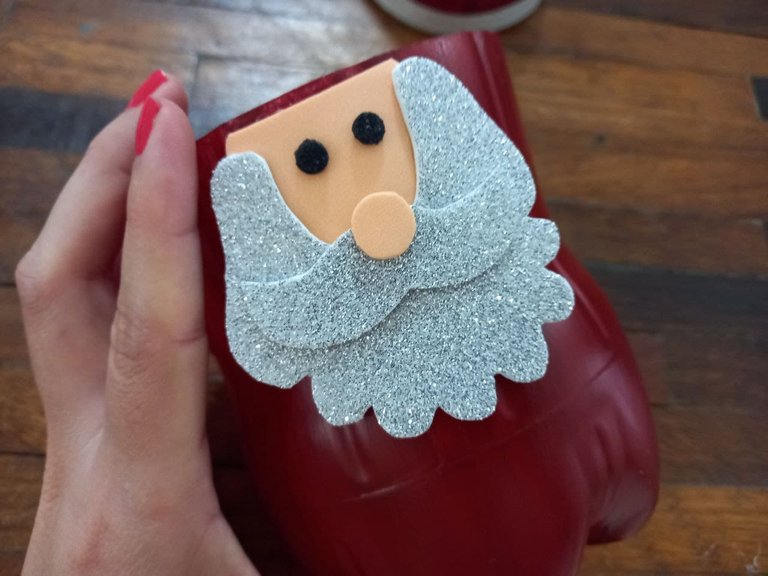
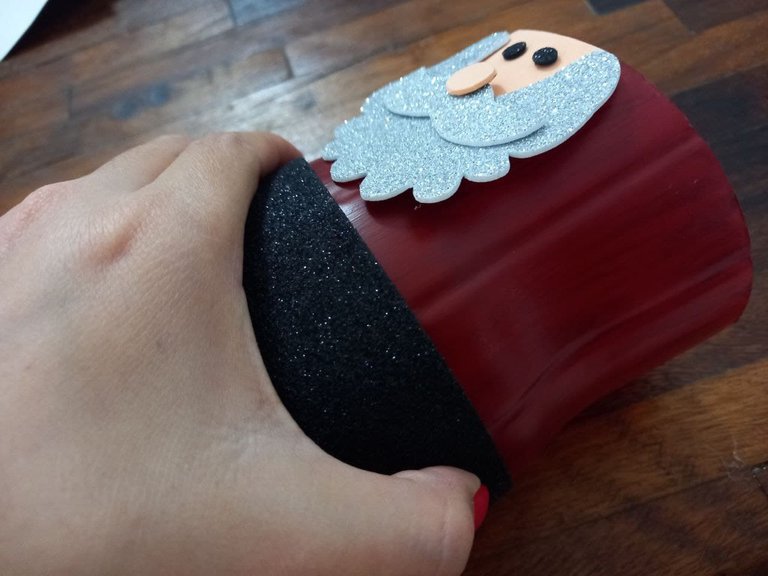
🎄 PASO 3. En el foami escarchado plateado vamos a hacer una barba y un bigote y en el foami color piel haremos la cabeza y la nariz, cabe destacar que deben tener los tamaños adecuados para poder pegar sobre la pieza de debajo de la botella plástica, la cual será el cuerpo de nuestro Santa Claus, la barba no debe tocar la línea que tiene esta parte de la botella casi al final, luego armamos al Santa, a la cabeza le cortamos una de las orillas para que quede recta, esa será la parte superior, luego pegamos la barba sobre la cabeza, el bigote sobre la barba y la nariz sobre el bigote, para finalizar hacemos los ojos con foami negro escarchado con ayuda del abrehuecos y los pegamos, una vez que tengamos todo el rostro de Santa armado lo pegamos sobre la pieza de debajo de la botella de refresco, en la orilla superior dejando un pequeño espacio.
🎄 STEP 3. In the silver frosted foami we are going to make a beard and a mustache and in the skin color foami we will make the head and the nose, it should be noted that they must have the appropriate sizes to be able to glue on the piece below of the plastic bottle, which will be the body of our Santa Claus, the beard must not touch the line that this part of the bottle has almost at the end, then we assemble the Santa, at the head we cut one of the edges so that it remains straight, that will be the upper part, then we glue the beard on the head, the mustache on the beard and the nose on the mustache, finally we make the eyes with frosted black foami with the help of the hole opener and glue them, once we have everything We stick the face of Santa armed on the piece below the soda bottle, on the upper edge leaving a small space.
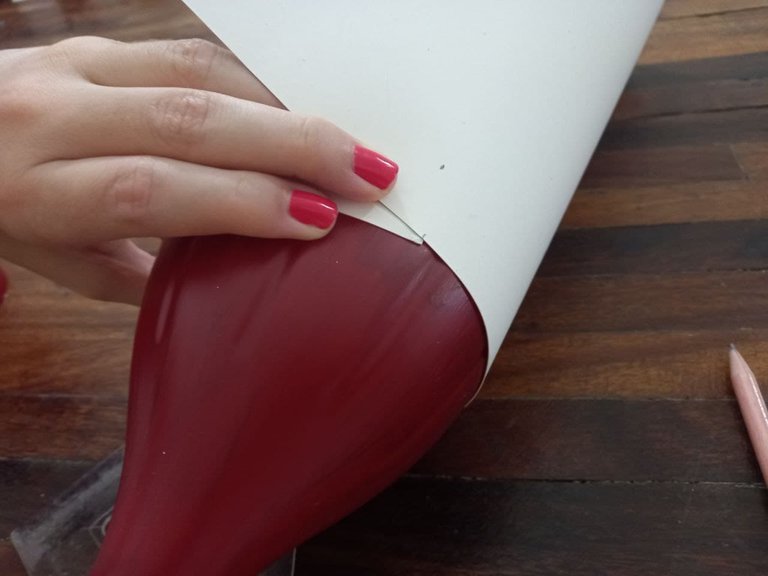
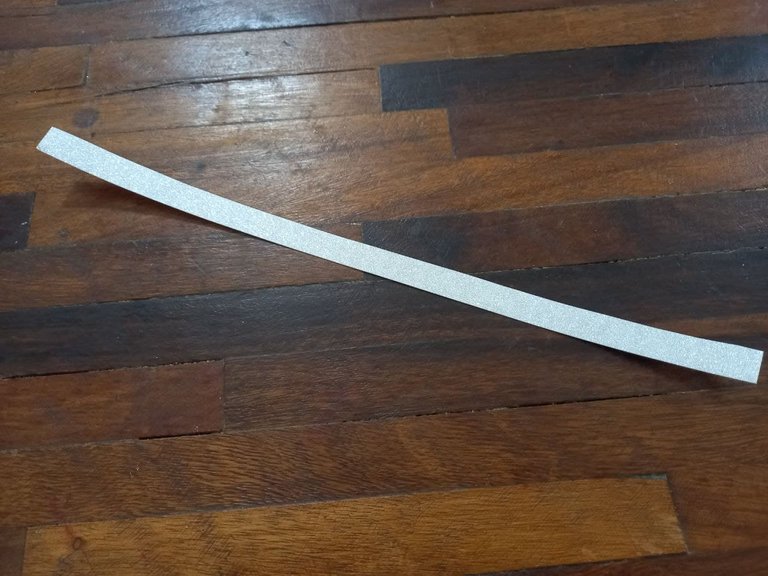
🎄 PASO 4. Medimos con la cartulina escarchada plateada la orilla de la pieza de arriba de la botella plástica y cortamos una tira delgada de la cartulina y la pegamos el toda la orilla de la pieza de plástico, este será el gorro de Santa.
🎄 STEP 4. With the silver frosted cardboard we measure the edge of the top piece of the plastic bottle and cut a thin strip of the cardboard and stick it on the entire edge of the plastic piece, this will be the cap Santa.

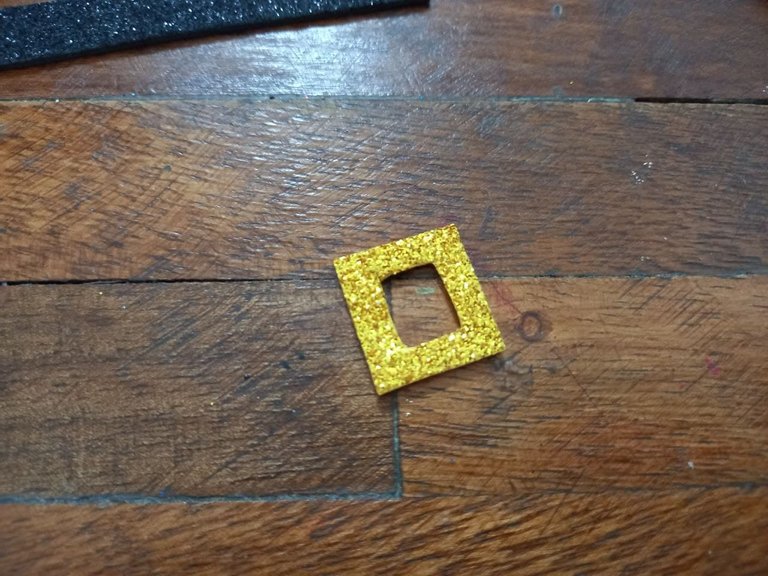
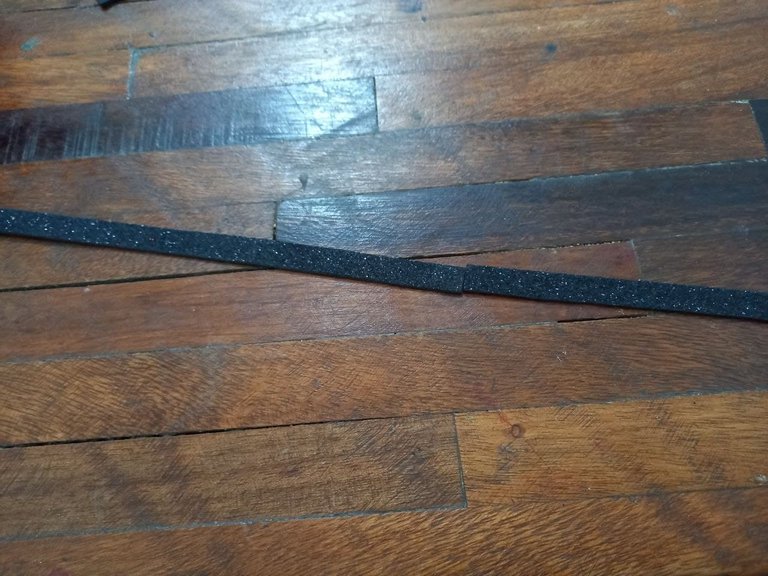
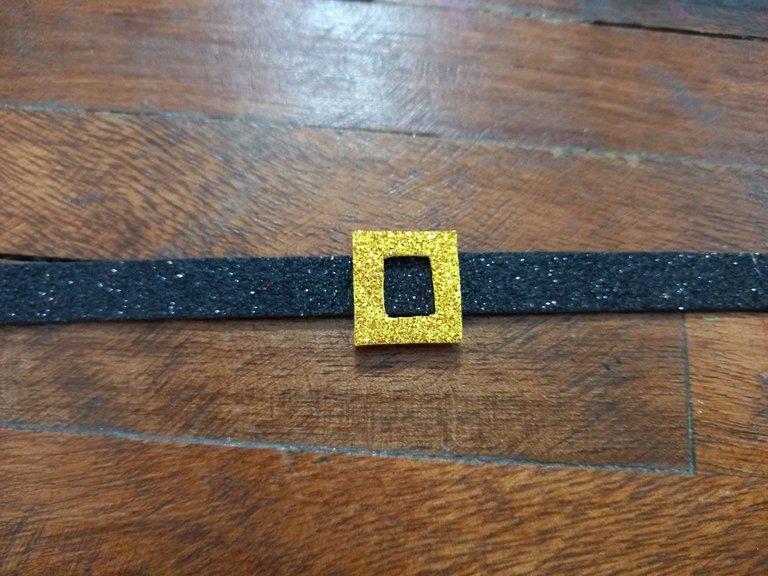
🎄 PASO 5. Medimos la línea de la botella debajo de la barba de Santa y recortamos una tira delgada de foami escarchado negro de esa medida, ese será el cinturón, luego hacemos un cuadro pequeño con centro hueco en foami escarchado dorado que será la hebilla del cinturón, pegamos la hebilla en el centro del cinturón y pegamos el cinturón sobre la línea debjo de la barba de Santa.
🎄 STEP 5. We measure the line of the bottle under Santa's beard and cut a thin strip of black frosty foami of that measure, that will be the belt, then we make a small square with a hollow center in golden frosty foami which will be the belt buckle, we glue the buckle in the center of the belt and glue the belt on the bottom line of Santa's beard.
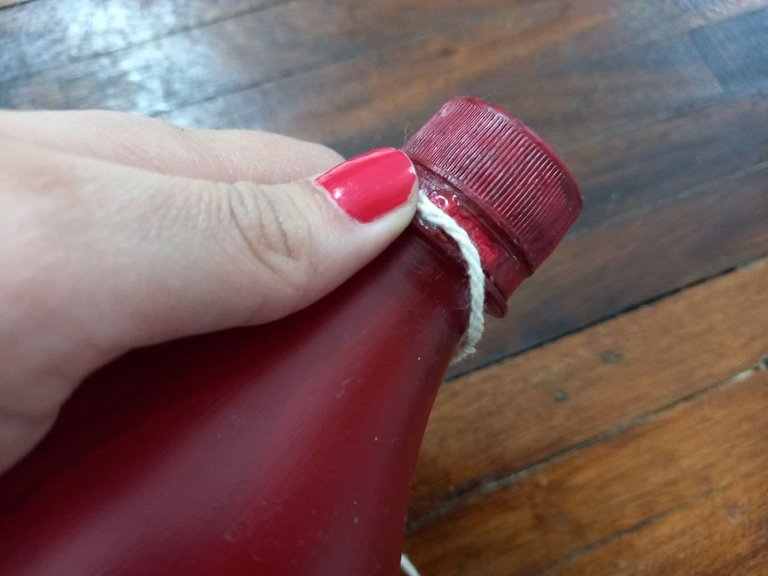
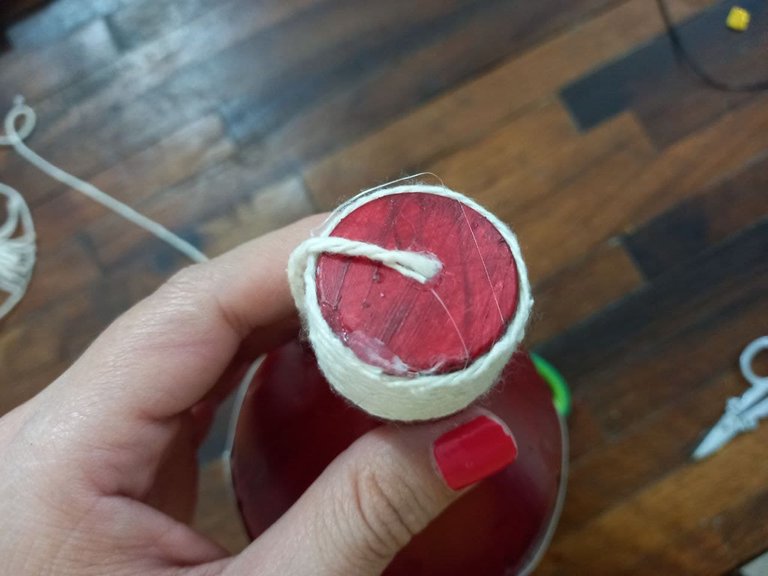
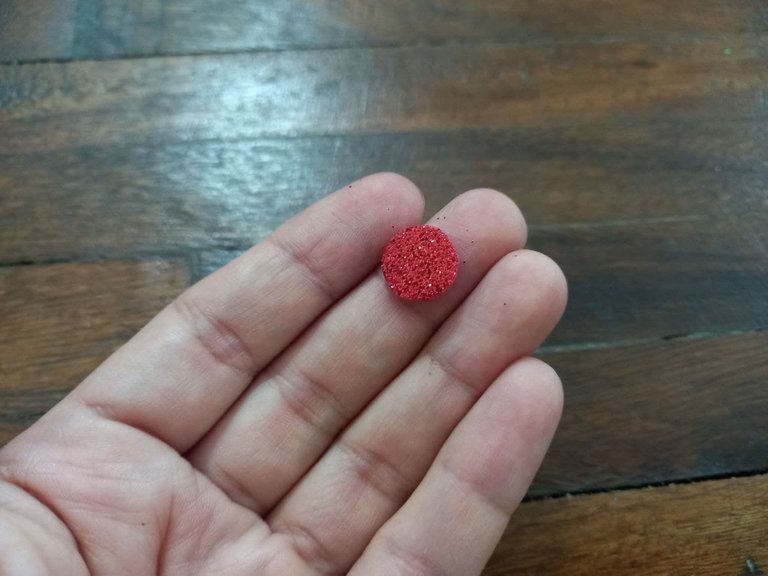
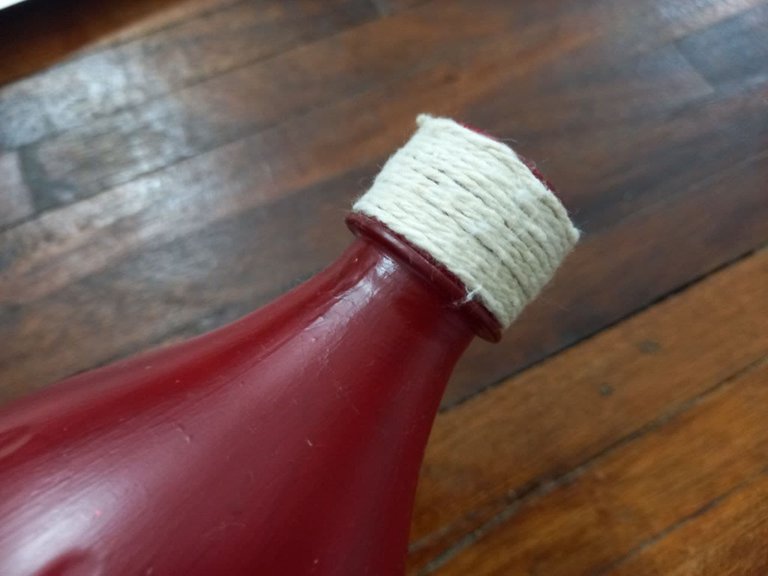
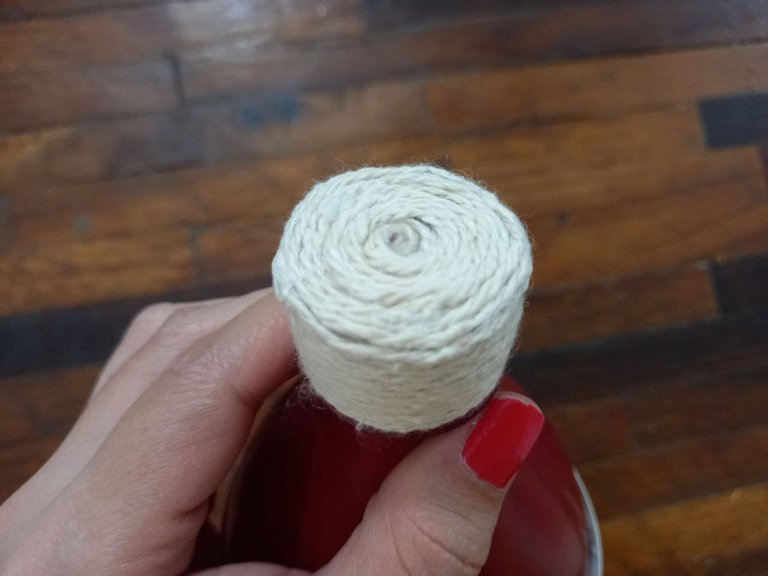
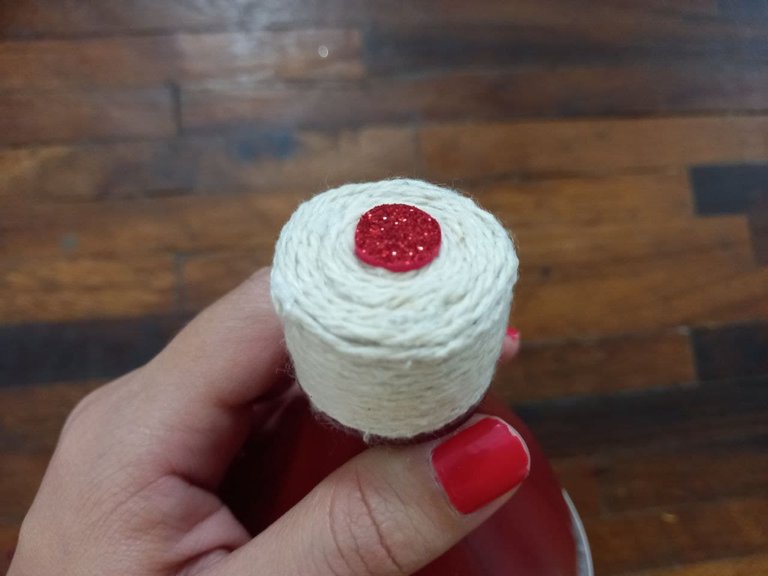
🎄 PASO 6. Aplicamos silicón en la tapa de la botella y enrollamos el pabilo hasta cubrir toda la tapa, luego aplicamos silicón en la parte superior de la tapa y pegamos el pabilo en forma de espiral hasta cubrir por completo, por último, recortamos un pequeño círculo de foami del color de nuestra preferencia y lo pegamos en el centro de la parte superior de la tapa de la botella el cual será como el pompón del gorro de Santa.
🎄 STEP 6. We apply silicone to the bottle cap and roll the wick to cover the entire cap, then we apply silicone to the top of the cap and glue the wick in a spiral shape until it is completely covered, for Finally, we cut out a small circle of foam in the color of our preference and glue it in the center of the upper part of the bottle cap, which will be like the pompom of Santa's hat.
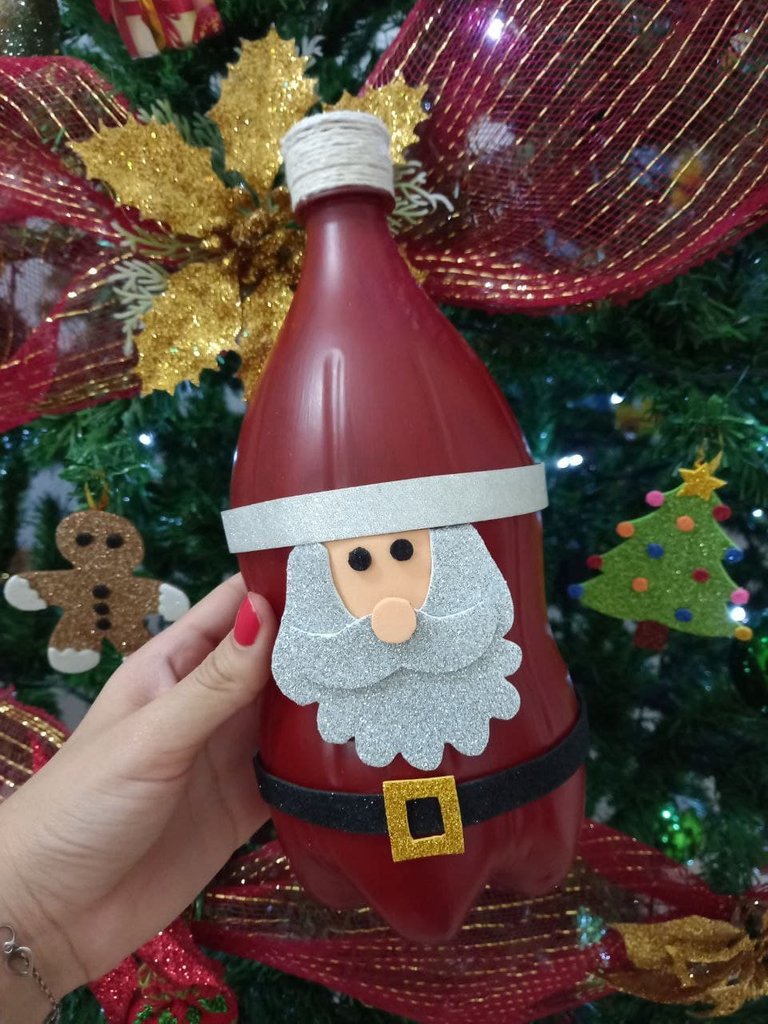
¡Y listo! De esta forma tenemos un lindo dulcero de Santa Claus reciclando una botella plástica de refresco, es una linda forma de darle un buen uso y una nueva vida a este objeto que solemos desechar, a la vez es un lindo regalo y muy original para obsequiar a un niño, solo resta llenarlo de duces y está listo para regalar. Espero que les haya gustado este tutorial y esta idea para reciclar, hay muchas ideas más para reutilizar botellas de refresco y esta en particular es increíble.
¡And ready! In this way we have a cute candy box of Santa Claus recycling a plastic bottle of soda, it is a nice way to put this object that we usually discard to good use and a new life, at the same time it is a nice and very original gift to give to a child, it only remains to fill it with candy and it is ready to give as a gift. I hope you liked this tutorial and this idea to recycle, there are many more ideas to reuse soda bottles and this one in particular is amazing.


Todas las fotografías son de mi propiedad.
Fotografías capturadas con mi Samsung Galaxy A12
Separador de texto elaborado en Canva.
Nos vemos en mi próxima publicación.
¡Tengan un feliz día!
All photographs are my property.
Photos captured with my Samsung Galaxy A12
Text separator made in Canva.
See you in my next post.
¡Have a happy day!
The rewards earned on this comment will go directly to the person sharing the post on Twitter as long as they are registered with @poshtoken. Sign up at https://hiveposh.com.
Maravillosa idea @mariajcastro28, me encanto el resultado final ¡Éxitos! 👍
Hola muchas gracias 😘 me alegra mucho que te gustara. Gracias por tu comentario, un abrazo!
Quedó bellísimo 😍❤️
Muchas gracias amiga 😍
Esta creación podría ser un dulcero perfecto para navidad, se nota que dedicaste tiempo en hacer que la pintura cubriera bien la botella, el acabado quedó espectacular, gracias por formar parte de esta edición navideña.
Pd: Te faltó colocar el link de tu participación en los comentarios del concurso.
Muchas gracias amiga, que bueno que te gustó mi entrada, y pues si, me tomó tiempo dejar que la pintura secar bien hasta cubrir por completo todo el plástico, pero valió la pena, quedé enamorada del resultado. Gracias por recordarme lo de colocar el link en el post original, ya lo acabo de hacer. Saludos y un abrazo! ♥️