
¡Feliz día Amigos Artesanos!
Espero tengan un día lleno de mucha esperanza y optimismo y que la pasen super bien al lado de sus familiares y amigos. Saludo muy especial a todos los amigos y compañeros de la grandiosa comunidad de Hive Diy, deseándoles a todos buena vibra y energía positiva para todos.
Como siempre poniendo cada día un granito de arena a esta hermosa comunidad de Hive Diy , en estos momentos no lo puedo hacer todos los días por asuntos de salud, pero me encantaría hacerlo, pero bueno poco a poco, pero todos los días veo lo que publican mis amigos Artesanos.
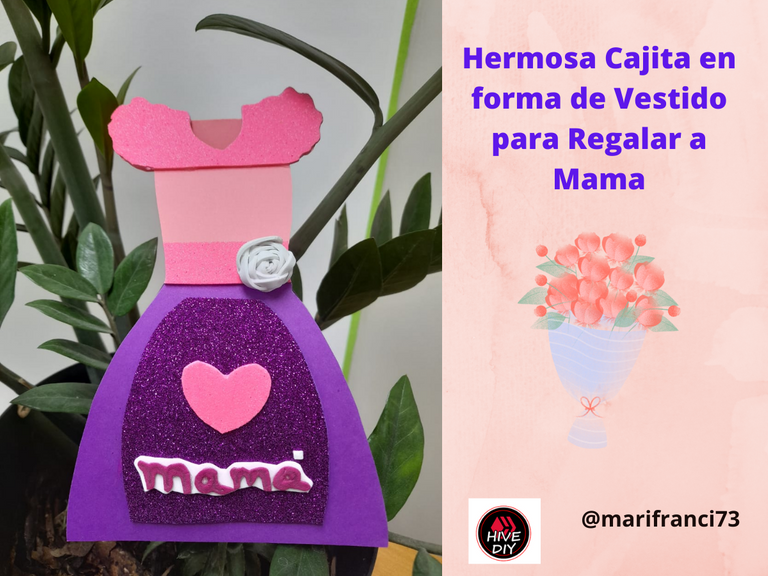
En el día de hoy elabore una Linda Cajita para regalar en el día de las madres ya que falta muy poco para este día tan especial, aquí en Venezuela se celebra el segundo Domingo de Mayo. Y para este fin quise realizar un hermoso vestido para mama, elaborado con material de reciclaje y retazos que me han quedado de manualidades anteriores. Esta Hermosa cajita nos sirve para regalar, chocolates, un perfume, caramelos, accesorios en mi caso la utilizare especialmente para regalar unas lindas pinturas para las uñas.
Espero se animen a realizarla es fácil y rápida de utilizar y lo mejor es que las puedes personalizar y colocarles los motivos que desees. Aquí te enseñare en unos minutos el paso a paso de como la realice. Manitas a la Obra. Comencemos amigos.

Happy day Artisan Friends!
I hope you have a day full of hope and optimism and that you have a great time with your family and friends. A very special greeting to all the friends and colleagues of the great Hive Diy community, wishing everyone good vibes and positive energy for everyone.
As always contributing a grain of sand to this beautiful Hive Diy community every day, right now I can't do it every day for health reasons, but I would love to do it, but well little by little, but every day I see what My Artisan friends publish.
Today I made a cute box to give away on mother's day since there is very little left for this special day, here in Venezuela the second Sunday of May is celebrated. And for this purpose I wanted to make a beautiful dress for mom, made with recycling material and scraps that I have left from previous crafts. This beautiful little box is used to give away chocolates, a perfume, candies, accessories. In my case, I will use it especially to give away some pretty nail paints.
I hope you are encouraged to do it, it is easy and quick to use and the best thing is that you can customize them and put the reasons you want. Here I will show you in a few minutes the step by step of how to do it. Handyman at Work. Let's start friends..
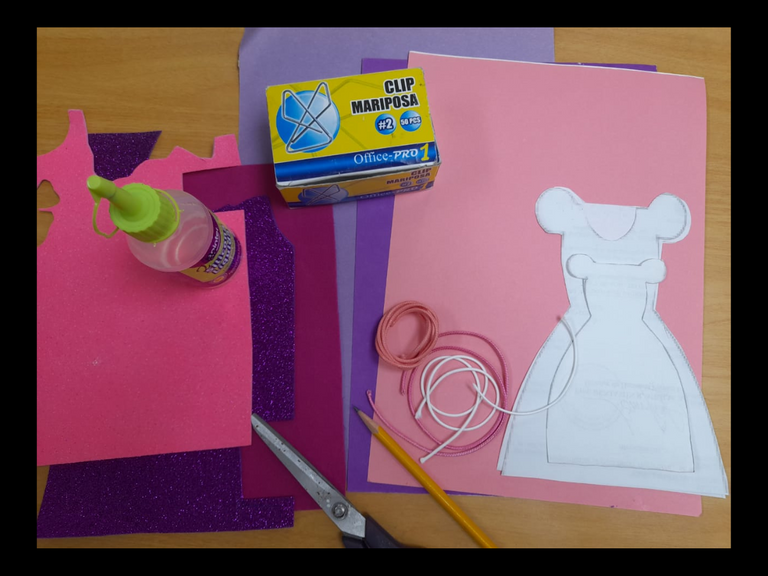
Los Materiales que vamos a utilizar son los siguientes;
Cartulina (rosada y morada)
Foami escarchado morado y rosado
Foami Blanco
Papel de Construccion morado
1 Caja de Clic en desuso
Molde de vestido
ESmaltes de uñas
Silicon
Tijera
The Materials that we are going to use are the following;
Cardstock (pink and purple)
Frosted purple and pink foami
White foam
purple construction paper
1 deprecated Click Box
Nail polish
dress mold
Silicon
Scissor
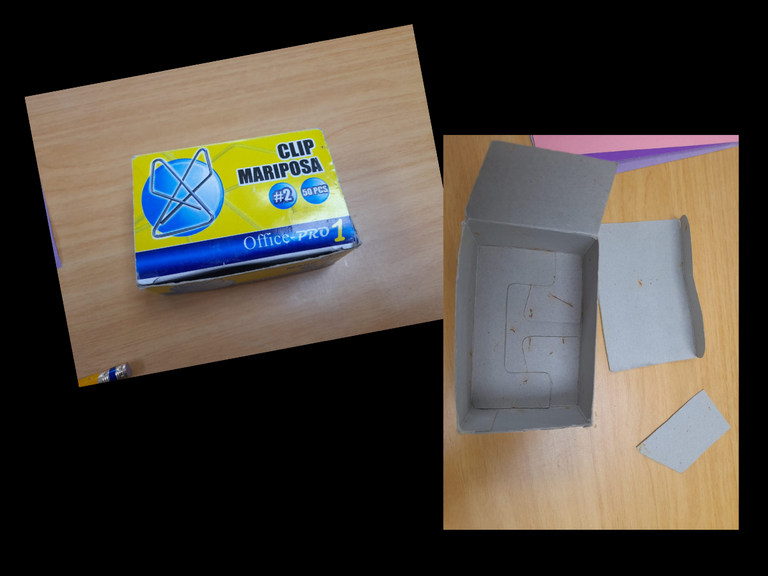
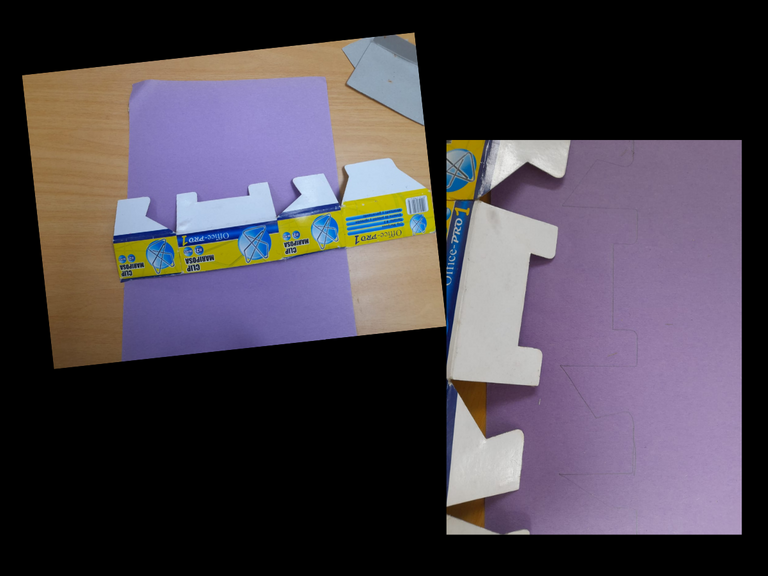
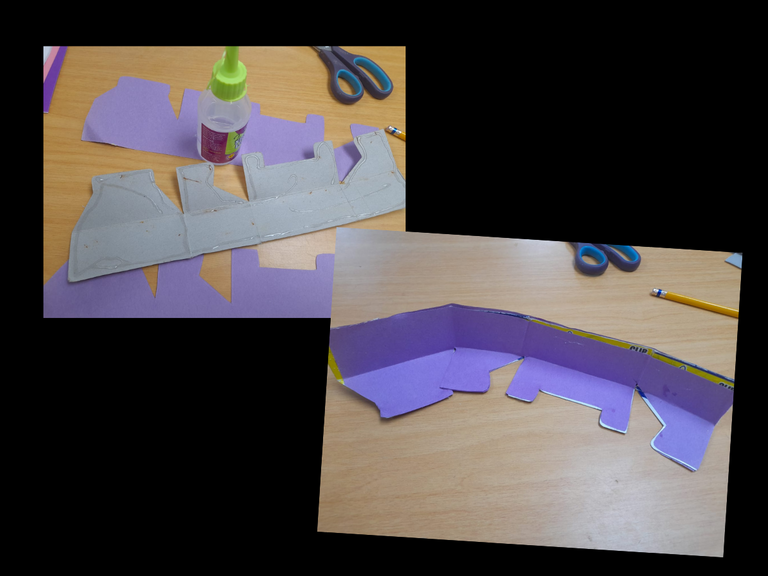
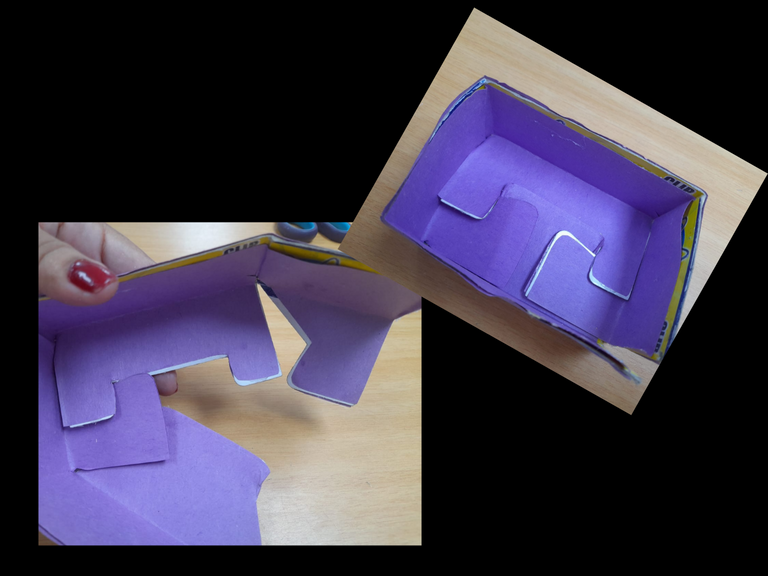
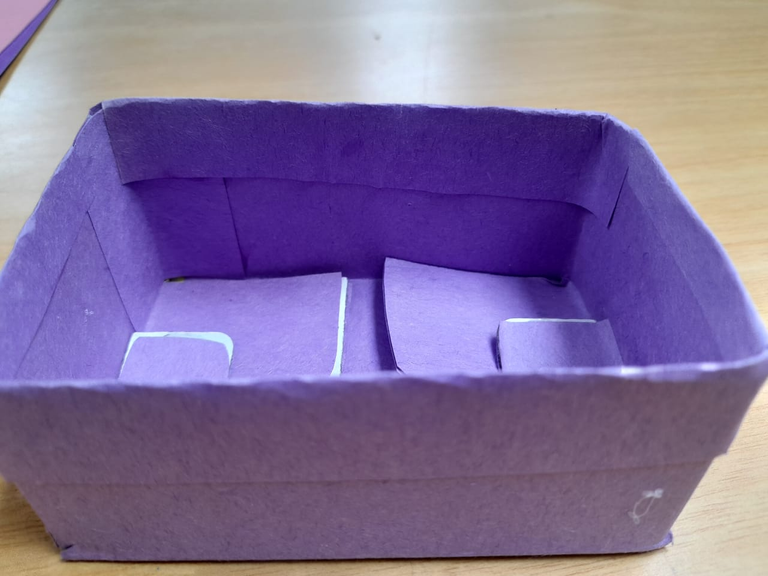
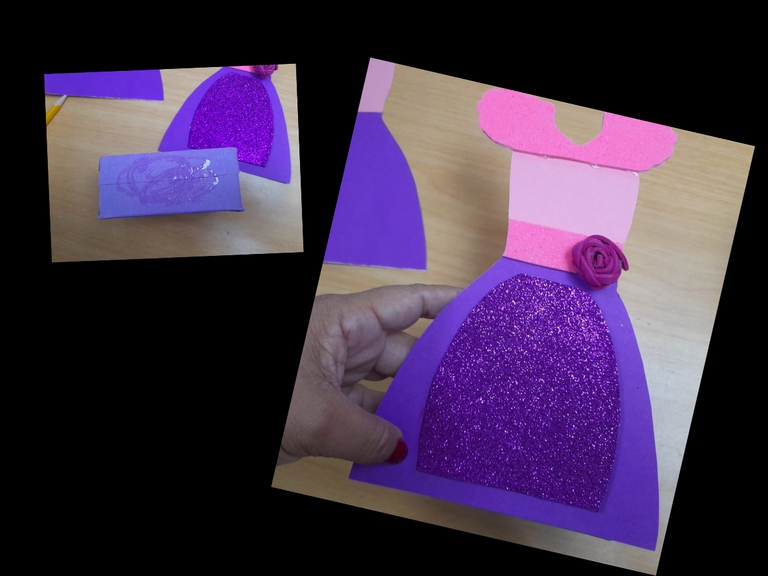
Paso Nº 01 En primer lugar desarmamos la caja de clic, encima del papel de construcción dibujamos toda la caja desarmada, doblamos el papel para sacar el molde, recortamos y pegamos por ambos lados y volvemos armar la caja de clic nuevamente, luego por las orillas y las esquinas pegamos papel de construcción para forrar la caja por completo, como se puede observar en las imágenes.
Step Nº 01 First of all, we disassemble the click box, on top of the construction paper we draw the entire disassembled box, fold the paper to remove the mold, cut and paste on both sides and reassemble the click box again, then along the edges and the corners we glue construction paper to cover the box completely, as can be seen in the images

Paso Nº 02.Para elaborar nuestro vestido, colocamos el molde o figura en la cartulina morada doblada en dos partes y dibujamos la parte de la falda, luego con una figura mas pequeña del vestido dibujamos y recortamos en el foami morado escarchado una falda mas pequeña.
Step No. 02. To make our dress, we place the mold or figure on the purple cardboard folded in two parts and draw the skirt part, then with a smaller figure of the dress we draw and cut out a smaller skirt on the frosted purple foami .
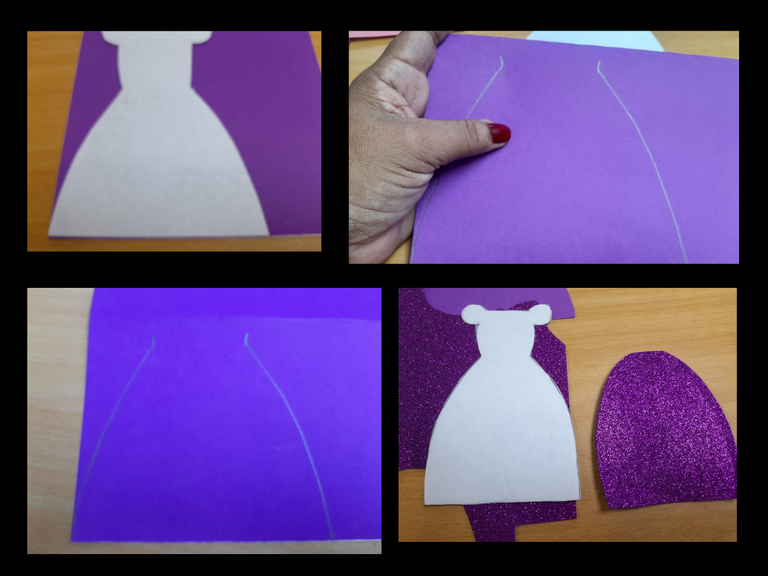
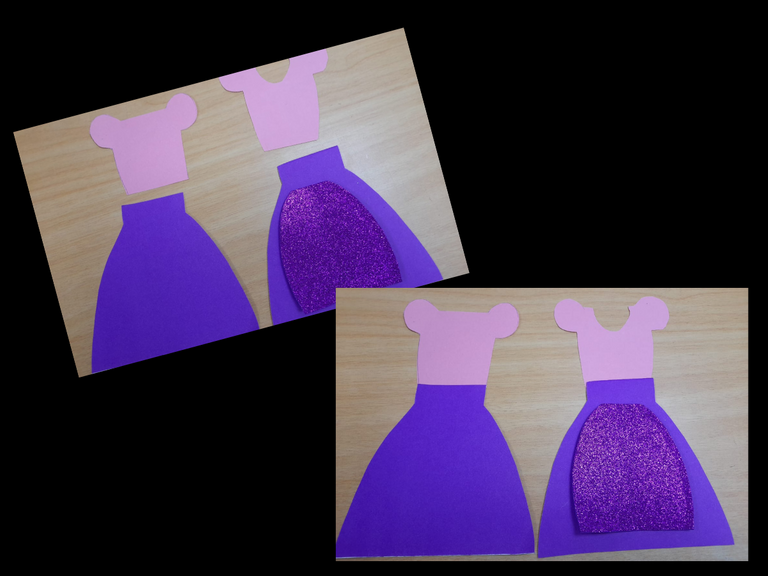
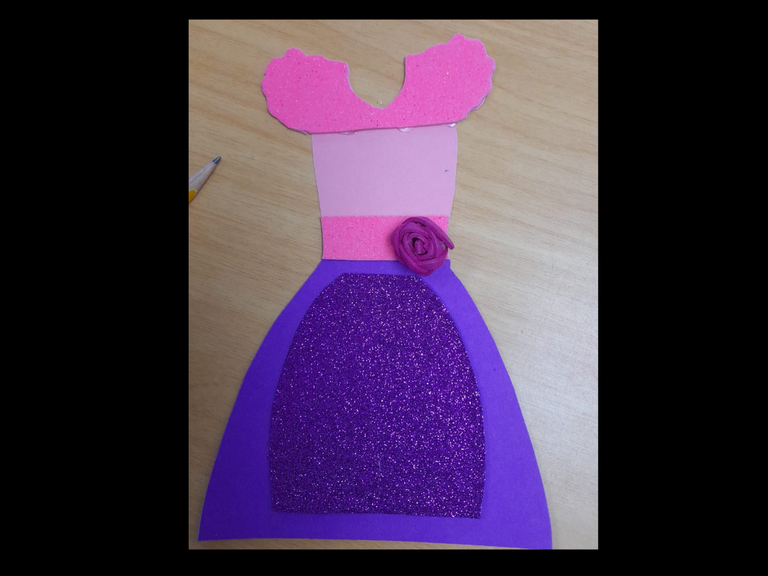
Paso Nº3.- Ahora procedemos a elaborar la parte de arriba del vestido la cual dibujamos y recortamos en la cartulina rosada, en la parte de adelante el cuello lo hacemos en forma de V y la parte de atrás la dejamos completa. Luego pegamos la falda de la parte de arriba y colocamos en la parte del medio un cinturón de foami escarchado rosado y seguidamente pegamos la falda mas pequeña que hicimos de foami escarchado.
Step Nº3.- Now we proceed to make the upper part of the dress which we draw and cut out on the pink cardboard, in the front part we make the neck in a V shape and the back part is left complete. Then we glue the skirt on the top and place a belt of pink frosted foami in the middle part and then we glue the smaller skirt that we made of frosted foami.
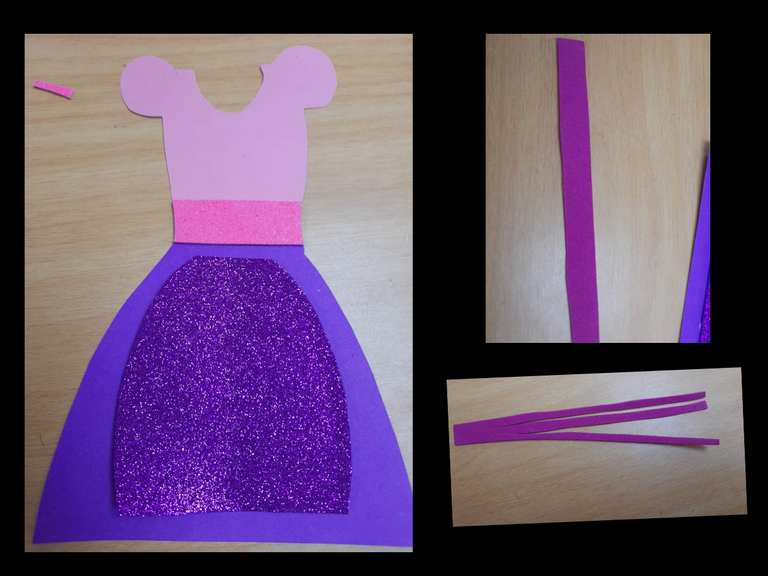
Paso Nº4.- .Para hacer la rosa la rosa que le colacaremos a nuestro vestido recortamos una tira de 1,5 cm de ancho por 15cm de largo, luego cortamos tres tiras a 0,5 cm sin llegar al final dejando 1,5 cm luego tejemos, enrollamos (ver post anteriores de rosas) , pero me sucedió algo no me gusto el color de esa rosa y realice una blanca que resaltaba mas. Luego a la parte de arriba con el molde recorte como un faralado en el foami rosado y se lo coloque al vestido en la parte de arriba.
Step Nº4.- .To make the rose the rose that we will attach to our dress, we cut a strip of 1.5 cm wide by 15 cm long, then we cut three strips at 0.5 cm without reaching the end, leaving 1.5 cm then we weave, we roll (see previous post about roses), but something happened to me, I didn't like the color of that rose and I made a white one that stood out more. Then cut the top part with the mold like a faralado in the pink foami and place it on the top part of the dress.
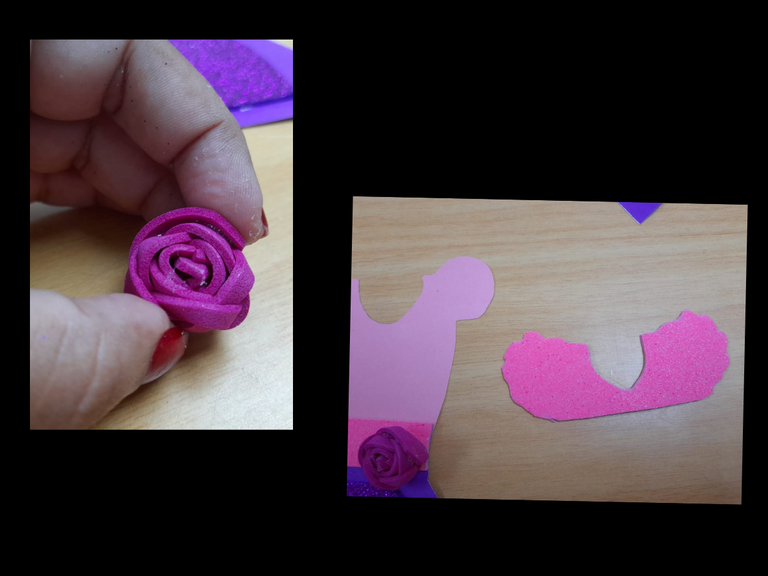
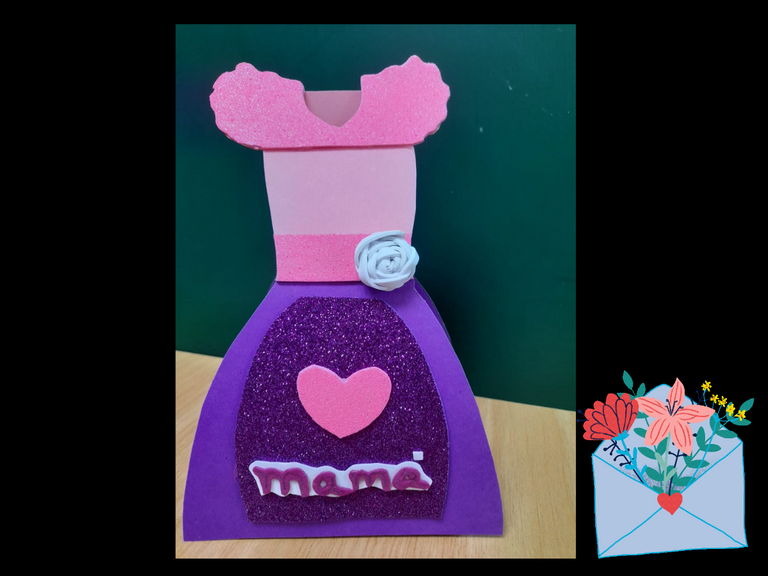
Paso Nº5.- Para finalizar nuestra Hermosa Cajita para las Madres, pegamos a la caja forrada el vestido por ambos lados de la caja, luego pegamos la parte de los hombros, hacemos un corazón que pegaremos el la falda del vestido y la palabra (mama) en foami blanco y fucsia.
Step Nº5.- To finish our Beautiful Box for Mothers, we glue the dress on both sides of the box to the lined box, then we glue the part of the shoulders, we make a heart that we will glue to the skirt of the dress and the word (mama ) in white and fuchsia foami.
center>
Listo mis queridos amigos Artesanos terminado mi nuevo Post del día de hoy, espero les haya gustado. !Hasta la próxima!
Ready my dear friends finished my new Post today, I hope you liked it. !Until next time!
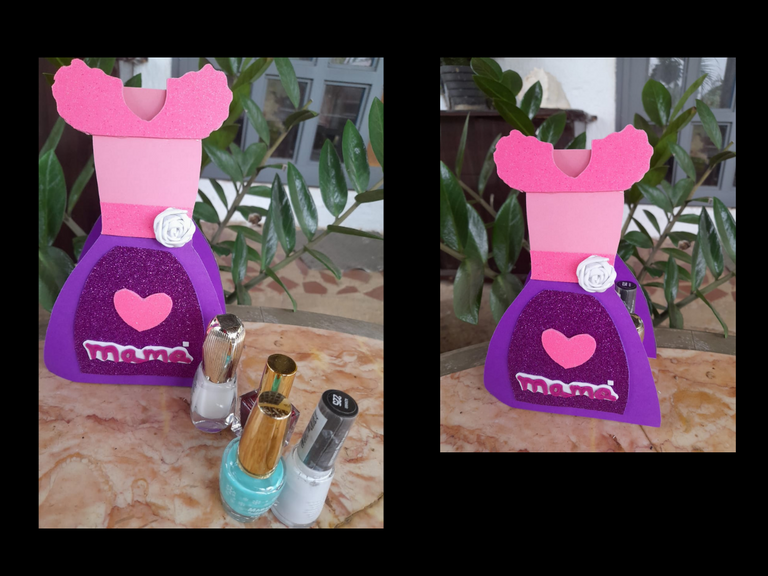
Imagen SeparadorFuente
Las fotografías fueron tomadas con un teléfono inteligente Samsung A12, el texto fue convertido al inglés con el traductor de Google.Fuente
El banner fue diseñado en canvas Fuente
The photographs were taken with a Samsung A12 smartphone, the text was converted to English with Google's translator.Fuente
The banner was designed on canvas Fuente
Thank you for sharing this amazing post on HIVE!
Your content got selected by our fellow curator @rezoanulvibes & you just received a little thank you via an upvote from our non-profit curation initiative!
You will be featured in one of our recurring curation compilations and on our pinterest boards! Both are aiming to offer you a stage to widen your audience within and outside of the DIY scene of hive.
Join the official DIYHub community on HIVE and show us more of your amazing work and feel free to connect with us and other DIYers via our discord server: https://discord.gg/mY5uCfQ !
If you want to support our goal to motivate other DIY/art/music/homesteading/... creators just delegate to us and earn 100% of your curation rewards!
Stay creative & hive on!