Hola amigos
Feliz inicio de semana para todos en especial a mi Linda Colmena de Bricolaje, espero se encuentren bien al lado de sus seres queridos y amigos, llenos de salud y mucha creatividad para comenzar el día, ya casi terminando este mes de marzo y próximo el mes de las flores, mi mes favorito ( Abril ) es mas bellos jejejejejjej, porque es el mes donde cumplo años,
Hi friends
Happy start to the week for everyone, especially my Linda DIY Beehive, I hope you are well next to your loved ones and friends, full of health and a lot of creativity to start the day, almost ending this month of March and next month. Of the flowers, my favorite month (April) is more beautiful hehehehehehe, because it is the month where I have my birthday,
La realización de este Post fue elaborado con material de reciclaje el (El Cartón) como material principal. Una vez mas contribuyendo con el reciclaje aunque existen muchas personas que no se dan cuenta cuando desechan estos tipos de materiales y son desechados de manera irracional dañando el ambiente.
The realization of this Post was made with recycling material (El Cartón) as the main material. Once again contributing to recycling, although there are many people who do not realize when they dispose of these types of materials and are disposed of irrationally, damaging the environment.
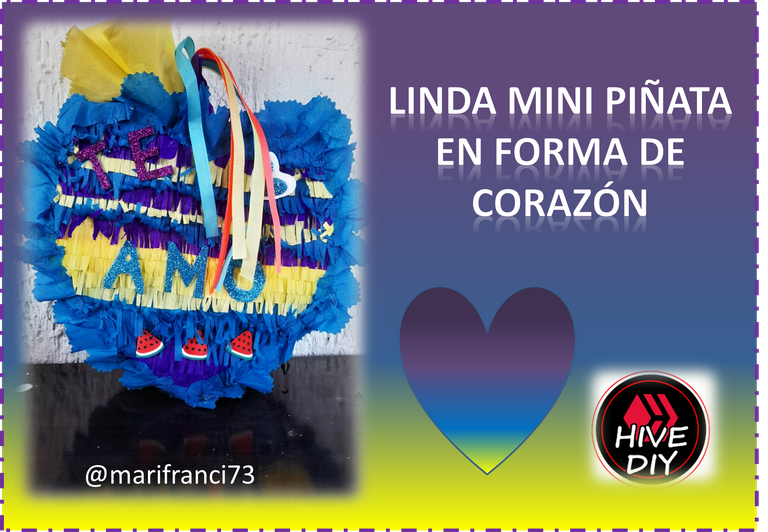
Este Post que realice de una Linda Mini Piñata en forma de Corazón es ideal para regalar en cumpleaños y la puedes llenas de muchas sorpresas, así te ahorraras comprar una bolsa de regalo que actualmente están un poco caras y con esta idea puedes diseñarla a tu preferencia y la puedes personalizar, Así como también la puedes utilizar para los cumple mes de los niños que en estos tiempos se celebran antes de que el niño o niña cumpla su primer añito.
This Post that I made of a Cute Heart-shaped Mini Piñata is ideal for a birthday gift and you can fill it with many surprises, so you will save yourself buying a gift bag that is currently a bit expensive and with this idea you can design it to your preference and you can customize it, as well as you can use it for children's birthdays that are celebrated in these times before the boy or girl turns their first year.
Les enseñare el paso a paso de como realice esta Linda Mini Piñata en forma de Corazón, ya verán que es muy fácil y económica de realizar solo deja volar tu imaginación y puedes combinar el color de tu preferencia. Manitas a trabajar. Comencemos amigos.
I will show you the step by step of how to make this Cute Mini Piñata in the shape of a Heart, you will see that it is very easy and cheap to make, just let your imagination run wild and you can combine the color of your choice. Handyman to work. Let's start friends..

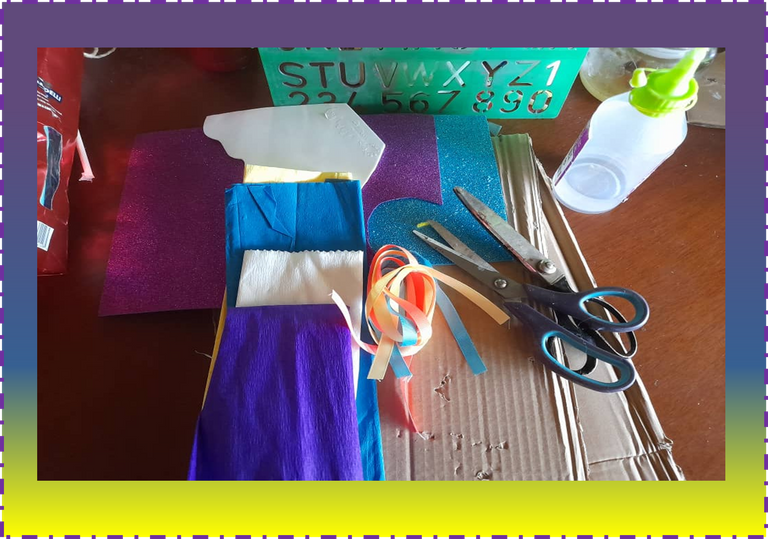
Aquí les dejo los materiales que vamos a utilizar:
Cartón
Cintas ( azul, amarilla y naranja)
Papel crepe ( morado, azul y amarillo)
Foami (azul y fucsia escarchado)
Accesorios de patilla
Silicon caliente
Lápiz
Regla
Tijeras
Here are the materials we are going to use:
Paperboard
Ribbons (blue, yellow and orange)
Crepe paper (purple, blue and yellow)
Foami (blue and frosty fuchsia)
pin accessories
hot silicone
Pencil
Ruler
Pair of scissors

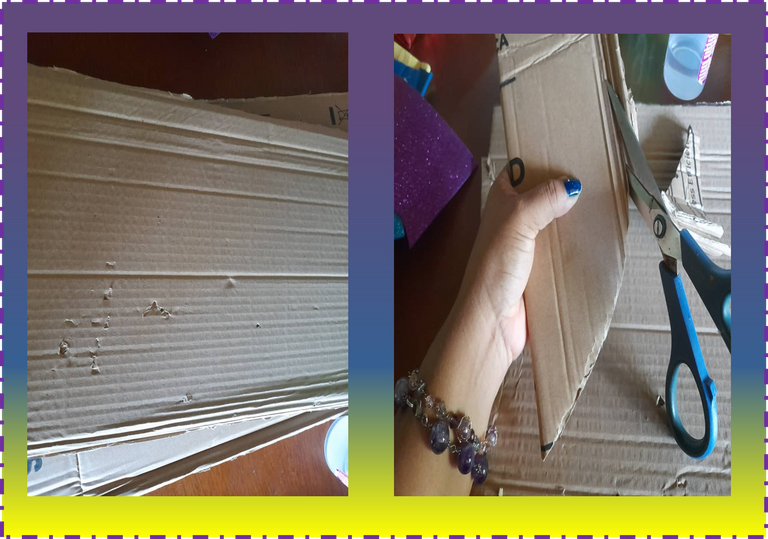
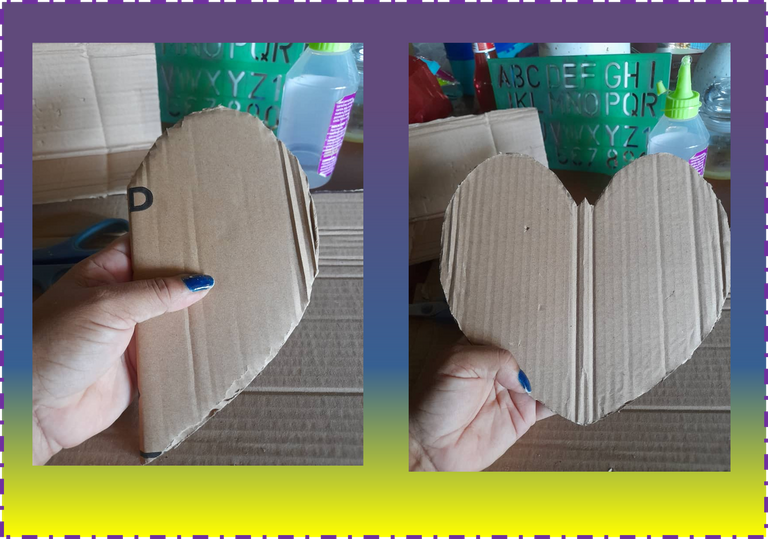
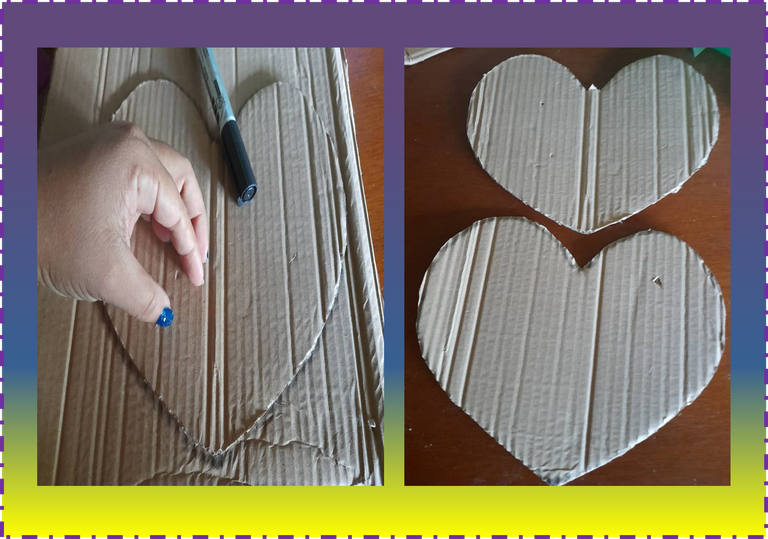
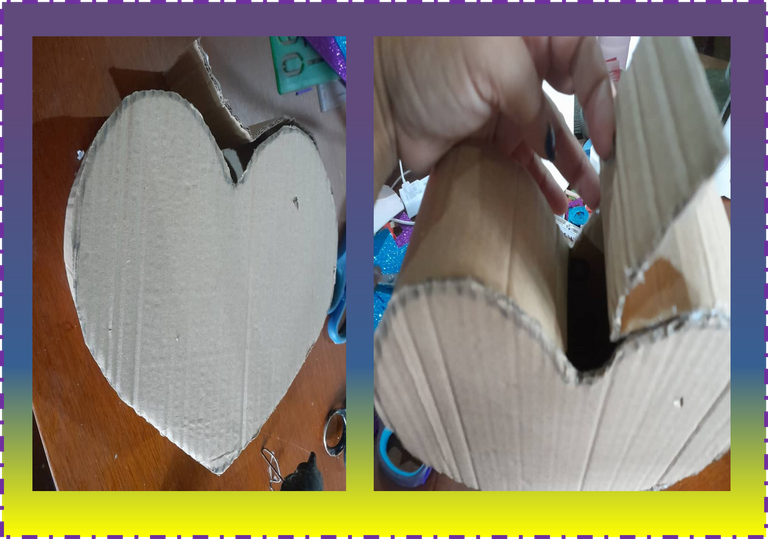
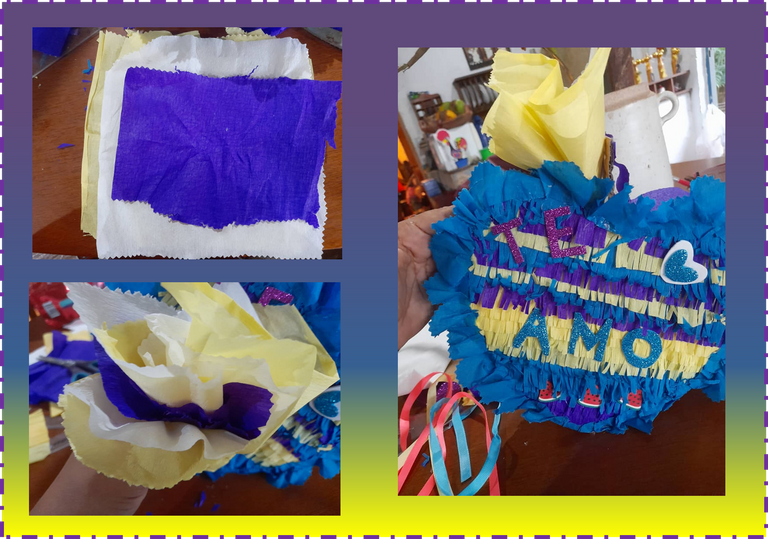
1.-Comenzamos a elaborar nuestra Linda Mini Piñata en forma de Corazón utilizando cartón en el cual sacaremos la forma de un corazón y para esto doblaremos el cartón a la mitad y sacamos la forma de un corazón , luego tomamos otro pedazo de cartón y dibujamos el corazón que sacamos para que sean de la misma medida
1.- .We begin to make our Cute Mini Heart-shaped Piñata using cardboard in which we will draw the shape of a heart and for this we will fold the cardboard in half and take the shape of a heart, then we take another piece of cardboard and draw the heart that we take out so that they are the same size
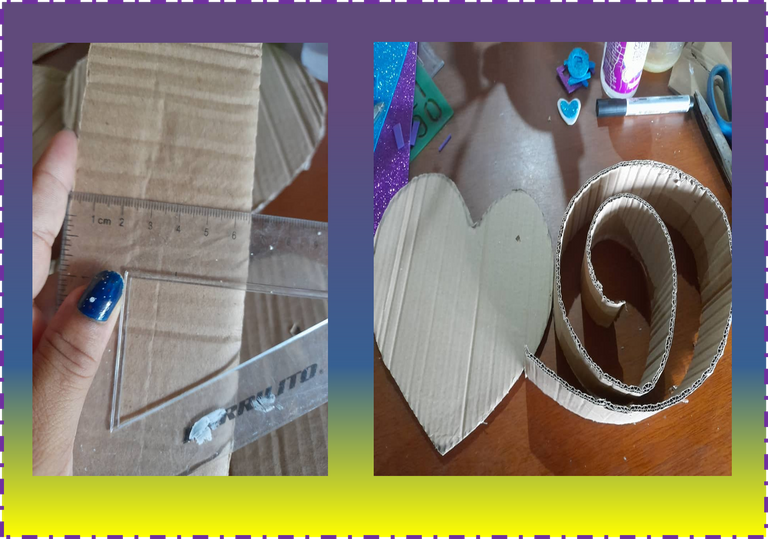
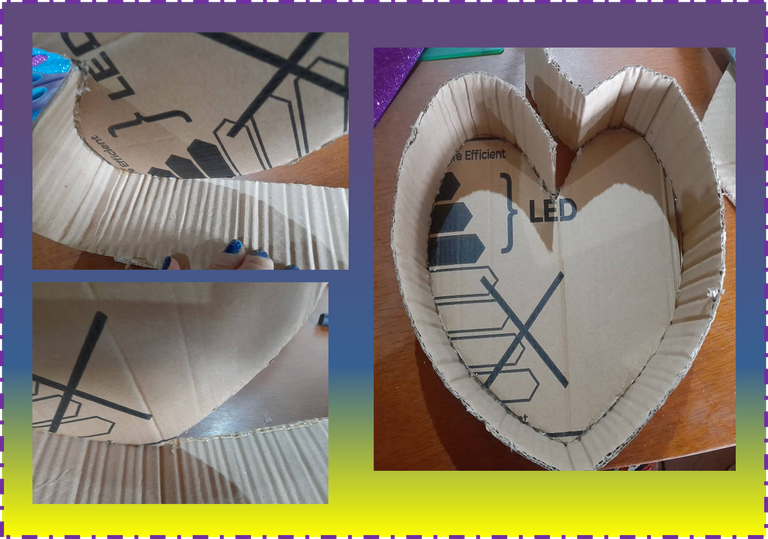
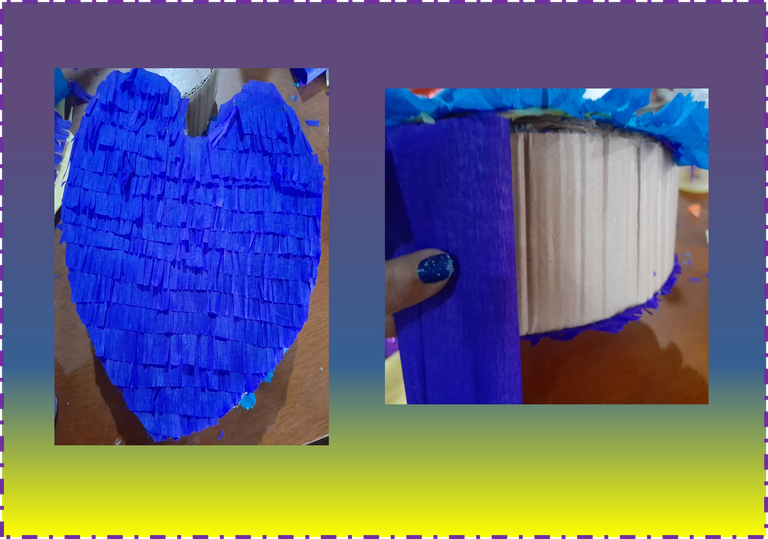
2.- Cortamos una tira de cartón de 6,50 cm de ancho, la cual enrollamos para que se nos haga mas fácil pegar por la orilla del corazón de la Linda Mini Piñata.Luego con silicon caliente pegamos y esperamos unos segundos a que se pegue bien, hasta cubrirla por ambos lados. Dejando la parte de arriba sin cerrarla.
2.- We cut a strip of cardboard 6.50 cm wide, which we roll up to make it easier for us to paste along the edge of the heart of the Cute Mini Piñata. Then with hot silicone we paste and wait a few seconds for it to beat well, until it is covered on both sides.Leaving the upper part without closing it.
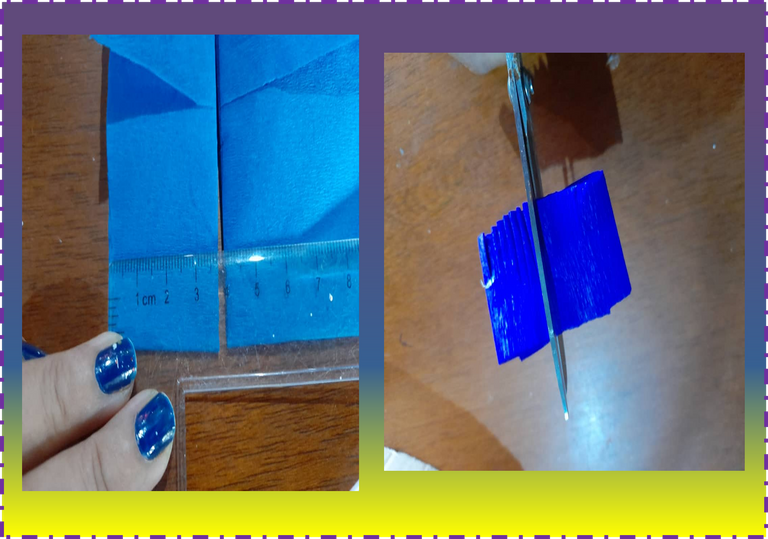
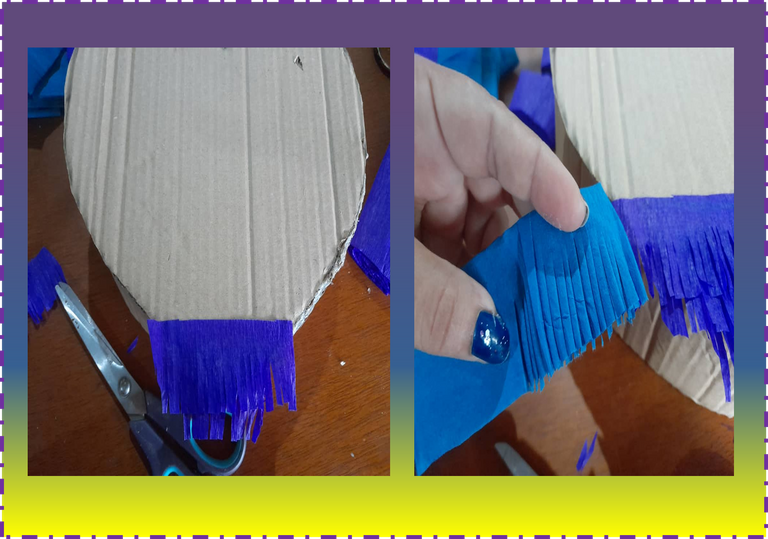
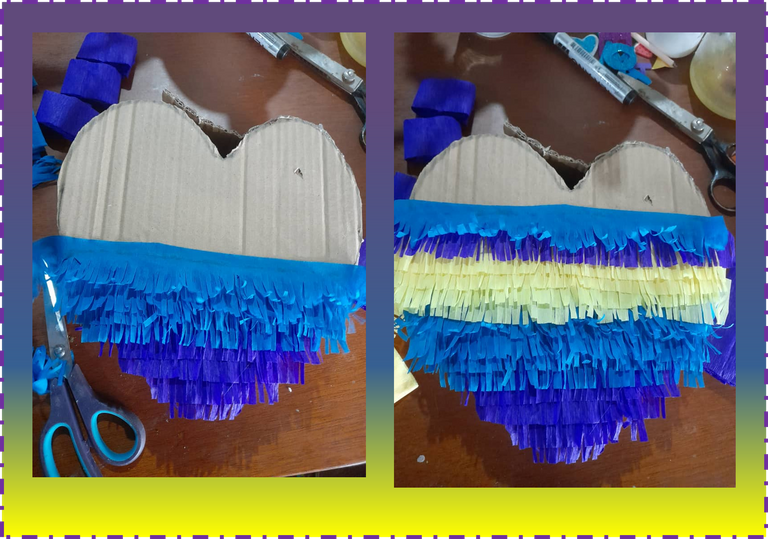
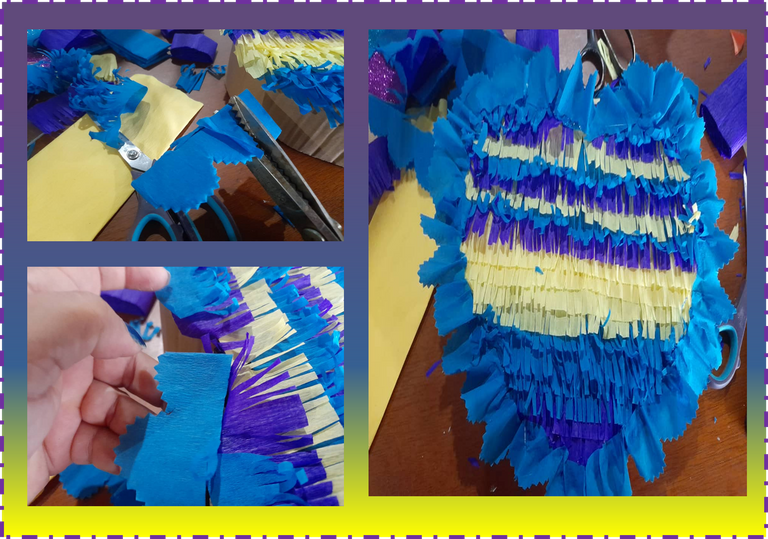
3.- Procedemos a recortar el papel crepe de 3,5 cm de ancho y al cual lo cortaremos en forma de piquitos como puedes observan en las imágenes, para luego ir pegandola desde la punta del corazon hasta arriba, comenzamos pegando el papel crepre morado, luego el azul, seguidamente el amarillo , ya queda a tu imaginación de como la quieres . Una vez que tengamos decorada la parte de adelante, en la parte de atrás la decoramos con papel crepe morado de la misma manera por los lados, Luego con la tijera de zic zac cortamos en el papel de crepe azul unas montañas el cual colocamos por todo el borde del corazón.
3.- We proceed to cut the crepe paper 3.5 cm wide and to which we will cut it in the form of little peaks as you can see in the images, and then stick it from the point of the heart to the top, we start by gluing the purple crepe paper , then the blue, then the yellow, it is left to your imagination of how you want it. Once we have decorated the front part, on the back we decorate it with purple crepe paper in the same way on the sides, then with the zic zac scissors we cut some mountains in the blue crepe paper which we place all over the edge of the heart.
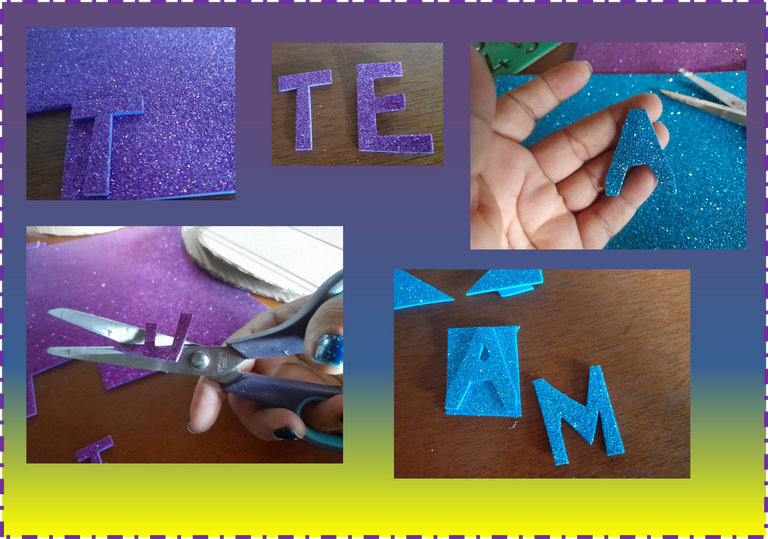
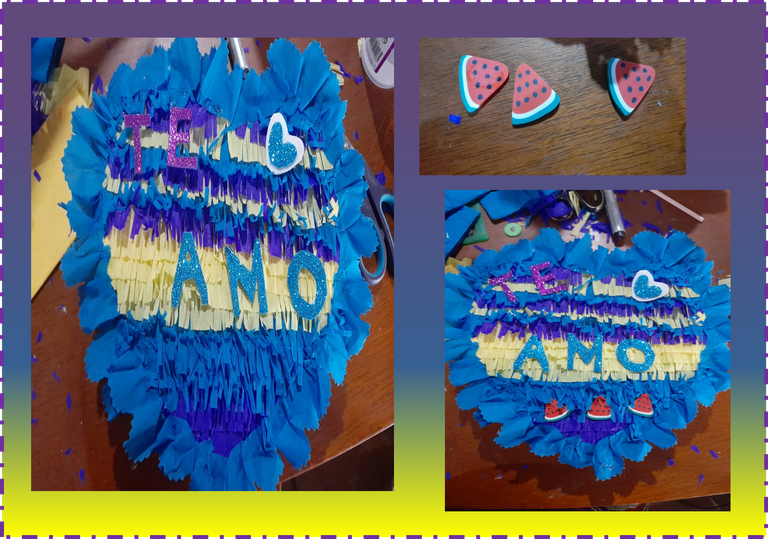
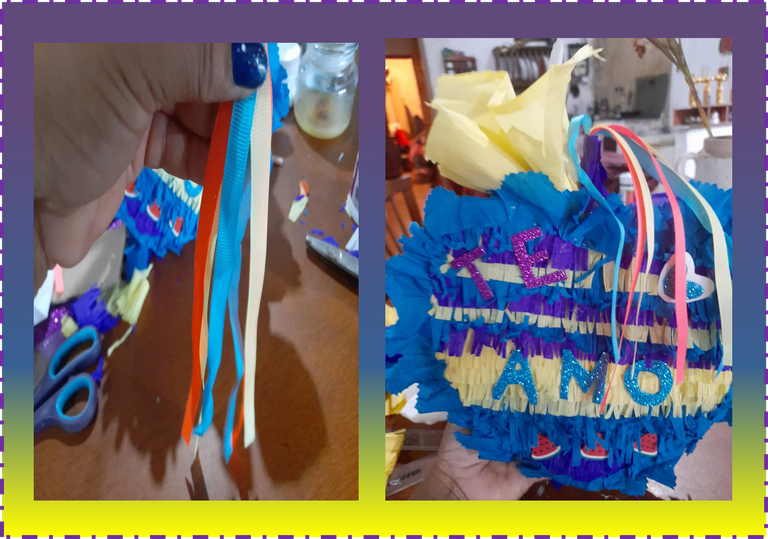
4.- Para finalizar procedemos a a recortar la palabra (TE AMO) para colocarla en la Linda MIni Piñata en forma de Corazón, así como también uniremos las cintas de los tres colores y pegamos en la parte que dejamos abierta en la caja, igualmente tomamos papel crepe amarillo, blanco y morado y la unimos formando una flor y de la misma manera la pegamos en la parte de arriba de nuestra Linda Mini Piñata en forma de Corazón. Vieron que hermosa nos queda mis queridos HIVERS.
4.- To finish we proceed to cut out the word (I LOVE YOU) to place it in the Cute MIni Piñata in the shape of a Heart, as well as we will join the ribbons of the three colors and paste in the part that we left open in the box, we also take yellow, white and purple crepe paper and join it to form a flower and in the same way we glue it to the top of our Cute Mini Heart-shaped Piñata. They saw how beautiful it is my dear HIVERS.
Listo terminado mi proyecto del día de hoy, espero les haya gustado. !Hasta la próxima!
Ready finished my project today, I hope you liked it. !Until next time!
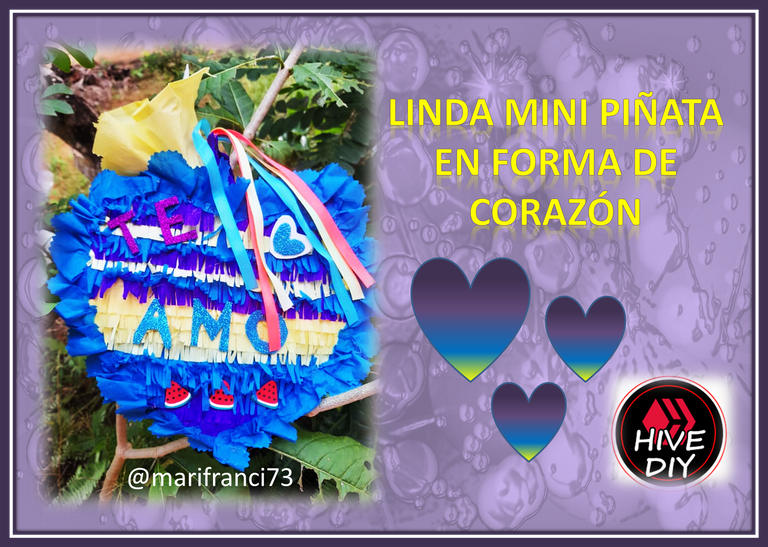
Imagen PortadaFuente
Imagen SeparadoresFuente
Las fotografías fueron tomadas con un teléfono inteligente Samsung Galaxy A12, el texto fue traducido al inglés con el traductor de Google.
The photographs were taken with a Samsung Galaxy A12 smartphone, the text was translated into English with the Google translator.
Una idea fantástica.👍🏼😊😉🤗😃🎉😄
Gracias por compartir
🌺🌸🌷🌹💮🏵️🌻🌼🥀💐