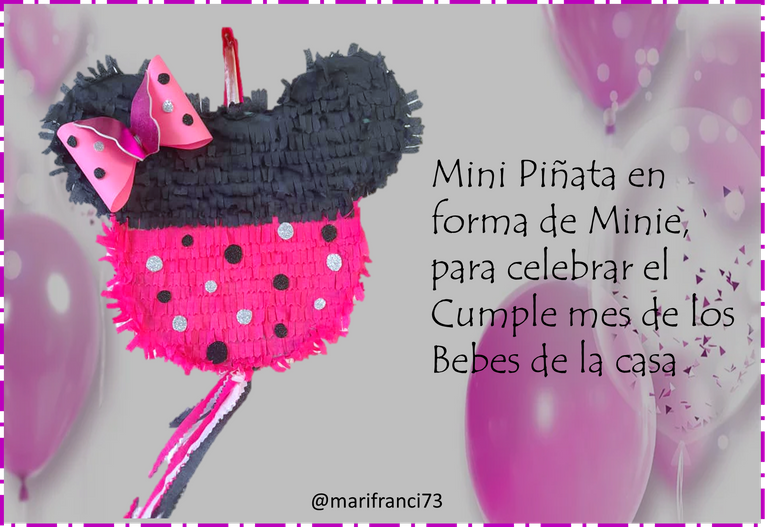
🌹Feliz inicio de semana para todos, esperando que todos se encuentren bien y llenos de mucha salud. Hoy estuve muy emocionada realizando esta actividad ya que me vinieron recuerdos de cuando era adolescente que hacia piñatas, y tenia muchísimos años que no las hacia primera vez que hago estas así Mini, en aquellos tiempos las hacia en forma de animales, recuerdo que la primera que hice fue un bebe Dalmata sentado a mi ahijado en su primer añito. Para ese entonces no se utilizaban las celebraciones de los cumple mes a los bebes como en estos tiempos. Me encanto estas Minis Piñatas son una ternura, Aquí vamos con el paso a paso de como lo realice, es muy fácil de realizar. Manos a la obra mis queridos Artesanos.🌹.
🌹Happy start to the week for everyone, hoping that everyone is well and full of good health. Today I was very excited doing this activity since I had memories of when I was a teenager that I made piñatas, and I had many years that I did not make them for the first time like this Mini, in those days I made them in the form of animals, I remember that the first What I did was a Dalmatian baby sitting with my godson in his first year. At that time, babies' birthday celebrations were not used as in these times. I love these minis piñatas, they are a tenderness, here we go with the step by step of how to do it, it is very easy to do. Let's get to work my dear Artisans.🌹

Cartón o carpetas en desuso
Papel Crepe, Negro y Fucsia
Papel Rosado
Mariposa en foami rosa
Foami plateado y negro
Cinta fucsia
Tijera
Silicon
Unused cardboard or folders
Crepe Paper, Black and Fuchsia
Pink Paper
Butterfly in pink foami
Silver and black foam
Fuchsia ribbon
Scissor
Silicon


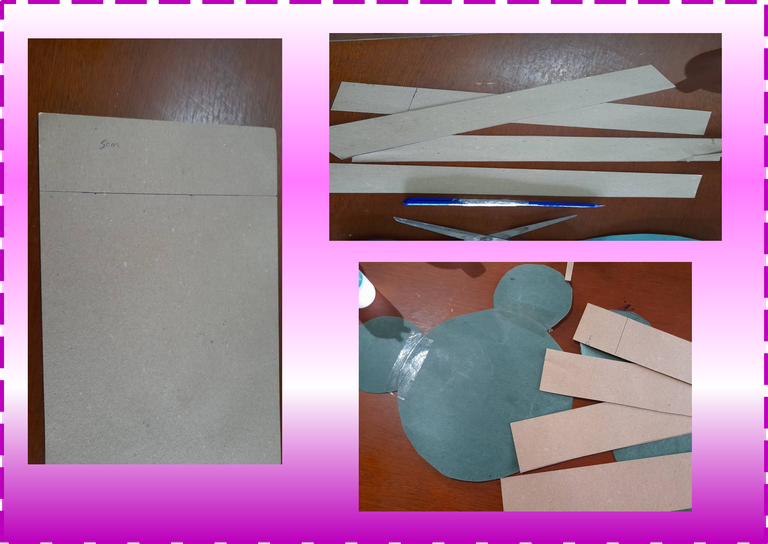
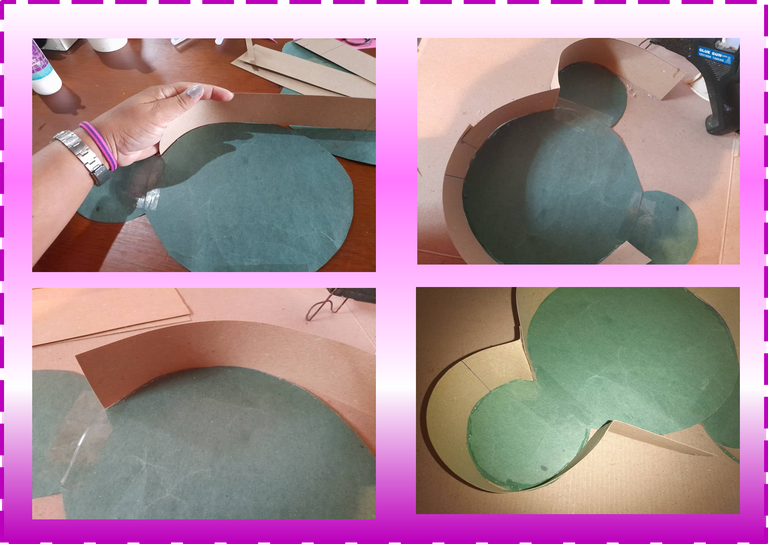
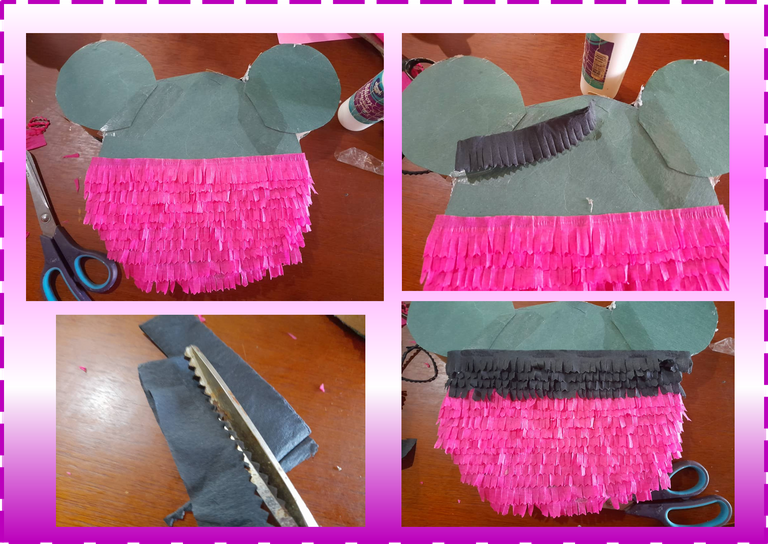
1.- Con un Compas o algo redondo de acuerdo al tamaño que queramos vamos a dibujar en el cartón o carpeta la silueta de cara de Minie la cual haremos doble.
1.-With a Compas or something round according to the size we want, we are going to draw the silhouette of Minie's face on the cardboard or folder, which we will double.
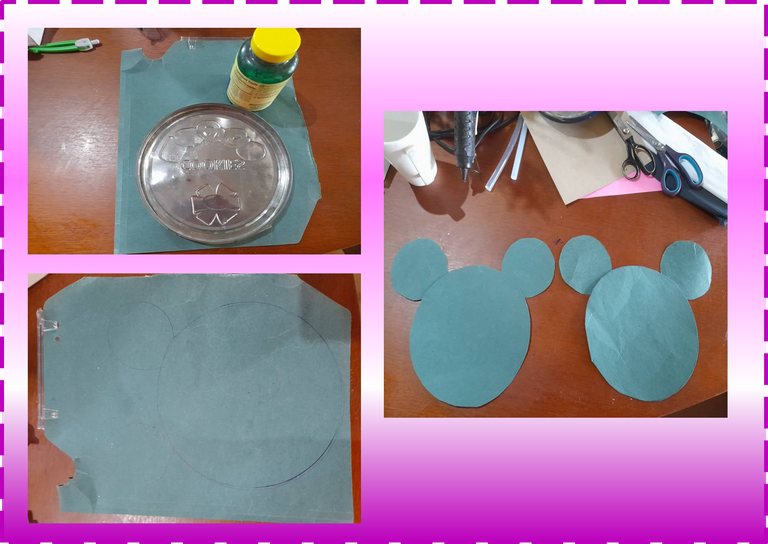
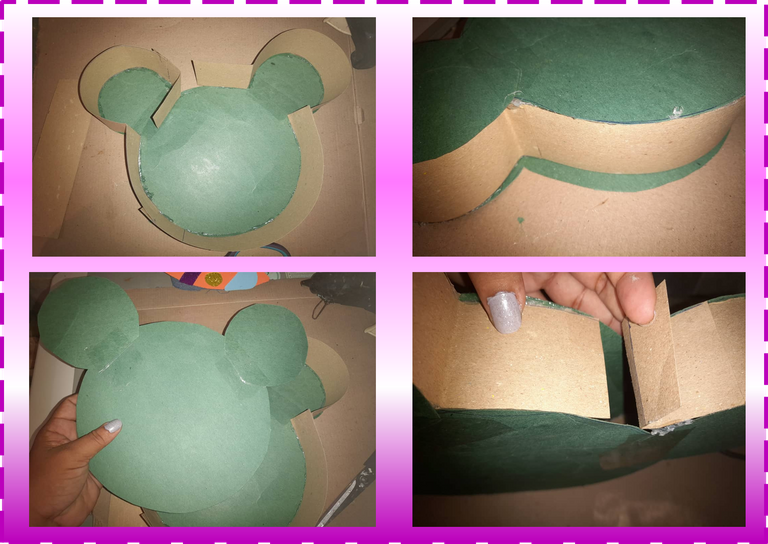
2.- Recortamos varias tiras de 5 cm de ancho la cual iremos pegando con silicon caliente por toda la orilla de la silueta de minie, cuando llegamos a las partes de las orejas doblamos un poco para moldearla,luego pegamos por las orillas la otra silueta de minie dejandole un espacio libre no pegado para colocar las golosinas o juguetes.
2.- We cut out several strips of 5 cm wide which we will stick with hot silicone along the entire edge of the minie silhouette, when we get to the parts of the ears we bend a little to mold it, then we stick the other silhouette on the edges of minie leaving a free space not glued to place the treats or toys.
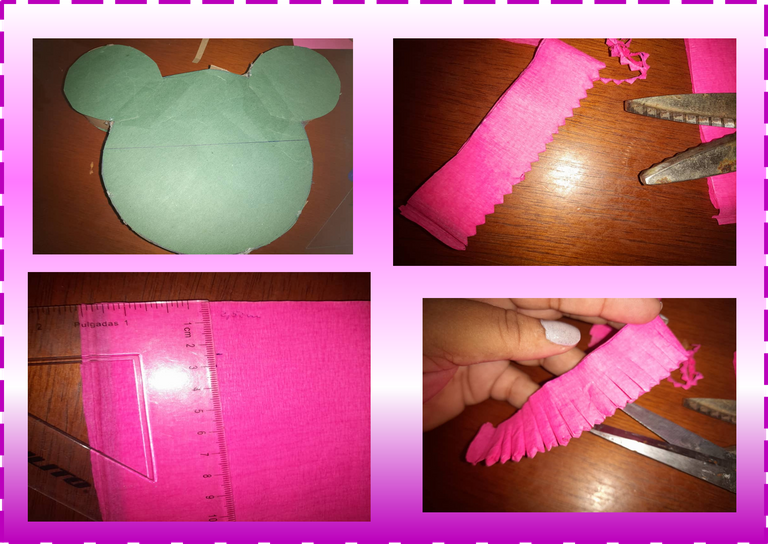
3.- Para empezar a forrar nuestra mini piñata, trazaremos una linea a la mitad para dividirla en dos colores fucsia y negro, para lo cual utilizaremos papel crepe de ambos colores, lo picaremos a 2,5cm de ancho y con una tijera de picos recortaremos en las orillas, luego picamos el papel hasta un poco mas de la mitad (ver fotos).
3.- To start lining our mini piñata, we will draw a line in the middle to divide it into two colors fuchsia and black, for which we will use crepe paper of both colors, we will chop it 2.5cm wide and with a pointed scissors we will cut on the edges, then we cut the paper until a little more than half (see photos).
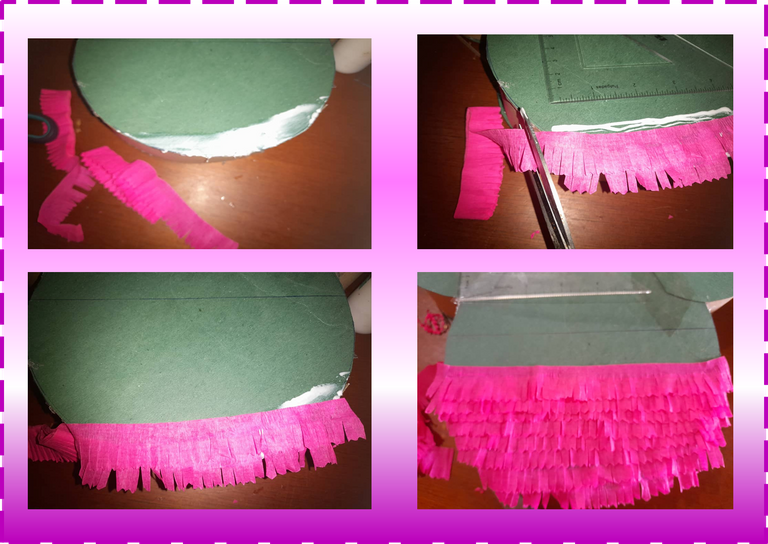
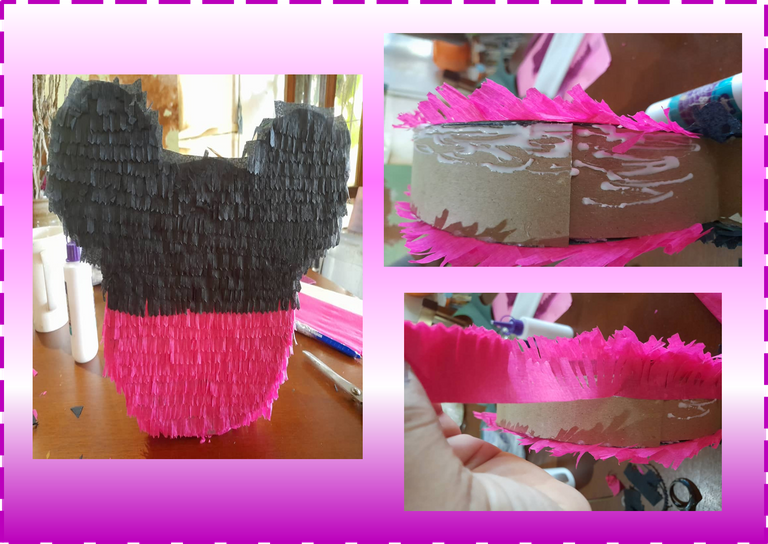
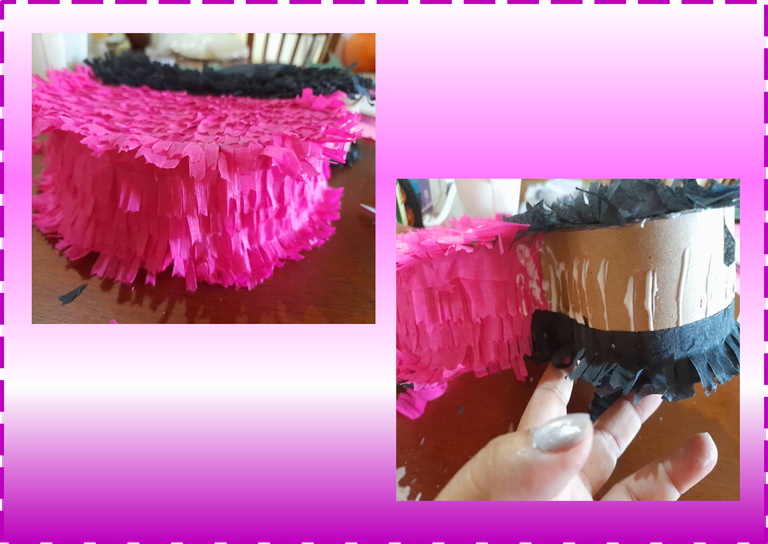
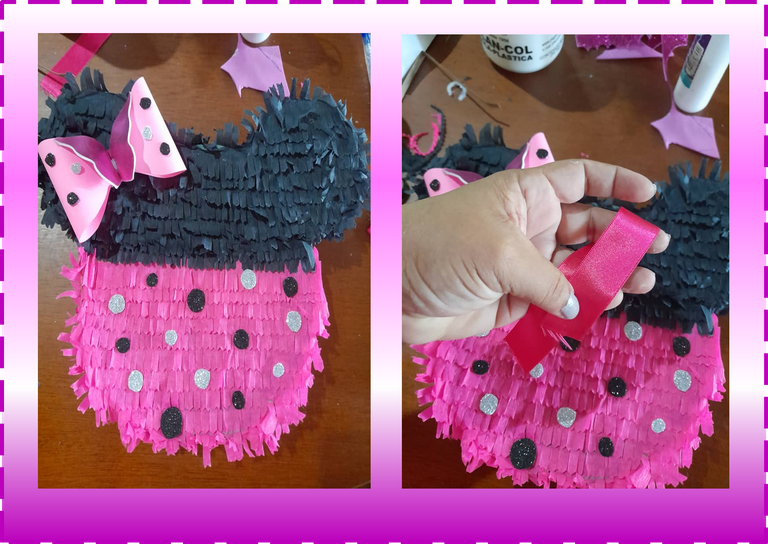
4.- Ahora comenzamos a decorar a nuestra Mini piñata de Minie, vamos a empezar pegando el papel crepe fucsia de abajo hacia arriba como de muestra en la figura al llegar a la otra esquina cortamos y pegamos encima dejando un poco de espacio hasta llegar a la raya y de allí para arriba colocaremos el papel crepe negro, este procedimiento se realiza por ambas caras, luego pegamos el papel crepe fucsia y negro a los alrededores.
4.- Now we begin to decorate our Mini Piñata of Minie, we are going to start gluing the fuchsia crepe paper from bottom to top as shown in the figure when we reach the other corner cut and paste on top leaving a little space until we reach the stripe and from there up we will place the black crepe paper, this procedure is carried out on both sides, then we glue the fuchsia and black crepe paper to the surroundings.
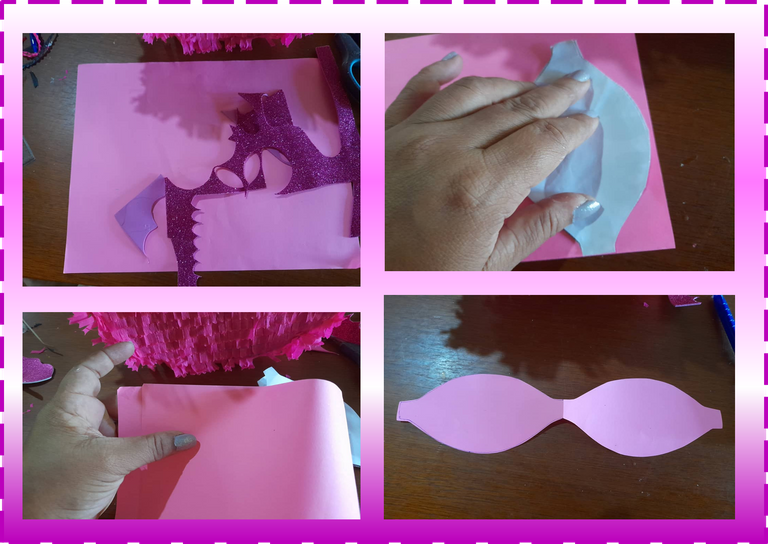
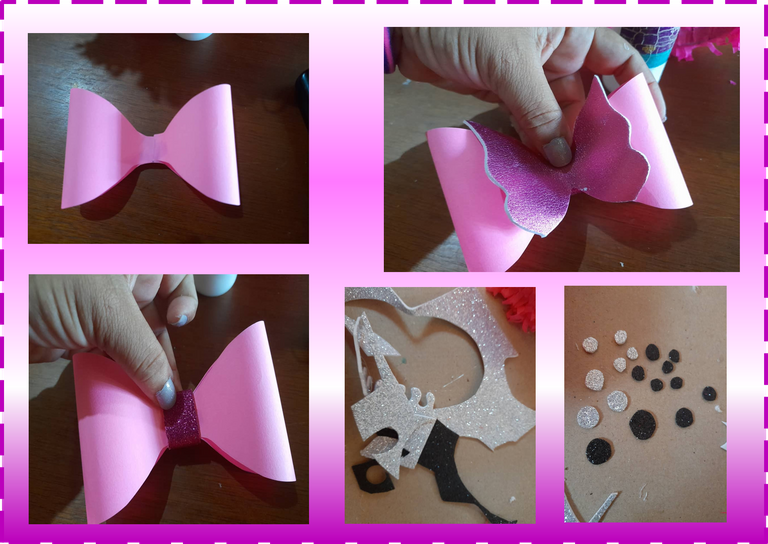
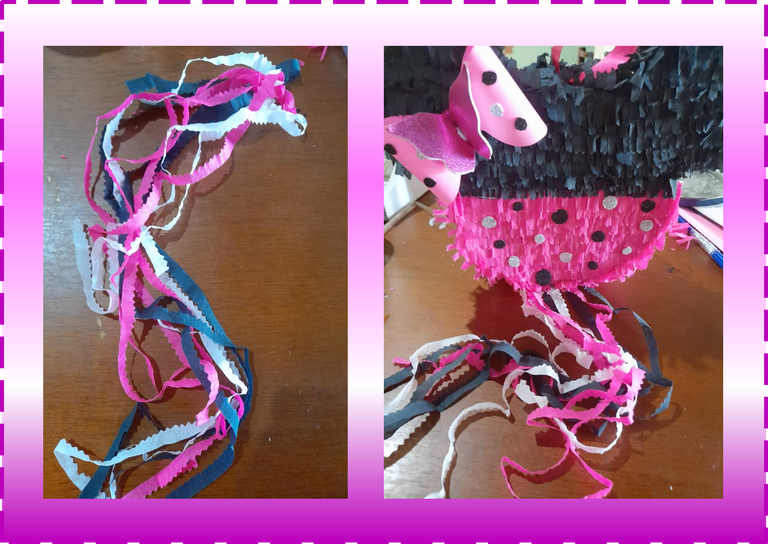
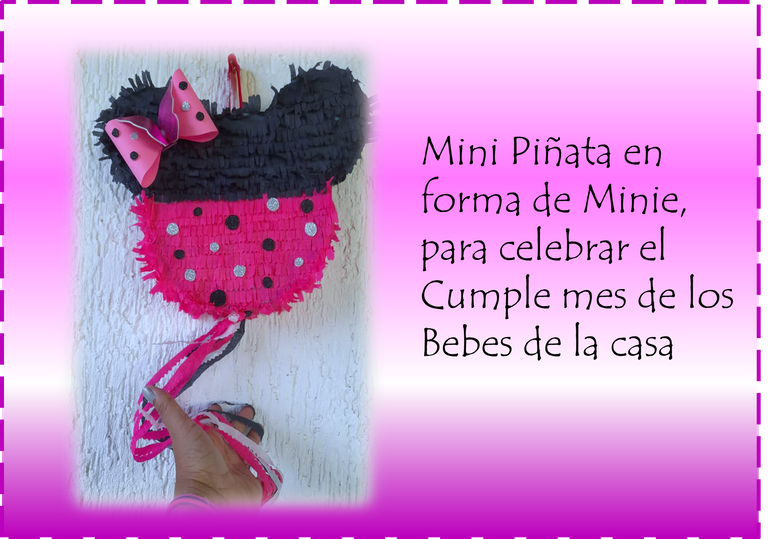
5.- Para finalizar realizaremos un hermoso lazo con papel rosado, foami fucsia y una mariposa en foami fucsia y le colocaremos unos circulitos de foami negro y plateado tanto al lazo como a la parte fucsia de la piñata, para guindar la piñata le colocare una cinta fucsia y en la parte de abajo con el mismo papel crepe negro, fucsia y blanco le haré unas bambalinas. Y así de Hermosa quedo mi Mini Piñata en forma de Minie para celebrar el cumple mes de los bebes de la casa.
5.- To finish we will make a beautiful bow with pink paper, fuchsia foami and a butterfly in fuchsia foami and we will place some circles of black and silver foami both on the bow and on the fuchsia part of the piñata, to wrap the piñata I will place a Fuchsia ribbon and at the bottom with the same black, fuchsia and white crepe paper I will make some backdrops. And that's how beautiful my Mini Piñata is in the shape of a Minie to celebrate the birthday of the babies of the house.
Listo terminado mi proyecto del día de hoy, espero les haya gustado. !Hasta la próxima!
Ready finished my project today, I hope you liked it. !Until next time!

La fuente de la presentación principal fue tomada de la pagina: https://pixabay.com/es/images/search/pi%C3%B1ata/
Las fotografías fueron tomadas con un teléfono inteligente SAMSUN GALAXY A12, el texto fue traducido al inglés con el traductor de Google.
The photographs were taken with a SAMSUN GALAXY A12 smartphone, the text was translated into English with the Google translator.
Te quedó súper linda 🤩🤩🤩 gracias por este paso a paso... Lo haces ver super fácil.
Buenas tardes, Gracias esa es la idea
me encantoo quedo hermosa, ya tengo una idea para la celebracion de mi beba graciass¡¡
Que bueno que te di una idea, eso se estila ahorita en estos tiempos cada mes de vida de los niños .
si me encanto gracias amiga, mucho exito
Wow.. .learnt something new today..