
¡Hola Amigos!
Como la están pasando; espero la estén pasando Super Bonito, pido mil disculpas por no estar en estos días con Ustedes, pero estaba resolviendo algunas cositas personales. Les envío mis mas sinceros saludo a mi Hermosa Comunidad de Hive Diy, y en especial a todas aquellas personas que hacen vida todos los días en esta plataforma, y que cada día dan lo mejor de si para enseñarnos a elaborar cosas bonitas las cuales hacen con mucho cariño y dedicación espero lo hayan pasado chevere este fin de semana con sus familias.
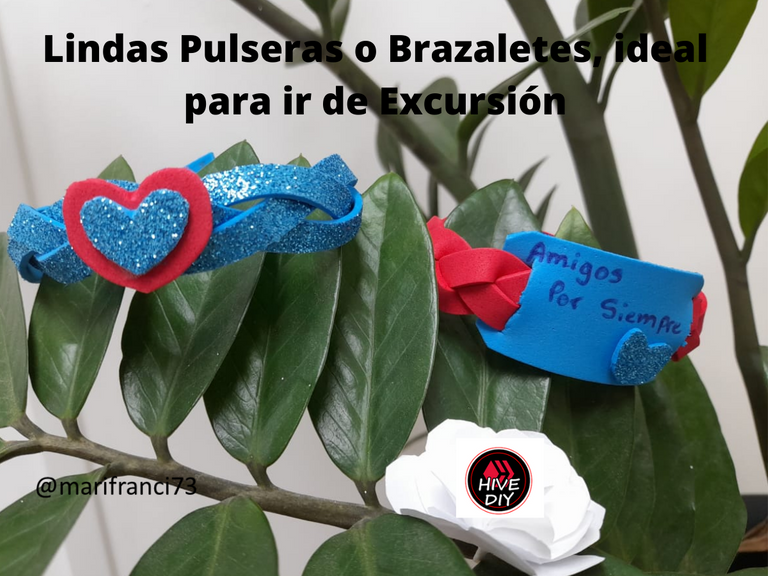
Hoy con mucho cariño les doy la Bienvenida nuevamente a mi Blog y que puedan dejar sus comentarios y recomendaciones. En el día de hoy elabore unas Lindas Pulseras o Brazaletes de Goma Eva para identificar a los niños y niñas en una piscinada, excursión o ida a la playa en grupo, lo bueno es que la puedes personalizar al motivo de tu preferencia incluso puedes colocarle el nombre de cada niño o niña, la puedes mojar, son seguras al colocarselas, ideal para esos tipos de eventos.
Esta Practica y Lindas Pulseras o Brazaletes también son ideales cuando celebramos algún cumpleaños en sitios comunes como parques, McDonald, Wendys, entre otros. La puedes diseñar con motivos de la fiesta. Espero les sea de utilidad este tutorial. Aquí les dejo el paso a paso de como lo realice de dos fáciles y economicas formas para elaborar estos lindos Brazaletes. Ahora a trabajar. Comencemos

Hi friends!
How are they doing; I hope you are having a great time, I apologize for not being with you these days, but I was solving some personal things. I send my most sincere greetings to my Beautiful Community of Hive Diy, and especially to all those people who make life every day on this platform, and who give their best every day to teach us how to make beautiful things which they do with much love and dedication I hope you had a great time this weekend with your families.
Today with great affection I welcome you back to my Blog and that you can leave your comments and recommendations. Today I made some Pretty Eva Rubber Bracelets or Bangles to identify the boys and girls in a pool, excursion or group trip to the beach, the good thing is that you can customize it to the reason of your preference, you can even place the name of each boy or girl, you can wet it, they are safe when you put them on, ideal for those types of events.
These Practical and Cute Bracelets or Bangles are also ideal when we celebrate a birthday in common places such as parks, McDonald's, Wendy's, among others. You can design it with party motifs. I hope this tutorial is useful to you. Here I leave you the step by step of how to do it in two easy and economical ways to make these beautiful Bracelets. Now to work. let's start.
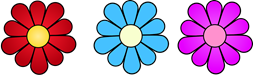
Los Materiales que vamos a utilizar son los siguientes;
Goma Eva (Azul escarchado y Rojo)
Reglas
Lápiz
Silicon
Tijera
The Materials that we are going to use are the following;
Eva foam (Frosted Blue and Red)
Rules
Pencil
Silicon
Scissor
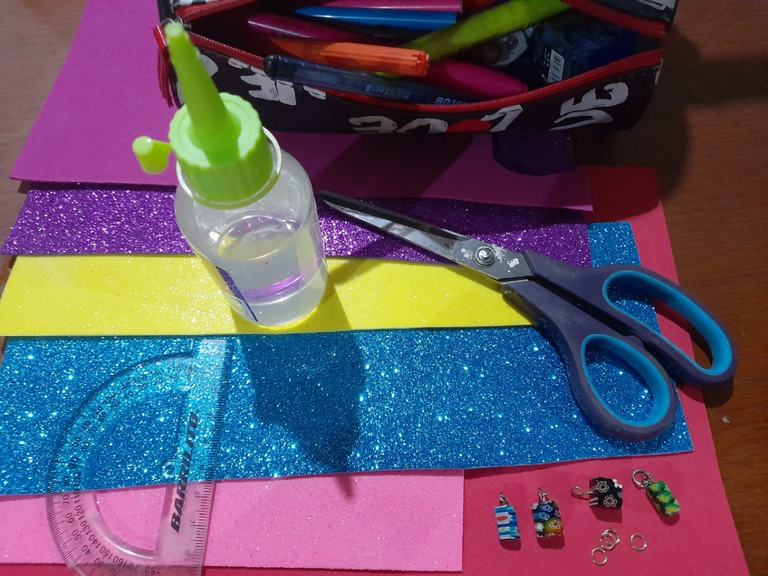
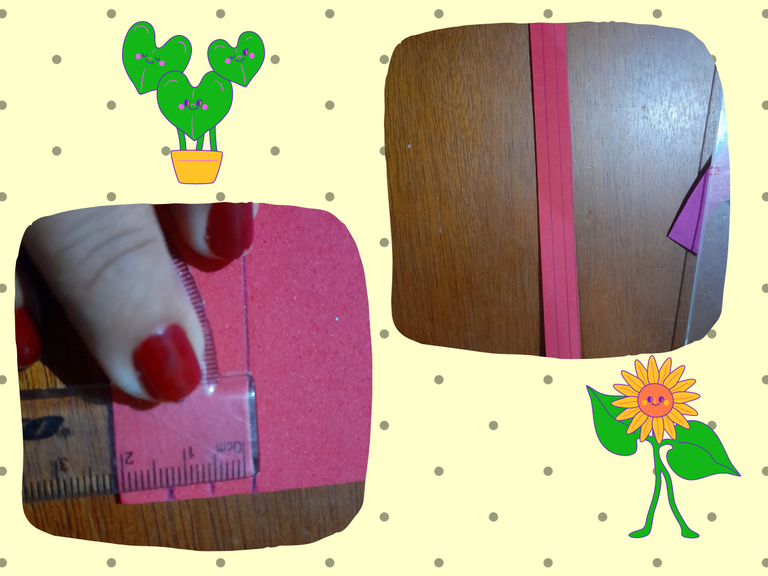
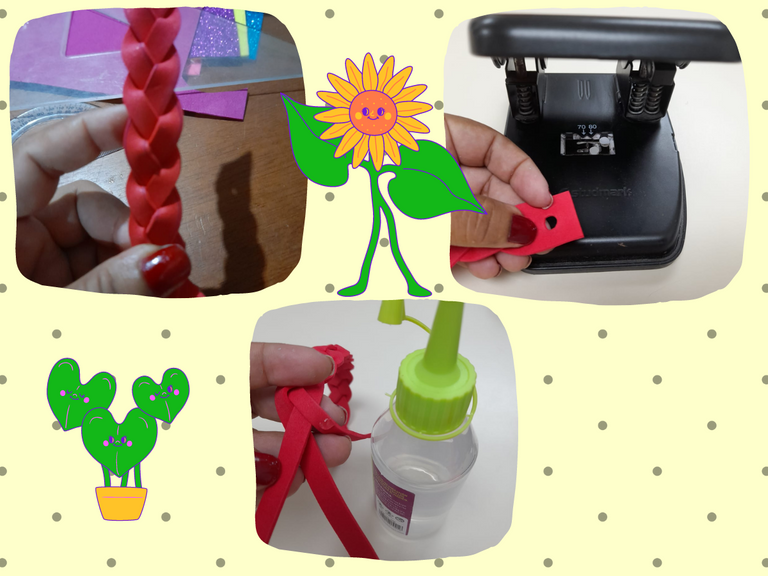
Paso Nº 01 En primer lugar vamos a medir en el foami rojo 2 cm de ancho por 30cm de largo esto va a depender de la medida del Brazalete y la muñeca de la persona.
Step Nº 01 First of all we are going to measure in the red foami 2 cm wide by 30 cm long this will depend on the measurement of the Bracelet and the person's wrist
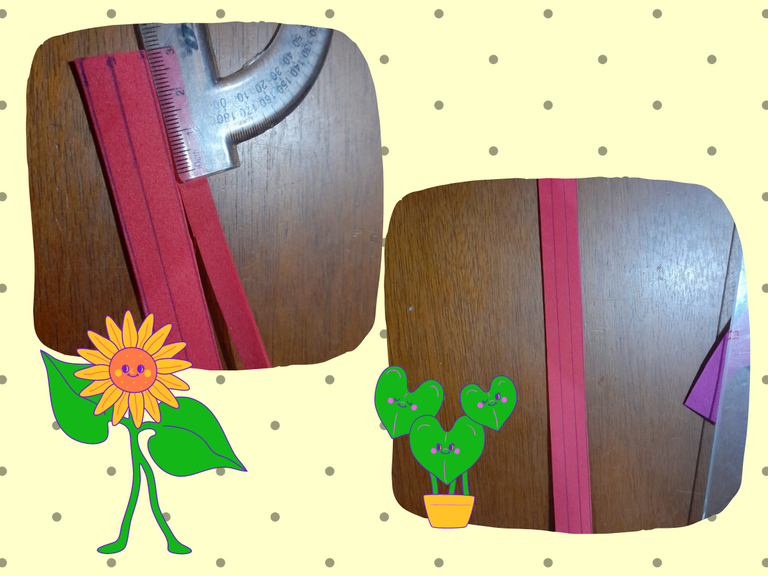
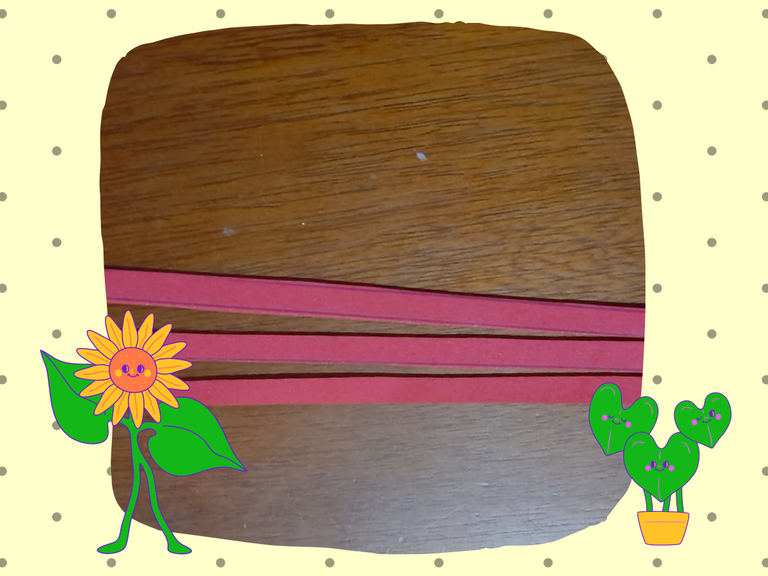
Paso Nº 02.En lA Goma Eva medida de 2 por 30 cm vamos a medir tres tiras de a 6,5 mm de ancho las cuales recortamos a lo largo que nos vaya quedando parejas las tiras y antes de llegar al final de la tira dejamos mas o menos 3 cm antes de llegar a la punta.
Step No. 02. In the EVA foam, measuring 2 by 30 cm, we are going to measure three strips 6.5 mm wide, which we cut lengthwise so that the strips become even, and before reaching the end of the strip, we leave about 3 cm before reaching the tip.
.
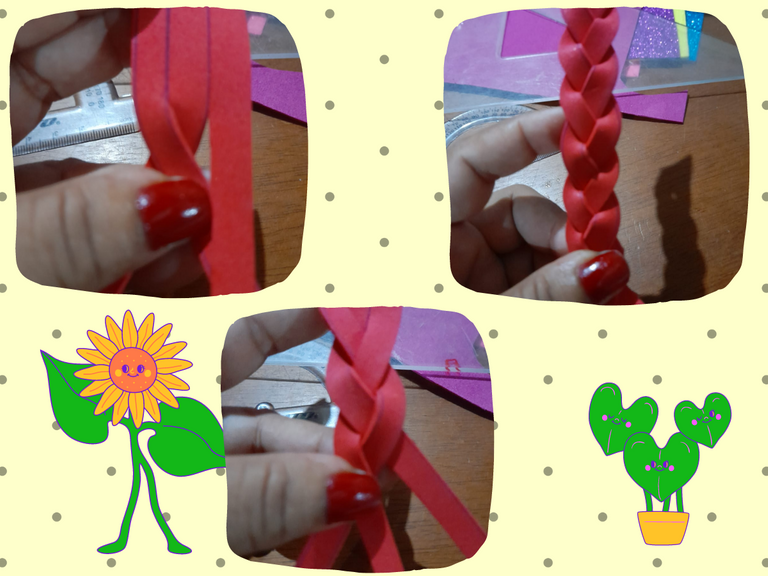
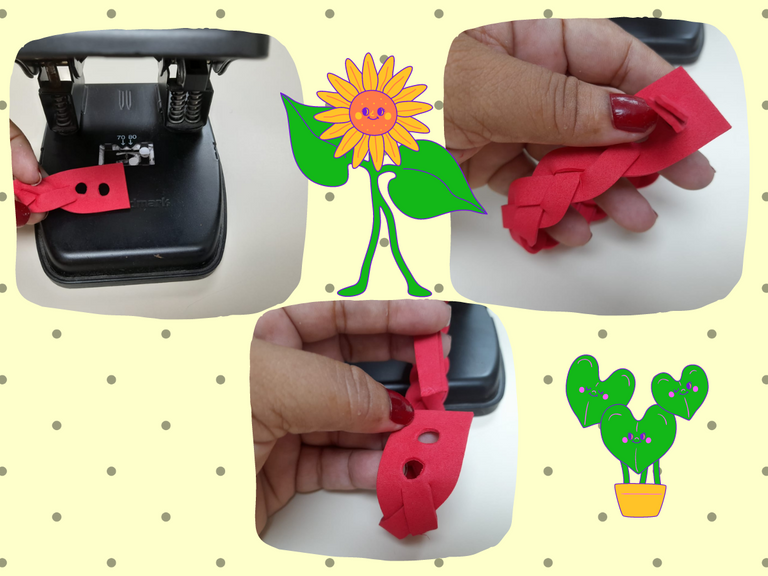
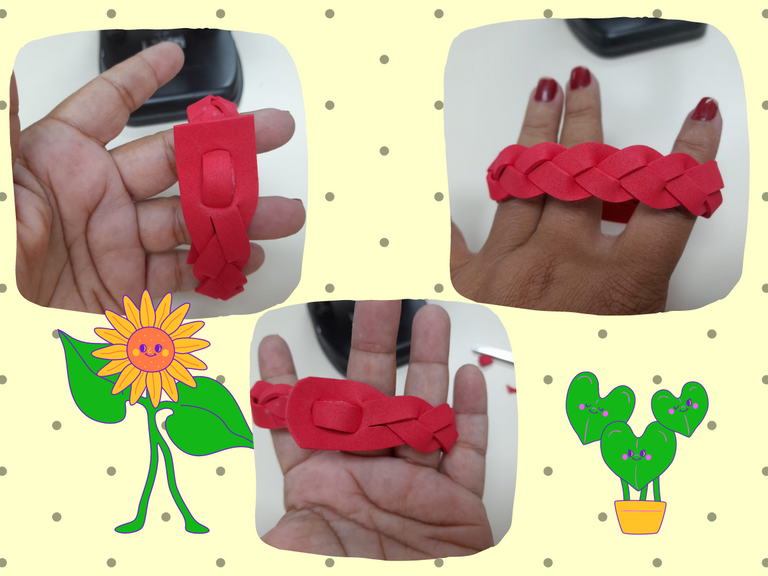
Paso Nº3.- Ahora comenzamos a tejer una trenza con las tiras de Goma Eva como se puede observar en las imágenes a continuación; una vez que la tejemos la medimos a la muñeca de la persona, luego con pegamento o silicon sellamos las tiras para que no se nos desarme el trenzado; cortamos la tira que nos queda en el centro y las otras dos la unimos y pegamos, ahora con un perforador hacemos dos orificios en la otra punta, por la cual pasaremos la punta que nos quedo en el otro extremo del brazalete.
Step Nº3.- Now we begin to weave a braid with the Eva Rubber strips as can be seen in the images below; once we weave it, we measure it to the person's wrist, then with glue or silicone we seal the strips so that the braid does not come apart; we cut the strip that remains in the center and the other two we join and glue, now with a perforator we make two holes in the other end, through which we will pass the end that remains in the other end of the bracelet.
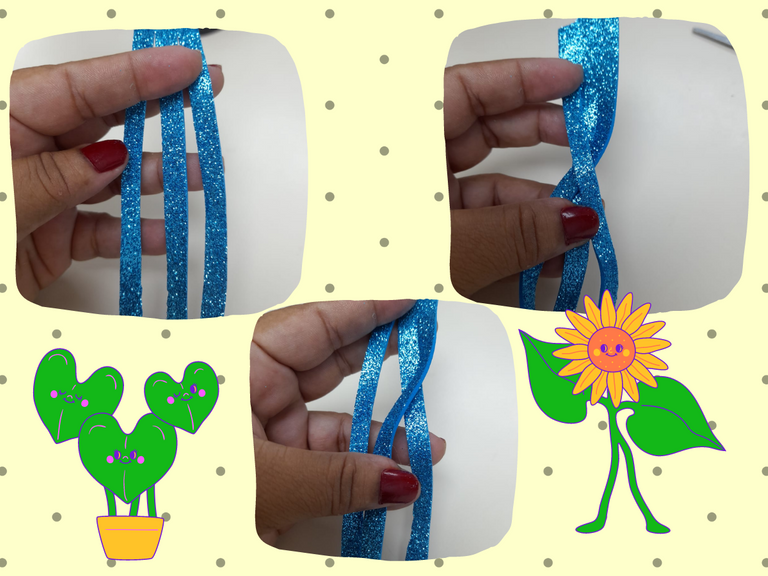
Paso Nº4.- La segunda forma o manera de elaborar estos Lindos Brazaletes o Pulseras para ir de excursión es la siguiente: En este caso utilizaremos Goma Eva azul escarchado , Ya una vez cortada y medida la Goma Eva con la misma medida que la anterior, vamos a recortar con un exacto o tijera tres tiras y dejamos un margen en las puntas de 3cm en cada extremo de la Goma Eva.
Step Nº4.- The second way or way to make these Cute Bangles or Bracelets to go on excursions is the following: In this case we will use Frosted Blue Eva Rubber, Once the Eva Rubber has been cut and measured with the same measurement as the previous one, We are going to cut three strips with an exact or scissors and leave a 3cm margin at each end of the Eva Foam.
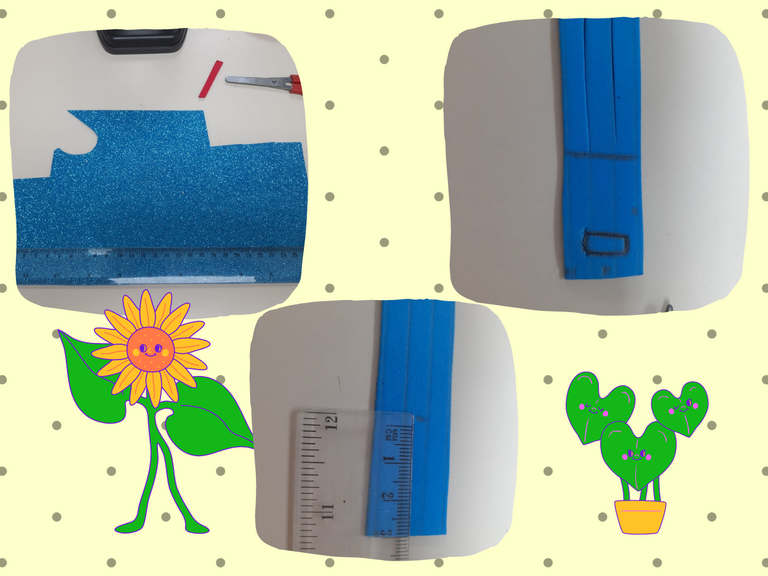
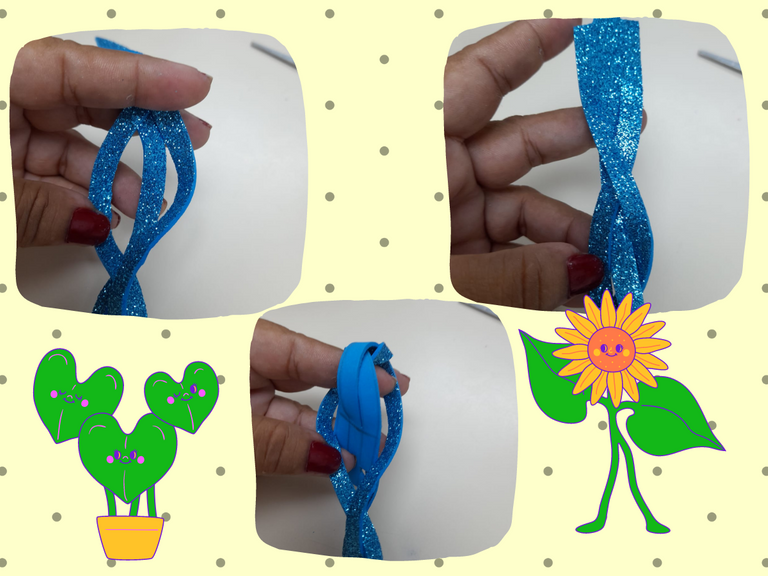
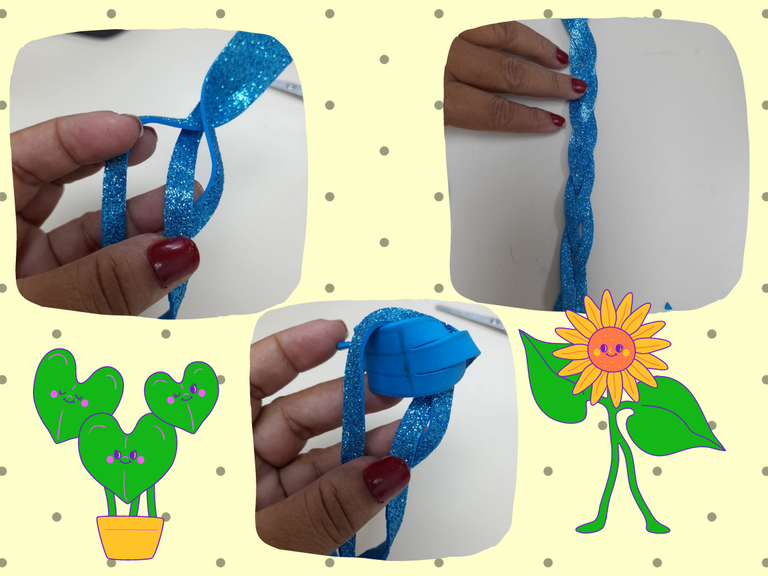
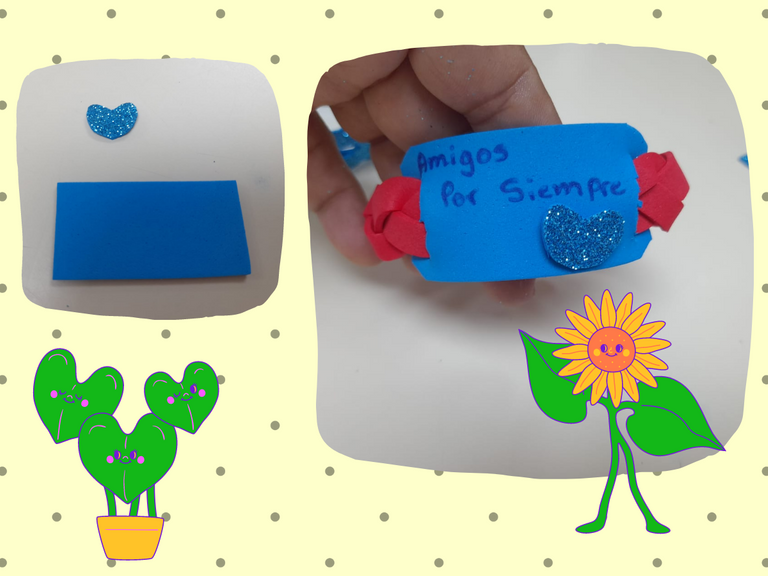
Paso Nº5.- Comenzamos a realizar una trenza, la tirita de los lados la pasamos hacia el centro solo tres veces, luego la punta de arriba la introducimos por el hueco que nos ha quedado como podemos observar en las imágenes, luego volvemos a pasar por el pequeño hueco que nos queda en la partes de arriba, En una de las puntas hacemos un orificio y el la otra recortamos la forma de un pasador para cerrar la pulsera. Para finalizar, con un pedazo de foami identificamos colocando el nombre, motivo,para que vamos a necesitar nuestra pulsera o brazalete.
Step Nº5.- We begin to make a braid, we pass the band-aid on the sides towards the center only three times, then we introduce the top tip through the hole that we have left as we can see in the images, then we go through the small hole that we have left in the upper parts, in one of the ends we make a hole and in the other we cut out the shape of a pin to close the bracelet. To finish, with a piece of foami we identify by placing the name, reason, why we are going to need our bracelet or bracelet.
Listo mis queridos amigos Artesanos terminado mi nuevo Post del día de hoy, espero les haya gustado. !Hasta la próxima!
Ready my dear friends finished my new Post today, I hope you liked it. !Until next time!

Imagen SeparadorFuente
Las fotografías fueron tomadas con un teléfono inteligente Samsung A12, el texto fue convertido al inglés con el traductor de Google.Fuente
El banner fue diseñado en canvas Fuente
The photographs were taken with a Samsung A12 smartphone, the text was converted to English with Google's translator.Fuente
The banner was designed on canvas Fuente
bellas