
Feliz y bendecido sábado queridos amigos de Hive Diy, un gusto saludarles, deseo que pasen un buen fin de semana junto a su familia, amigos, disfrutando de un bello día soleado y algo caluroso también, el día de hoy me siento súper contenta de traerles este nuevo proyecto ya que es muy especial para mí.
Happy and blessed Saturday, dear friends of Hive Diy, it's a pleasure to greet you. I hope you have a good weekend with your family and friends, enjoying a beautiful sunny day, and a bit warm too. Today I feel super happy to bring you this new project, as it's very special to me.
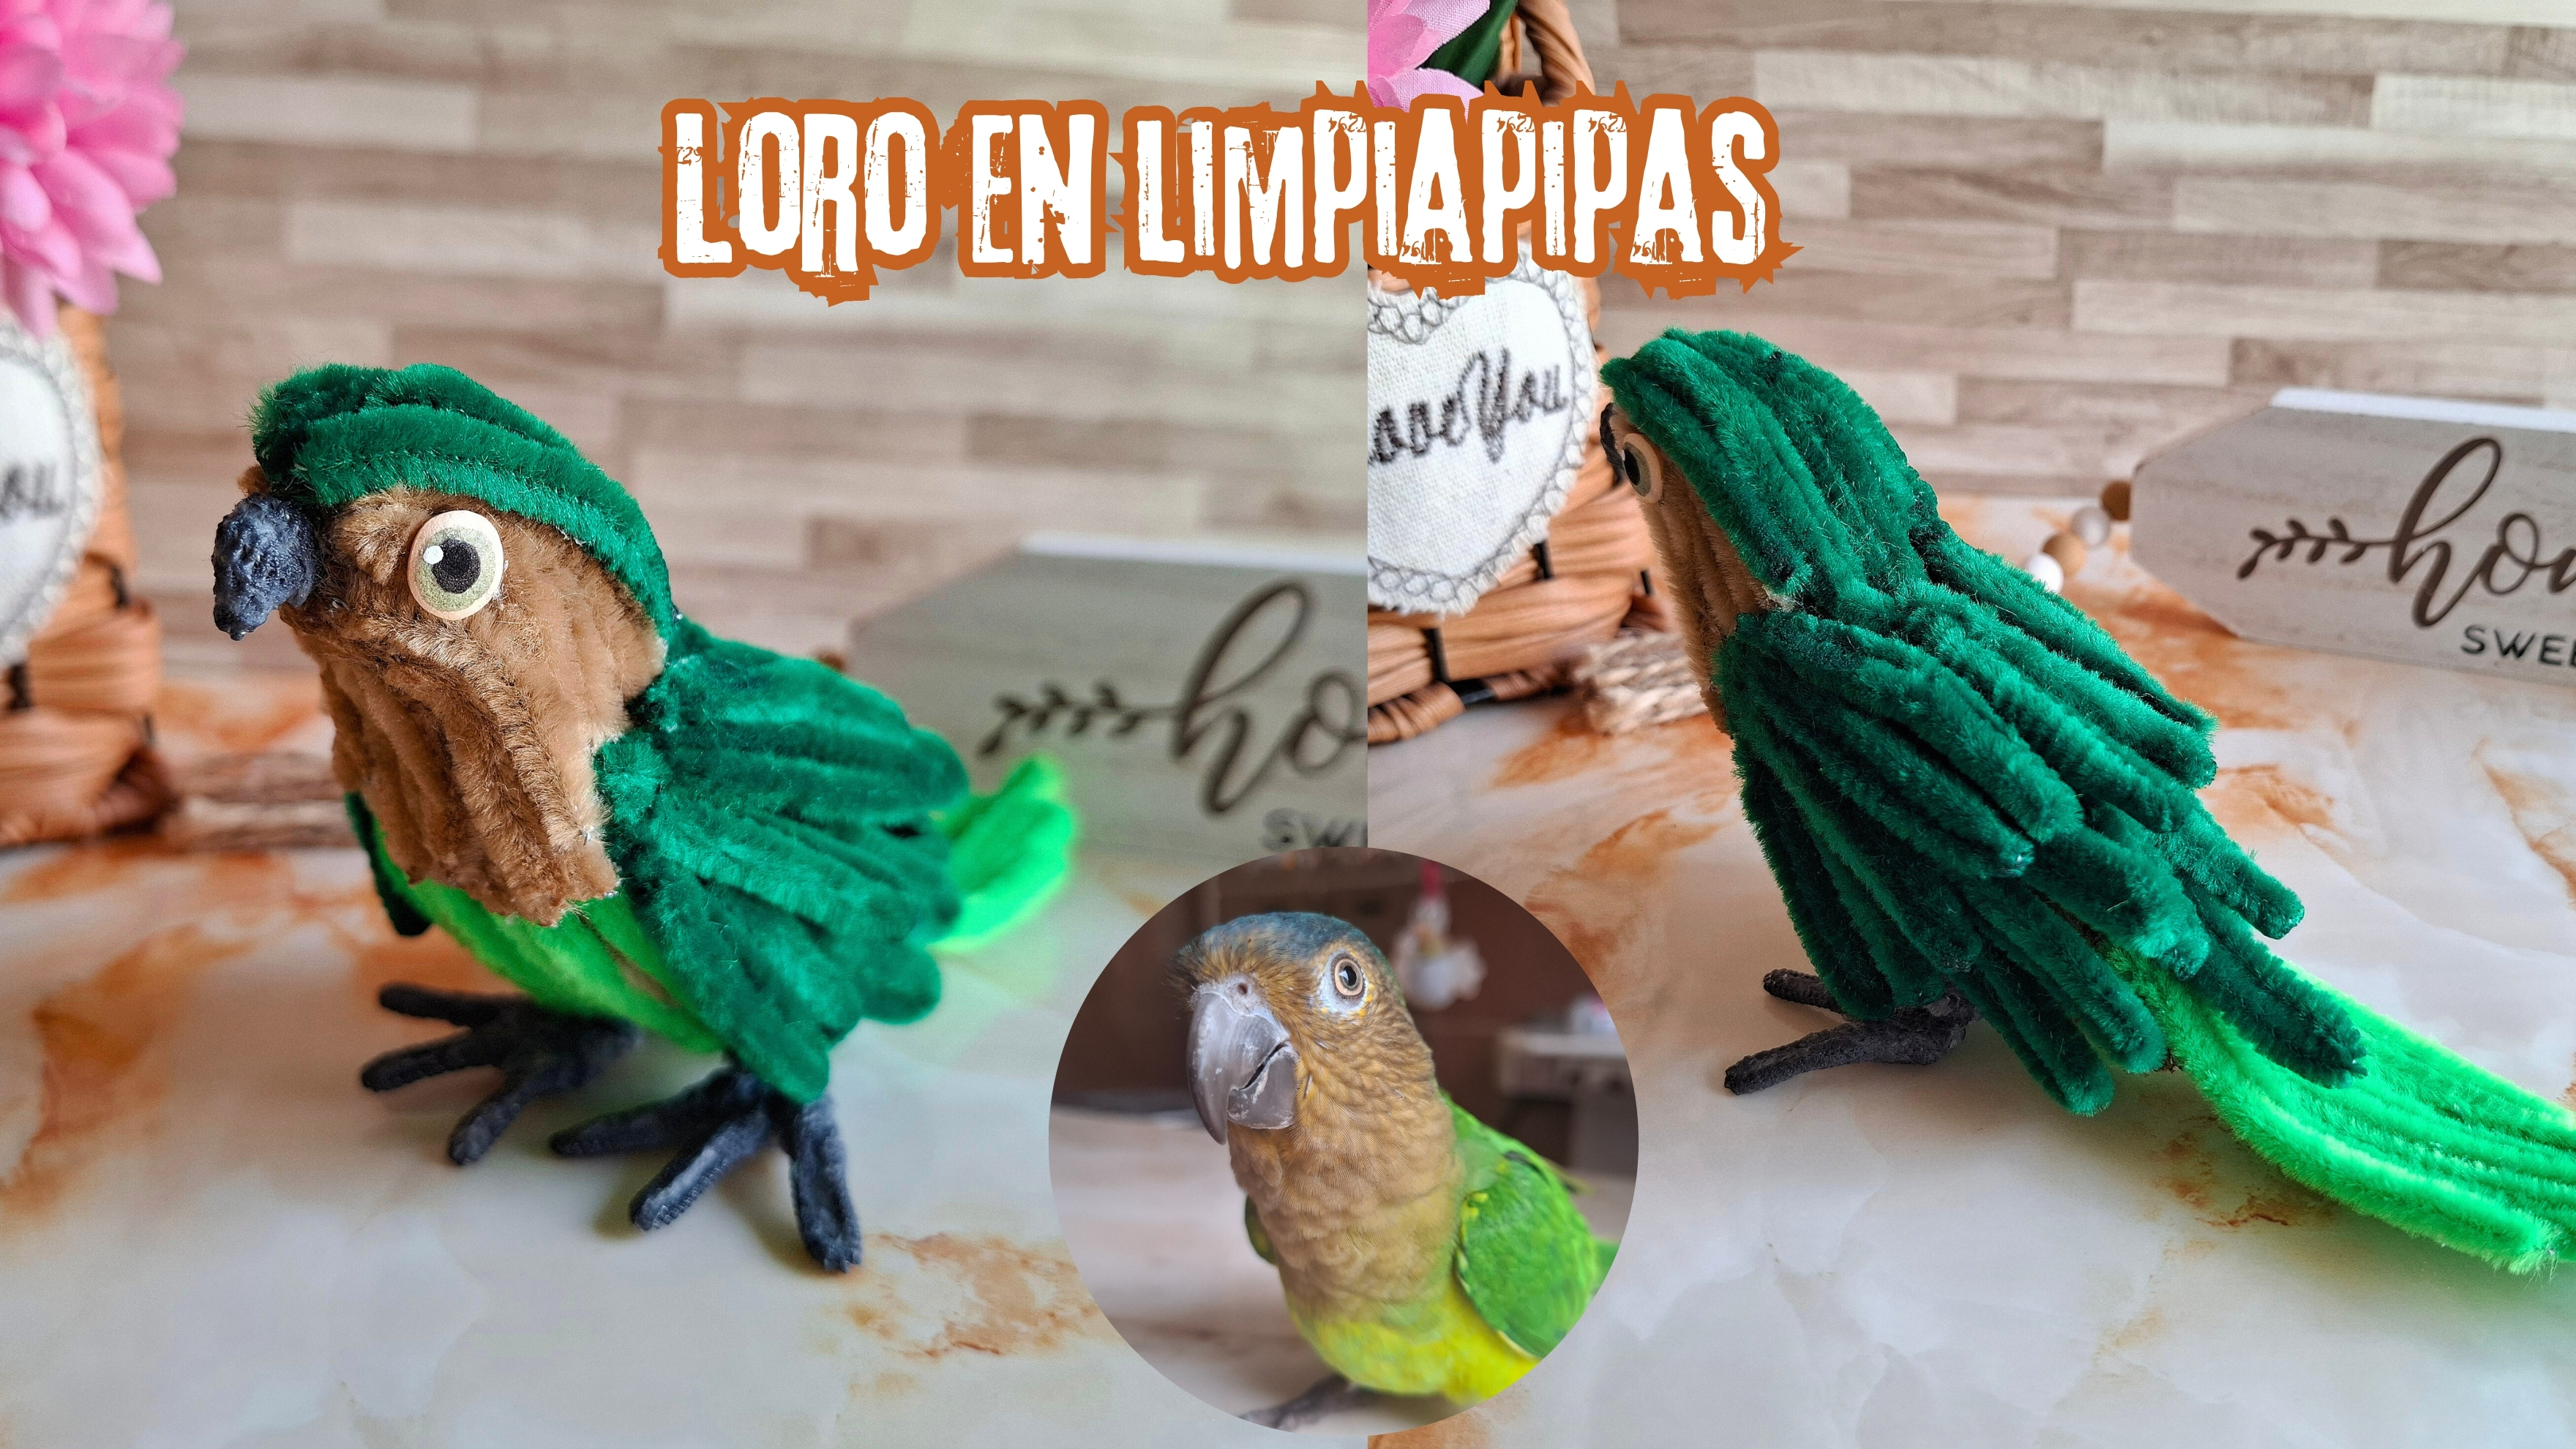
En esta oportunidad les comparto la elaboración de un lorito en limpiapipas, Lorito lo puedes encontrar en Pinterest, más sin embargo se puede personalizar de acuerdo a los colores que gustes, hace unas semanas realicé uno para otra comunidad inspirado en un personaje.
This time I share with you how to make a parrot out of pipe cleaners, Parrot you can find it on Pinterest, however it can be customized according to the colors you like, a few weeks ago I made one for another community inspired by a character.

Pero esta vez lo realicé como un recuerdo de mi Tomy, se acuerdan de mi lorito que ya no está conmigo, busqué una foto en dónde se notan bien sus colores y características, y con mucho cariño las llevé al arte del limpiapipas, estoy muy contenta con el resultado ya que quedó muy tierno, este ha sido mi proyecto favorito.
But this time I made it as a memory of my Tomy, remember my parrot who is no longer with me, I looked for a photo where his colors and characteristics are clearly visible, and with much love I took them to the art of pipe cleaners, I am very happy with the result since it was very tender, this has been my favorite project.
| Materiales | Materials |
|---|---|
| Limpiapipas verde oscuro | Dark green pipe cleaners |
| Limpiapipas verde claro | Light green pipe cleaner |
| Limpiapipas marrón claro | Light brown pipe cleaners |
| Limpiapipas gris | Gray pipe cleaner |
| Tijera | Scissors |
| Silicón | Silicone |
| Algodón | Cotton |
| Foami, pintura | Foam, paint |
| Marcadores | Bookmarks |

Paso a paso / Step by step
El primer paso que voy a realizar será la cola, elegí un tono de verde muy clarito, cortamos un limpiapipas en la mitad y otro completo solo lo vamos a doblar en la mitad, ahora las dos piezas que cortamos las vamos a doblar y unir al limpiapipas grande. Los bordes sobrantes los pegamos con silicón y ya tenemos la cola.
The first step is the tail. I chose a very light shade of green. We cut one pipe cleaner in half, and we're just going to fold the other full one in half. Now we're going to fold the two cut pieces and join them to the large pipe cleaner. We'll glue the excess edges with silicone, and that's it.
 |  |  |
|---|
El siguiente paso será realizar parte de las plumas, elegí el color verde más oscuro, en este punto es muy sencillo solo tienes que ir doblando el limpiapipas y uniendo, de la siguiente forma, voy a medir aproximadamente unos 3 a 4 cm doblamos giramos el limpiapipas para que no se mueva y continuamos el mismo paso dos veces más.
Realicé plumas de tres divisiones, y de dos, ambas en par, luego cortamos piezas en limpiapipas de 10 cm, de 8cm, 6cm, 4 cm, también en par.
The next step is to make part of the feathers. I chose the darkest green color. At this point, it's very simple. Just fold the pipe cleaner and join it together. Measure approximately 3 to 4 cm. Fold, twist, and then continue the same step two more times.
I made feathers with three divisions and two, both in pairs. Then, we cut pieces into 10 cm, 8 cm, 6 cm, and 4 cm pipe cleaners, also in pairs.
 |  |  |
|---|
 |  |
|---|
El siguiente paso es realizar las patitas, utilicé limpiapipas gris, voy a realizar el mismo paso de las plumas, solo que con una medida de 2 a 3 cm, cortamos el sobrante y con un encendedor vamos a rebajar la pelusa, para el pico solo vas a realizar una especie de bolita pequeña y cuando comiences a pasar el encendedor vas a dar forma puntiaguda con ayuda de los dedos.
The next step is to make the legs, I used gray pipe cleaners, I'm going to do the same step as the feathers, only with a measurement of 2 to 3 cm, we cut the excess and with a lighter we are going to reduce the fluff, for the beak you are only going to make a kind of small ball and when you start to pass the lighter you are going to give it a pointed shape with the help of your fingers.
 |  |
|---|
 |  |
|---|
Luego voy a realizar la base del cuerpo, para esto utilicé tres limpiapipas ambas piensas, doblamos en la mitad y se tomará una medida de 10 cm, allí cerramos, cortamos y con ayuda de los dedos vamos a realizar una especie de curva en el inicio, de igual forma con la otra pieza solo que tendrá una medida de 11 cm, y la forma de la curva será al sentido contrario.
Then I'm going to make the base of the body, for this I used three pipe cleaners, both of them, we fold them in half and it will measure 10 cm, there we close, cut and with the help of our fingers we are going to make a kind of curve at the beginning, in the same way with the other piece only it will measure 11 cm, and the shape of the curve will be in the opposite direction.
 |  |  |
|---|
 |  |
|---|
Esto lo vamos a pegar con silicón y en el centro rellenamos con algodón, para terminar de cubrir la base uni dos limpiapipas en la mitad y según la forma de los laterales vamos a cubrir ambas partes. Ahora es momento de comenzar a cubrir con el verde oscuro, primero en la cabeza, luego pegamos las piensas dobles juntas y también la cola.
We'll glue this with silicone, and fill the center with cotton. To finish covering the base, join two pipe cleaners in the middle, and, depending on the shape of the sides, we'll cover both parts. Now it's time to start covering the head with dark green, first, then glue the double-ended pipe cleaners together, and then glue the tail.
 |  |  |
|---|
 |  |
|---|
Luego voy a ubicar el resto de las plumas en los laterales comenzando con la pirza triple, si falta algún espacio por cubrir puedes colocar más limpiapipas verde, también ubique las patitas y el pico.
Then I'm going to place the rest of the feathers on the sides starting with the triple pirza, if there is any space left to cover you can place more green pipe cleaners, I also placed the legs and the beak.
 |  |
|---|
 |  |
|---|
En la parte del pecho coloqué limpiapipas de color verde claro, terminamos de perfeccionar la carita, ya que en algunos puntos queda con menos limpiapipas, esto lo puedes ir rellenando poco a poco hasta lograr una buena simetría, el último paso fue realizar los ojitos, para esto utilicé foami color piel en el centro marcador gris y negro con un punto blanco, si mirada era muy expresiva así que traté de realizarla lo mejor posible.
On the chest part I placed light green pipe cleaners, we finished perfecting the face, since in some places it remains with less pipe cleaners, you can fill this little by little until achieving good symmetry, the last step was to make the eyes, for this I used skin-colored foam in the center gray and black marker with a white dot, if look was very expressive so I tried to make it as best as possible.
 |  |
|---|
 |  |
|---|
Y listo, de esta forma terminé mi lorito en limpiapipas, realmente fue muy especial para mí, es un recuerdo que tendré por mucho tiempo, a mi familia les gustó mucho, espero les haya gustado el resultado, muchas gracias por el apoyo y por visitar mi publicación, nos vemos en una próxima oportunidad con más ideas creativas.
And that's it! This is how I finished my pipe cleaner parrot. It was truly special to me. It's a memory I'll have for a long time. My family loved it. I hope you enjoyed the result. Thank you so much for your support and for visiting my post. See you next time for more creative ideas.

Más del resultado final:
More of the final result:


Amiga que impresionante tu trabajo😍 te quedó precioso y además es muy bonito que lo hayas hecho pensando en Tomy💖
Estoy muy agradecida por el apoyo 🥹 saludos
Que hermosura de proyecto. Amé este lorito y lo bien explicado para enseñarnos a hacerlo . Un lindo recuerdo de Tomy.
Inspiración para hacerlos en otros colores y crear por ejemplo guacamayas 🦜♥️
Muchas gracias, bendiciones 🙏🏽
Sending you some Ecency curation votes!
Thanks 🥹
Amo la creatividad que tienes para estos proyectos. Te quedó increíble saludos y un fuerte abrazo!🥰
Gracias bella ✨
You've been curated by @plantpoweronhive! Delegations welcome!
Quedó demasiado hermoso😍, y se ve muy lindo y creativo al principio pensé que ara un loro real porque se ve bien realista JAJAJAJA.Saluditos!!💜
Jajaja si es que hasta parece que te mira 🥹 gracias por el apoyo 🫶🏽
Jajajaja si parece bien realista y esta hermoso. Saluditos!!🫶✨
Que cosa más bella... Sin duda eres una gran artesana. Poder replicar los colores de una belleza de loro es muy díficil y lo lograste que parece real. Bendecidas manos creadoras!!!
!discovery 30
Agradezco mucho el apoyo y tus palabras, saludos 🥹✨
This post was shared and voted inside the discord by the curators team of discovery-it
Join our Community and follow our Curation Trail
Discovery-it is also a Witness, vote for us here
Delegate to us for passive income. Check our 80% fee-back Program
Aaaaww que lorito más lindo, parece real, si que tienes talento, Dios bendiga tus manos ♥️🦜❤️