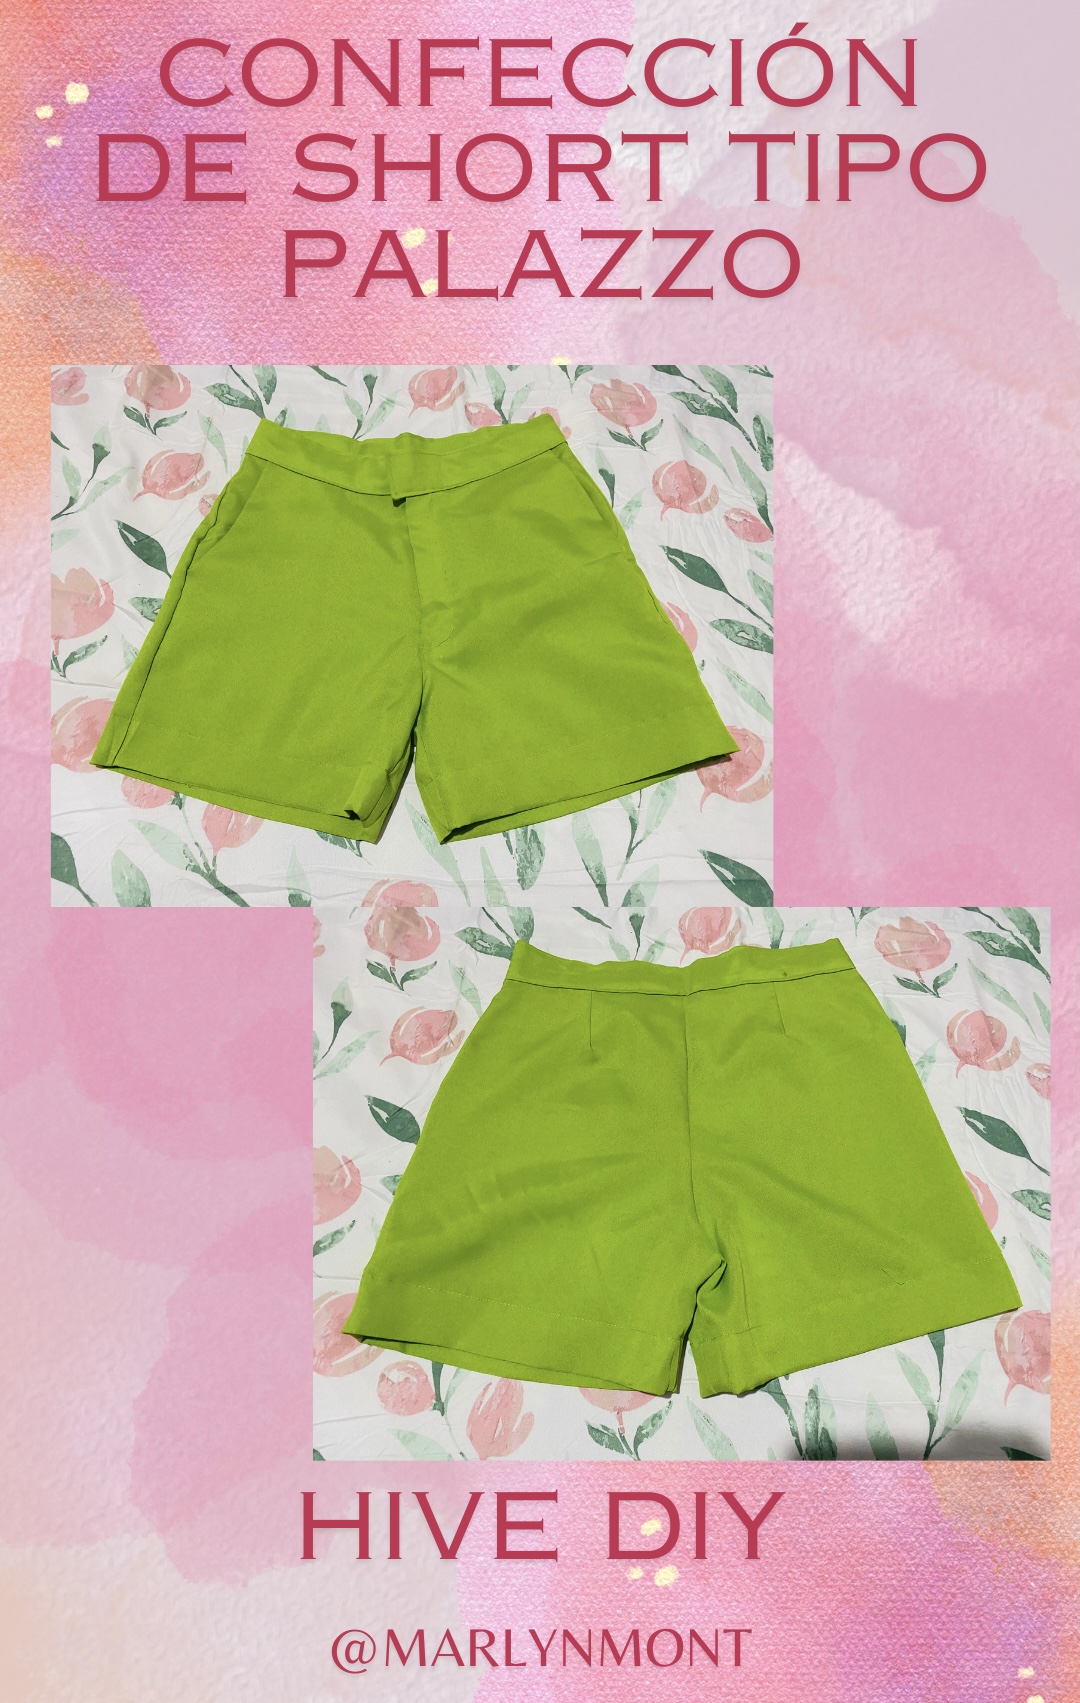
Saludos amigos de HIVE DIY! ❤️🪡✂️
Es un gusto compartir parte de mis trabajos por esta querida comunidad, Hace poco descubrí una nueva moda, el estilo Palazzo, este tipo de prendas de vestir son anchas en las piernas pero ajustadas en la cintura, hoy quiero mostrarles la confección de un Short tipo palazzo, sencillo y fácil de hacer, acompáñame a confeccionarlo:
➿➿➿➿💚🪡✂️➿➿➿➿
MATERIALES
MATERIALS
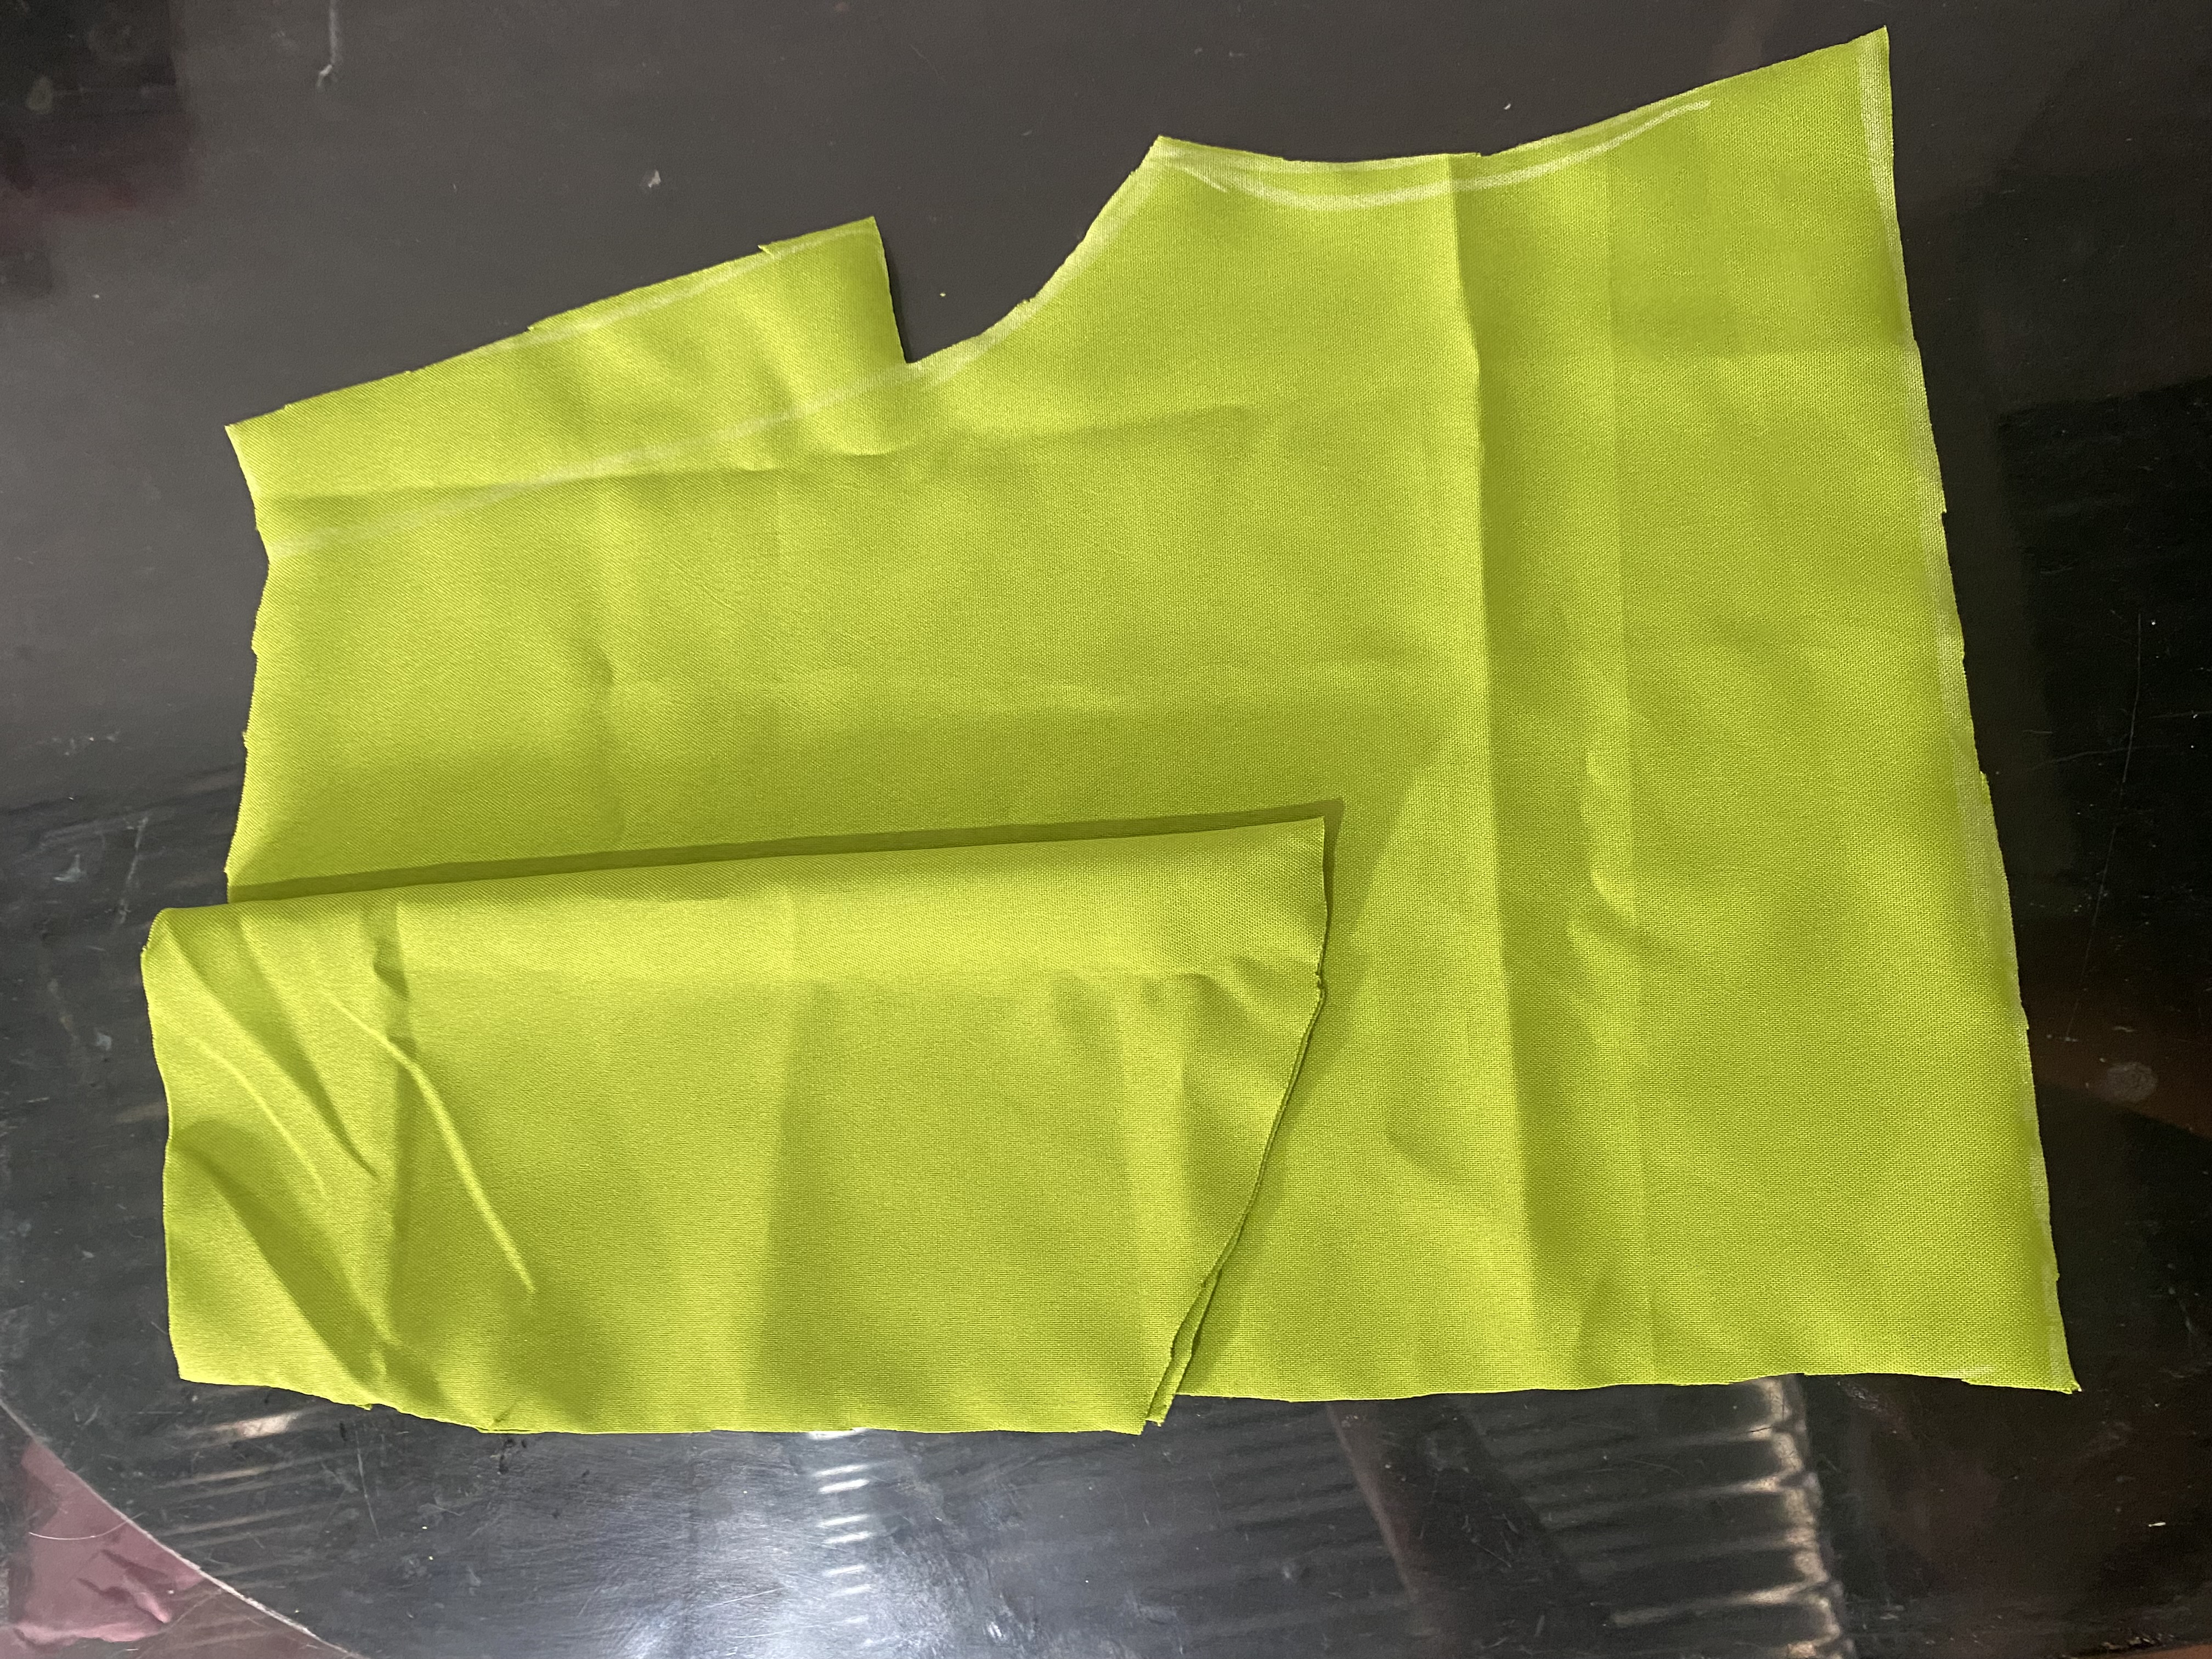
Éste estilo de pantalones o shorts tipo palazzo se caracterizan por ser de corte alto , ajustado en la cintura, recto en las piernas o botas y que puedes utilizar para cualquier ocasión y te dará ese toque de elegancia, la gran mayoría de modelos son bastantes sencillos con muy pocos bolsillos pero con detalles hermosos, la tela que voy a utilizar se llama minimat y la conseguí por tan sólo 1$ el metro, acá te dejo la lista de materiales:
- 75 cm de la tela de tu preferencia
- Una cremallera de 18 cm
- Máquina de coser
- Hilo del color acorde para la tela
- Cinta métrica
- tijeras
This style of palazzo-type pants or shorts are characterized by being high cut, tight at the waist, straight on the legs or boots and that you can use for any occasion and will give you that touch of elegance, the vast majority of models are quite simple with very few pockets but with beautiful details, the fabric I am going to use is called minimat and I got it for only $1 per meter, here is the list of materials:
- 75 cm of the fabric of your choice
- An 18 cm zipper
- Sewing machine
- Thread of the appropriate color for the fabric
- Measuring tape
- scissors
➿➿➿➿💚🪡✂️➿➿➿➿
PASO A PASO
STEP BY STEP
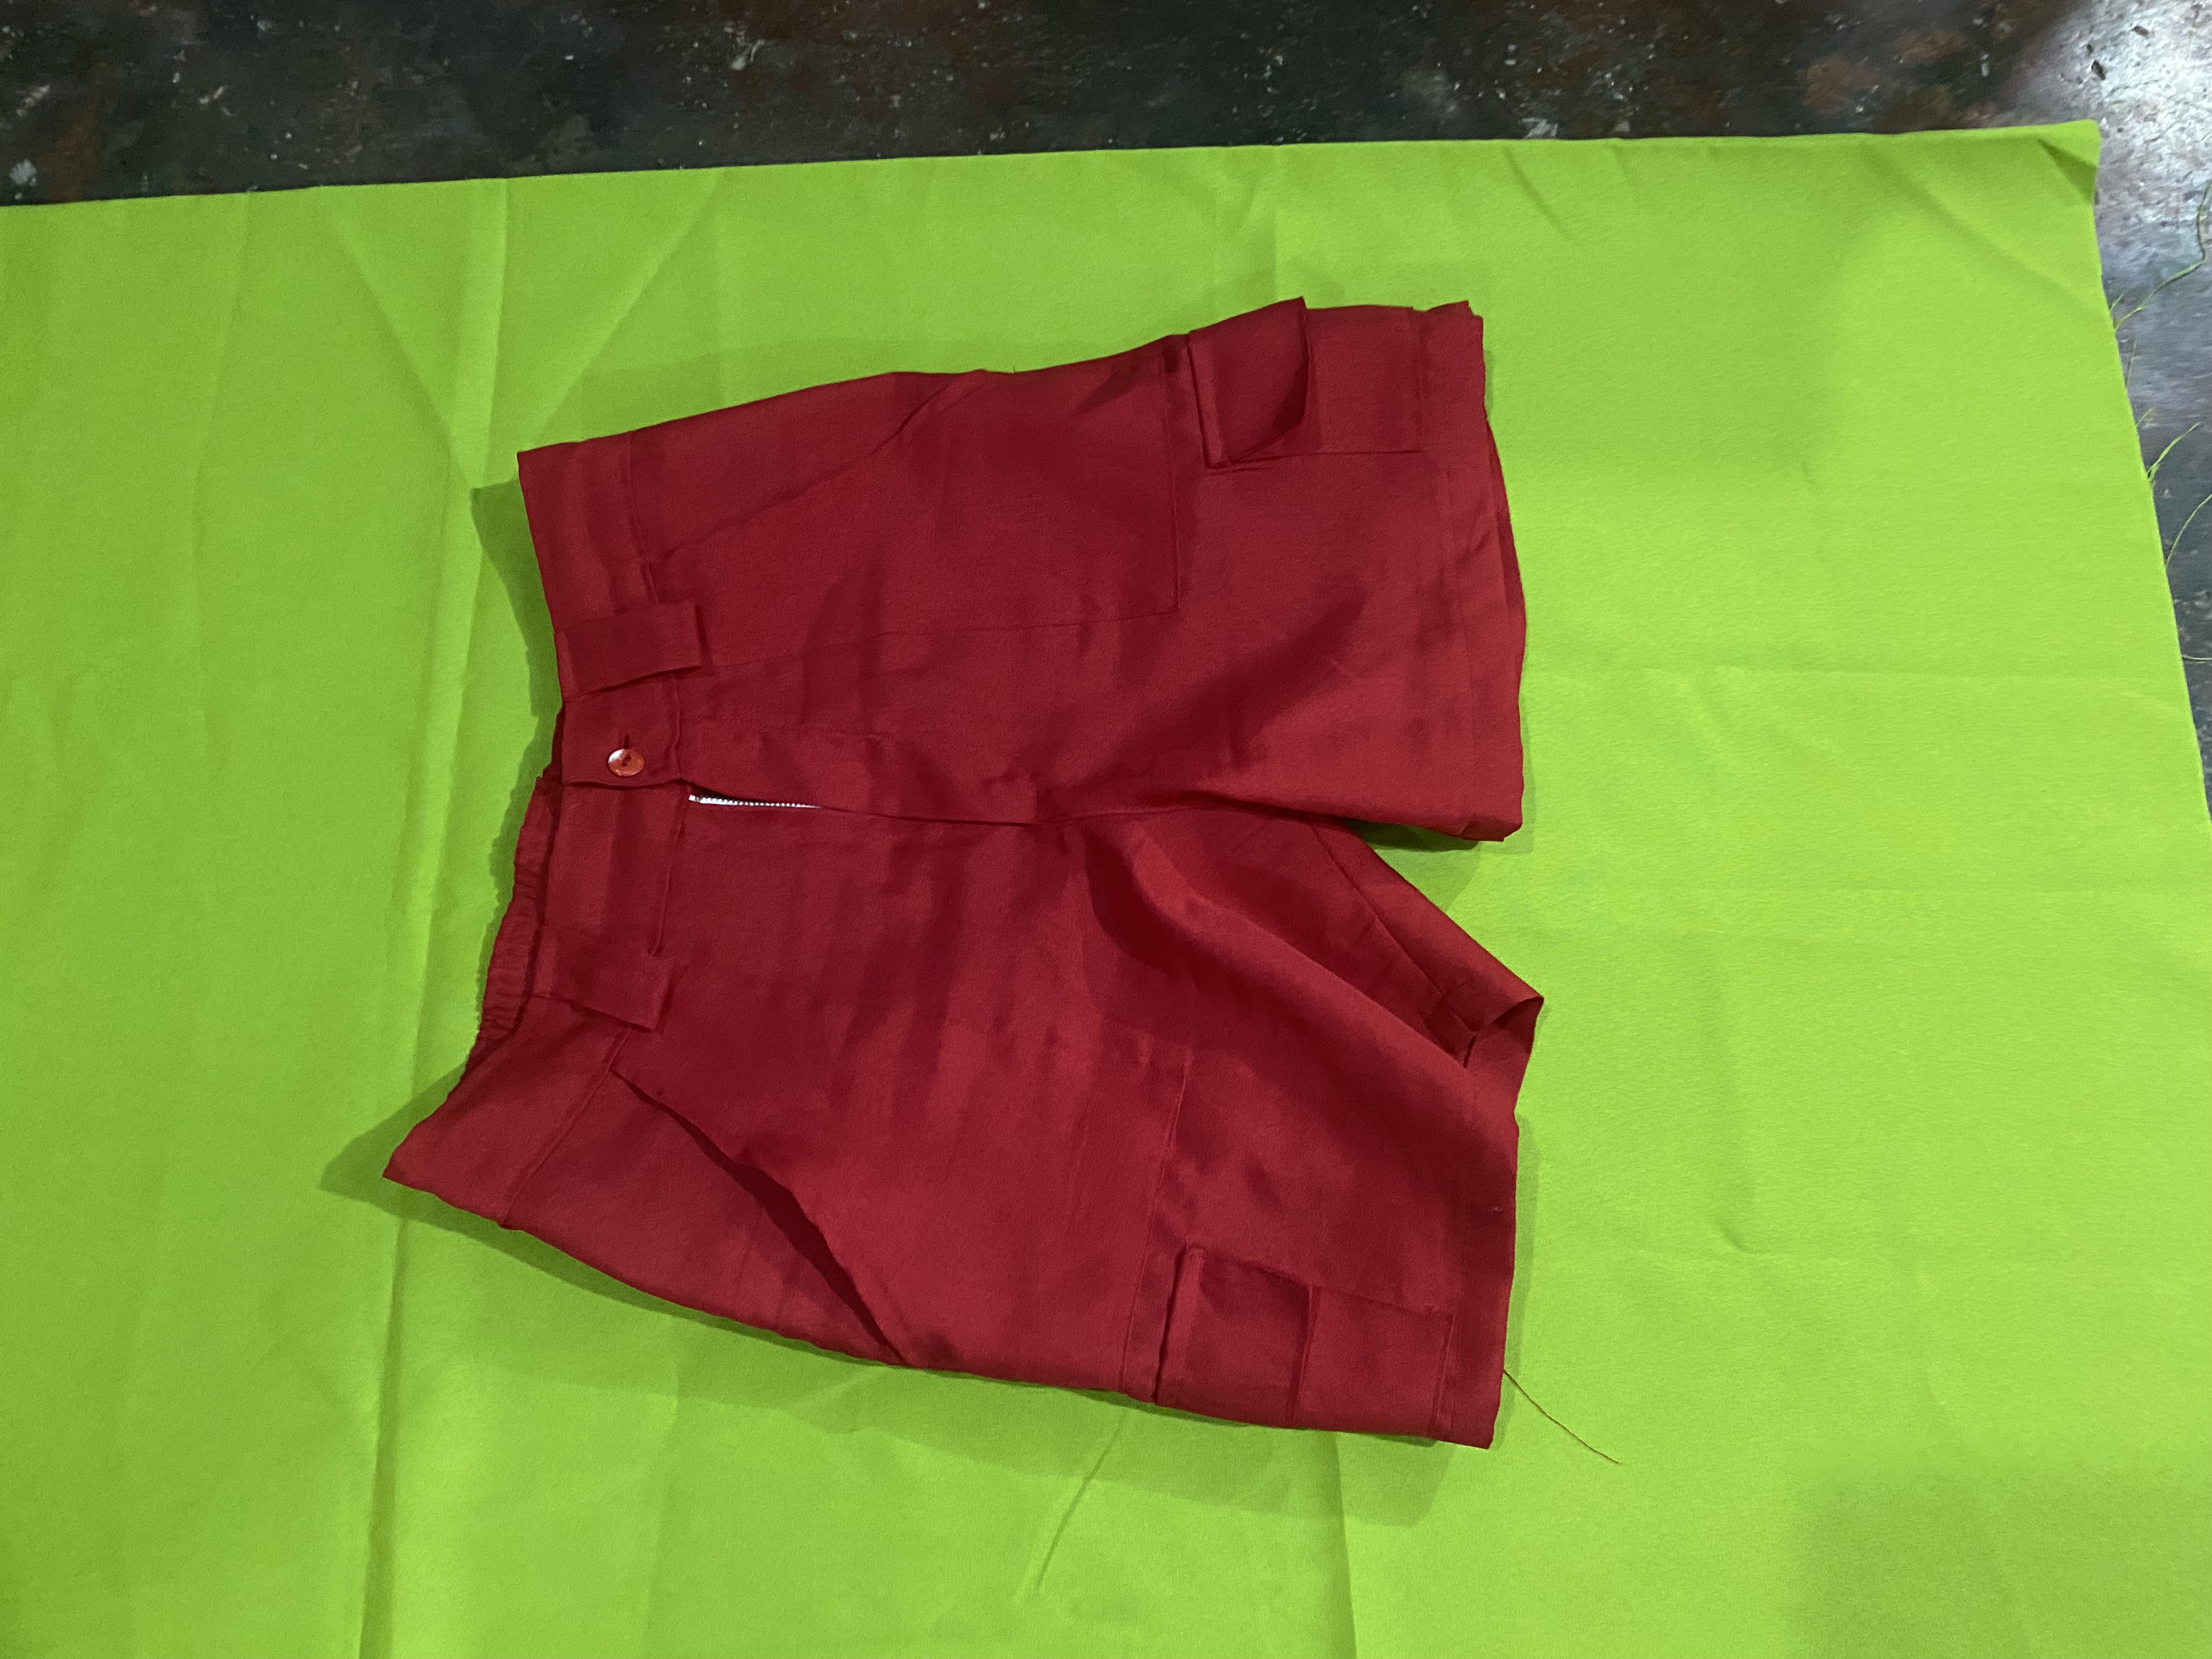
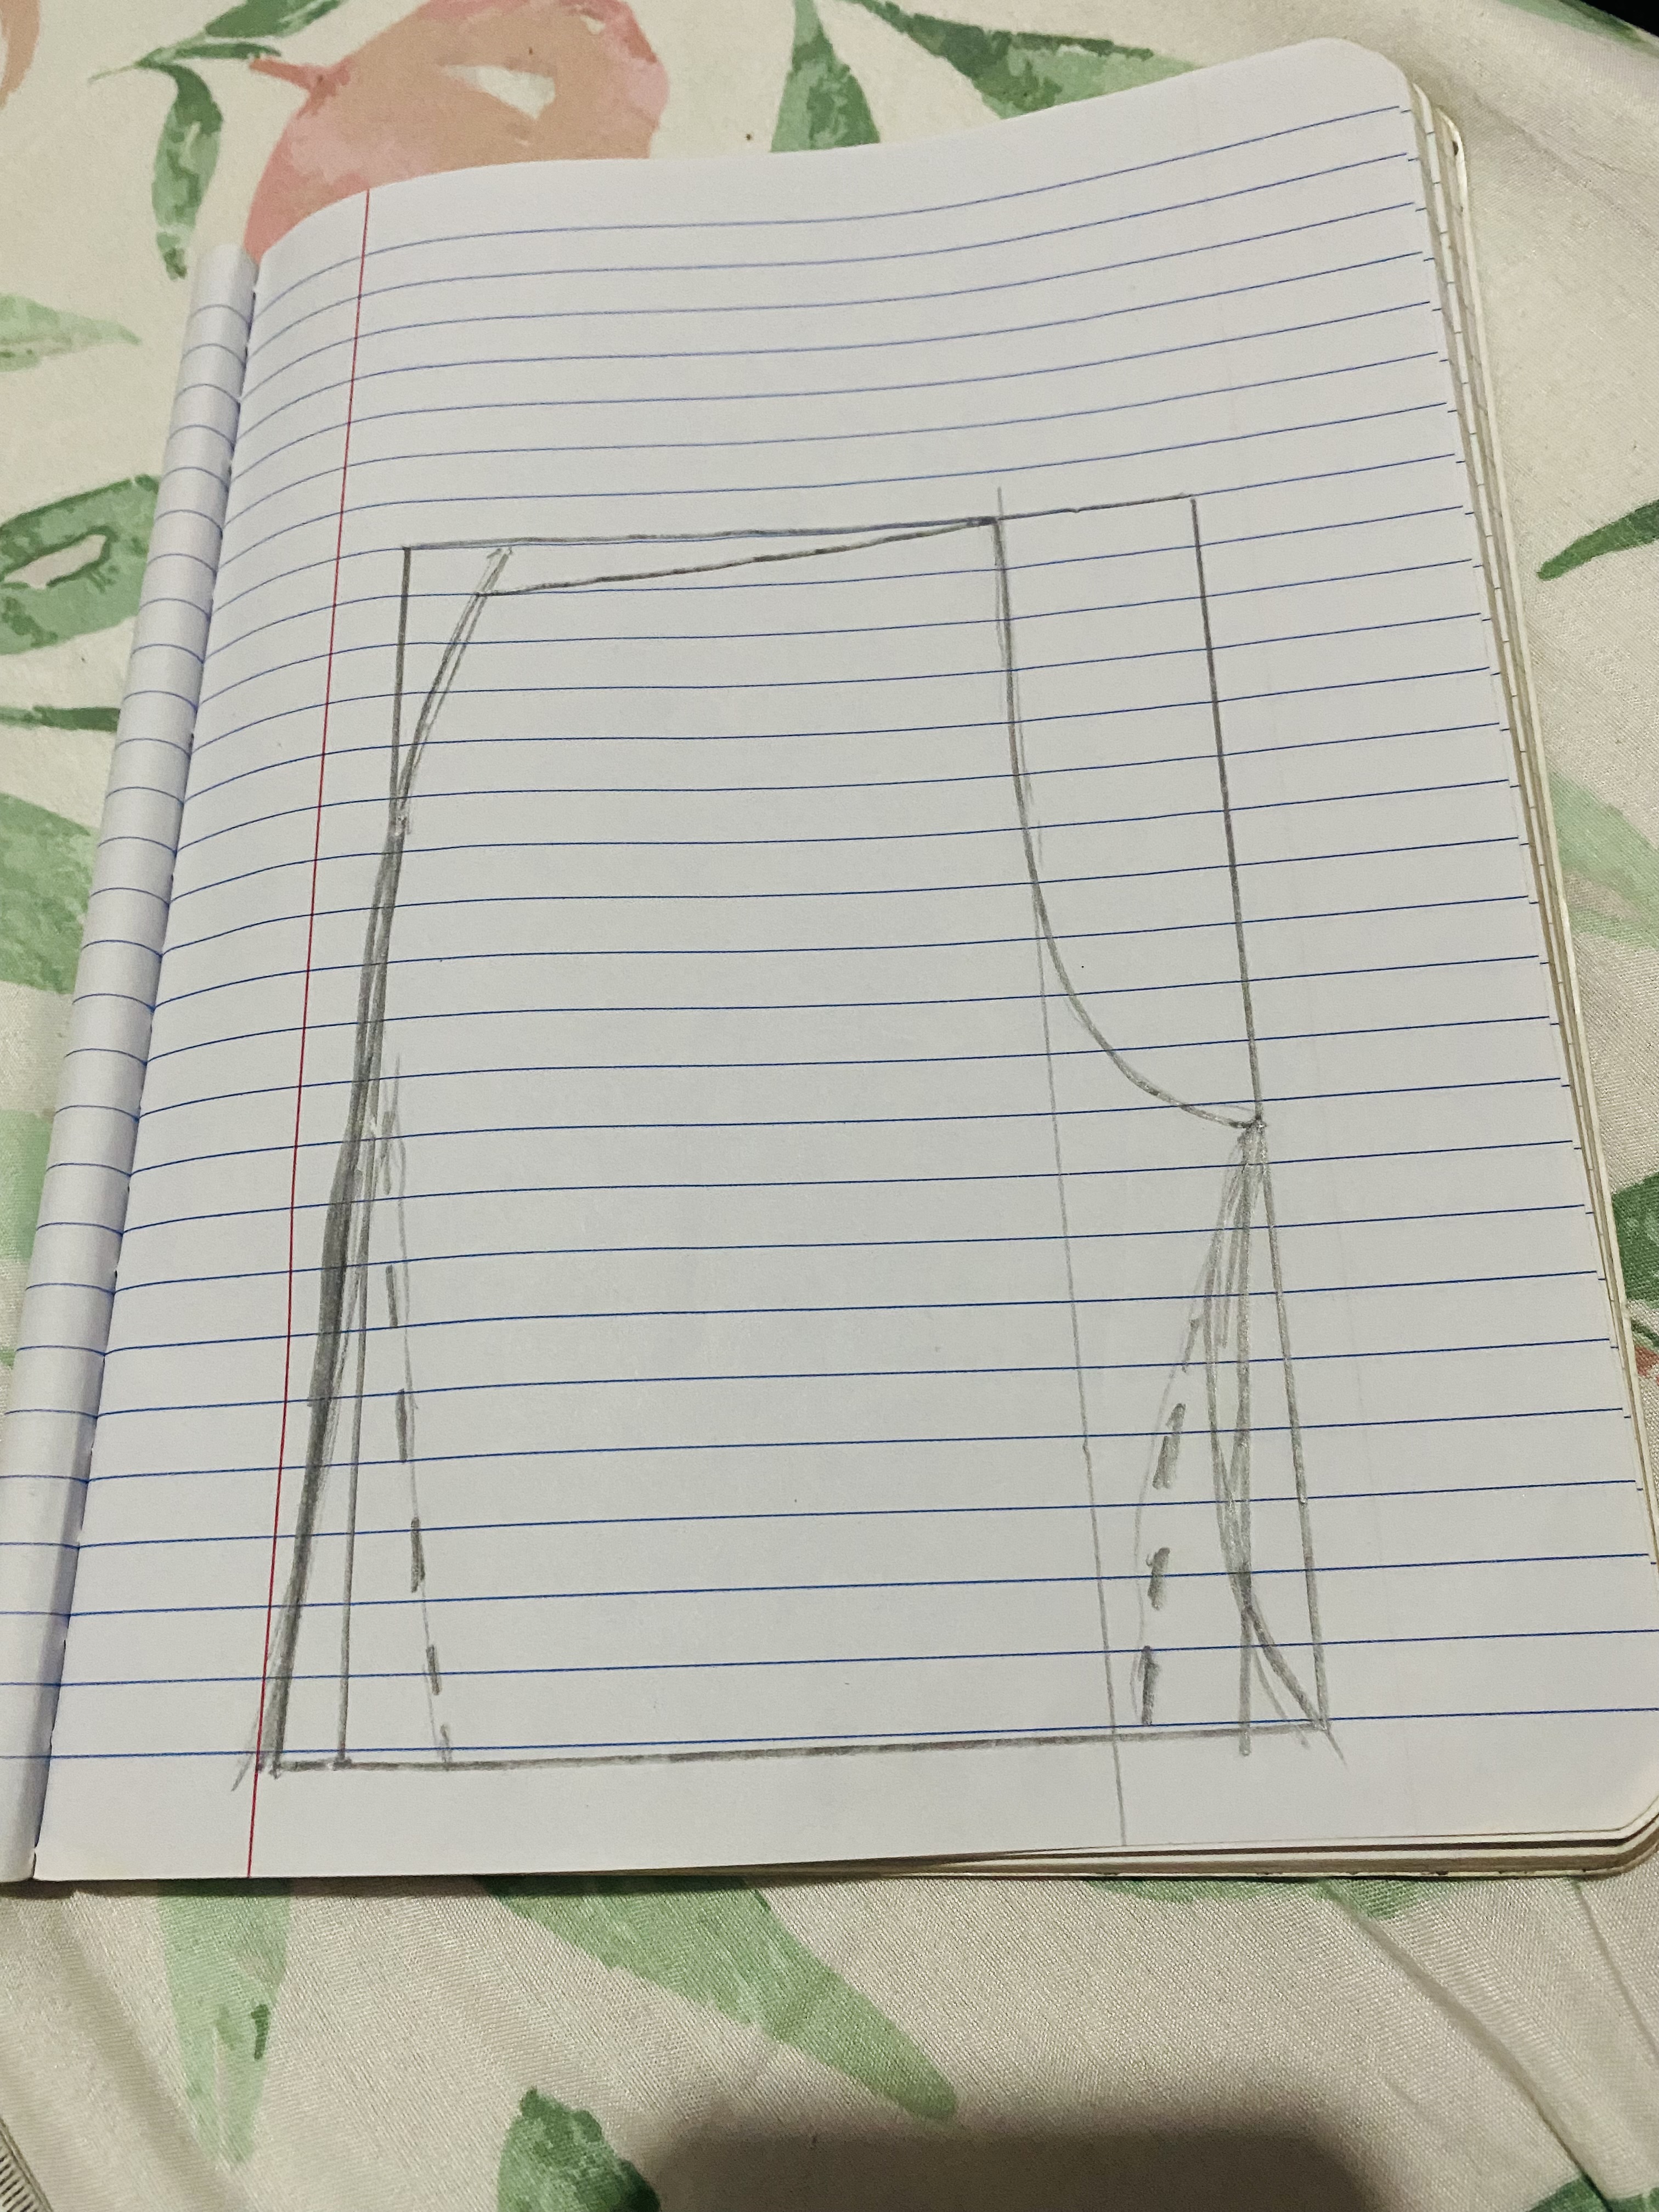
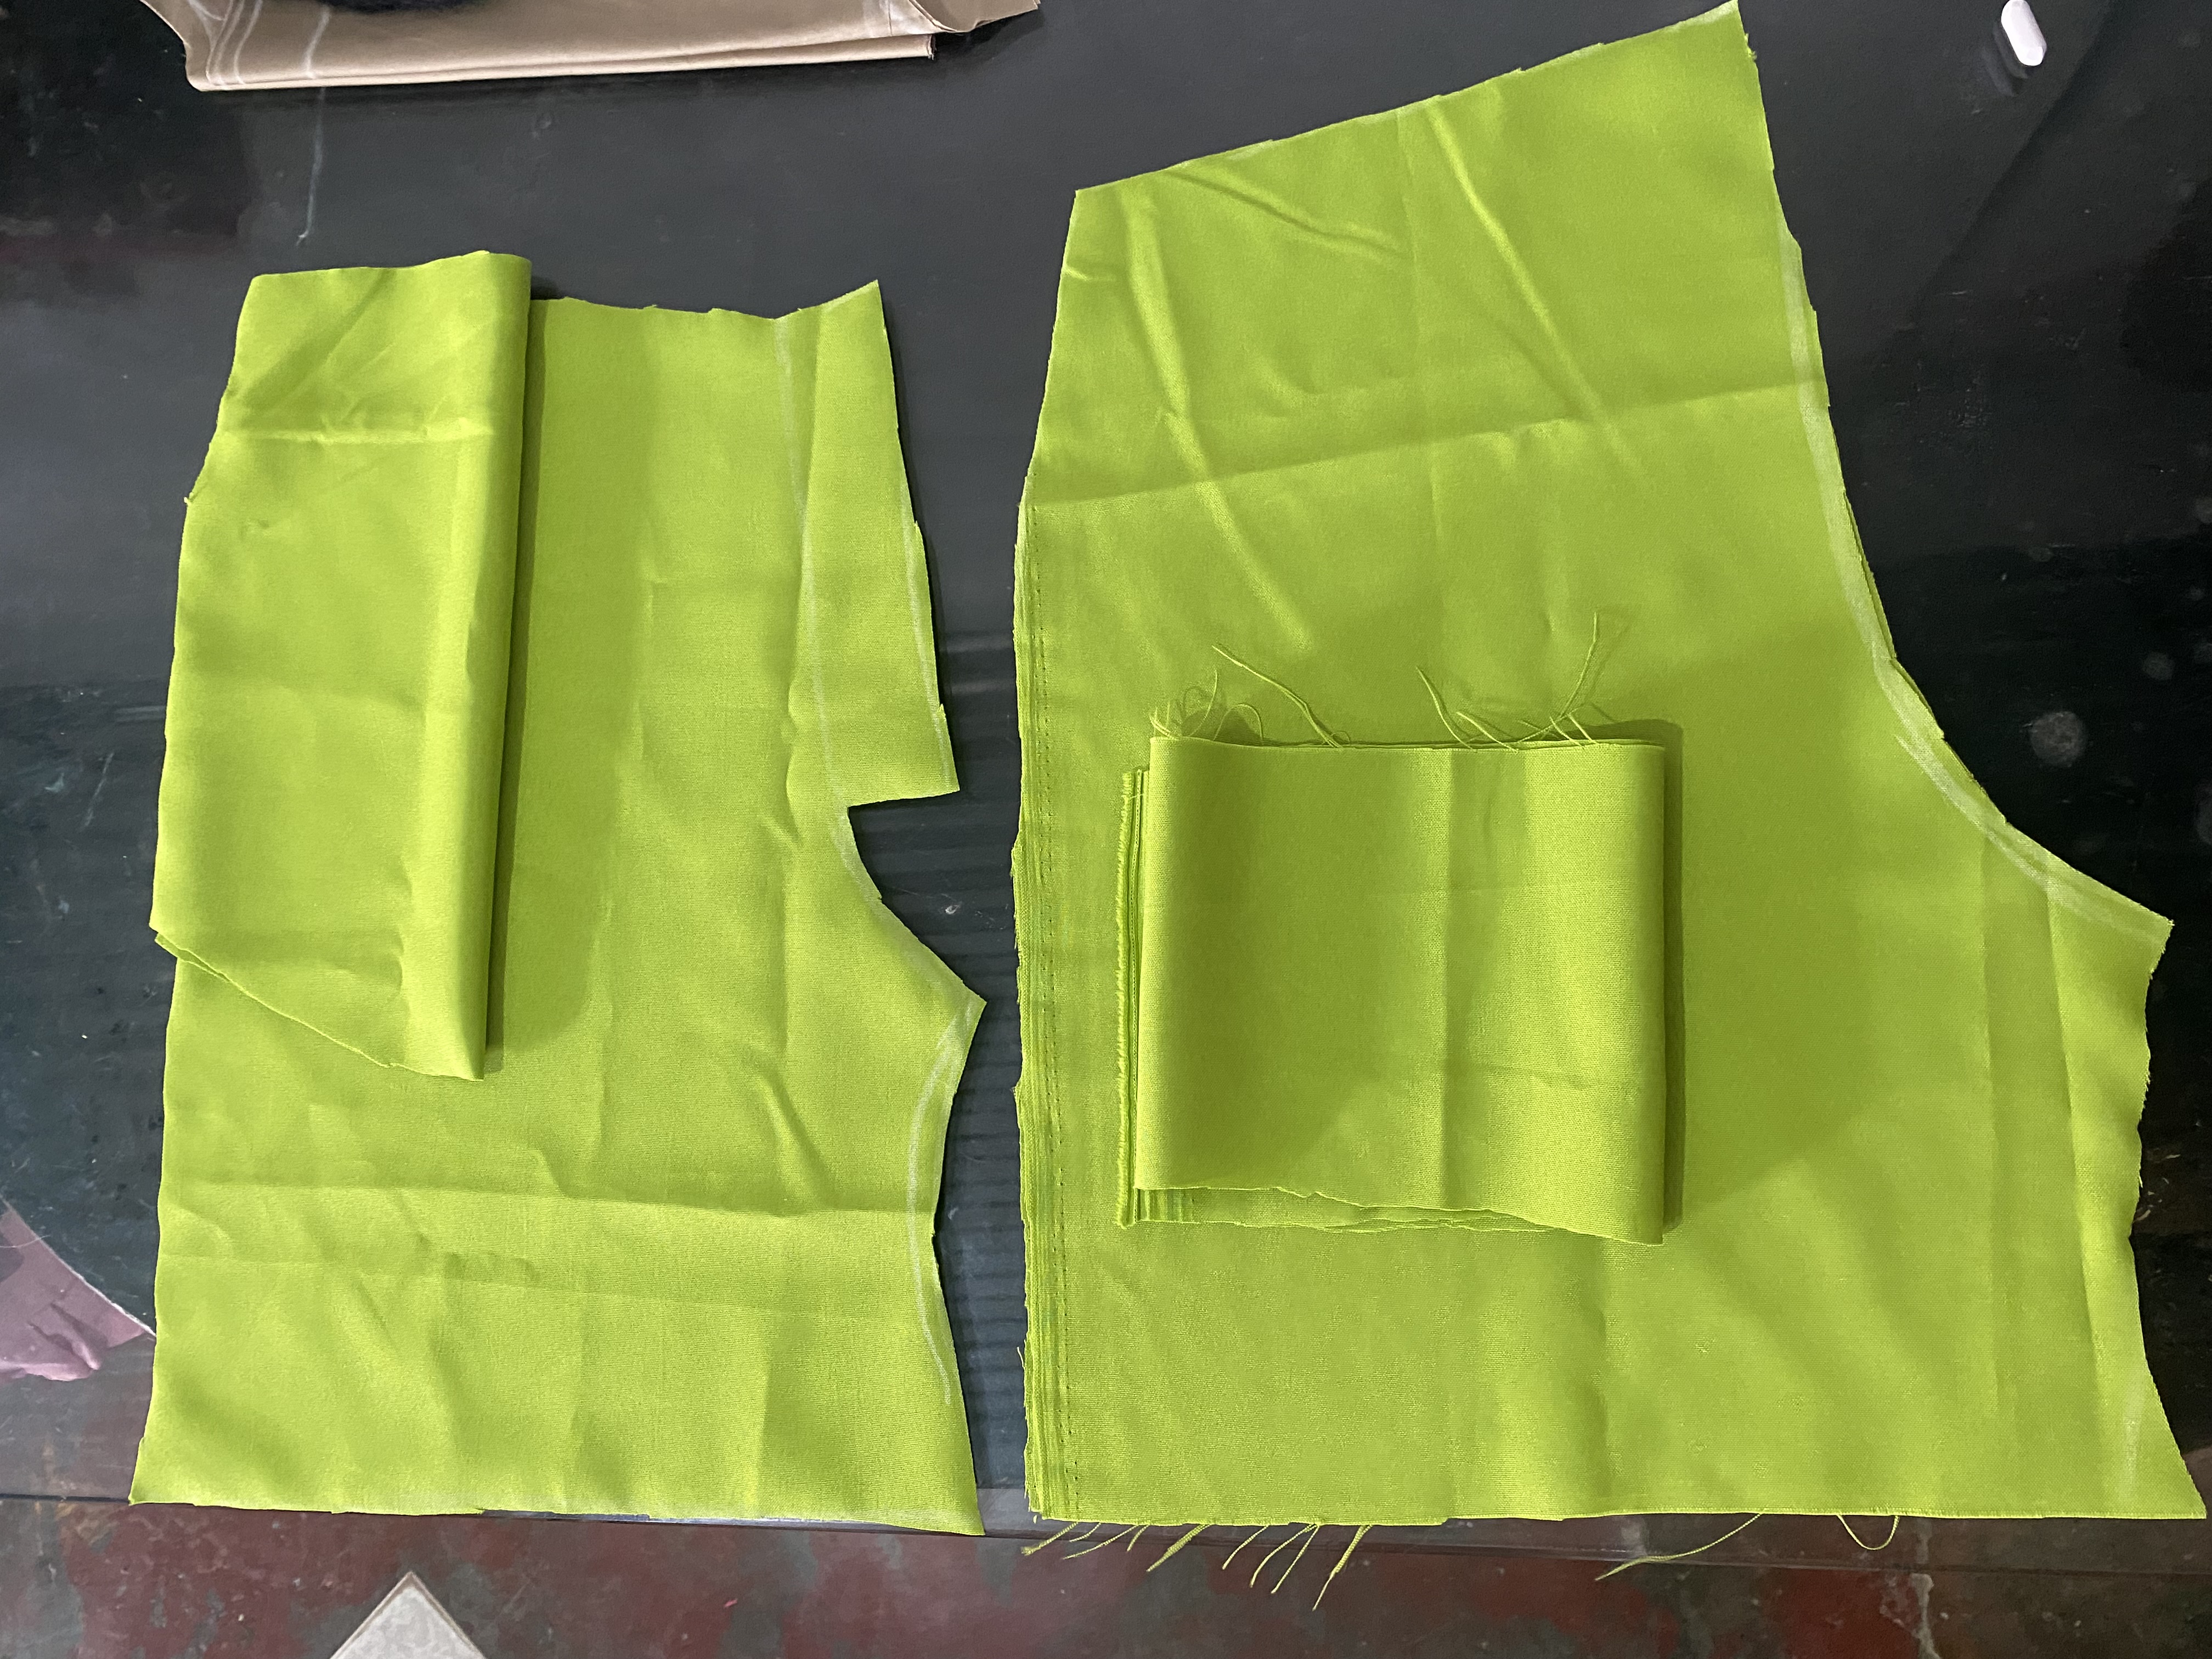
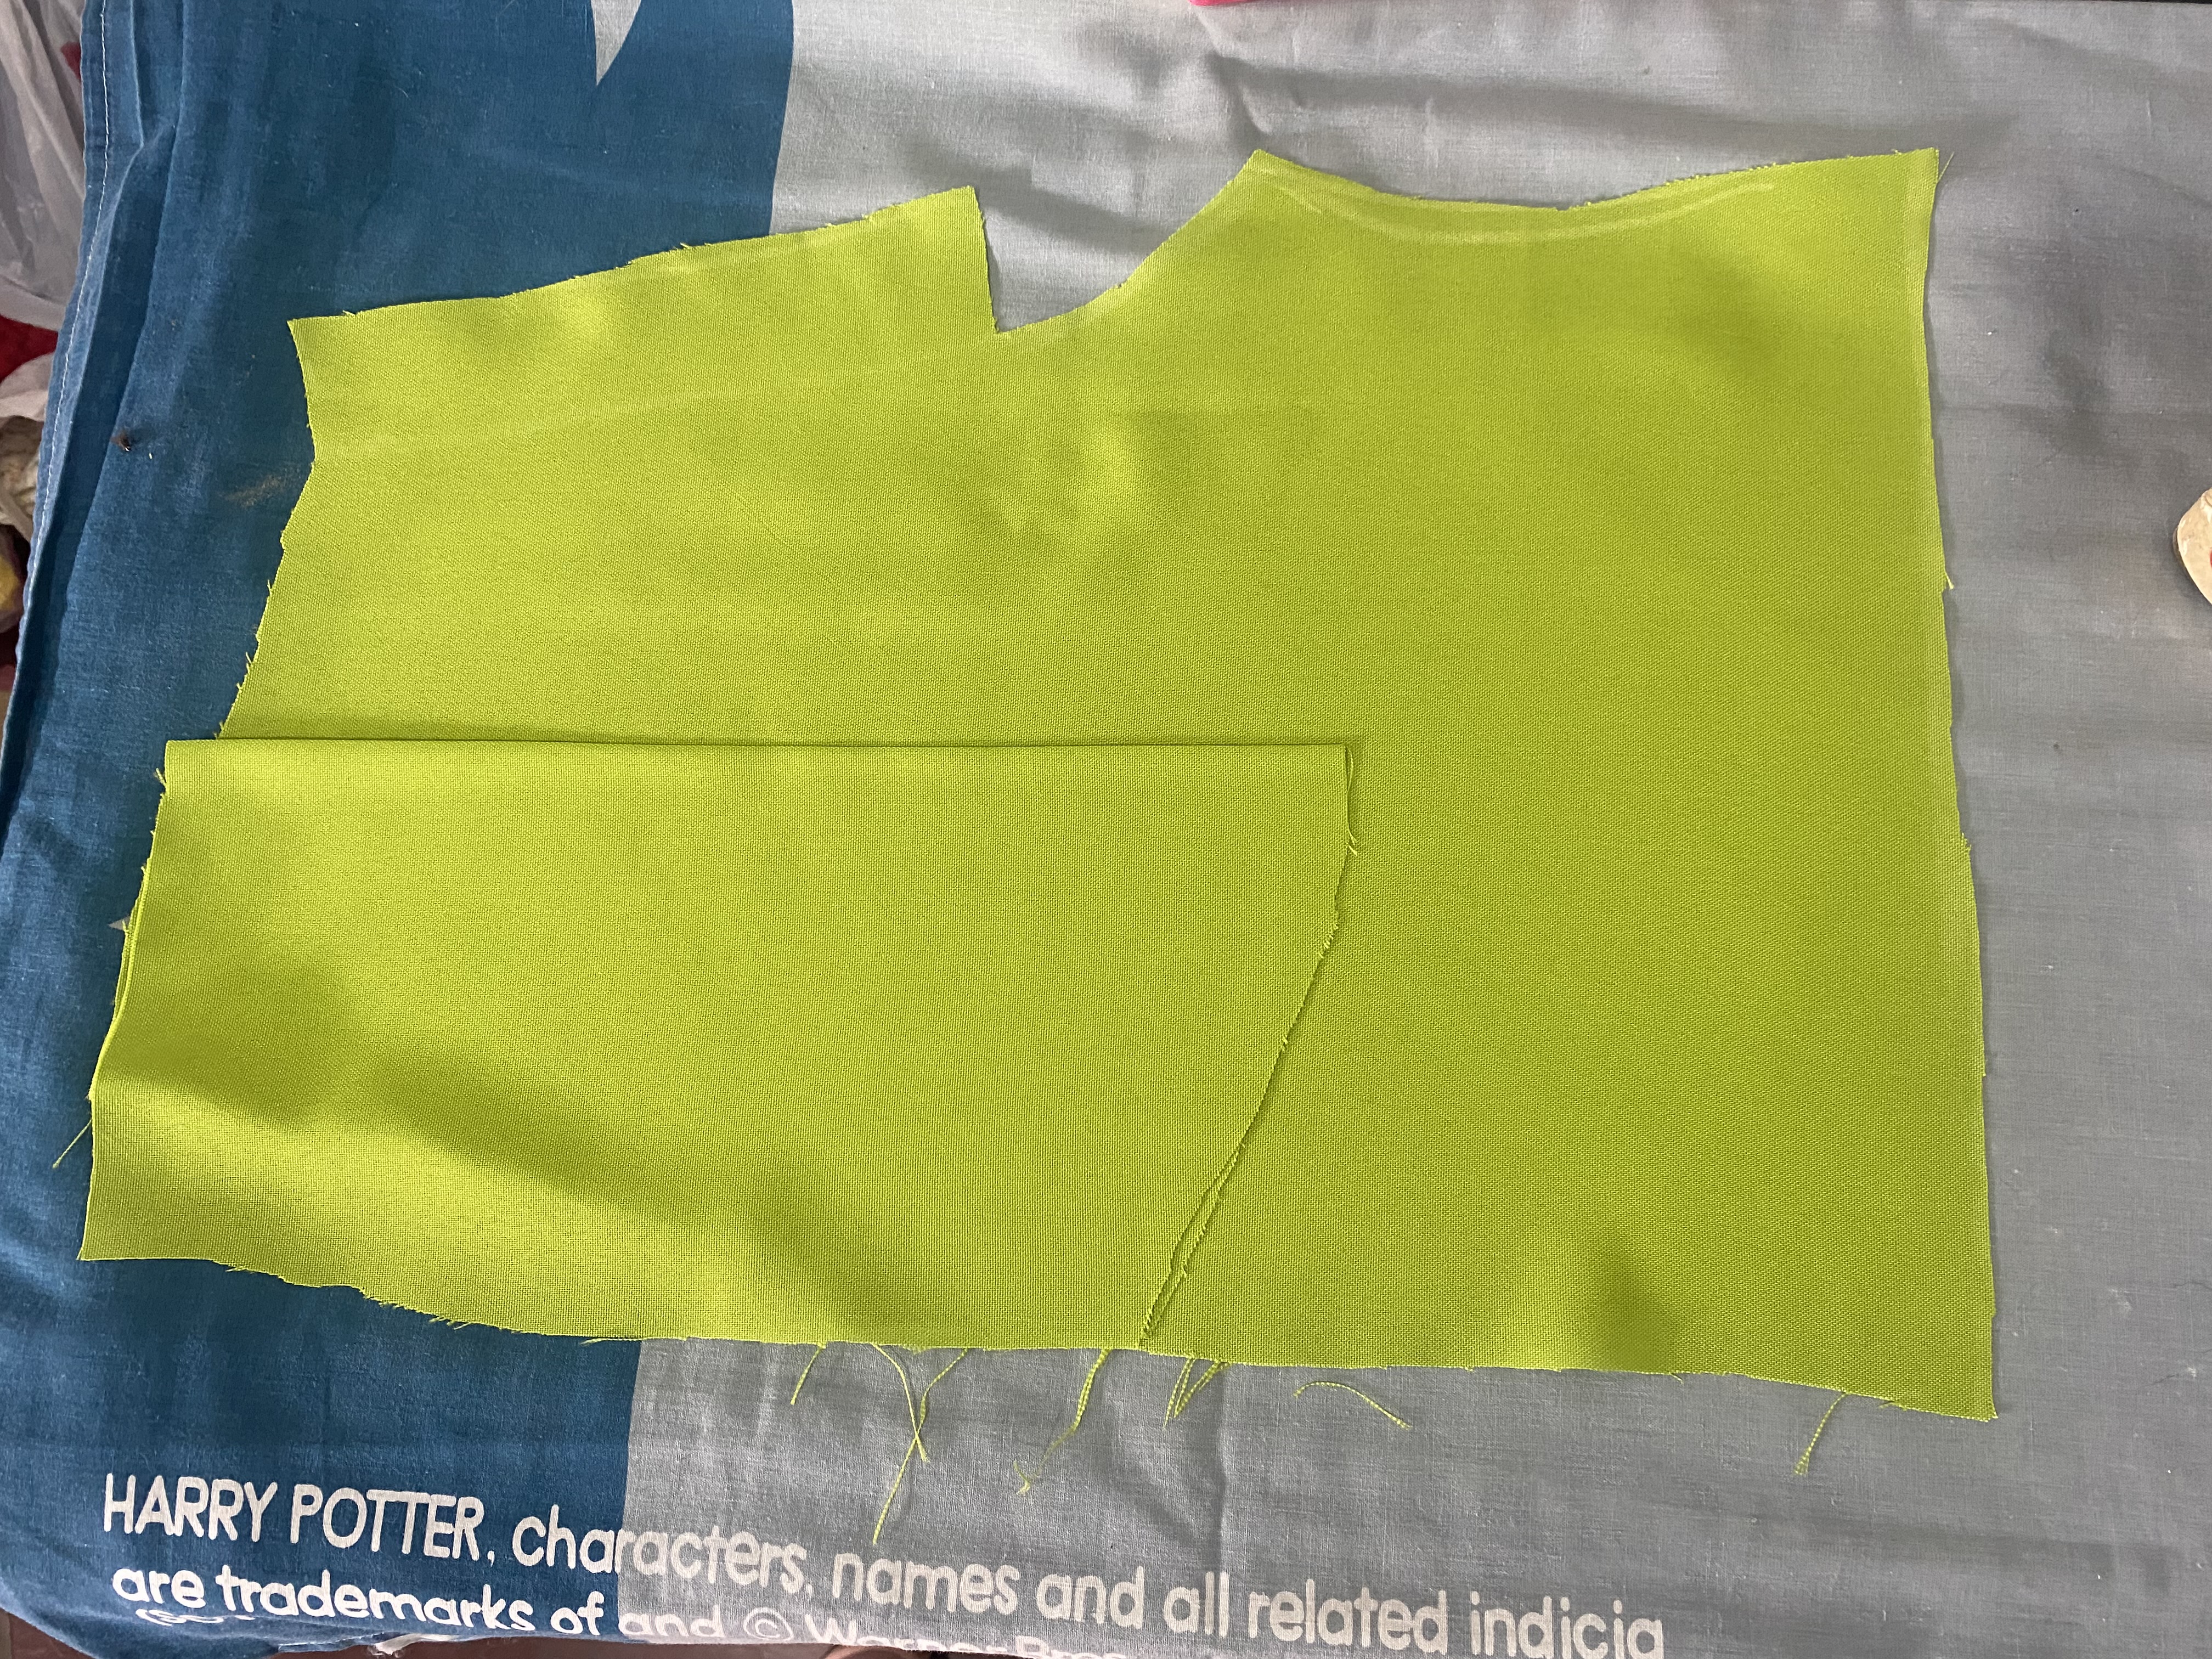
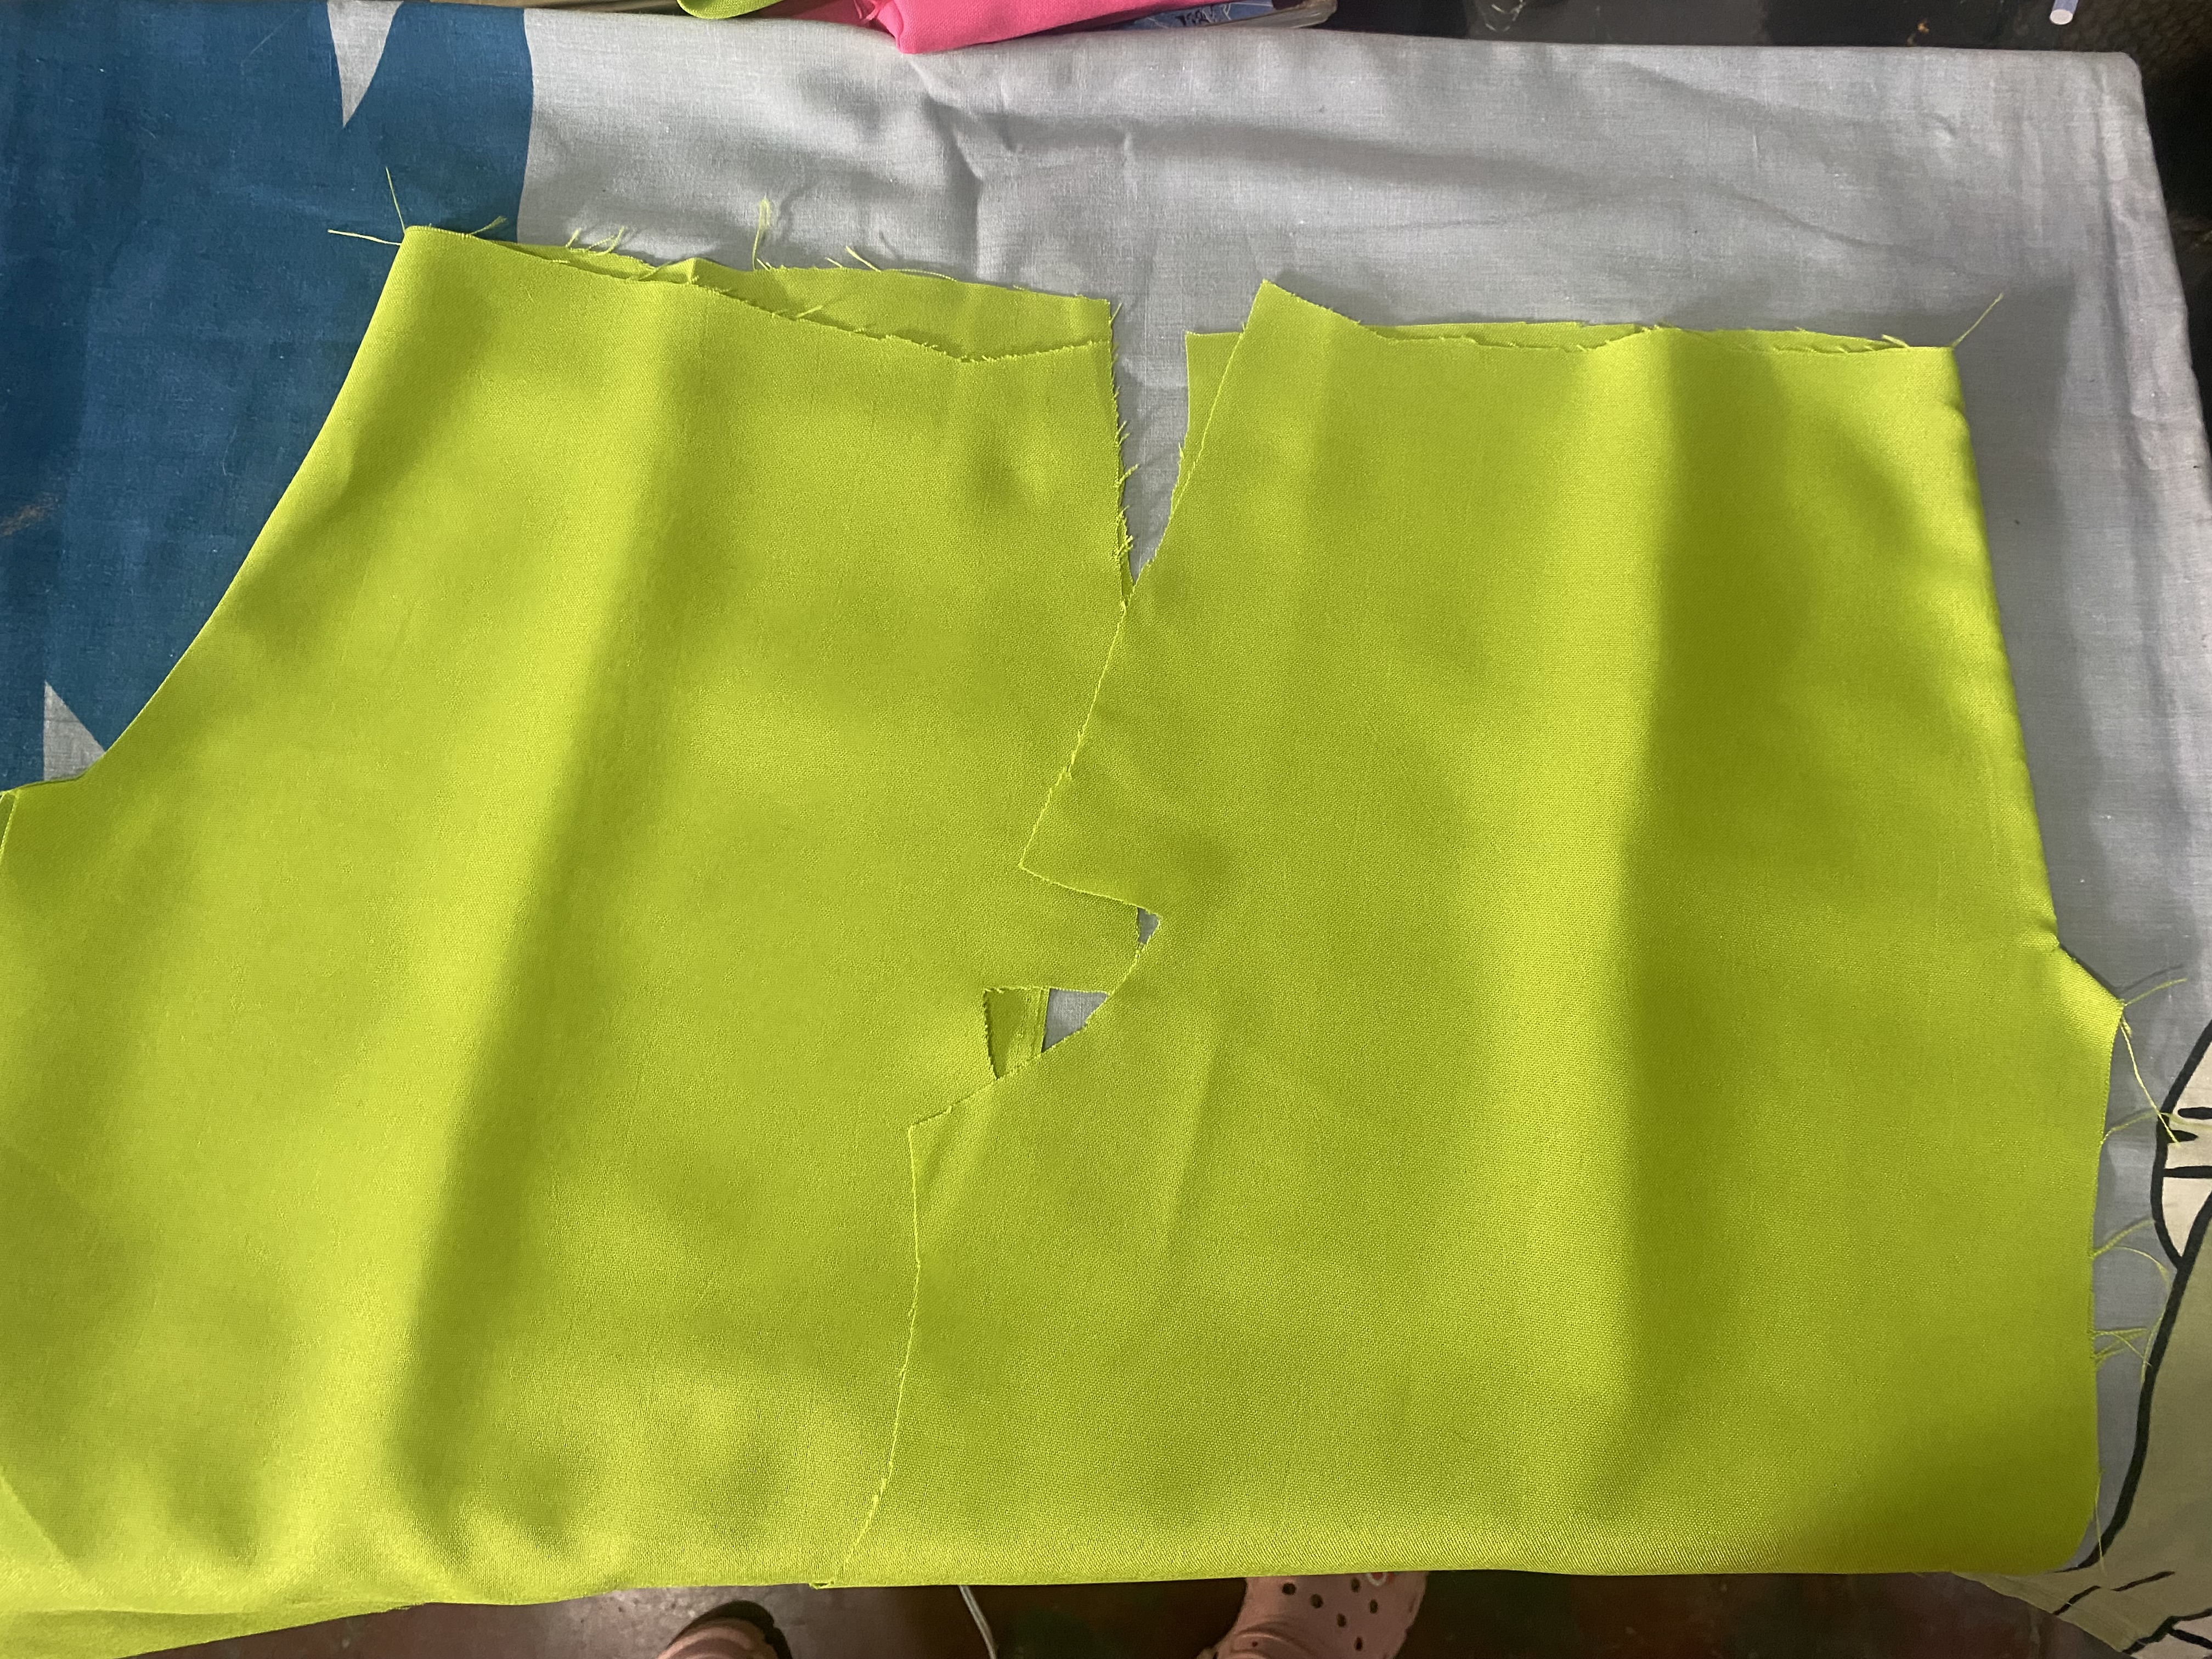
Si no sabes hacer patrones no te preocupes, yo hago mis prendas de vestir guiándome por una prenda que sea parecida al modelo que quiero realizar o que sea del tamaño adecuado para la persona a la cual le voy a hacer la prenda nueva, y luego le hago los ajustes necesarios, en mi caso voy a utilizar uno de los Shorts de mi hija, dibujaremos el contorno del short sobre la tela, dejaremos 1 cm por cada lado para las costuras.
Siempre comienzo dibujando la parte trasera ya que me resulta más sencilla, la diferencia será en la pierna de este Short, hice un dibujo referencial para guiarnos como va a ser el aumento de medidas, le vamos a aumentar 3 cm en el lateral y 2cm en la parte interna o fundillo, el ruedo lo quiero ancho así que le aumentaré 6 cm de largo.
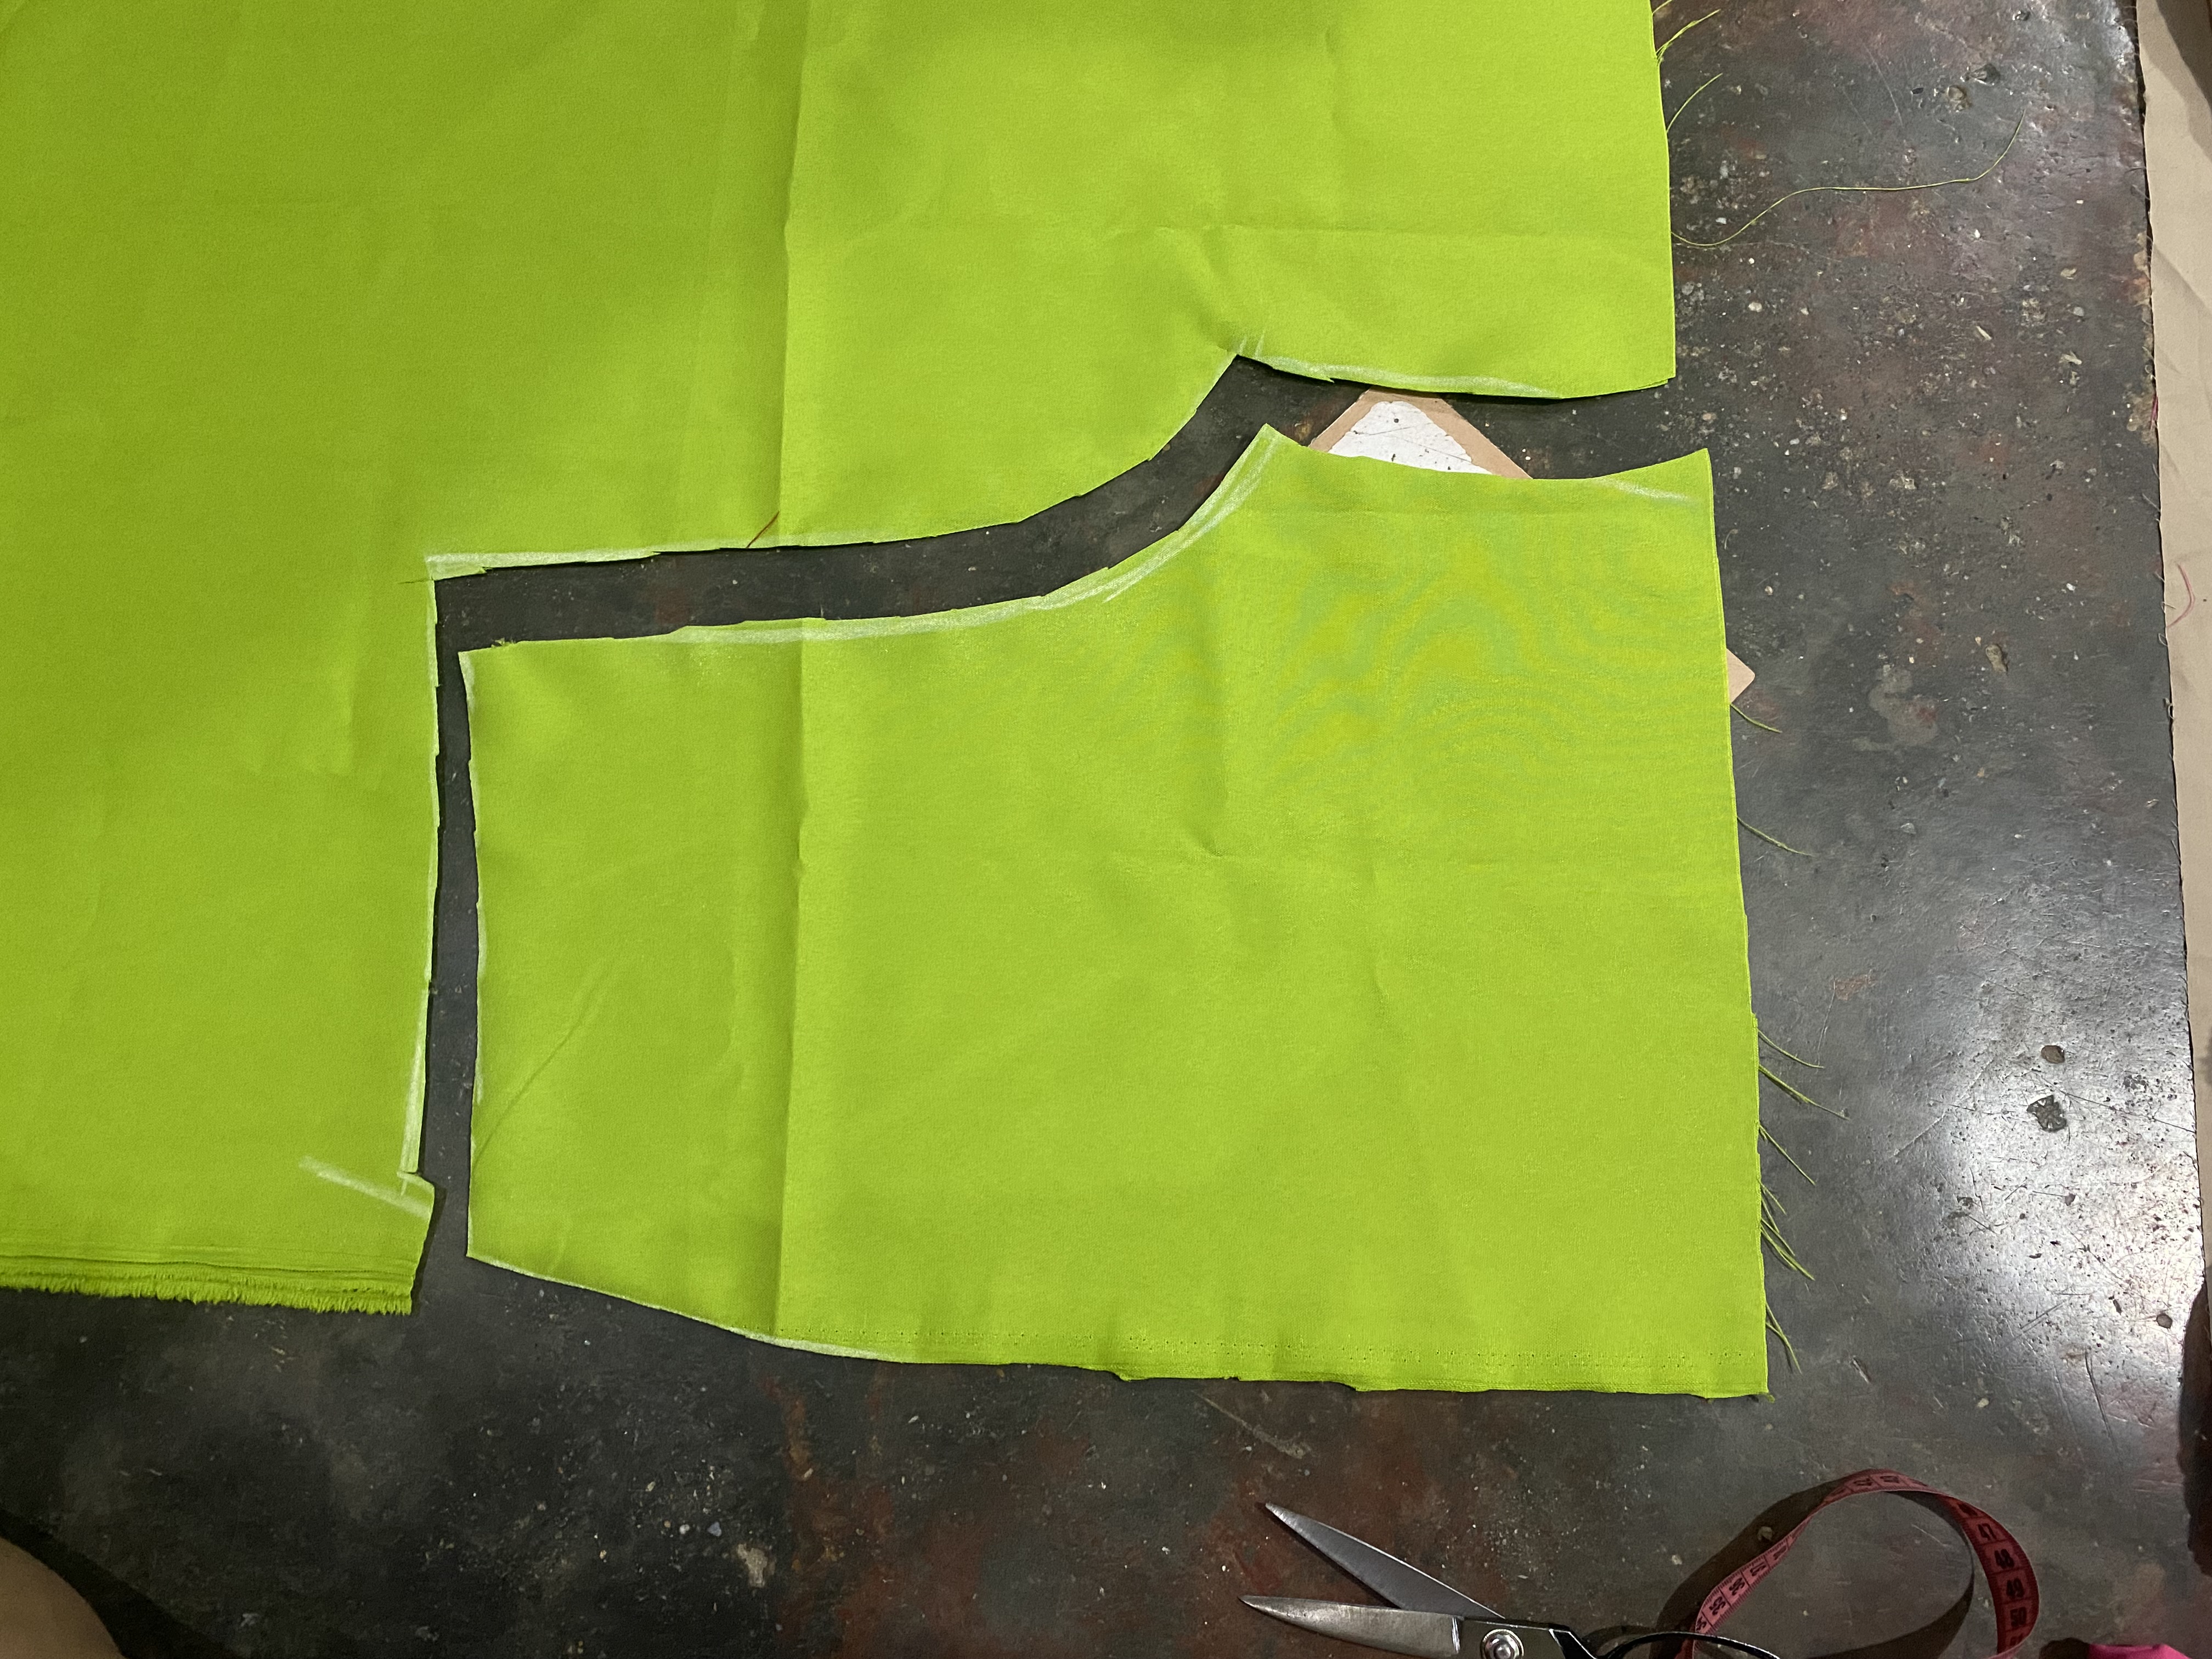
Para la parte delantera igual le aumentaré 1 cm en la cintura y a medida que vaya bajando haré un aumento de 2 cm en el ruedo del Short, este lo haré un poco curveado para que al momento de hacerle el ruedo no se me prense la tela, en la parte de la cremallera siempre dejo un excedente de tela ya que me gusta como queda al momento de coser la cremallera.
Para el bolsillo vamos a cortar un cuadrado de tela de 32 cm, una de las orillas del bolsillo lo vamos a enfrentar con las piezas delanteras del Short, marcamos de la orilla Superior hacia adentro 3 cm y luego bajamos en forma diagonal 20 cm, luego doblamos la tela del bolsillo a la mitad para darle la forma, También cortaremos una tira de 17 cm de ancha por el largo de la cintura de nuestro Short.
If you don't know how to make patterns, don't worry, I make my clothes guided by a garment that is similar to the model I want to make or that is the right size for the person for whom I am going to make the new garment, and then I make the necessary adjustments, in my case I am going to use one of my daughter's shorts, we will draw the outline of the shorts on the fabric, leaving 1 cm on each side for the seams.
I always start by drawing the back part since it is easier for me, the difference will be in the leg of this Short, I made a reference drawing to guide us how the increase in measurements will be, we are going to increase 3 cm on the side and 2cm on the back. I want the inner part or bottom, the hem to be wide so I will increase the length by 6 cm.
For the front part I will still increase 1 cm at the waist and as I go down I will increase 2 cm in the hem of the Shorts, I will make this a little curved so that when I make the hem the fabric does not catch. In the zipper part I always leave a surplus of fabric since I like how it looks when sewing the zipper.
For the pocket we are going to cut a 32 cm square of fabric, one of the edges of the pocket we are going to face with the front pieces of the Shorts, we mark from the Upper edge inwards 3 cm and then we go down diagonally 20 cm, then We fold the pocket fabric in half to give it the shape. We will also cut a 17 cm wide strip along the waist length of our shorts.
 |  |
|---|---|
 |  |
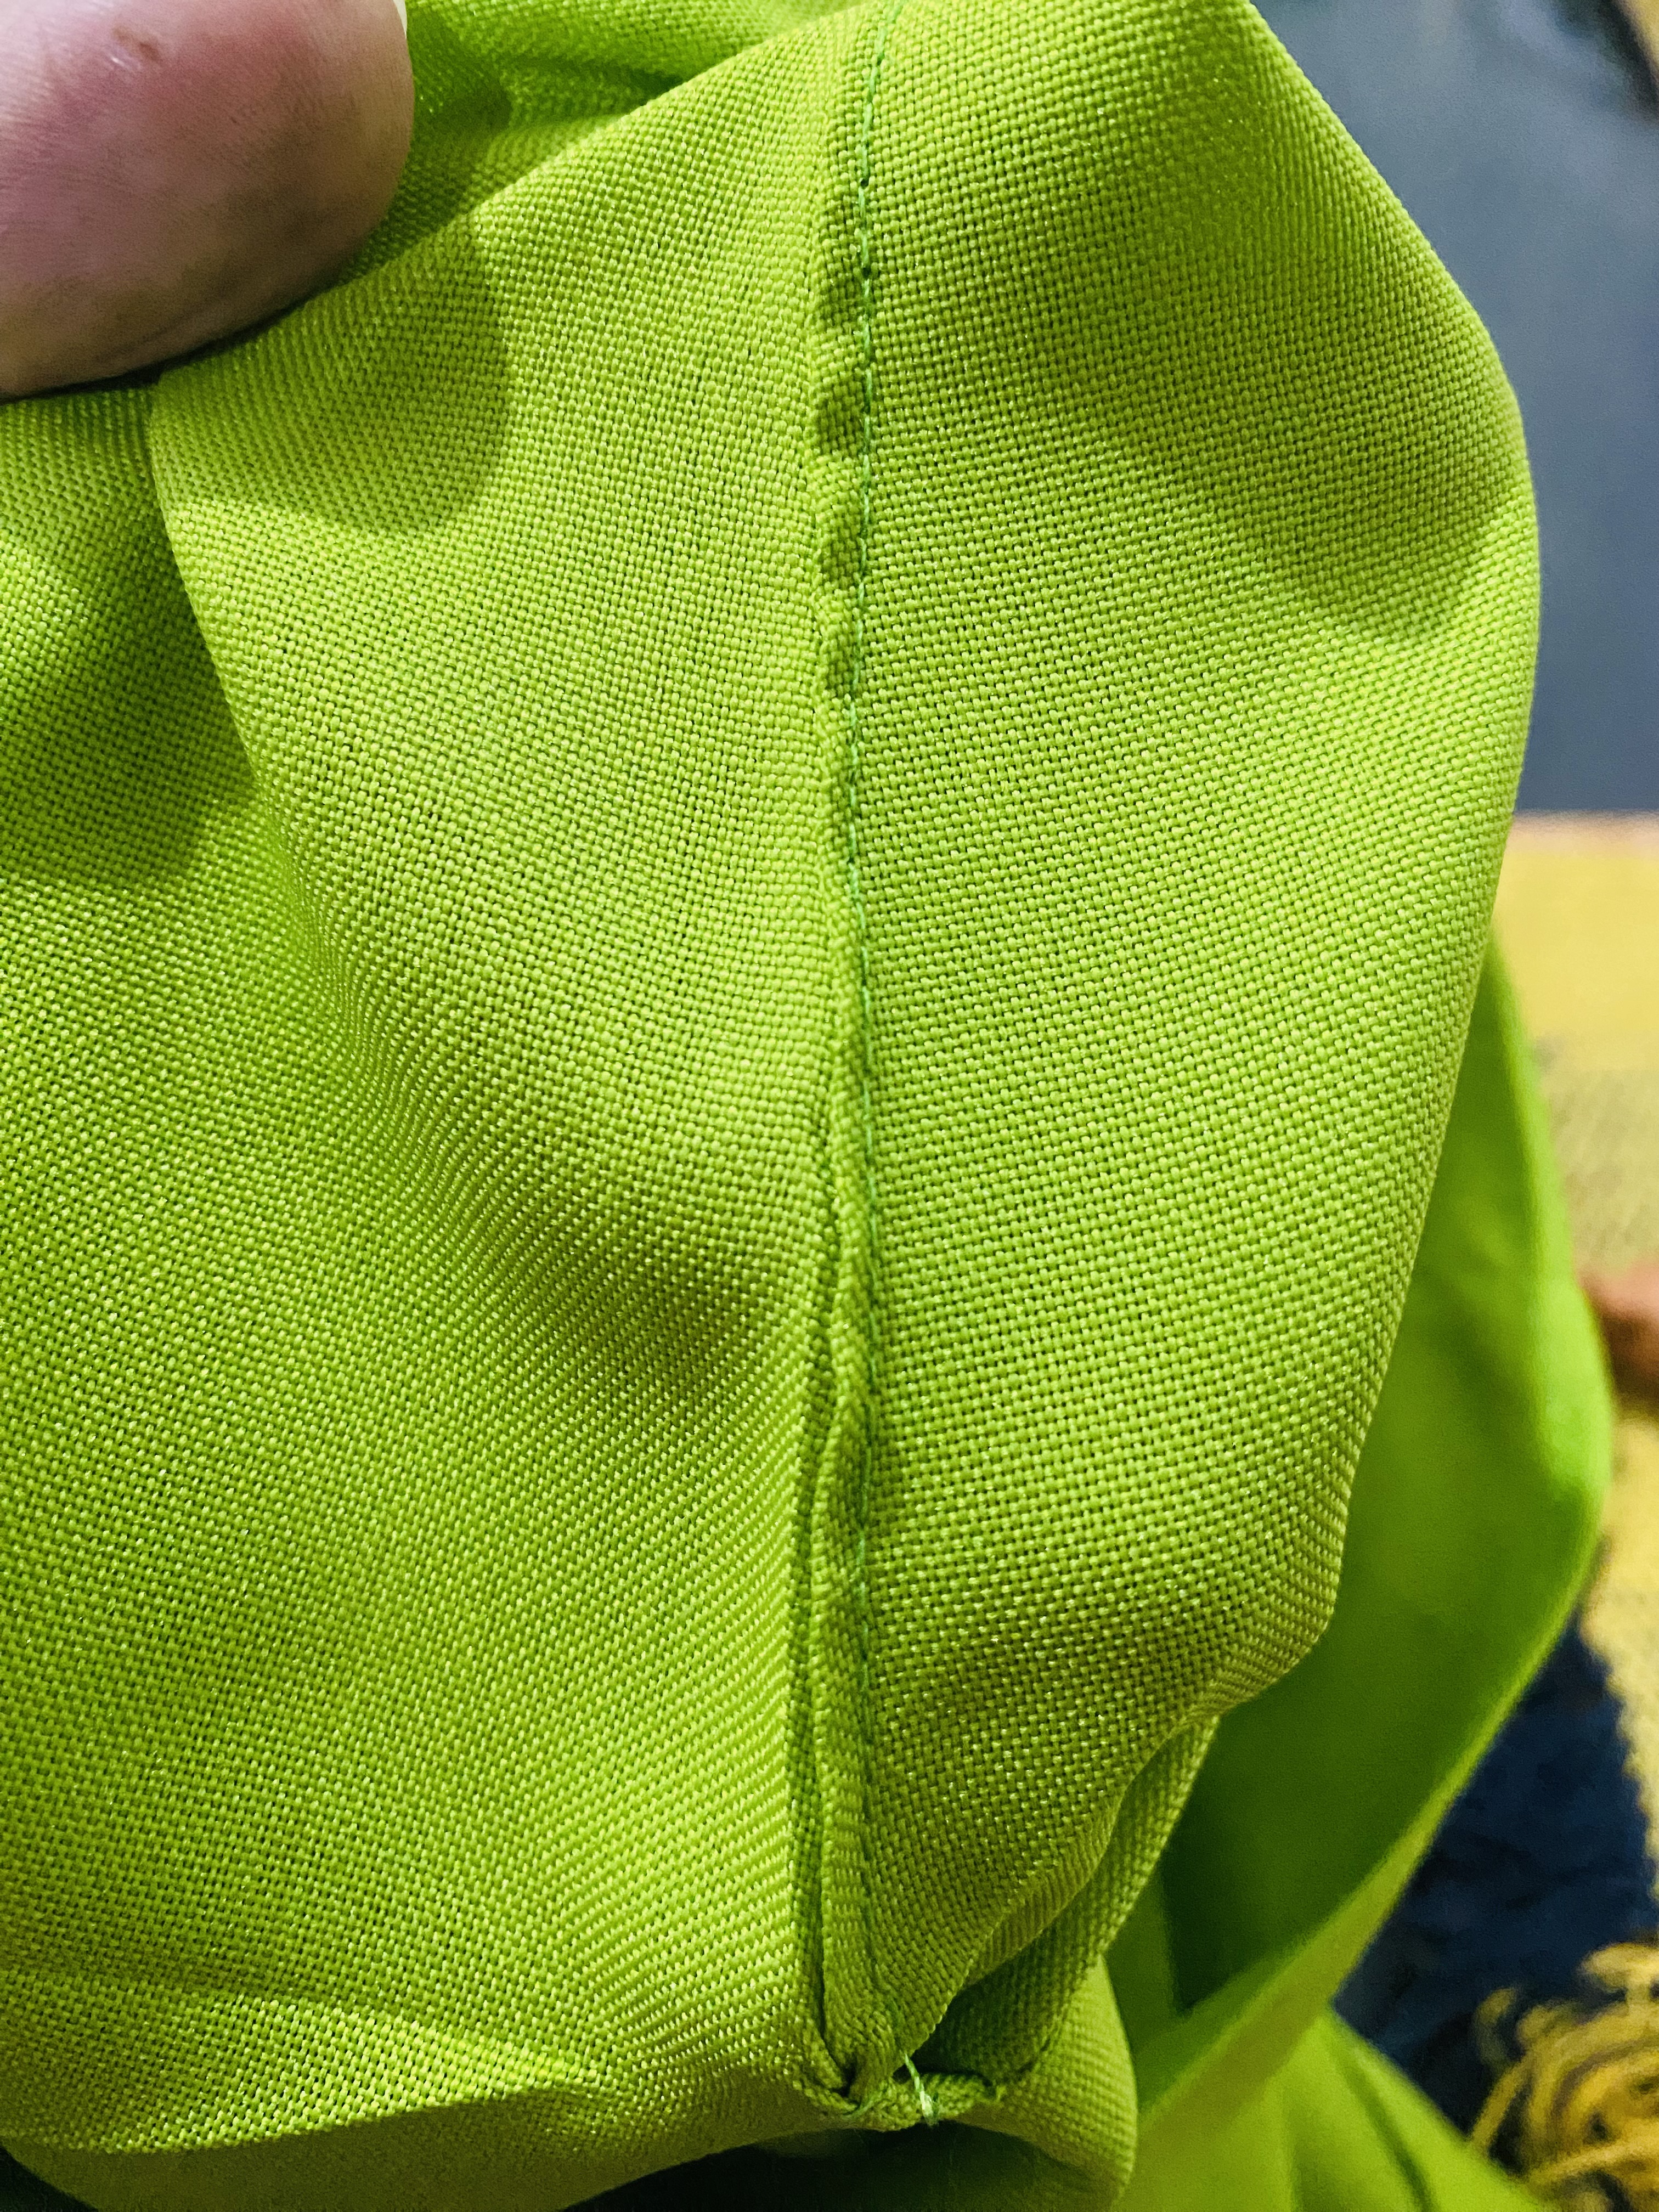
Comenzaremos con las costuras uniendo el bolsillo, en mi caso la tela que estoy utilizando no tiene revés, puedo utilizarla por cualquier lado, ubicaré el bolsillo por la parte de afuera paso una costura luego doblo hacia dentro y paso una costura en la parte interna bien pegada a la orilla para que quede cómo invisible, por fuera no se notará.
Llego dobló a la mitad la tela del bolsillo y paso la plancha para fijar bien las costuras y la tela, este paso es importante ya que la plancha nos ayuda a corregir errores y que nuestra tela quede perfecta.
We will start with the seams joining the pocket, in my case the fabric I am using does not have a reverse side, I can use it on any side, I will locate the pocket on the outside, I pass a seam then I fold inwards and I pass a seam on the inside well glued to the edge so that it remains invisible, from the outside it will not be noticed.
I folded the pocket fabric in half and ironed it to secure the seams and the fabric. This step is important since the iron helps us correct errors and make our fabric perfect.
 |  |
|---|---|
 |
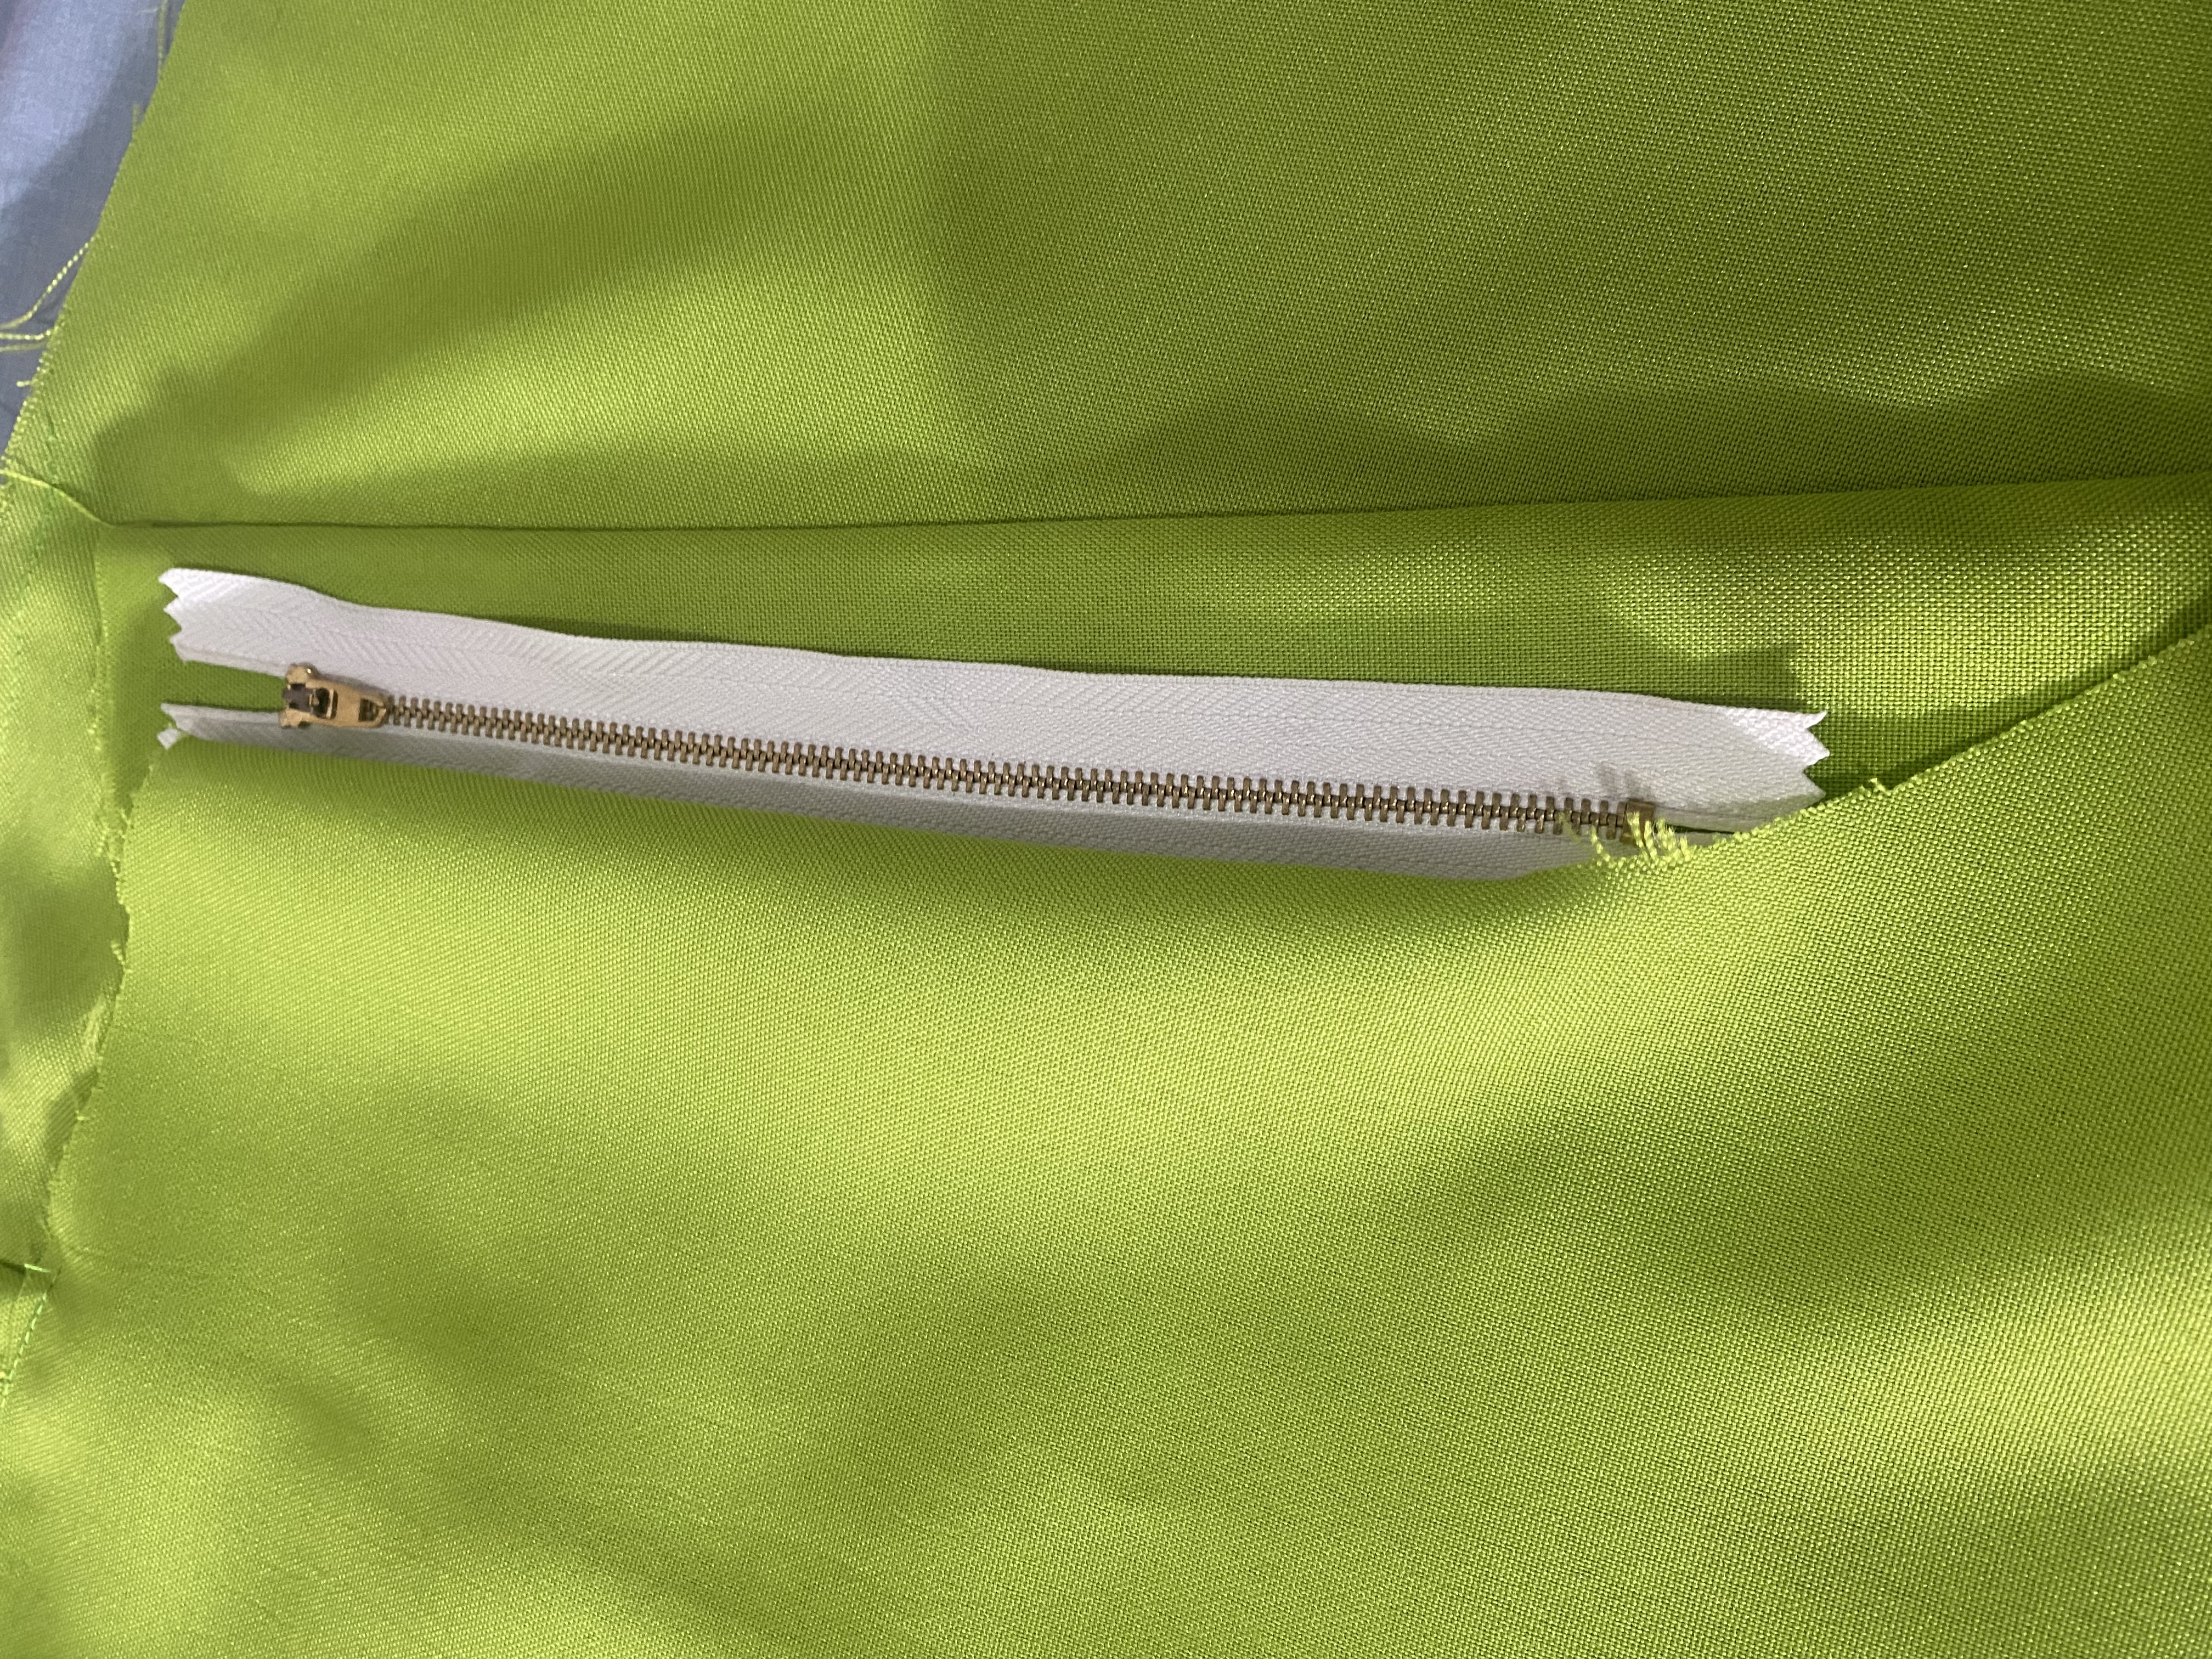
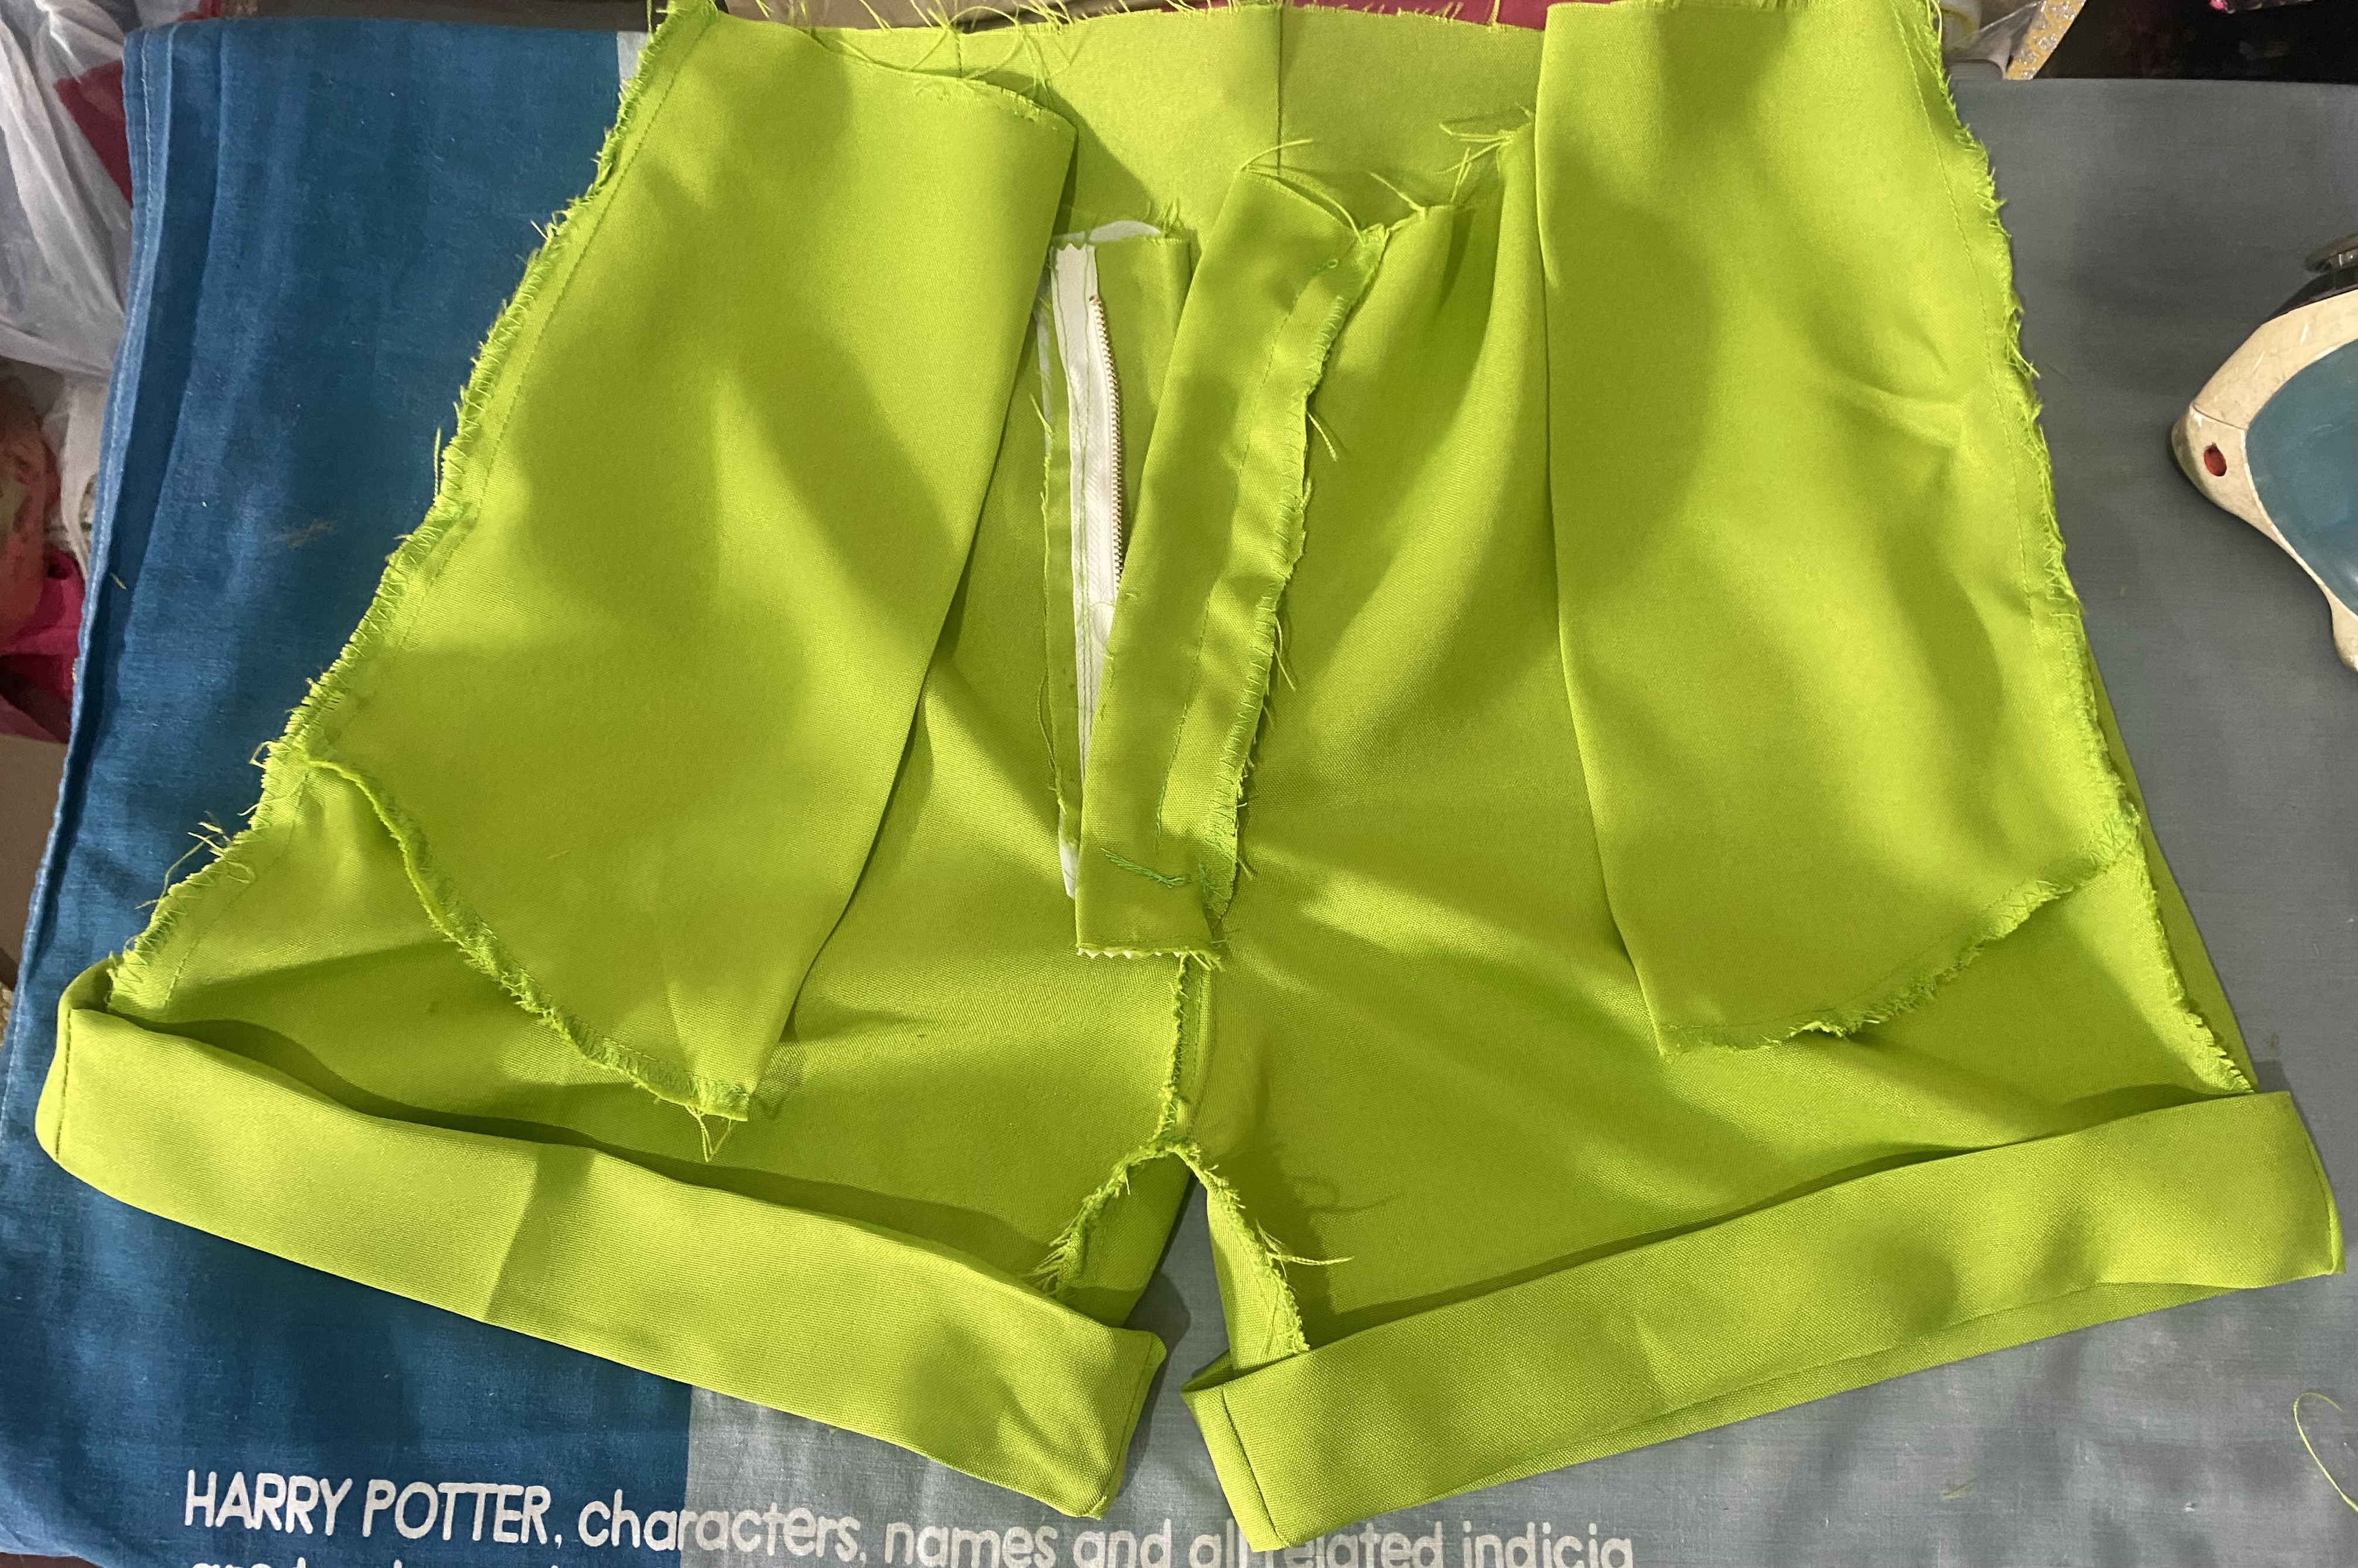
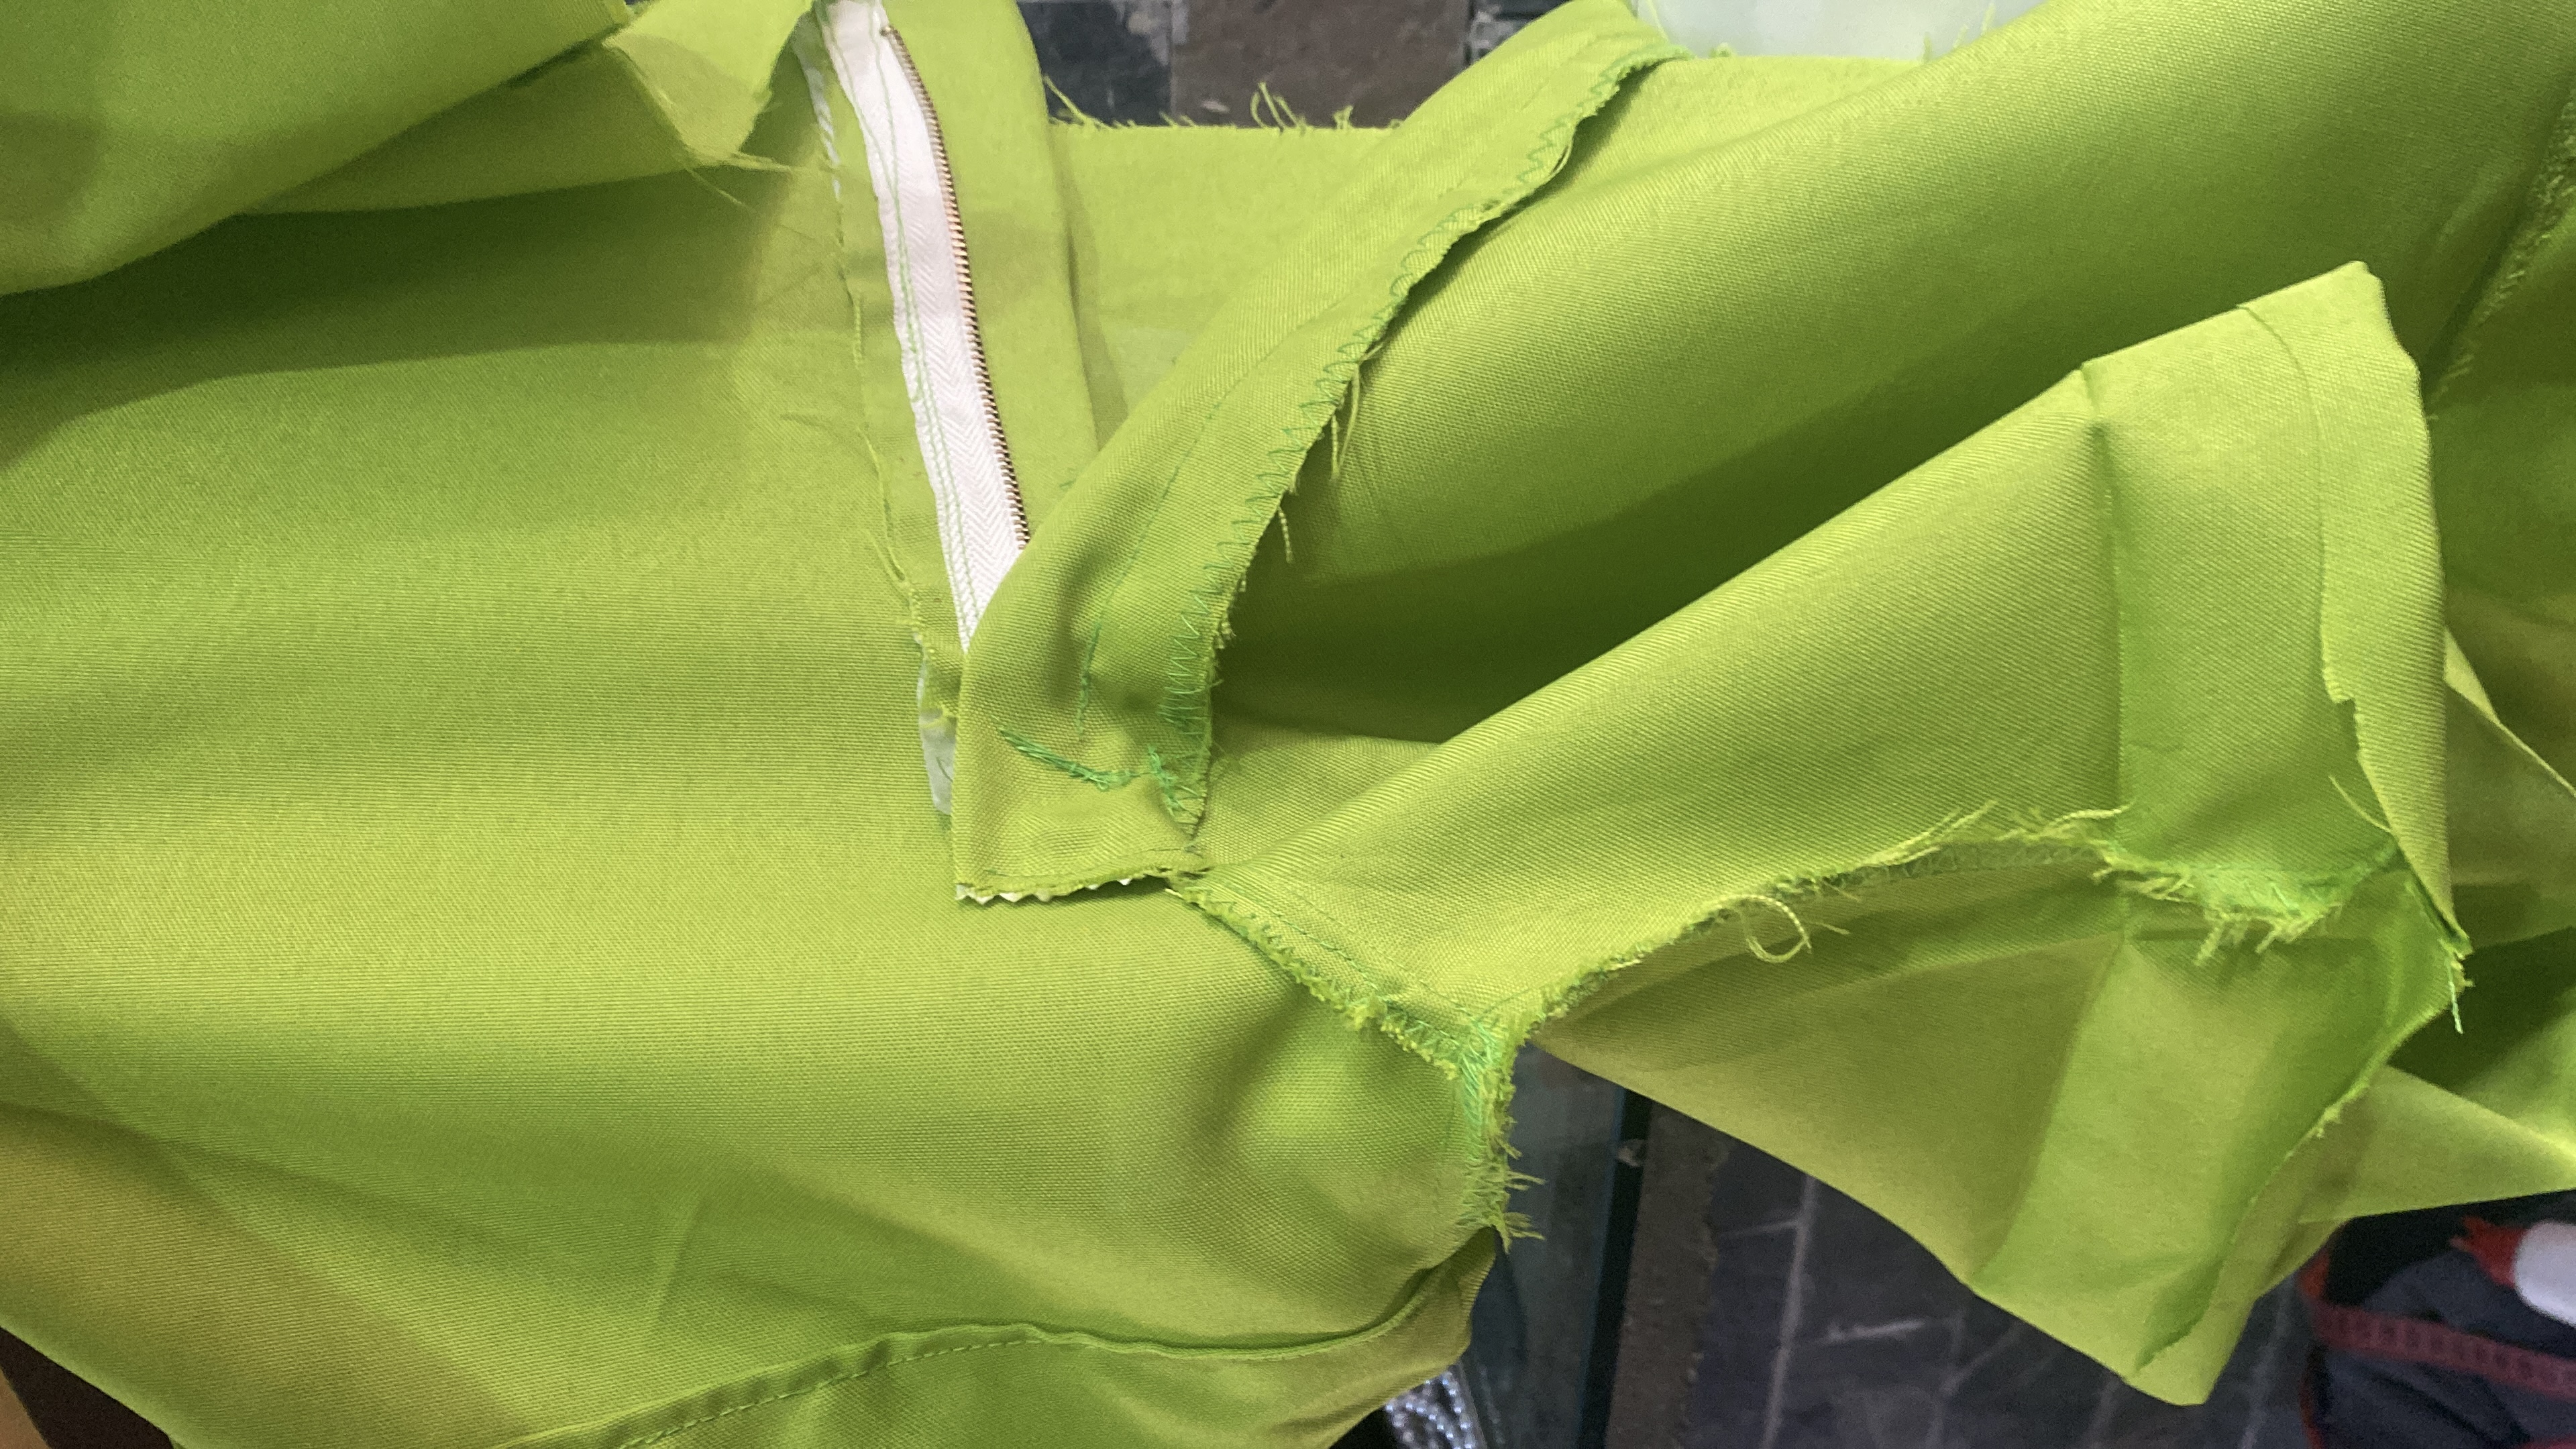
En este paso uniremos la cremallera, vamos a cortar un retazo de tela de 20 cm de larga por 8 cm de ancha doblamos a la mitad, doblamos la pestaña que dejamos de excedente de tela, unimos ambas partes y pasamos costura, por la parte interna cortamos lo que sobre y le pasamos una costura zig zag para evitar que se hilache.
Luego unimos por el fundillo la parte izquierda del Short hacemos el dobles respectivo fijamos la cremallera con alfileres para pasar costura por la parte interna y luego por la parte de afuera, Y así ya tendremos lista la parte delantera de nuestro Short
In this step we will join the zipper, we are going to cut a piece of fabric 20 cm long by 8 cm wide, we fold it in half, we fold the tab that we left excess fabric, we join both parts and sew on the inside We cut off what is left over and sew a zig zag seam to prevent it from fraying.
Then we join the left part of the Short at the bottom, we make the respective doubles, we fix the zipper with pins to pass the seam on the inside and then on the outside, and thus we will have the front part of our Shorts ready.
 |  |
|---|---|
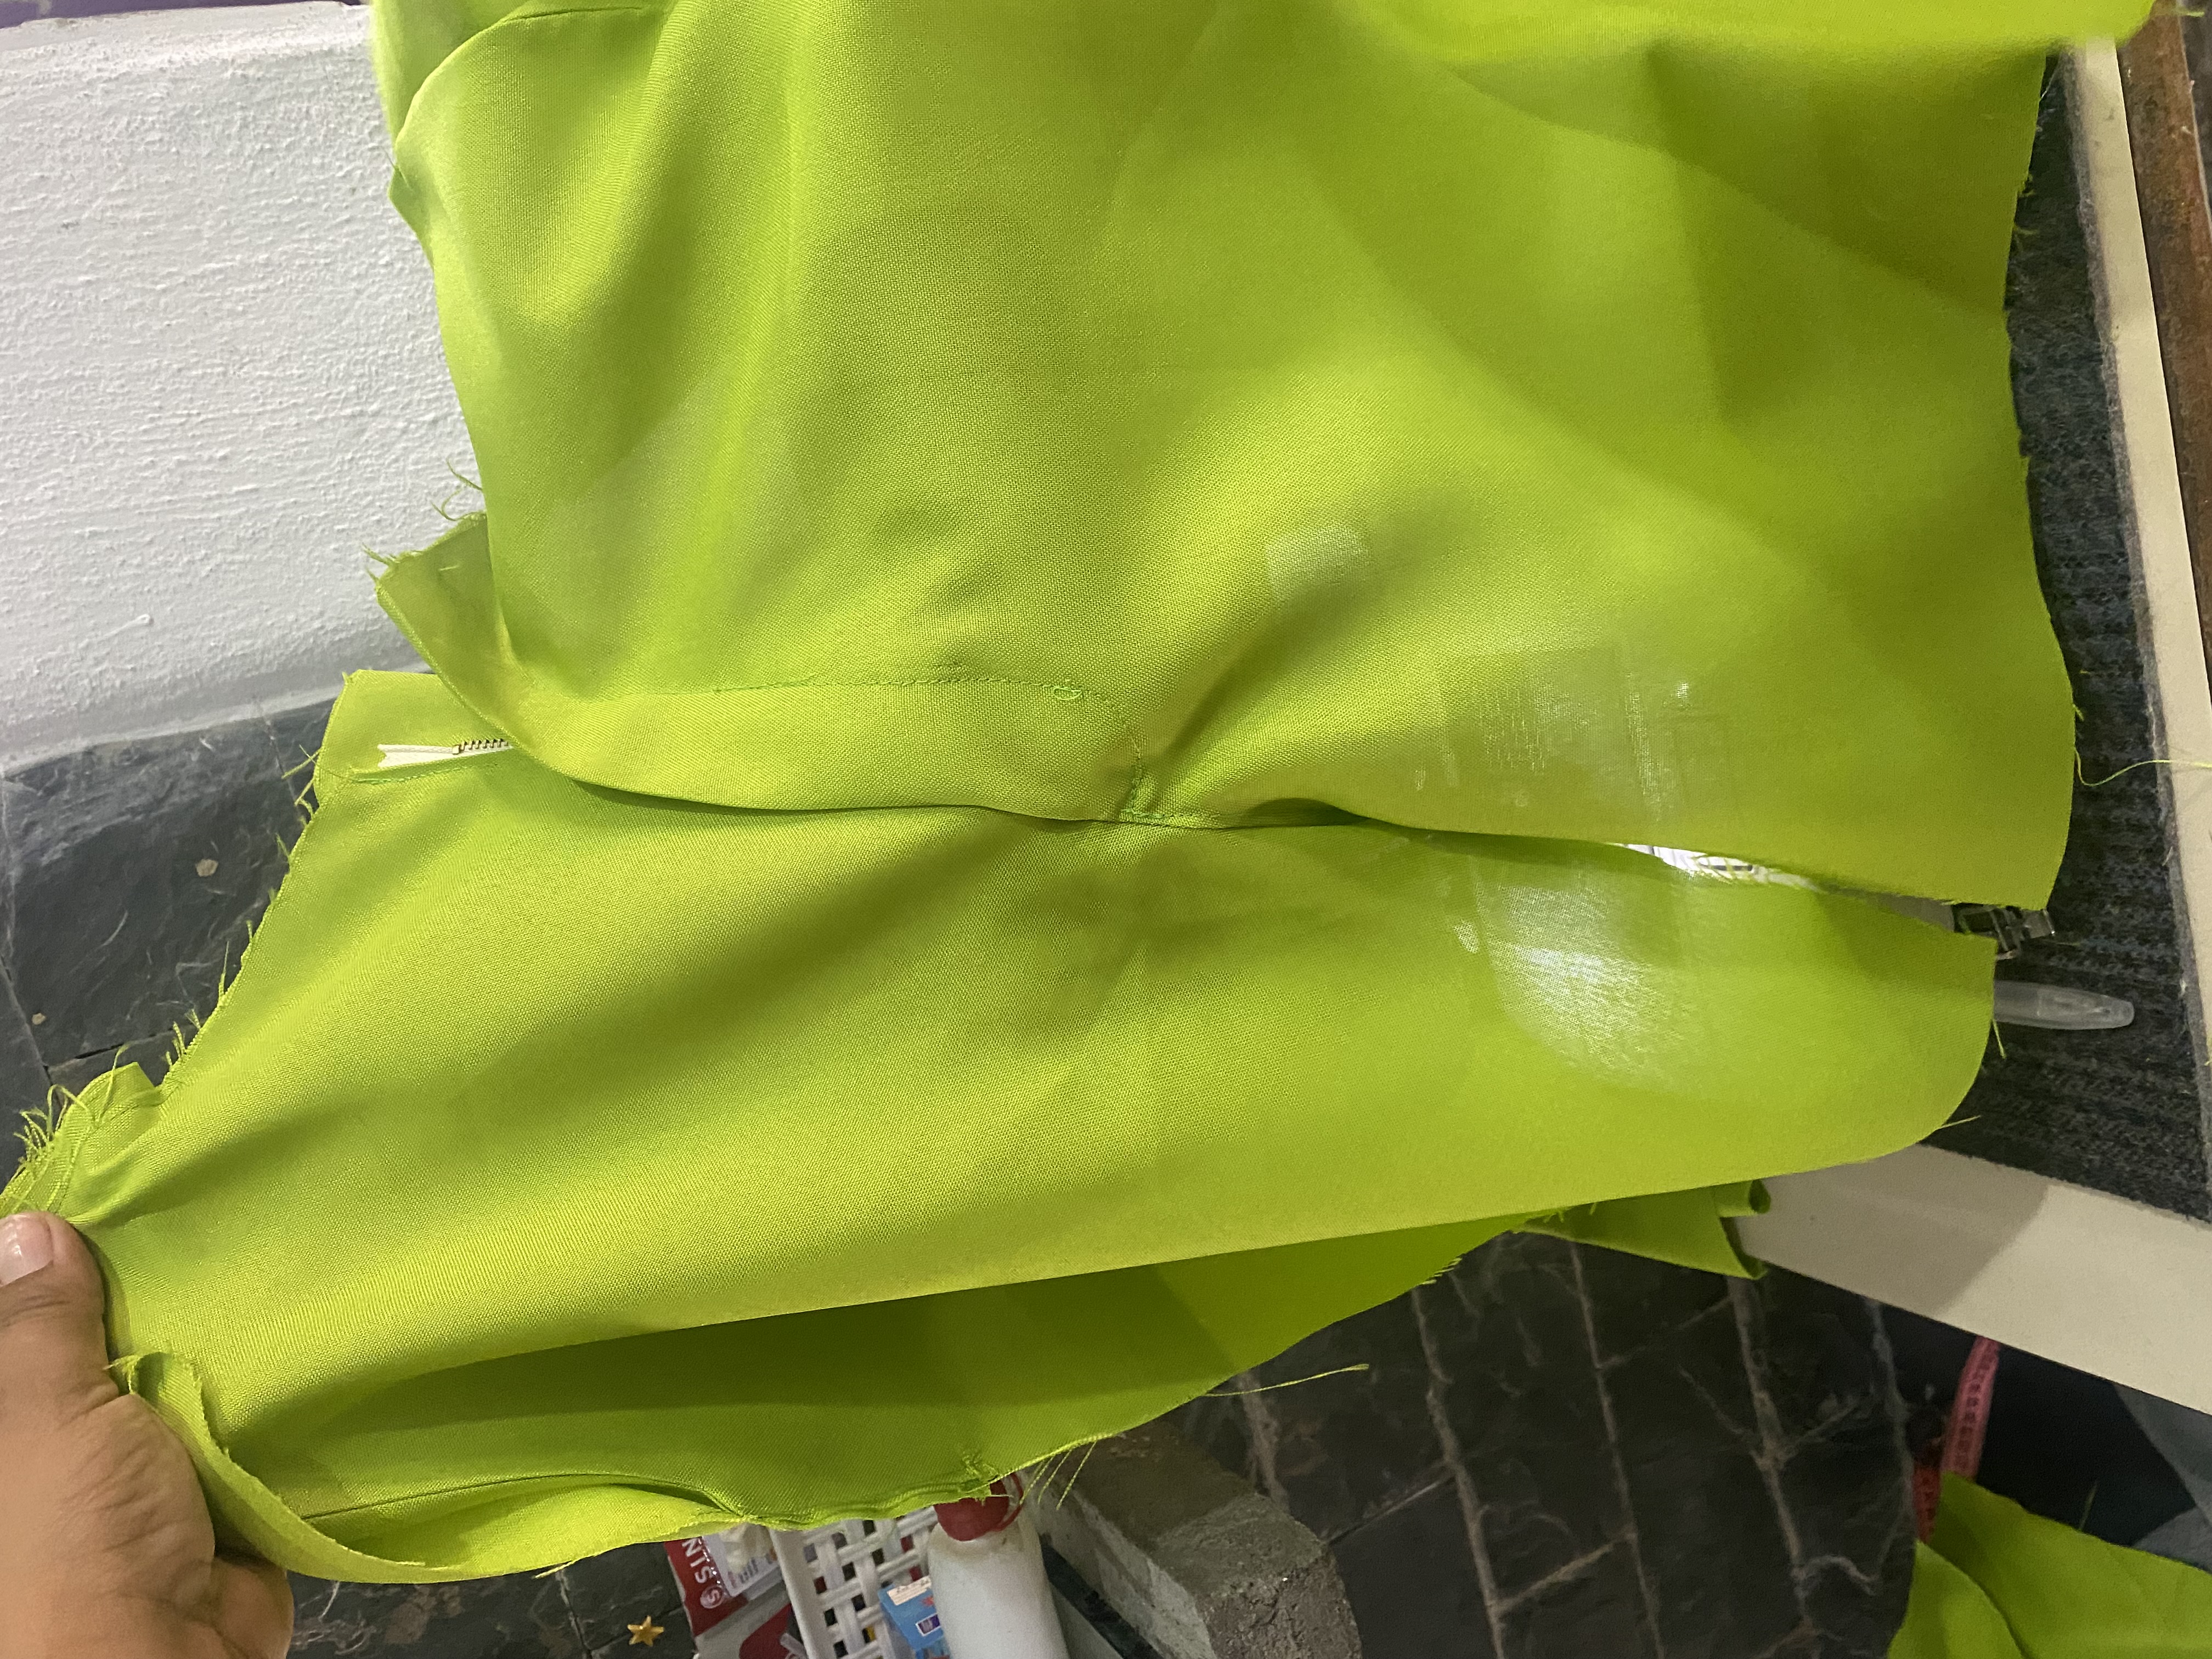 |
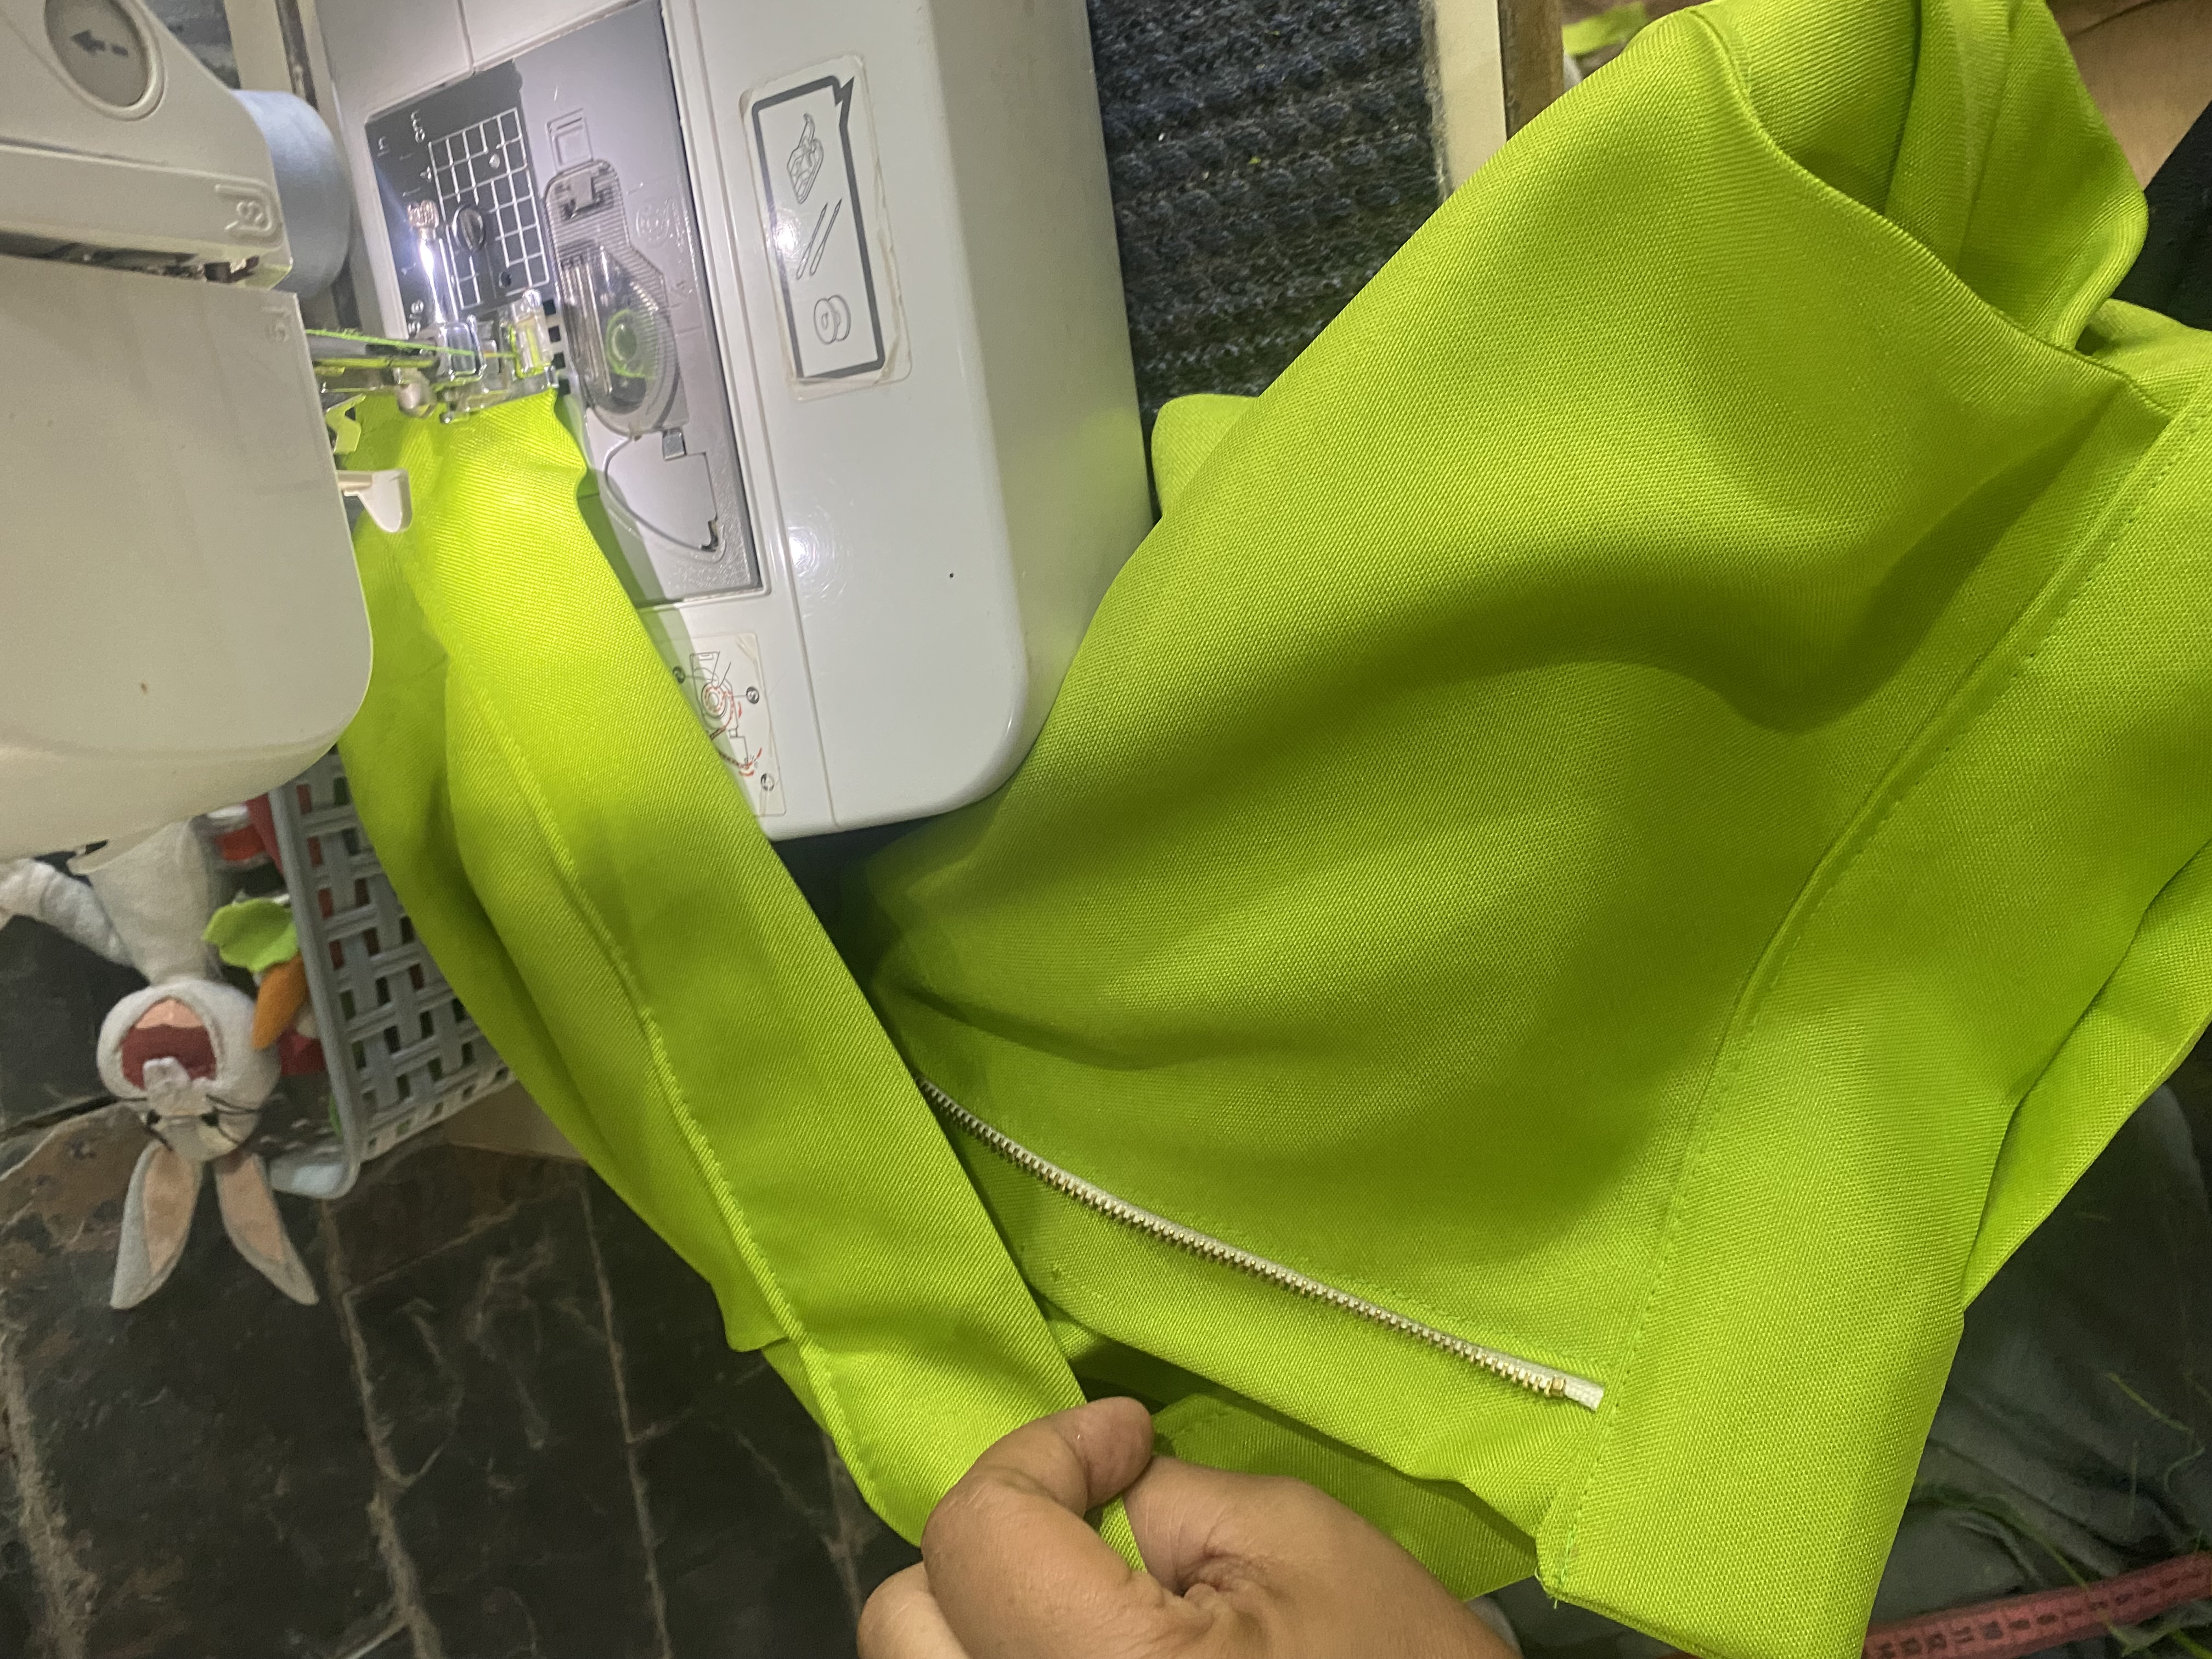
Ahora uniremos las partes traseras pasamos una costura recta y una costura zig zag , Si es de tu preferencia puedes pasar una costura por la parte de afuera yo quiero que mi Short quede sin costuras visibles así que lo dejé así, para hacer las pinzas vamos a marcar 1 cm hacia adentro doblando cada parte trasera a la mitad y luego en diagonal vamos a bajar 10cm
Now we will join the back parts, we pass a straight seam and a zig zag seam. If you prefer, you can pass a seam on the outside. I want my shorts to be without visible seams, so I left it like this. To make the darts, we are going to mark 1 cm inwards folding each back part in half and then diagonally we will go down 10cm
 |  |
|---|
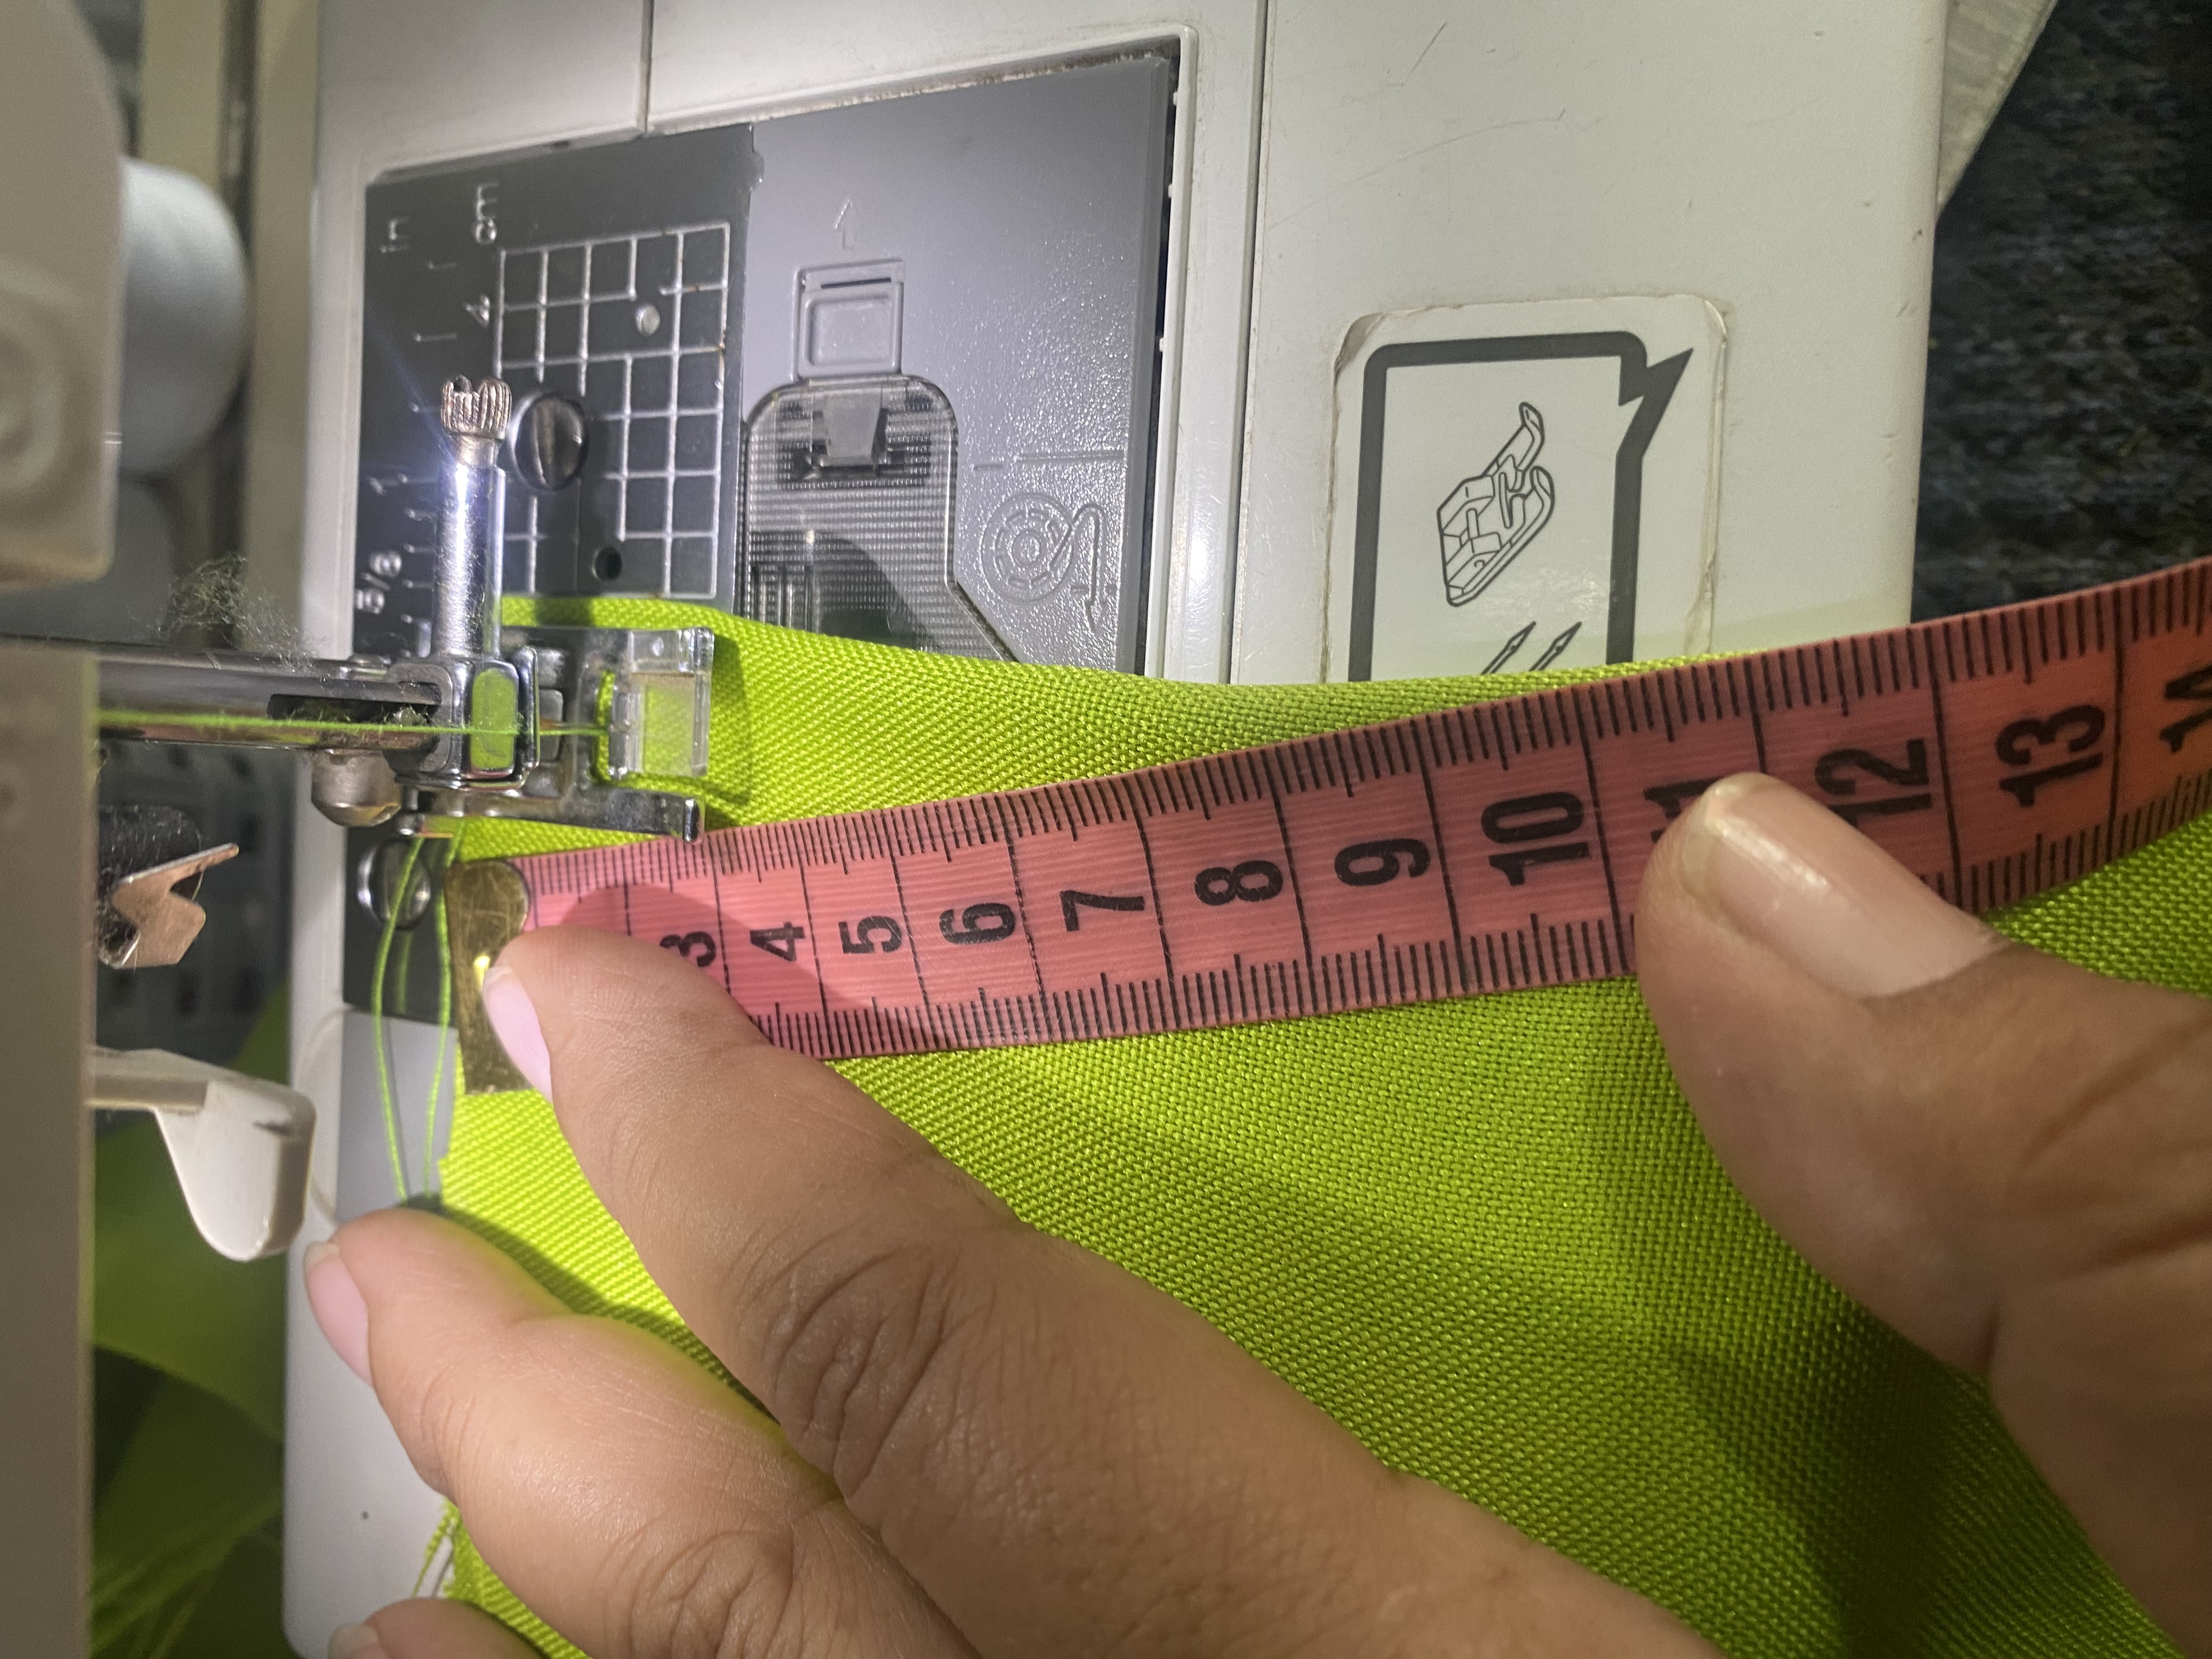
Luego uniremos con costura por los laterales y el fundillo igual pasando costura recta y luego zig zag, Para el ruedo vamos a doblar 6 cm y 1 cm hacia adentro, pasamos la plancha para fijar bien y luego le pasamos costura
Para la pretina vamos a doblar a la mitad el retazo de tela que cortamos, en mi caso le coloqué entretela para que quede más durito, plánchanos, y le damos la forma para luego unirla al short, la pretina nos quedará de 5 cm de ancha.
Then we will join with a seam on the sides and the bottom in the same way, passing a straight seam and then zig zag. For the hem we are going to fold 6 cm and 1 cm inwards, we use the iron to fix it well and then we sew it.
For the waistband we are going to fold the piece of fabric that we cut in half. In my case I added interlining to make it stiffer. Iron it and give it the shape to then attach it to the shorts. The waistband will be 5 cm wide. .
 |  |
|---|---|
|  |
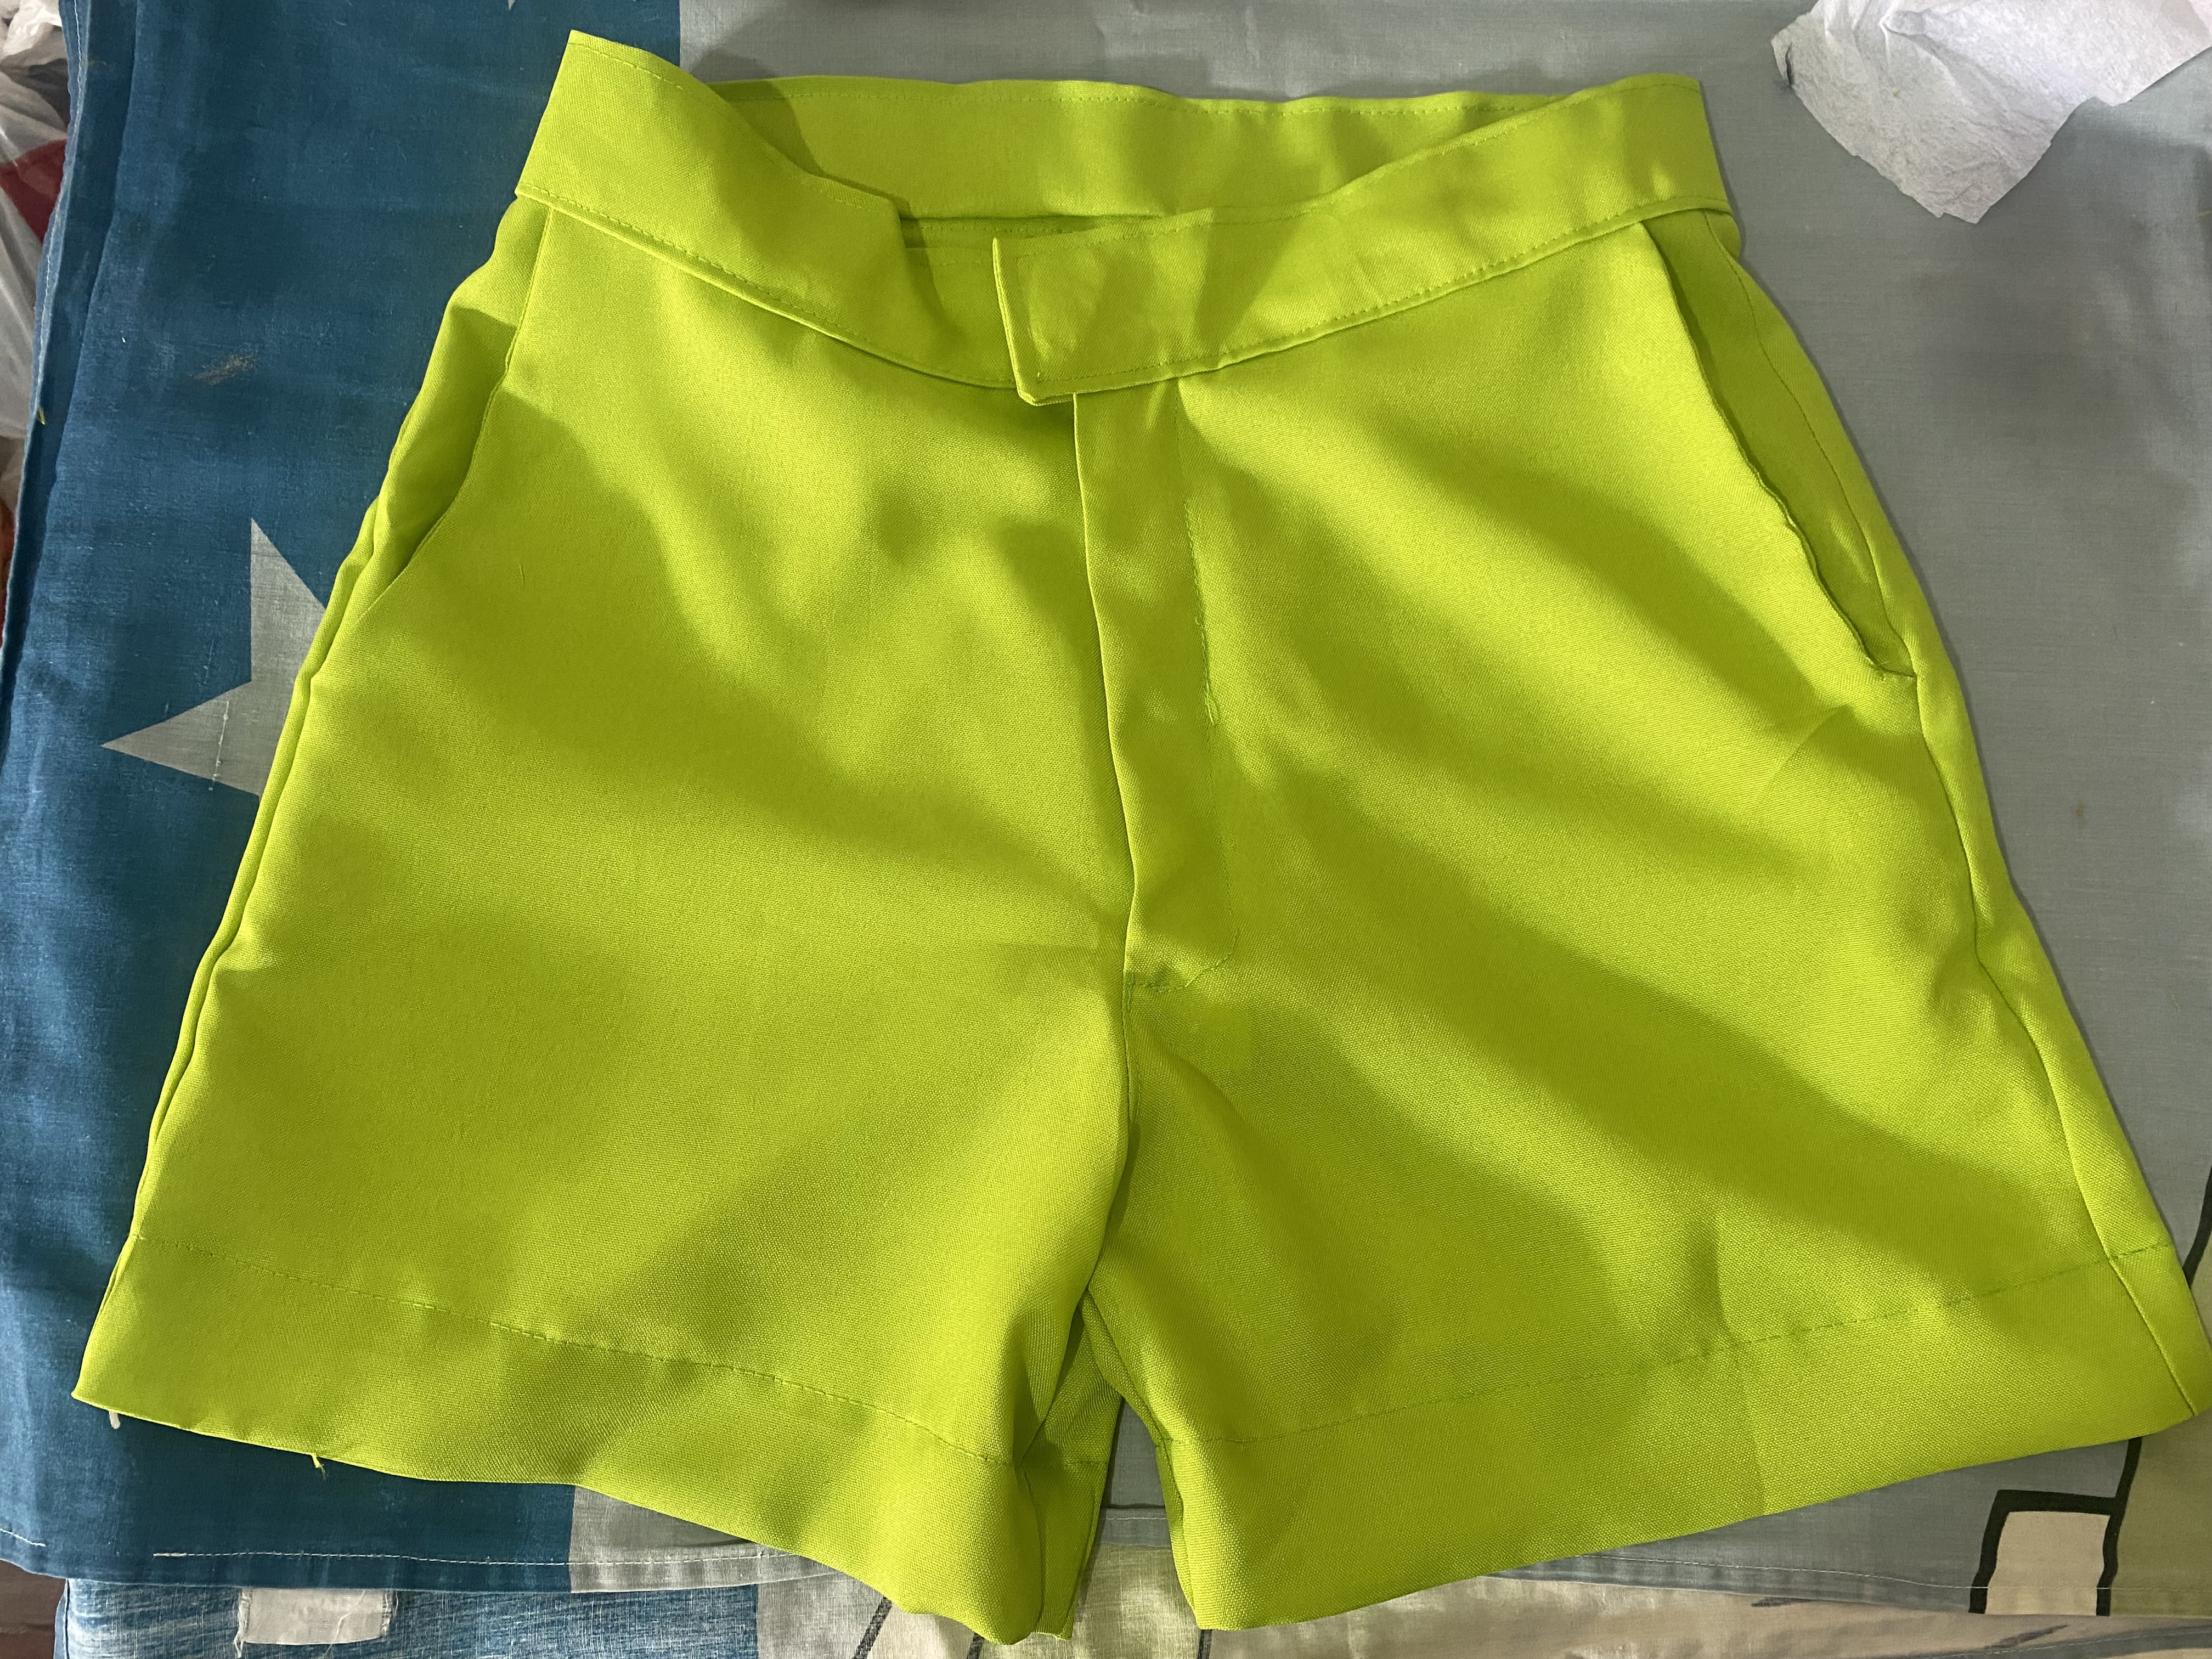
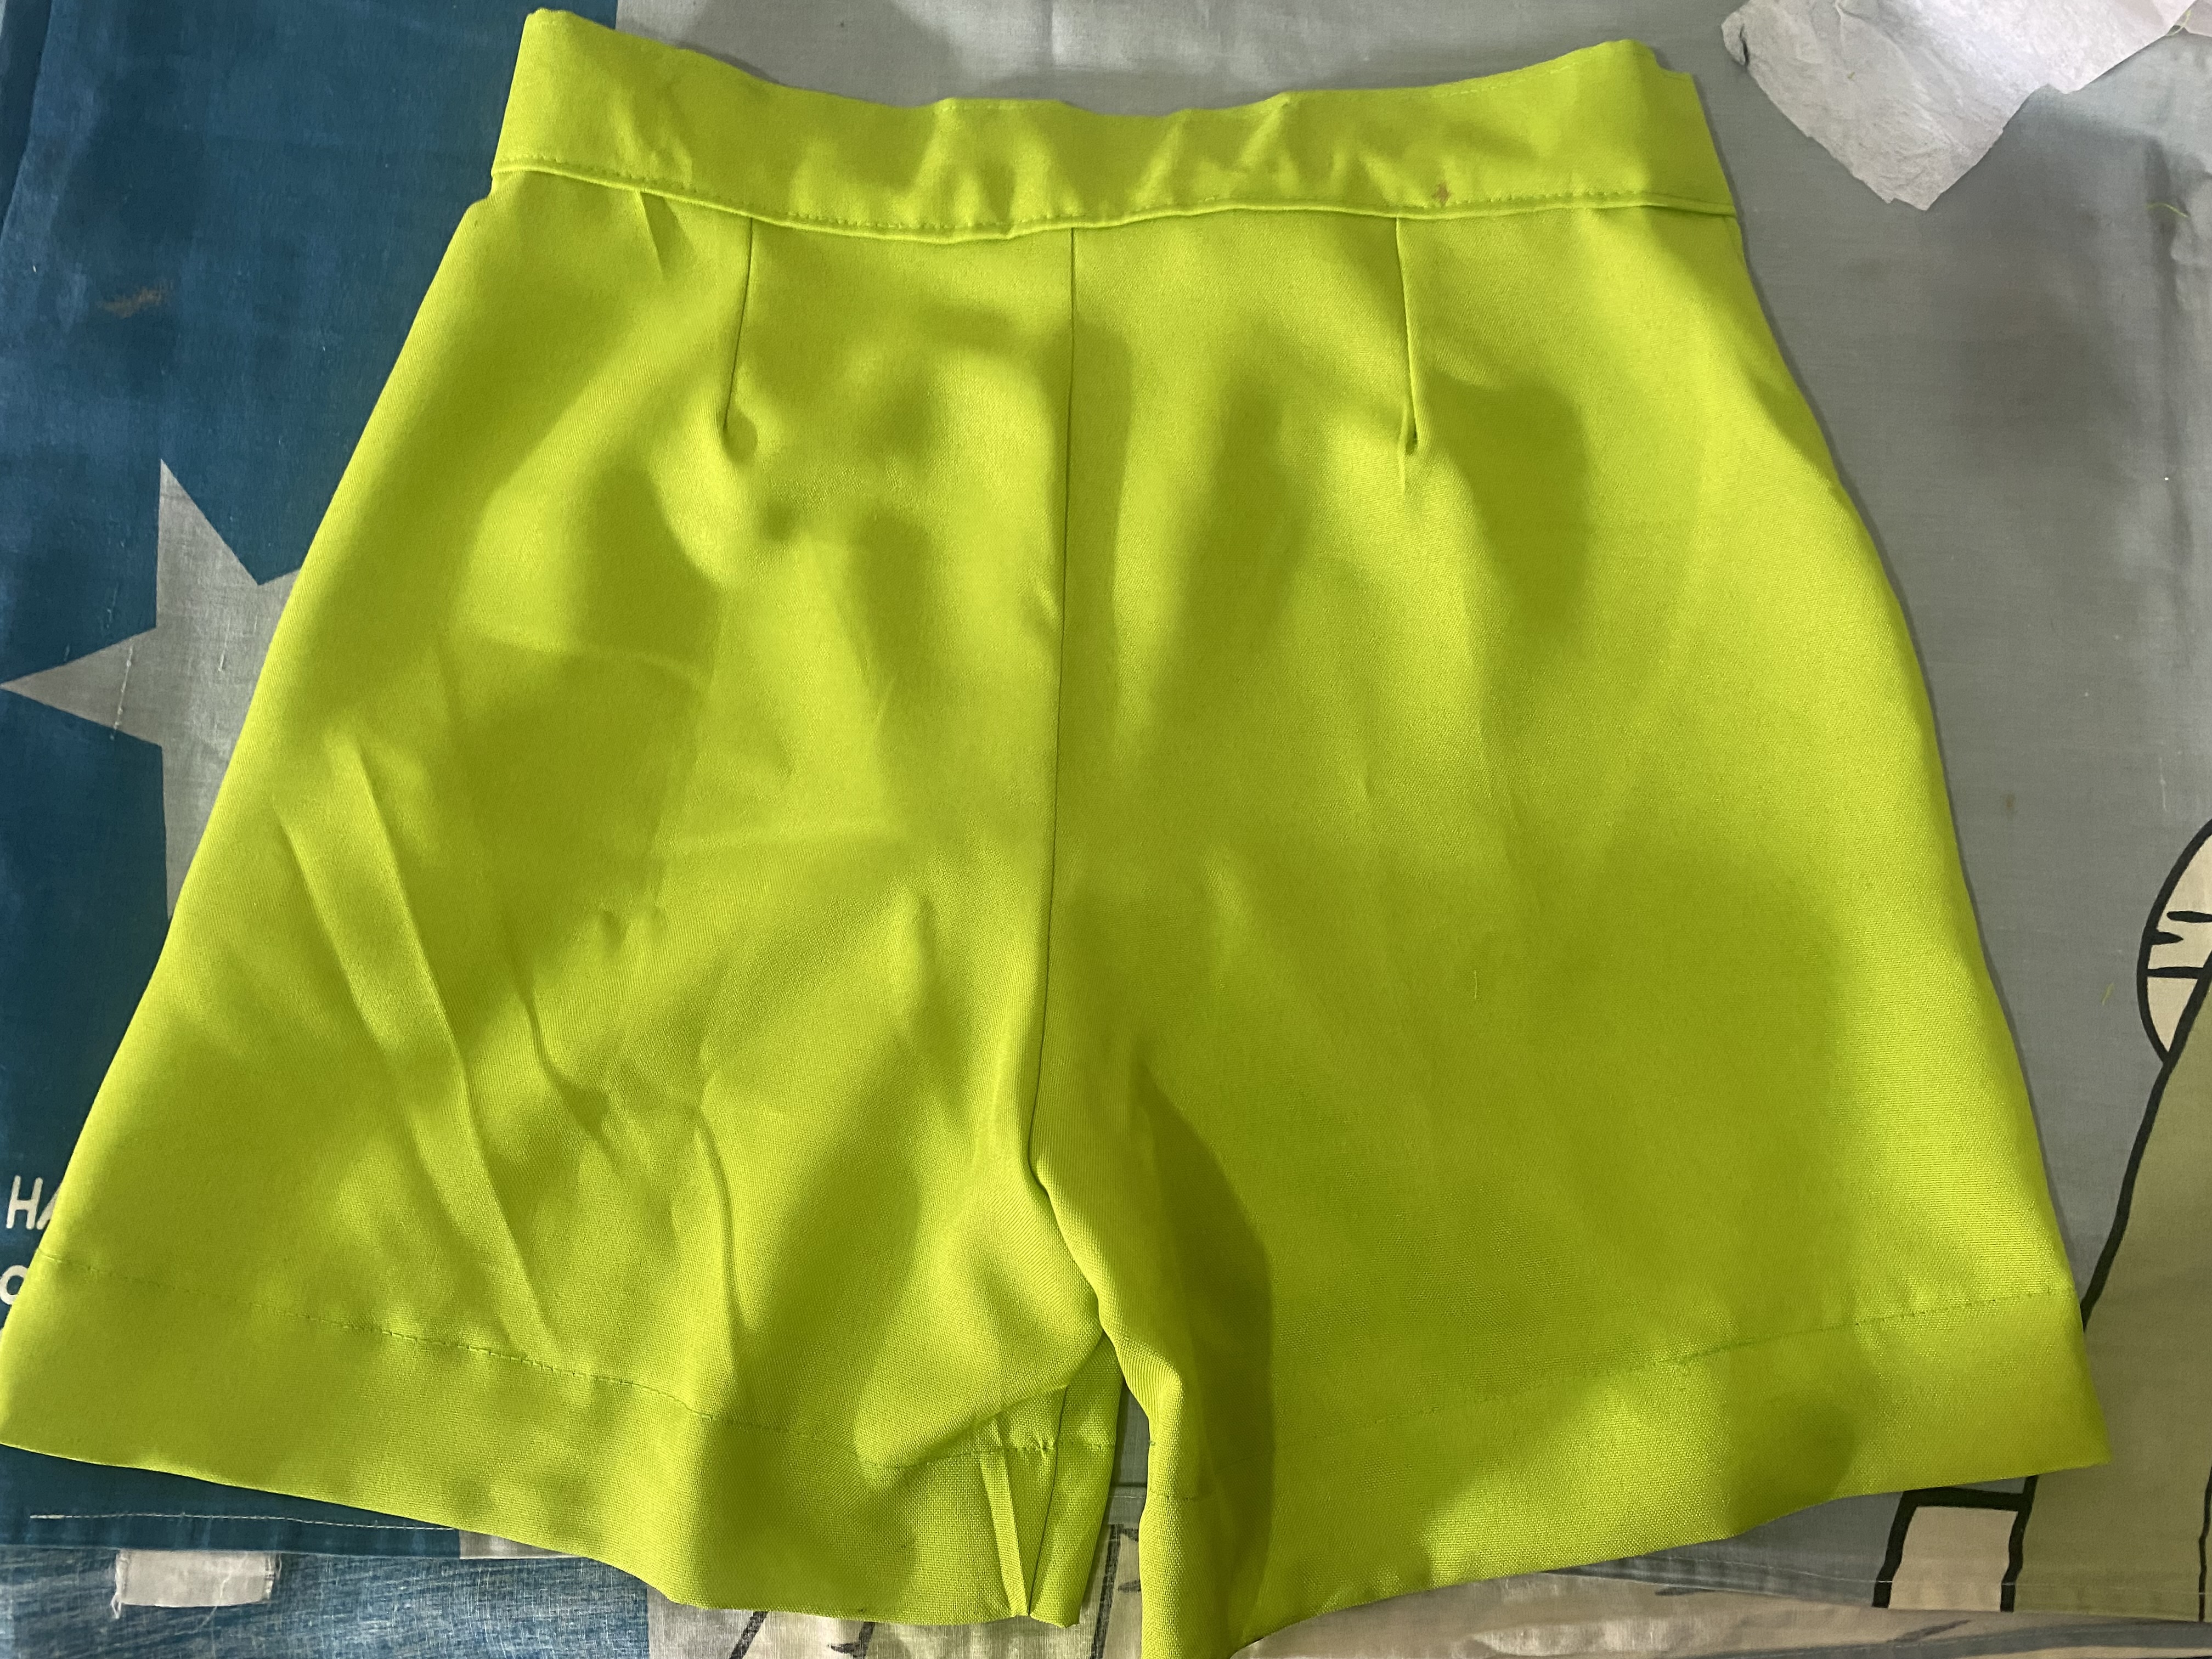
Y así ya está listo este lindo Short tipo palazzo Moderno y especial para cualquier ocasión y para combinar con cualquier tipo de blusas y zapatos, lo puedes utilizar tanto con sandalias de tacón, bajitas, o zapatos deportivos y te aseguro que se verá hermoso.
En mi caso aún no he decidido si colocarle botón y hacerle ojal o colocarle algún tipo de broche para que se vea como si no tuviese botón, me gustó mucho el resultado espero a ustedes les guste también, me despido deseándoles muchos éxitos y bendiciones, hasta otra oportunidad 😘
And so this cute palazzo short is ready. Modern and special for any occasion and to combine with any type of blouses and shoes, you can use it with high-heeled sandals, low ones, or sports shoes and I assure you that it will look beautiful.
In my case I have not yet decided whether to add a button and make a buttonhole or put some type of brooch on it so that it looks as if it did not have a button. I really liked the result. I hope you like it too. I say goodbye wishing you many successes and blessings, until another chance 😘
 |  |
|---|---|
 |
➿➿➿➿💚🪡✂️➿➿➿➿
Visually it looks simple, that's what I like about these posts, sometimes you think it's easy but then you see the process and all the work behind it.
I love the apple green color, very good job.
It's true, friend, many times the process is a bit annoying, the important thing is to do it with love and patience 😊, thank you very much for your valuable comment, greetings 🥰
Me encantó tu Confección y proceso de este Short, amé las pinzas traseras, los bolsillos y la pretina, bueno... todo. Es un hermoso proyecto, gracias por traerlo a nuestra Comunidad Hive Diy
Gracias 🥰❤️
Muy buena explicación y confección. Saludos ☺️
Gracias 🥰