Condor./// Aerografia Paso a paso
Hola amigos…! Es para mí un placer hacer llegar hasta todos ustedes mi saludo y mis deseos de paz y prosperidad, y que la voluntad de Dios sea esparcida en sus vidas como la semilla fecunda de amor y esperanza.
En cuanto a mi…Bueno…En la ruta usando esa brújula que señala rumbo norte con destino desconocido por no saber que hay en el mañana, pero confiado por la fe que nos mueve en la dirección acertada, tratando de ver la cara buena de la vida y ponerle corazón de león ( Como decía Oscar,… ja!) y retribuirle con buena actitud, incluso en los penurias y desencantos, rogando por fortaleza a ese Poder Superior para arrear las velas de mi barco imaginario en la tormenta del mar de la vida en estos momentos, y Bueno,… aquí vamos!
Siguiendo con el tema de la aerografía, hoy les traje parte del trabajo que días atrás estuve realizando en un bus propiedad de un primo, que labora en el sector transporte, cabe decir que hace tiempo tuve la oportunidad de decorarle otras unidades, quedando conforme, siempre me ha contratado para hacerle este tipo de trabajos, parece que tengo algo de reputación,…quizás, pero bueno, quien sabe!... Y así este ha sido el caso, han sido para mi buenas experiencias, puesto que me ha dado la oportunidad de poner en práctica las técnicas y ocasion de relacionarse con la familia y por supuesto la oportunidad de ganar algún dinero que tanta falta hace.
Hello friends…! It is a pleasure for me to convey to all of you my greetings and my wishes for peace and prosperity, and that the will of God be spread in your lives as the fertile seed of love and hope.
As for me… Well… On the road using that compass that points north to an unknown destination because we don't know what tomorrow will bring, but trusting in the faith that moves us in the right direction, trying to see the good side of the life and give him the heart of a lion (As Oscar used to say,… ha!) and repay him with a good attitude, even in the hardships and disappointments, praying for strength to that Higher Power to haul the sails of my imaginary ship in the storm of the sea of the life right now, and Well…here we go!
Continuing with the theme of airbrushing, today I brought you part of the work that I was doing a few days ago on a bus owned by a cousin, who works in the transport sector, it should be said that a long time ago I had the opportunity to decorate other units, being satisfied, He has always hired me to do this type of work, it seems that I have a bit of a reputation...perhaps, but hey, who knows!... And so this has been the case, they have been for my good experiences, since it has given me the opportunity to put into practice the techniques and opportunity to interact with the family and of course the opportunity to earn some money that is sorely lacking.
Una particularidad de Isaias (mi primo), es el asunto de los diseños, siempre necesita un borrador y opciones para hacer selección, afortunadamente para el caso que les presento a continuación ya tenía el tema. Seguía el asunto de los colores, que acordamos tomando en cuenta los colores del bus y la técnica, una de sus favoritas El Graffiti, según el por lo urbano., y así todo marcha sobre ruedas, o sea las ruedas del auto…Ja!.
En estos tiempos de crisis se ha reducido mucho este mercado, la gente no tiene recursos para invertir en la decoración de sus unidades, uno más que otros, por lo menos en esta parte del país, me cuentan que es más viable invertirle a sus unidades en la parte mecánica para poder mantenerlos activos, en mi caso tenia al menos unos ocho años que no hacia este tipo de trabajos, quizás en el futuro me vea en la obligación de trasladarme a otra parte donde existan más posibilidades, de hecho ya me han ofrecido algunas ofertas, una de ellas en Colombia, claro esta es solo una opción de la lista, por ahora no está en consideración.
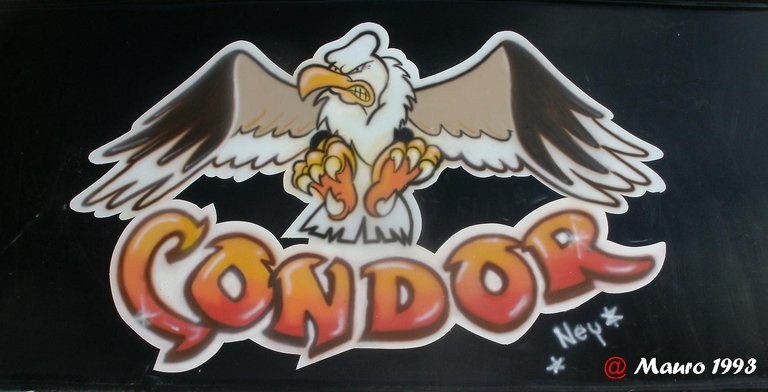
El caso es que yo solo soy un pintor novato, con ganas de seguir aprendiendo,…y algo se resolverá…igual sigo optimista, contento y como decía Timon y pumba, Jakuna Matata…Ja!.y asi sin mas les invito a ver el paso a paso de “ Condor"...
A peculiarity of Isaias (my cousin) is the issue of designs, he always needs a draft and options to make a selection, fortunately for the case that I present below, he already had the theme. The matter of colors continued, which we agreed on taking into account the colors of the bus and the technique, one of his favorites was Graffiti, according to him because of the urban, and so everything goes smoothly, that is, the wheels of the car… Ha! .
In these times of crisis this market has been greatly reduced, people do not have the resources to invest in the decoration of their units, one more than others, at least in this part of the country, they tell me that it is more viable to invest in their units in the mechanical part to be able to maintain the assets, in my case I had not done this type of work for at least eight years, perhaps in the future I will be obliged to move to another place where there are more possibilities, in fact I already They have offered some offers, one of them in Colombia, of course this is only one option on the list, for now it is not under consideration.
The fact is that I'm just a novice painter, wanting to continue learning,... and something will be resolved... I'm still optimistic, happy and, as Timon and Pumbaa said, Jakuna Matata... Ha! And so without further ado, I invite you to see the step by step of "Condor"...
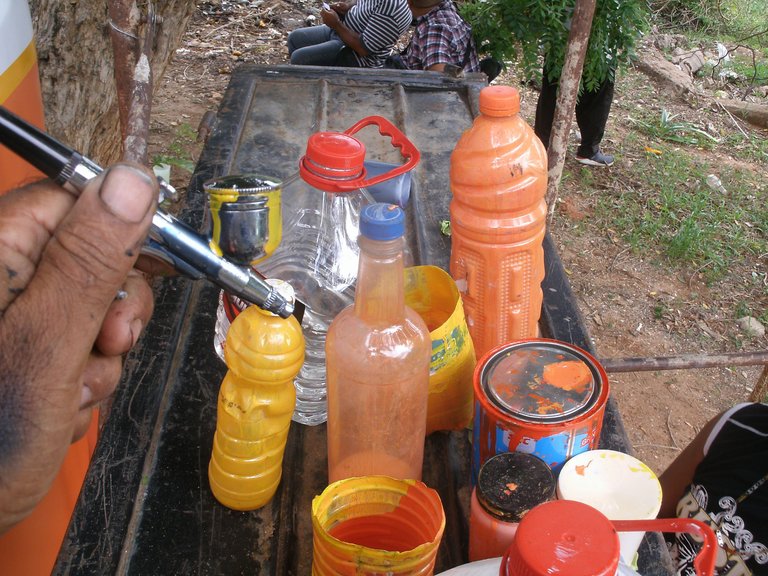
Primero que todo los materiales, par este caso tenemos: pinturas acrilicas, Thiner, envaces, aerografo, carboncillo, tirro, papel bond y el boceto.
First of all the materials, for this case we have: acrylic paints, Thinner, containers, airbrush, charcoal, plaster, bond paper and the sketch.
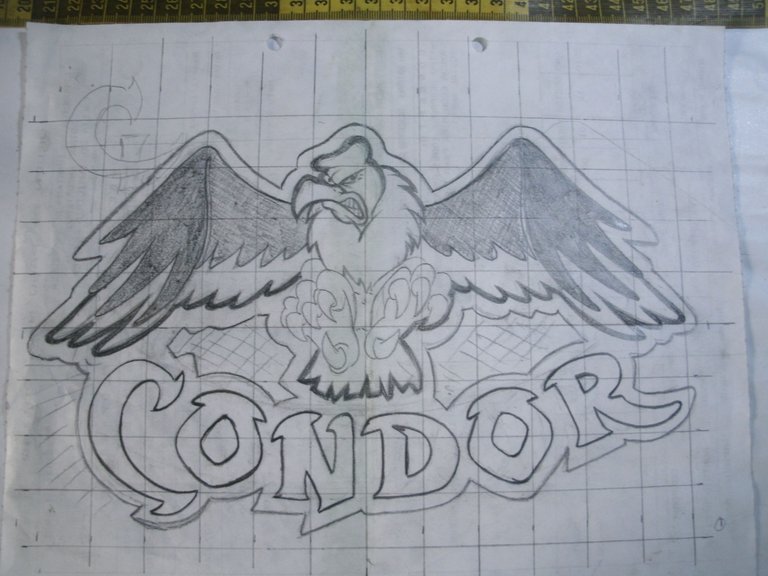
El boceto como les habia mencionado fue de seleccion personal, solo lo mejore en cuanto a las lineas y lo cuadricule en una escala de 2cm. a 3,8 cm, si lo notan en la parte superior se ve parte de una cinta metrica para comparacion del tamaño,
The sketch, as I had mentioned, was a personal selection, I only improved it in terms of lines and gridded it on a 2cm scale. at 3.8 cm, if you notice it at the top you see part of a tape measure to compare the size,
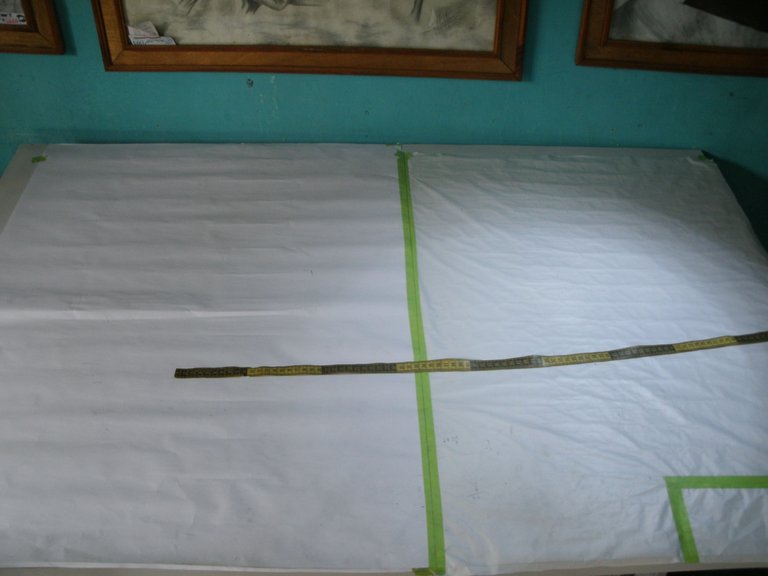
Esta es la superficie real a la cual voy a trasladar el boceto inicial con la escala antes mencionada.
This is the real surface to which I am going to transfer the initial sketch with the aforementioned scale.
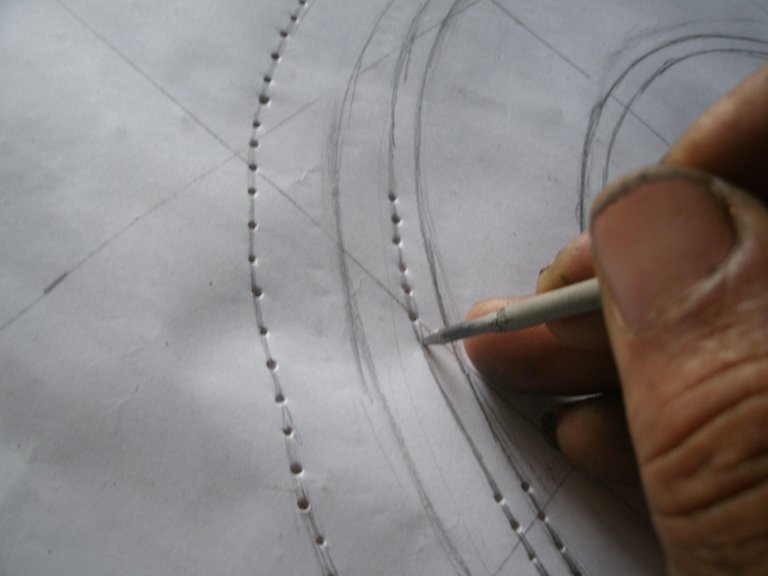
Una vez realizado el diseño, procedo a perforarlo en todas las lineas y así fabricar una especie de plantilla, así se facilita mucho el trabajo, pues no es necesario trazar directamente en la superficie a dibujar y se evitan mas incomodidades, se ahorra el tiempo y se consigue mejorías en el resultado final.
Once the design is done, I proceed to drill it in all the lines and thus make a kind of template, this makes the work much easier, since it is not necessary to trace directly on the surface to be drawn and more discomfort is avoided, time is saved and improvements are achieved in the final result.
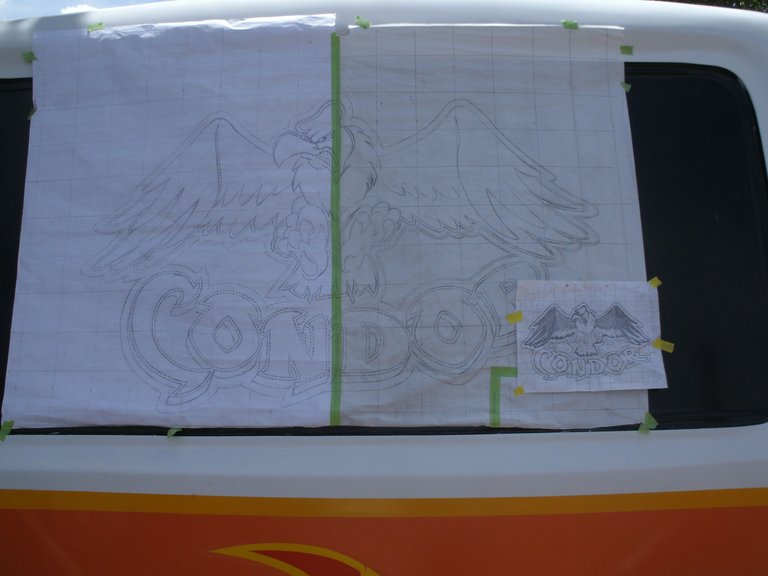
Teniendo lista la plantilla procedemos a fijarla y cuadrarla en el lugar indicado, aquí vemos la comparación entre el boceto y la dimencion de la plantilla final
Having the template ready, we proceed to fix it and square it in the indicated place, here we see the comparison between the sketch and the dimension of the final template
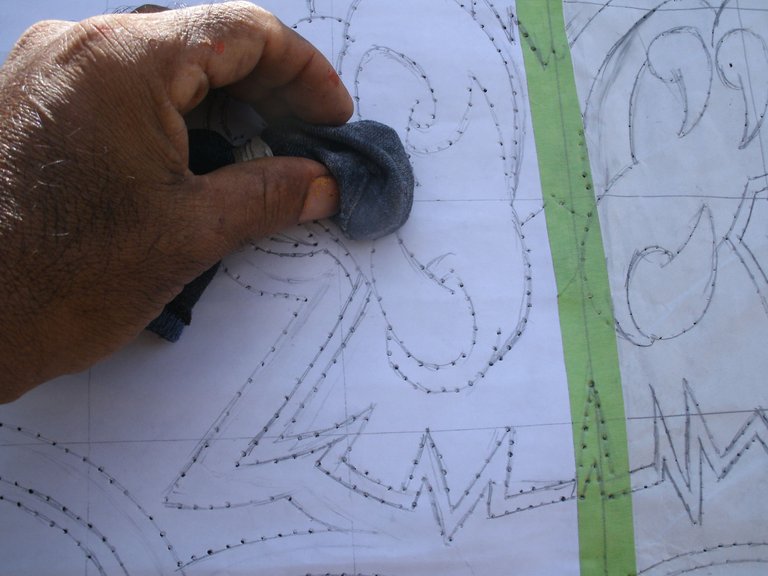
Aplico tiza blanca pulverizada, por cierto me ocasiono cierto percance, pues use una media para este asunto y luego se me extravió, y la media era de mi sobrino willians ,imagínese el resto... que cosas....Ja!. a continuación el agujereado en la plantilla hará su función , primero sobre el negro con la tiza blanca y luego con el carboncillo pulverizado en la base blanca, el caso es que el polvo pasara a través de los hoyos y dejara plasmado el diseño en la superficie, otra ventaja de este sistema es que si requiere borrar el diseño solo basta sacudir con un paño.
I apply powdered white chalk, by the way it caused me some mishap, because I used a stocking for this matter and then it got lost, and the stocking belonged to my nephew willians, imagine the rest... what things... Ha! then the holes in the template will do its job, first on the black with the white chalk and then with the powdered charcoal on the white base, the fact is that the powder will pass through the holes and leave the design on the surface Another advantage of this system is that if you need to erase the design, just shake it with a cloth.
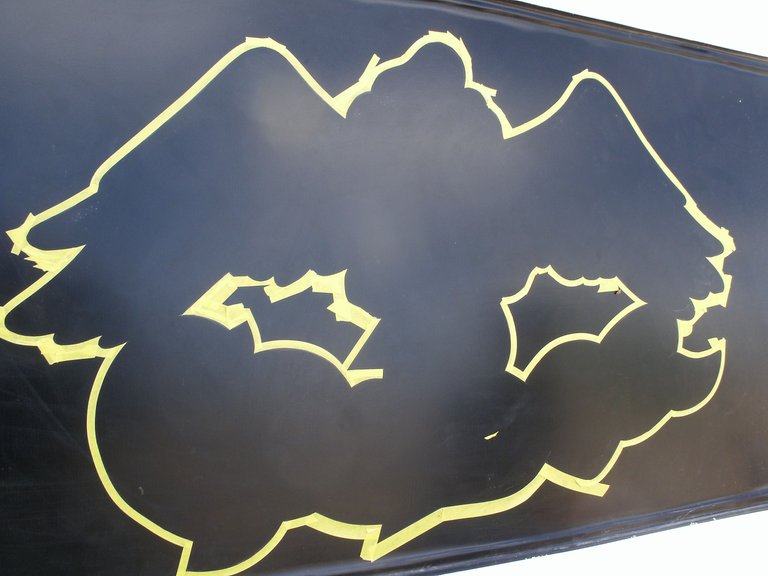
Para el fondo negro es necesario aplicar una superficie blanca, se logra enmascarando la superficie con el tirro y el papel bond, también puede usarse periódico si lo tiene a su alcance.
For the black background it is necessary to apply a white surface, it is achieved by masking the surface with the plaster and bond paper, you can also use newspaper if you have it at your fingertips.
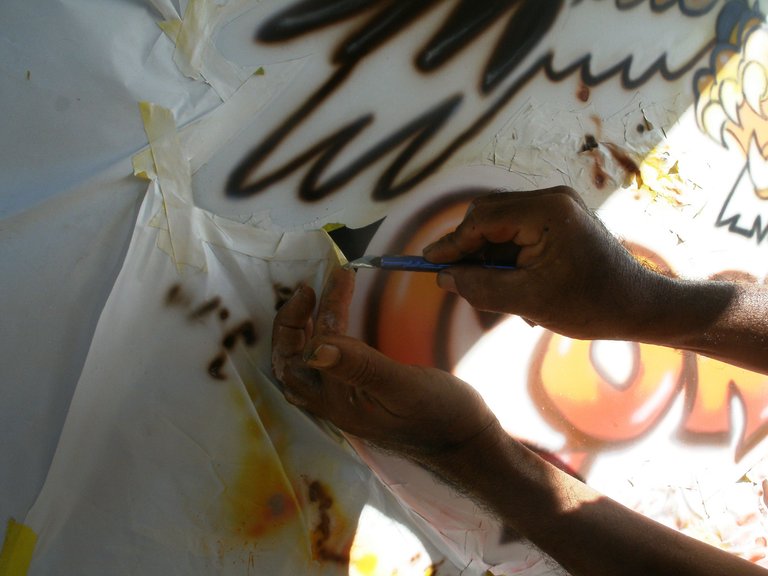
Una vez enmascarado y trazado y remarcado nuestro diseño con lápiz de grafito procedemos con la aplicación del color, para las sombras mas y para los claros menos material. es primordial básico y necesario tener buen pulso.
Once masked and traced and highlighted our design with graphite pencil, we proceed with the application of color, for the shadows more and for the clear ones less material. It is essential basic and necessary to have a good pulse.
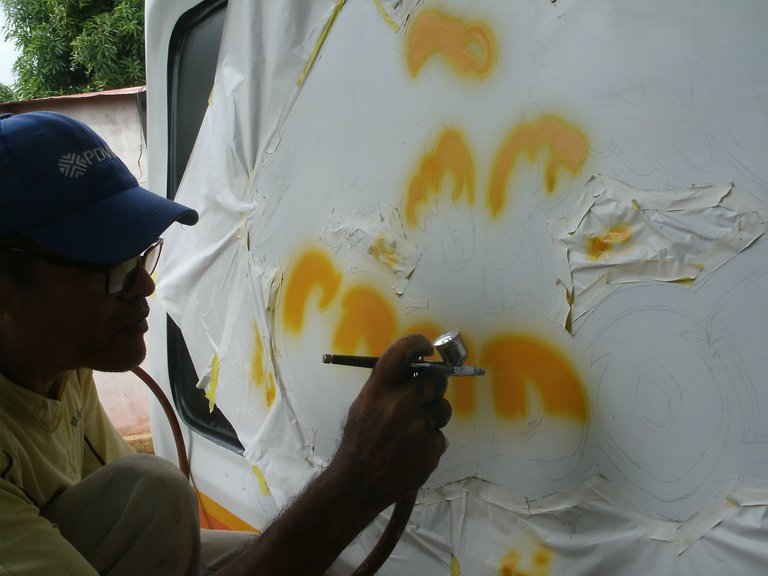
Procuramos aplicar el color que estamos usando en sus zonas respectivas para evitar estar cambiando el color muchas veces, así se ahorra material, sobre todo el thiner ademas de el tiempo
We try to apply the color that we are using in their respective areas to avoid changing the color many times, thus saving material, especially the thinner as well as time.
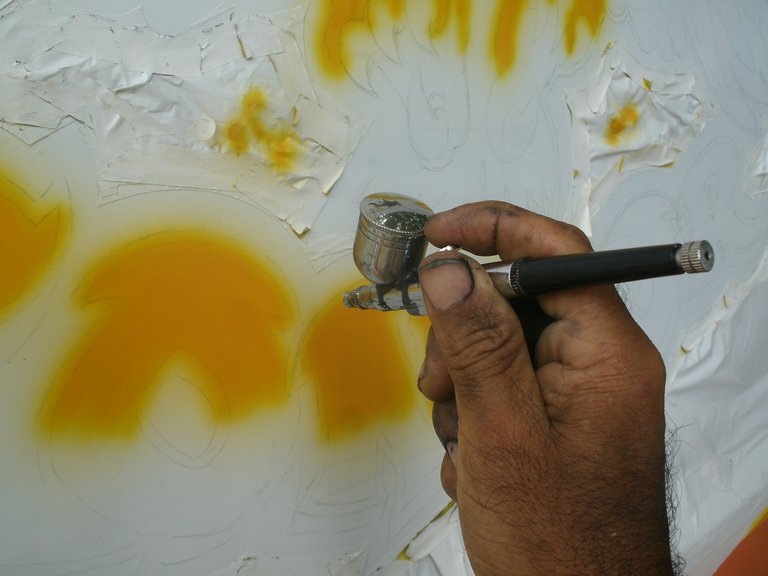
Ahora cambio el color y sigo con el mismo patrón, abro la válvula de pintura en el aerografo y este me dispensa mas un trazo bien abierto,
Now I change the color and continue with the same pattern, I open the paint valve in the airbrush and it gives me another wide open stroke,

Aplico otros colores. tomando en cuenta un sentido de dirección.
I apply other colors. taking into account a sense of direction.
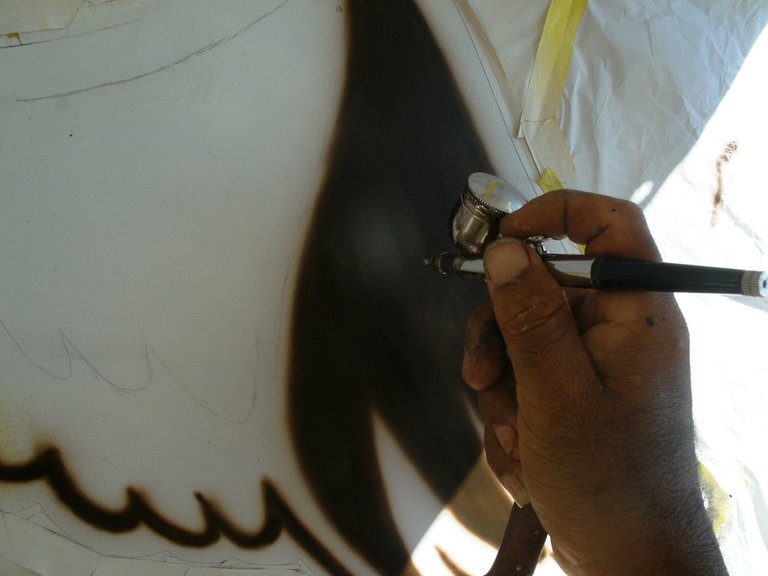
Delineo con el aerografo, aquí no uso pincel ya que el uso de pintura acrílica no lo permite, pero uso un trazo fino logrado con la manipulación de las válvulas del aerografo, creo que este es el paso mas difícil , por el asunto del pulso.
I outline with the airbrush, here I do not use a brush since the use of acrylic paint does not allow it, but I use a fine line achieved with the manipulation of the airbrush valves, I think this is the most difficult step, due to the matter of the pulse.
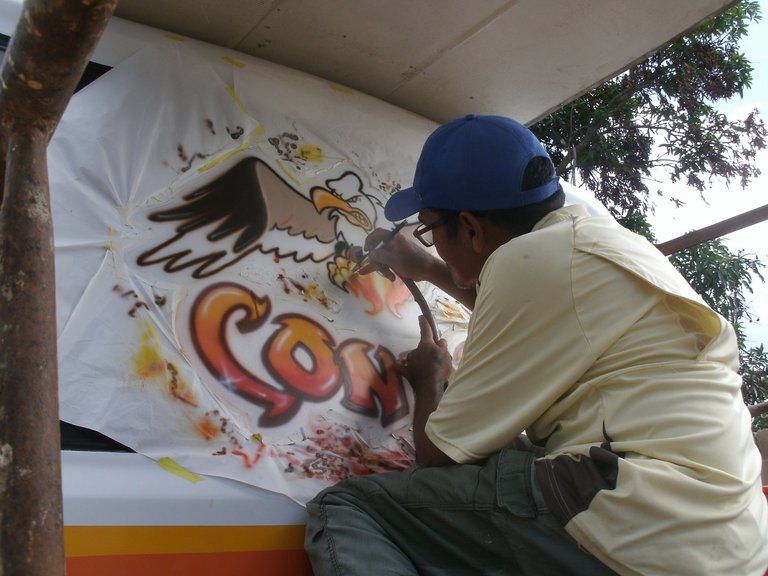
Y una vez aplicaos todos los colores con su detalles y mas, procedemos a retirar el enmascarado.
And once you apply all the colors with their details and more, we proceed to remove the masking.

Y así quedo este dibujo.Les digo que quede conforme y satisfecho, aunque la presentación de esta publicación es corta , el trabajo fue laborioso...o al menos así me parece.
And this is how this drawing is left. I tell you to be satisfied and satisfied, although the presentation of this publication is short, the work was laborious... or at least it seems that way to me.
y así llegamos al final de esta publicación, muy contento con los resultados finales de "Cóndor" y mucho mas al poder compartirlo con ustedes, Agradeciéndole una vez mas a mi poder superior Jehova Dios, por permitirme llegar a ustedes. Vaya un agradecimiento muy especial por los comentarios a publicación "autorretrato". Así se despide de ustedes su servidor....Ney...Ja!
And so we come to the end of this publication, very happy with the final results of "Cóndor" and much more to be able to share it with you, Thanking once again my superior power Jehovah God, for allowing me to reach you. A very special thanks for the comments on the "self-portrait" post. This is how your server says goodbye to you....Ney...Ja!
Wow @mauro1993, ese cóndor quedo genial y a simple vista se nota que no es nada fácil hacer eso.

Gracias por compartirlo.
Gracias a ti amiga por tu comentario!... no creas que es tan difícil, algo laboriosa, todo es cuestión de adaptarse al medio, este trabajo es sencillo, la técnica para este caso es bastante básica, con relación a otros trabajos de otros artistas que están mas avanzados, pero sabes! yo quiero seguir esta ruta para ver que hay al final... Saludos!
Gracias a ti amiga por tu comentario!... no creas que es tan difícil, algo laboriosa, todo es cuestión de adaptarse al medio, este trabajo es sencillo, la técnica para este caso es bastante básica, con relación a otros trabajos de otros artistas que están mas avanzados, pero sabes! yo quiero seguir esta ruta para ver que hay al final... Saludos!
Wow... Un excelente trabajo amigo... Me encantó como explicas la técnica para utilizar el aerógrafo (siempre he querido trabajar con uno pero no se me ha presentado la oportunidad)... Gracias por compartir tu experiencia.
🎆🎇🎉🎊🌧️💐✨🌾🌱🌹🌙🌿🍃🥀⚡🌺☘️🍀🌈🌷⭐🪴🌵🌸🌟💮🌴🌳💫☀️💮☔🌲🌳🌍🌌🌠☄️🏵️🐝🌻🌼🍄🐞🦋💙☕💜🍍🎆🎇🎉🎊
Gracias a ti amiga, por tu comentario ! me alegra que te haya gustado la manera como quise explicar este contenido...Sabes!,.. uno de los beneficios que he recibido en estos días , es que que ustedes se beneficien de una u otra manera de estos pasos que trato de explicar, tanto en este como en mis otras publicaciones, espero en el futuro poder explicar algo mas de este tema que me tiene de cabeza...y por supuesto seguir aprendiendo de los suyos... y bueno, aunque todavía es largo el camino, apenas estoy iniciando, vamos a recorrerlo a ver que hay al final. ojala le llegue la oportunidad de usar un aerografo y vera de lo que le hablo..... saludos y bendiciones!
Amén y éxitos en su proceso.
Felicitaciones por ese trabajo tan hermoso, realmente tener la inteligencia visual es un don expectacular, le felicito.🌺