Un saludo a todos. Hoy quiero compartir con ustedes esta linda cajita que armé para un regalo que iba a dar mi mamá, se trataba de unos bombones que necesitaban estar bien protegidos para soportar el viaje y sufrir daños físicos en el camino, así que, te invito a seguir leyendo y así no te pierdas ningún detalle de esta práctica idea.
English Version
Greetings to all. Today I want to share with you this cute little box that I put together for a gift that my mom was going to give, it was about some chocolates that needed to be well protected to withstand the trip and suffer physical damage on the way, so, I invite you to read on so you do not miss any detail of this practical idea.
Imagen creada por mí en Canva / Image created by me in Canva
Materiales:
- Cartón
- Papel de regalo
- Pegamento
- Tijeras / Cúter
- Regla
- Lápiz
- Cordón / Cinta decorativa
- Bombones
Procedimiento:
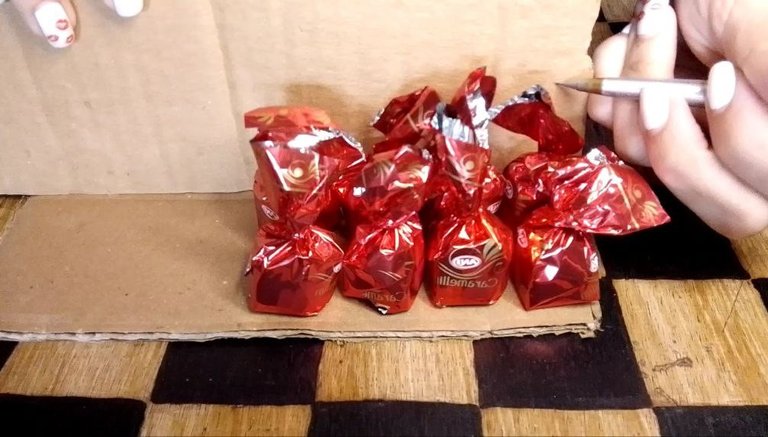
Iniciaremos tomando una porción de cartón, sobre ella, colocaremos nuestros bonitos bombones cuidadosa y ordenadamente, distribuyéndolos de la manera que deseamos que se posicionen definitivamente.
English Version
Materials:
- Cardboard
- Wrapping paper
- Glue
- Scissors / Cutter
- Ruler
- Pencil
*Cord / Decorative ribbon - Chocolates
Procedure:
We will start by taking a portion of cardboard, on it, we will place our pretty chocolates carefully and neatly, distributing them in the way we want them to be positioned definitively.
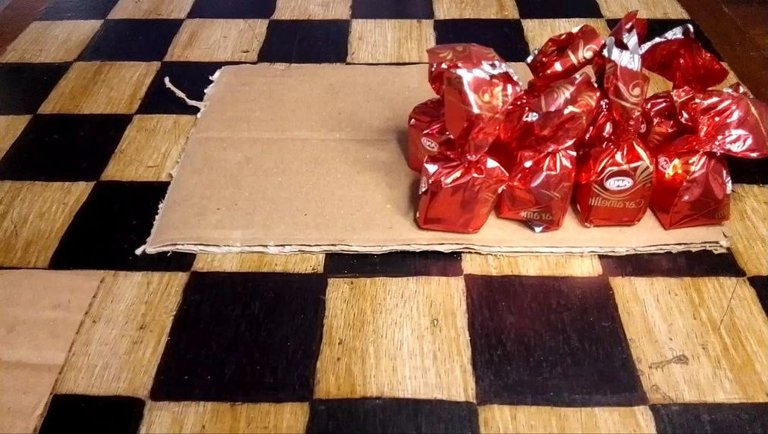
Bombones ordenados / Chocolates ordered
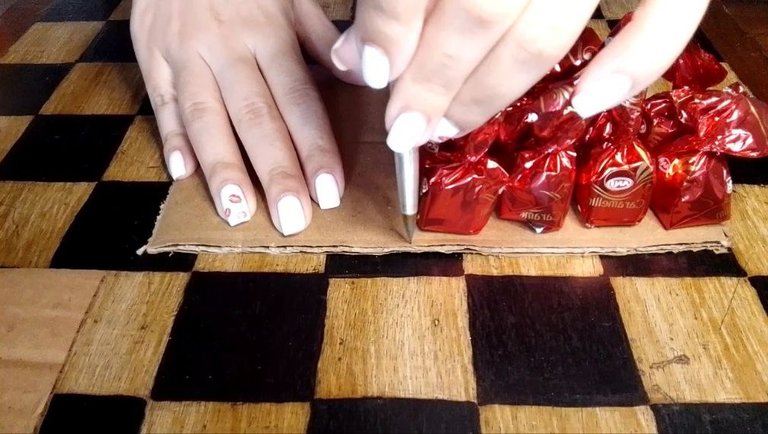
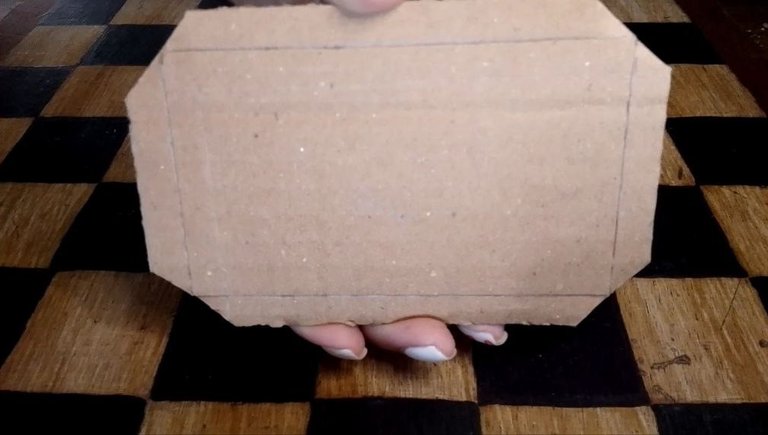
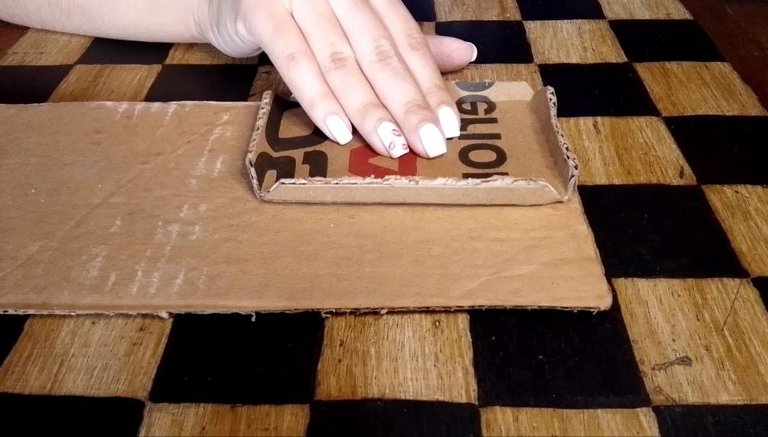
Acto seguido, con ayuda de algún implemento de escritura, como un lápiz, bolígrafo, color o como en mi caso, un portaminas, haremos una marca, indicando que hasta allí, ocupan lugar nuestros bombones. Esta acción la llevaremos a cabo, tanto para un lado, como para el otro, de modo que, trazando líneas paralelas, teniendo en cuenta los puntos marcados, podamos formar un rectángulo. Sin embargo, no debemos nunca olvidar, dejar un centímetro extra aproximadamente, por todo el perímetro del mencionado rectángulo, puesto que este “extra” será la pestaña que nos permitirá unir a esta pieza con las demás. También, recorta las esquinas del rectángulo para que las pestañas tengan un mejor acomodo.
English Version
Then, with the help of a writing implement, such as a pencil, pen, color or as in my case, a mechanical pencil, we will make a mark, indicating that up to there, our chocolates take place. This action will be carried out both for one side and the other, so that, drawing parallel lines, taking into account the marked points, we can form a rectangle. However, we must never forget to leave an extra centimeter approximately around the perimeter of the rectangle, since this “extra” will be the tab that will allow us to join this piece with the others. Also, trim the corners of the rectangle so that the tabs will fit better.
 |  |  |
|---|
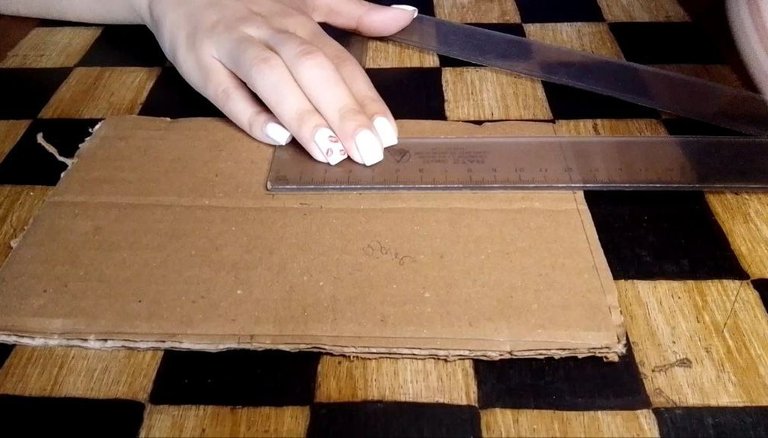
A continuación, tomaremos las medidas de las paredes de la caja. De forma análoga al paso anterior, colocaremos otro trozo de cartón en paralelo a nuestros bombones y apoyado perpendicularmente a la base de los mismos y con ayuda del lápiz, marcaremos la altura deseada. La longitud de cada pared, dependerá de las medidas de los laterales que hemos establecido para la base, en mi caso, como tiene una forma rectangular, serán dos piezas largas y dos piezas un poco más cortas.
English Version
Next, we will take the measurements of the walls of the box. Similarly to the previous step, we will place another piece of cardboard parallel to our chocolates and supported perpendicularly to the base of the same and with the help of the pencil, we will mark the desired height. The length of each wall will depend on the measurements of the sides that we have established for the base, in my case, as it has a rectangular shape, there will be two long pieces and two pieces a little shorter.
Medidas paredes de la base / Base wall dimensions
A cada pared se le ha de dejar una pestaña en uno de sus laterales correspondientes a la altura de la misma, de modo que, en el futuro, pueda adherirse por medio de ella a la pared siguiente. Para que todo quede con un mejor acabado, al recortar las piezas, es bueno cortar también las esquinas de las pestañas, las mismas quedarán así con una forma trapezoidal y calzarán mejor al momento de su ensamblaje.
English Version
Each wall should have a flange on one of its sides corresponding to the height of the wall, so that in the future it can be attached to the next wall. For a better finish, when trimming the pieces, it is good to cut the corners of the flanges, so that they will have a trapezoidal shape and will fit better when assembled.
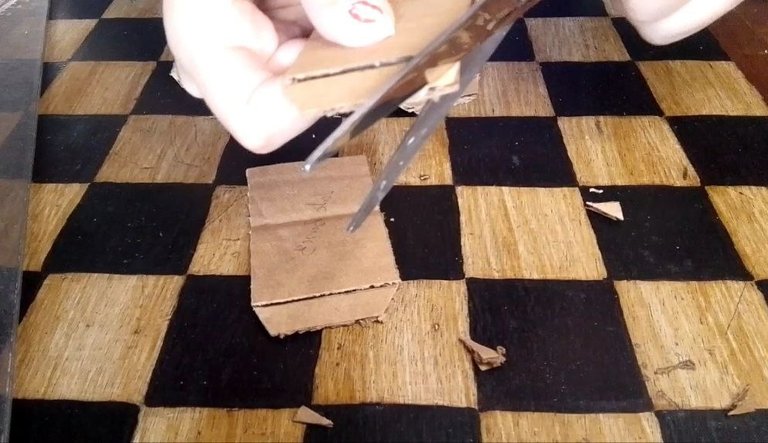
Recortando las piezas y pestañas / Trimming parts and flanges
Es momento de doblar las pestañas de la base, como este cartón es algo grueso, es recomendable hacer un corte con ayuda del cúter por la línea del doblez, este corte no debe cruzar hasta el otro lado de la pieza, es solo un corte superficial que facilite la manipulación para el doblado.
English Version
It is time to fold the flanges of the base, as this cardboard is somewhat thick, it is advisable to make a cut with the help of the cutter along the line of the fold, this cut should not cross to the other side of the piece, it is only a superficial cut to facilitate the handling for the folding.
Doblando pestañas de la base / Folding base tabs
En este punto, también tomo las medidas para la tapa de la caja, colocando la base que hemos recortado y doblado sus pestañas previamente para que así, la tapa quede a medida y no vaya a ser muy pequeña, puesto que debemos tomar en cuenta es grueso del cartón que conformará las paredes en todo el perímetro de la misma.
English Version
At this point, I also take the measurements for the lid of the box, placing the base that we have previously cut out and folded its flaps so that the lid will fit and will not be too small, since we must take into account the thickness of the cardboard that will form the walls around the perimeter of the box.
Medidas base de la tapa / Cover base dimensions
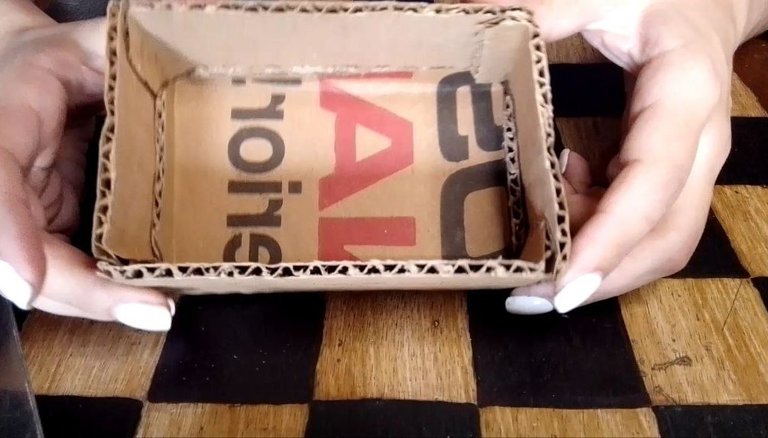
Procedemos a armar la parte de abajo de la caja, colocando un poco de pegamento y extendiendo éste en una capa delgada, se van adhiriendo las partes poco a poco y apretando las uniones unos segundos para asegurar la adherencia.
English Version
We proceed to assemble the bottom part of the box, placing a little glue and spreading it in a thin layer, gradually adhering the parts and squeezing the joints for a few seconds to ensure adhesion.
Unión de piezas de la base / Joining of base parts
Para la tapa procedemos de manera muy similar a los pasos previos explicados para la parte de abajo de la caja, solo que, las paredes de la tapa no deben ser necesariamente de la altura de los bombones (a menos que así se desee), con que sean de máximo 2 centímetros de alto es más que suficiente.
English Version
For the lid we proceed in a very similar way to the previous steps explained for the bottom of the box, only that the walls of the lid should not necessarily be the height of the chocolates (unless desired), with a maximum height of 2 centimeters is more than enough.
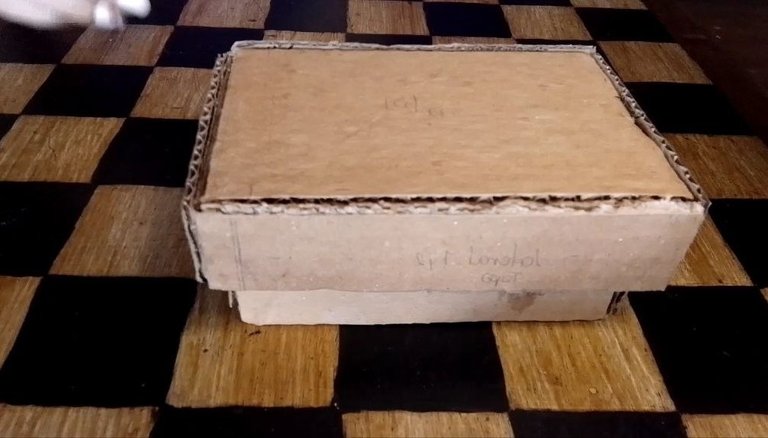
Todas las piezas ensambladas / All assembled parts
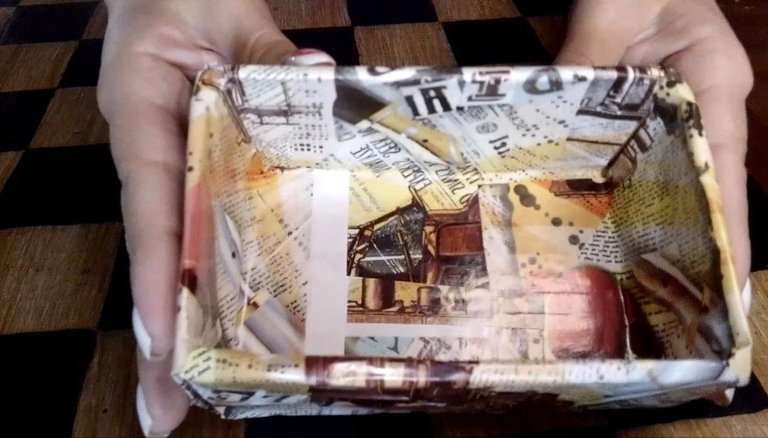
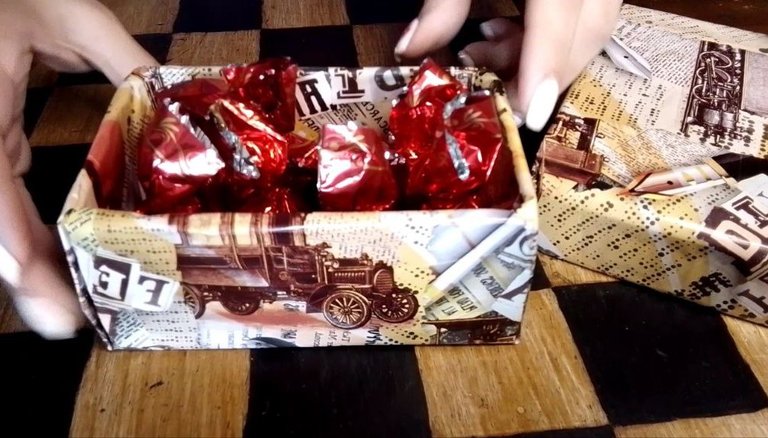
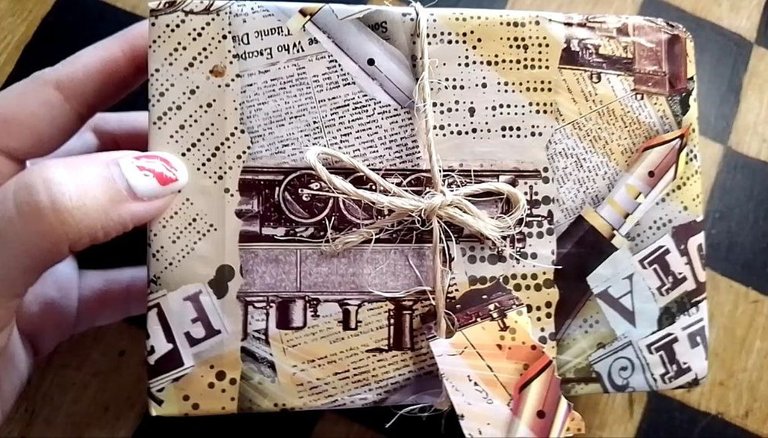
Ahora que la estructura de la caja está lista, es el turno de la decoración, para ello, tomaremos nuestro papel de regalo (aunque también puedes utilizar cualquier papel bonito que te agrade) y forramos todo, tanto la parte de abajo como la tapa, por fuera y también por dentro e introducimos los bombones, además, yo le he dado un toque final con este cordón artesanal que he atado alrededor de la caja terminando en un bonito lazo y agregando una pequeña tarjeta que hice con el mismo papel de regalo.
English Version
Now that the structure of the box is ready, it is the turn of the decoration, for this, we will take our wrapping paper (although you can also use any pretty paper that you like) and line everything, both the bottom and the lid, outside and also inside and introduce the chocolates, in addition, I have given a final touch with this handmade cord that I have tied around the box ending in a pretty bow and adding a small card that I made with the same wrapping paper.
 |  |  |
|---|
Comentarios finales:
- No les di medidas exactas porque como dije al comienzo, dependerá del tamaño, cantidad y distribución que le des a tus bombones.
- A mi mamá le encantó el resultado y a su pequeño sobrino le gustó mucho todo el regalo (no sé si se lo preguntaban pero se los digo por si acaso {risas}).
- Si te sientes con un poco de inseguridad respecto a que los bombones se mantengan en su lugar, siempre puedes ocupar un poco de cinta adhesiva en la base de cada uno.
- Si quieres hacer el interior de la caja aún más vistoso, puedes agregar algo de confeti y le dará un toque colorido y divertido a la experiencia.
English Version
Final comments:.
- I didn't give them exact measurements because as I said at the beginning, it will depend on the size, quantity and distribution you give to your chocolates.
- My mom loved the result and her little nephew loved the whole gift (I don't know if you were wondering but I'm telling you just in case {laughs}).
- If you're feeling a little insecure about the chocolates staying in place, you can always take up a little bit of tape at the base of each one.
- If you want to make the inside of the box even more colorful, you can add some confetti and it will add a colorful and fun touch to the experience.
Fotografías propias, tomadas con mi Tecno Spark 10C.
Traducido al inglés con DeepL.
English Version
Own photographs, taken with my Tecno Spark 10C.
Translated to English with DeepL.

Banner creado por mí en Canva / Banner made by me in Canva
Muy hermosa, excelente trabajo 😍🥰
Muchas gracias Anne🤗
Congratulations @mavilan30! You have completed the following achievement on the Hive blockchain And have been rewarded with New badge(s)
Your next target is to reach 900 upvotes.
You can view your badges on your board and compare yourself to others in the Ranking
If you no longer want to receive notifications, reply to this comment with the word
STOPMuchas gracias 🫂✨
Buena alternativas para un regalo es un placer conocerte
Me alegra que te gustara amigo☺️