¡Hola querida comunidad! En esta oportunidad vengo a compartirles mi manualidad más reciente, un hermoso frasco de vidrio decorado ideal para dar un obsequio como dulces o cualquier otra cosa bonita y llena de amor o bien, puede ser de utilidad para uno mismo, puesto que dentro de él se pueden guardar un sinfín de objetos, como accesorios del cabello, materiales de costura, entre otros. Toda la idea surgió porque mi mamá ya tenía muchos frascos e iba a botar algunos, así que se los pedí con la promesa de que podía darles un segundo uso, además de volverlos decorativos (risas). Así que sin más, los dejo con el paso a paso.
Hello dear community! This time I come to share with you my most recent craft, a beautiful decorated glass jar ideal for giving a gift like candy or anything else beautiful and full of love or can be useful for oneself, since inside it you can store a myriad of objects such as hair accessories, sewing materials, among others. The whole idea came up because my mom already had a lot of jars and was going to throw some away, so I asked her for them with the promise that I could give them a second use, besides making them decorative (laughs). So without further ado, I leave you with the step by step.
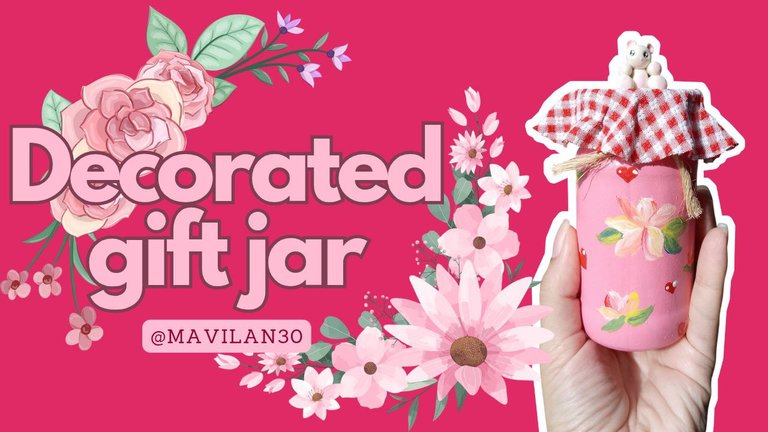
Imagen creada por mí en Canva / Image created by me in Canva
Materiales:
- Frasco de vidrio con tapa
- Pinturas al frío
- Esponja
- Pincel
- Vasito
- Agua
- Pegamento escolar
- Silicón caliente
- Retazo de tela
- Cordón o cinta
- Adorno para la tapa
Procedimiento:
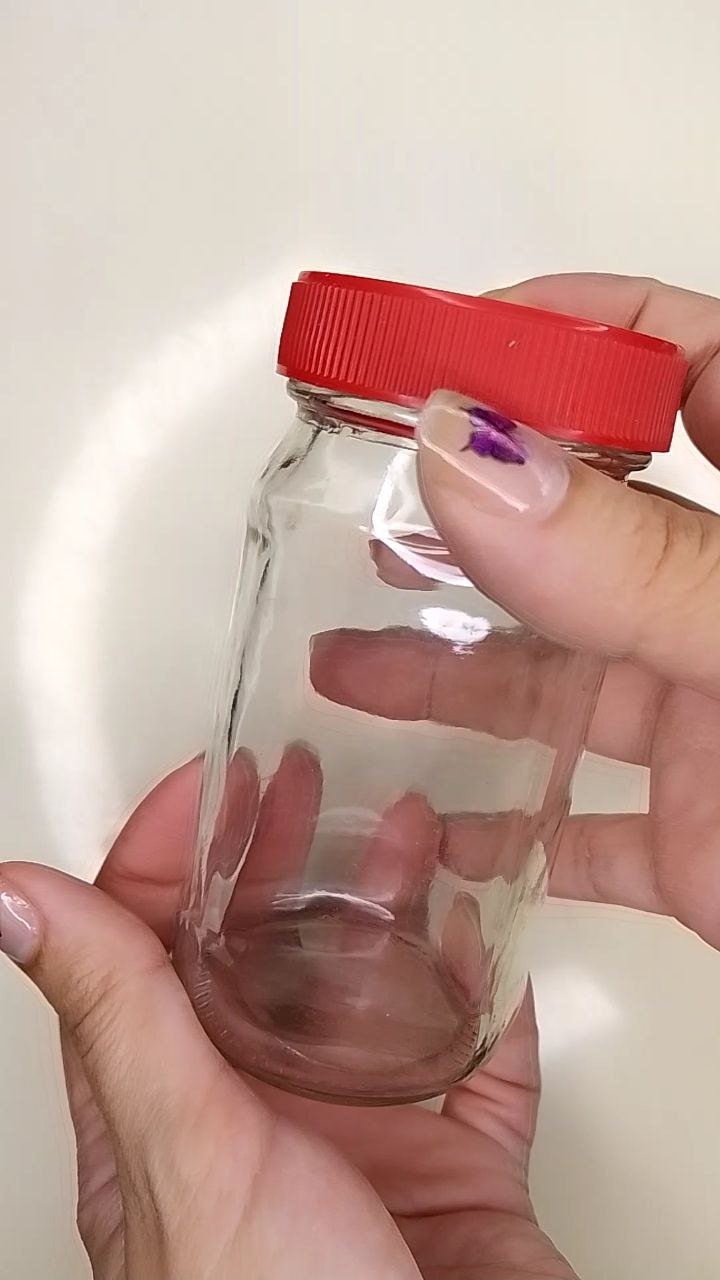
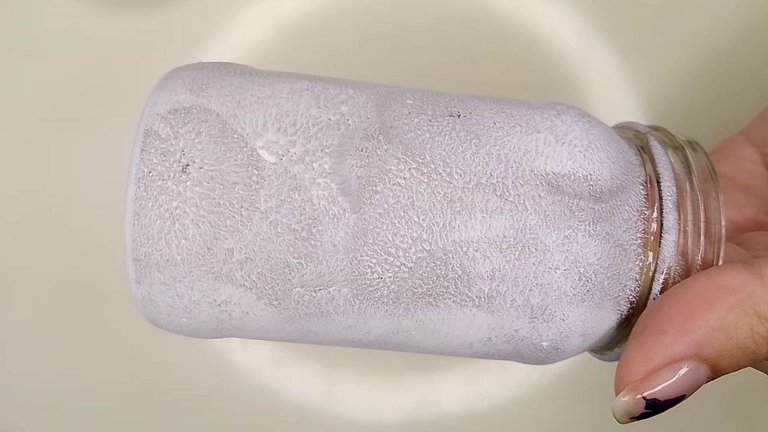
Iniciamos separando la tapa del frasco, ya que de momento, solo necesitamos el frasco de vidrio como tal. Al mismo lo vamos a pintar con la pintura al frío, puedes emplear otros tipos de pintura, pero esta es de la que yo disponía en ese momento y la verdad me fue muy bien. El frasco puede ir pintado del color de tu preferencia, en mi caso, he elegido el color rosado, pero, para que se pudiese ver el color lo más saturado posible, pinté el frasco totalmente de blanco primero, proporcionando una base más sólida para el color definitivo. No usé un pincel para esta tarea porque es poco funcional, se tarda más y quedan marcadas rayas, así que utilicé una esponja de maquillaje que ya había desechado y el resultado es más uniforme. Le di dos capas de pintura.
Materials:
- Glass jar with lid
- Cold paints
- Sponge
- Small glass
- Water
- School glue
- Hot glue
- Piece of cloth
- Cord or ribbon
- Ornament for the lid
Procedure:
We start by separating the lid from the jar, since for the moment, we only need the glass jar as such. We are going to paint it with cold paint, you can use other types of paint, but this is the one I had at that time and the truth is that it worked very well. The jar can be painted in the color of your preference, in my case, I chose the pink color, but, so that the color could be seen as saturated as possible, I painted the jar completely white first, providing a more solid base for the final color. I did not use a brush for this task because it is not very functional, takes longer and leaves streaks, so I used a makeup sponge that I had already discarded and the result is more uniform. I applied two coats of paint.
 |  |
|---|
Pintando de blanco / Painting white
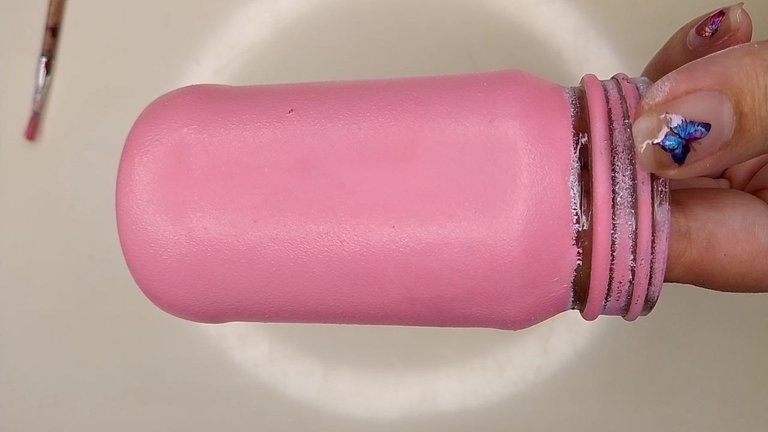
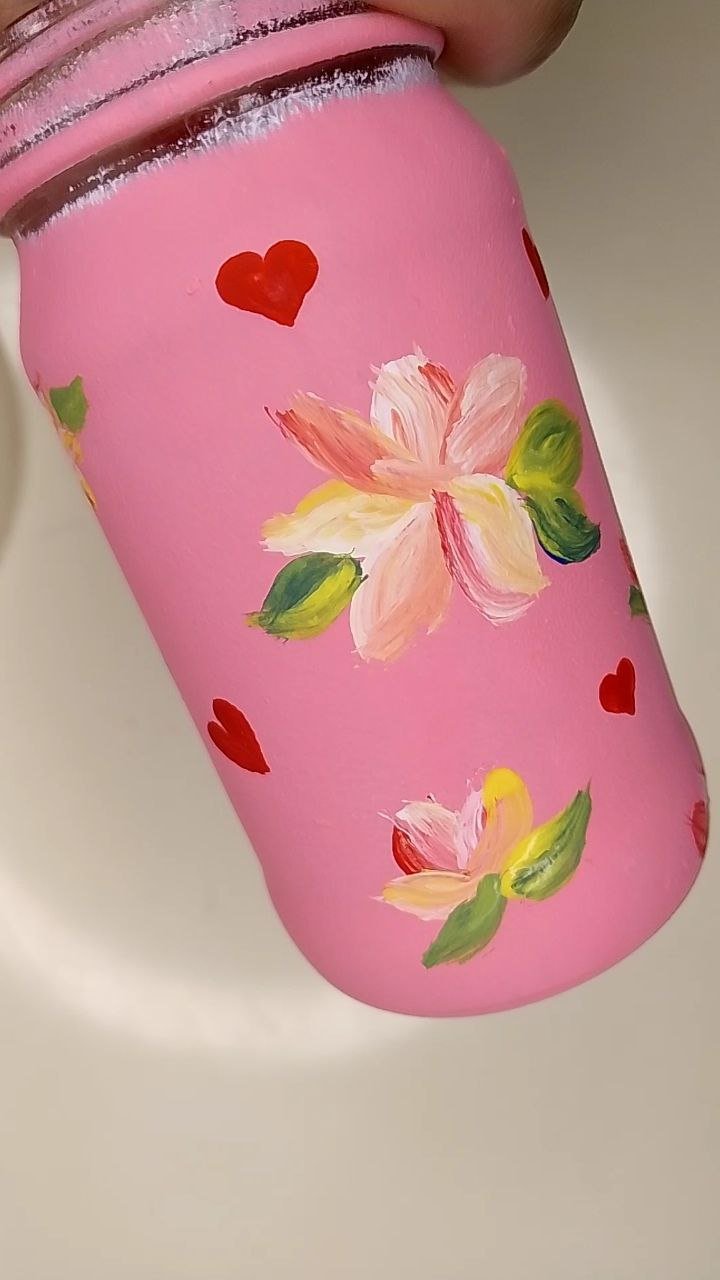
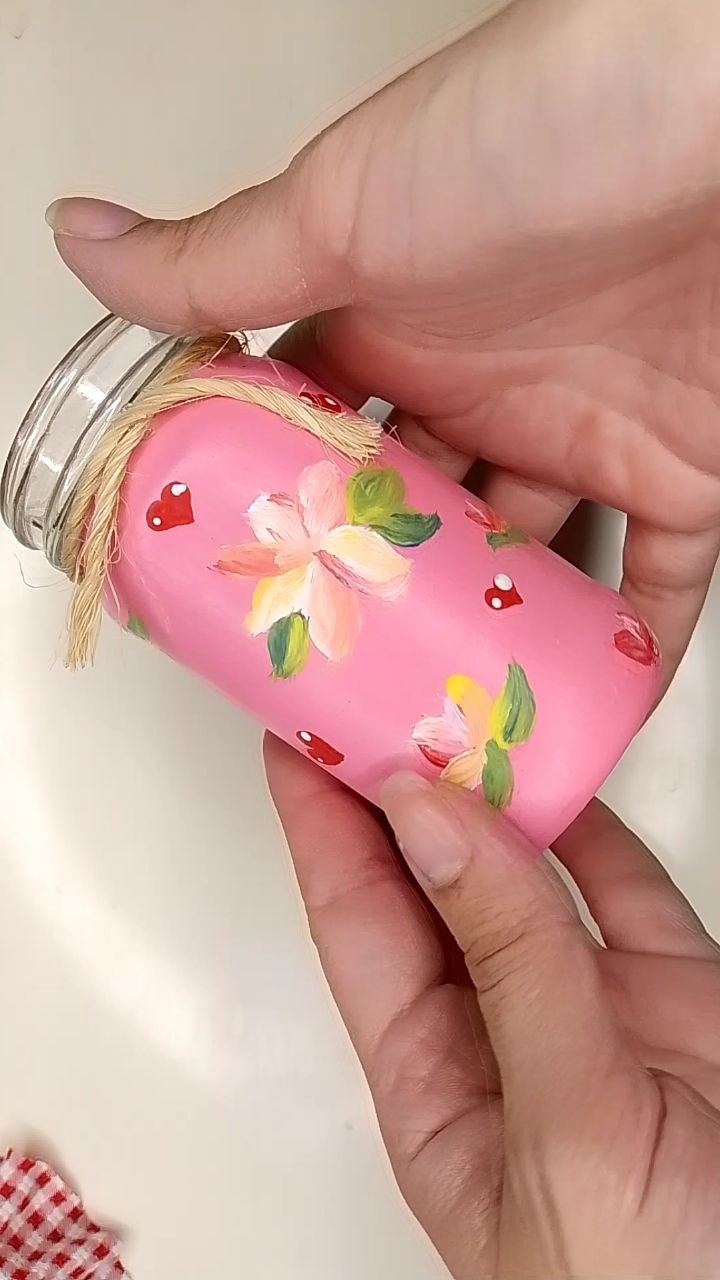
Posteriormente, repetimos el proceso anterior pero esta vez con el color rosado, dando también dos capas de pintura para que el color no tuviese imperfecciones y una vez seca la última capa, viene lo mejor, pintar flores de distintos tamaños, formas y colores. Debo confesar que en esta parte me tocó confiar en el proceso, porque al comienzo no estaba agarrando forma de flor mi primera flor (risas), pero continué adelante y al agregar las hojitas de color verde, todo se vio hermoso, como un campo de flores contenido en mi frasquito. También añadí algunos corazones rojos en los espacios vacíos entre las flores y esto le dio mucha vida a la composición.
Afterwards, we repeated the previous process but this time with the pink color, giving also two coats of paint so that the color would not have imperfections and once the last coat was dry, the best part came, painting flowers of different sizes, shapes and colors. I must confess that in this part I had to trust the process, because at the beginning my first flower was not taking the shape of a flower (laughs), but I kept going and when I added the little green leaves, everything looked beautiful, like a field of flowers contained in my little bottle. I also added some red hearts in the empty spaces between the flowers and this gave a lot of life to the composition.
 |  |
|---|
Pintura definitiva / Final painting
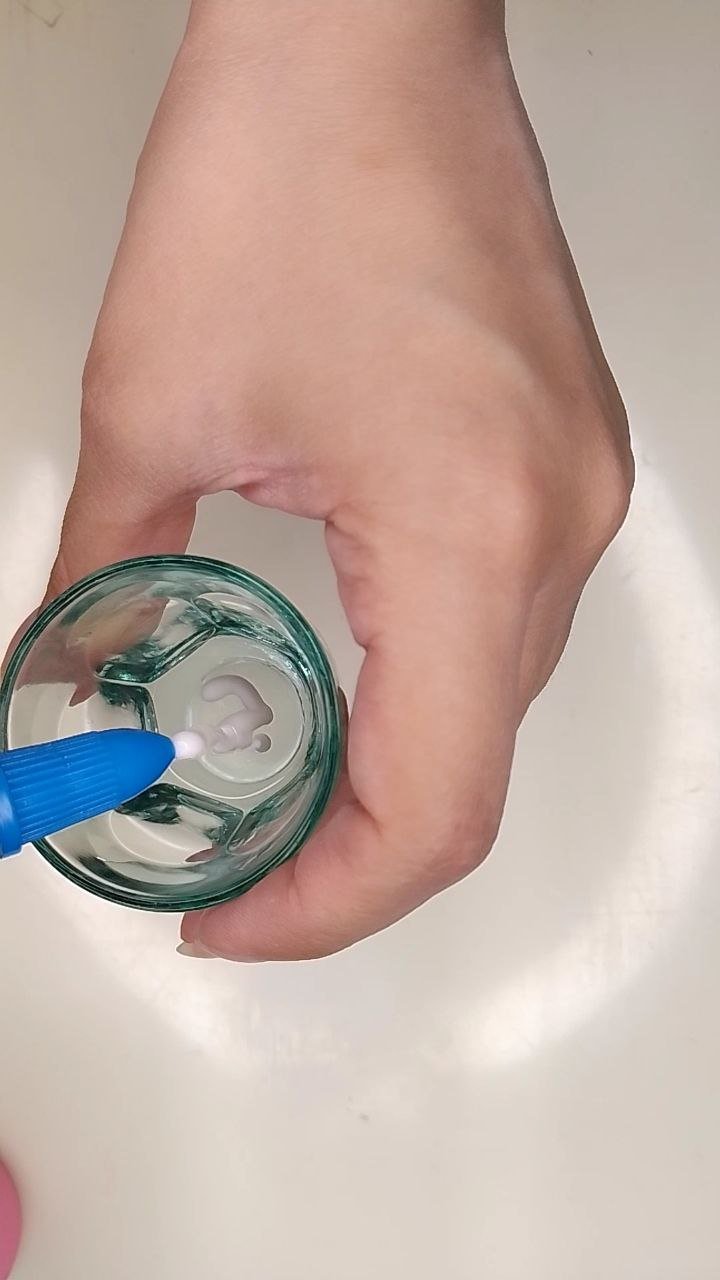
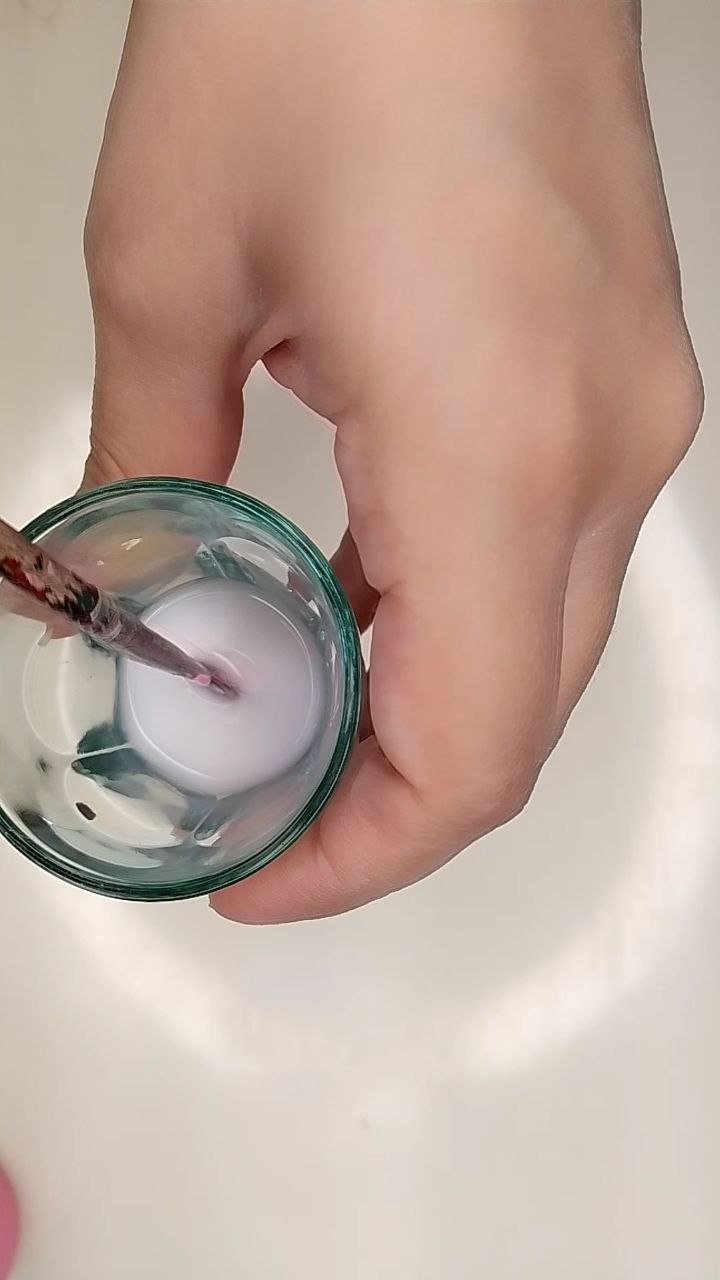
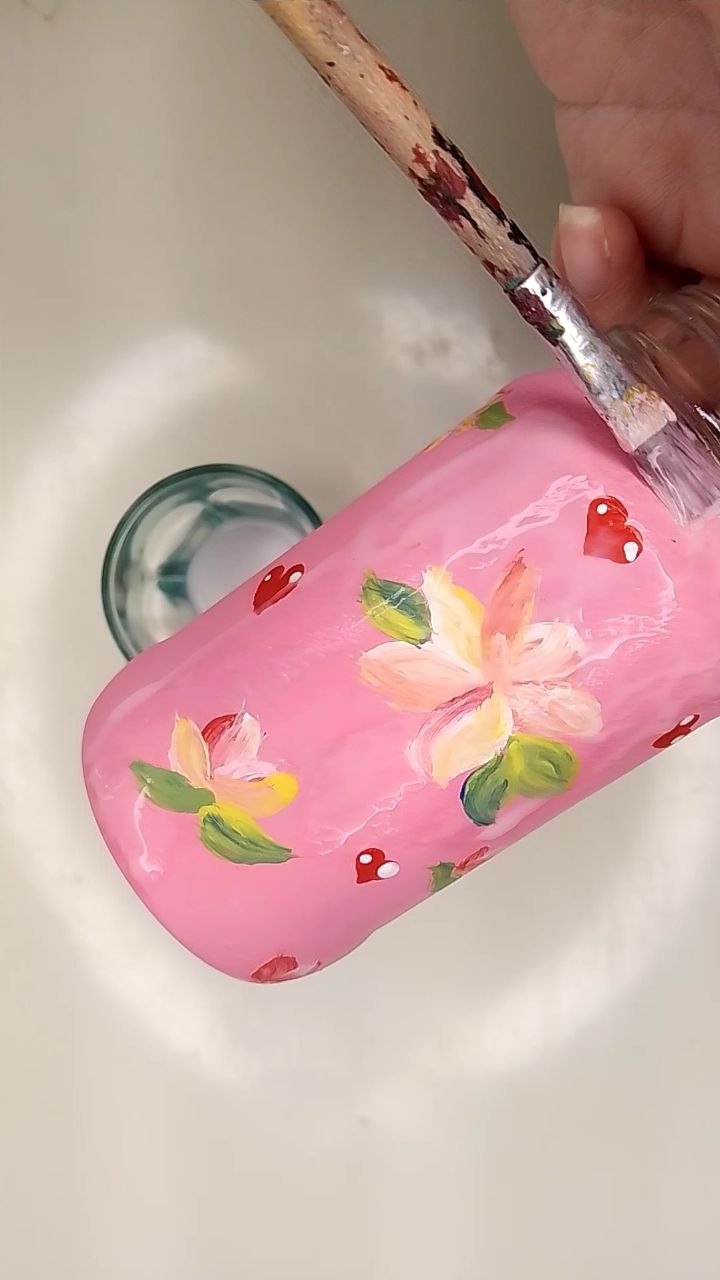
Dejamos secar todo muy bien y decidí sellar toda la parte de la pintura con una capa de pegamento blanco diluido en agua, esta sí la apliqué con el pincel y dejé secar. Por cierto que, con un pañito húmedo, he limpiado la parte superior del frasco (donde va la tapa) de los restos de pintura que han caído en esa área.
We let everything dry very well and I decided to seal the whole part of the painting with a layer of white glue diluted in water, I applied it with the brush and let it dry. By the way, with a damp cloth, I cleaned the top of the jar (where the lid goes) of the paint that has fallen in that area.
 |  |  |
|---|
Capa de pegamento / Glue layer
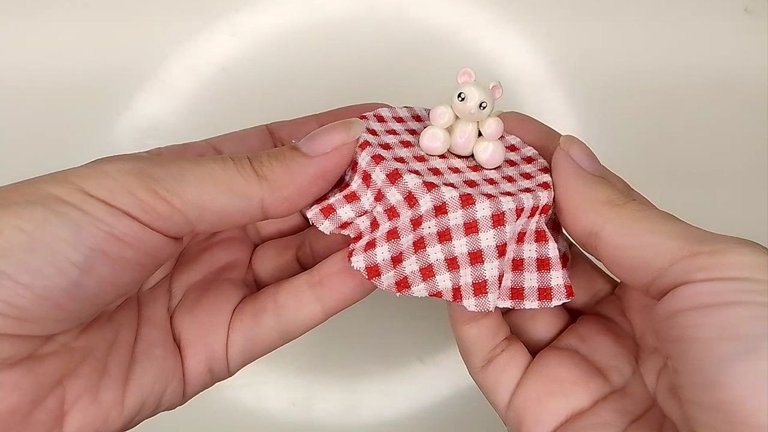
Mientras se seca la capa de pegamento vamos decorando la tapa del frasco. Tomamos un retazo de tela que le combine a la decoración previa, yo he elegido esta de cuadritos blancos y rojos que me parece súper bonita y recortamos un círculo lo suficientemente grande para cubrir la tapa y que aún sobre un pequeño margen de tela. Esta la adherimos a la tapa con silicón caliente, al igual que el bonito osito de porcelana fría que irá en lo más alto. El osito lo he hecho yo hace años y me pareció que este sería un lugar ideal para él.
While the glue layer dries we decorate the lid of the jar. We take a piece of fabric that matches the previous decoration, I have chosen this white and red squares that I find super nice and cut a circle big enough to cover the lid and still have a small margin of fabric. This we adhere to the lid with hot silicone, as well as the cute cold porcelain teddy bear that will go on top. I made the teddy bear years ago and I thought this would be an ideal place for it.
 |  |
|---|
Decoración de la tapa / Cover decoration
Finalmente, he tomado un trocito de este mecatillo que me parece que va muy bien con los trabajos artesanales y he envuelto el cuelo del frasco asegurándolo con un punto de silicón caliente.
Finally, I have taken a small piece of this small piece of mecatillo that seems to me to go very well with the handicrafts and I have wrapped the neck of the jar, securing it with a dot of hot silicone.
*Mecatillo en el frasco / Cord in the jar *
Y este es el resultado final:
And this is the final result:
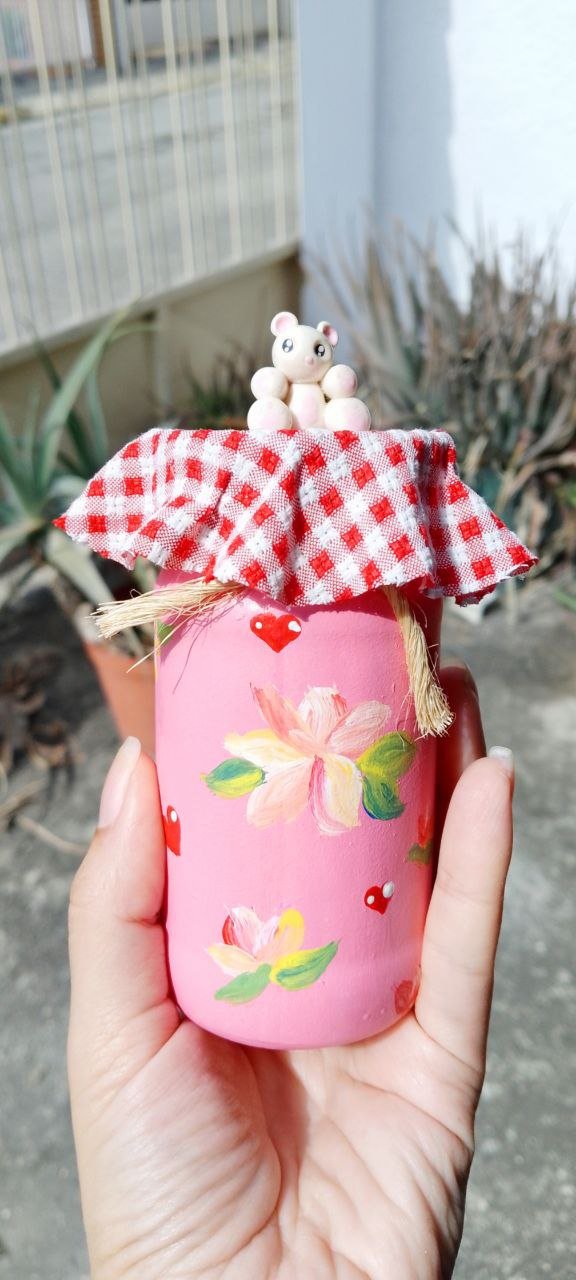
Resultado final / Final result
¡Muchas gracias por leerme!
Thank you so much for reading me!
Fotografías propias, tomadas con mi Tecno Spark 10C.
Traducido al inglés con DeepL.
Own photographs, taken with my Tecno Spark 10C.
Translated to English with DeepL.

Posted Using INLEO
Qué precioso, tan rosita, tan floral, tan campestre. Amé.🌷
Jeje me encanta tu comentario💖 muchas gracias querida Celely, me alegra que te gustara✨
Wow this turned out so beautiful, the transformation is amazing. Lovely work friend, thanks for sharing.
Thank you so much!!!! I'm glad you liked it🤗💖✨.
Te quedó precioso! De verdad que pintas muy lindo 💕
Muchísimas gracias 💖 me pusieron nerviosa mis flores al comienzo🙈🤭
Que bonito quedó, gracias por el tutorial 🤗
Muchas gracias amiga🤗
Oh, this is so beautiful! We can make it as a gift for our lovely friends.
Thanks for sharing!
Thank you so much! I'm glad you liked this idea🤗✨
Me encantó la jarrita! Le pondría yogurt o leche dentro.
Pasada de bonita.
Buen trabajo Amor!!! 😘
Muchísimas gracias amor❤️ jeje esa es una muy buena idea🥰
Te quedó precioso mavi 😍✨ todo un frasquito Cotaggecore, como de una película de haditas ✨💜 y queda todo adorable para decorar los espacios
Ay gracias Mily💖 de verdad que justo así es como quería que se viera✨
Es una idea muy bonita, ademas de que reutilizamos los envases de vidrio, sirve hasta para colocarle dulces y regalar, saludos
Muchas gracias, me alegra que te guste esta idea☺️✨