Hoy les he preparado un detalle que sin duda para mí, es multifuncional, este puede ser empleado para otros trabajos como un aplique o detalle de color que sin duda hará resaltar aún más cualquier manualidad. Es practico, se reutiliza material de provecho queda muy lindo y es muy sencillo de elaborar.
Ahora sí, manos a la obra. Deseo les guste.

Materiales:
| Cantidad | Material |
|---|---|
| 1 | Silicón |
| 1 | Hoja de cartulina de construcción. |
| 1 | Hoja blanca o de reciclaje |
| 1 | Tijeras |
| 1 | Lápiz de grafito |
| 1 | CD |
| 12 | Recortes de foami o goma Eva escarchada. |
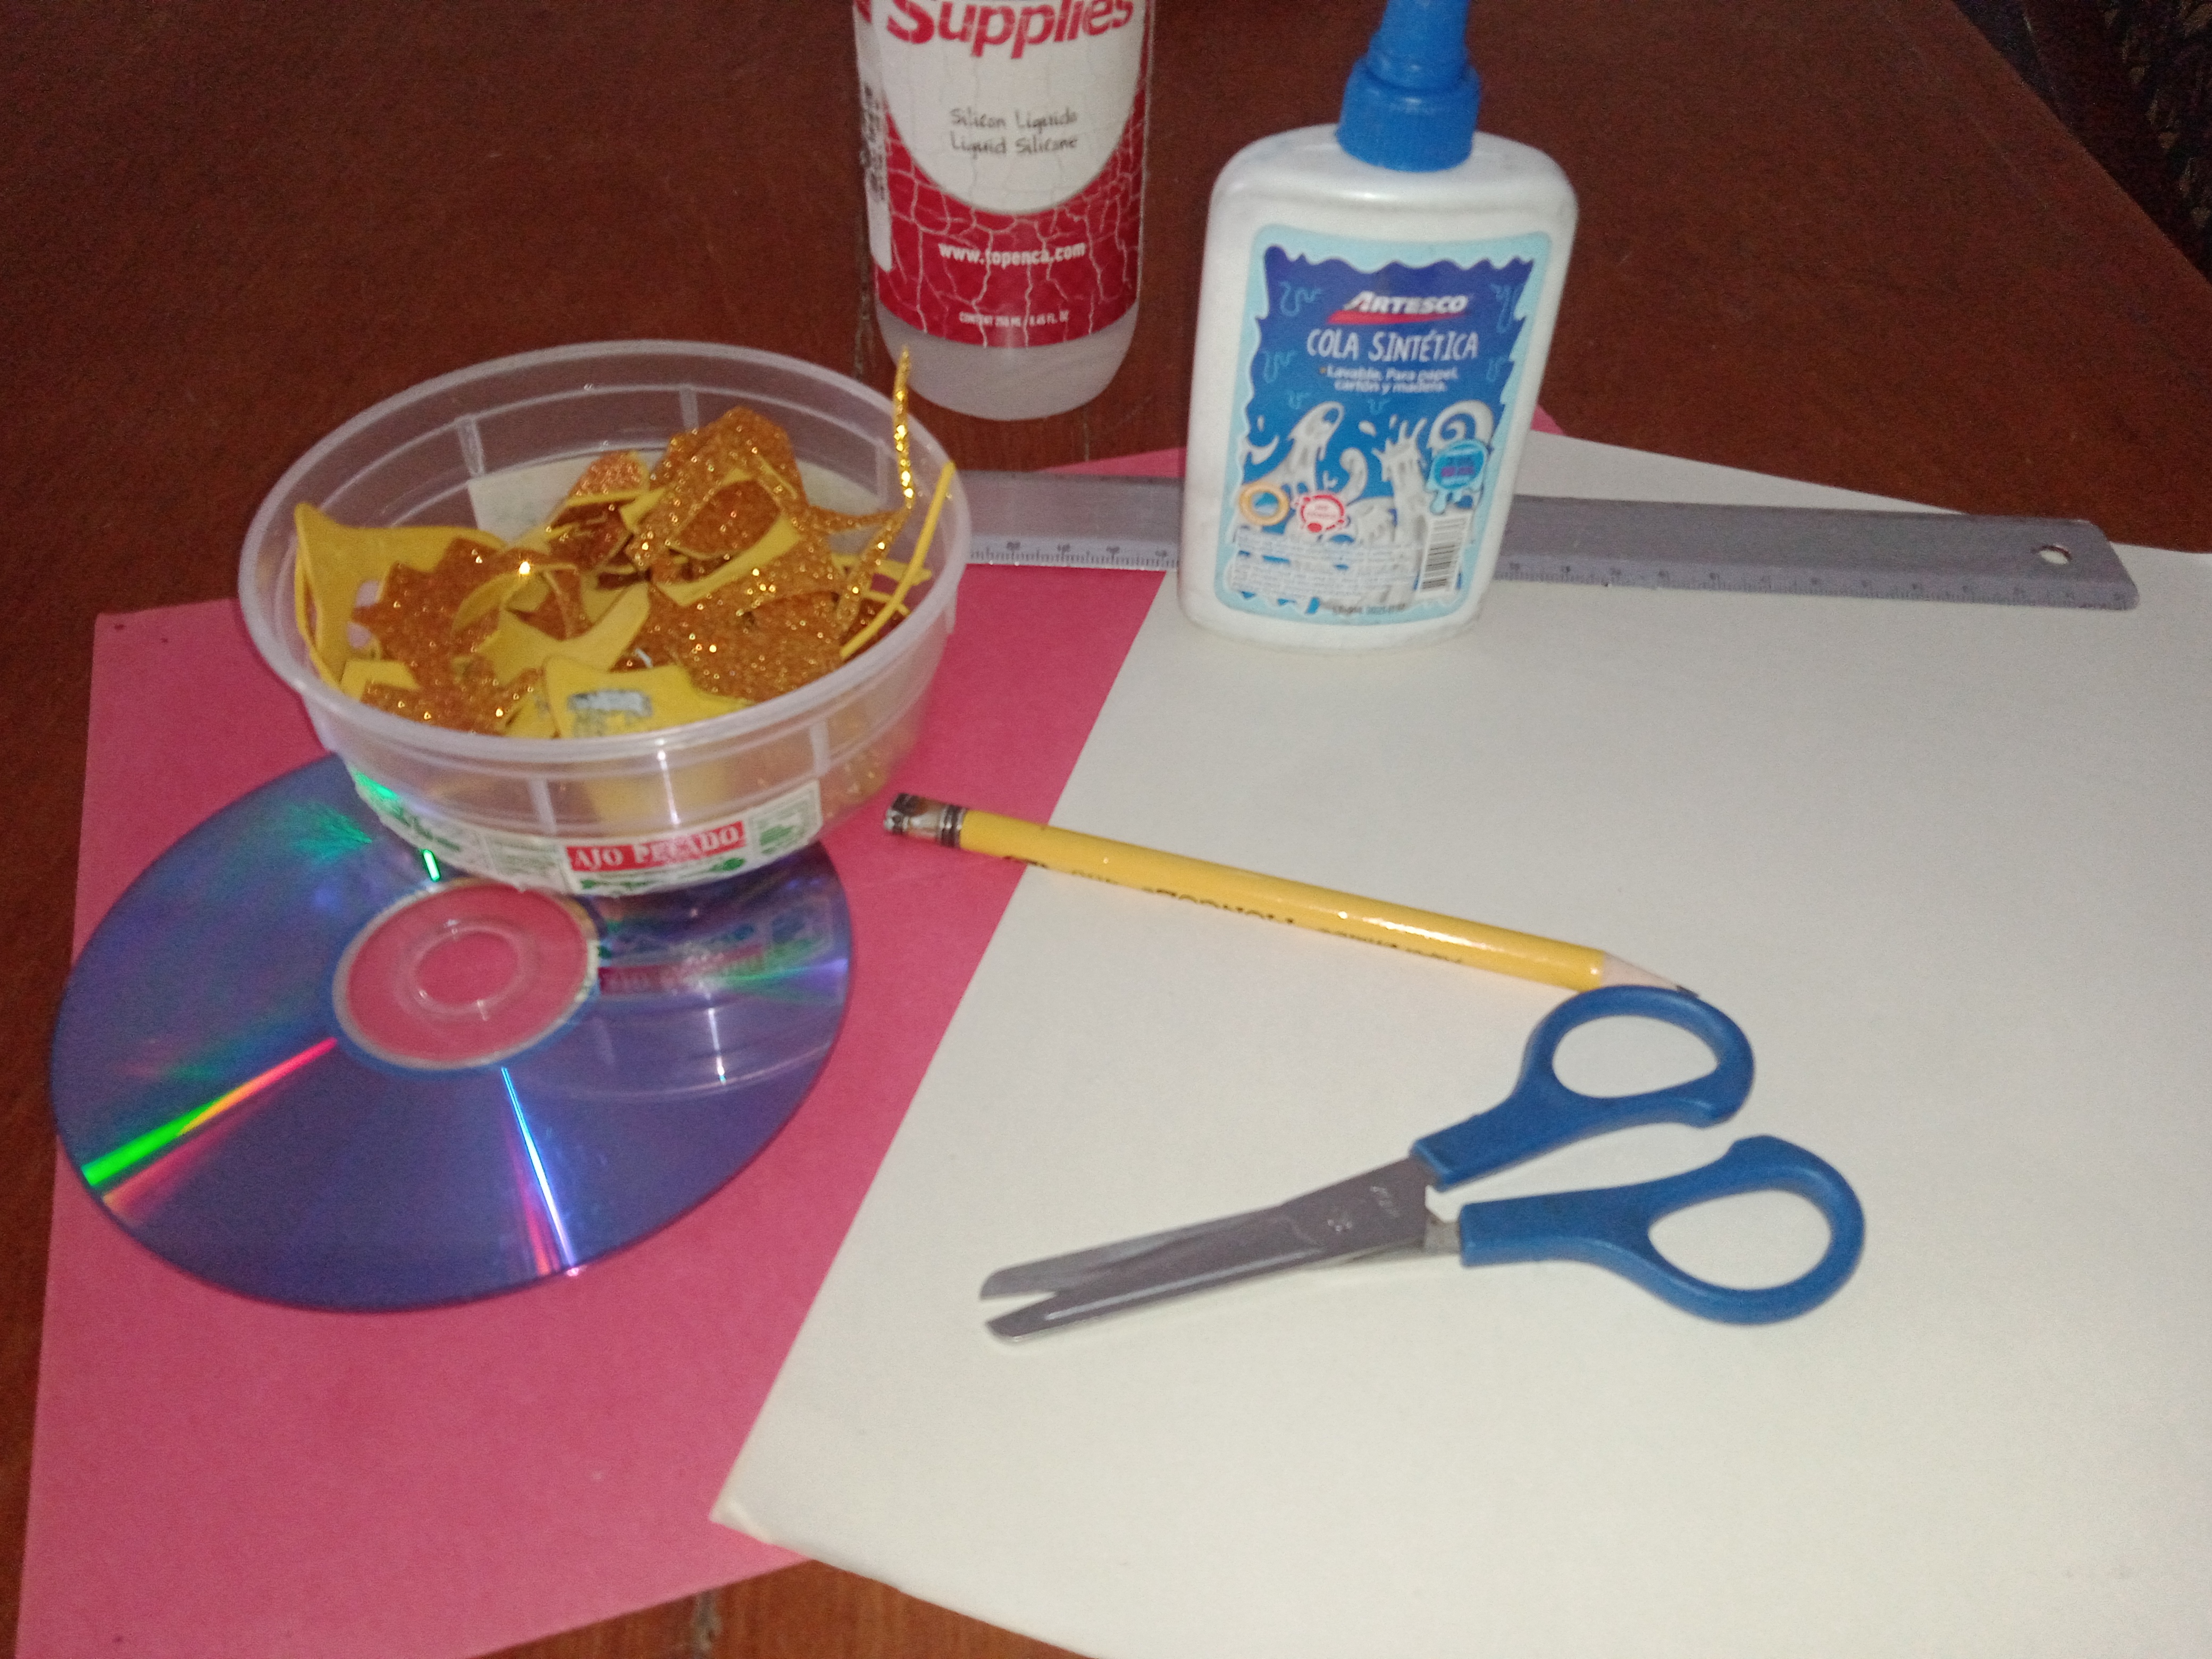
Opcional: pinturas de acuarela.
Procedimientos:
Paso # 1:
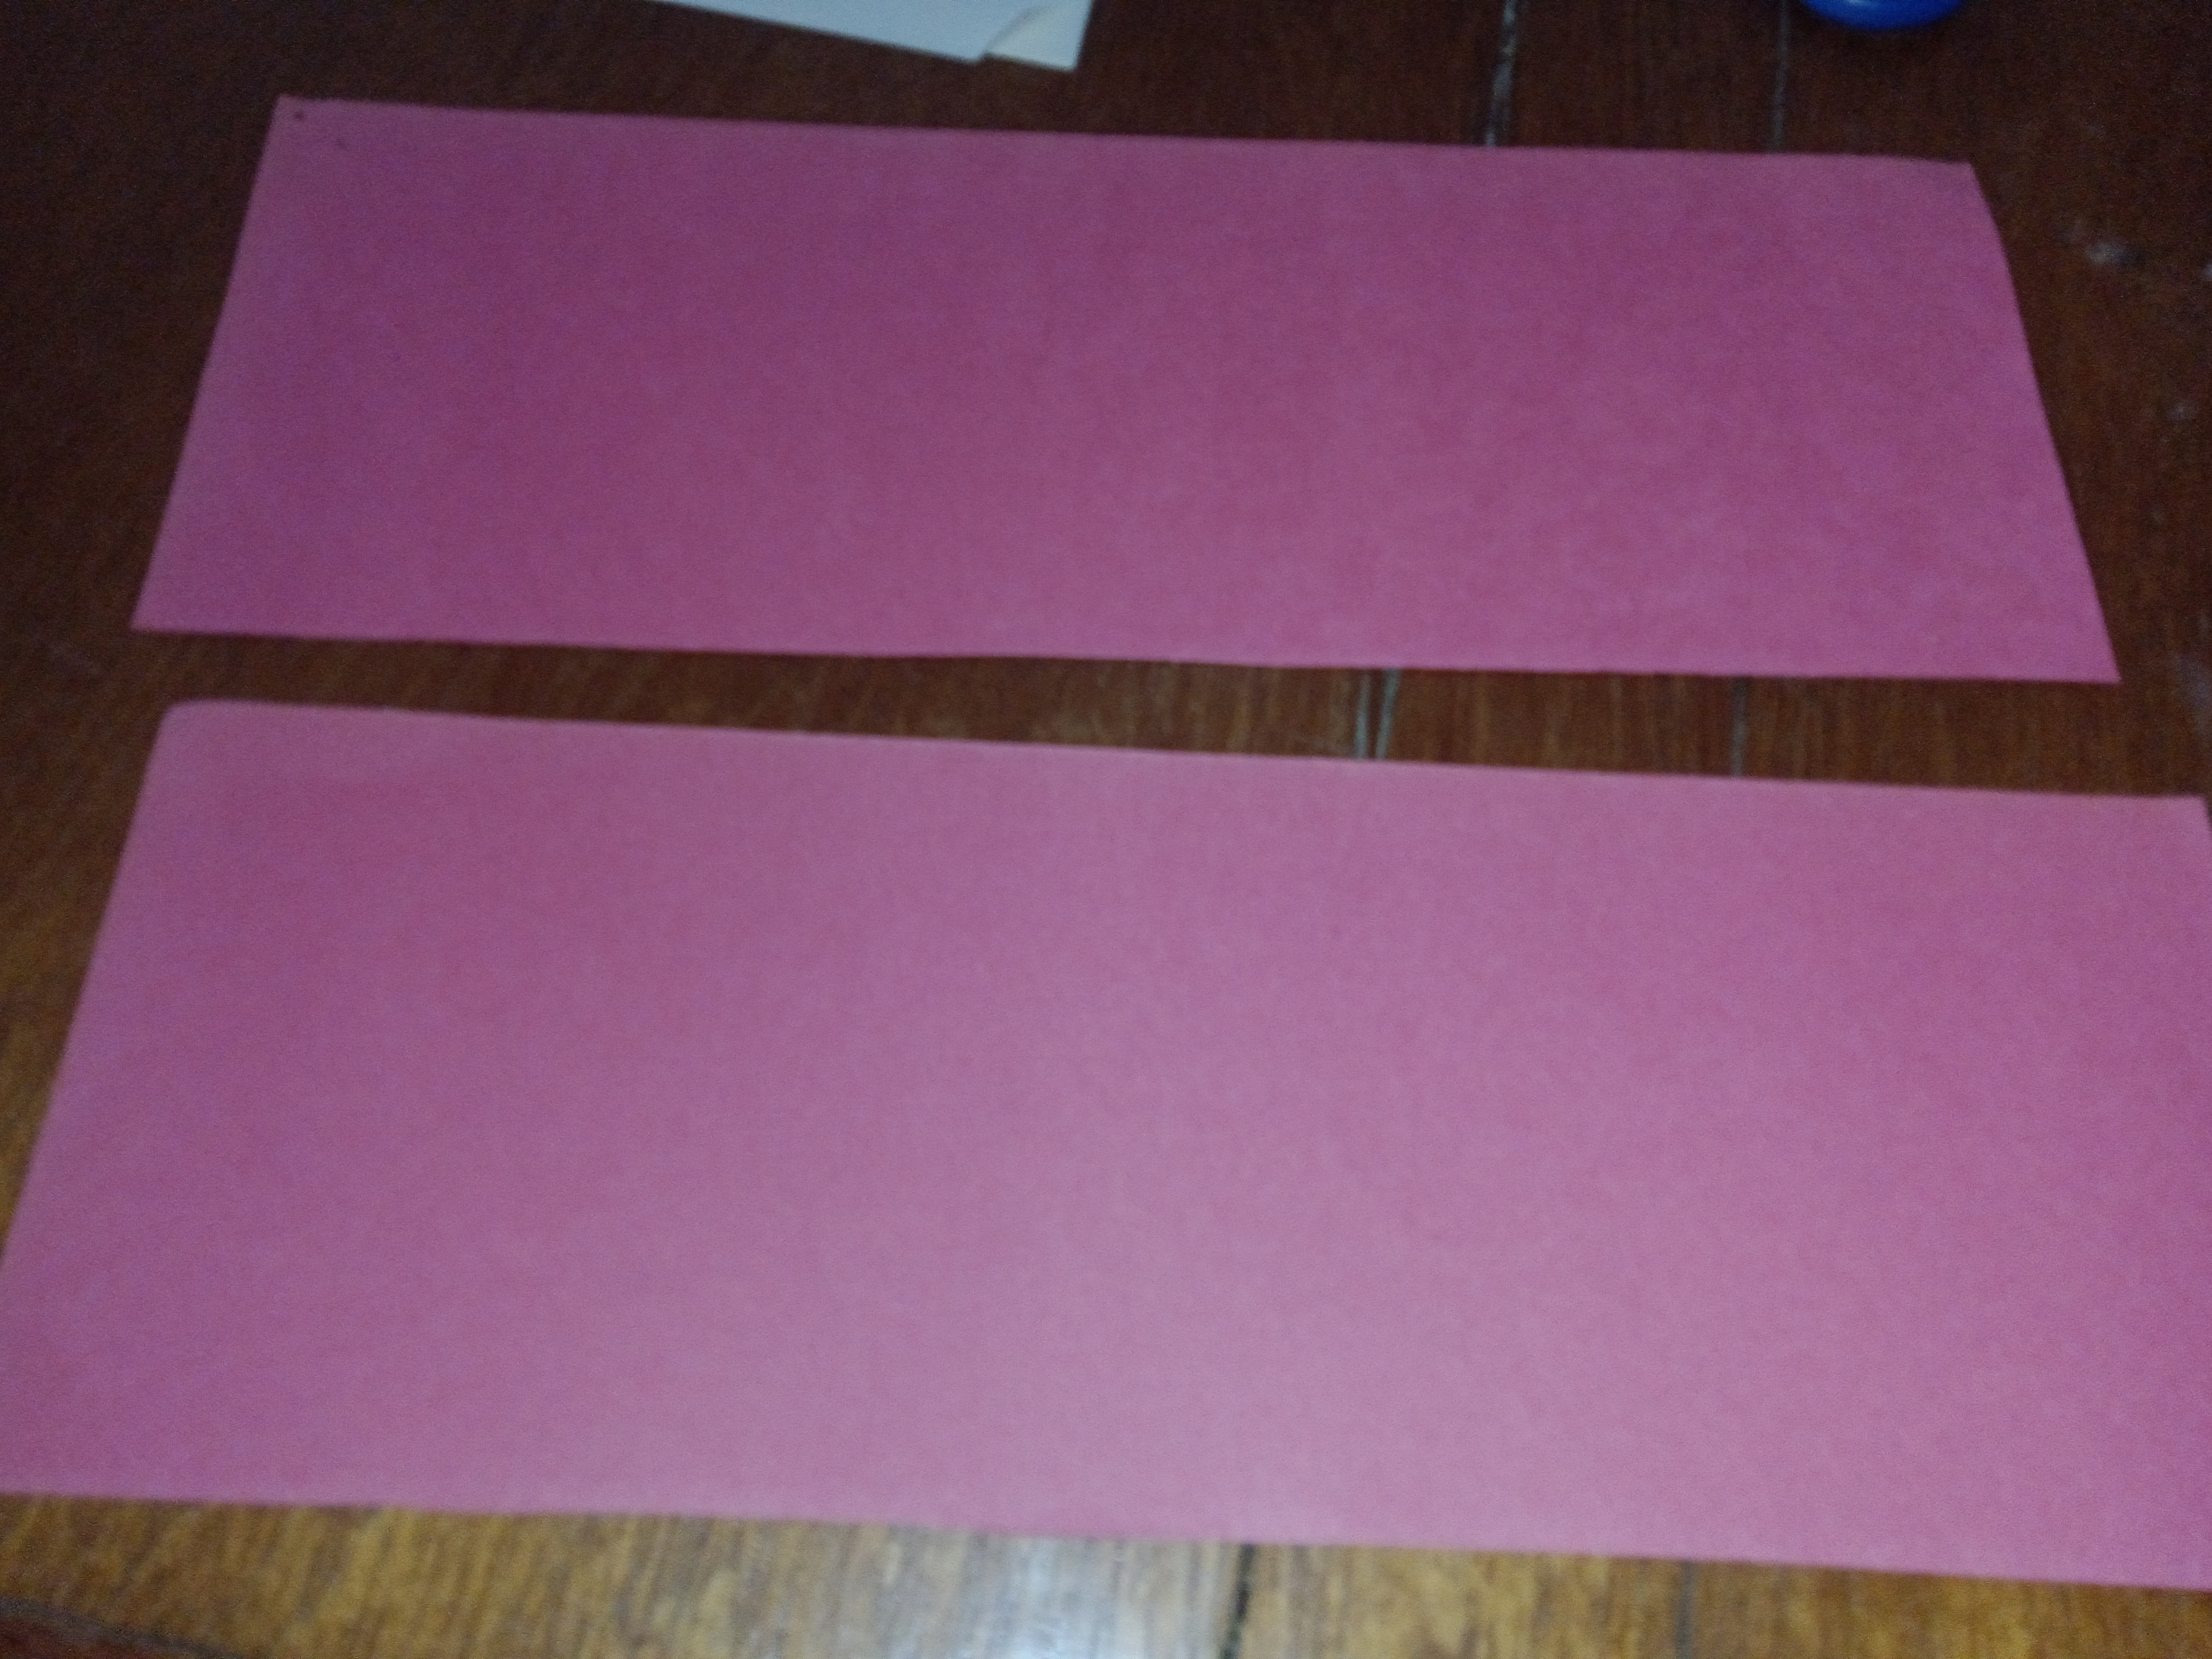
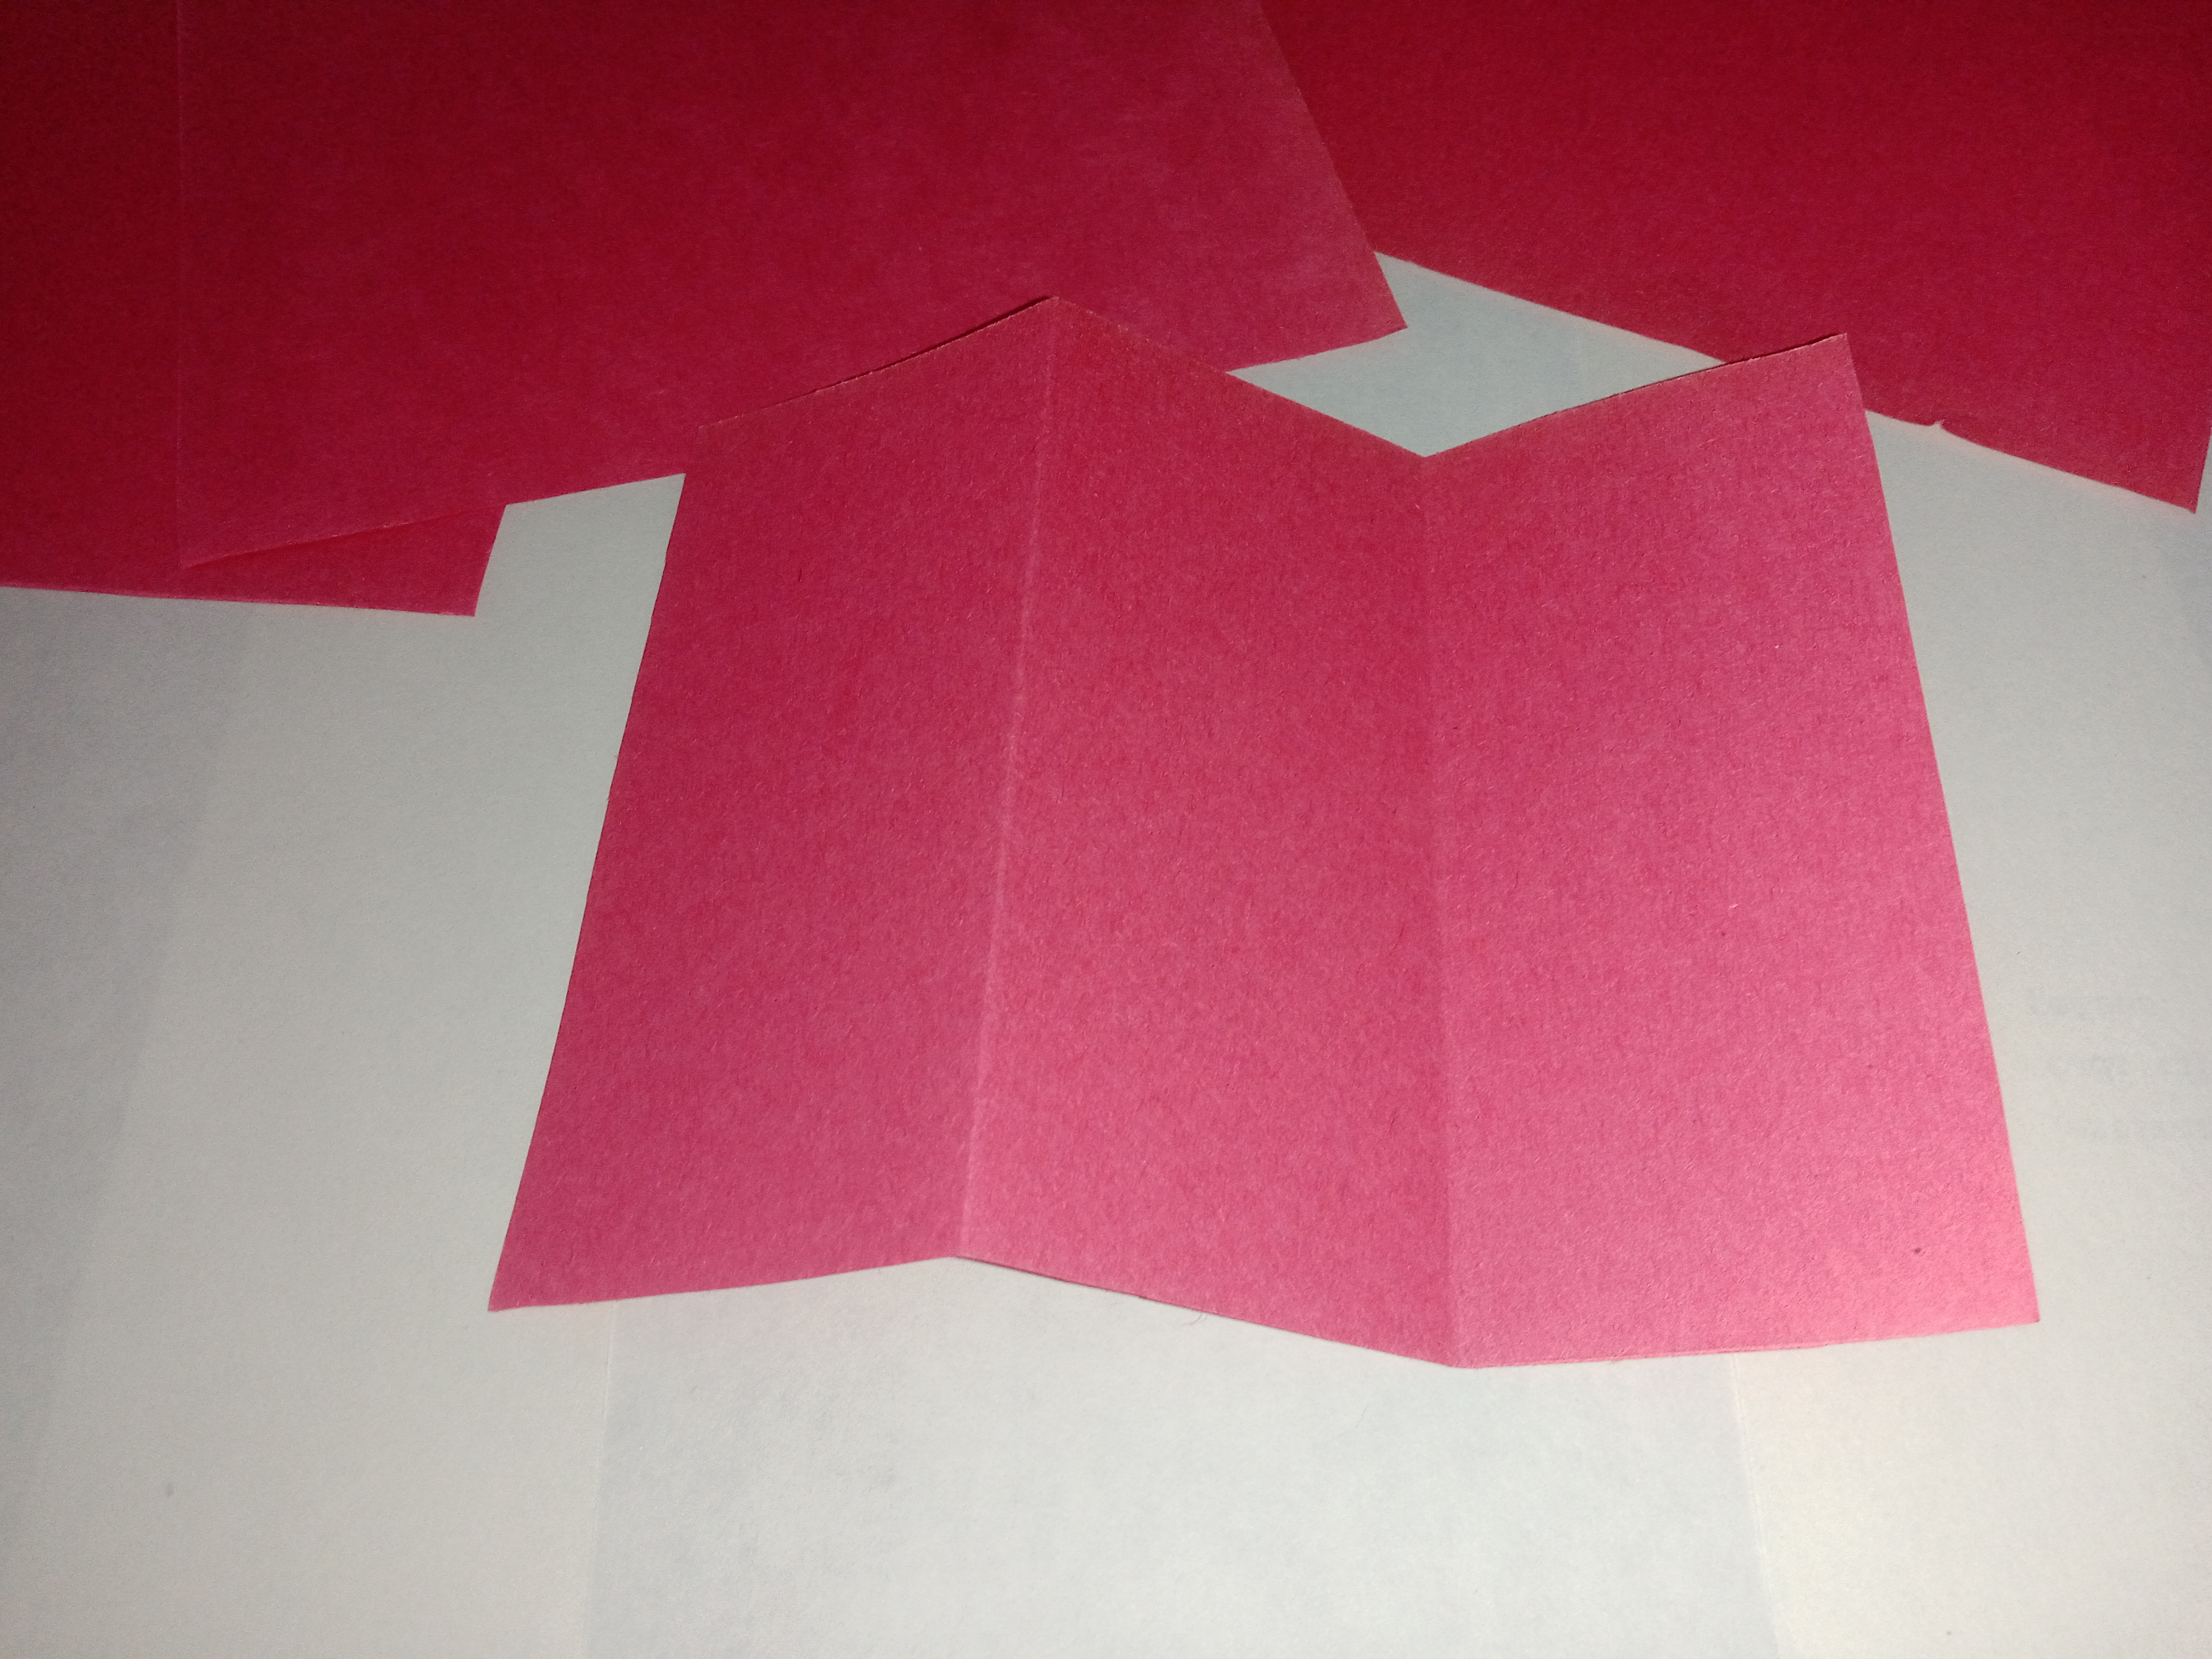
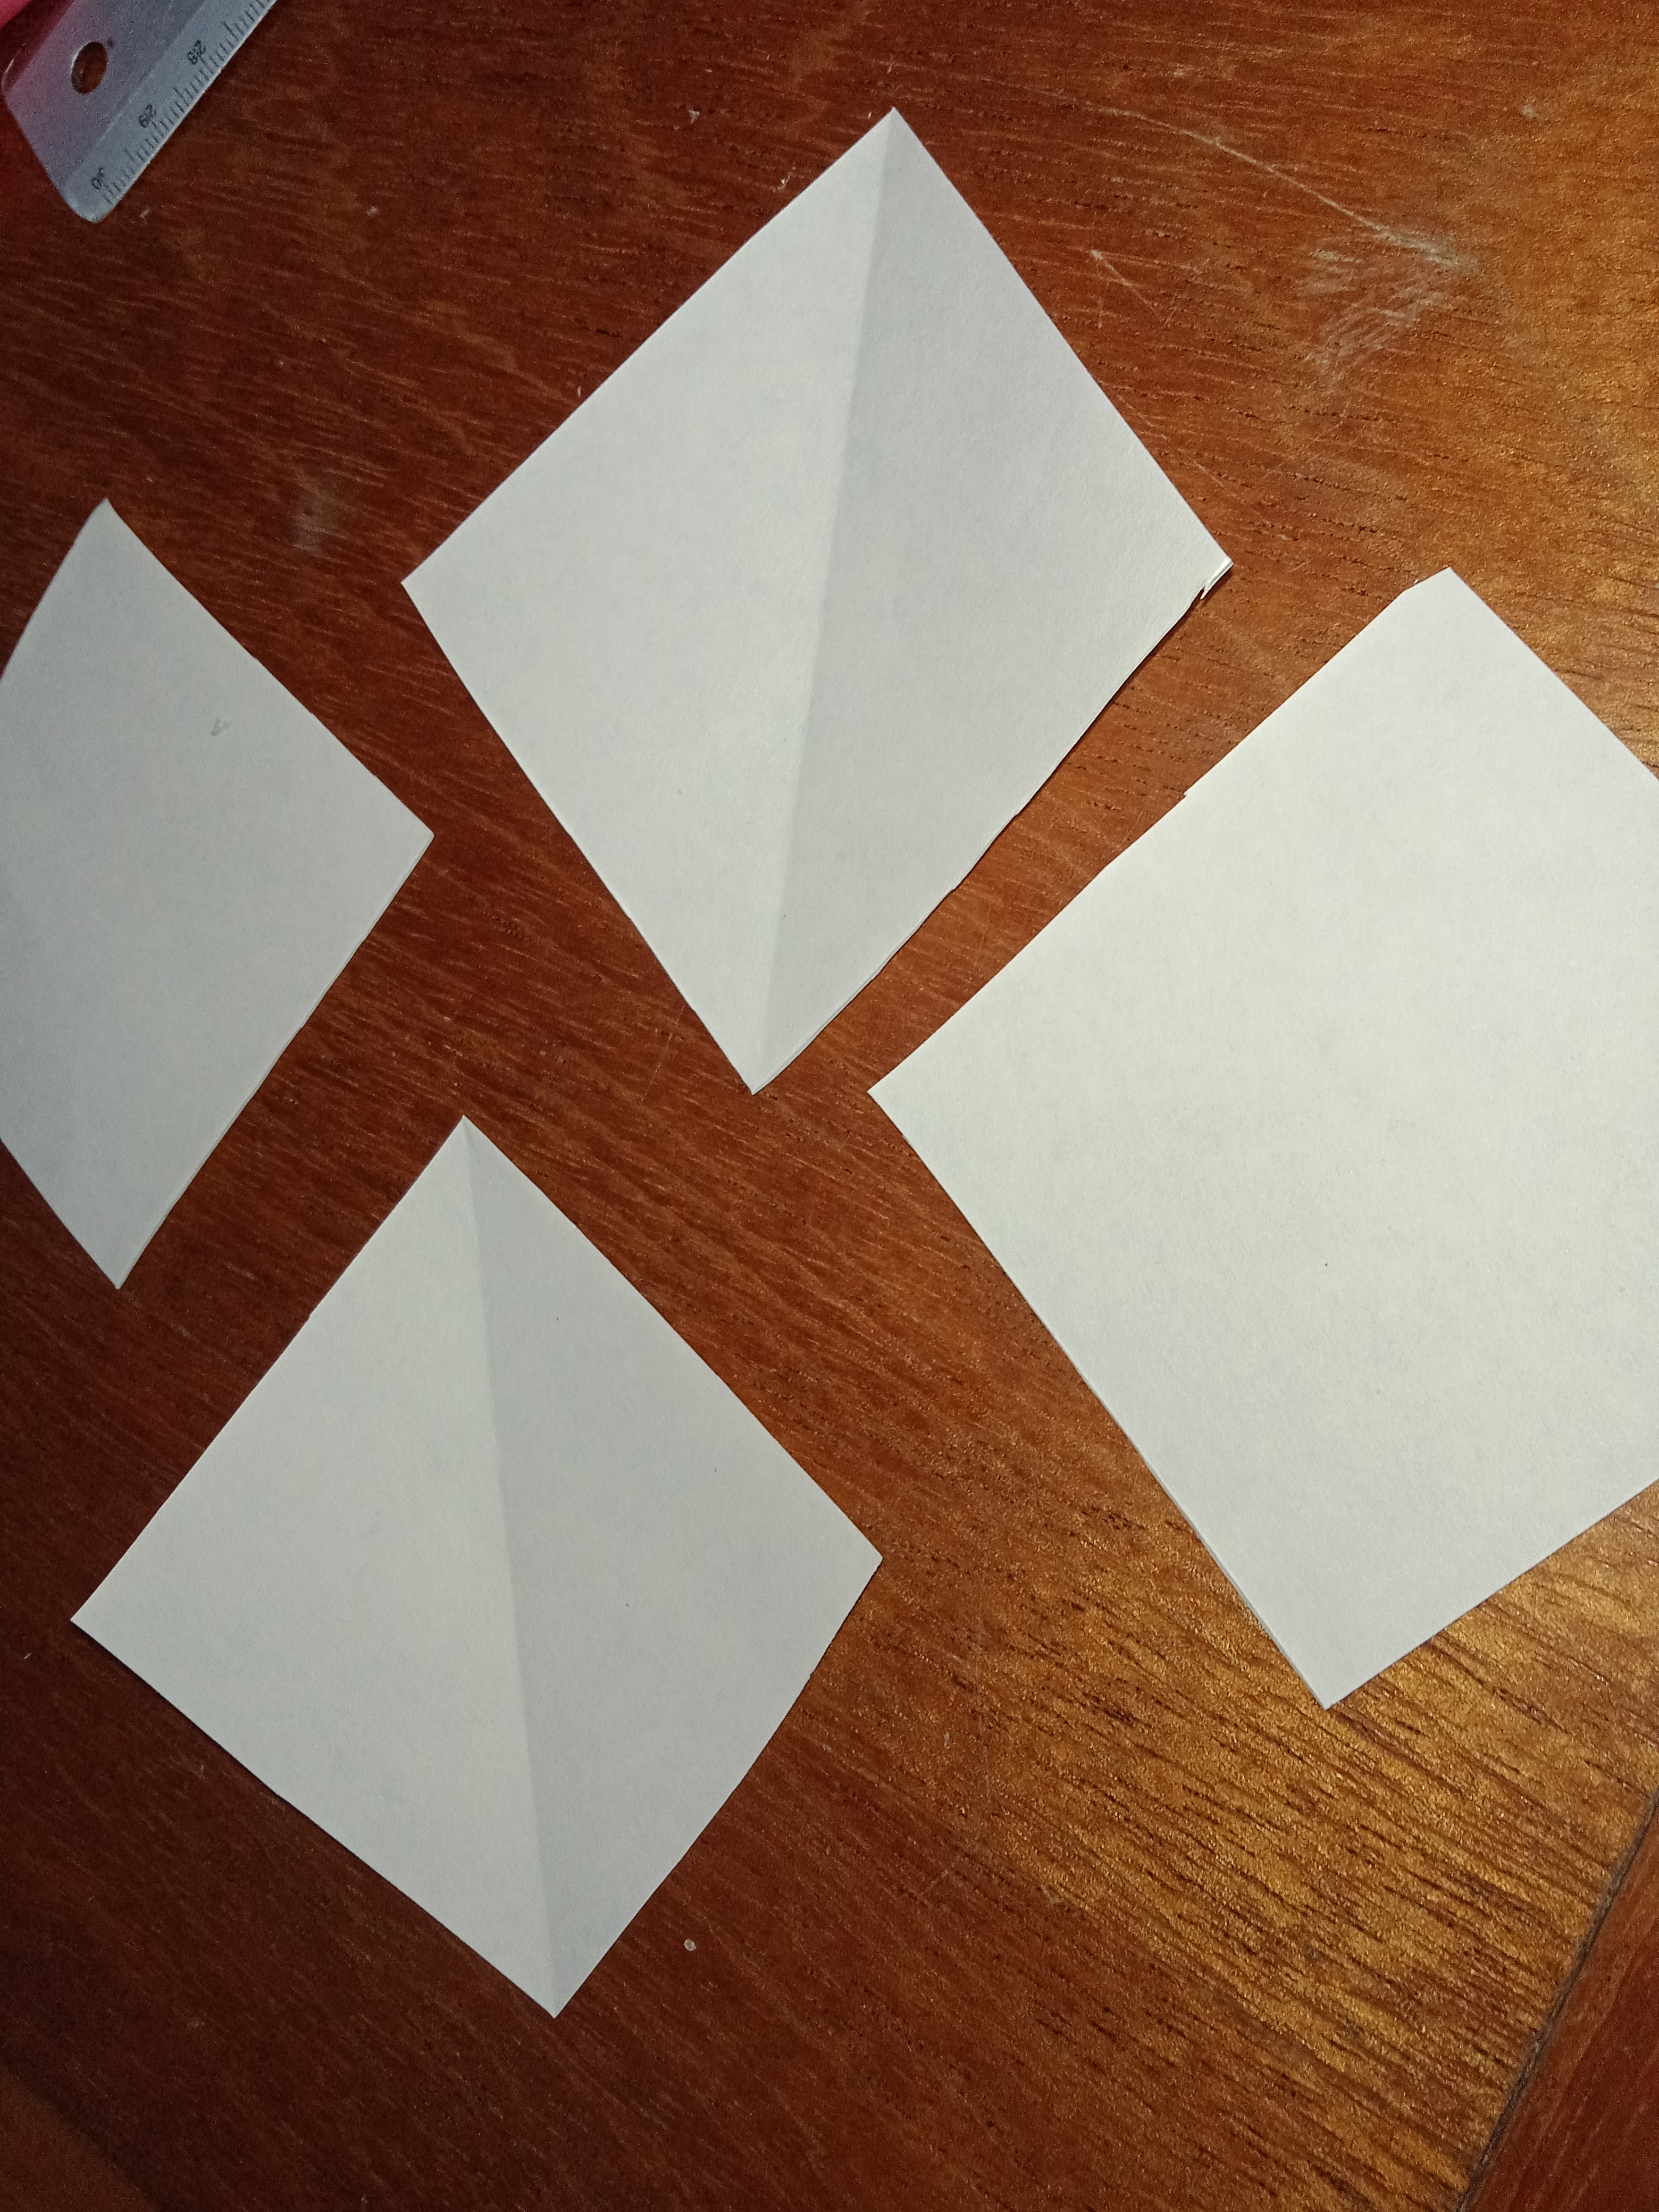
Doblar la hoja de cartulina de construcción a la mitad de forma vertical y recortar.
Paso # 2:
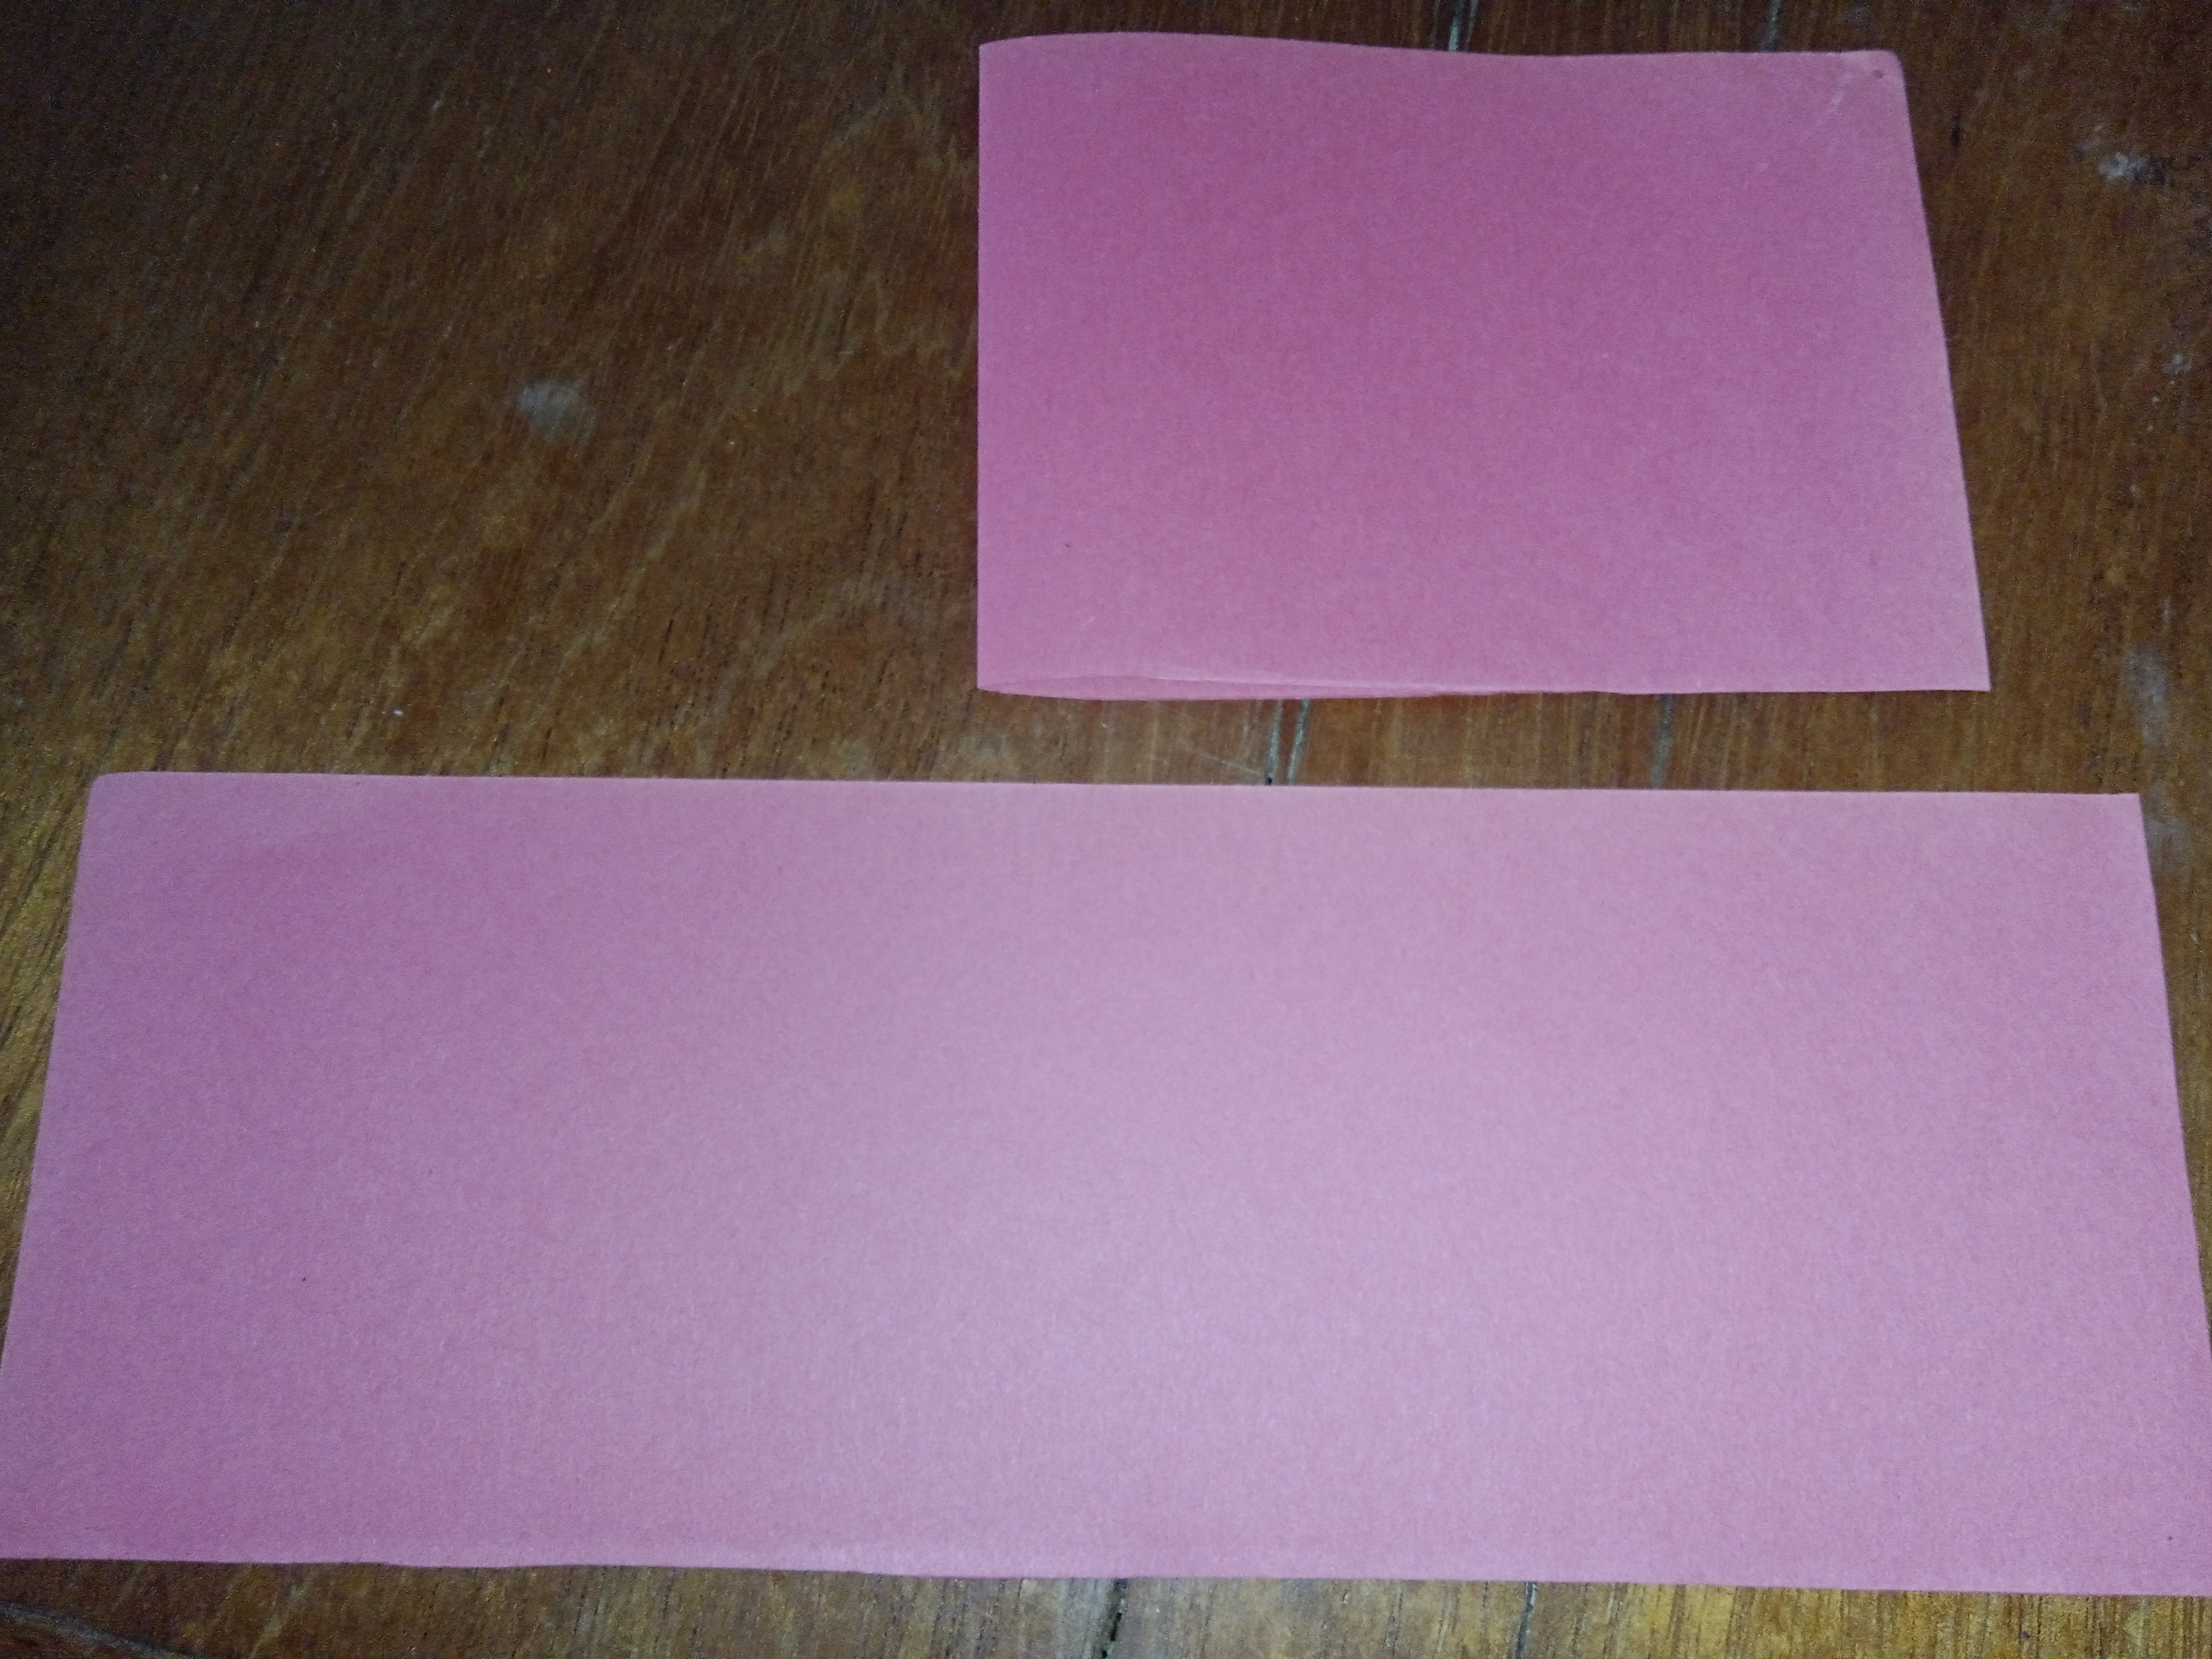
De nuevo, doblar a la mitad en forma horizontal y recortar, deben quedarte 4 cuadrantes en total.
Cada uno de los cuadrantes o rectángulos deben doblarse en tres partes iguales y recortarlos todos del mismo tamaño. Quedaran al final 12 piezas rectangulares.
 |  |
|---|
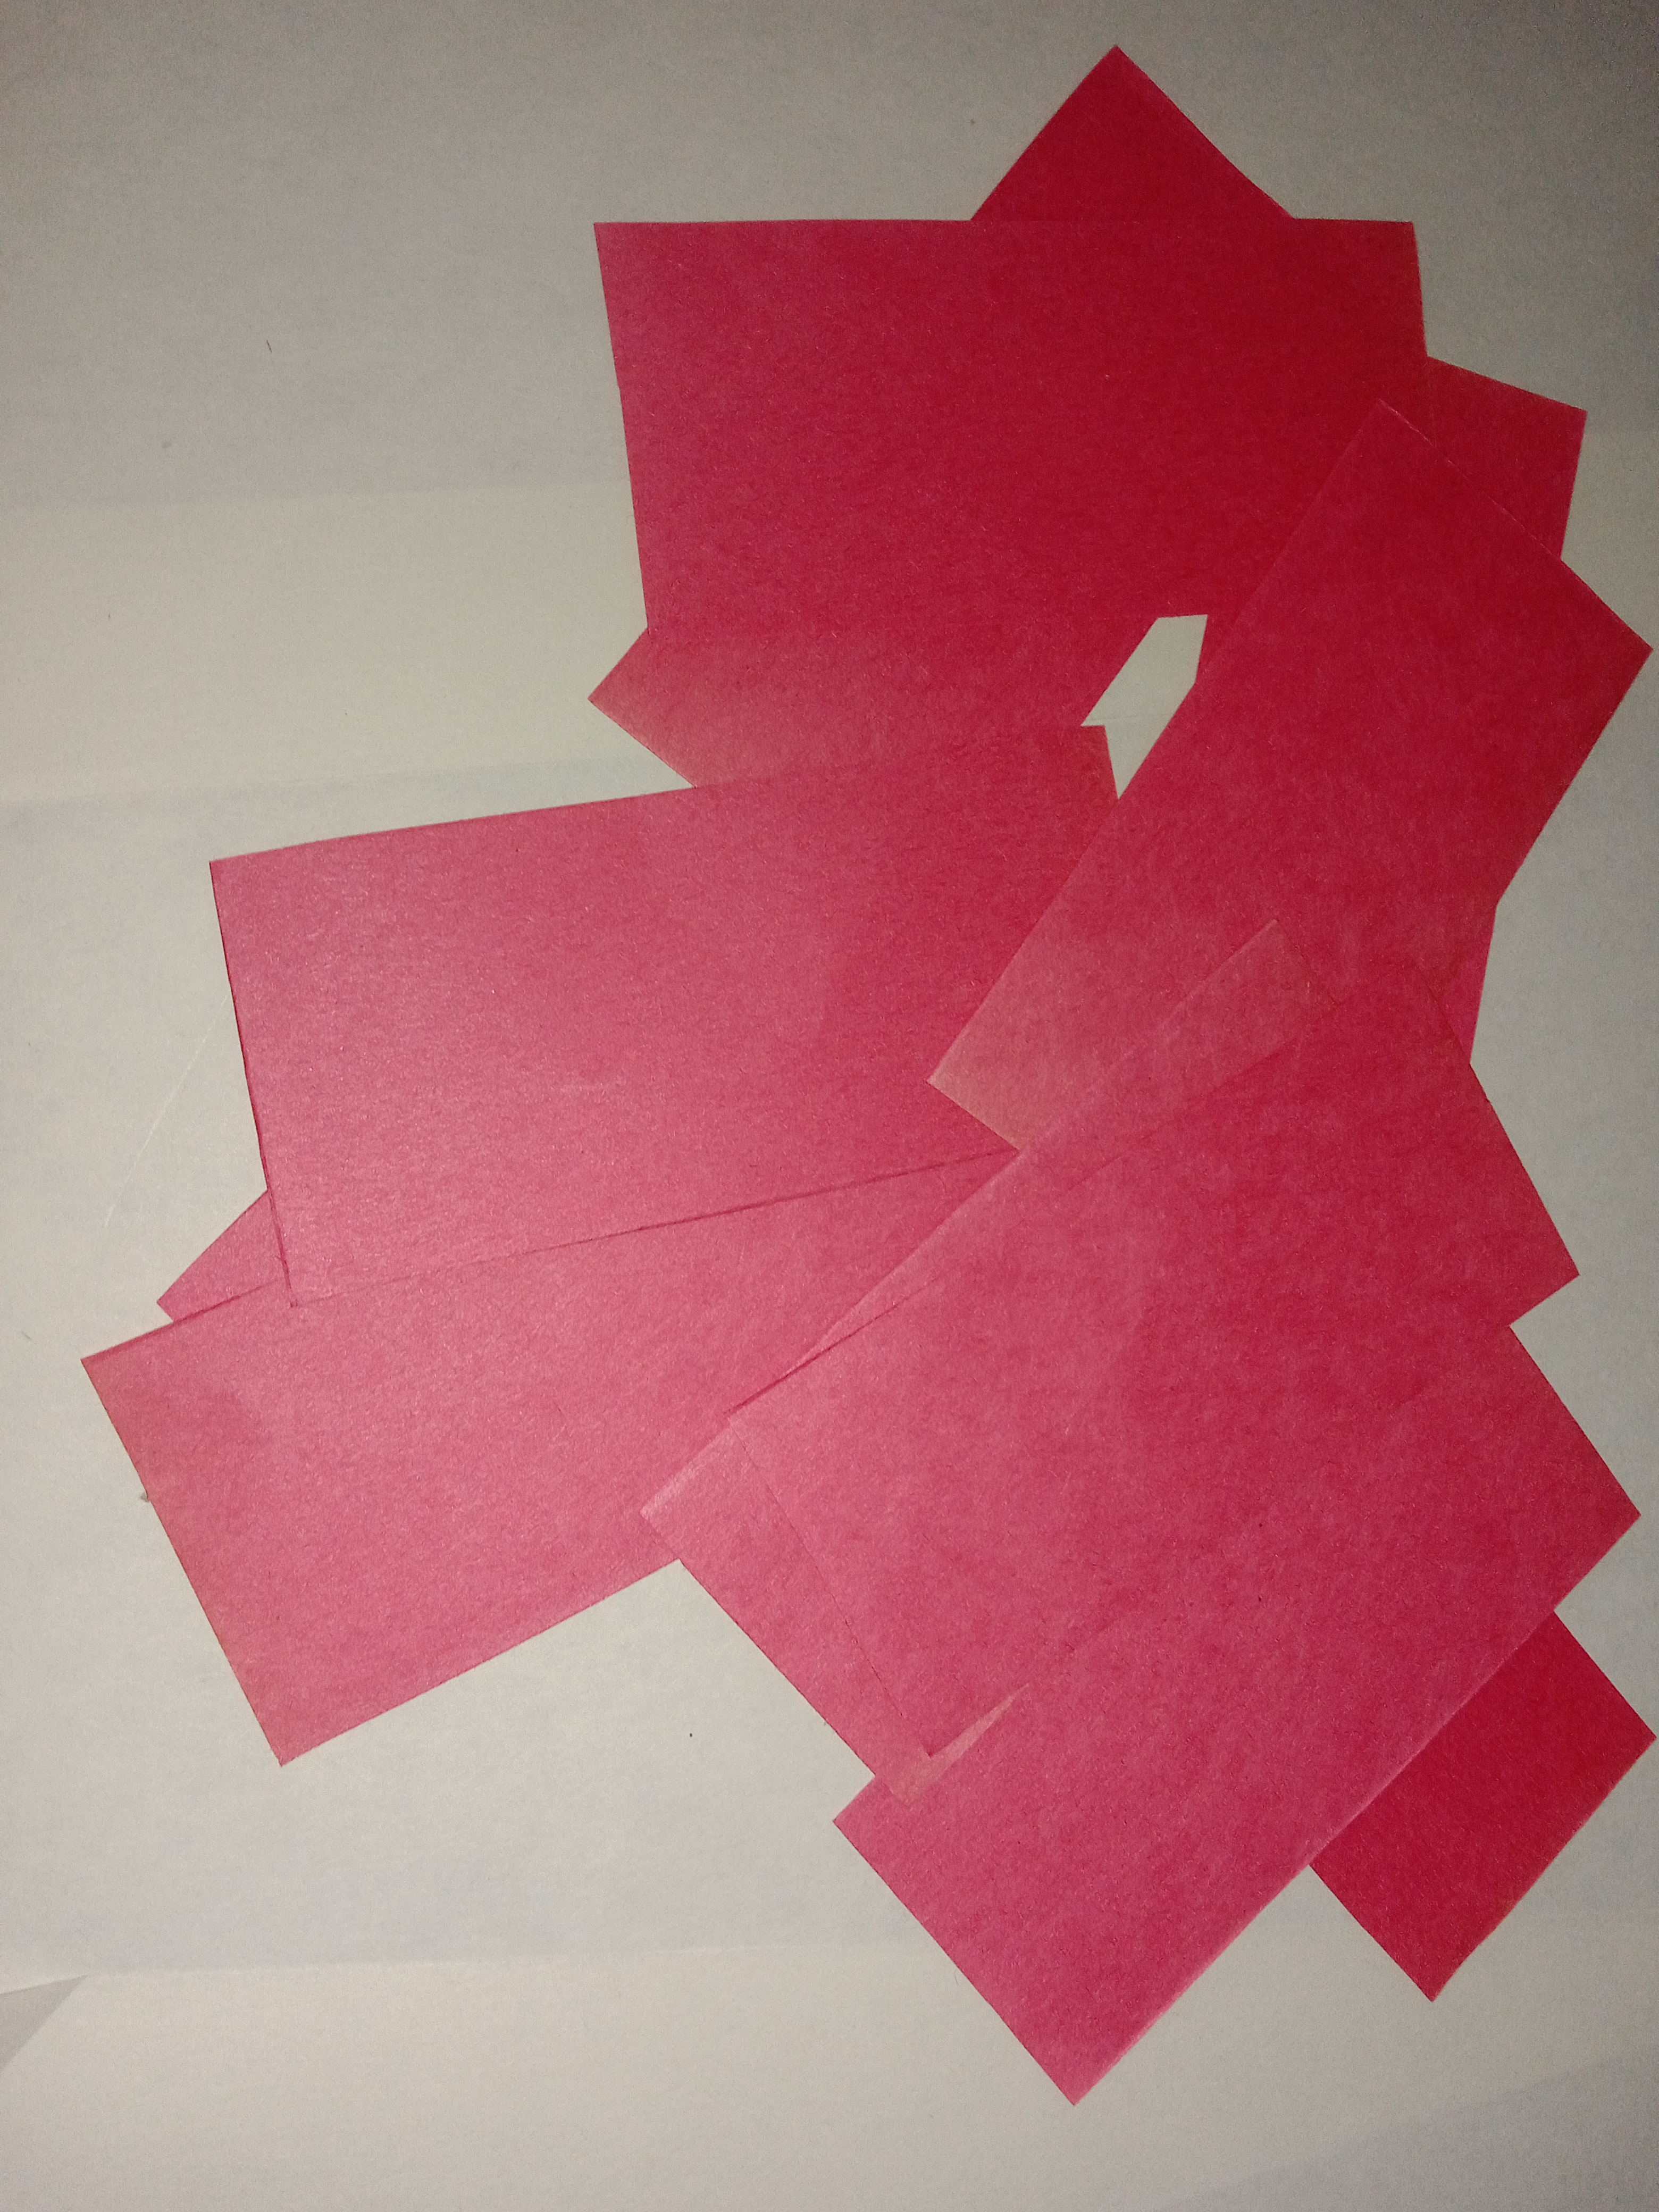
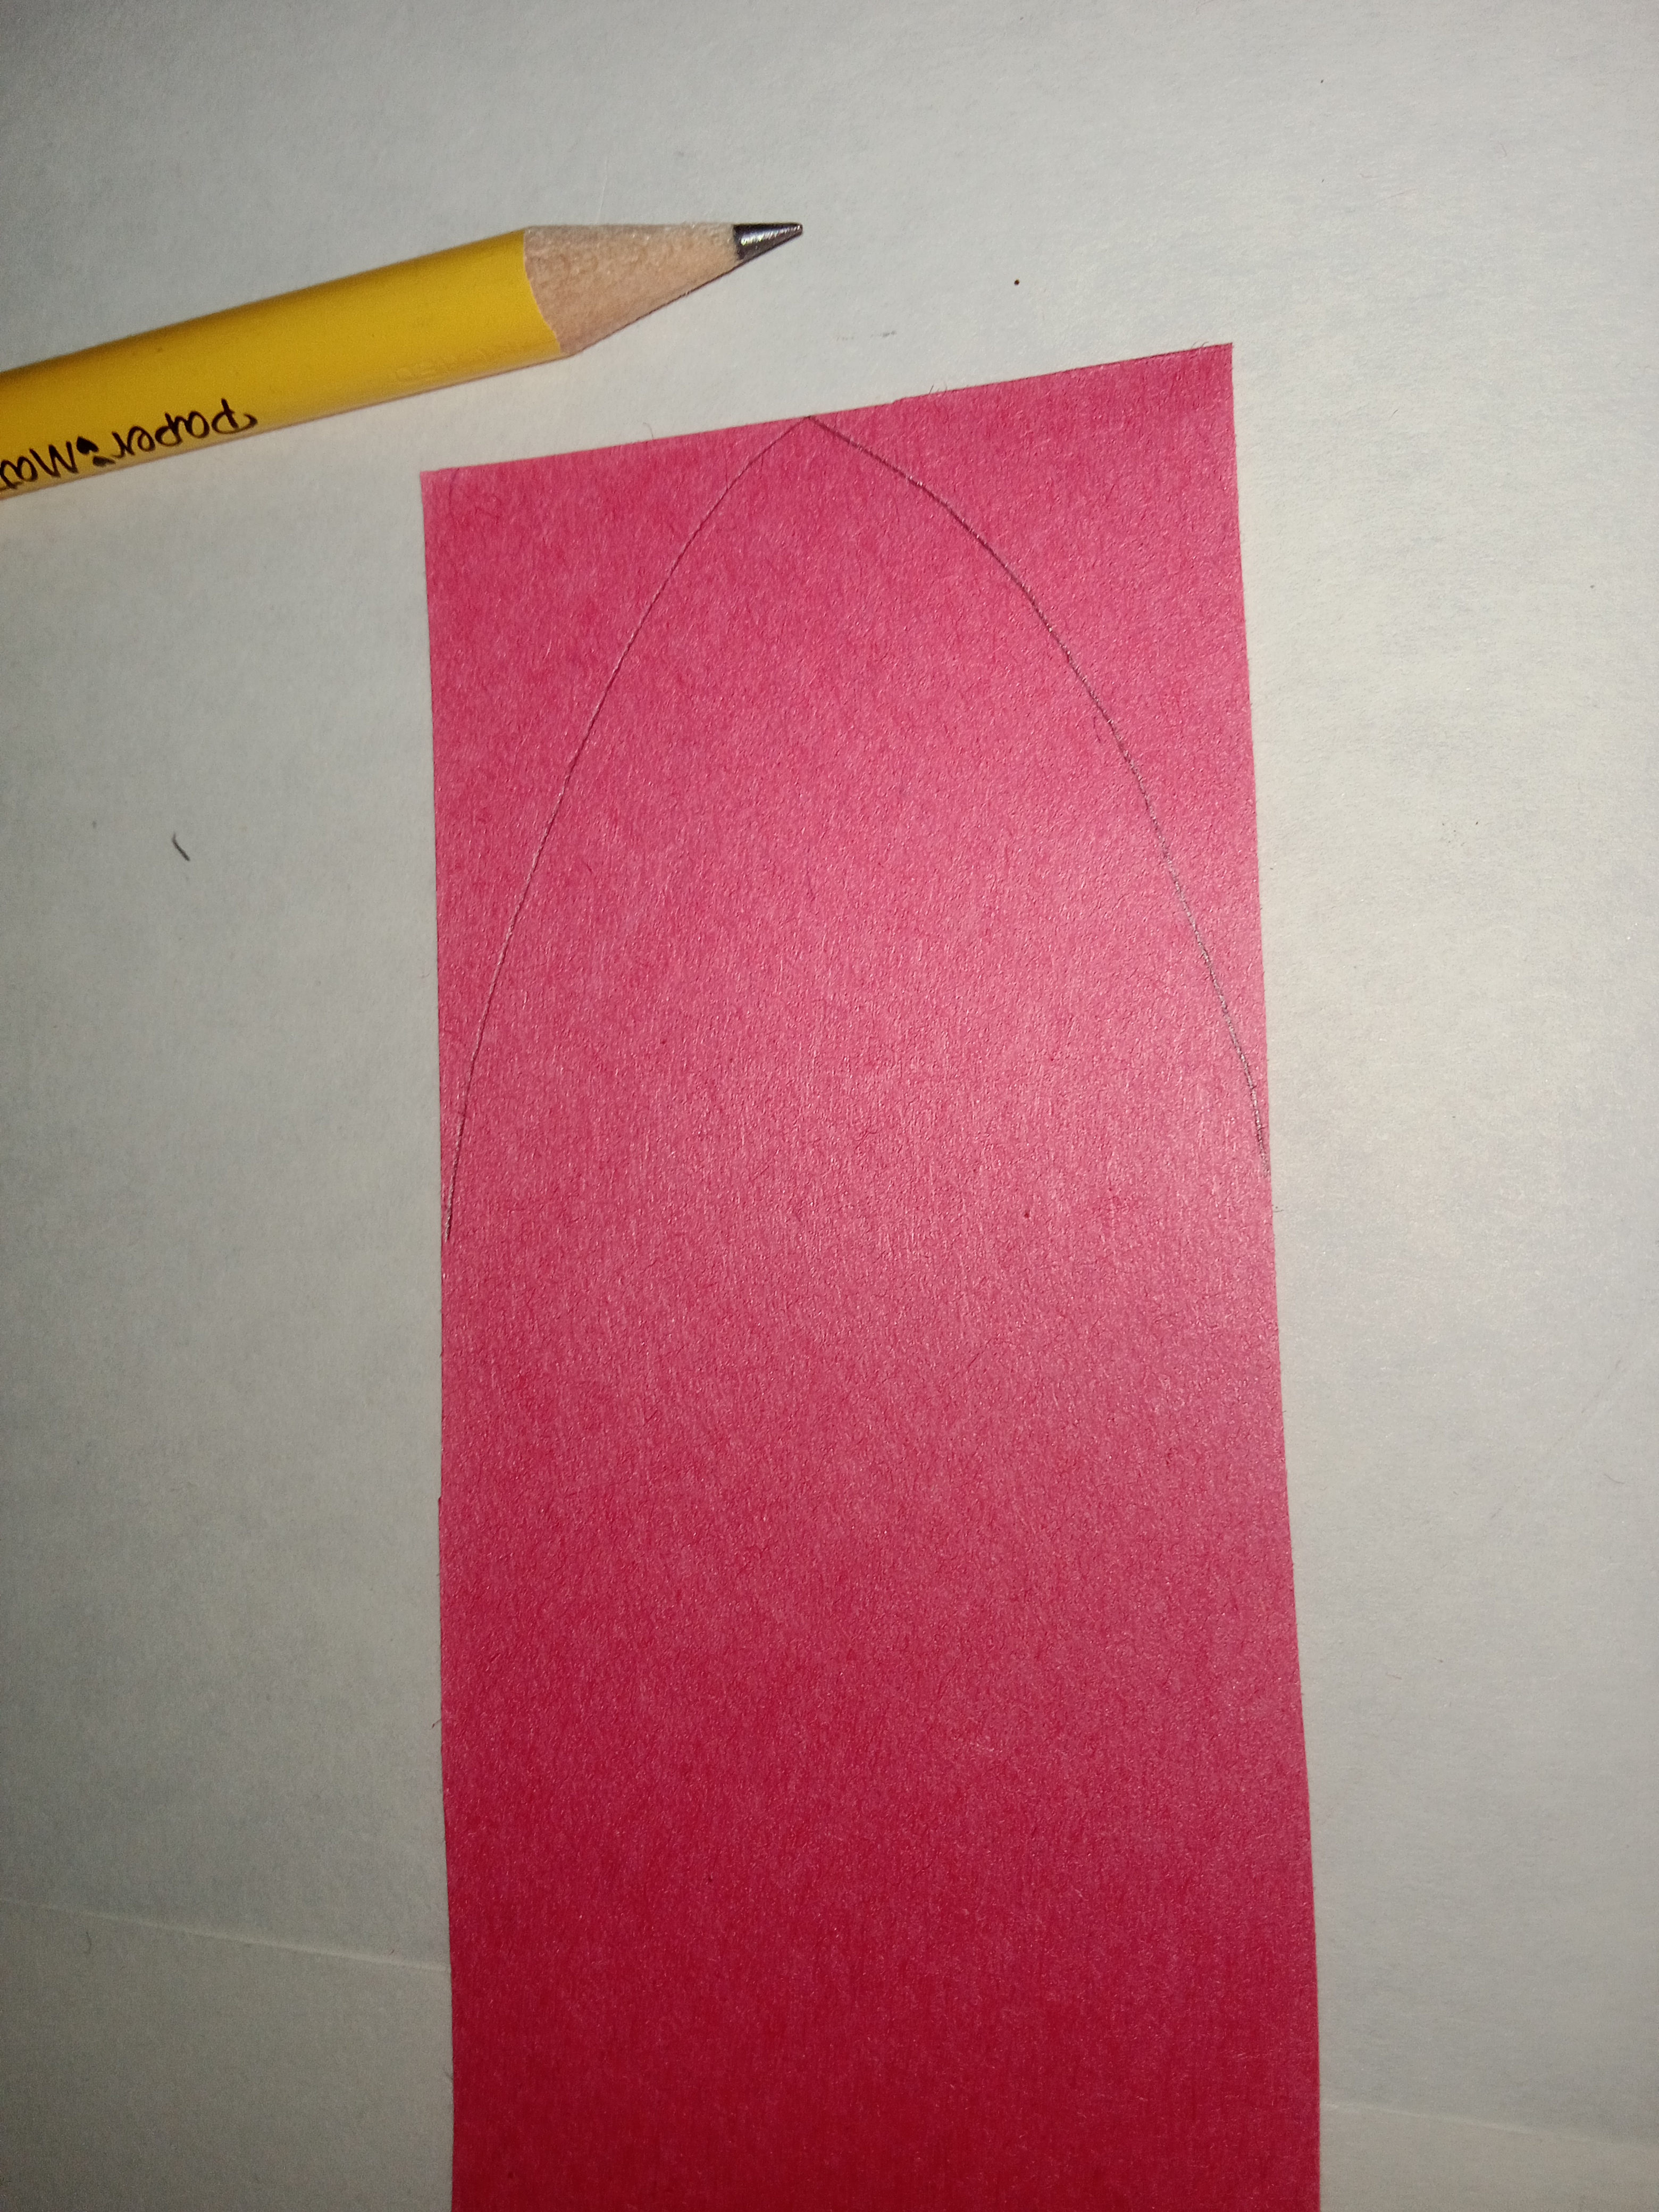
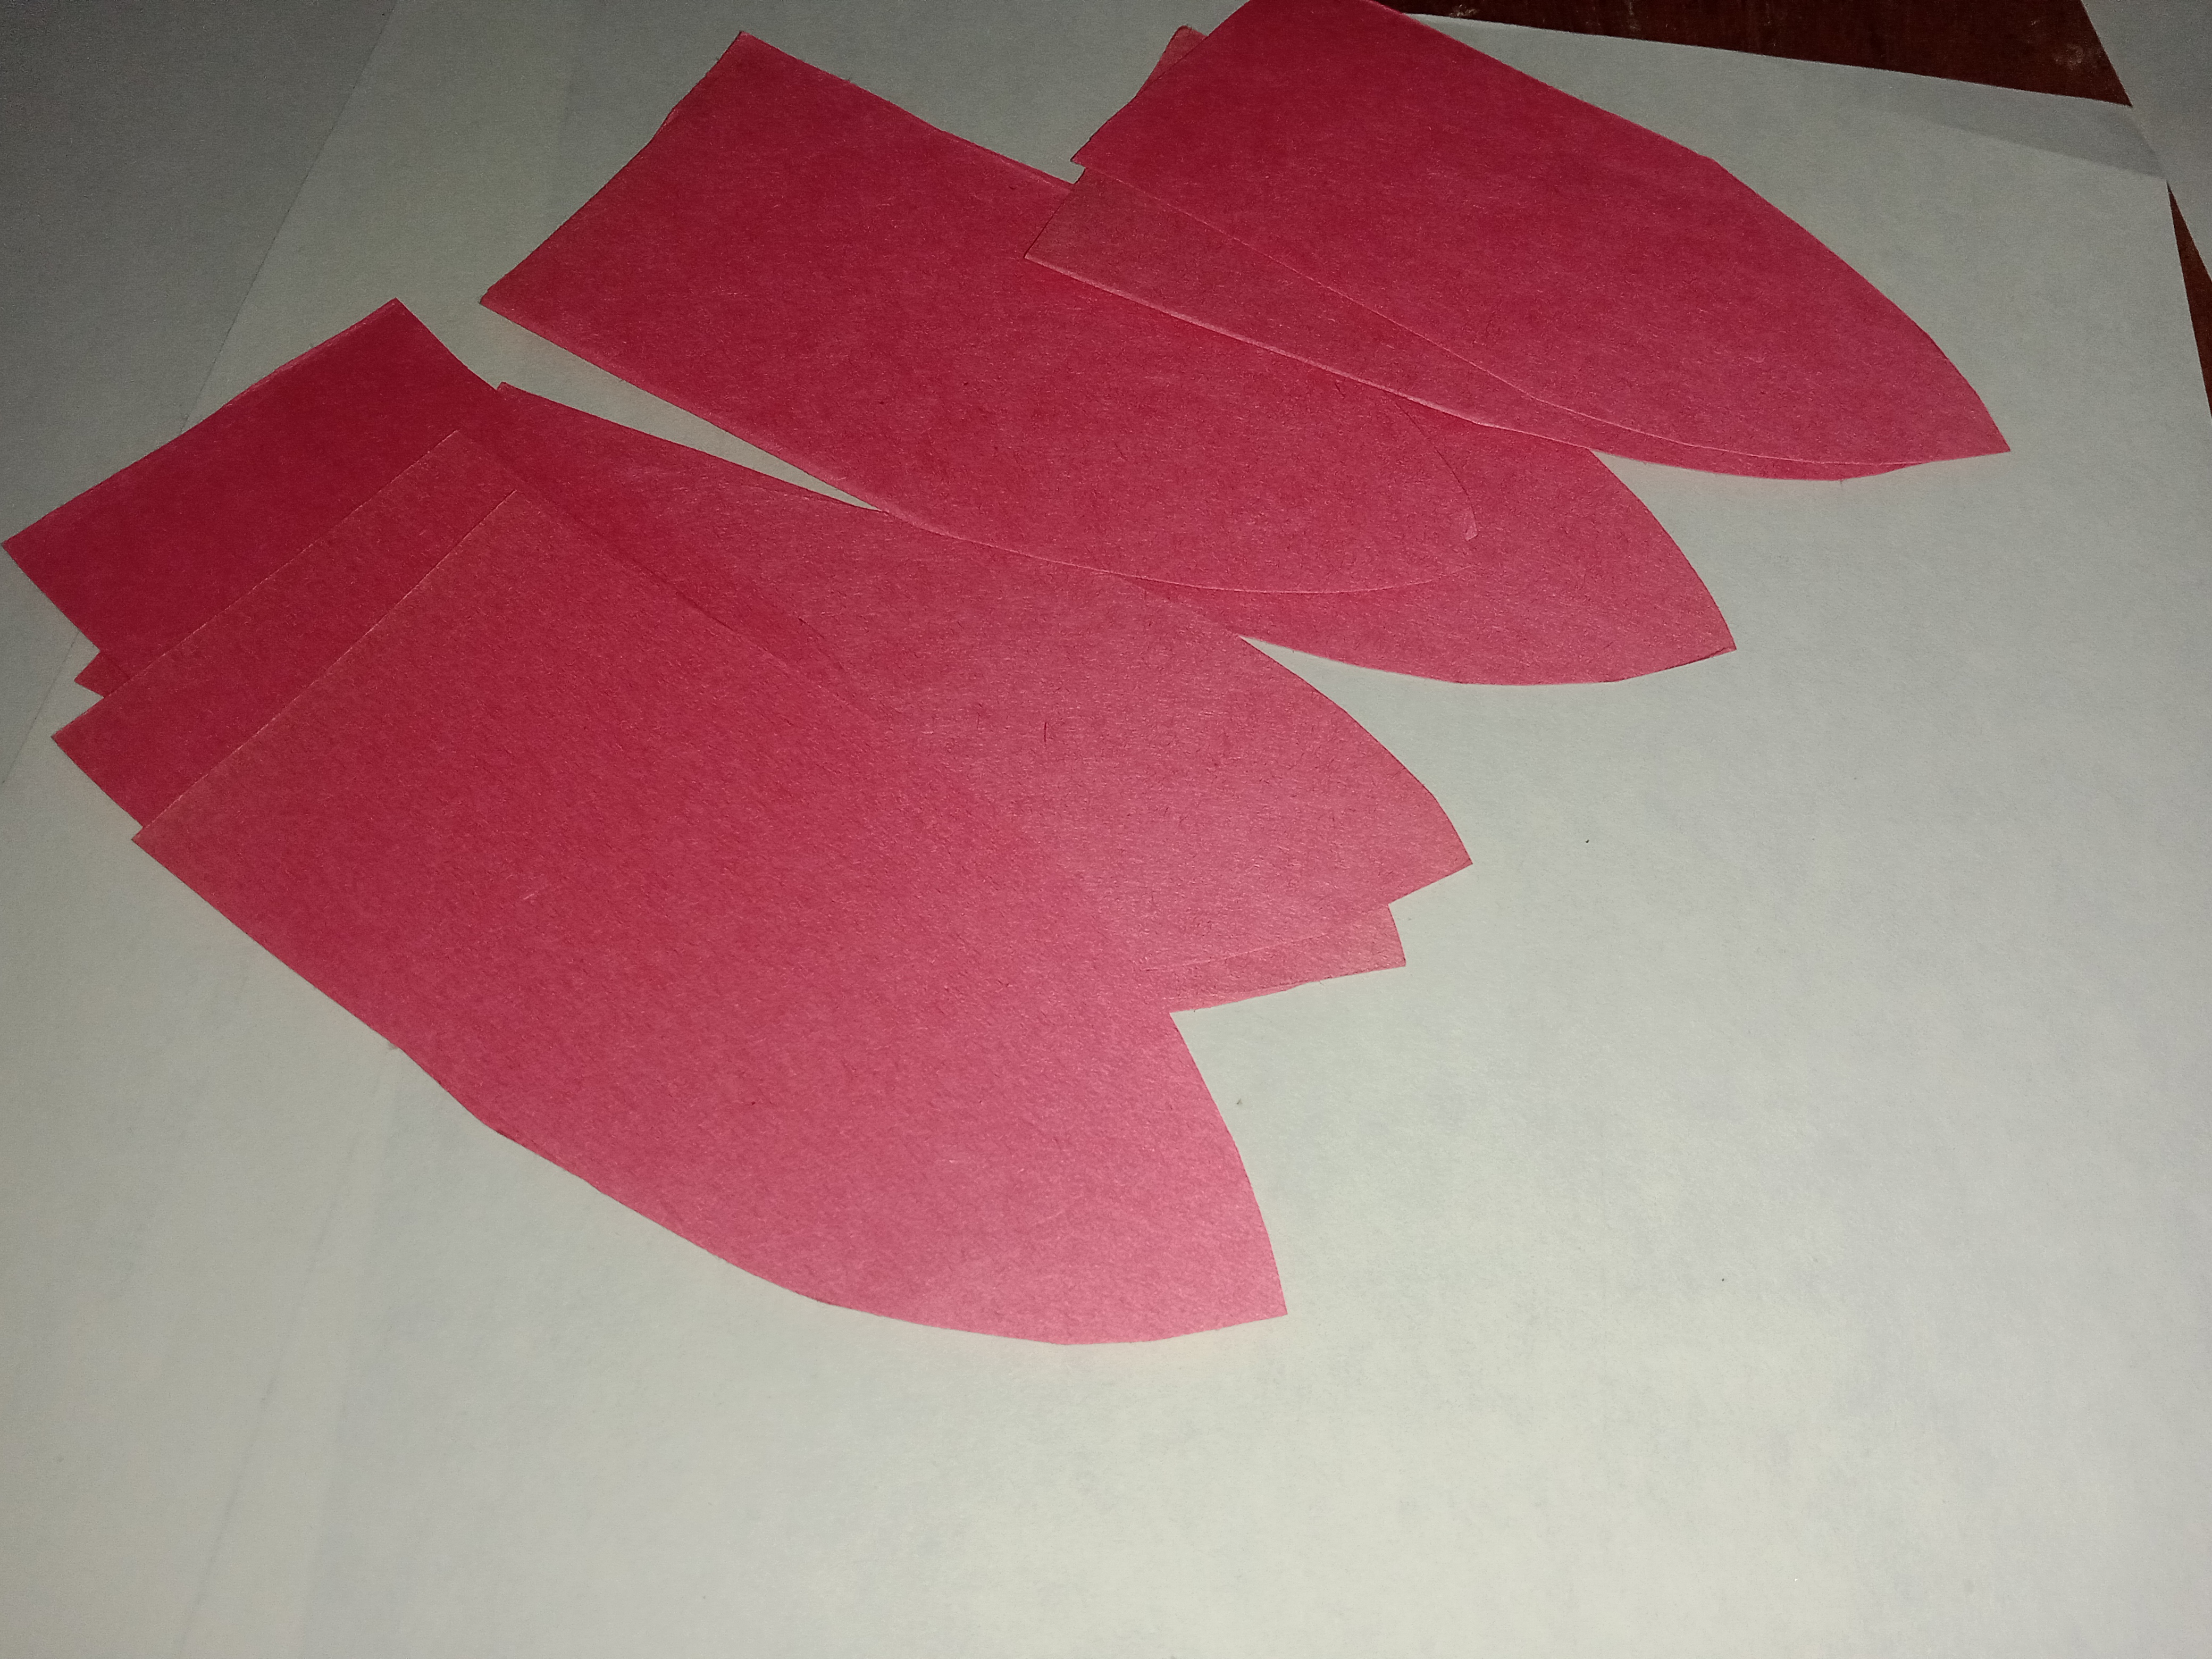
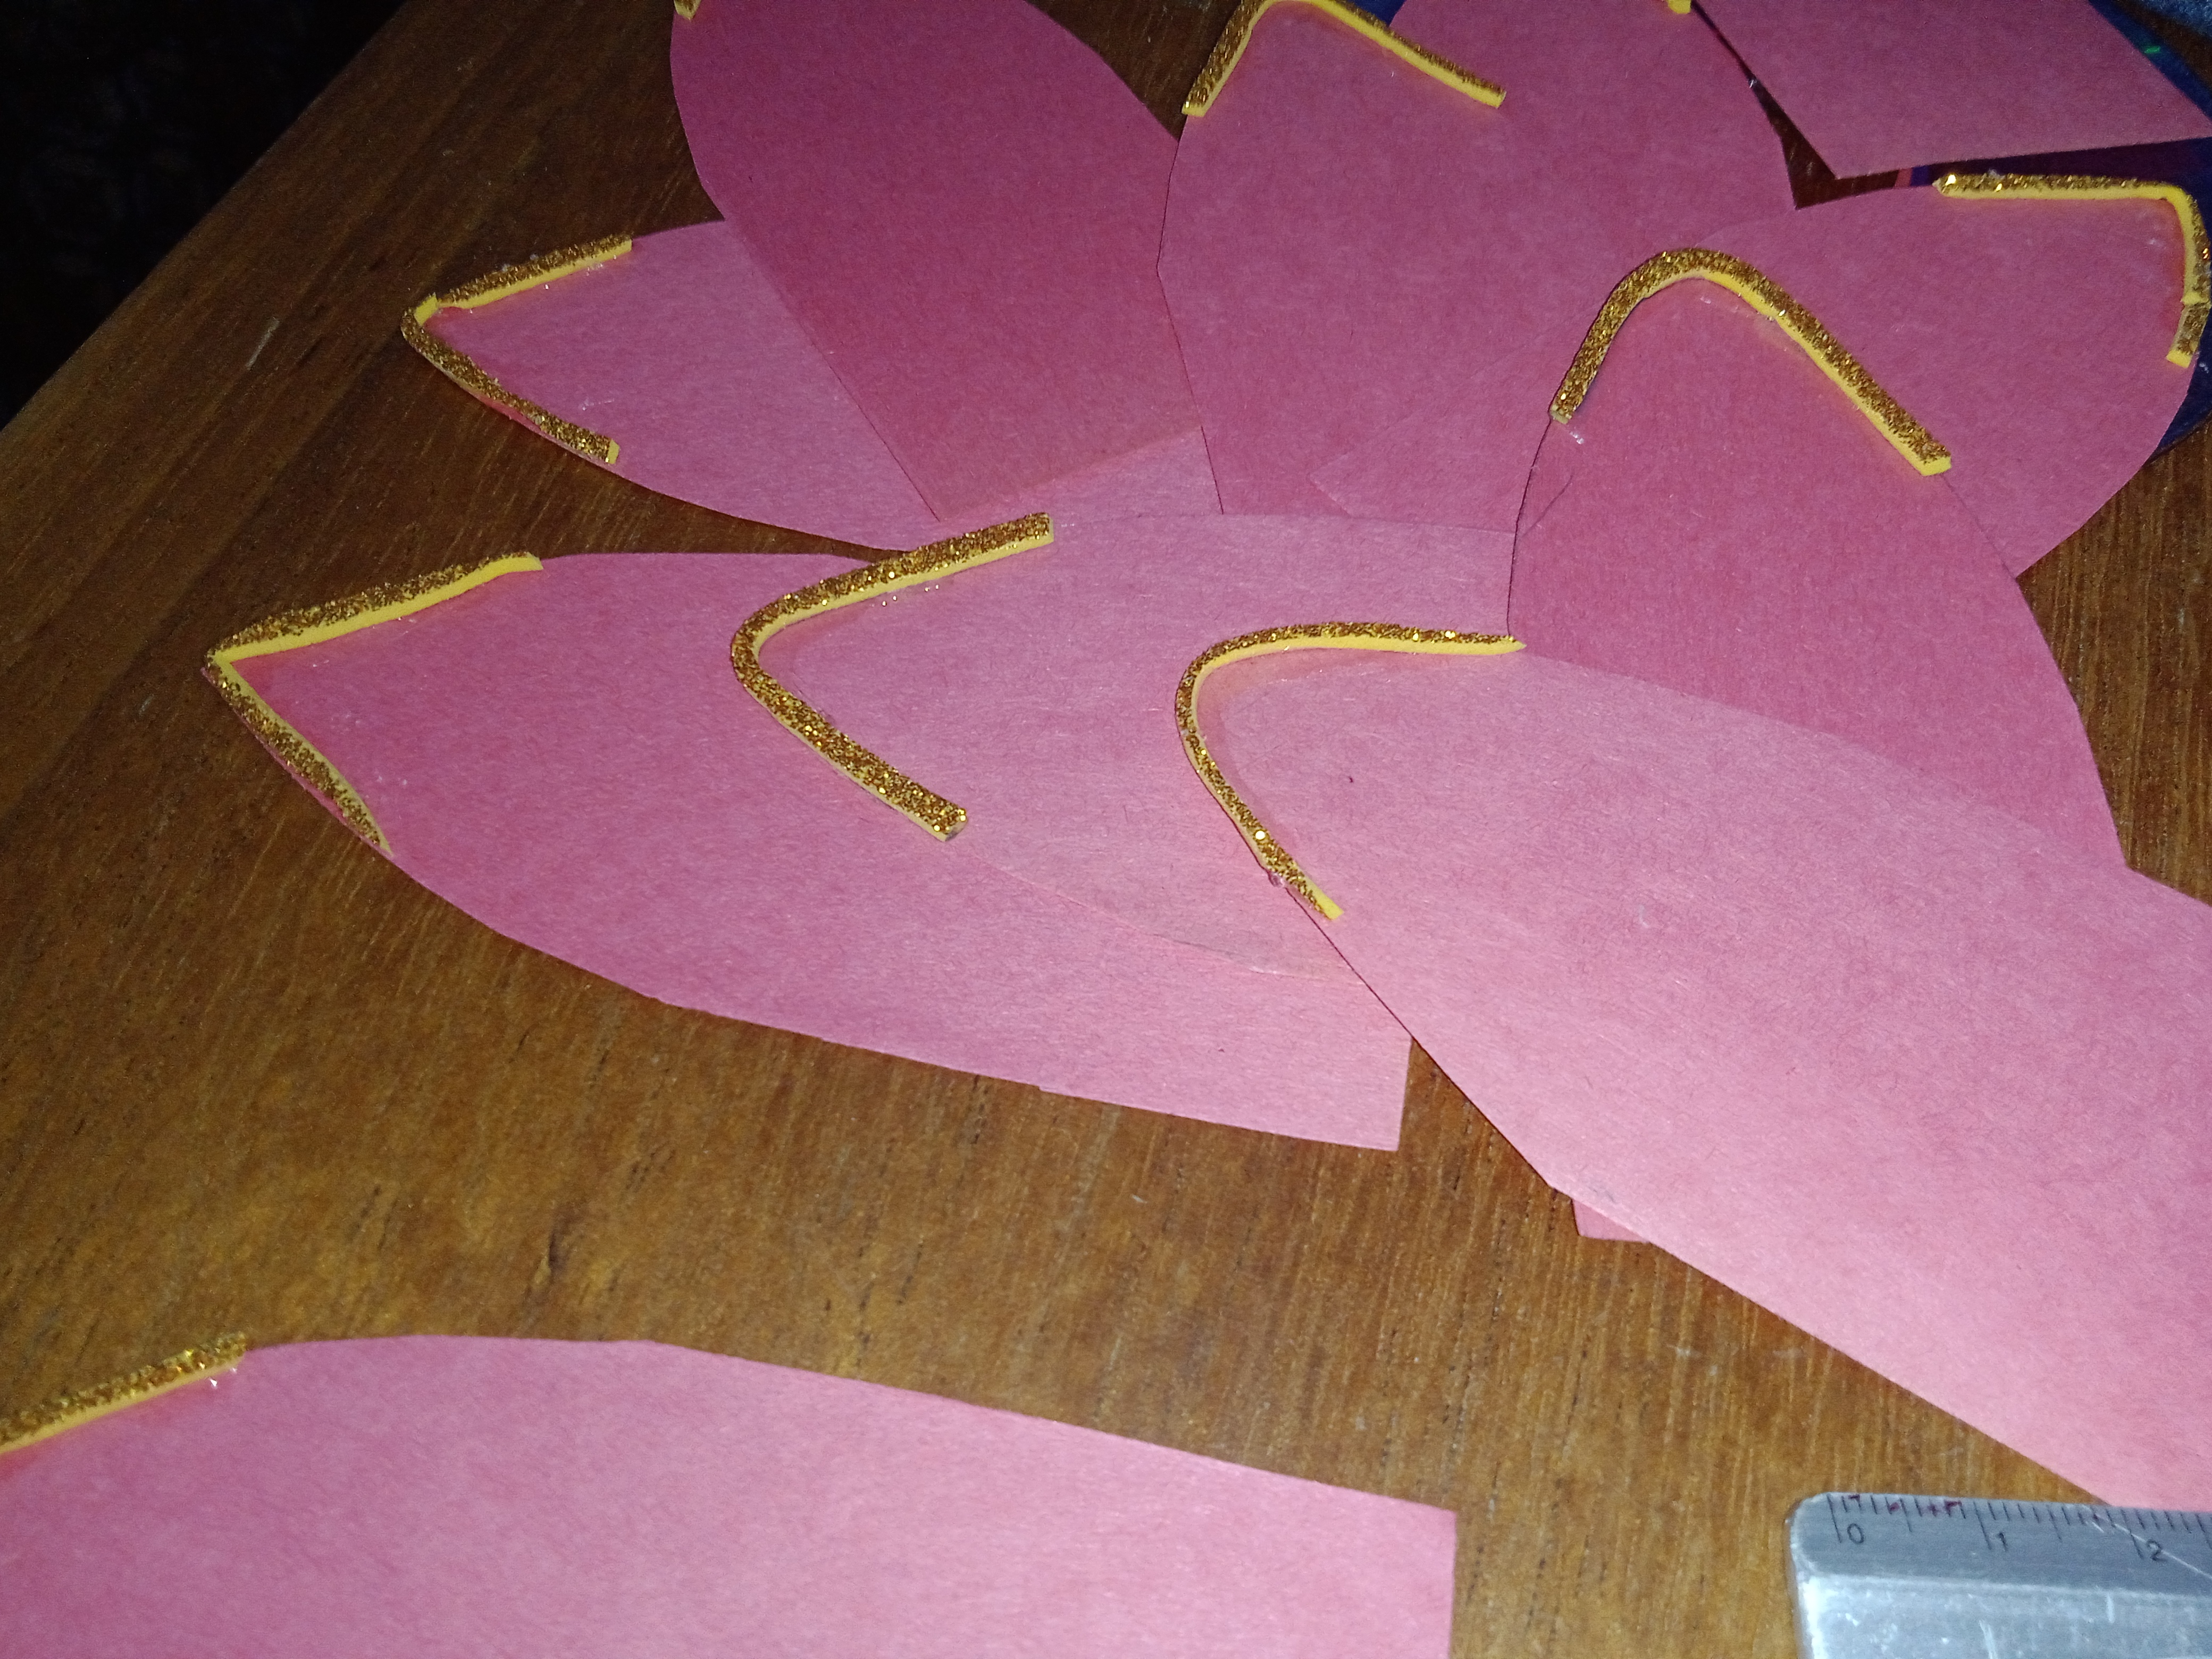
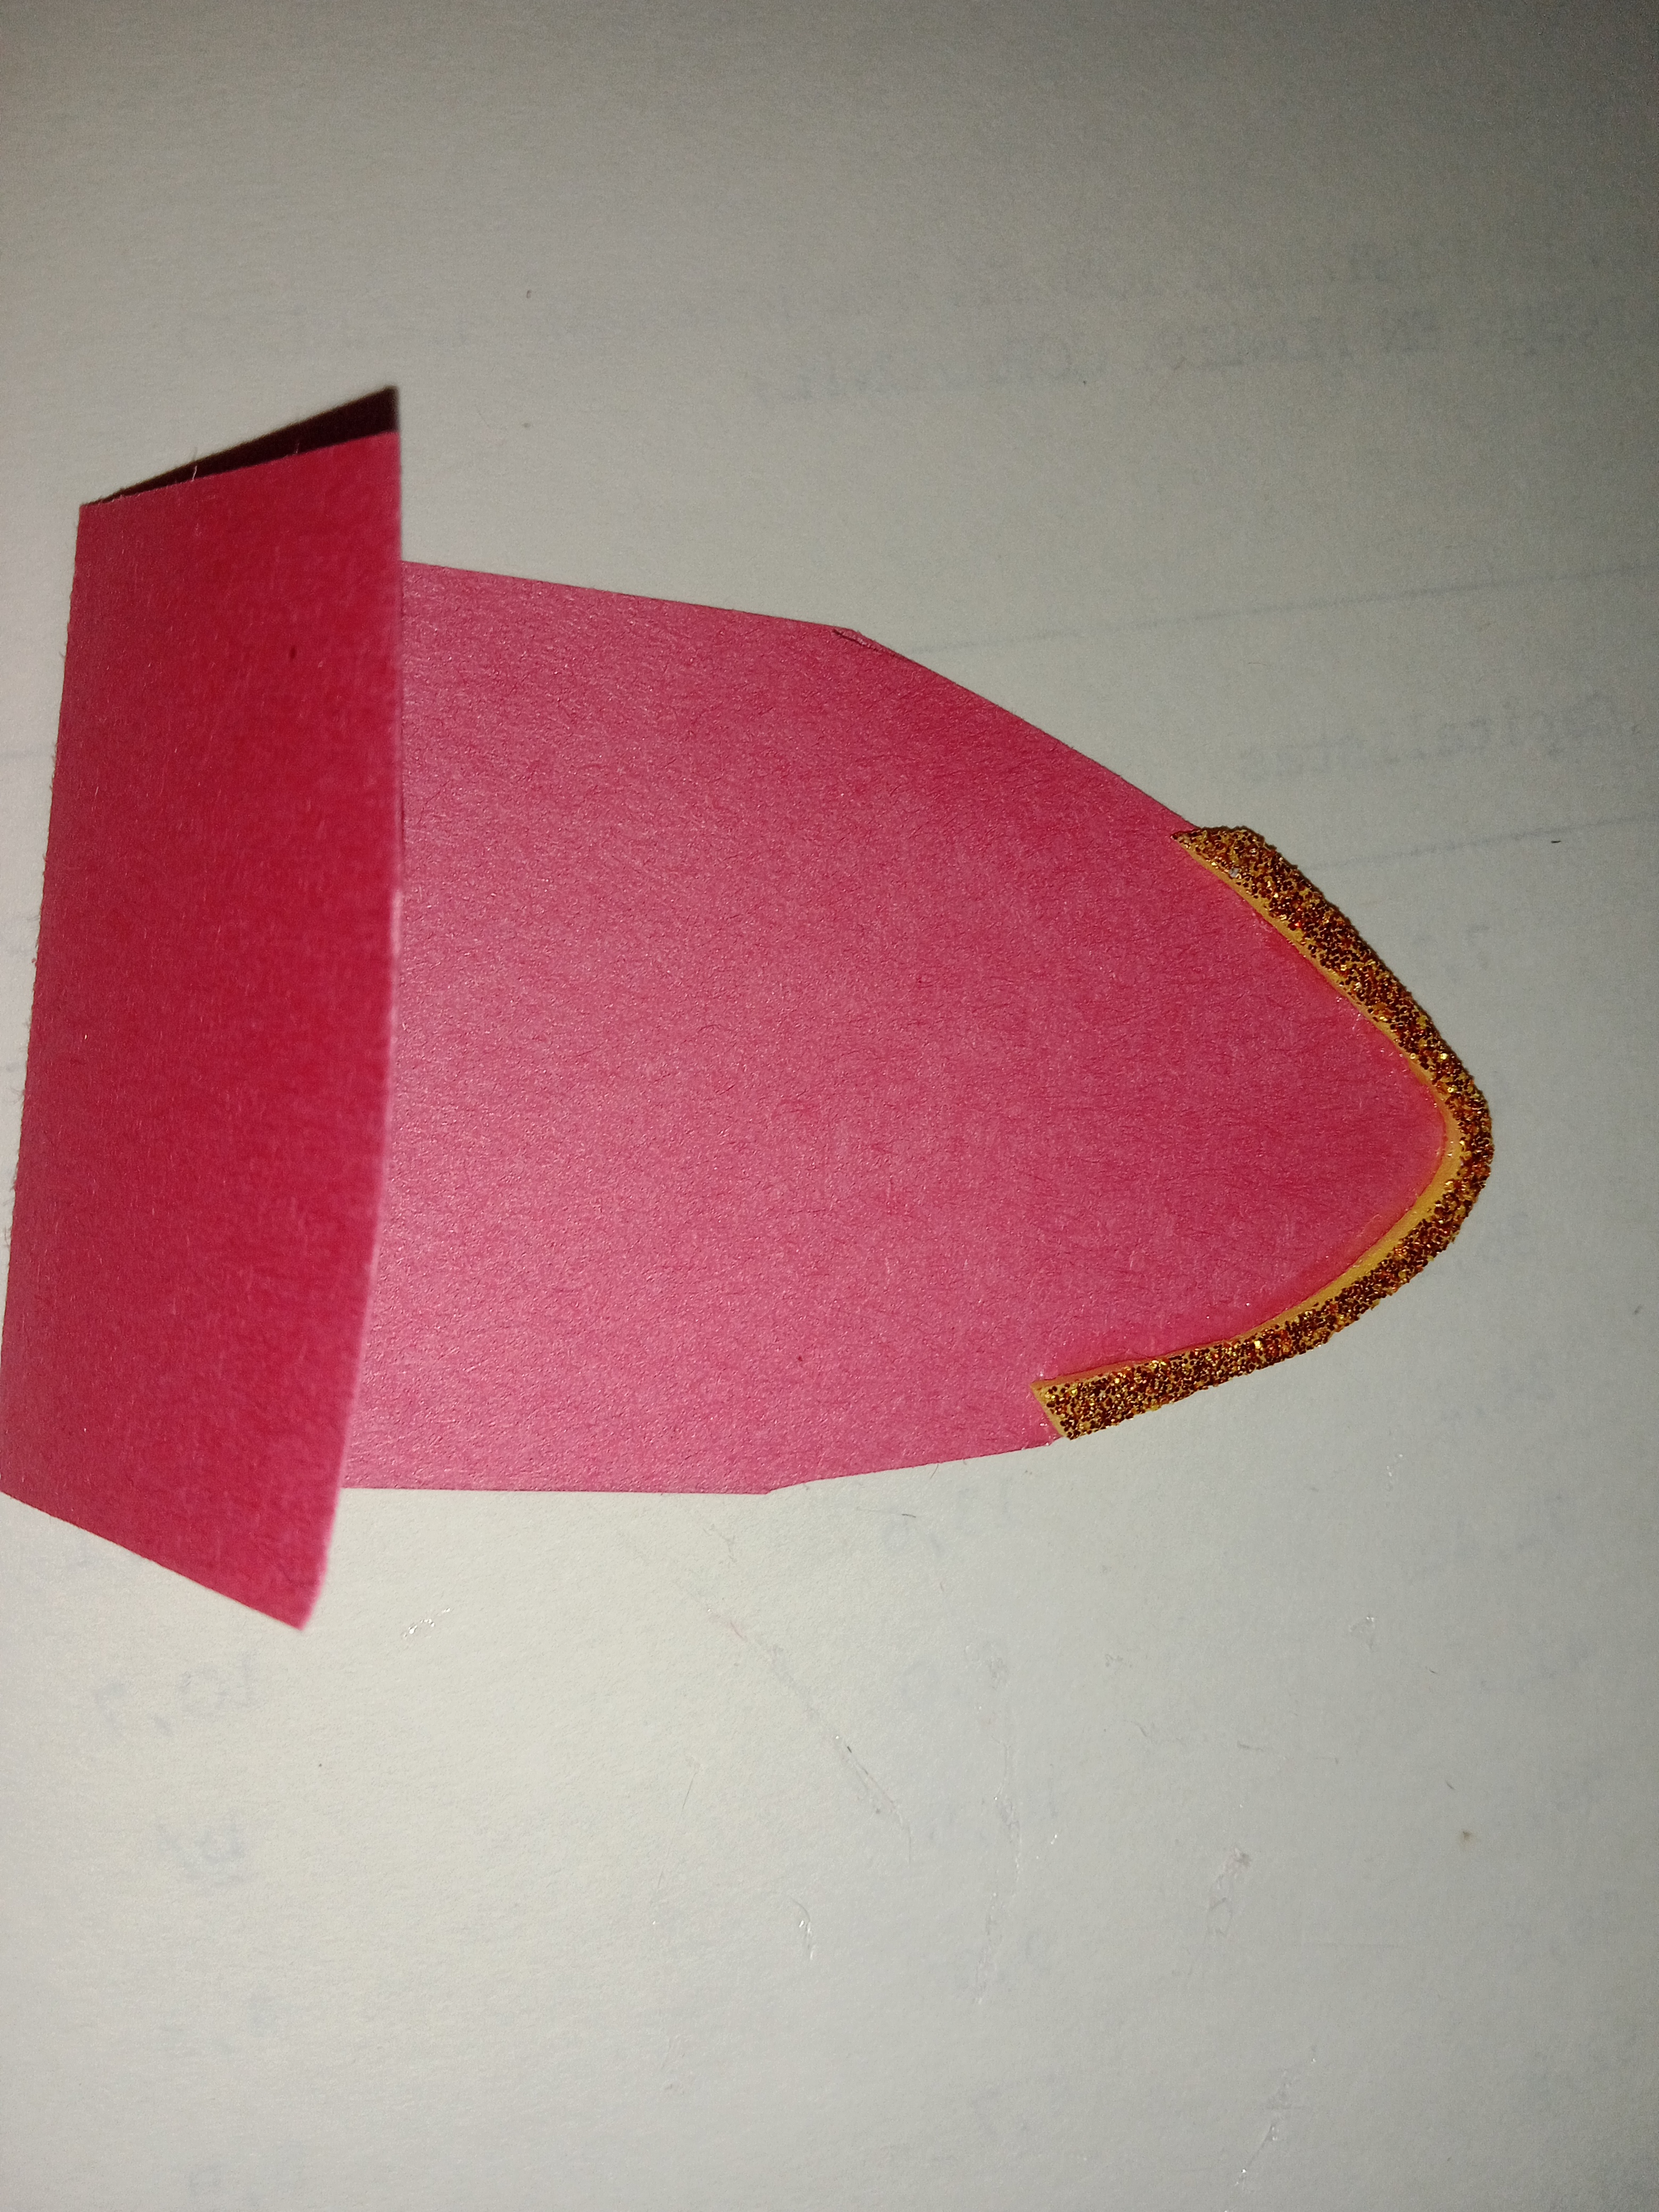
Paso # 3:
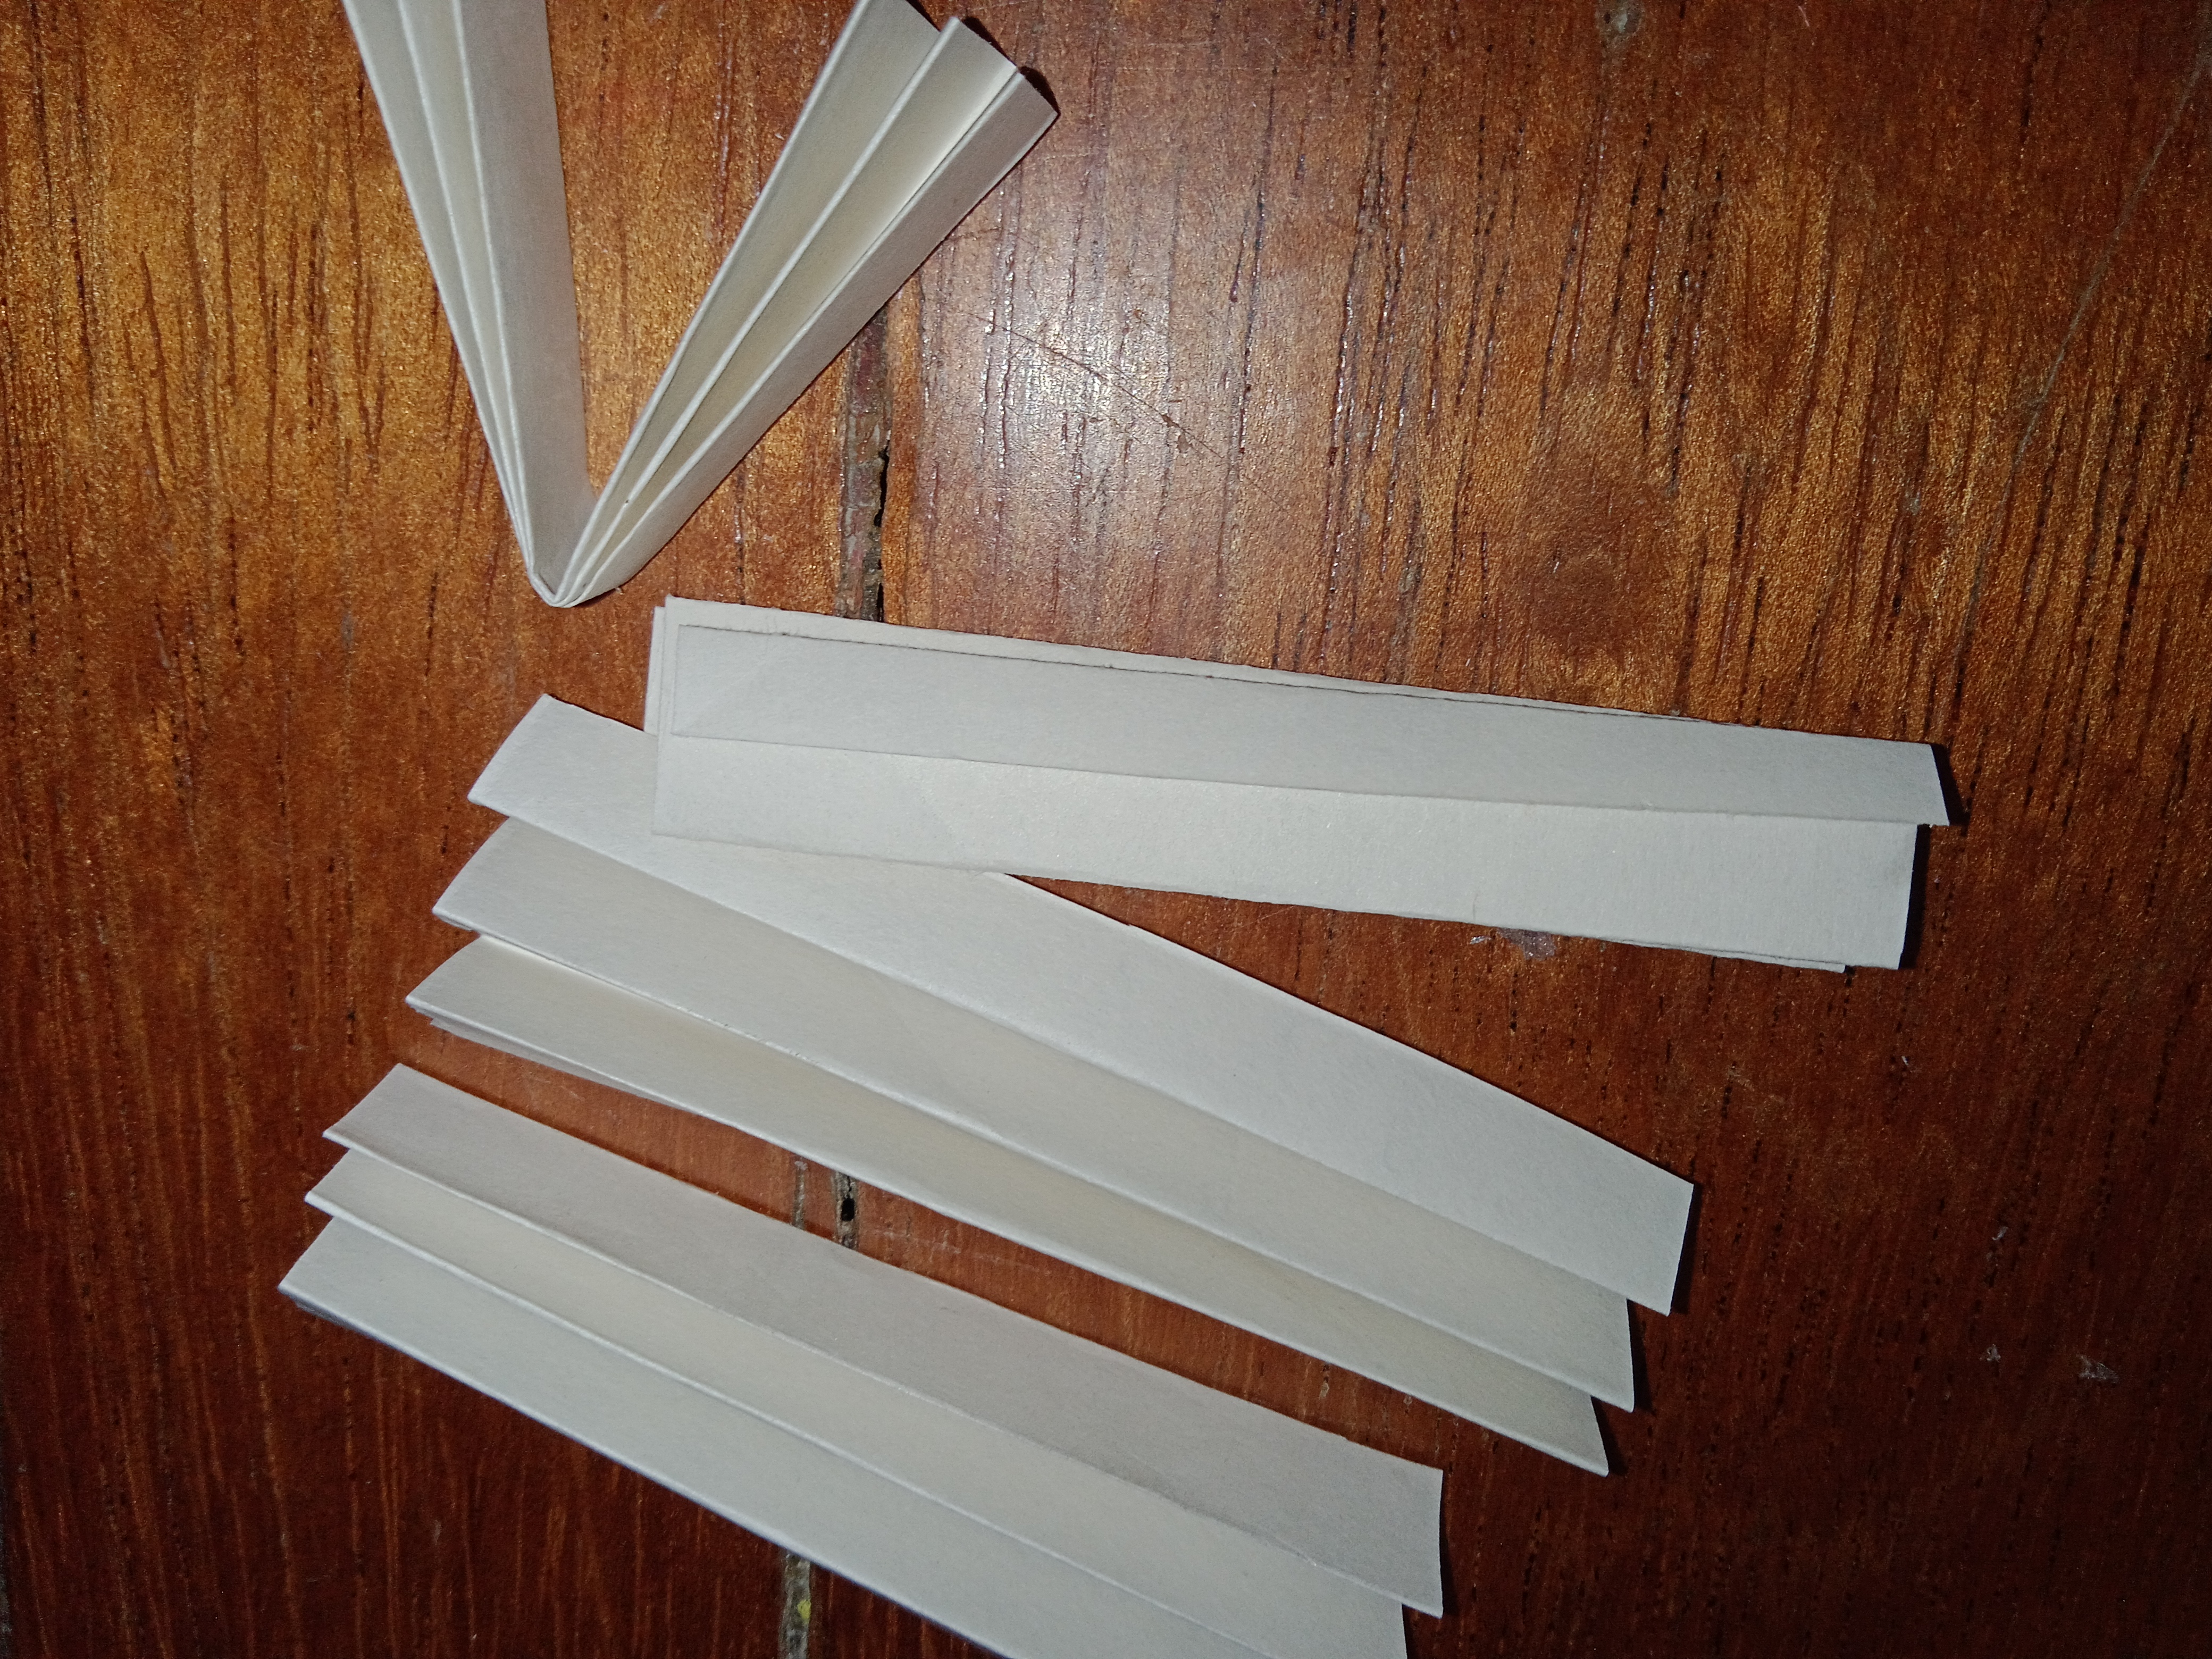
Con el lápiz hacer la forma de un semi-triangulo en una de sus lados, tal como se muestra en la fotografía y recortar todos los rectángulos de esta forma.
 |  |
|---|
Paso # 4:
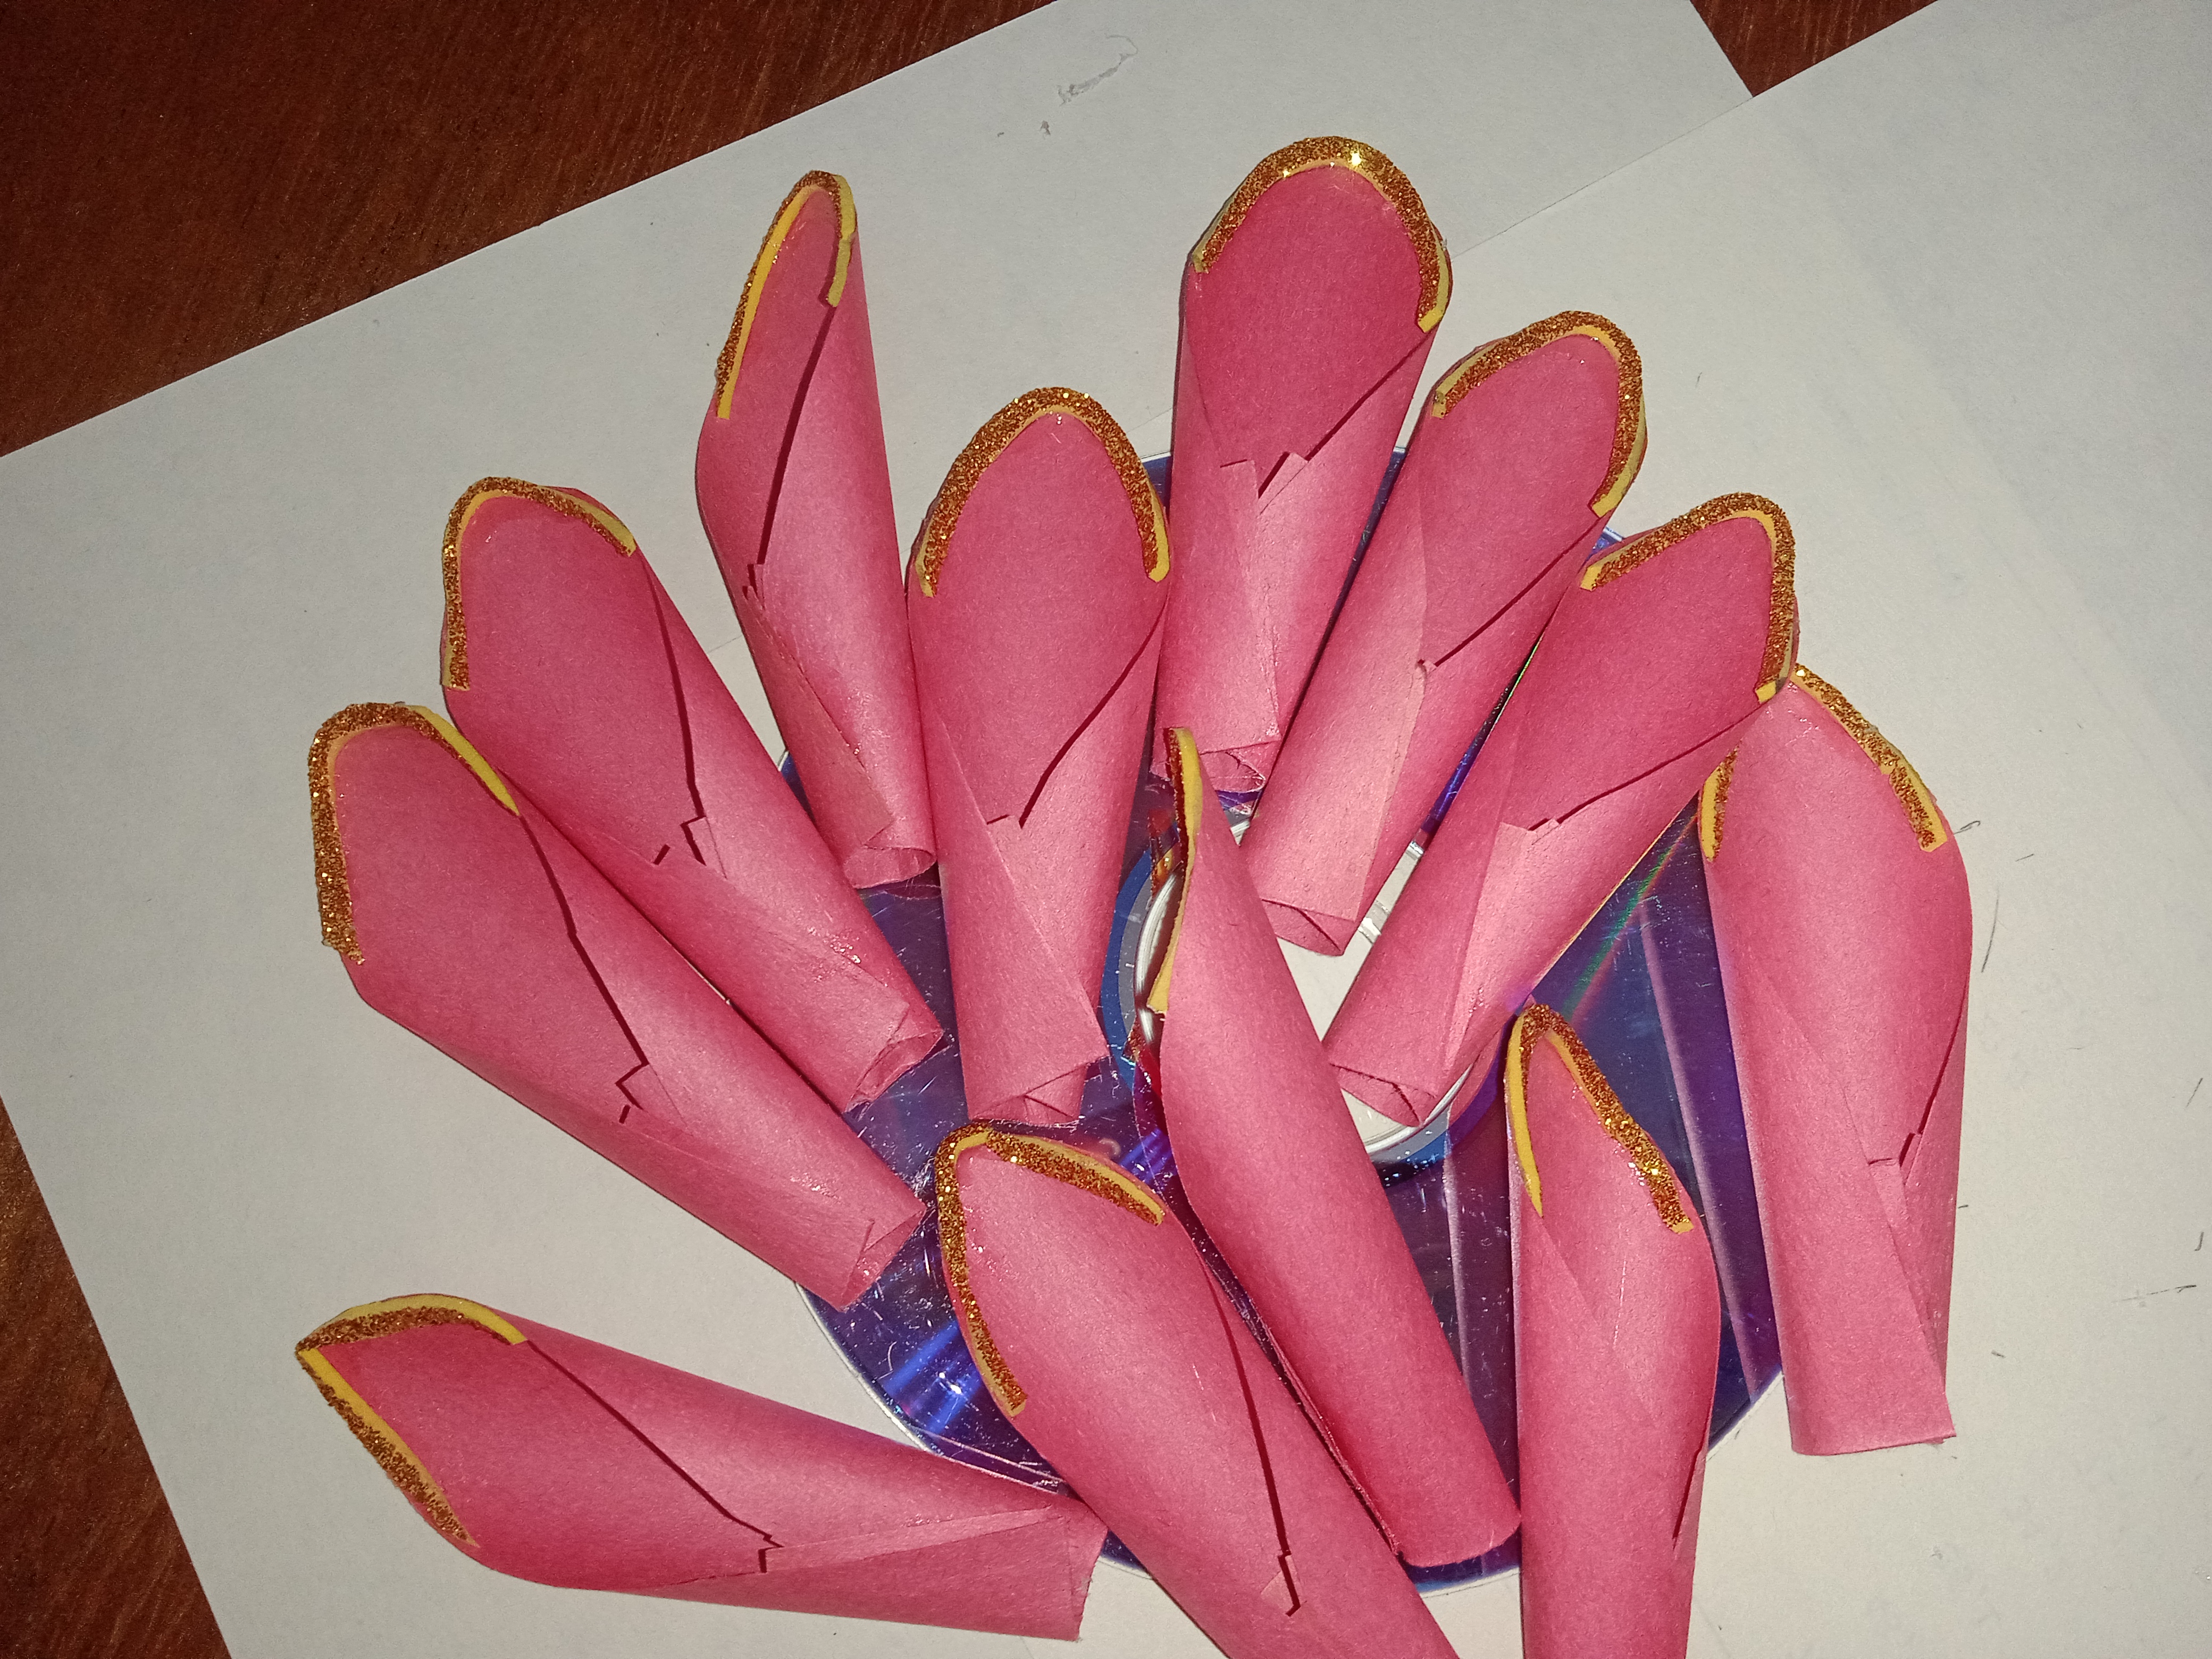
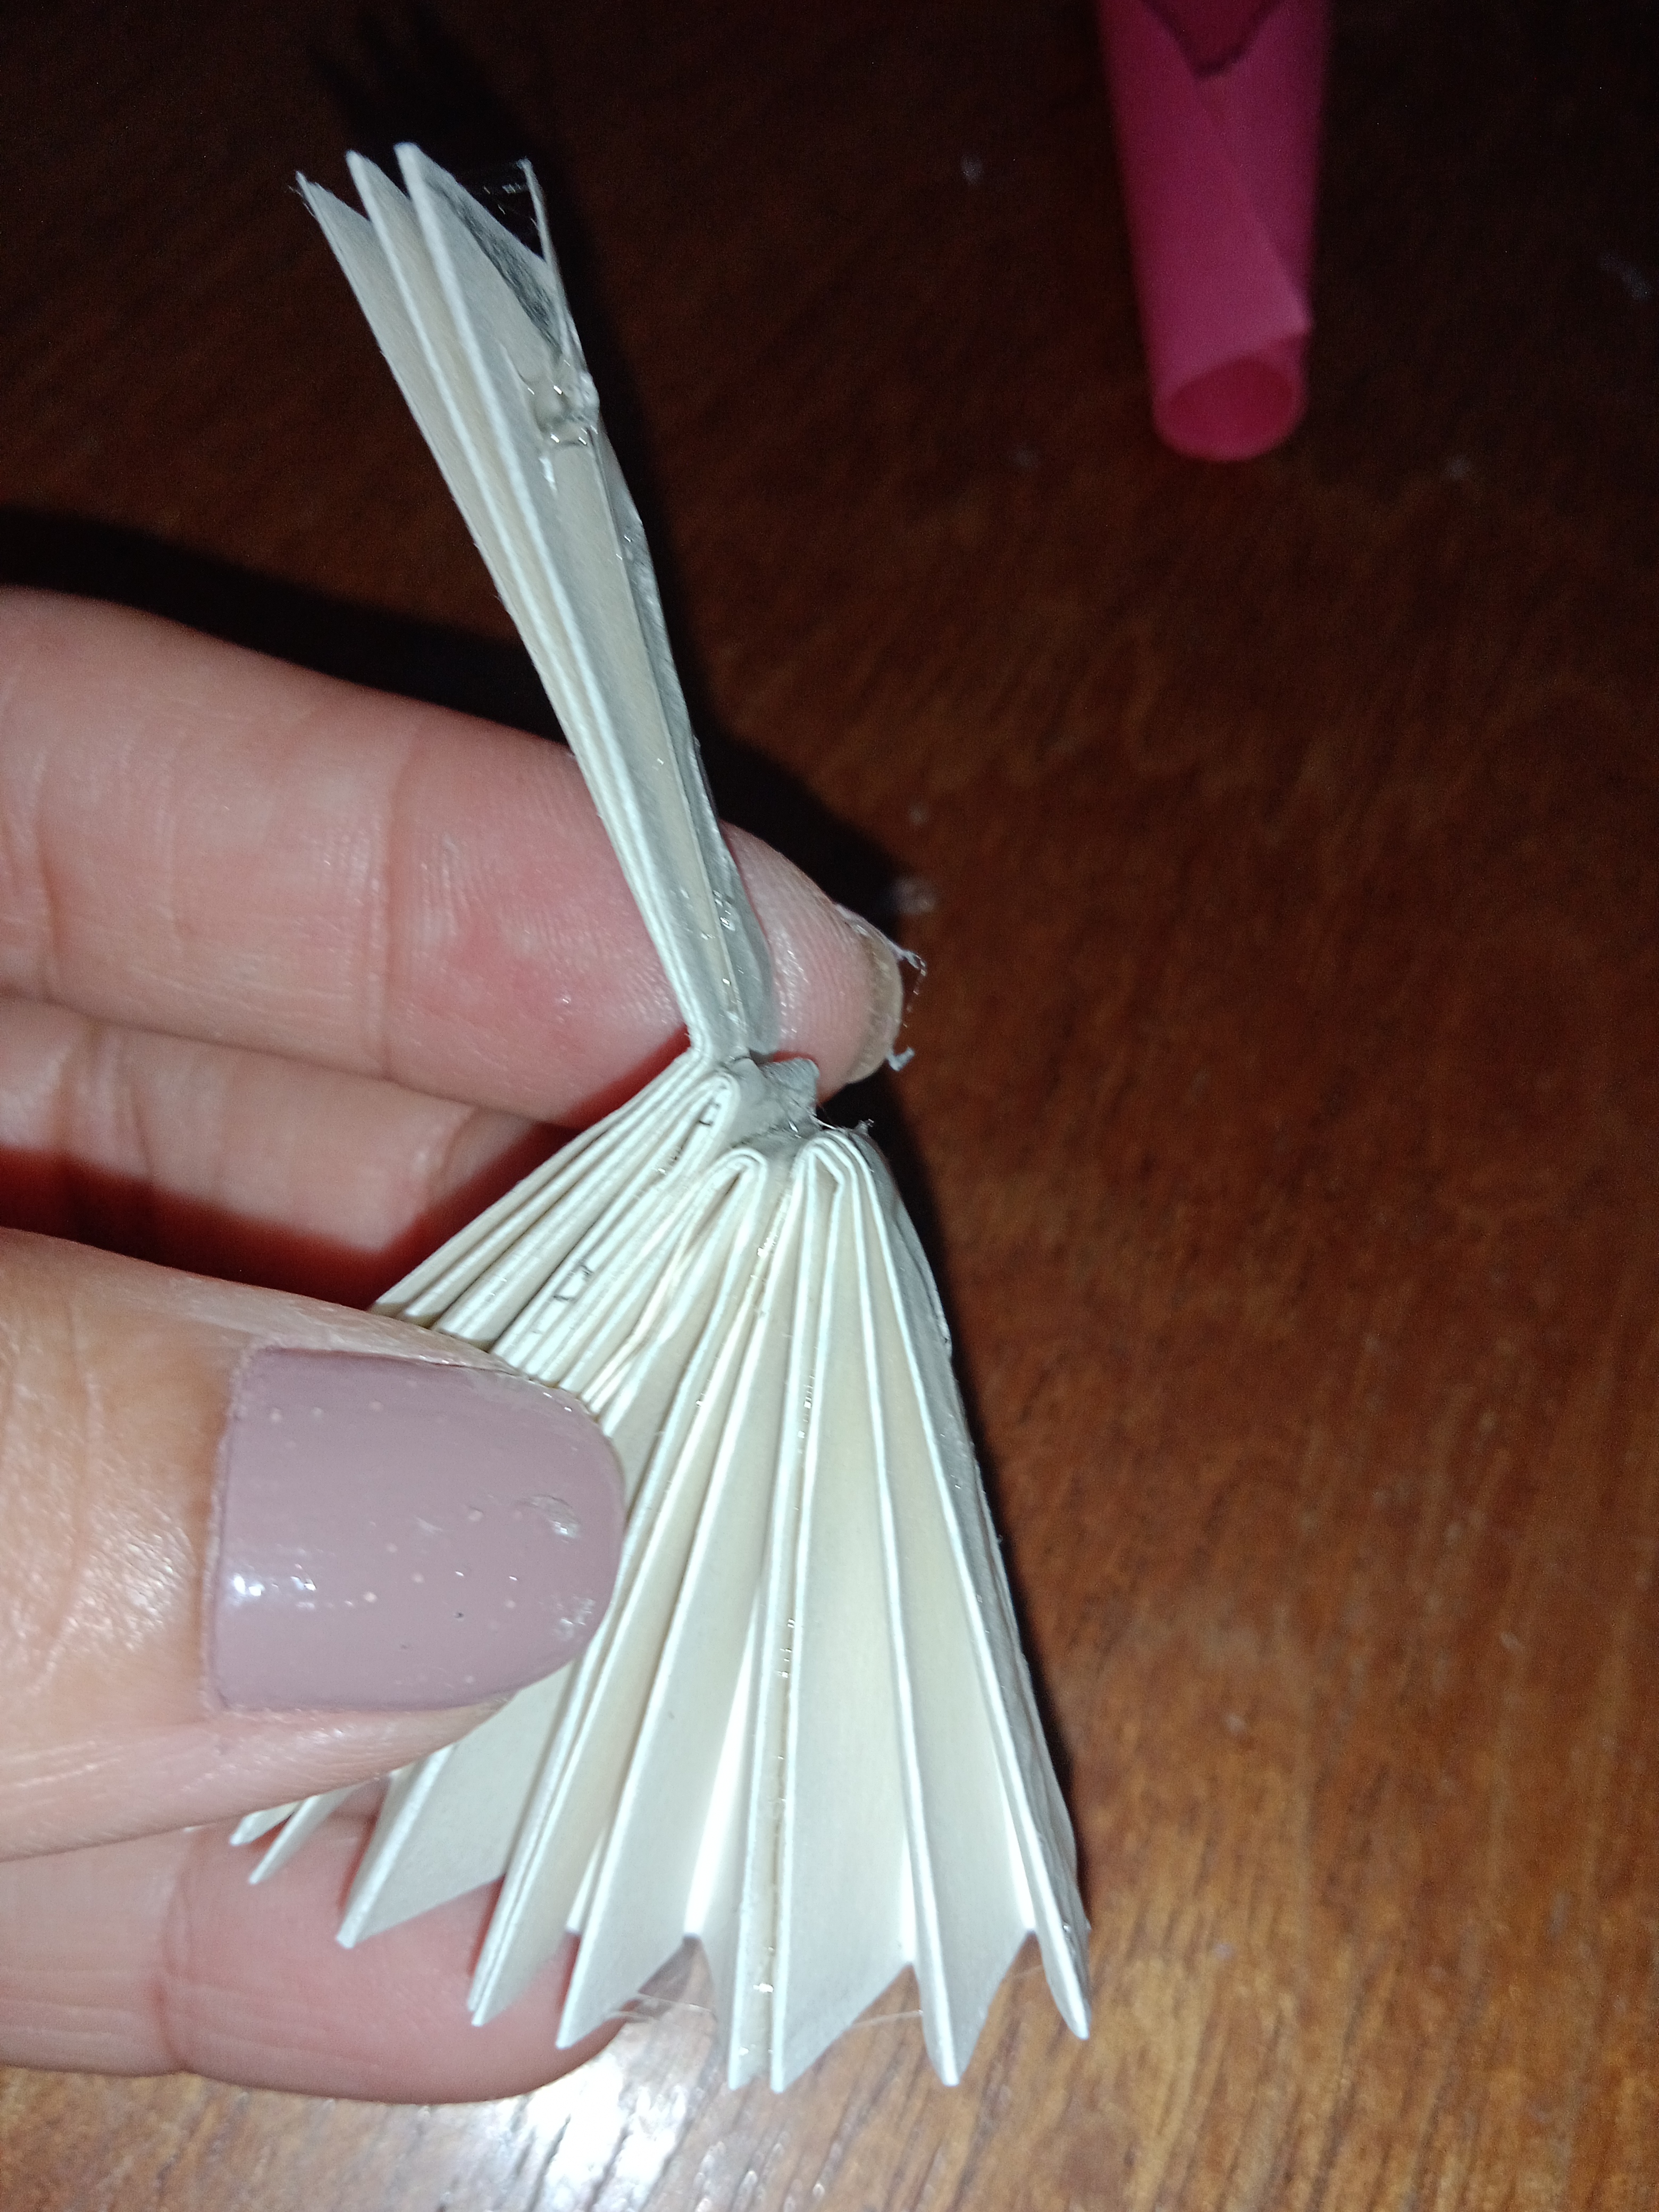
Hacer recortes de goma Eva de aproximadamente 3 milímetros de ancho y de largo 5 centímetros. Colocar silicón en las puntas y pegar los recortes de foami para dar brillo a nuestro adorno.
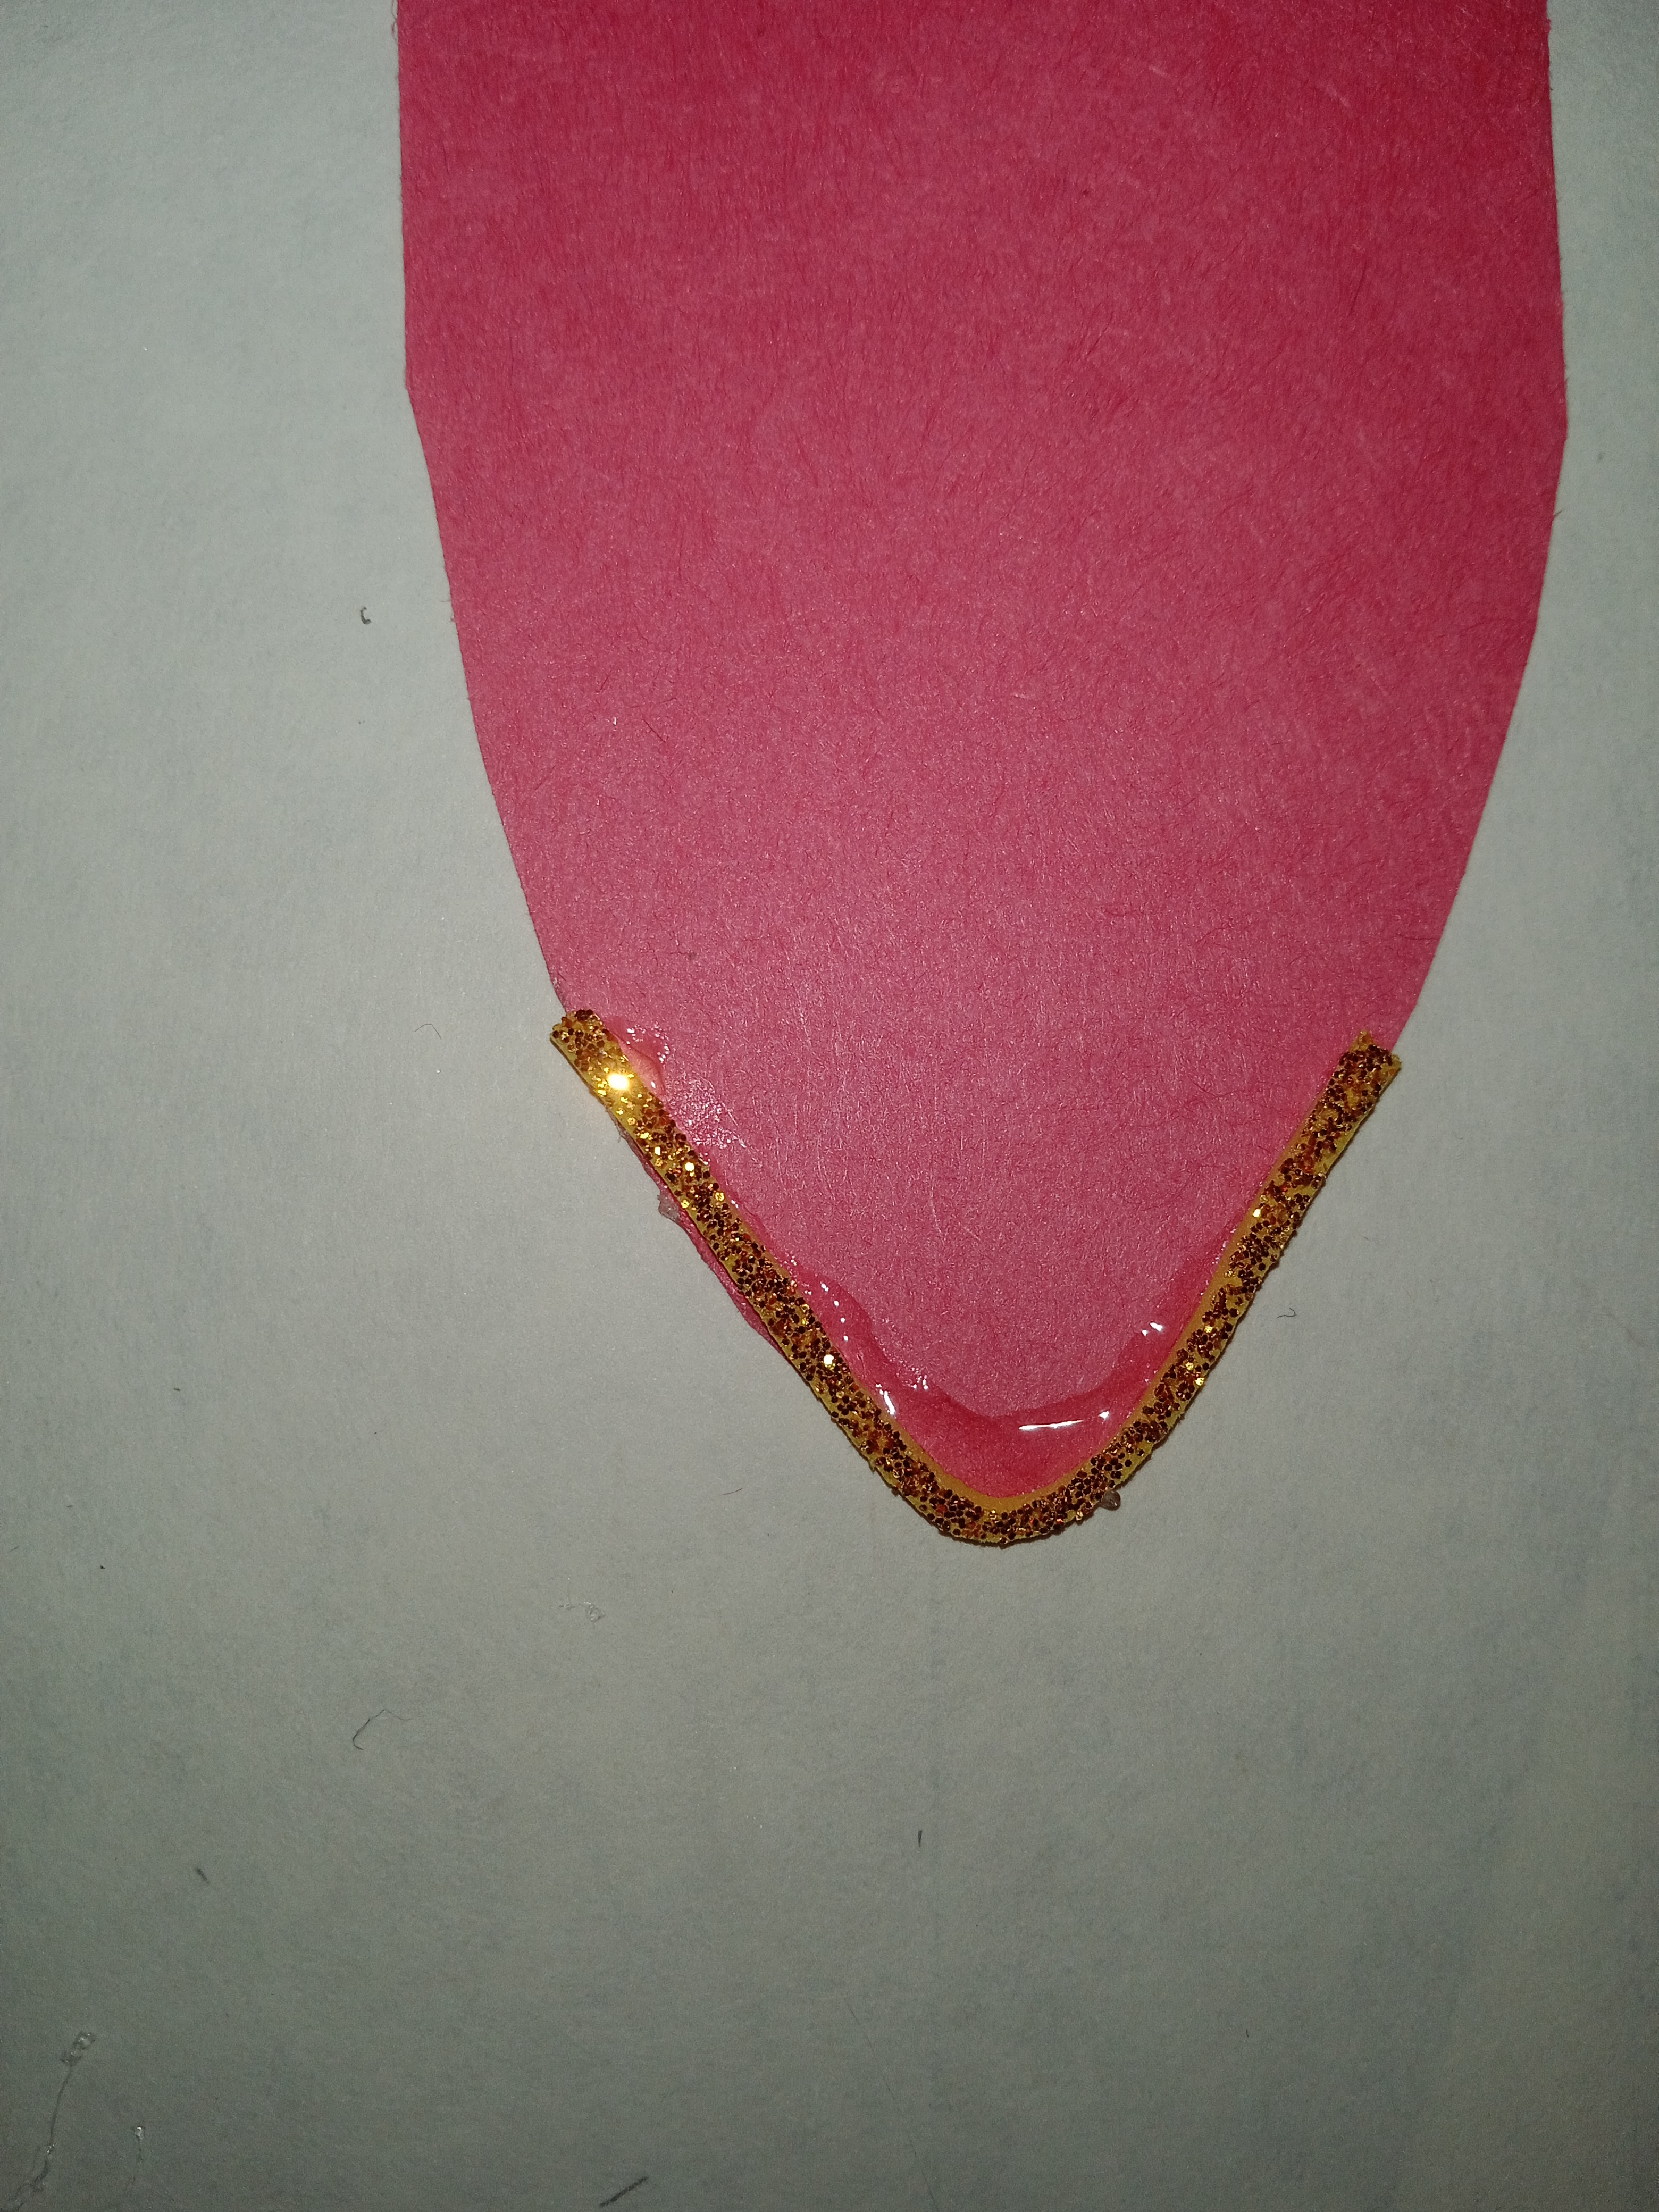 |  |
|---|
Paso # 5:
Una vez estén ya listos se debe hacer un dobles hacia el centro y dar la forma de pétalo de un flor de cala. Colocar silicón para pegar las puntas.
 | 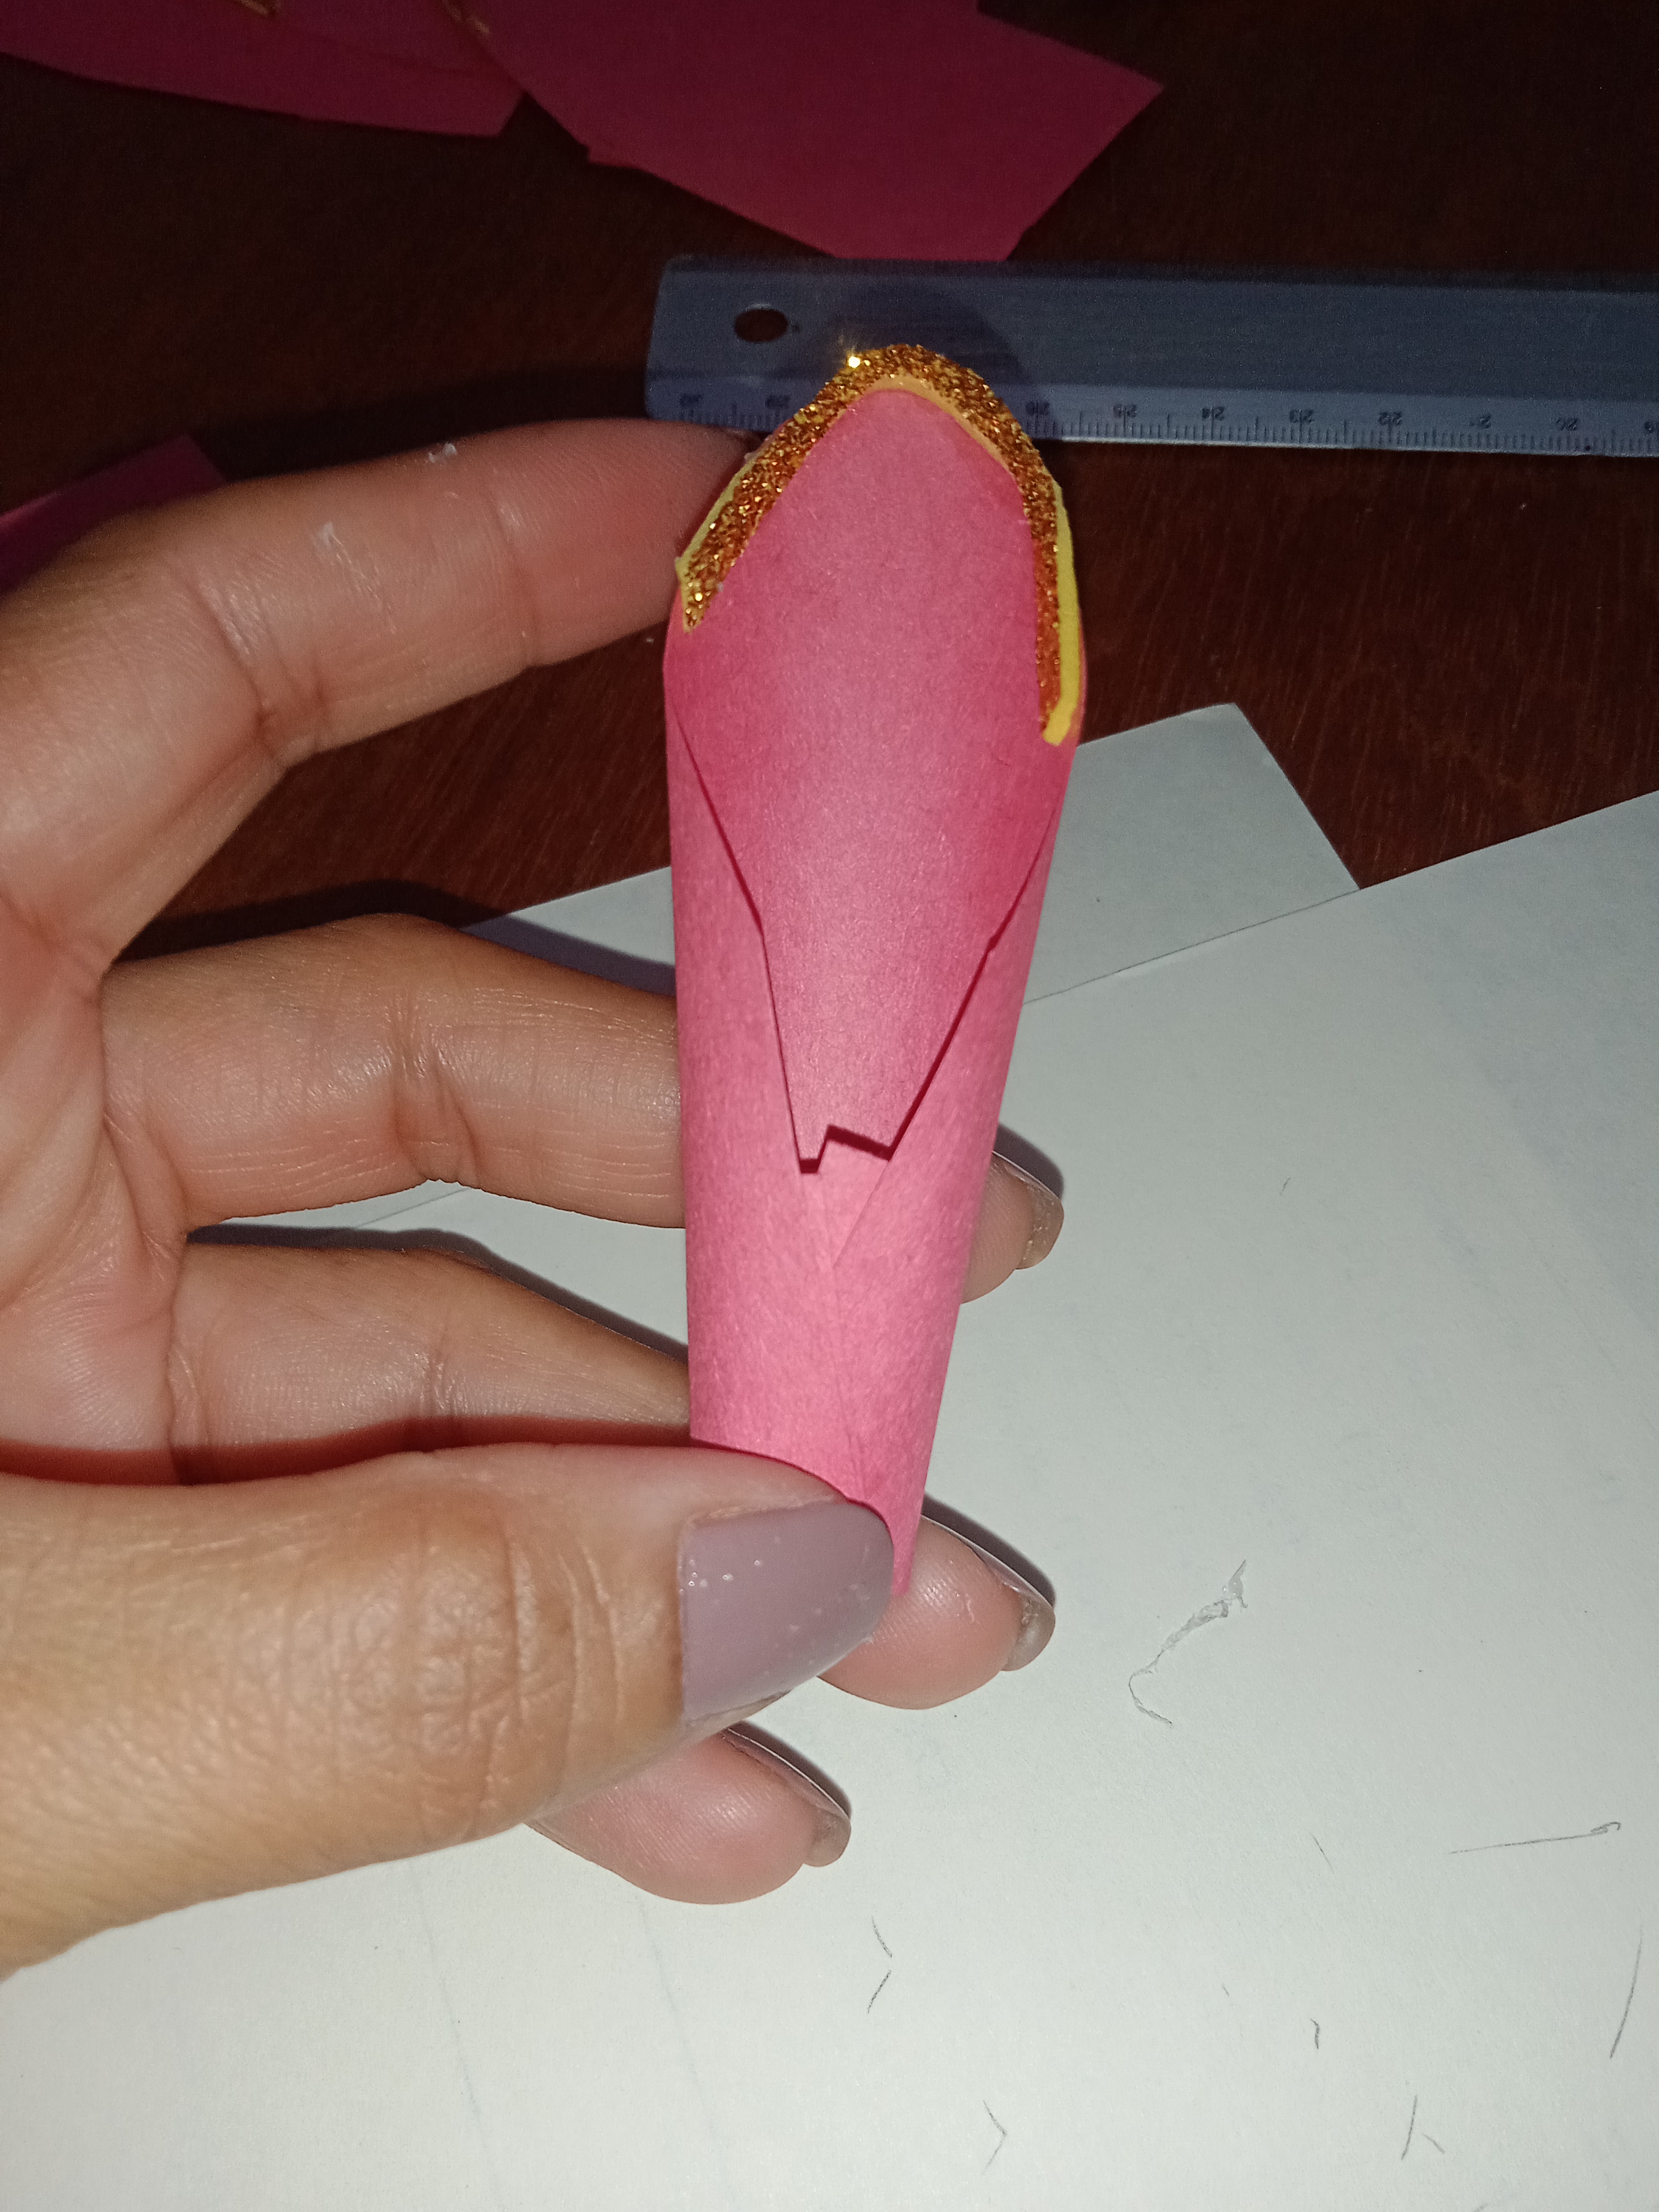 |  |
|---|
Paso # 6:
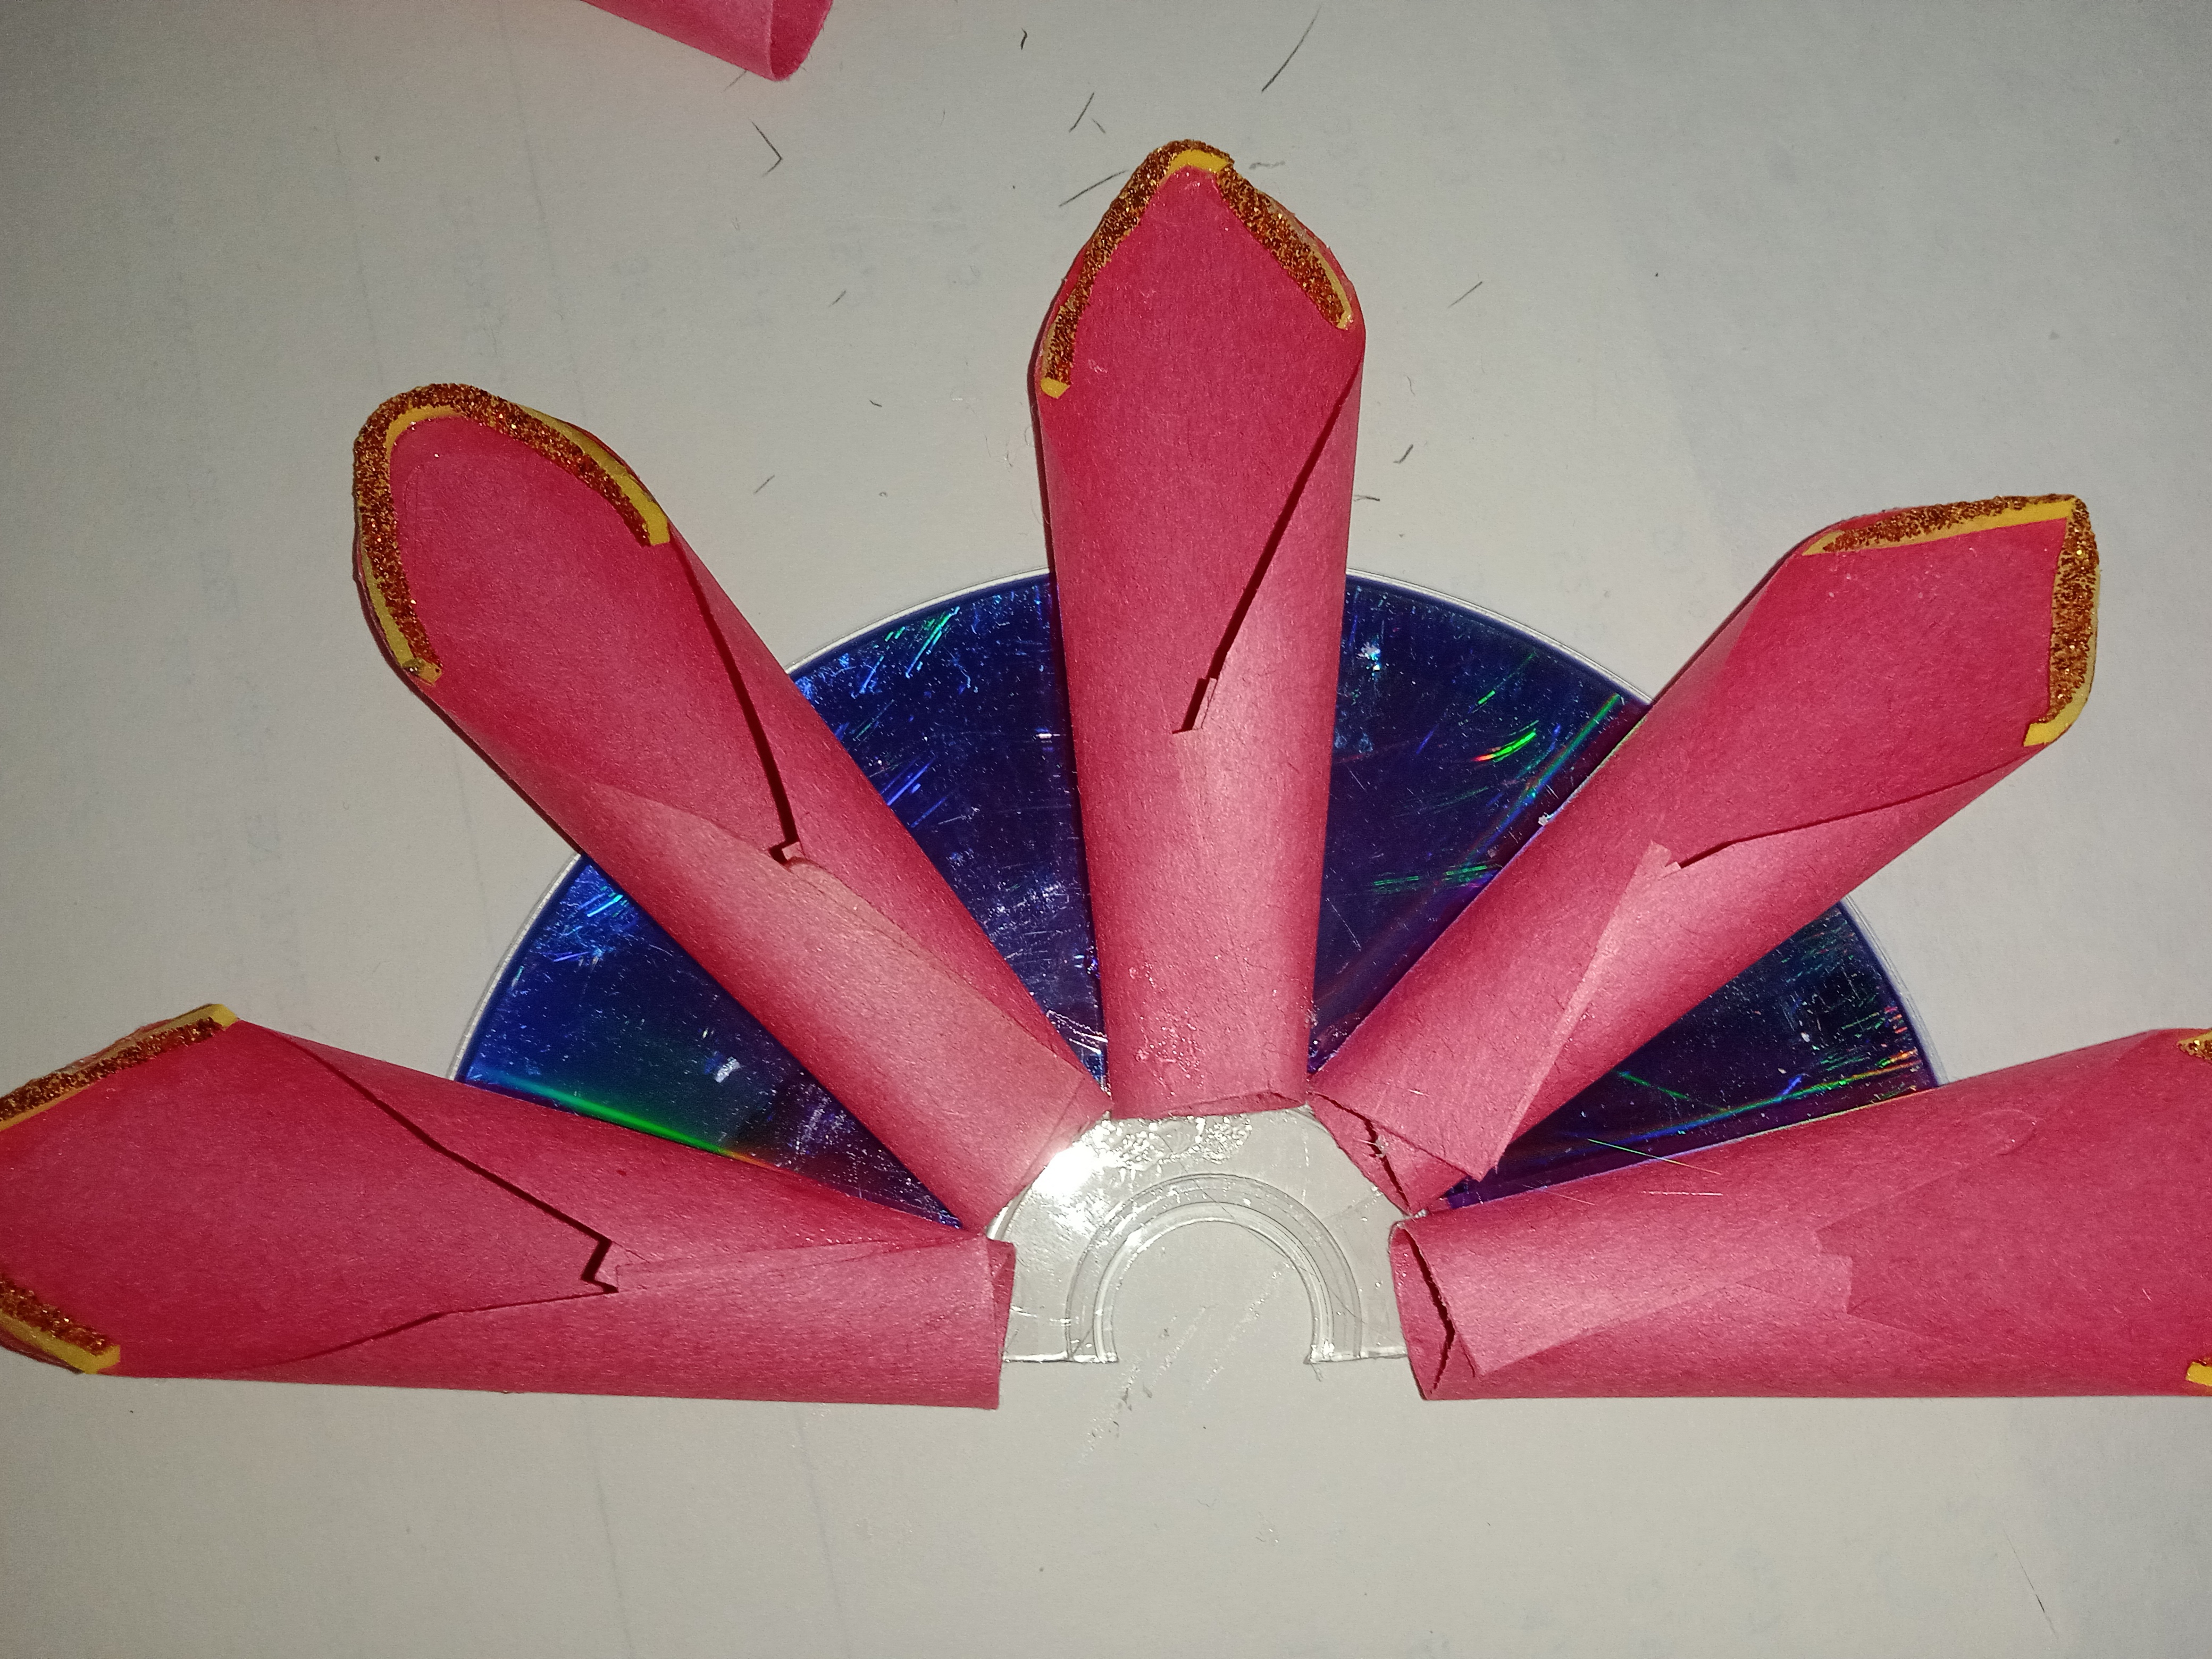
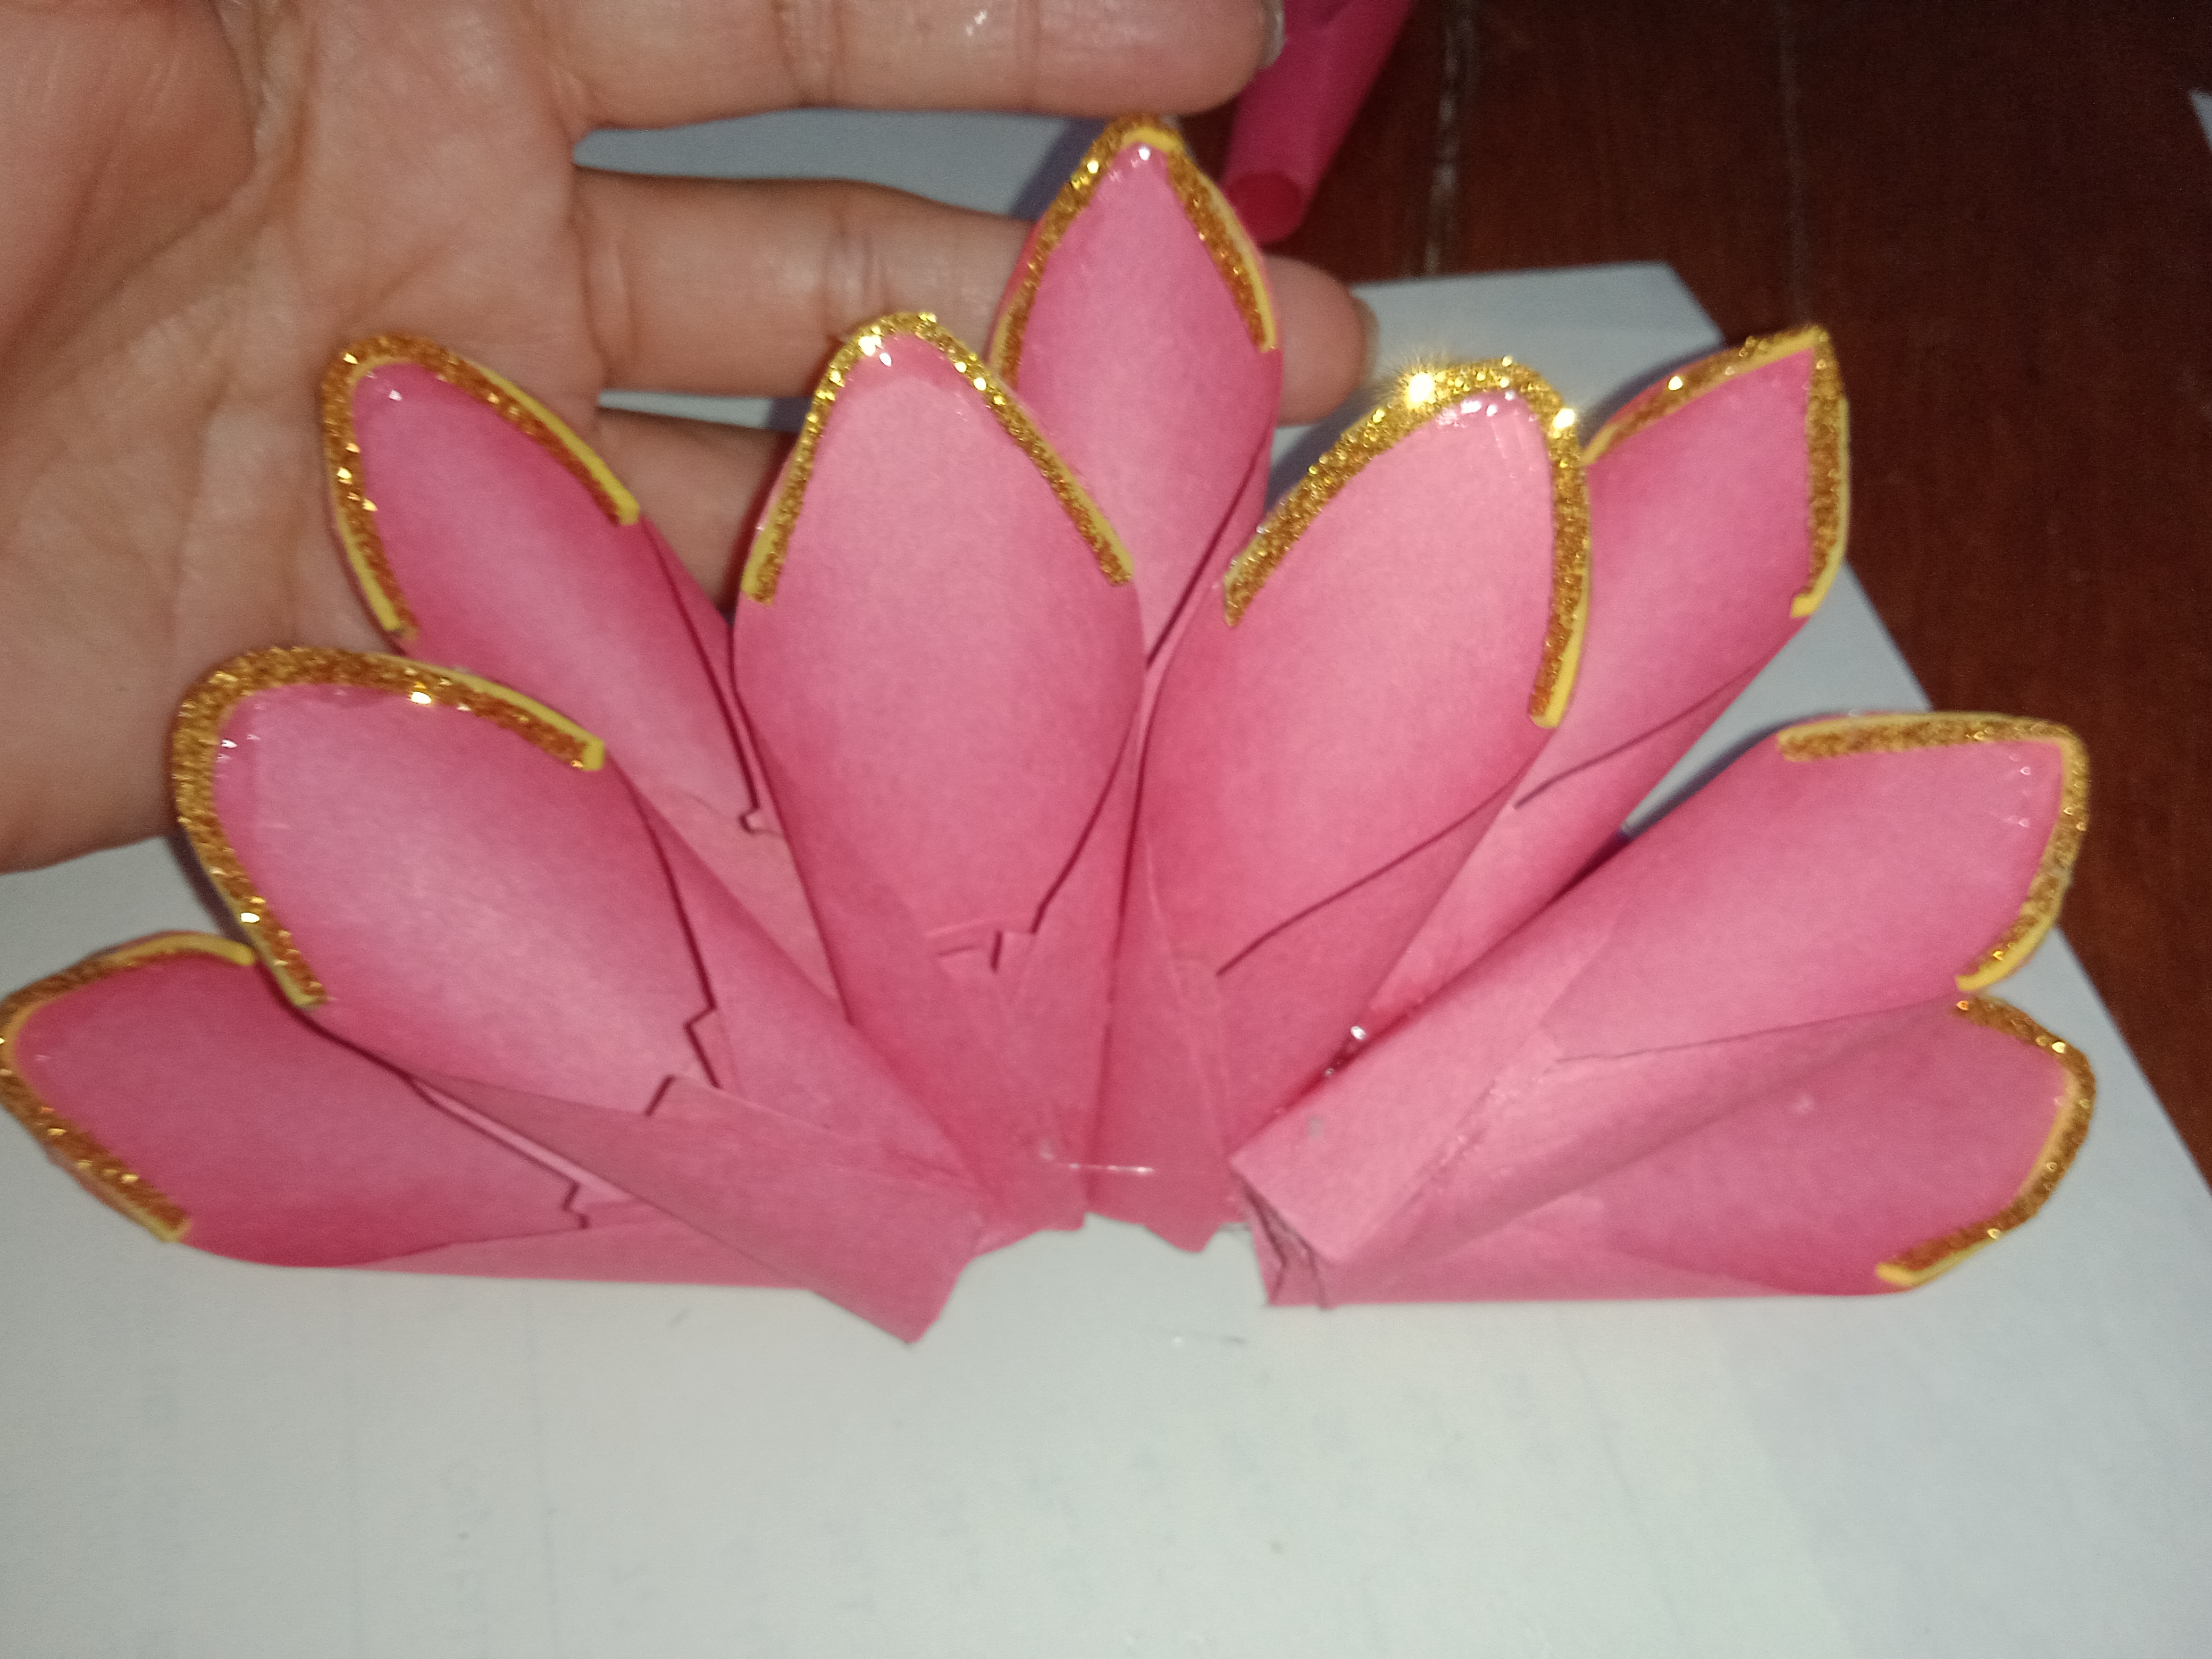
Cuando todos los pétalos estén listos cortar el CD a la mitad y pegar los pétalos como se indica en la fotografía tapando que no se vea parte del CD.
 |  |  |
|---|
Paso # 7:
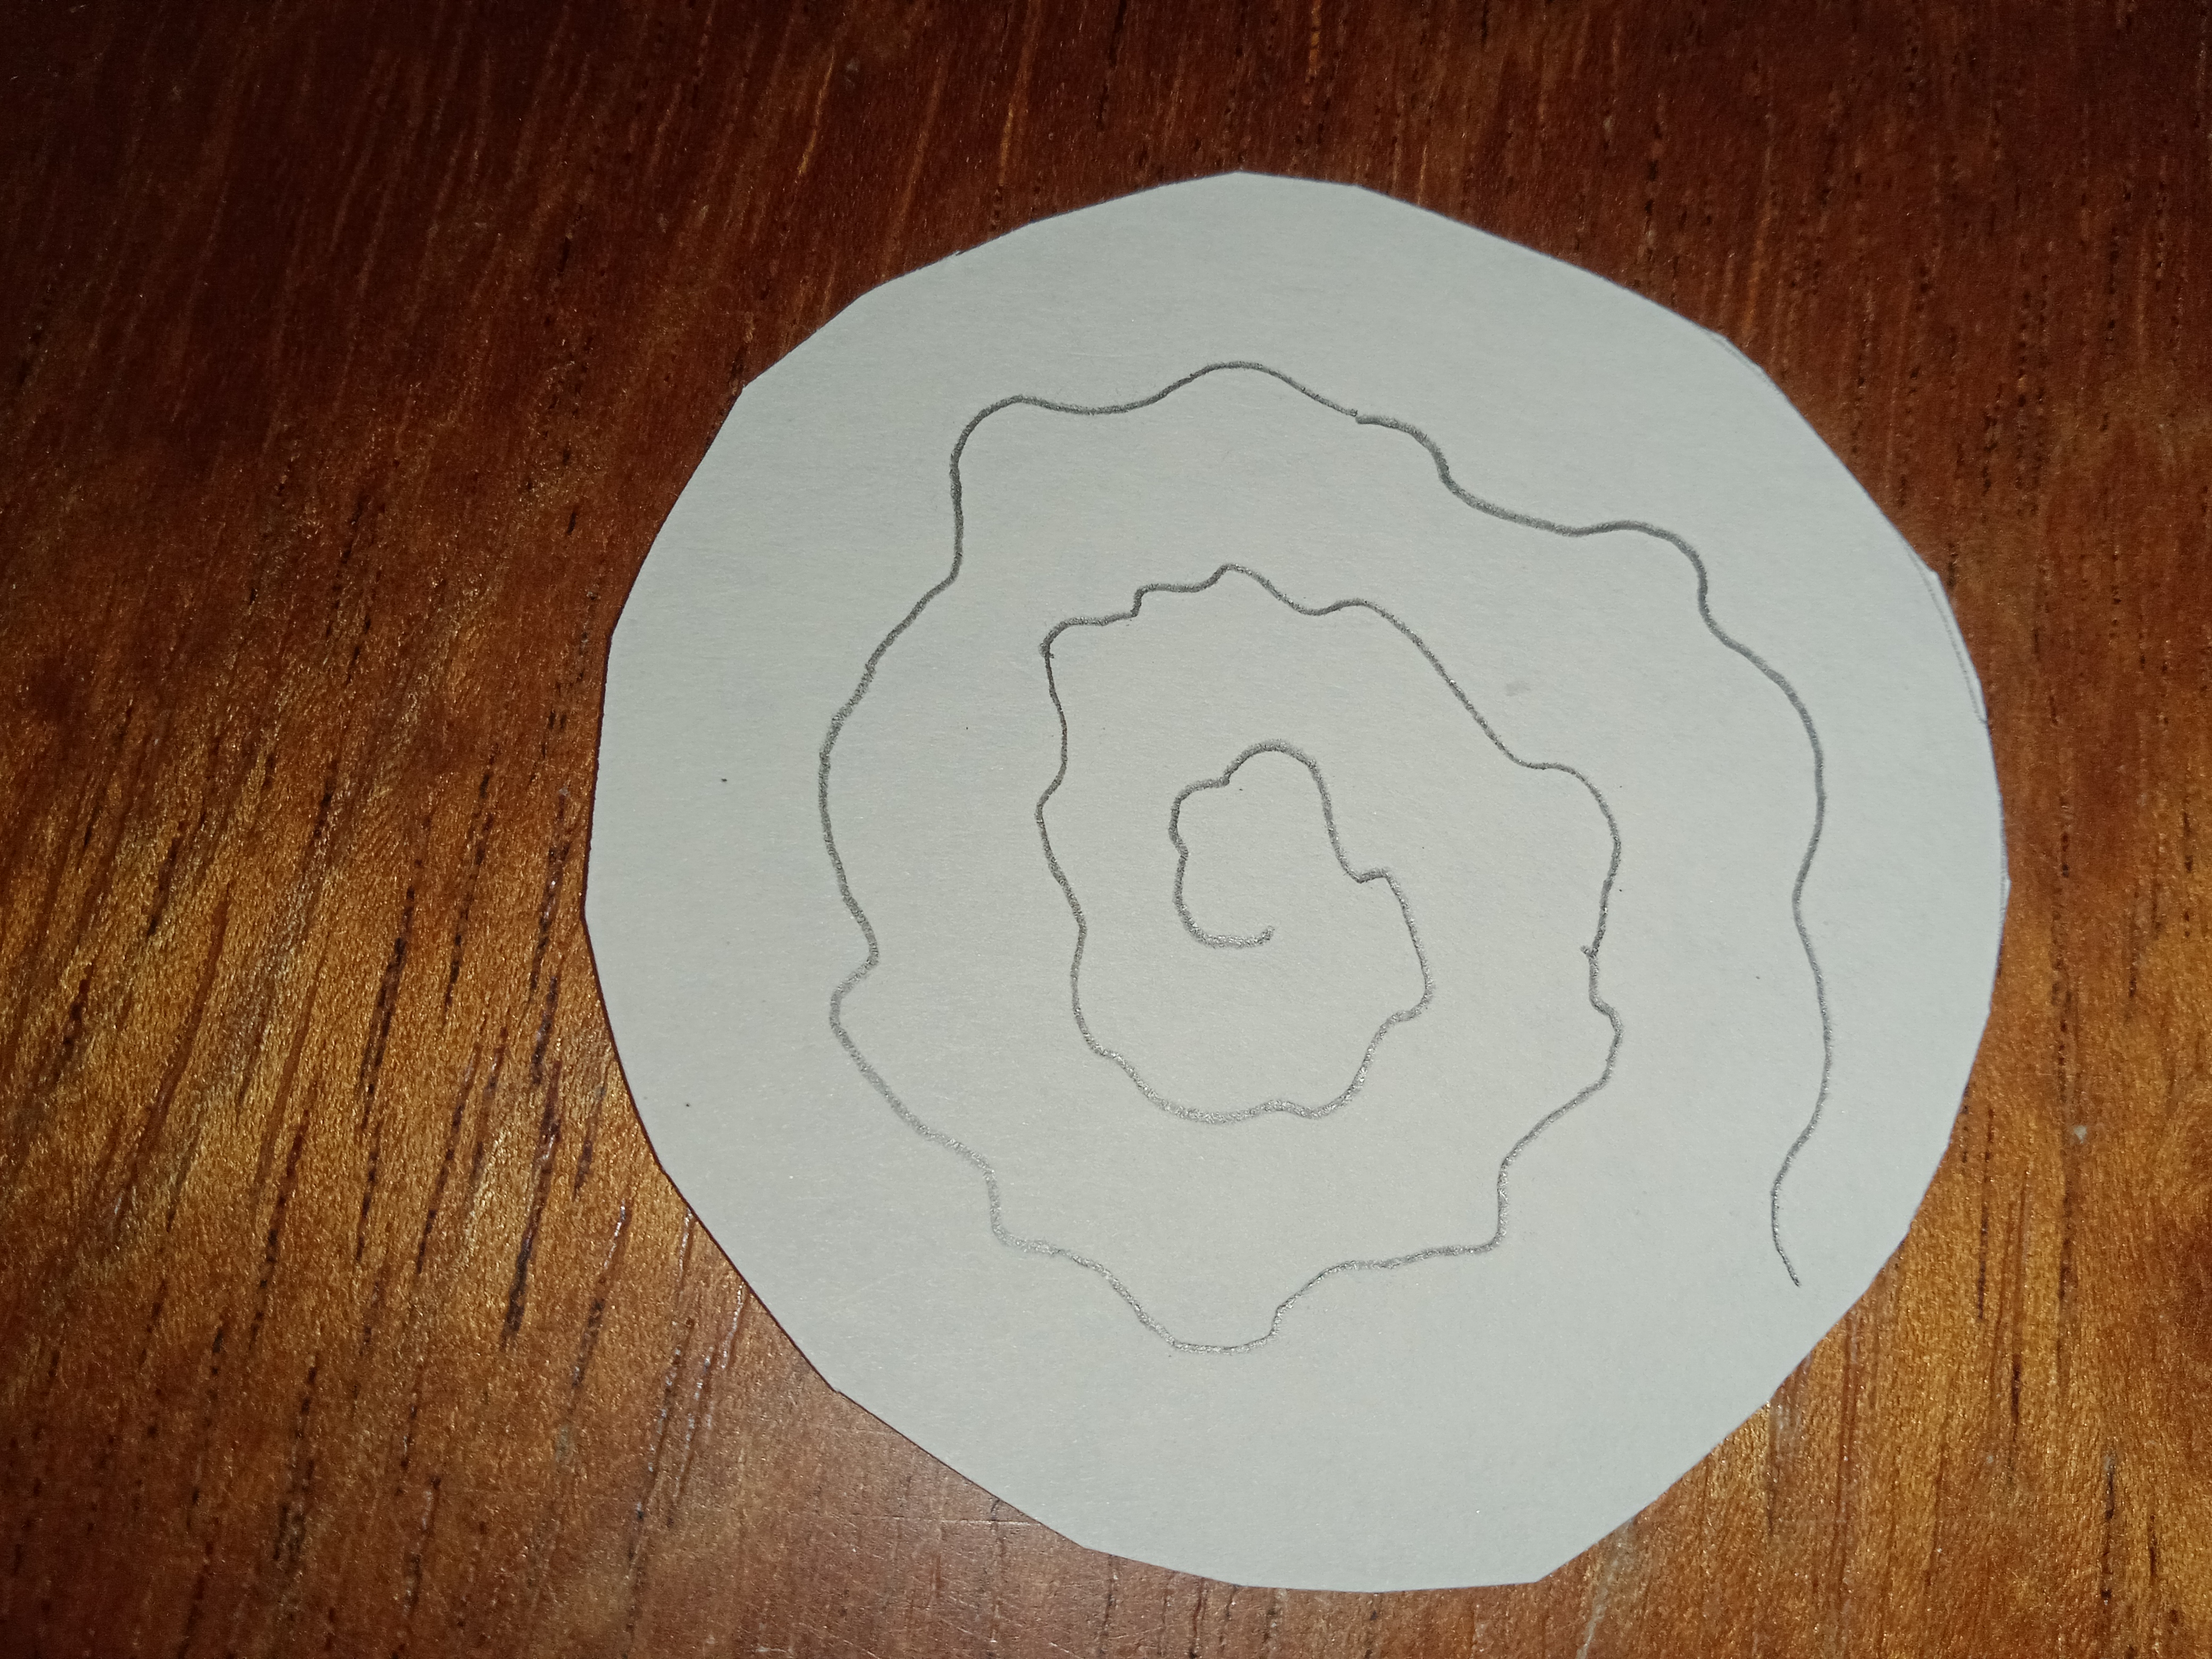
Hacer un circulo con sinuosidad y recortar para formar una flor pequeña enrollándola para ello nos ayudamos con un lápiz para iniciar el rollito y fijar con pega blanca o silicón. Reservar.
 |  |  |
|---|
Paso # 8:
Hacer un acordeón básico con el papel restante de la hoja de reciclaje y pegarlo para que sea la base de nuestra pequeña flor.
 |  |  |
|---|
Paso # 9:
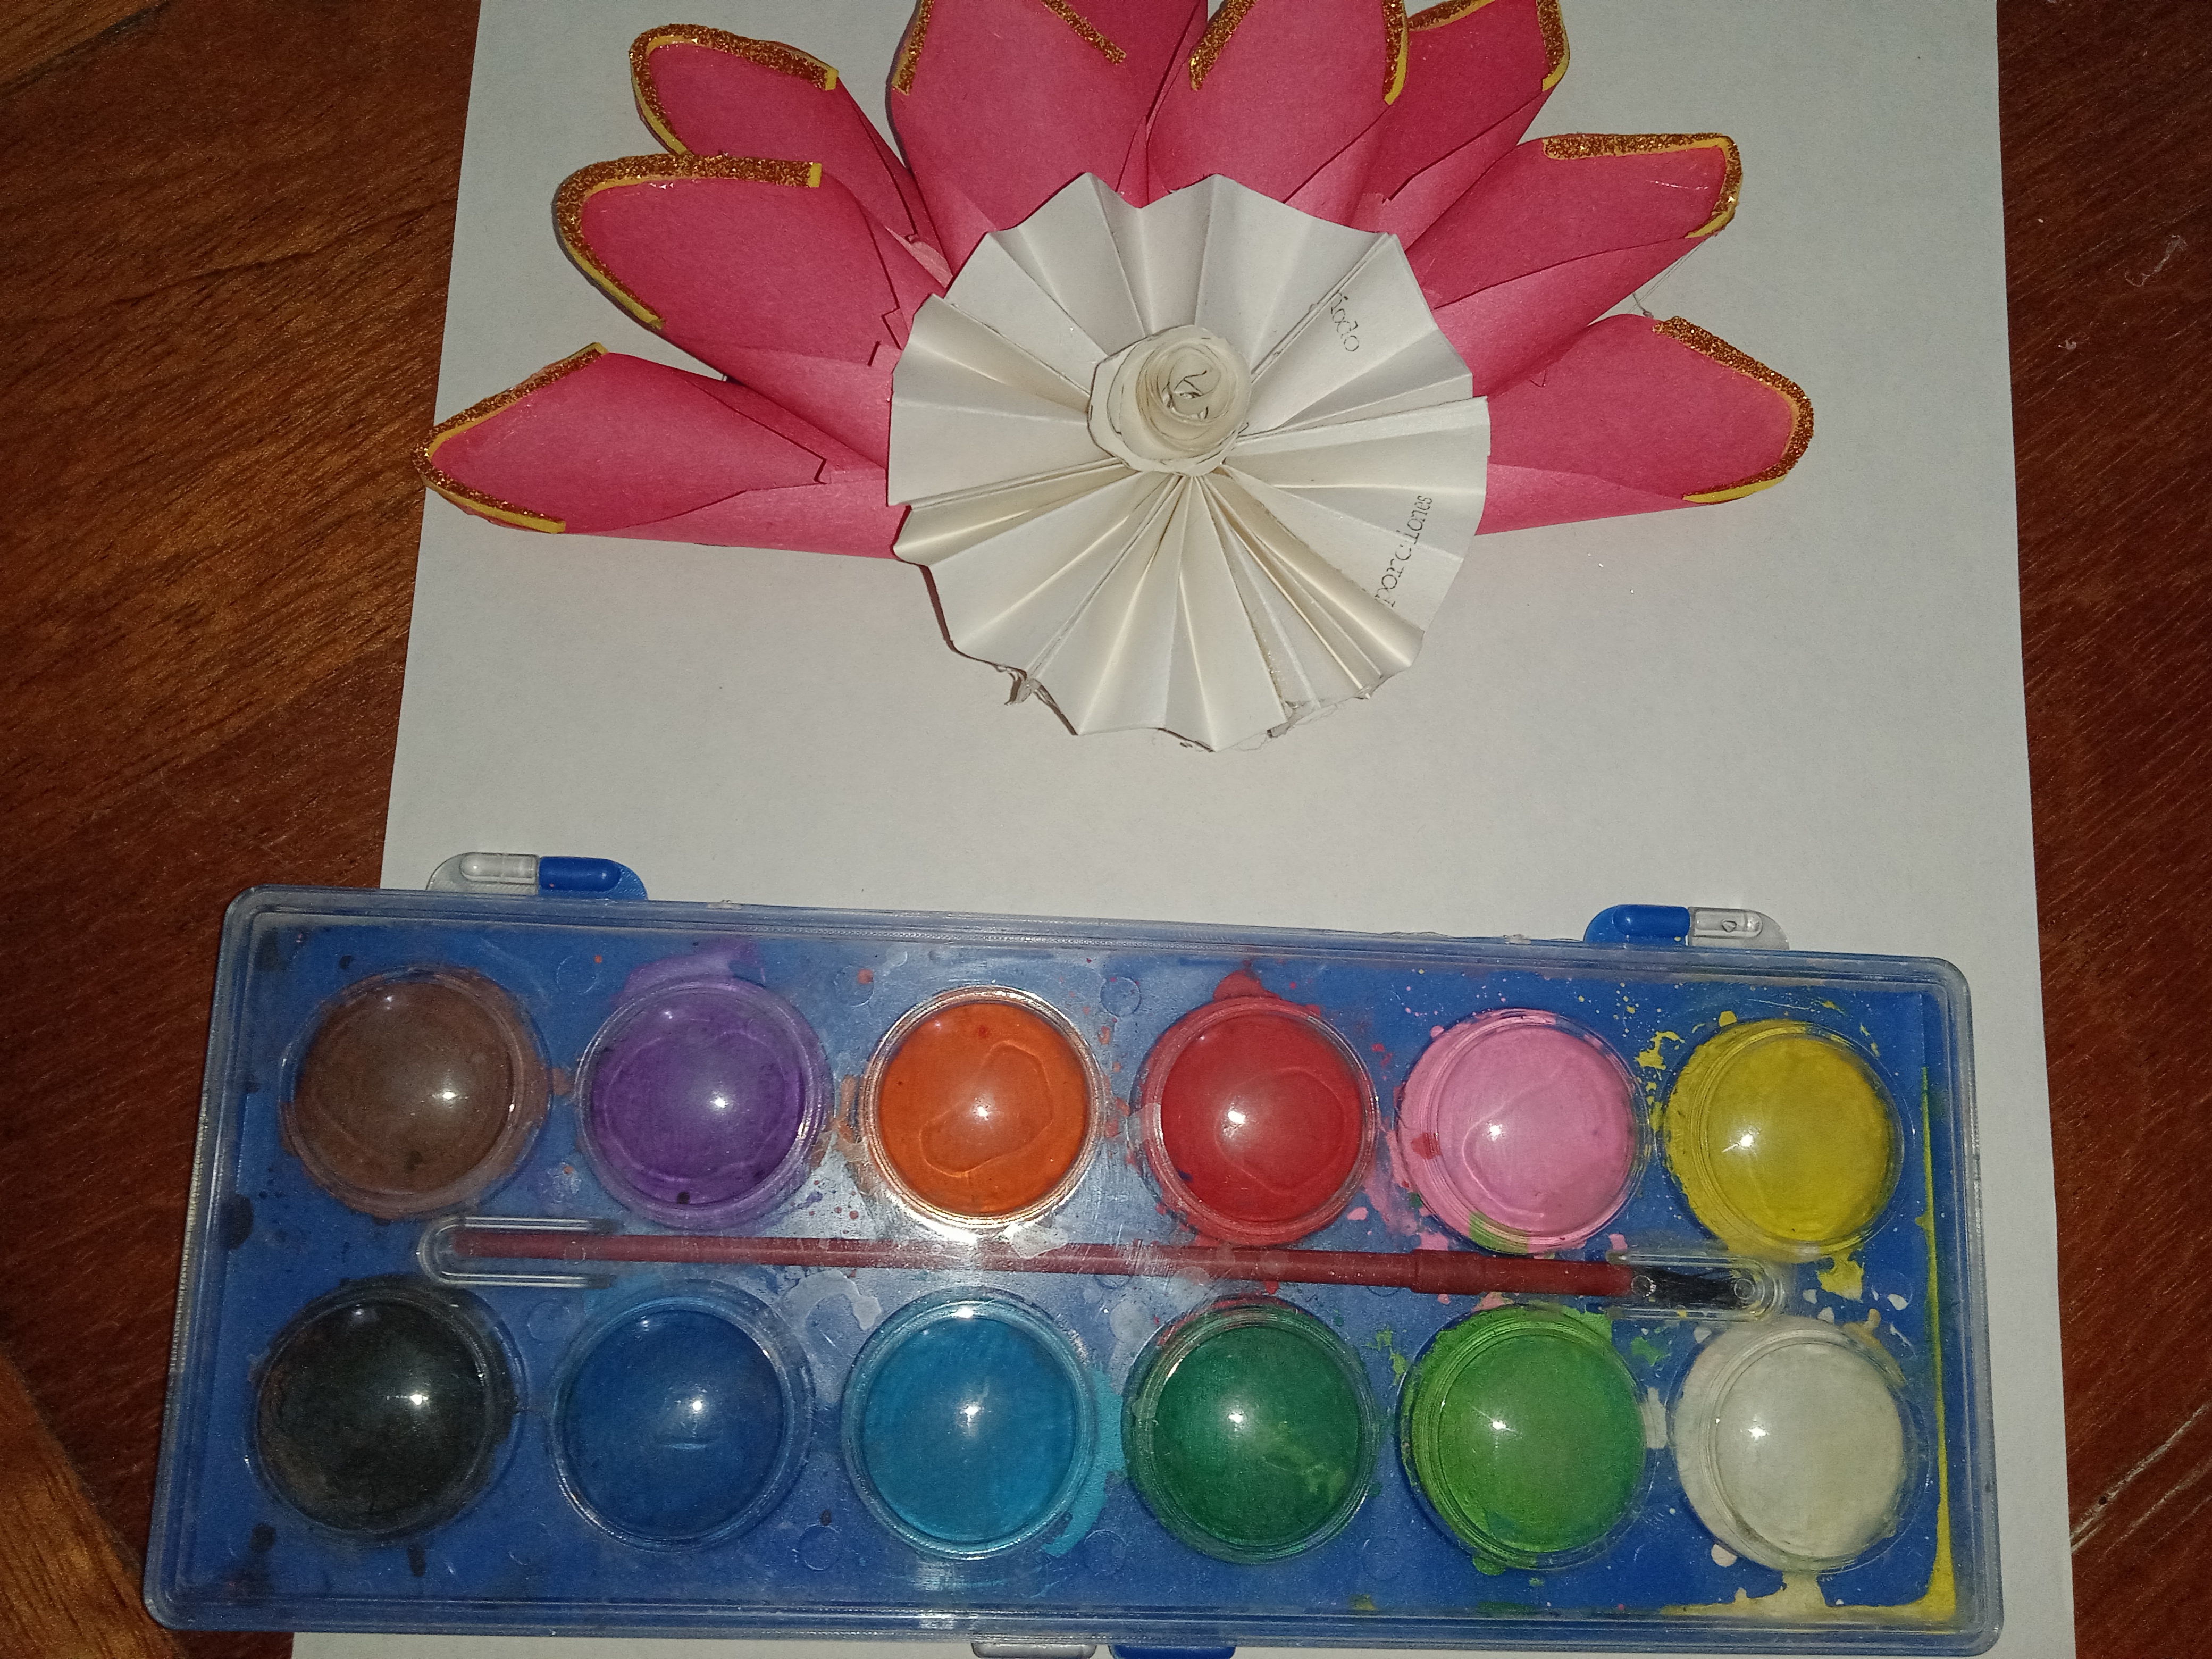
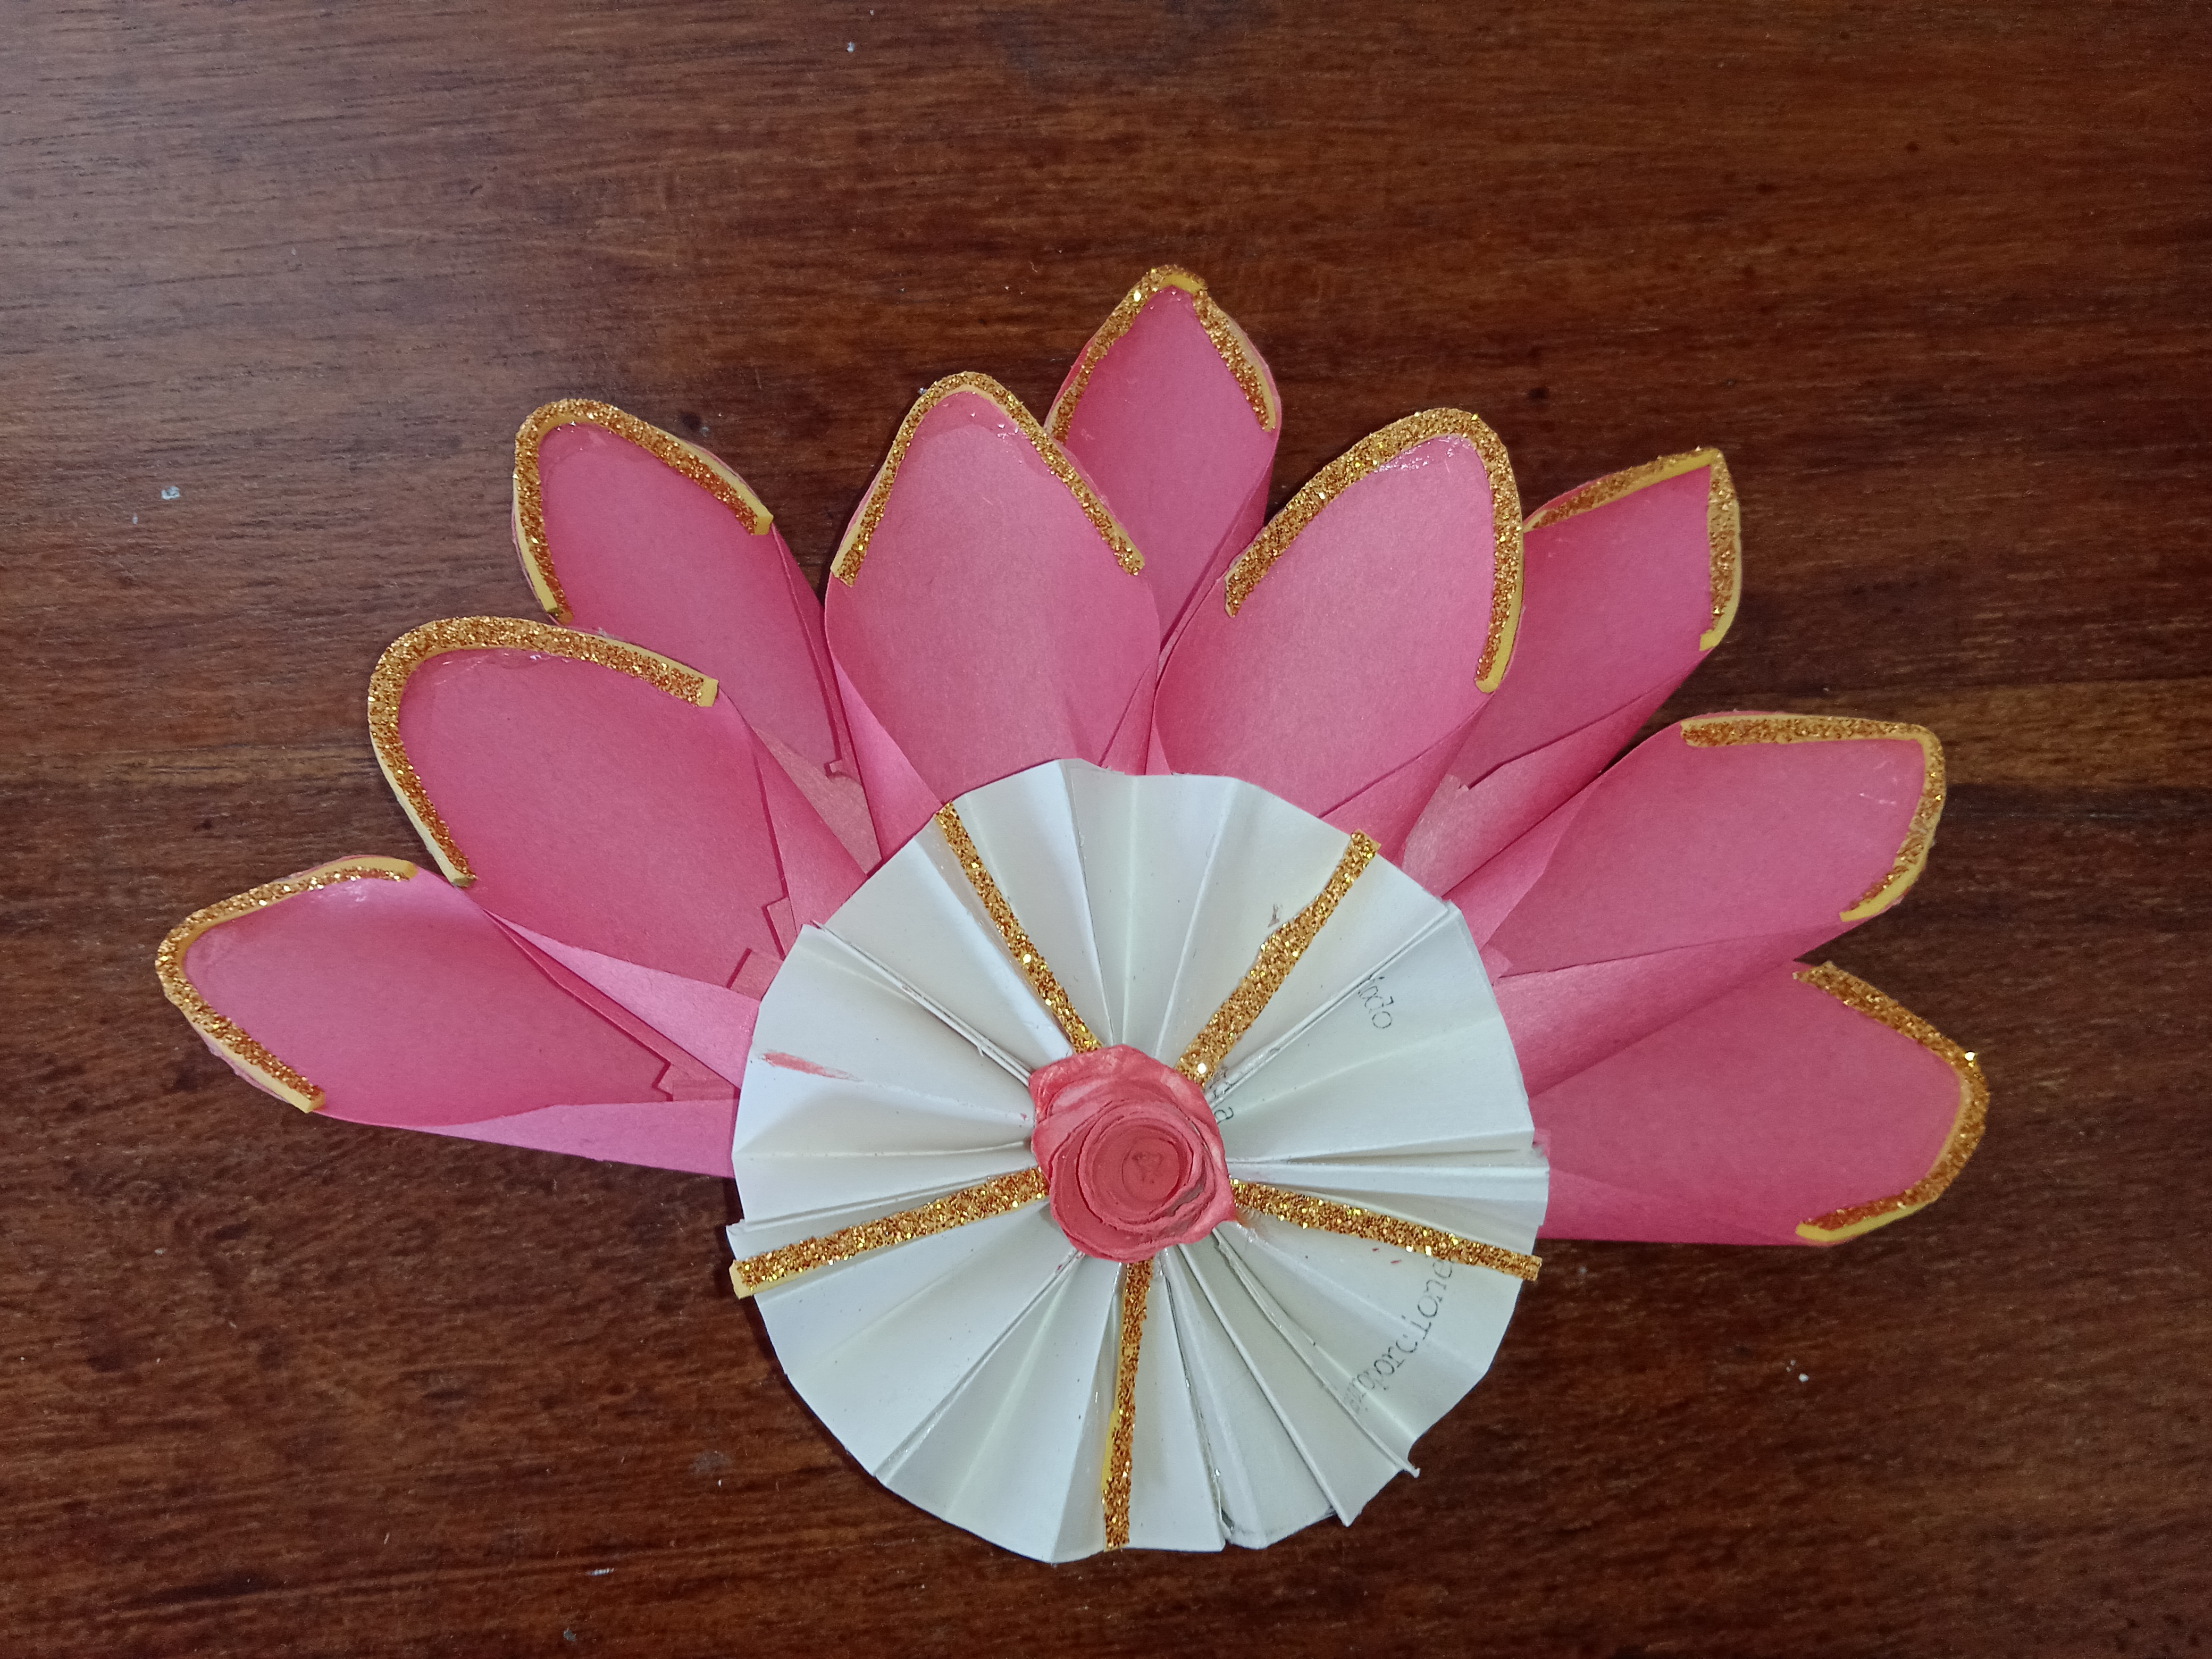
Pegar en el centro del CD sobre los pétalos anteriores el acordeón ya pegado y encima la flor, dar toque de color con acuarela o puedes sustituir con una flor en papel de otro color.
 |  |
|---|
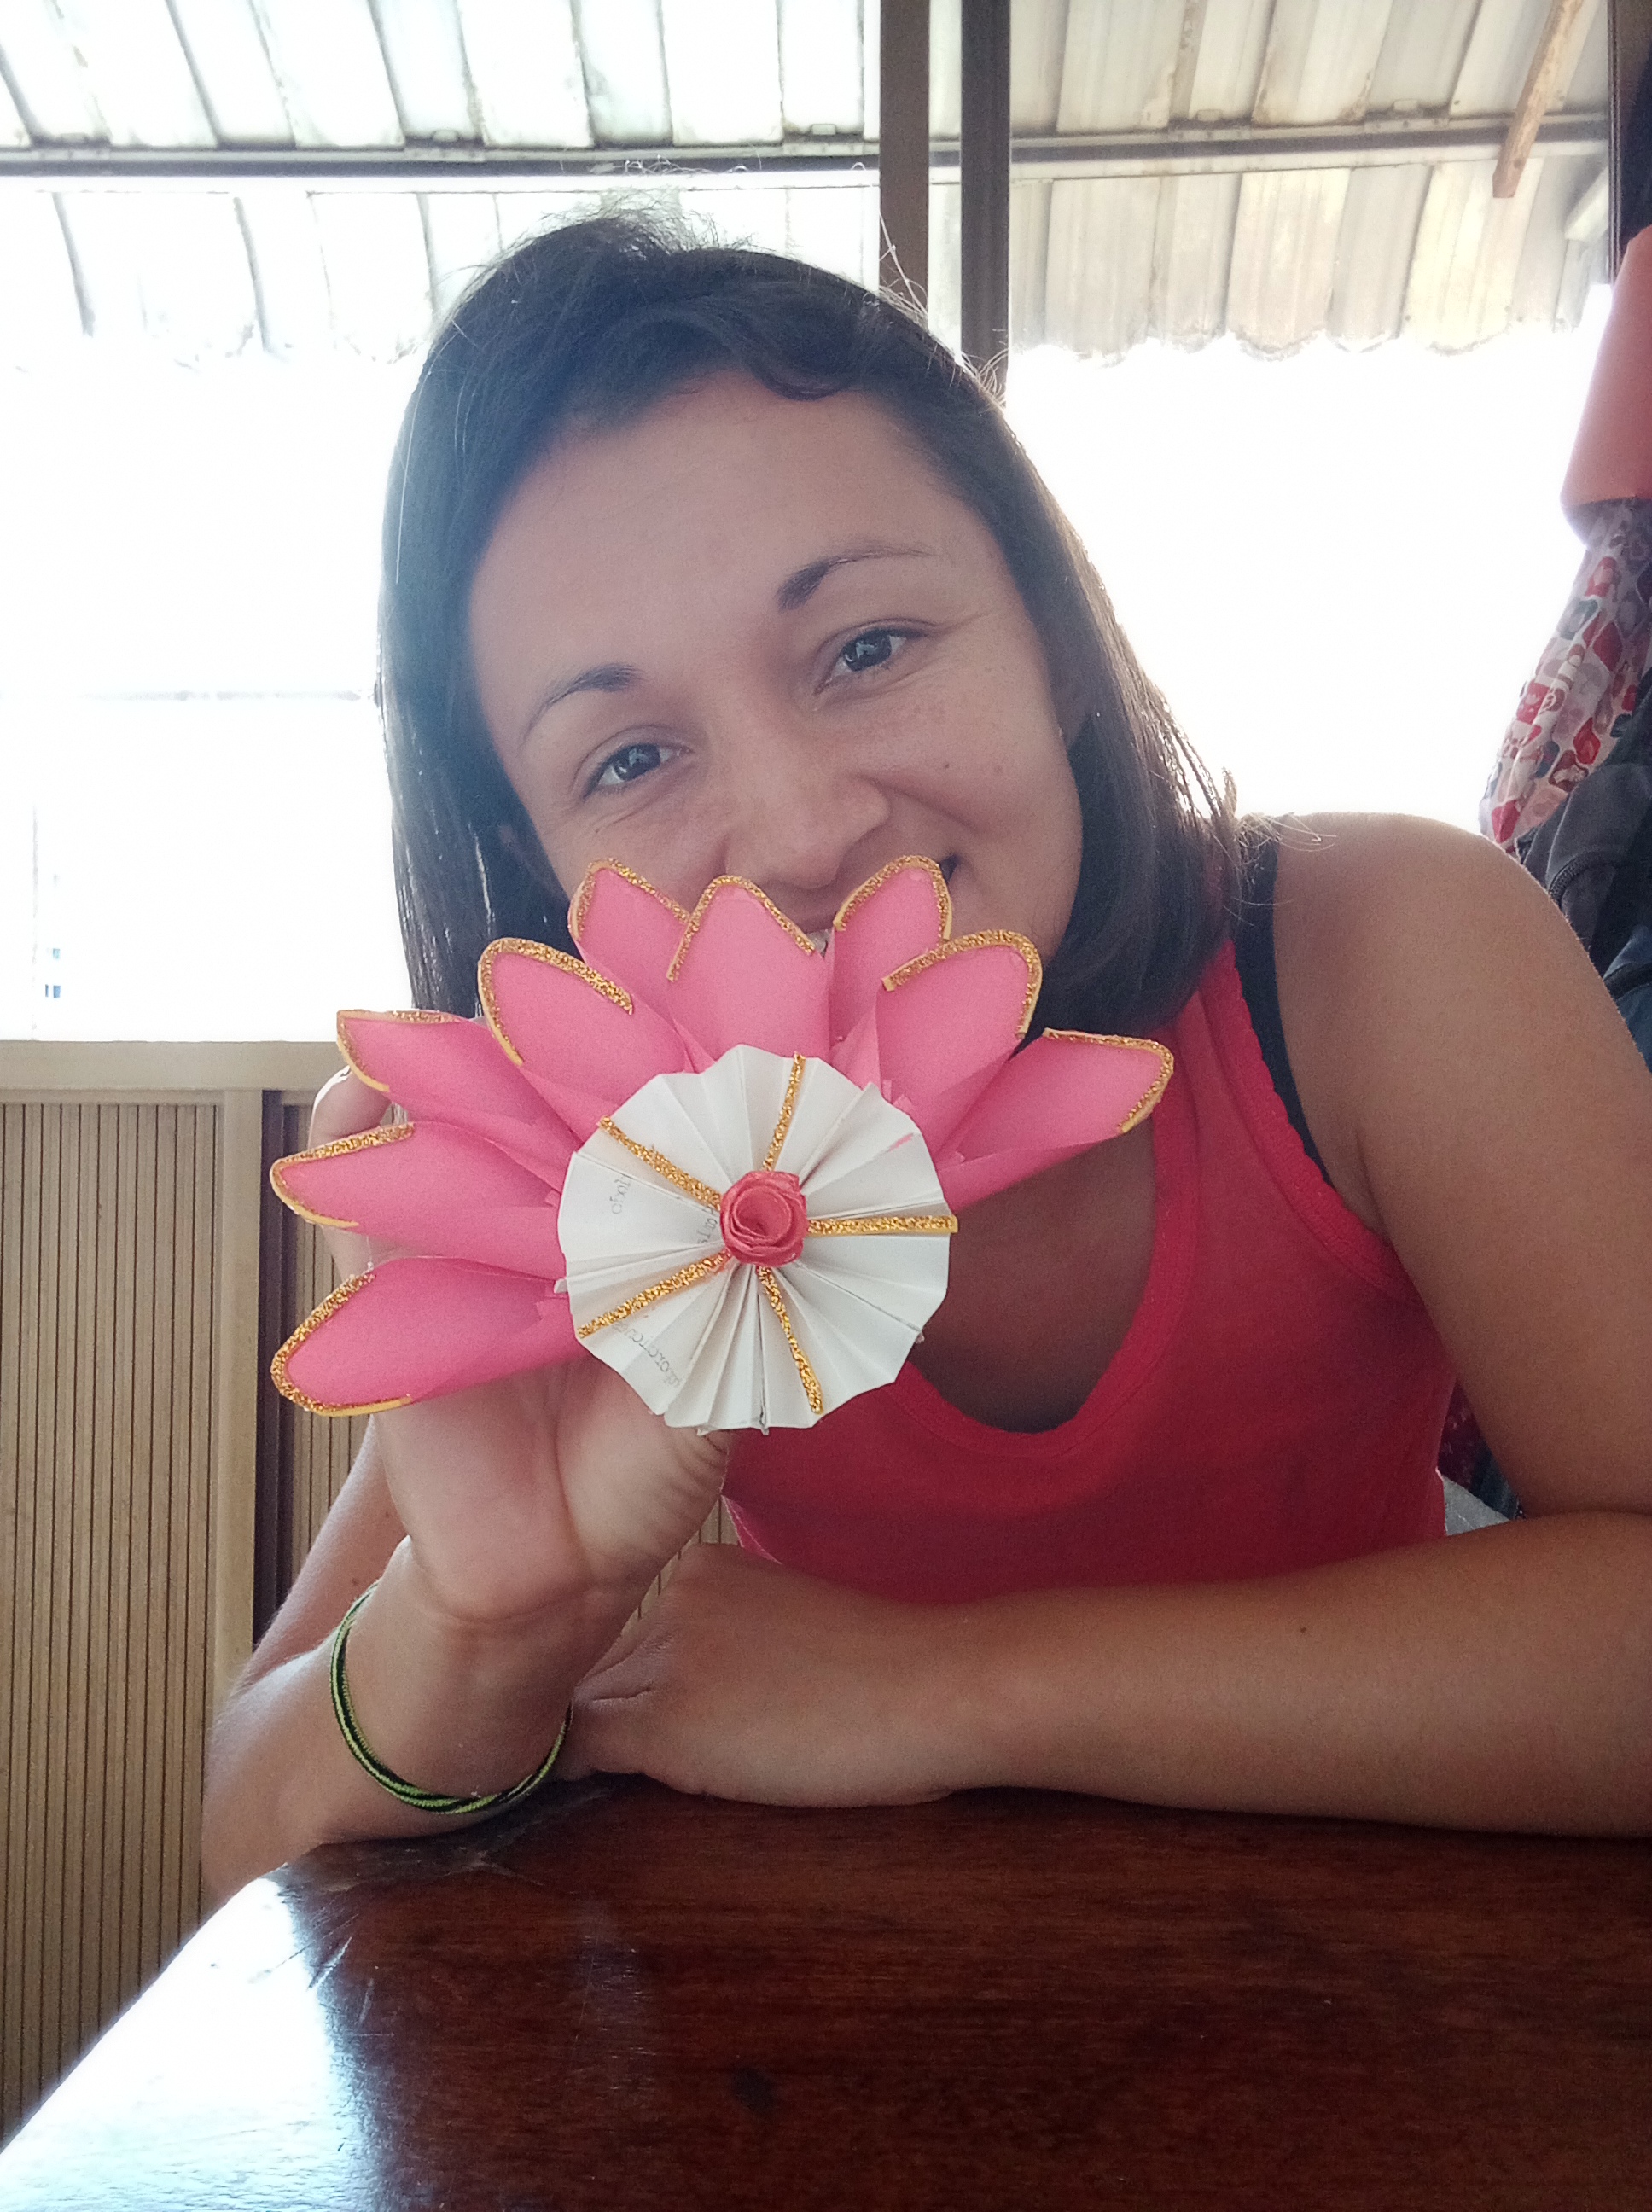
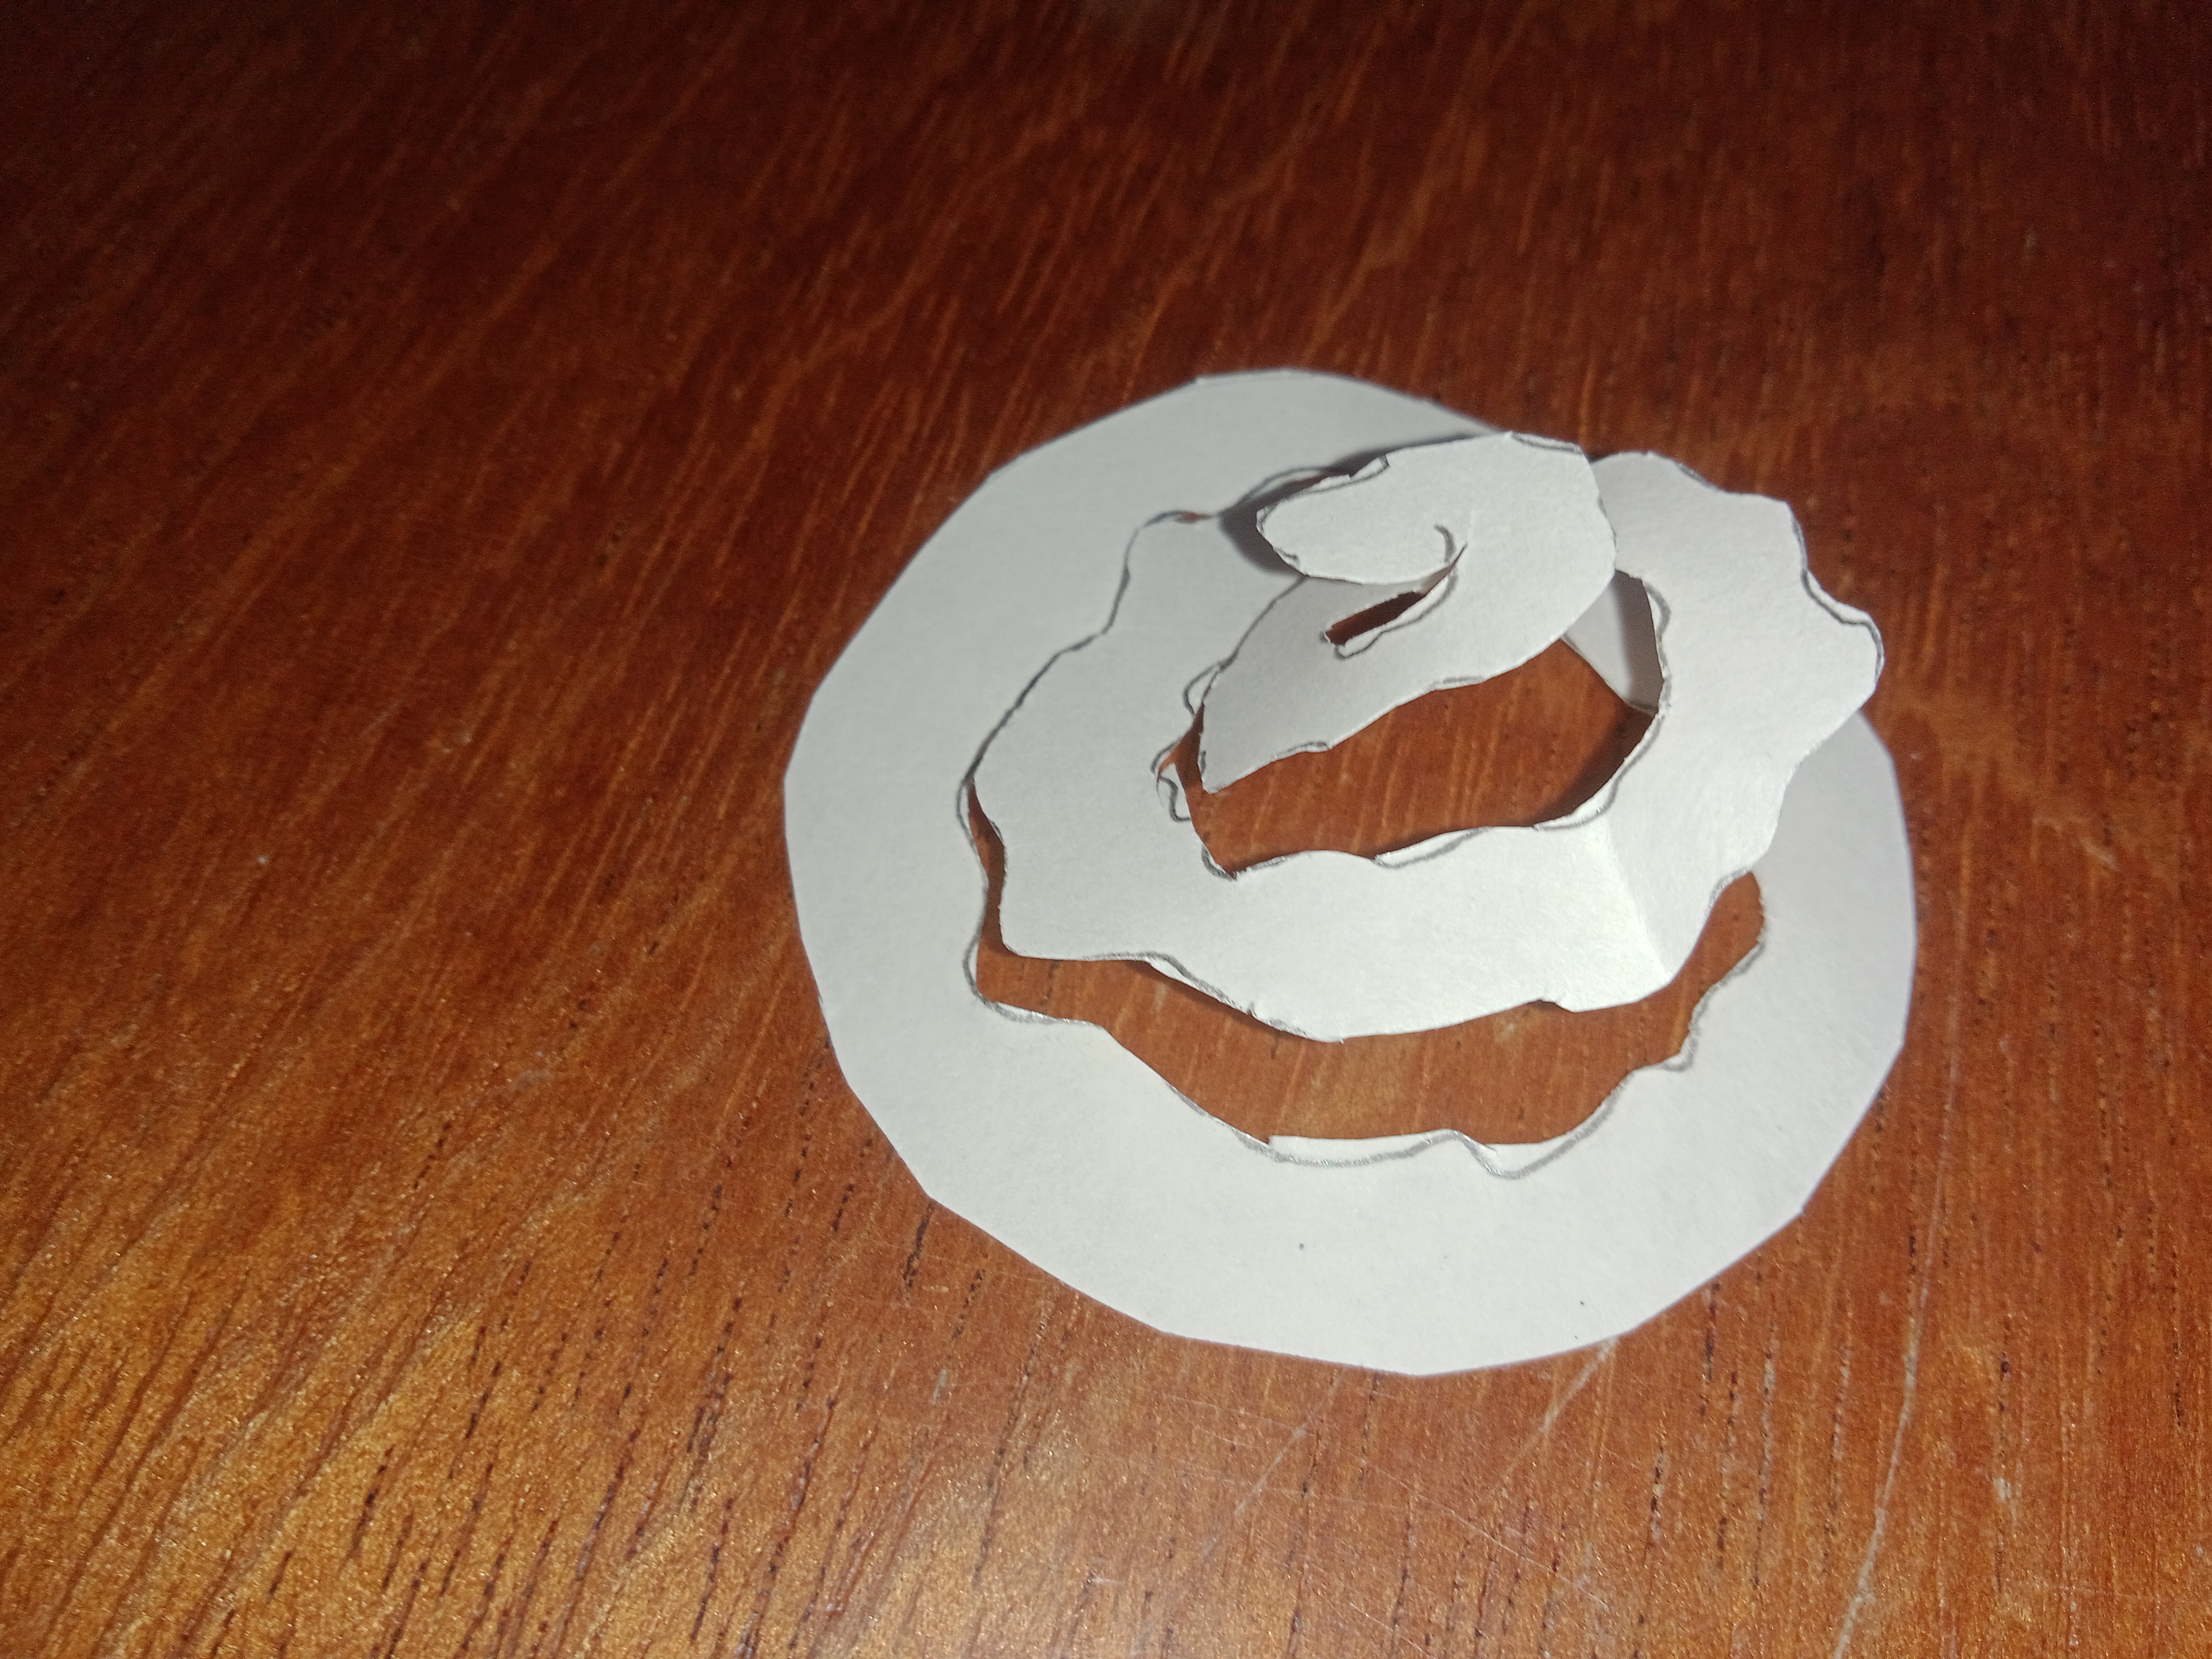
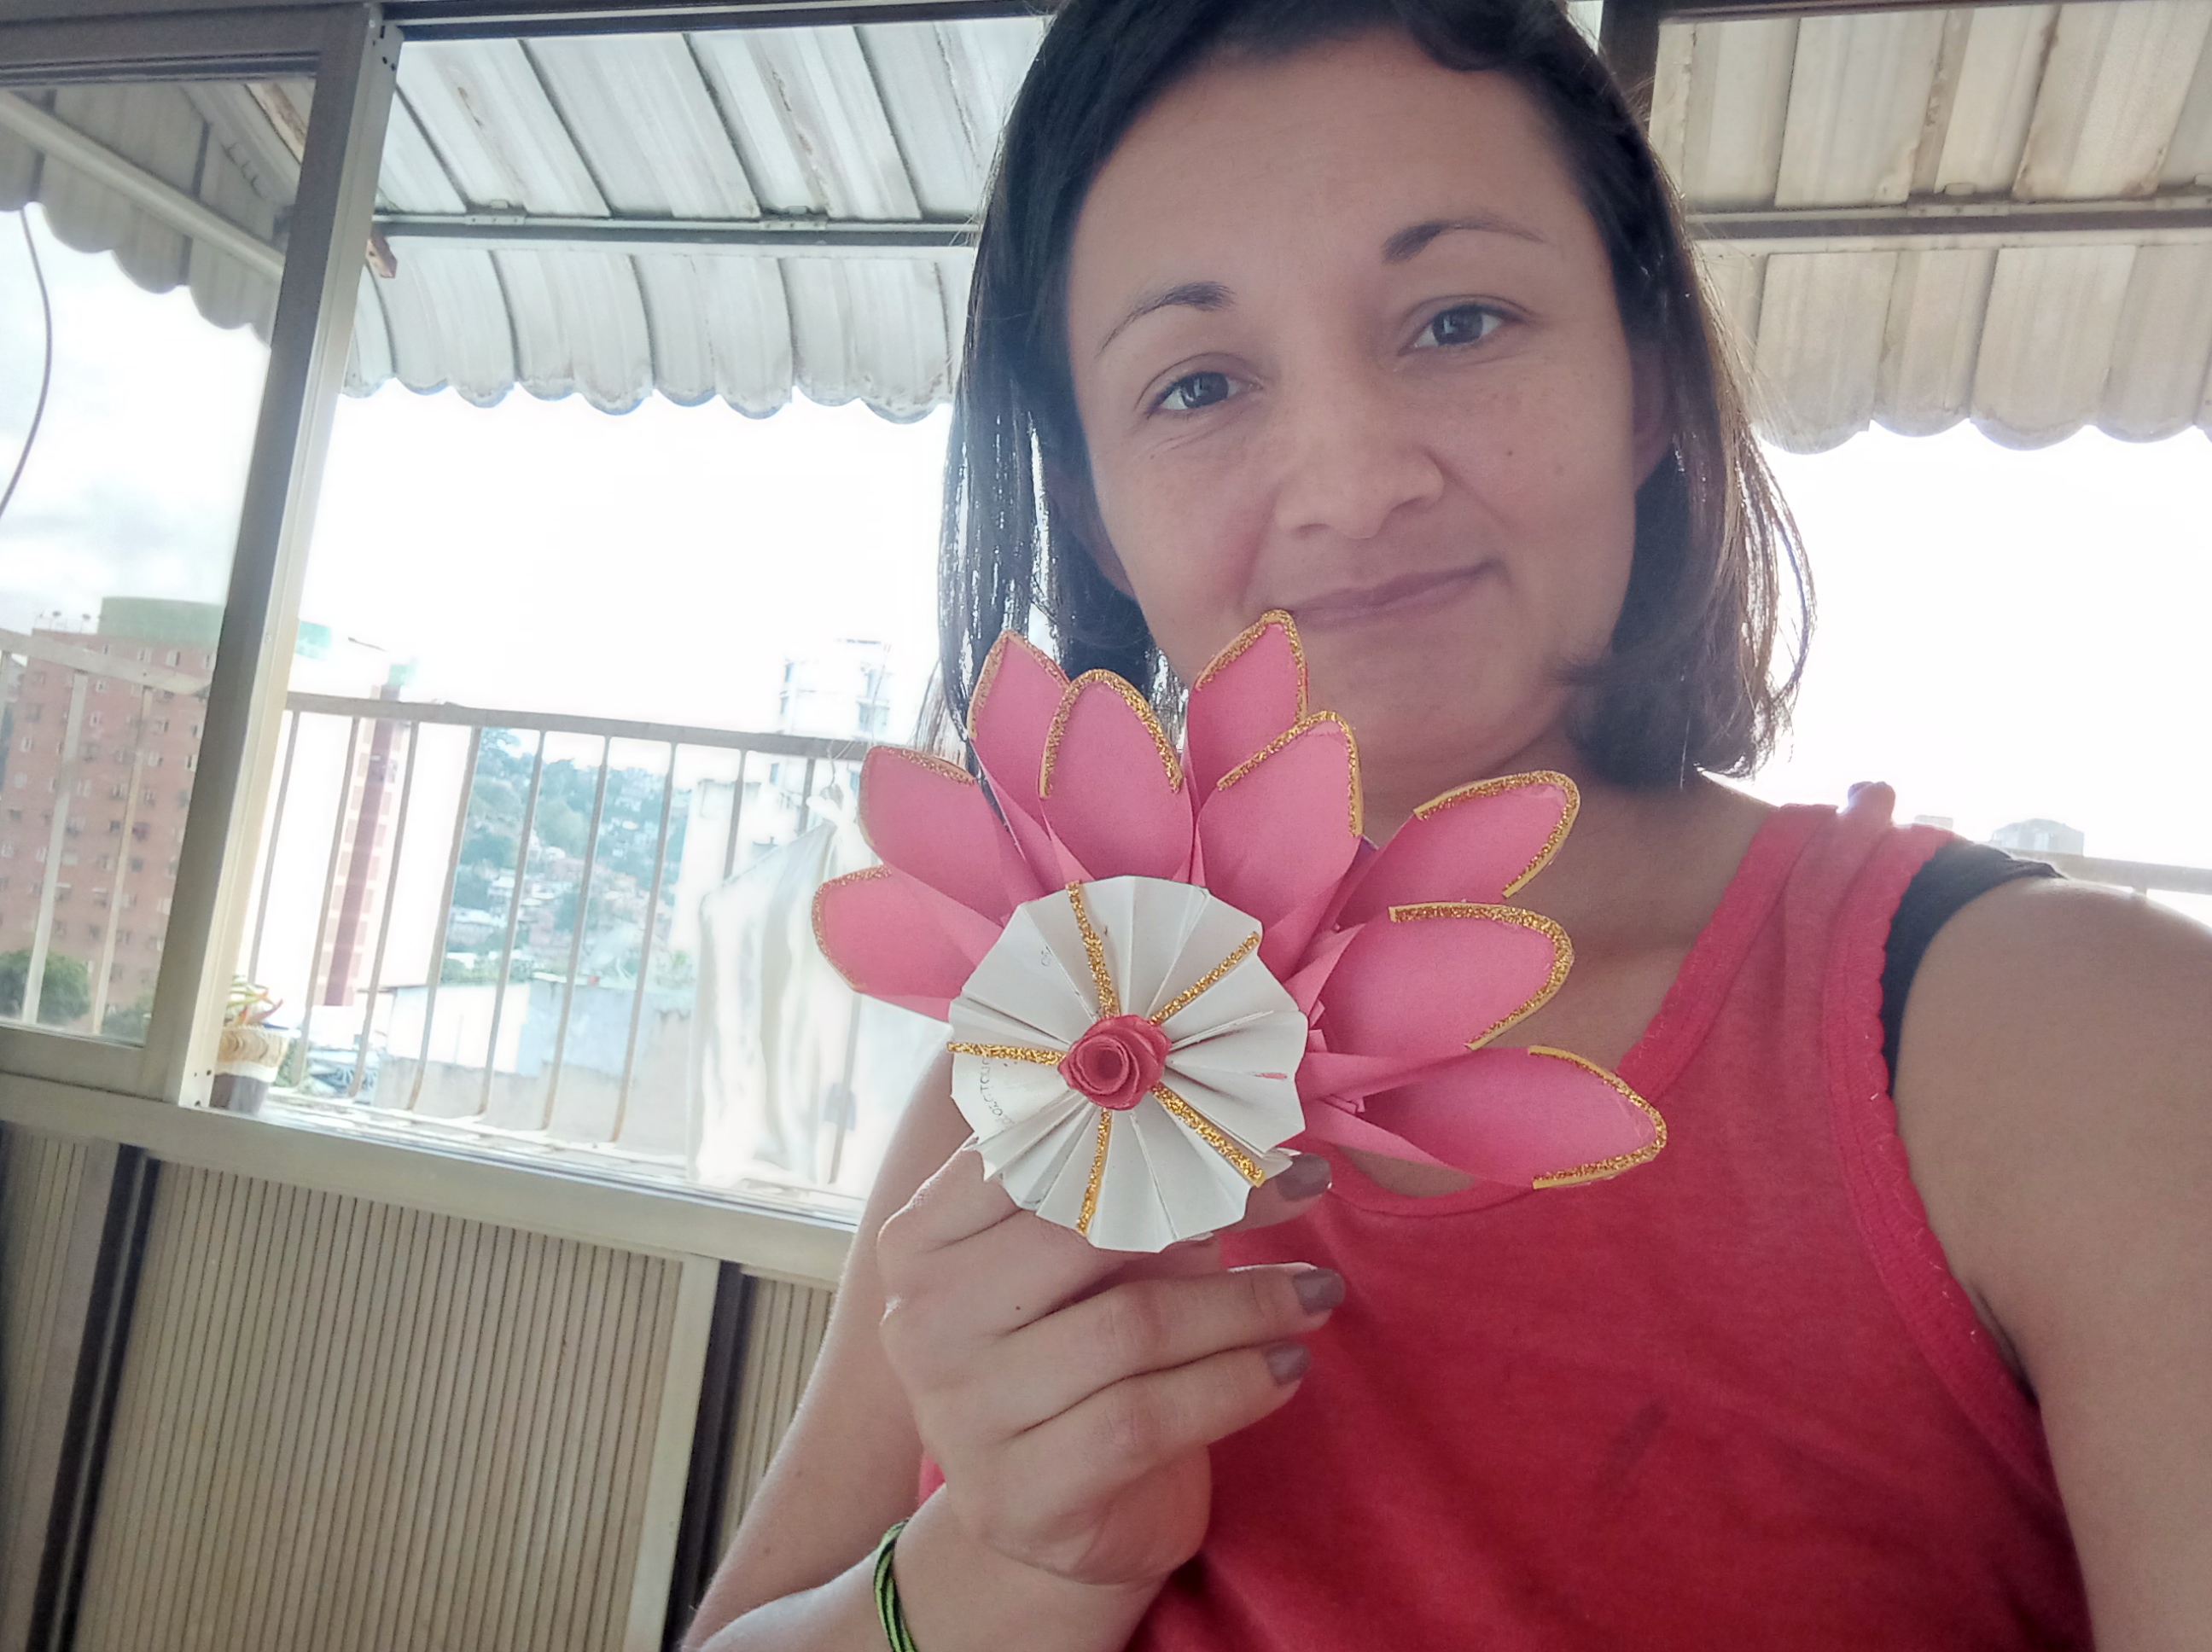
Listo, asi nos queda nuestro detalle, particularmente lo voy a emplear para decorar una bolsa de regalo para la maestra de mi hijo Mathias como agradecimiento a su cariño y comprensión.
Sé que parecen muchos pasos, pero, si se fijan son muy sencillos y fáciles de realizar, es cuestión de llevarlos a cabo y en poco tiempo van a tener un aplique muy versátil, se puede usar en carteleras, poniéndole un imán puede ser un pin para decorar la nevera, puede ser usado para decorar una carpeta o portafolio. En fin, la versatilidad es bienvenida para usar este aplique.
Espero les haya gustado y les agradezco mucho su tiempo y comentarios. Feliz día. Saludos.
English
Hello, greetings. Good morning, my name is Maylin Chirinos, I am Venezuelan and this is my first publication for this beautiful community, I am a little nervous but willing to receive your guidance to improve.
Today I have prepared a detail that certainly for me is multifunctional, this can be used for other works as an applique or detail of color that certainly will highlight more any craft. It is practical, it reuses useful material, it looks very nice and it is very easy to make.
Now, let's get to work. I hope you like it.
Materials:
| Quantity | Material |
|---|---|
| 1 | Silicone |
| 1 | sheet of construction paper. |
| 1 | white or recycled sheet |
| 1 | Scissors |
| 1 | Graphite pencil |
| 1 | CD |
| 12 | cut-outs of foami or frosted Eva rubber. |
Optional: watercolor paints.
Procedures:
Step # 1:
Fold the sheet of construction paper in half vertically and cut out.
Step #2:
Again, fold in half horizontally and cut out, you should be left with 4 quadrants in total.
Each of the quadrants or rectangles should be folded in three equal parts and cut them all to the same size. You will end up with 12 rectangular pieces.
| |
|---|
Step 3:
With the pencil make the shape of a semi-triangle on one of its sides, as shown in the picture and cut out all the rectangles in this shape.
| |
|---|
Step #4:
Make eva rubber cutouts approximately 3 millimeters wide and 5 centimeters long. Place silicone on the ends and glue the foami cutouts to give shine to our ornament.
| |
|---|
Step #5:
Once they are ready, make a fold towards the center and give the petal shape of a calla flower. Place silicone to glue the tips.
| | |
|---|
Step # 6:
When all the petals are ready cut the CD in half and glue the petals as shown in the picture covering that part of the CD is not visible.
| | |
|---|
Step # 7:
Make a circle with sinuosity and cut it out to form a small flower by rolling it up with a pencil to start the roll and fix it with white glue or silicone. Set aside.
| | |
|---|
Step # 8:
Make a basic accordion with the remaining paper from the recycling sheet and glue it to be the base of our small flower.
| | |
|---|
Step #9:
Glue in the center of the CD on the previous petals the accordion already glued and on top of the flower, give a touch of color with watercolor or you can substitute with a flower on paper of another color.
| |
|---|
Ready, this is how we have our detail, particularly I am going to use it to decorate a gift bag for my son Mathias' teacher as a thank you for her love and understanding.
I know it seems like a lot of steps, but, if you look they are very simple and easy to do, it is a matter of carrying them out and in a short time you will have a very versatile applique, it can be used in billboards, putting a magnet on it, it can be a pin to decorate the fridge, it can be used to decorate a folder or portfolio. In short, versatility is welcome to use this applique.
I hope you liked it and thank you very much for your time and comments. Have a nice day. Greetings.

The rewards earned on this comment will go directly to the people sharing the post on Twitter as long as they are registered with @poshtoken. Sign up at https://hiveposh.com.
Gracias por el apoyo 😃
Congratulations @maydelvalle! You have completed the following achievement on the Hive blockchain and have been rewarded with new badge(s):
Your next target is to reach 200 upvotes.
You can view your badges on your board and compare yourself to others in the Ranking
If you no longer want to receive notifications, reply to this comment with the word
STOPTo support your work, I also upvoted your post!
Check out the last post from @hivebuzz:
Gracias por el apoyo amigos. Feliz día
Hello @maydelvalle, I am new in this Community too and I am still nervous too, infact a lot of us are nervous but thanks to the people I met in the discord group, I became a bit relaxed. They're really friendly in this Community and you would love them. I advise that you join the discord group if you're not yet in it.
This is the community discord group link https://discord.gg/3tgVDsdY.
You can join and ask whatever question you like.
Your craft is nice, it's a good decoration. Thanks for sharing
Hola, muchas gracias por ser tan receptiva conmigo. Los nuevos comienzos siempre dan un poco de nervios y me alegro que hayas encontrado un grupo que te apoyo. Yo espero poder integrarme.
Gracias por tu apoyo y linda visita. Muchas gracias por leerme 🌷🤗
¡sin duda un lindo detalle para decorar, me gusto como explicas el paso a paso, yo tengo una colección de CD aquí, voy a tener que buscar, hacerles uso jejeje, gracias por compartirlo amiga, una gran creatividad, saludos!
Muchas gracias por tus palabras amiga. Siempre que puedo me hago una manualidad para aprovechar la colección de cd que hay por estos lados jajaja. Espero ver qué te animas a preparar jajaja. Bendiciones 🙏
pues de que es multifuncional, es multifuncional. Le he visto varios usos con solo ver la foto de portada, me parece interesante. A ver, como un topper podría funcionar, si le coloca un palillo de altura; con los mismos palillos podria servir como arreglo para un cotillón o un arreglo festivo similar. Incluso se podría colocar en alguna esquina de un arreglo mucho más grande.
Una genial idea, además de que está usando materiales que todos tenemos en casa.
Me has ampliado gratamente la forma para usar este proyecto en muchos más. La verdad como un Topper debe verse hermoso. Y decorando una cartelera escolar también. De verdad que si es multifuncional. Muchas gracias por tu bienvenida y apreciación. Un placer compartir con ustedes 😊.
Bendiciones 🙏
Hola @maydelvalle !
Bienvenida a la comunidad... excelente forma de estrenarte. Me encantó este multifuncional yo lo pondría sobre una caja o bolsa de regalo, sería la decoración perfecta. Gracias por compartir tu técnica y espero ver más de tus creaciones. Bienvenida!
🎆🎇🎉🎊🌧️💐✨🌾🌱🌹🌙🌿🍃🥀⚡🌺☘️🍀🌈🌷⭐🪴🌵🌸🌟💮🌴🌳💫☀️💮☔🌲🌳🌍🌌🌠☄️🏵️🐝🌻🌼🍄🐞🦋💙☕💜🍍🎆🎇🎉🎊
!PIZZA
Hola, saludos 🤗.
Muchas gracias por tu cálida bienvenida. Estoy muy emocionada por participar, he visto muchos trabajos maravillosos y de muchas técnicas. Es un panorama muy amplio para crear.
Lo usaré como tú para decorar una bolsa de regalo.
Bendiciones 🙏 y gracias nuevamente por tu bienvenida 🌷
PIZZA Holders sent $PIZZA tips in this post's comments:
@chacald.dcymt(3/5) tipped @maydelvalle (x1)
You can now send $PIZZA tips in Discord via tip.cc!
Muchas gracias por el apoyo a mi publicación ☺️. Saludos