Saludos amigos de esta hermosa y creativa comunidad.👩🎨🥰

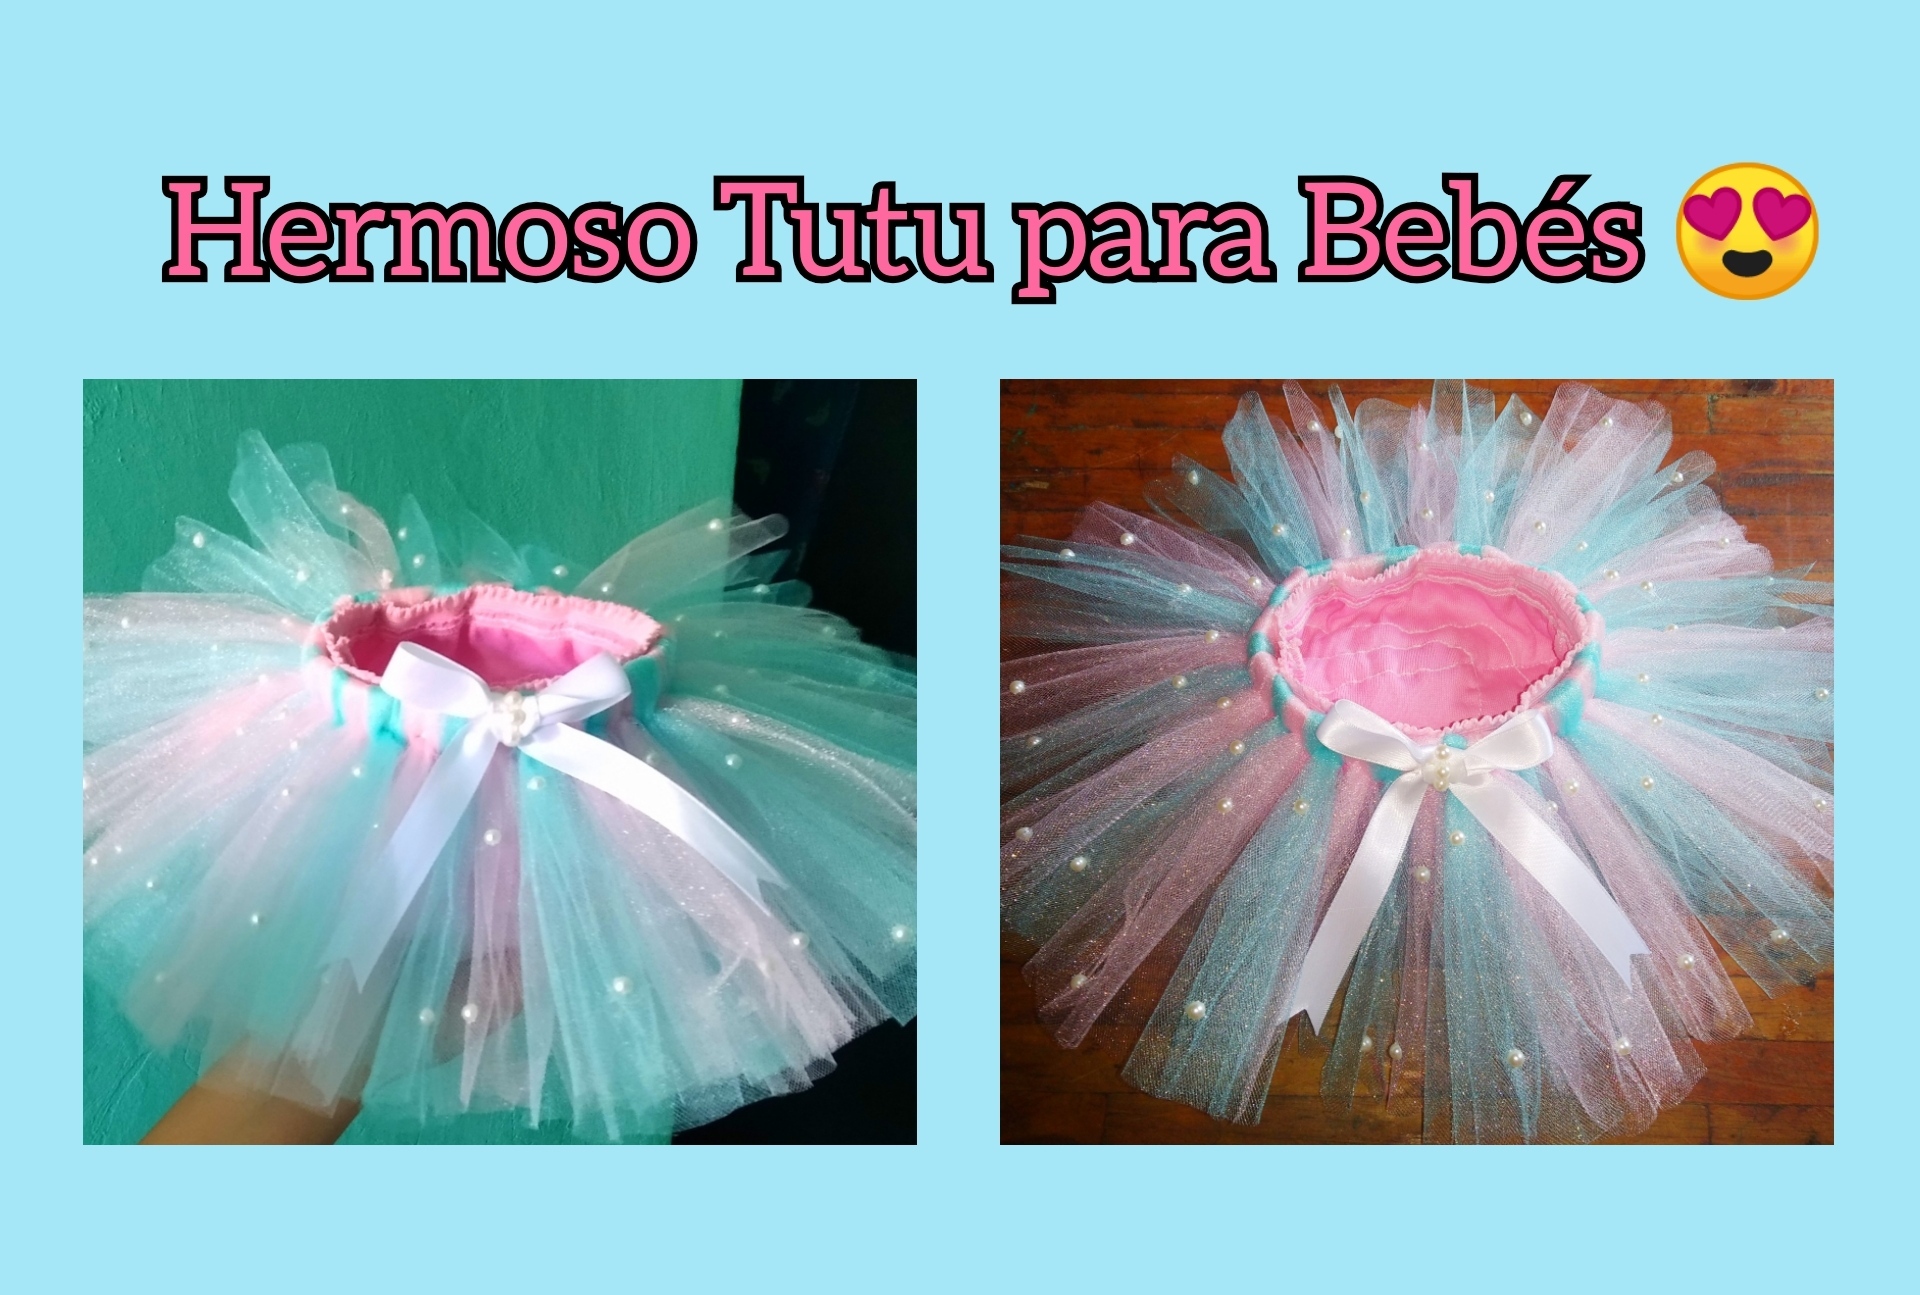
First of all I wish you success in everything you set out to do, once again I'm here sharing with all my Hivers friends, this time I bring you a cute and flirty craft that you can't miss since it is very fashionable these days and it is a "Beautiful Tutu for Babies" 😍 in stores we can get them at a cost of 15$, 20$ and in some cases with a higher cost, here we will do it ourselves With our little hands and apart from the cuteness and cuteness that remains, we would be saving most of the money that we would spend in a store since the materials used are super cheap.
Well friends, I'll tell you that the owner of this beautiful tutu is called Mia, my friend Gladys who is her grandmother asked me to do it for her since her daughter is in another state and a relative will travel to visit her, the girl will give birth in May and her grandmother is very happy for her granddaughter who is going to be born, that's why she wanted me to help her with this beautiful tutu for the most spoiled princesses in the house.
Materiales.
Materials.
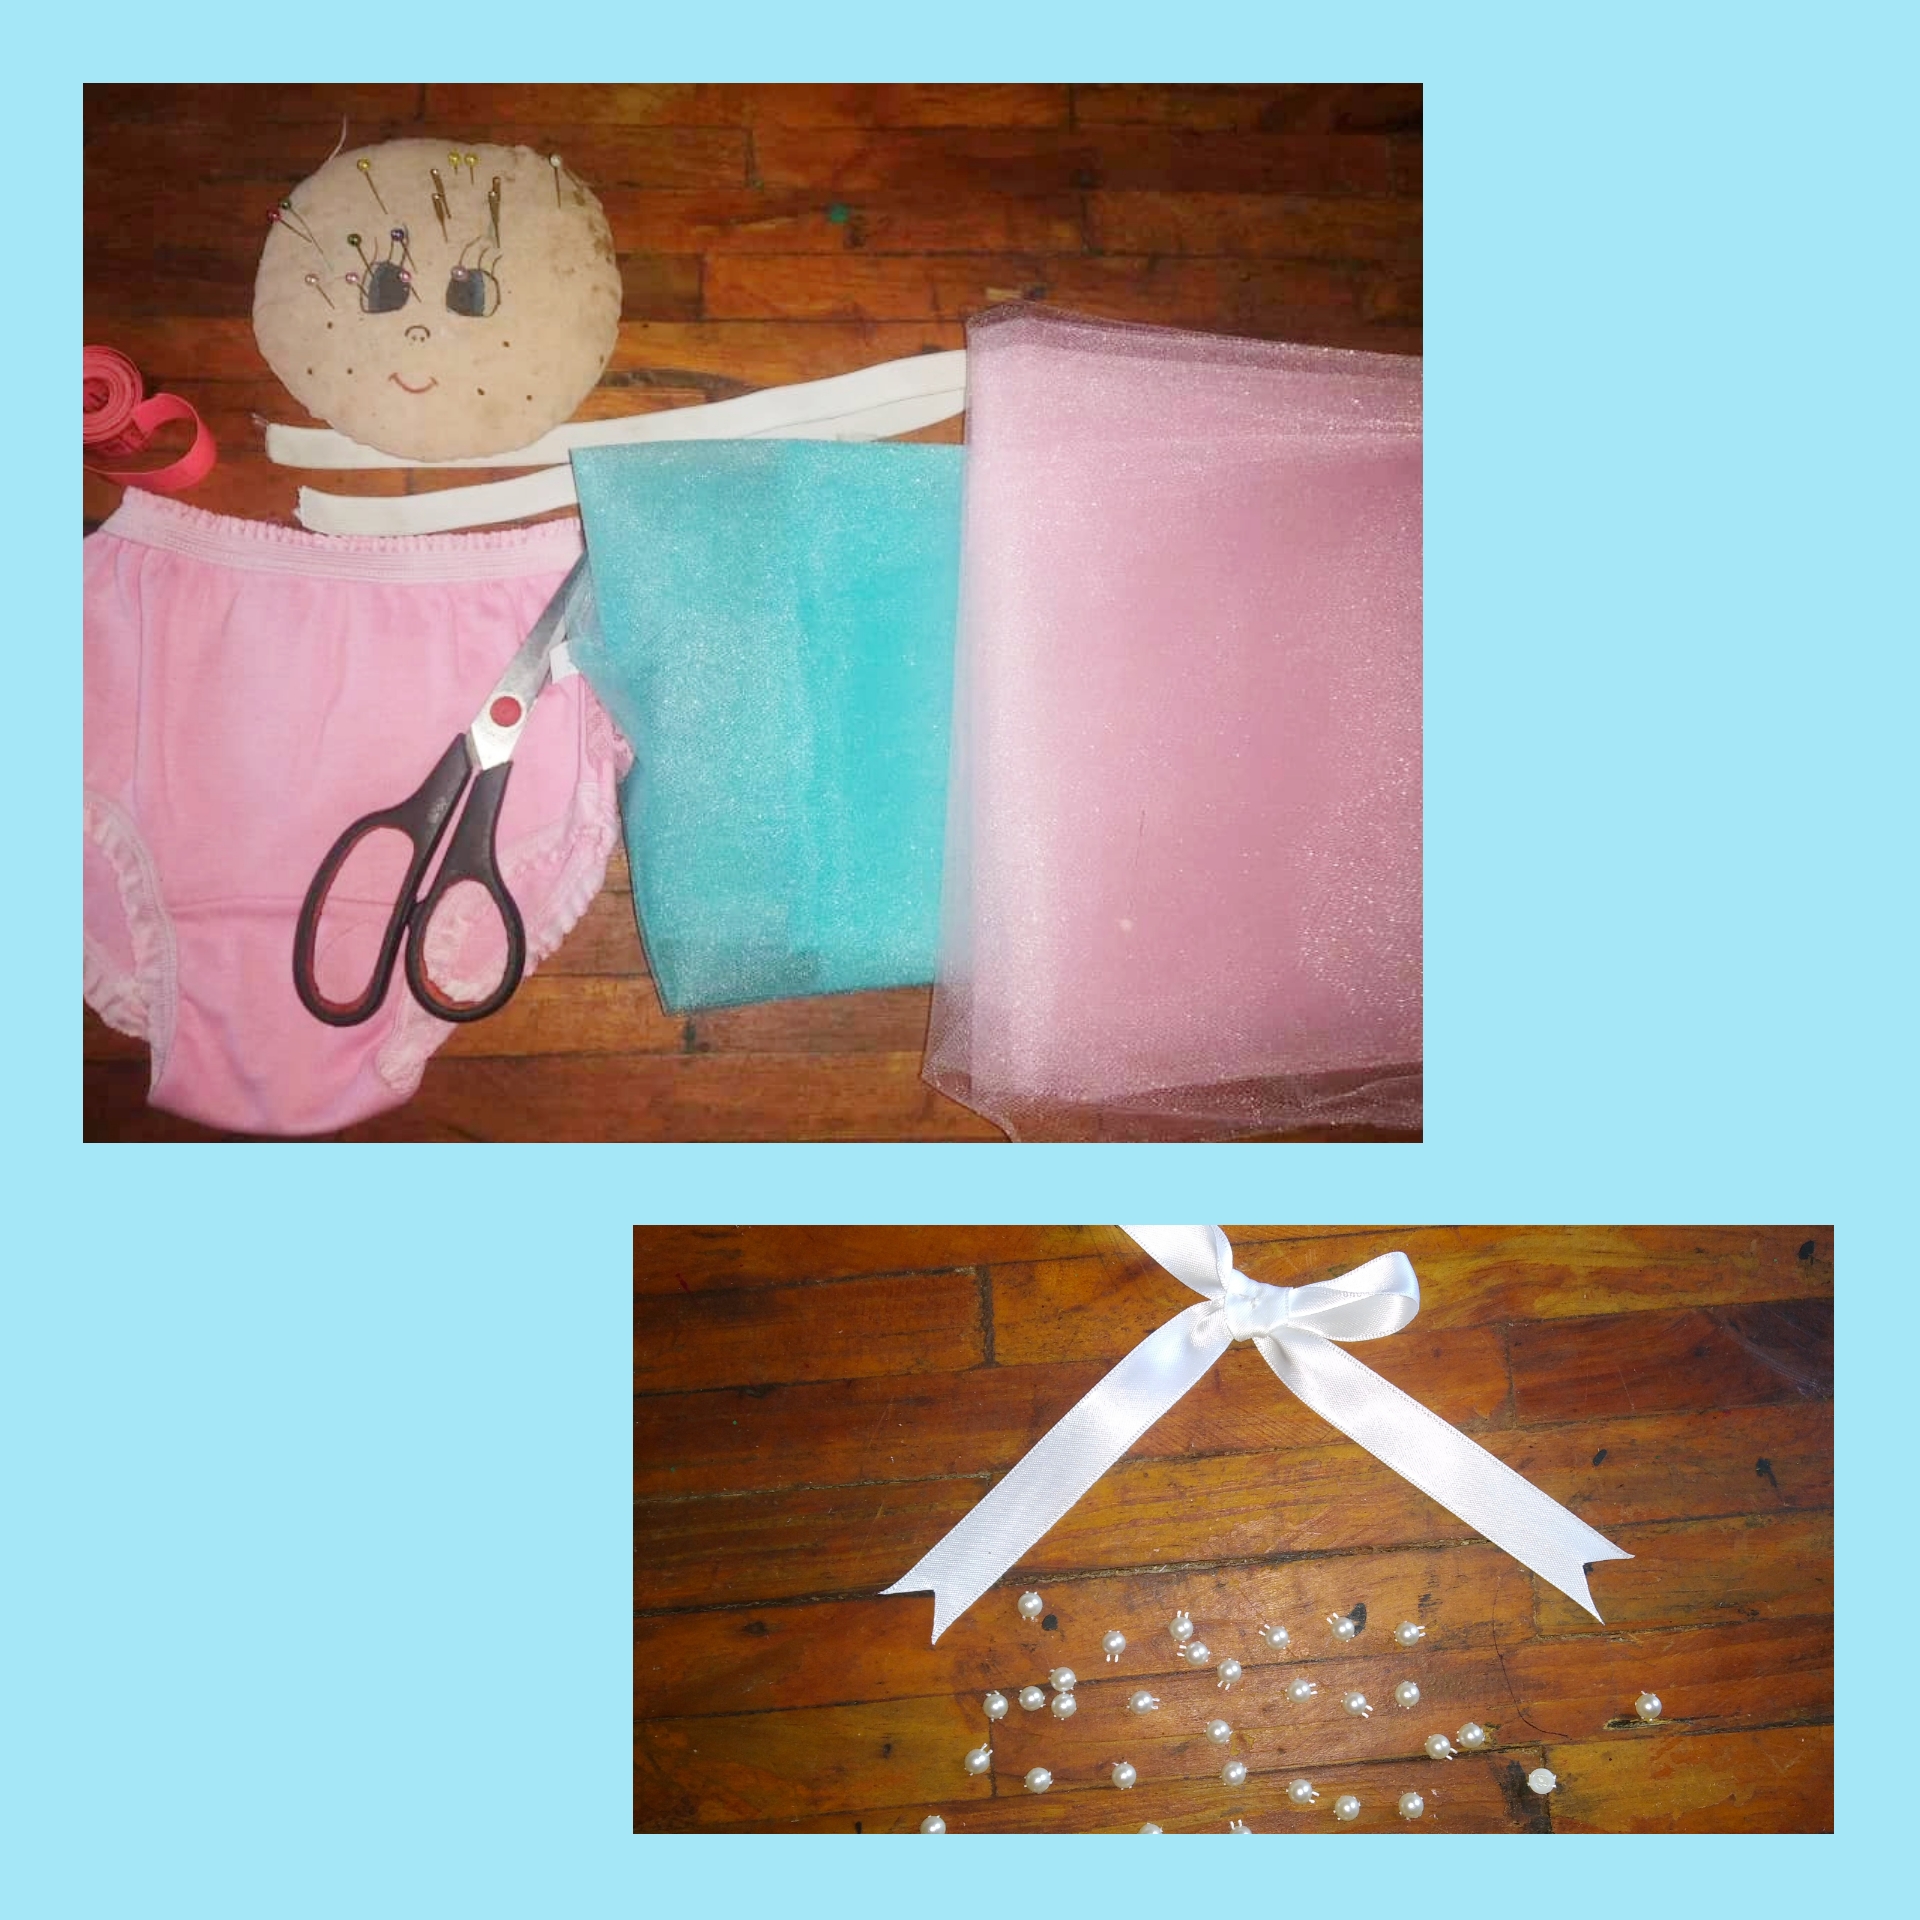
👶 Tul rosado.
👶 Tul azul.
👶 Pantaleta de niña.
👶 Cinta métrica.
👶 Tijera.
👶 Hilo y aguja.
👶 Goma.
👶 Alfileres.
👶 Cinta bebé blanca.
👶 Perlas.
👶 Pink tulle.
👶 Blue tulle.
👶 Girl panties.
👶 Tape measure.
👶 Scissor.
👶 Thread and needle.
👶 Rubber.
👶 Pins.
👶 White baby ribbon.
👶 Pearls.
Hermoso Tutu para Bebés Recién Nacidas. 😍🥰
My dear friends, now I will explain in detail how to surprise a family member with this beautiful gift or if your friend Hivers that you read to me is pregnant, it is your time to create this beauty for your beloved baby that will soon be born
Pasos para la elaboración.
Step 1.We start by taking the blue tulle which is 1/2 meter, we fold it in half and with the tape measure we are going to measure 20 cm long we put pins right in the 20 cm to guide us and with the scissors we cut the excess fabric.
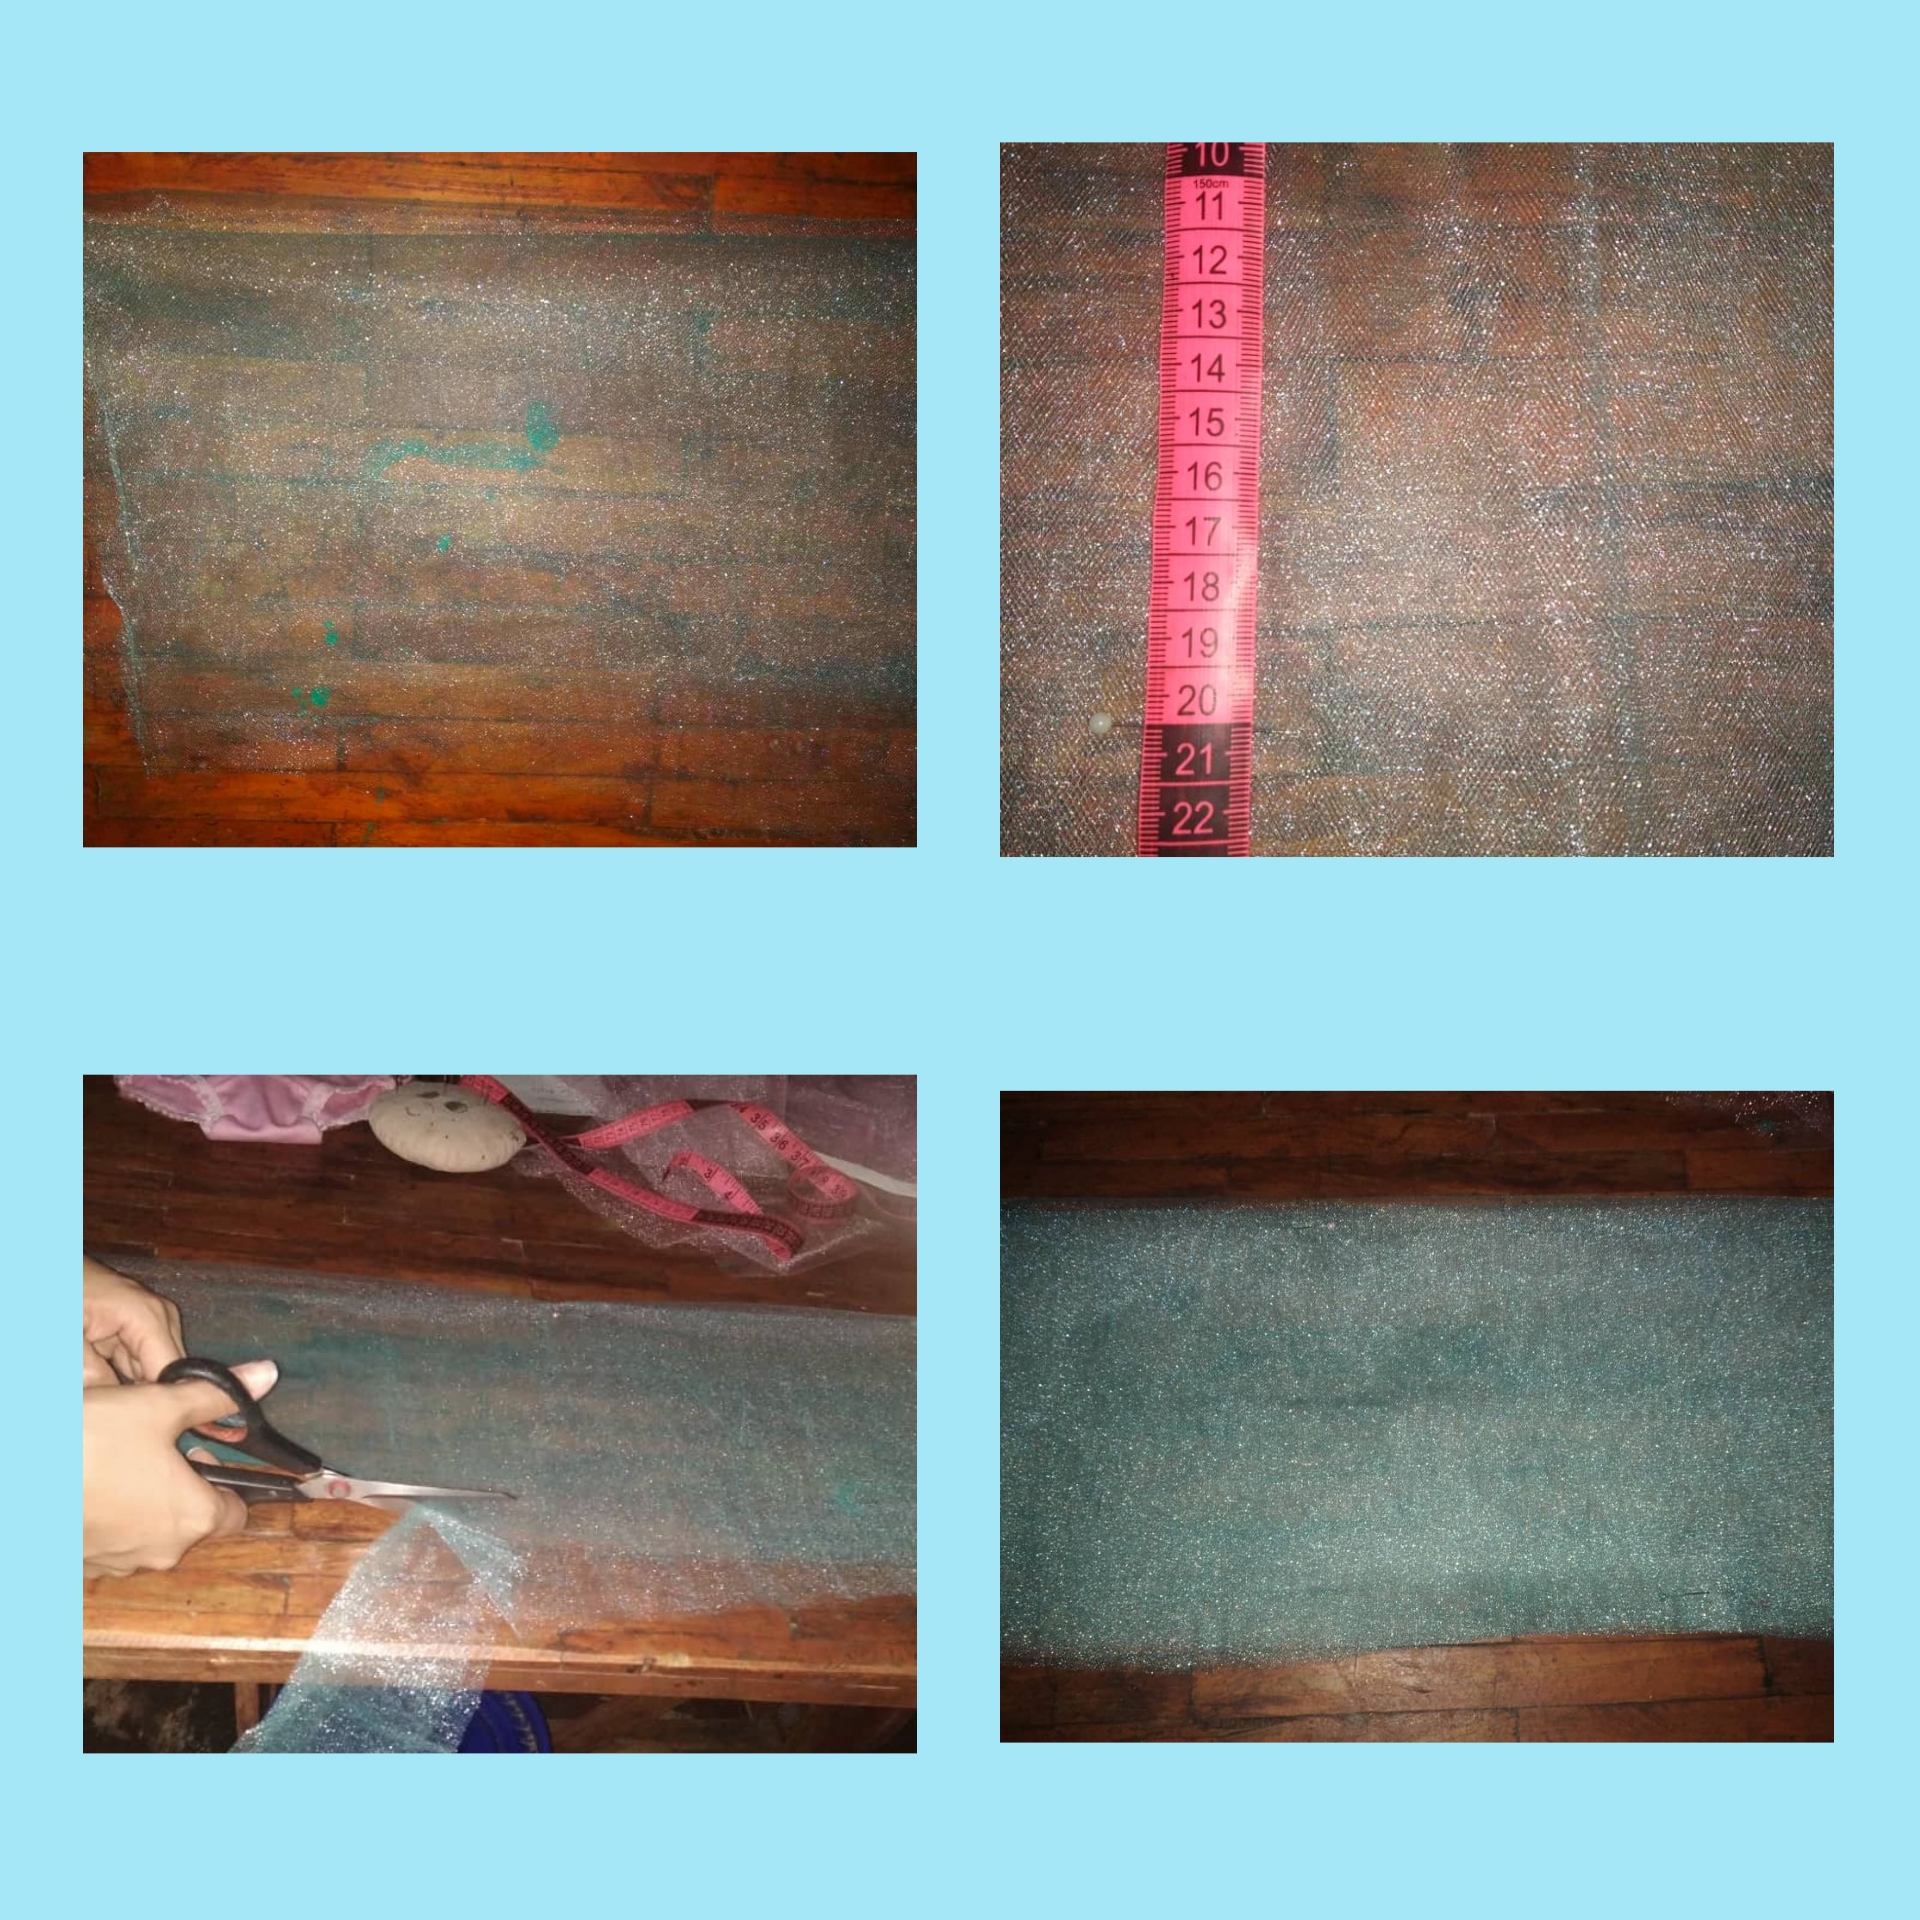
Step 2.In the same way we are going to do with the pink tulle which we also have 1/2 meter, we fold it in half and mark the 20 cm we place pins and cut the excess fabric.
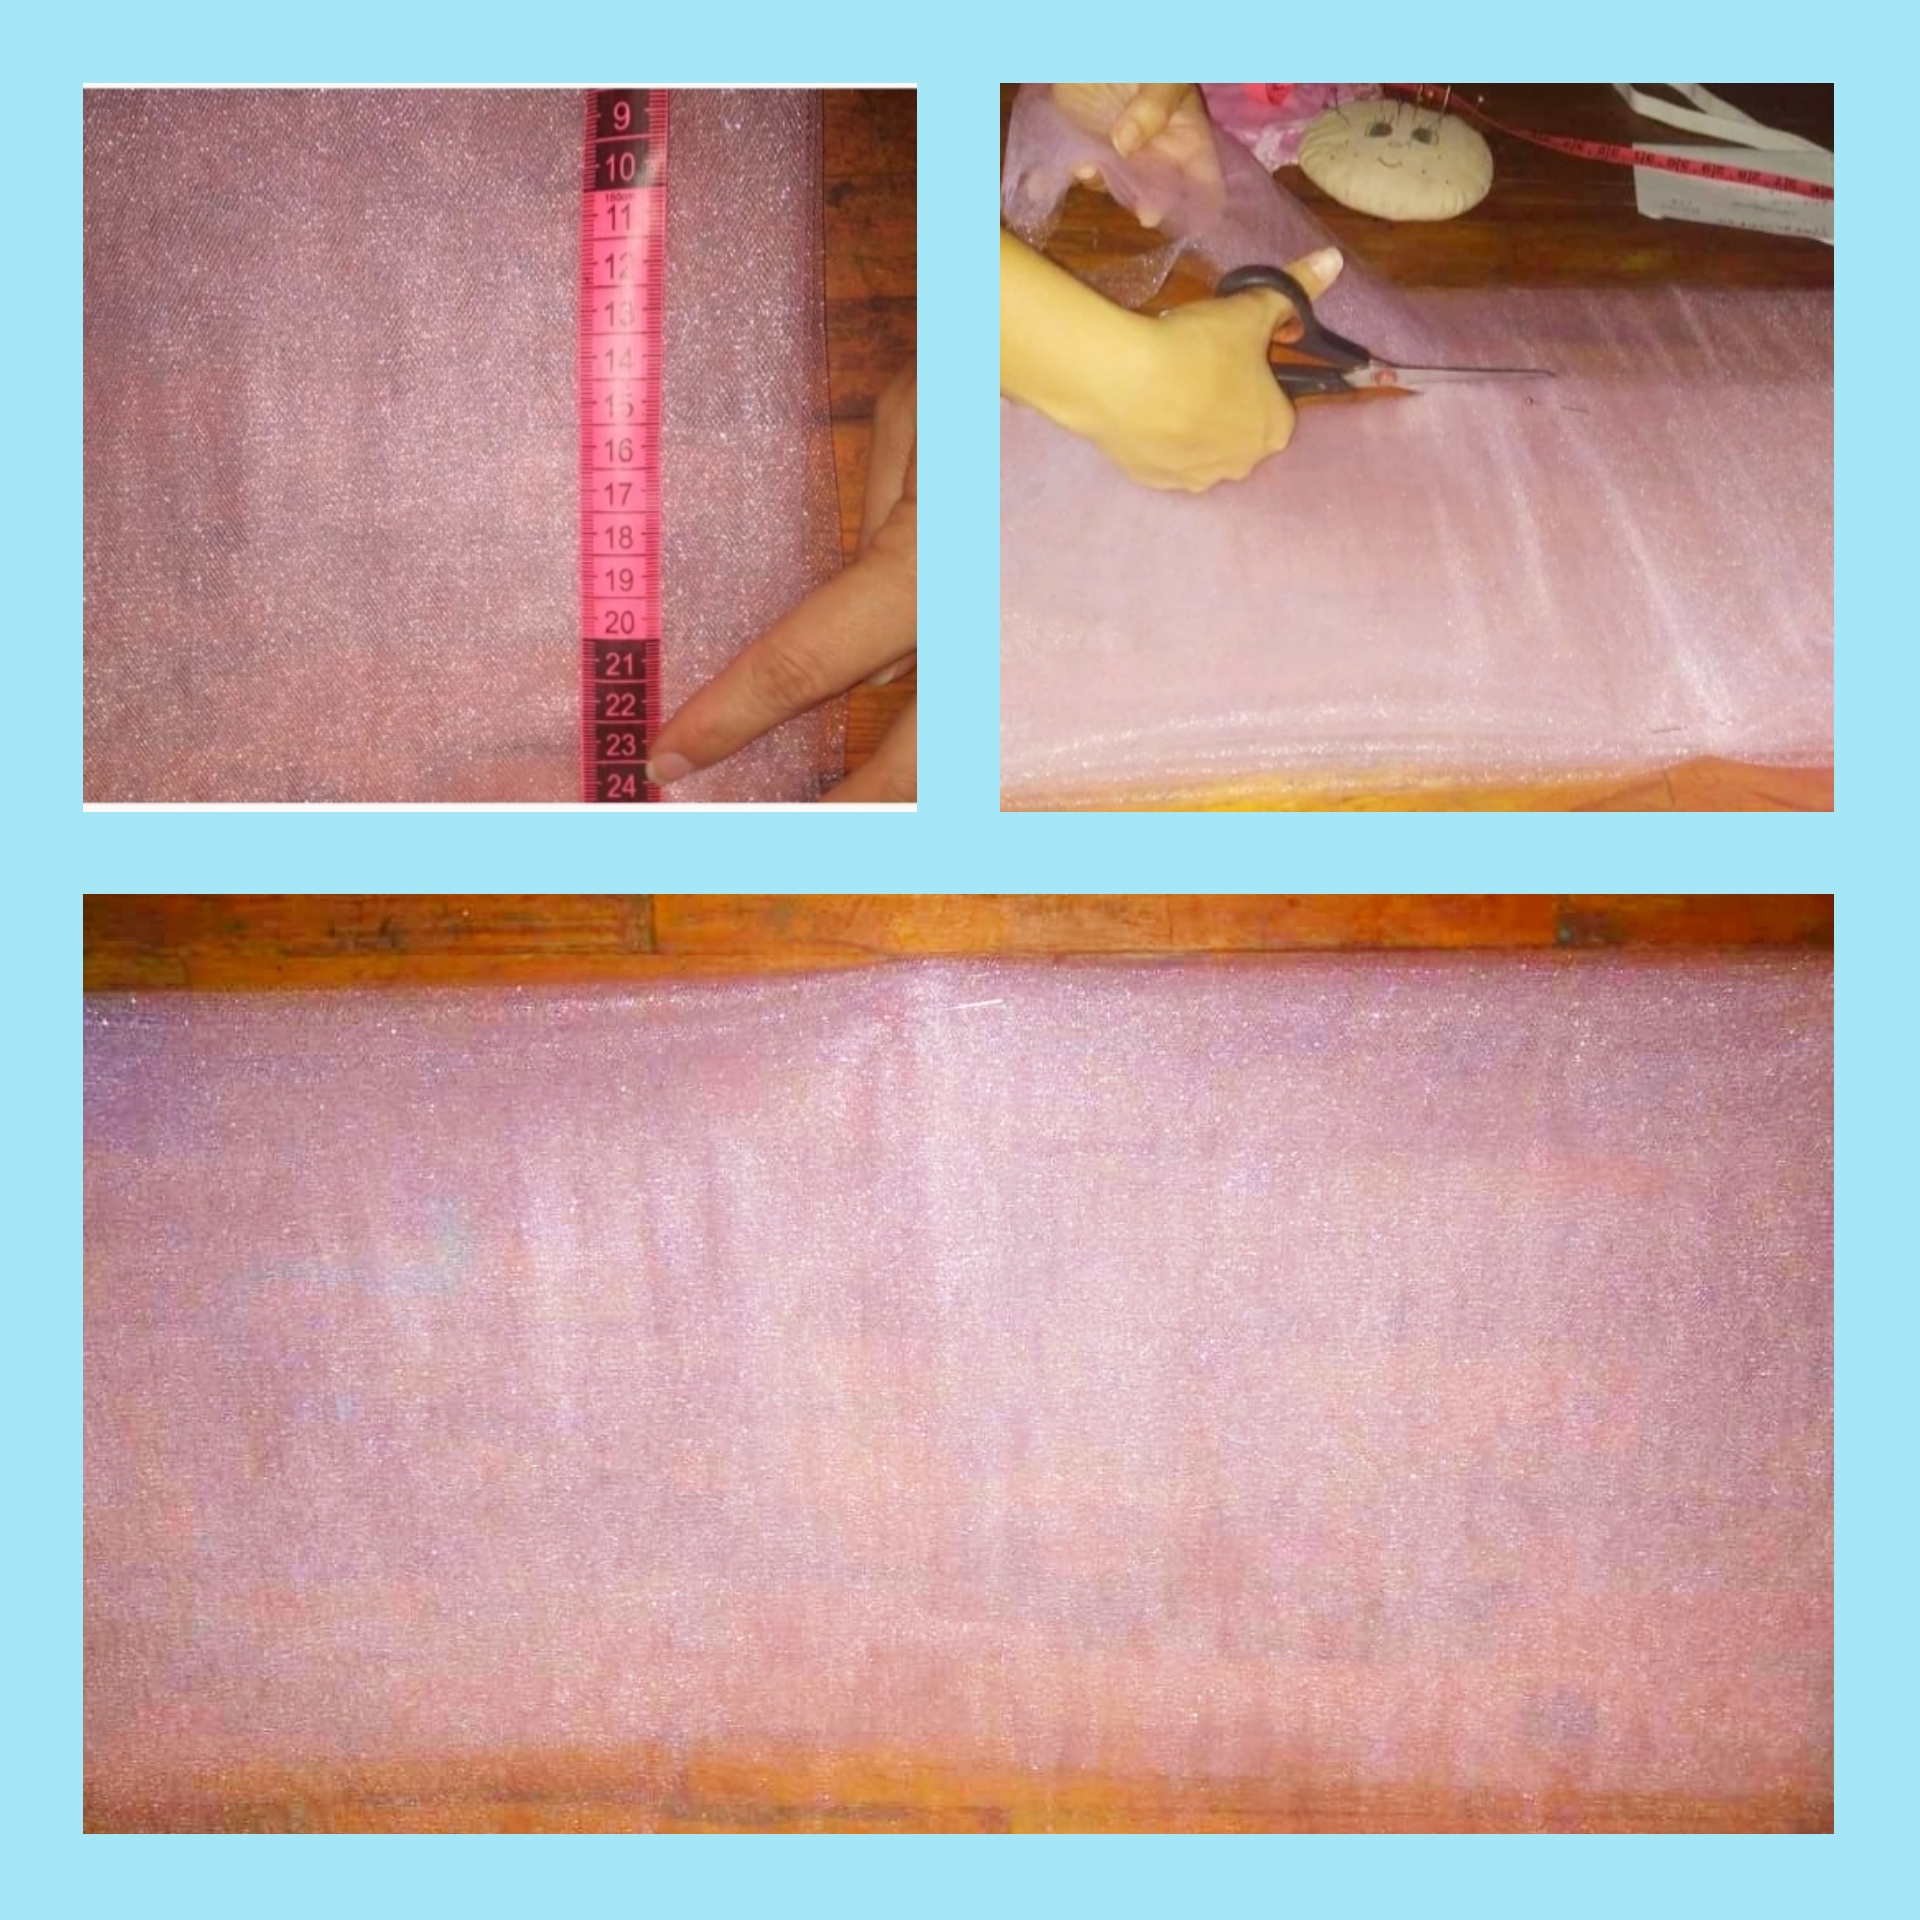
Step 3.In the pink tulle we are going to mark 15 cm wide and we are going to cut it, then we are going to use that piece that we obtained as a mold to take out the other pieces that we need, we place it on the tulle and we cut by that measure.
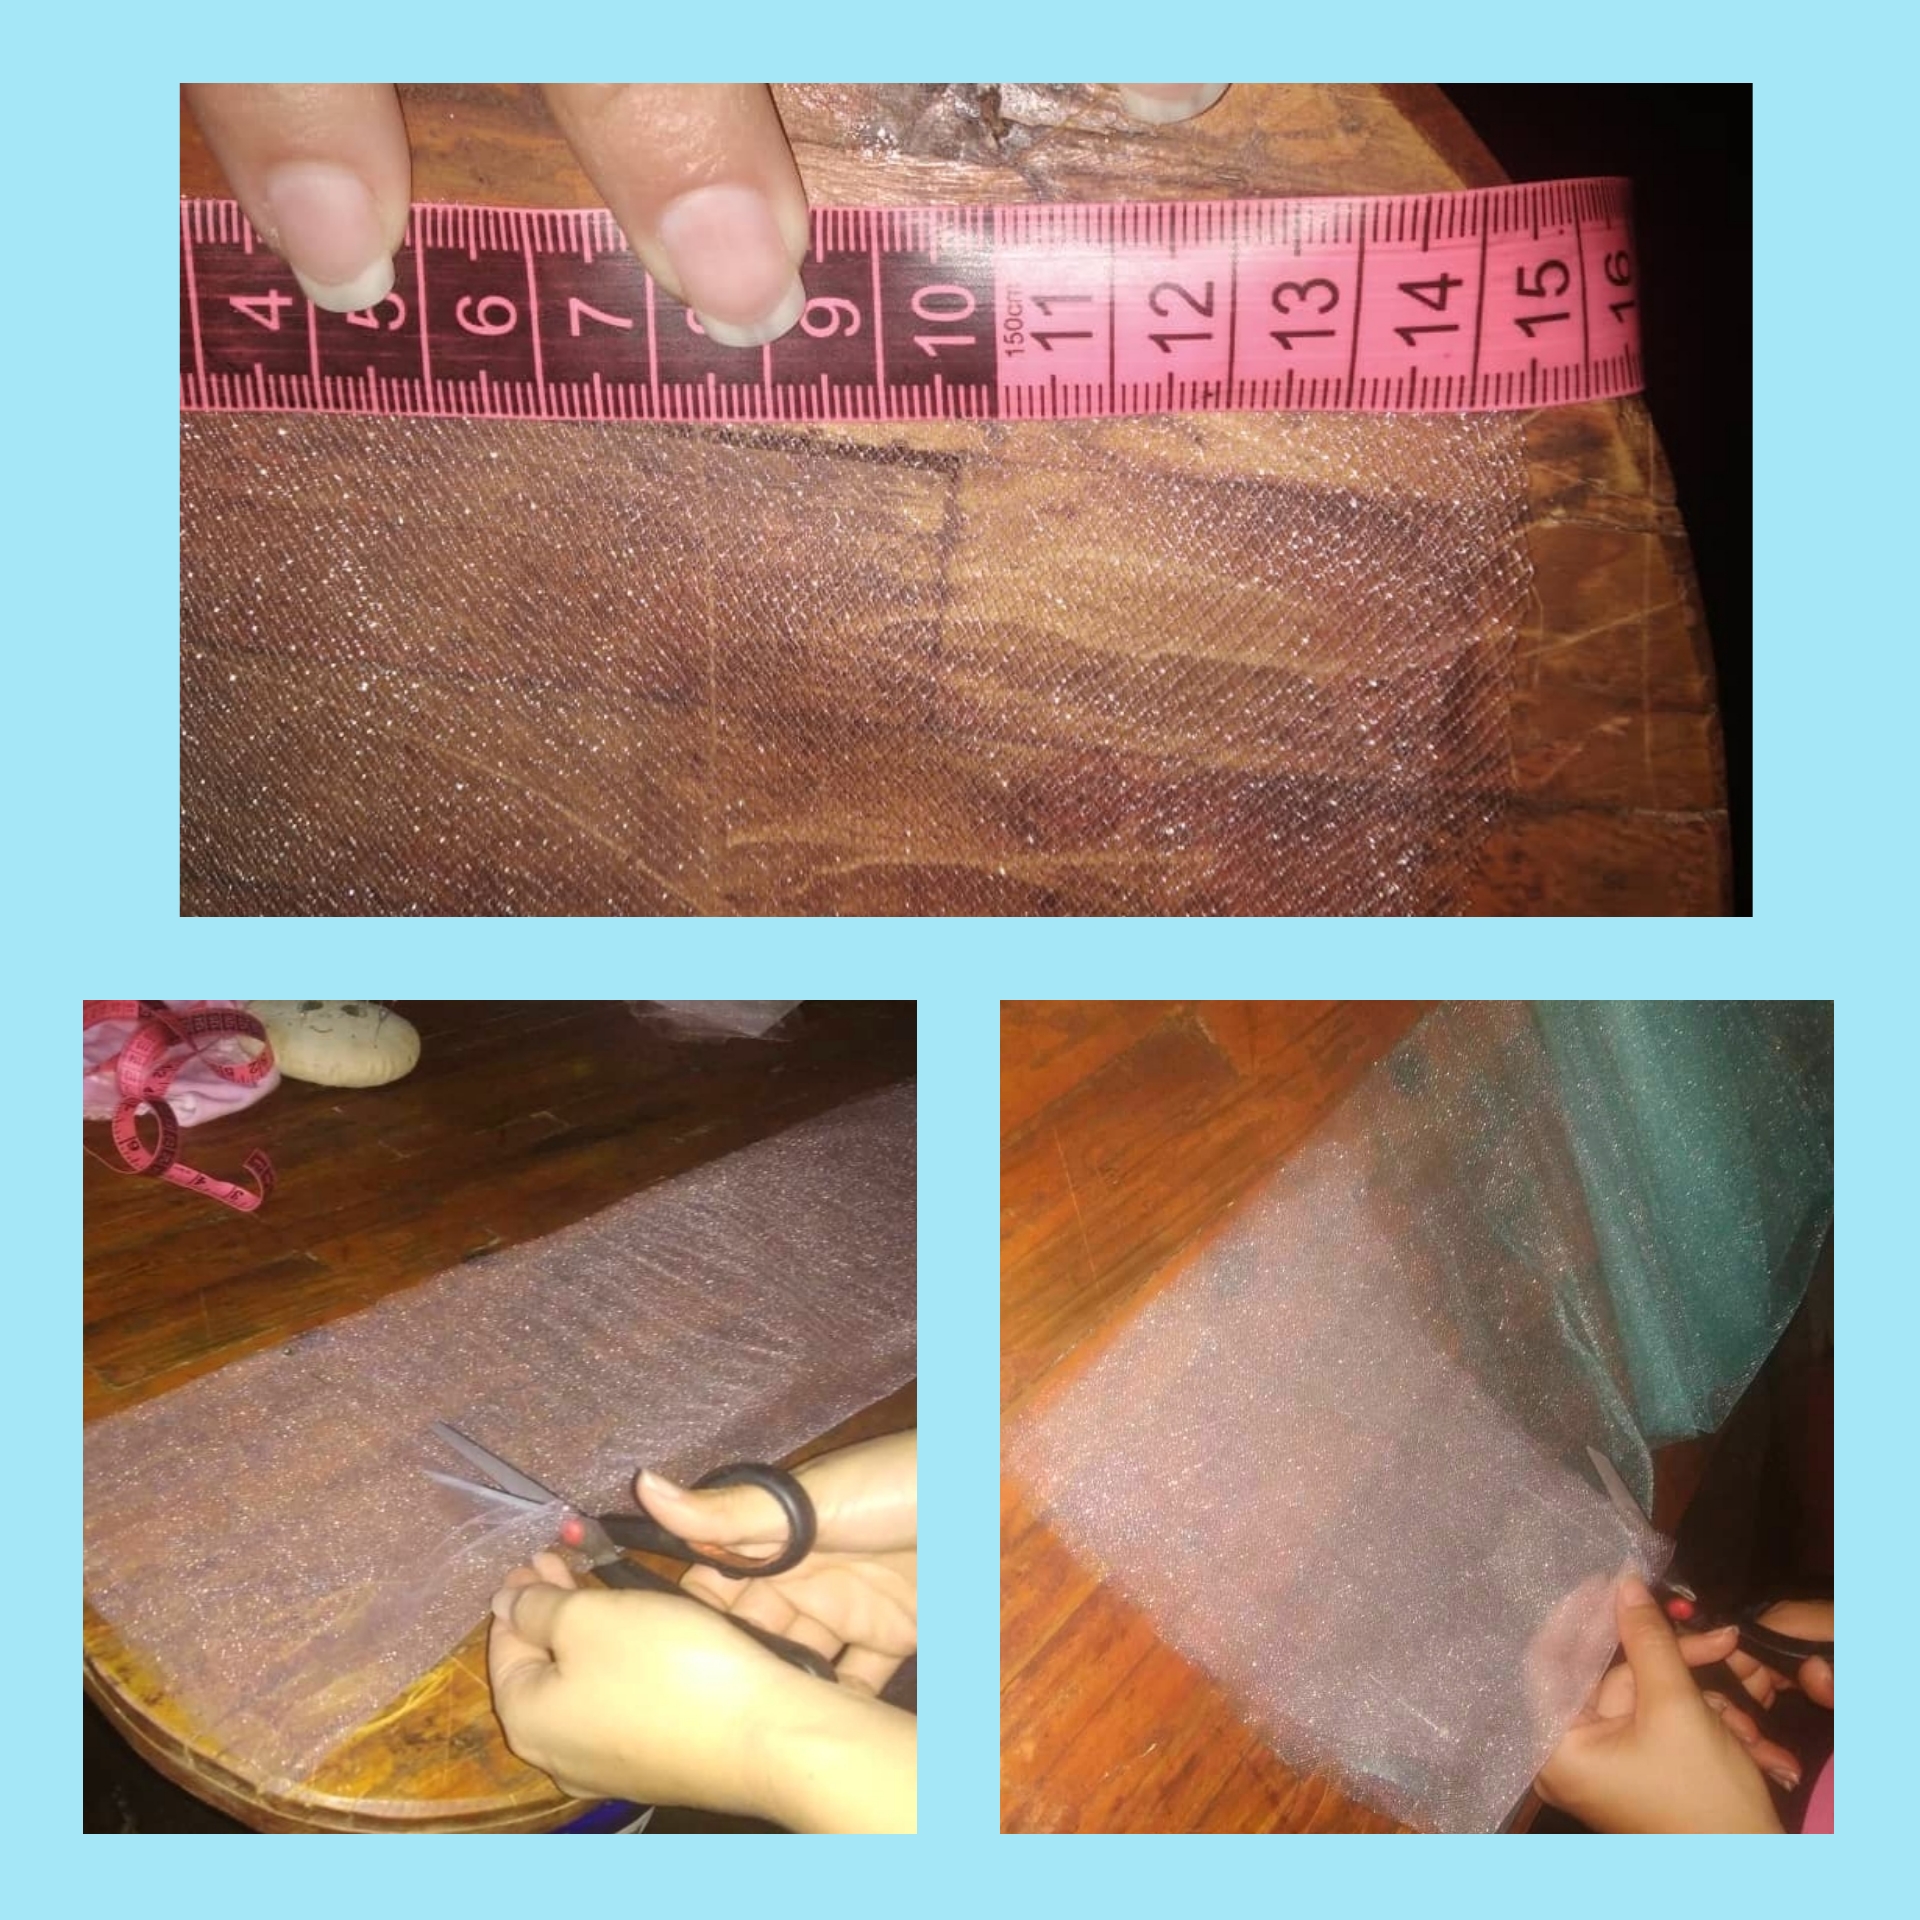
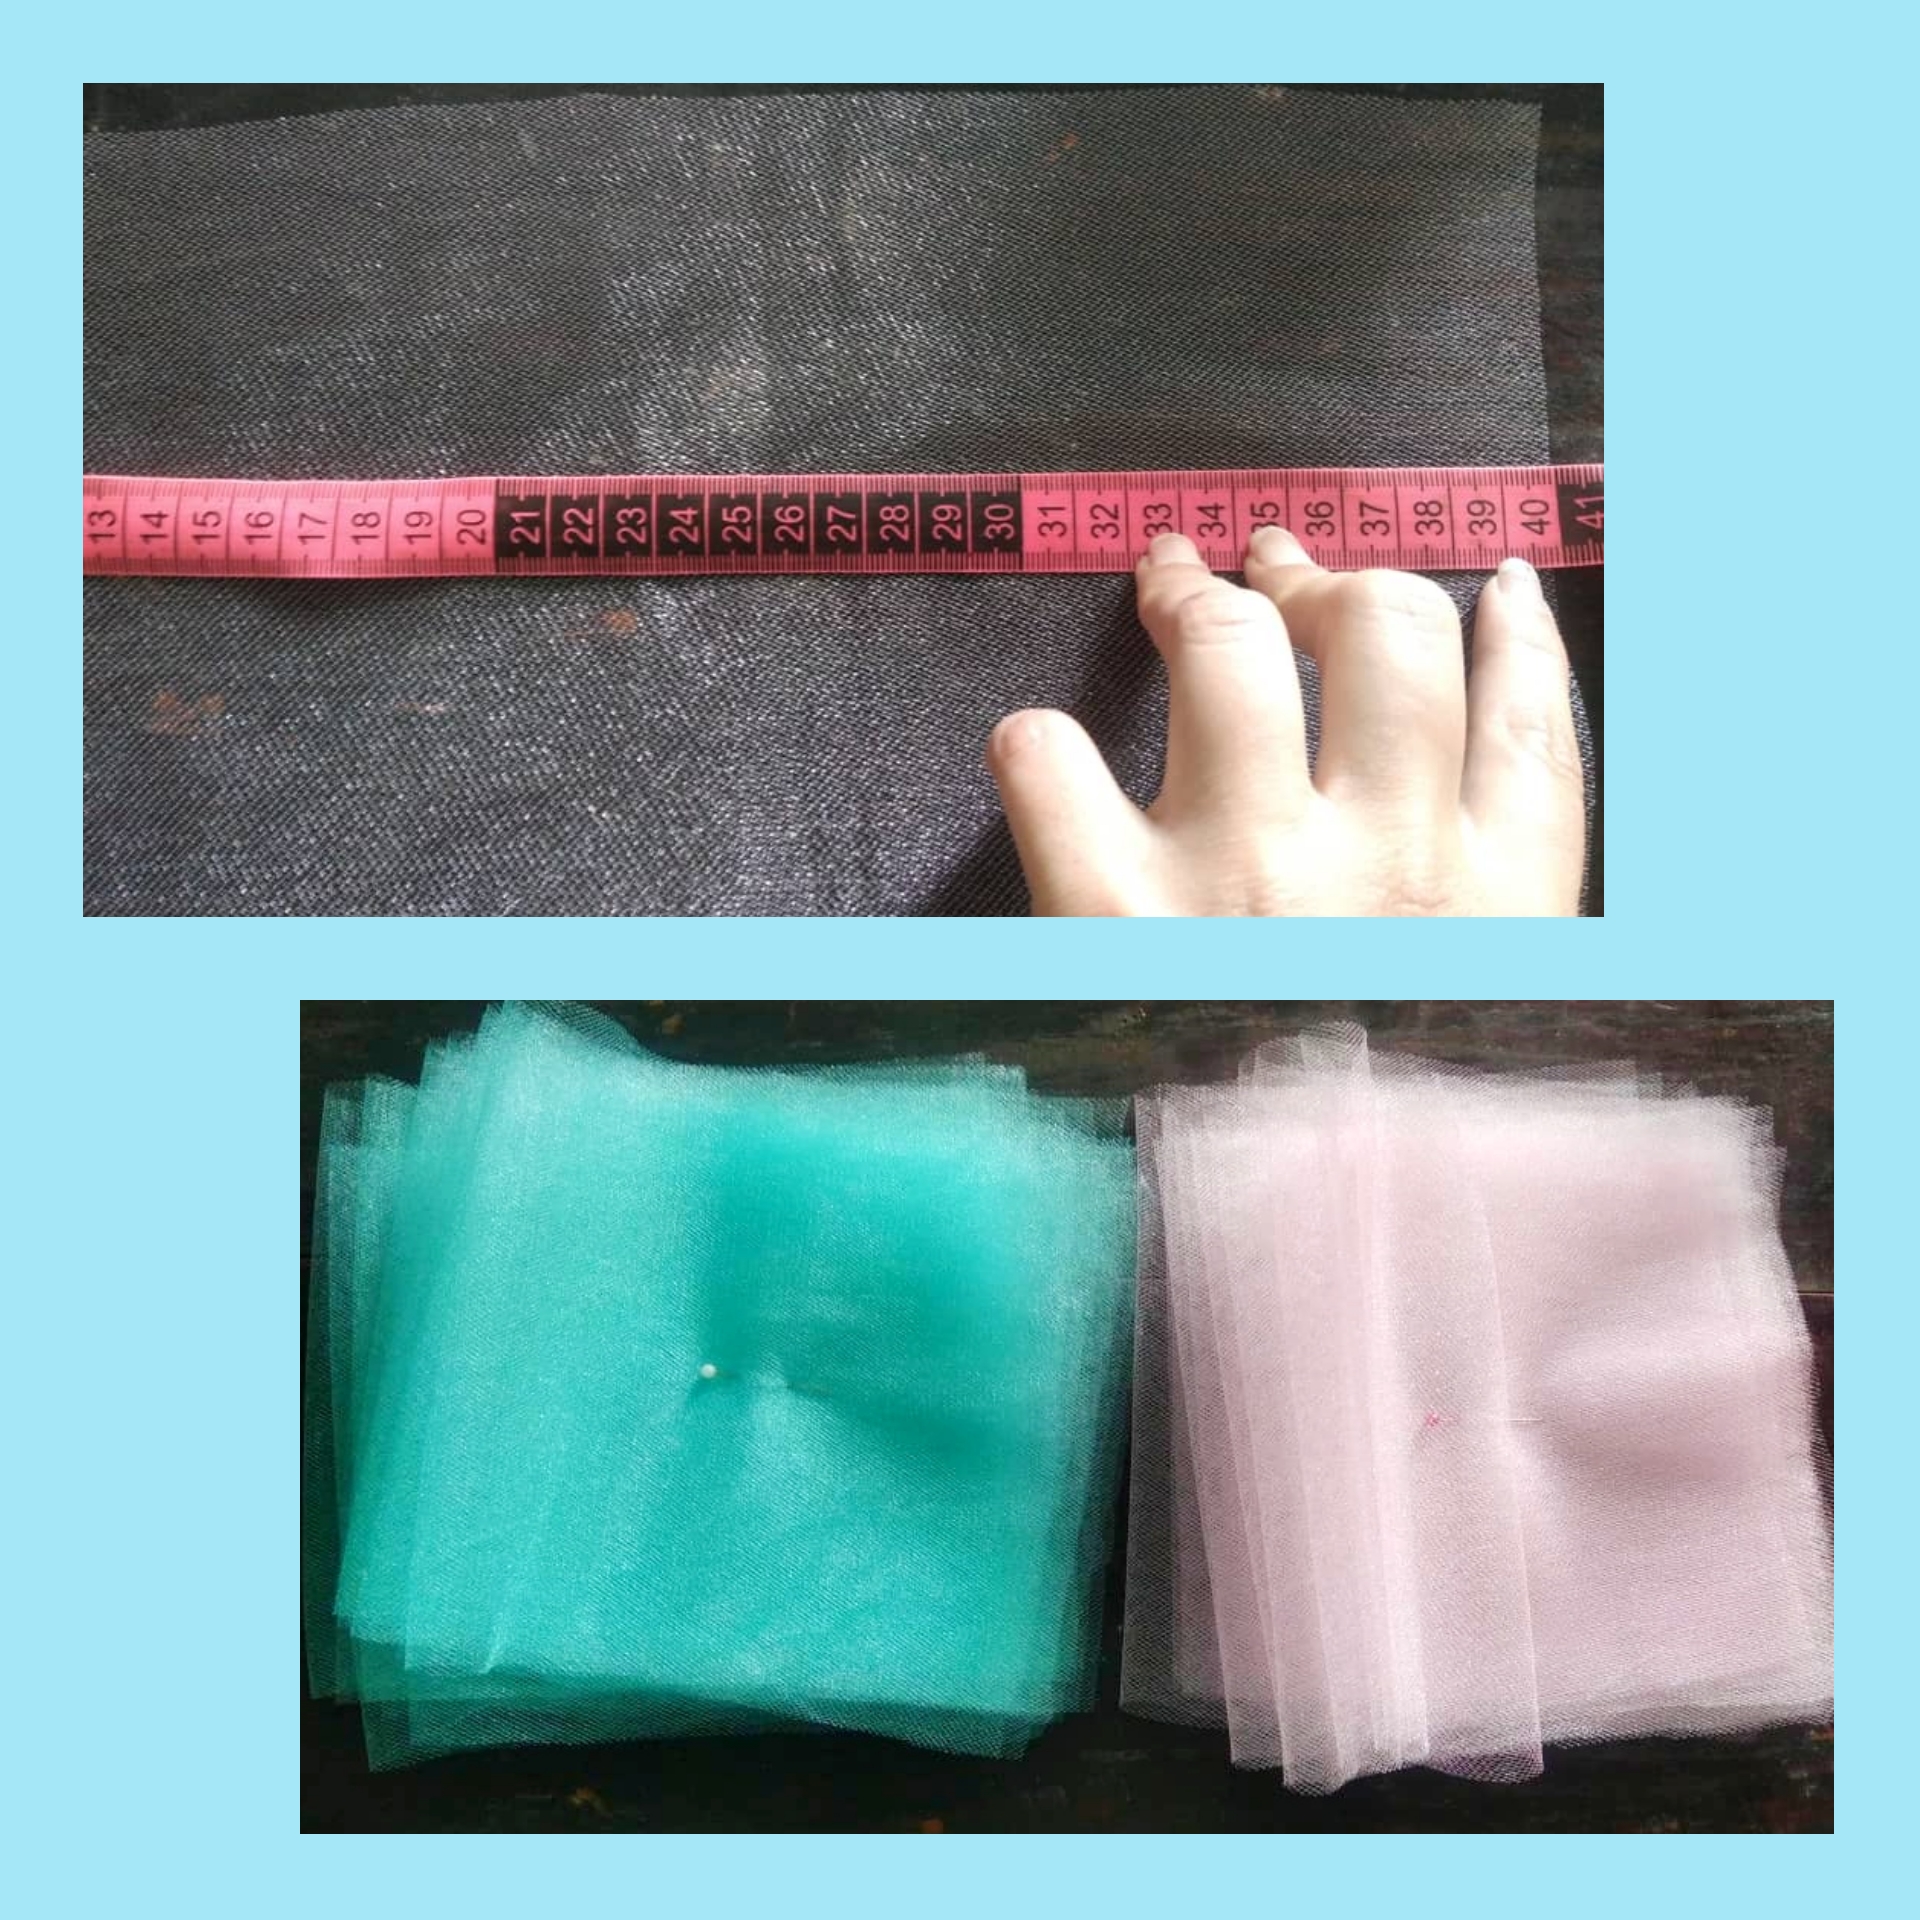
Step 4.Remember that we have the fabric folded in half, when we open it we would have a width of 40 cm by 15 cm in length. We will obtain 07 pink pieces and 07 blue pieces in total would be 14 pieces.
A tip that I want to give you is that when buying tulle, buy one called bridal tulle, since it is soft, manageable and most importantly it does not itch, there are types of tulle that itch and can cause in children rash or eruption.
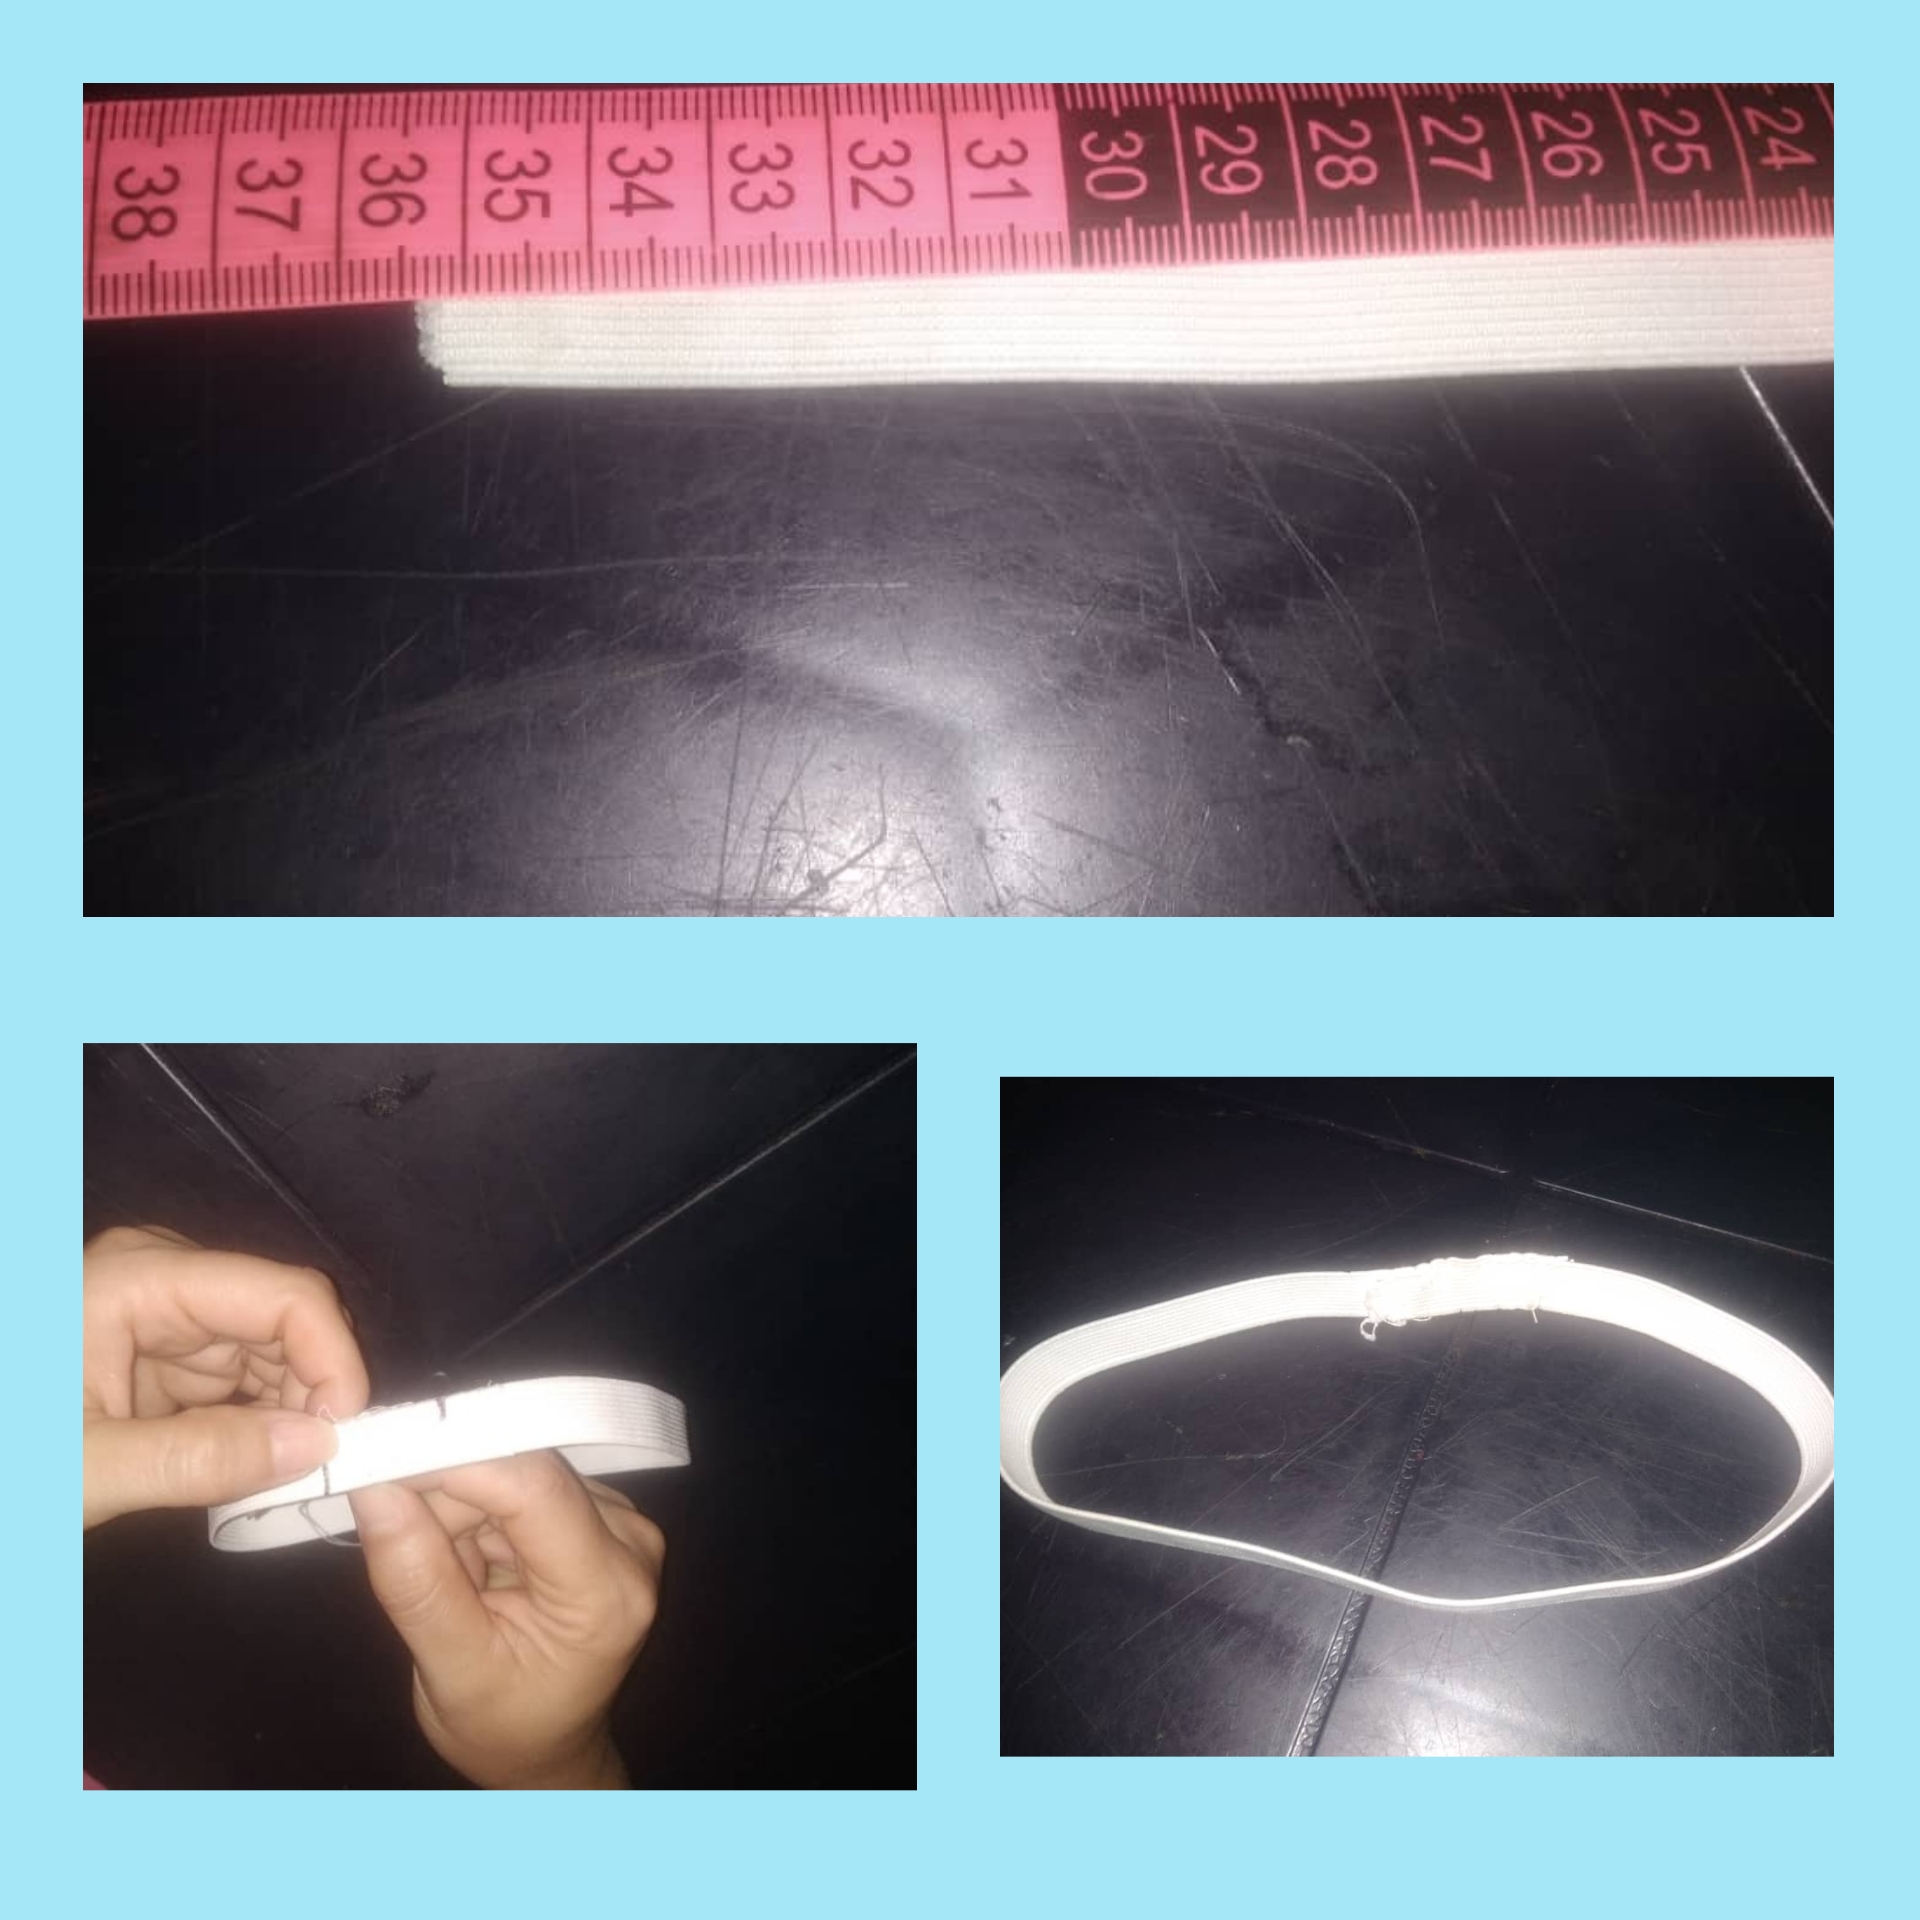
Step 5.Now we are going to take the rubber band and we are going to measure up to 35 cm (I took this measurement from a neighbor who is just born). Then we cut and with the needle we are going to sew to make a circle with it.
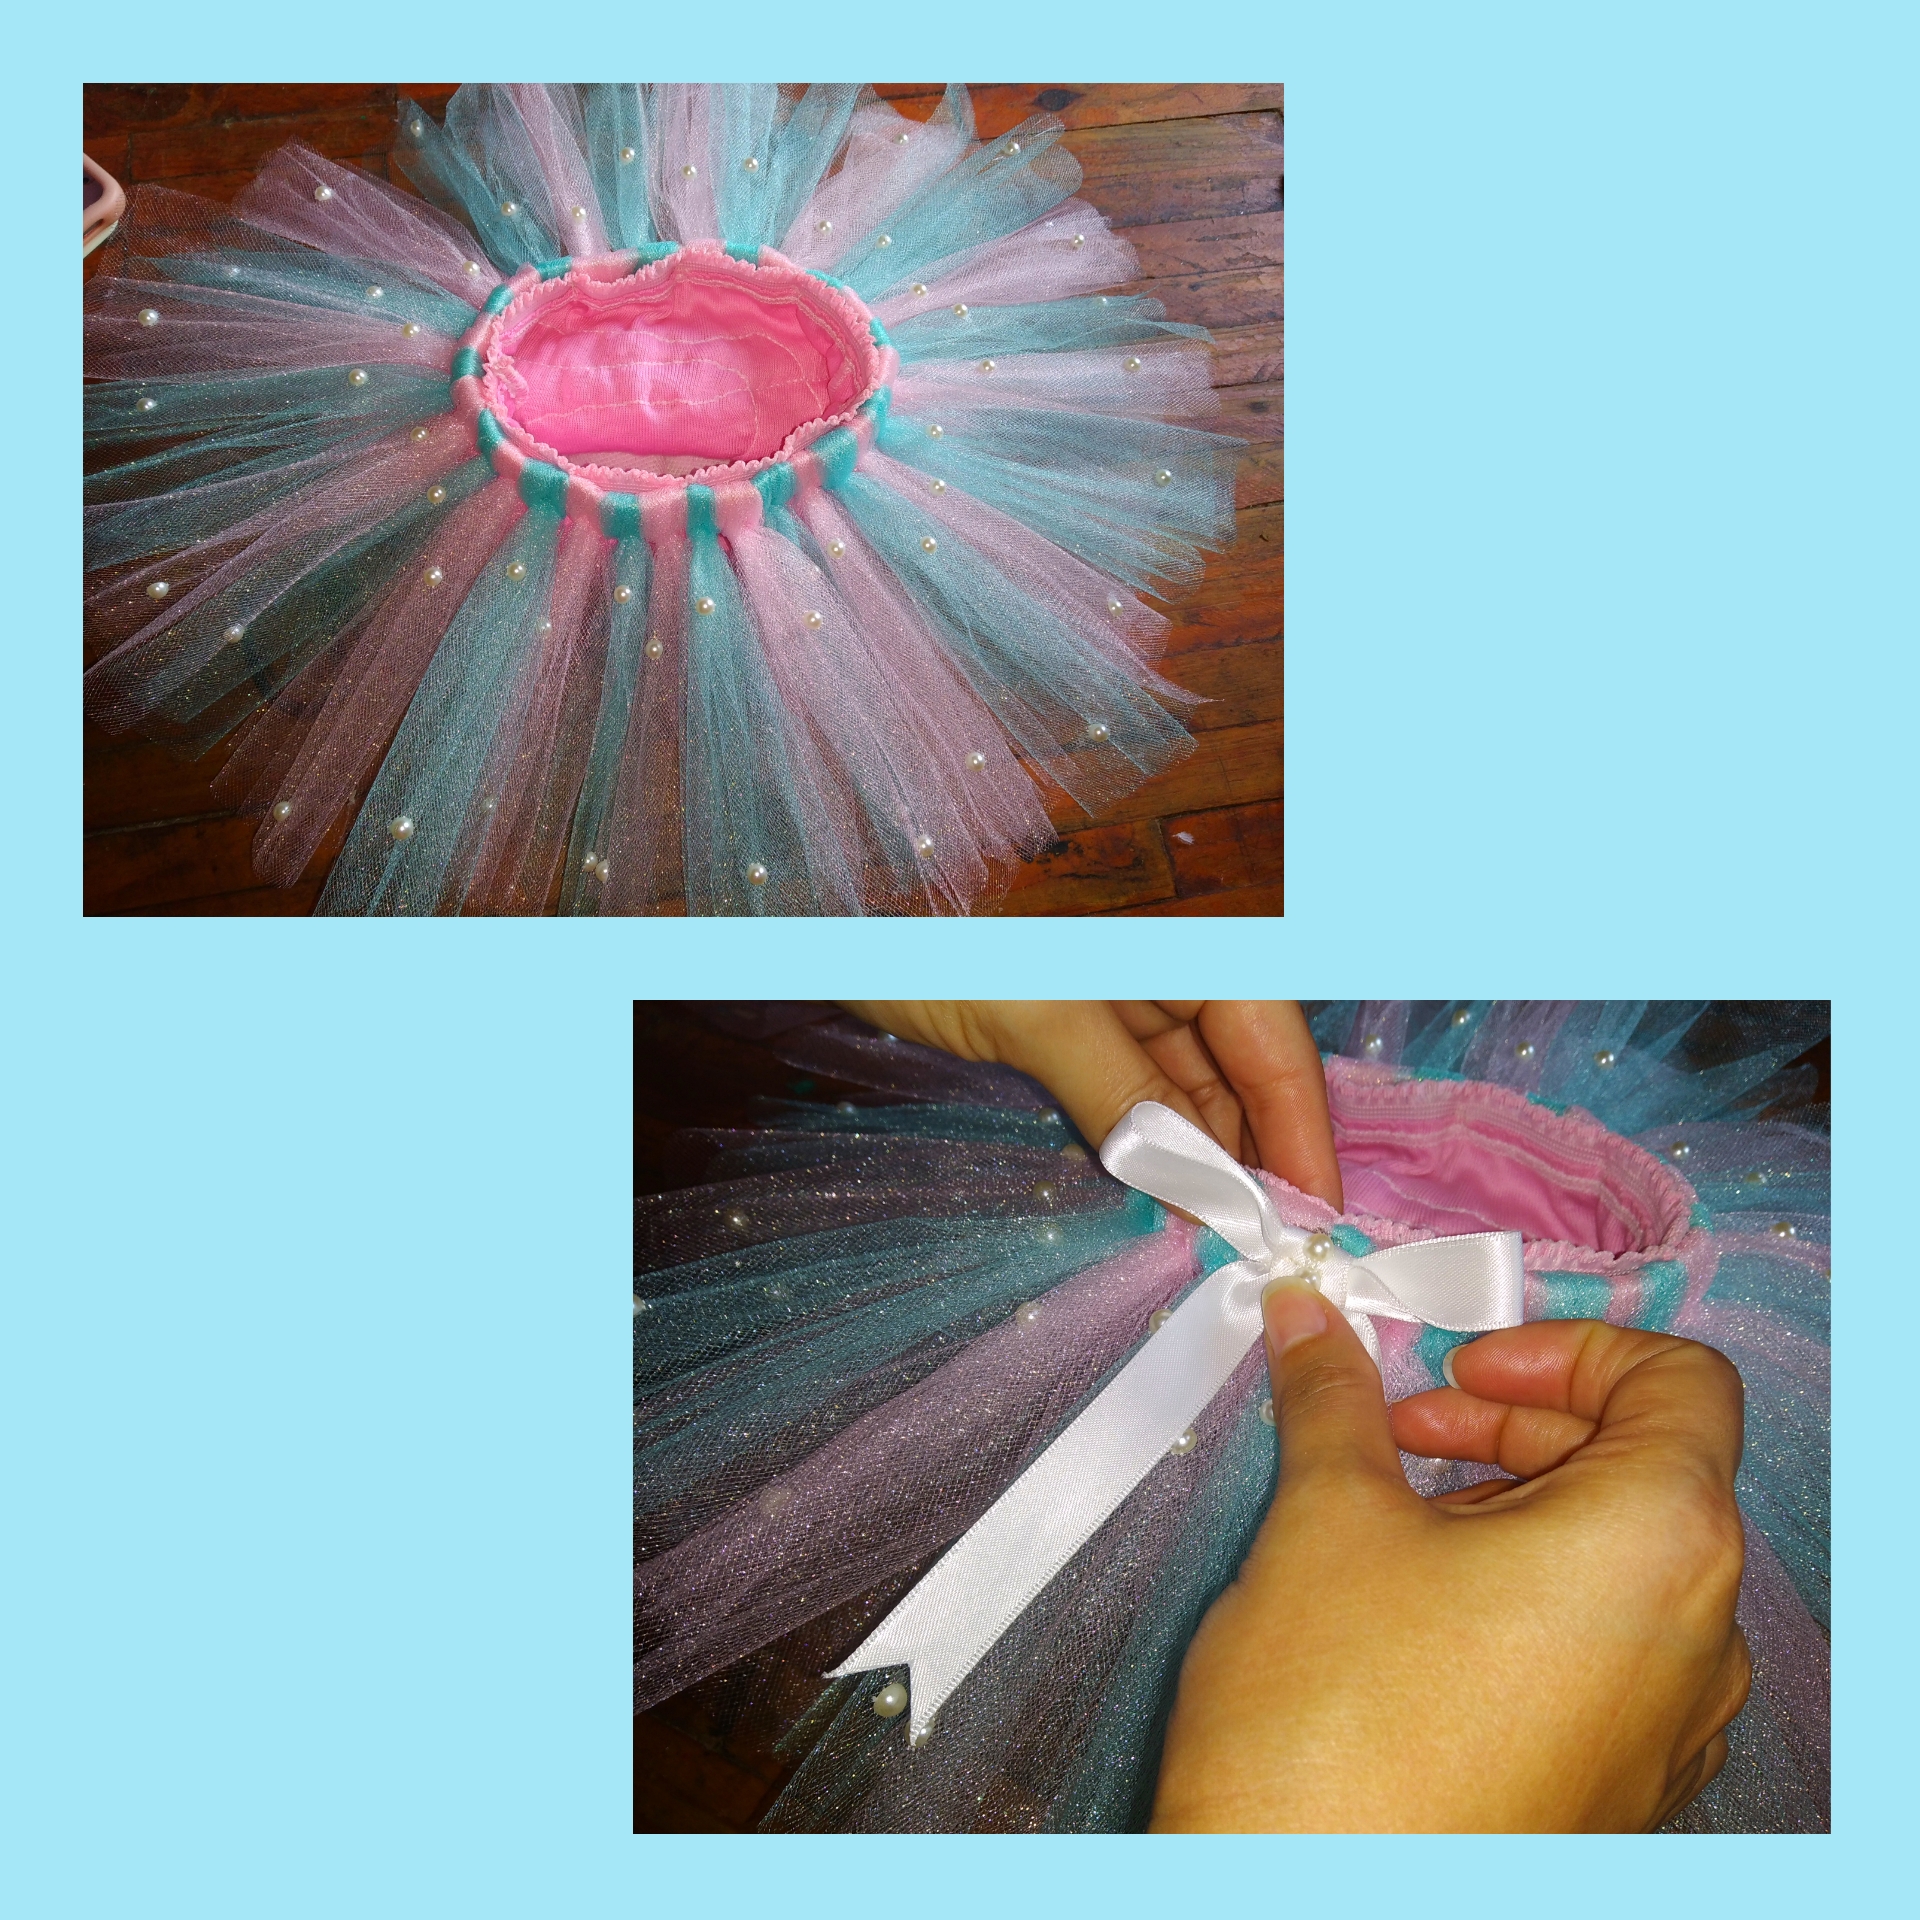
Step 6.Having the tulle pieces cut out and the elastic tied, we are going to start assembling the tutu. With our hand we take a piece of tulle all over the middle, we wrinkle it a little, then we make a bow with it and leave a hole in the center, we place it on the back of the elastic and the strip that sticks out downwards We are going to pass it through the hole, in this way we make the knot that we see in the image. This is how we go through all the pieces of tulle, interspersing the colors, one pink and one blue, until we complete all the rubber.
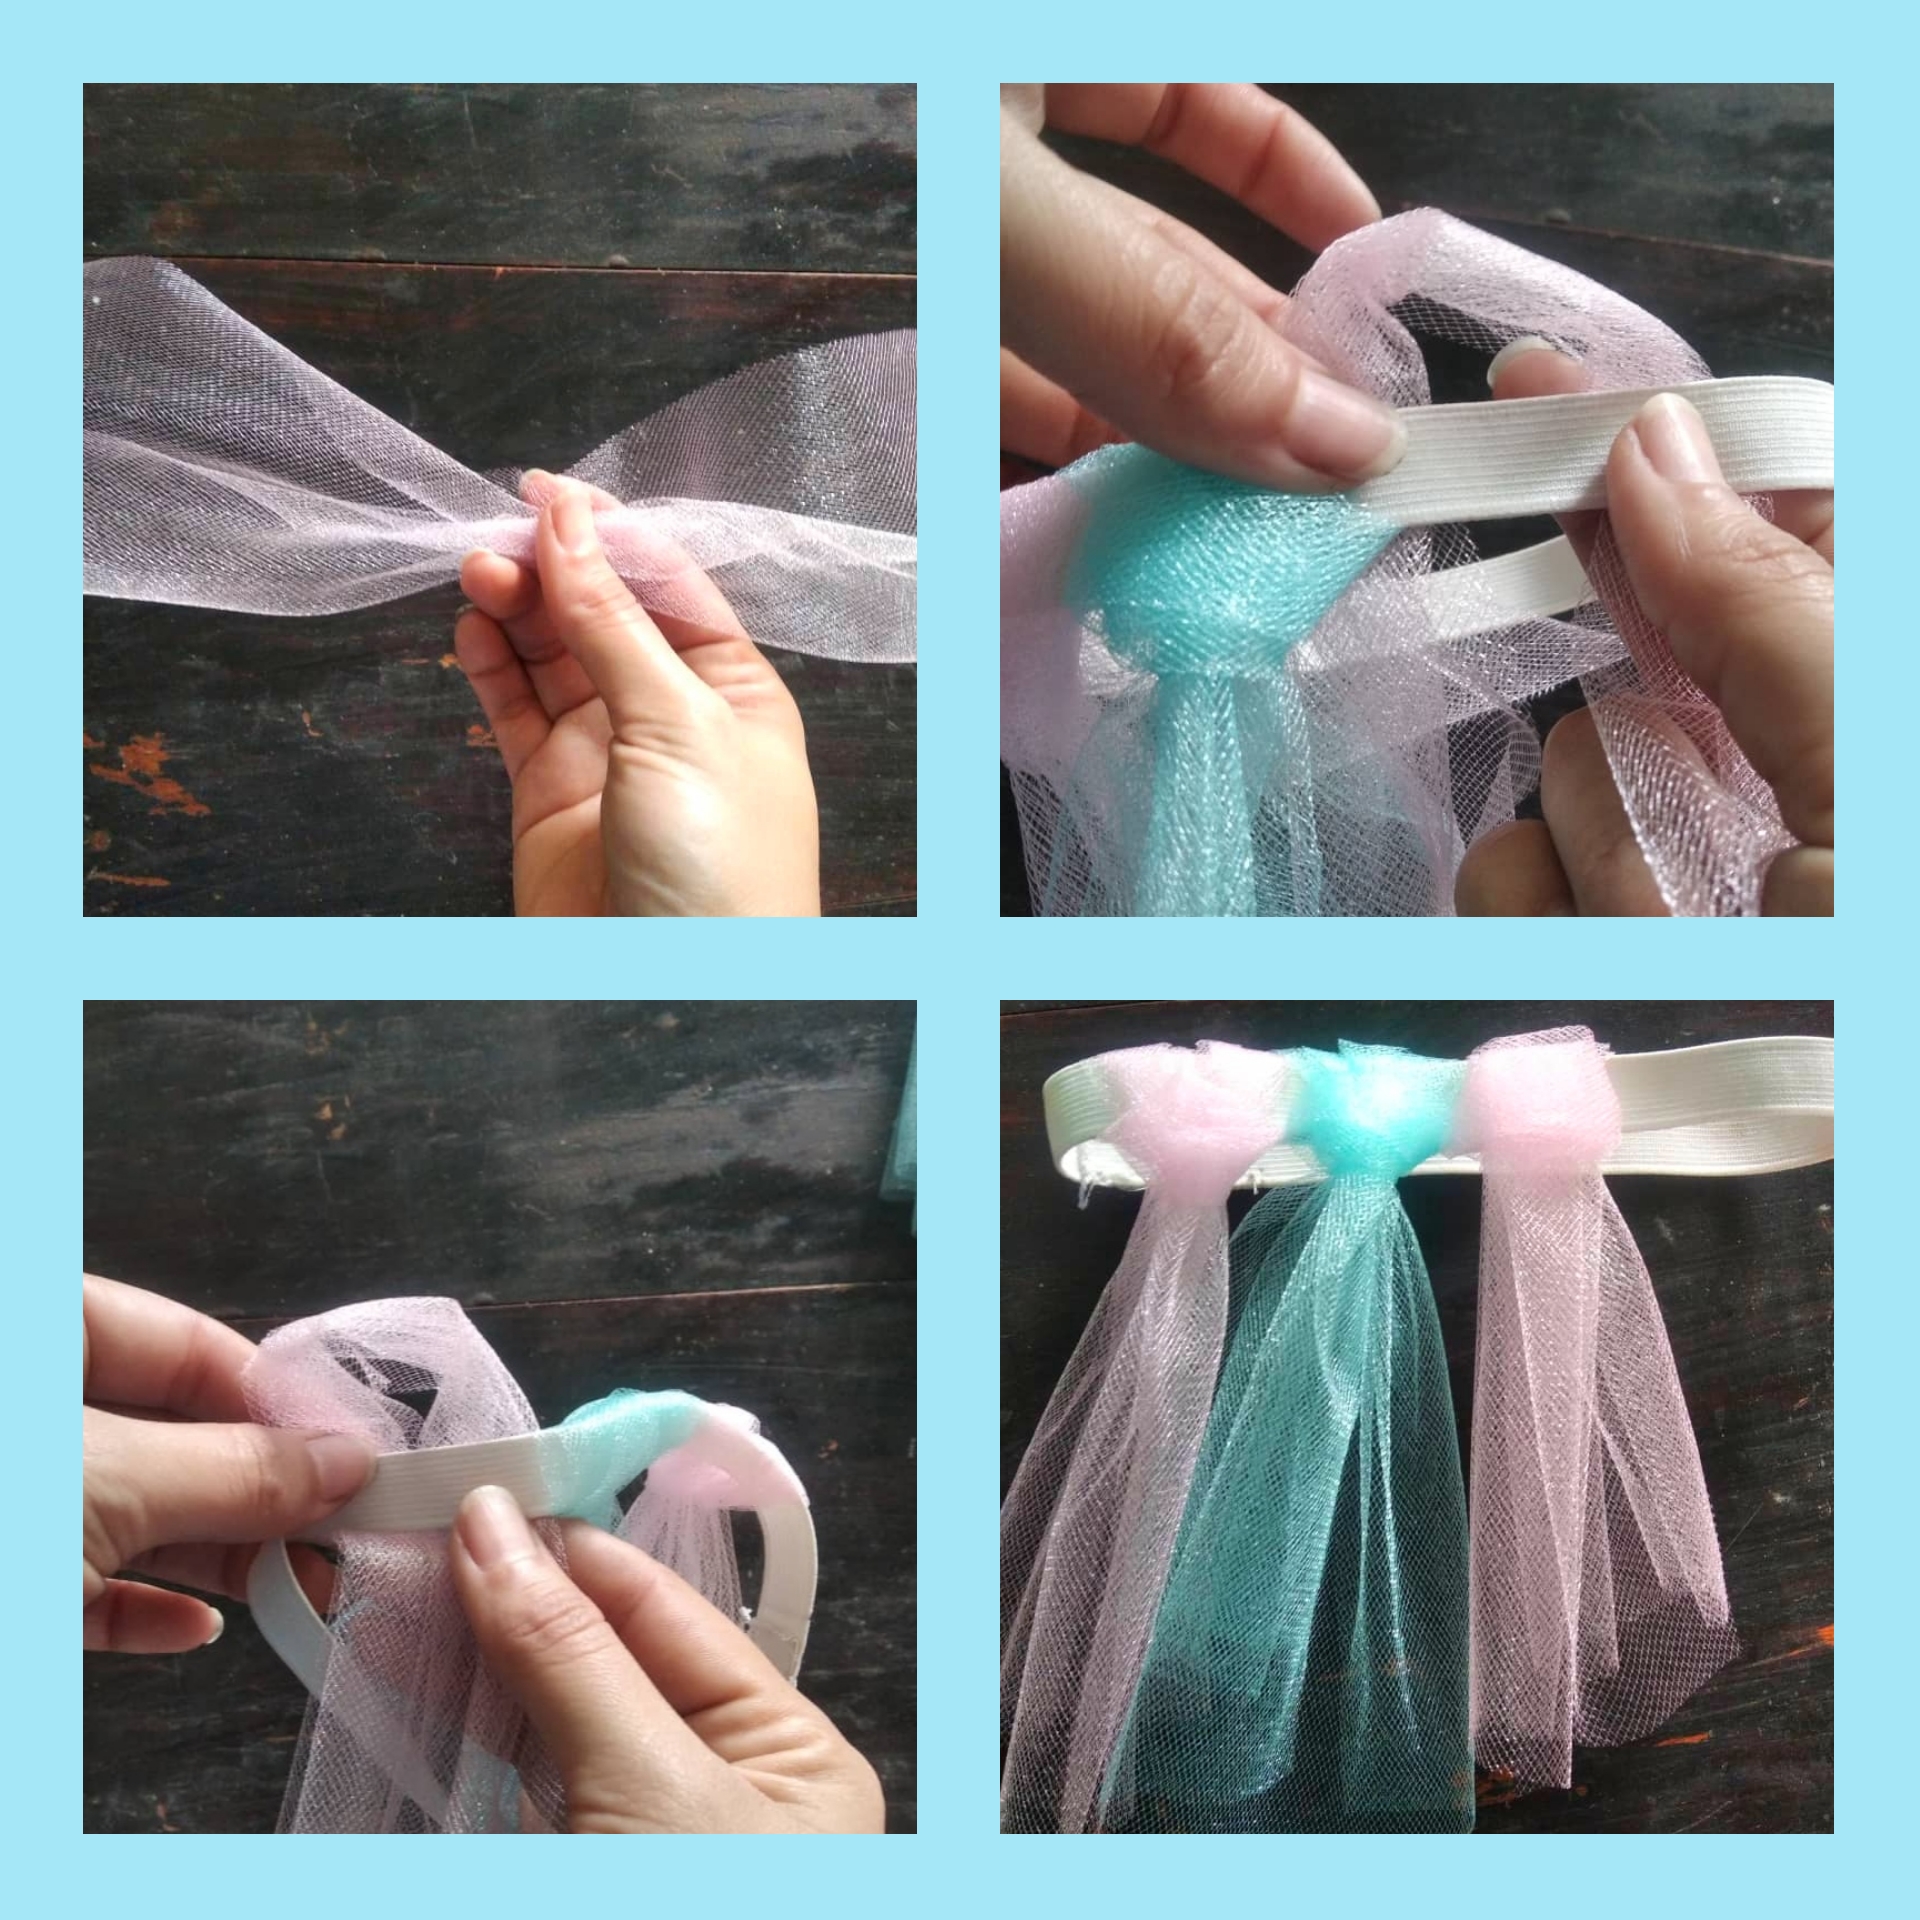
Staying this way, friends, we already see how the tutu is forming, it looks great, but it's still missing.
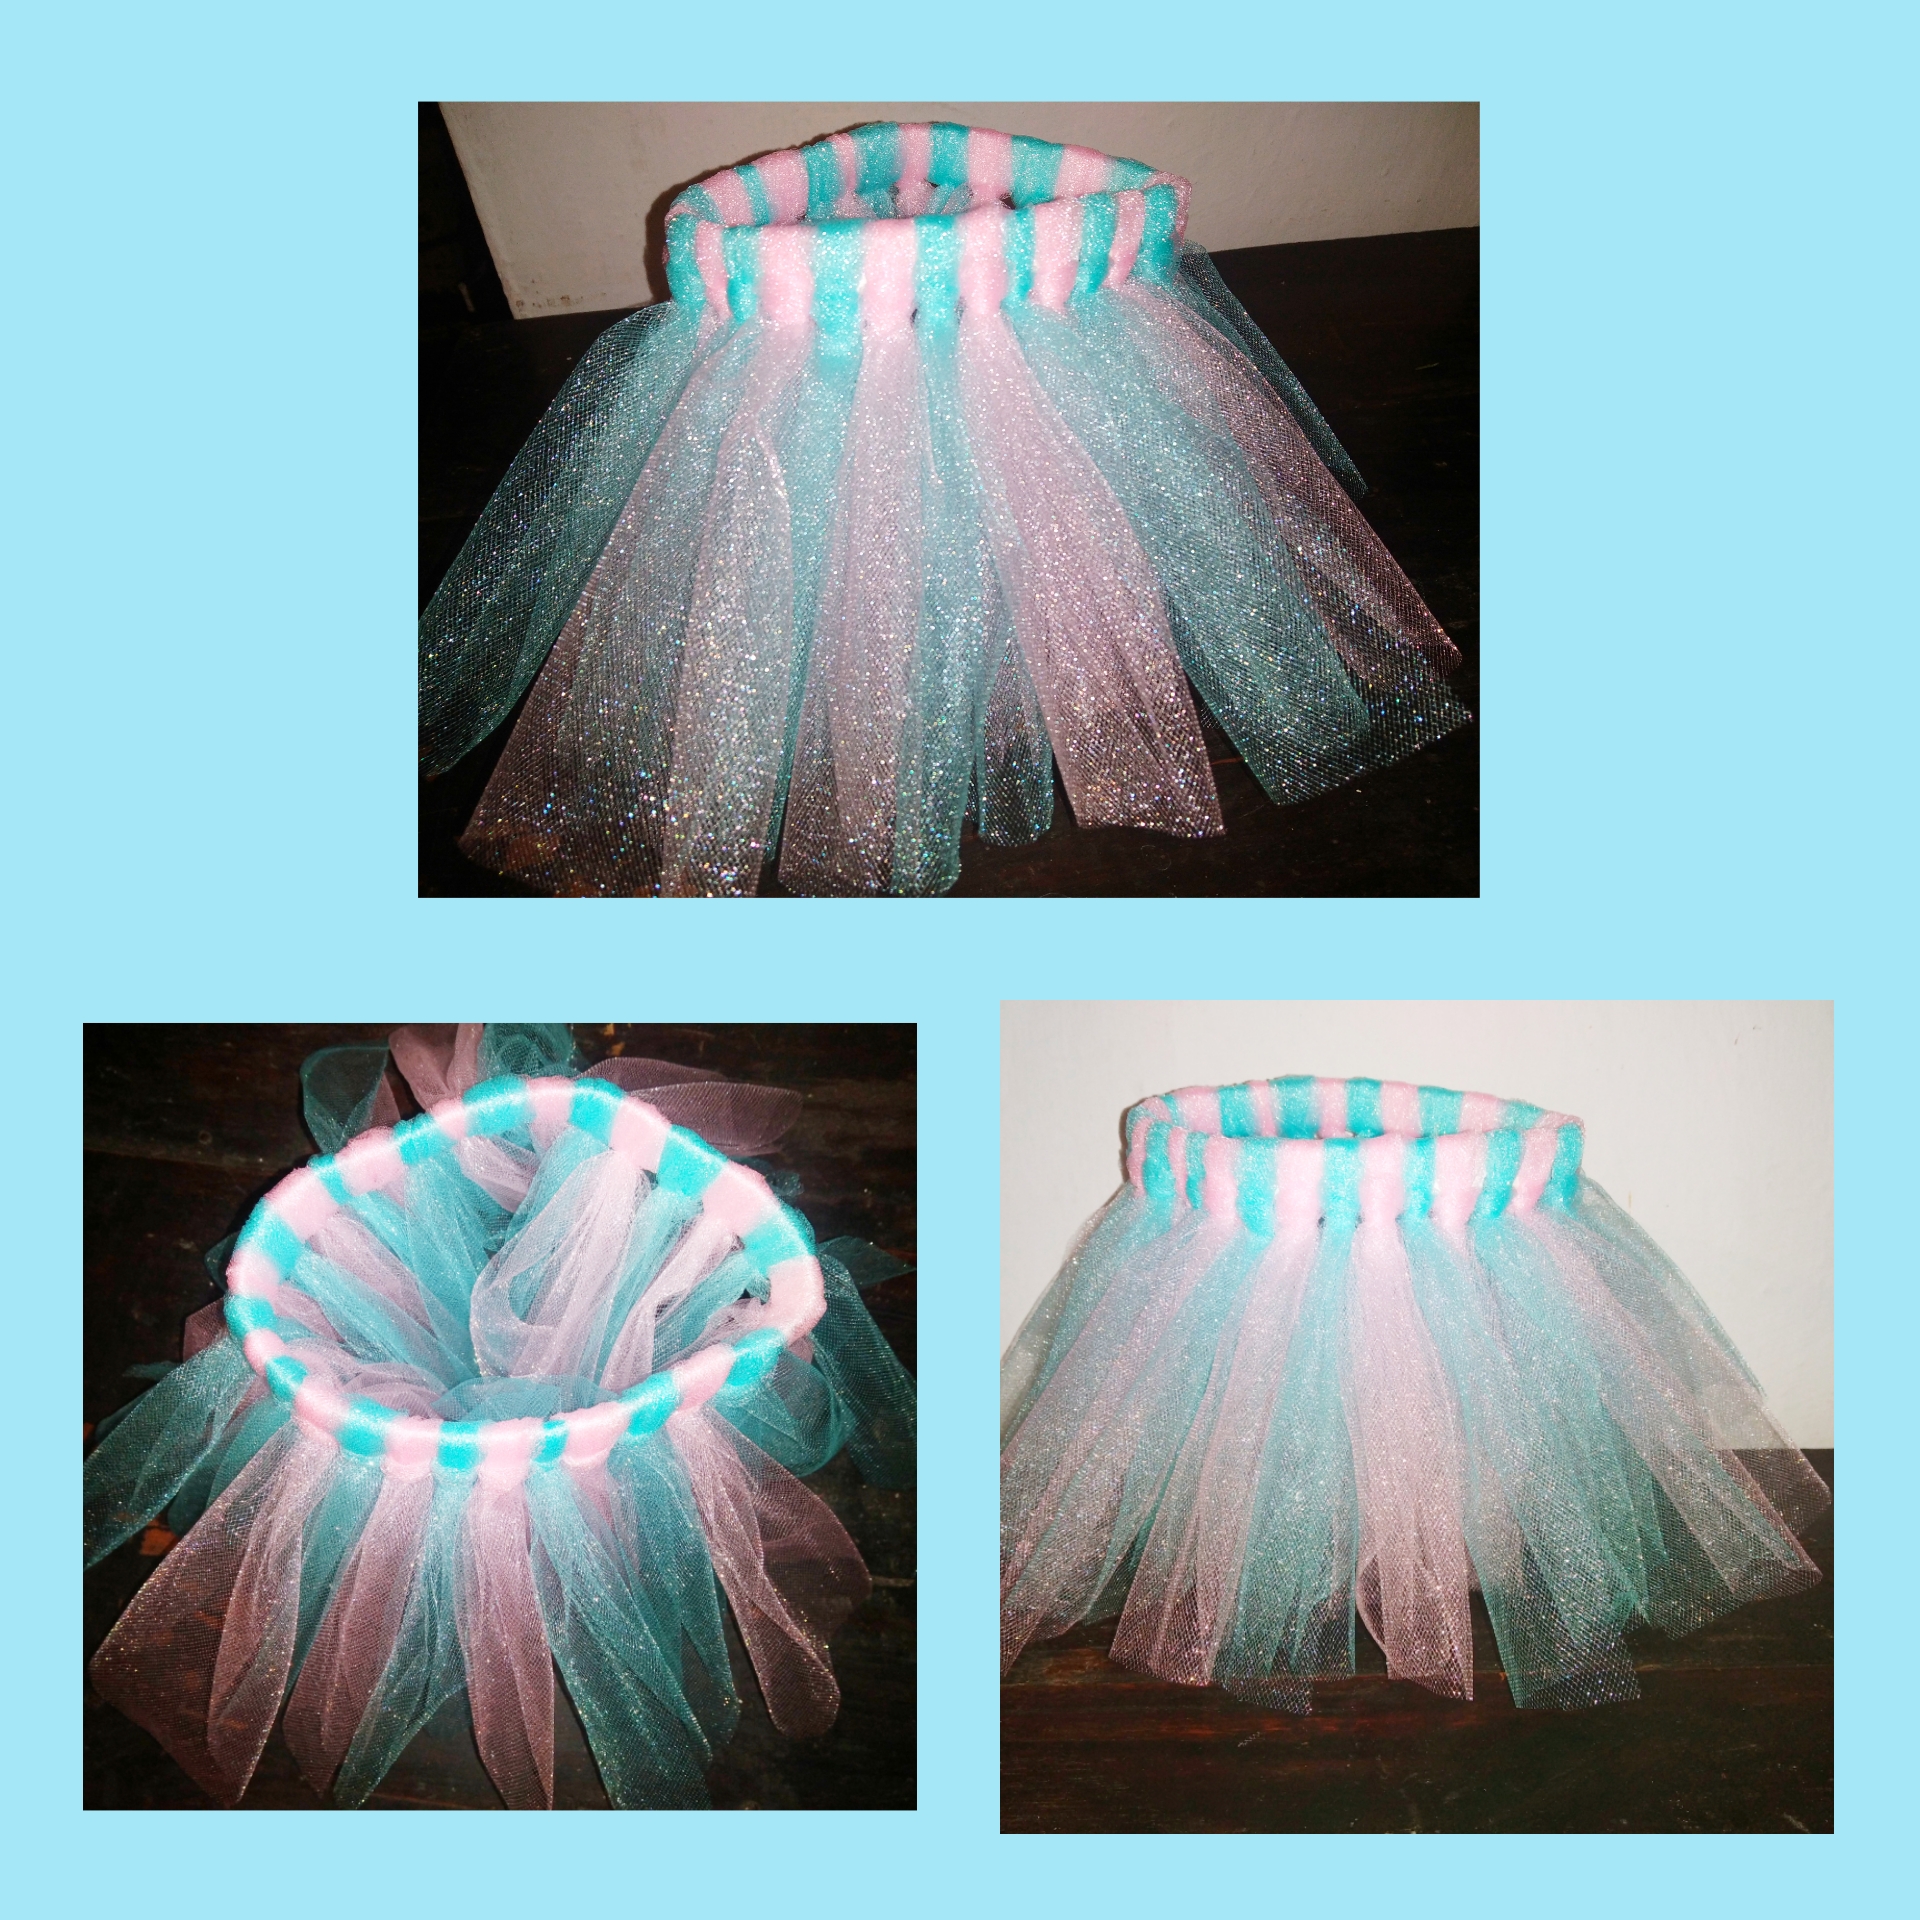
Step 7.We take the girl's panties, with a needle and thread we are going to sew on the upper part of the tutu and in this way we have fixed the panties to our tutu. This idea of gluing her panties occurred to me because since she is a very small baby who wears a diaper so we can protect her diaper and prevent it from being noticed, it is really adorable.
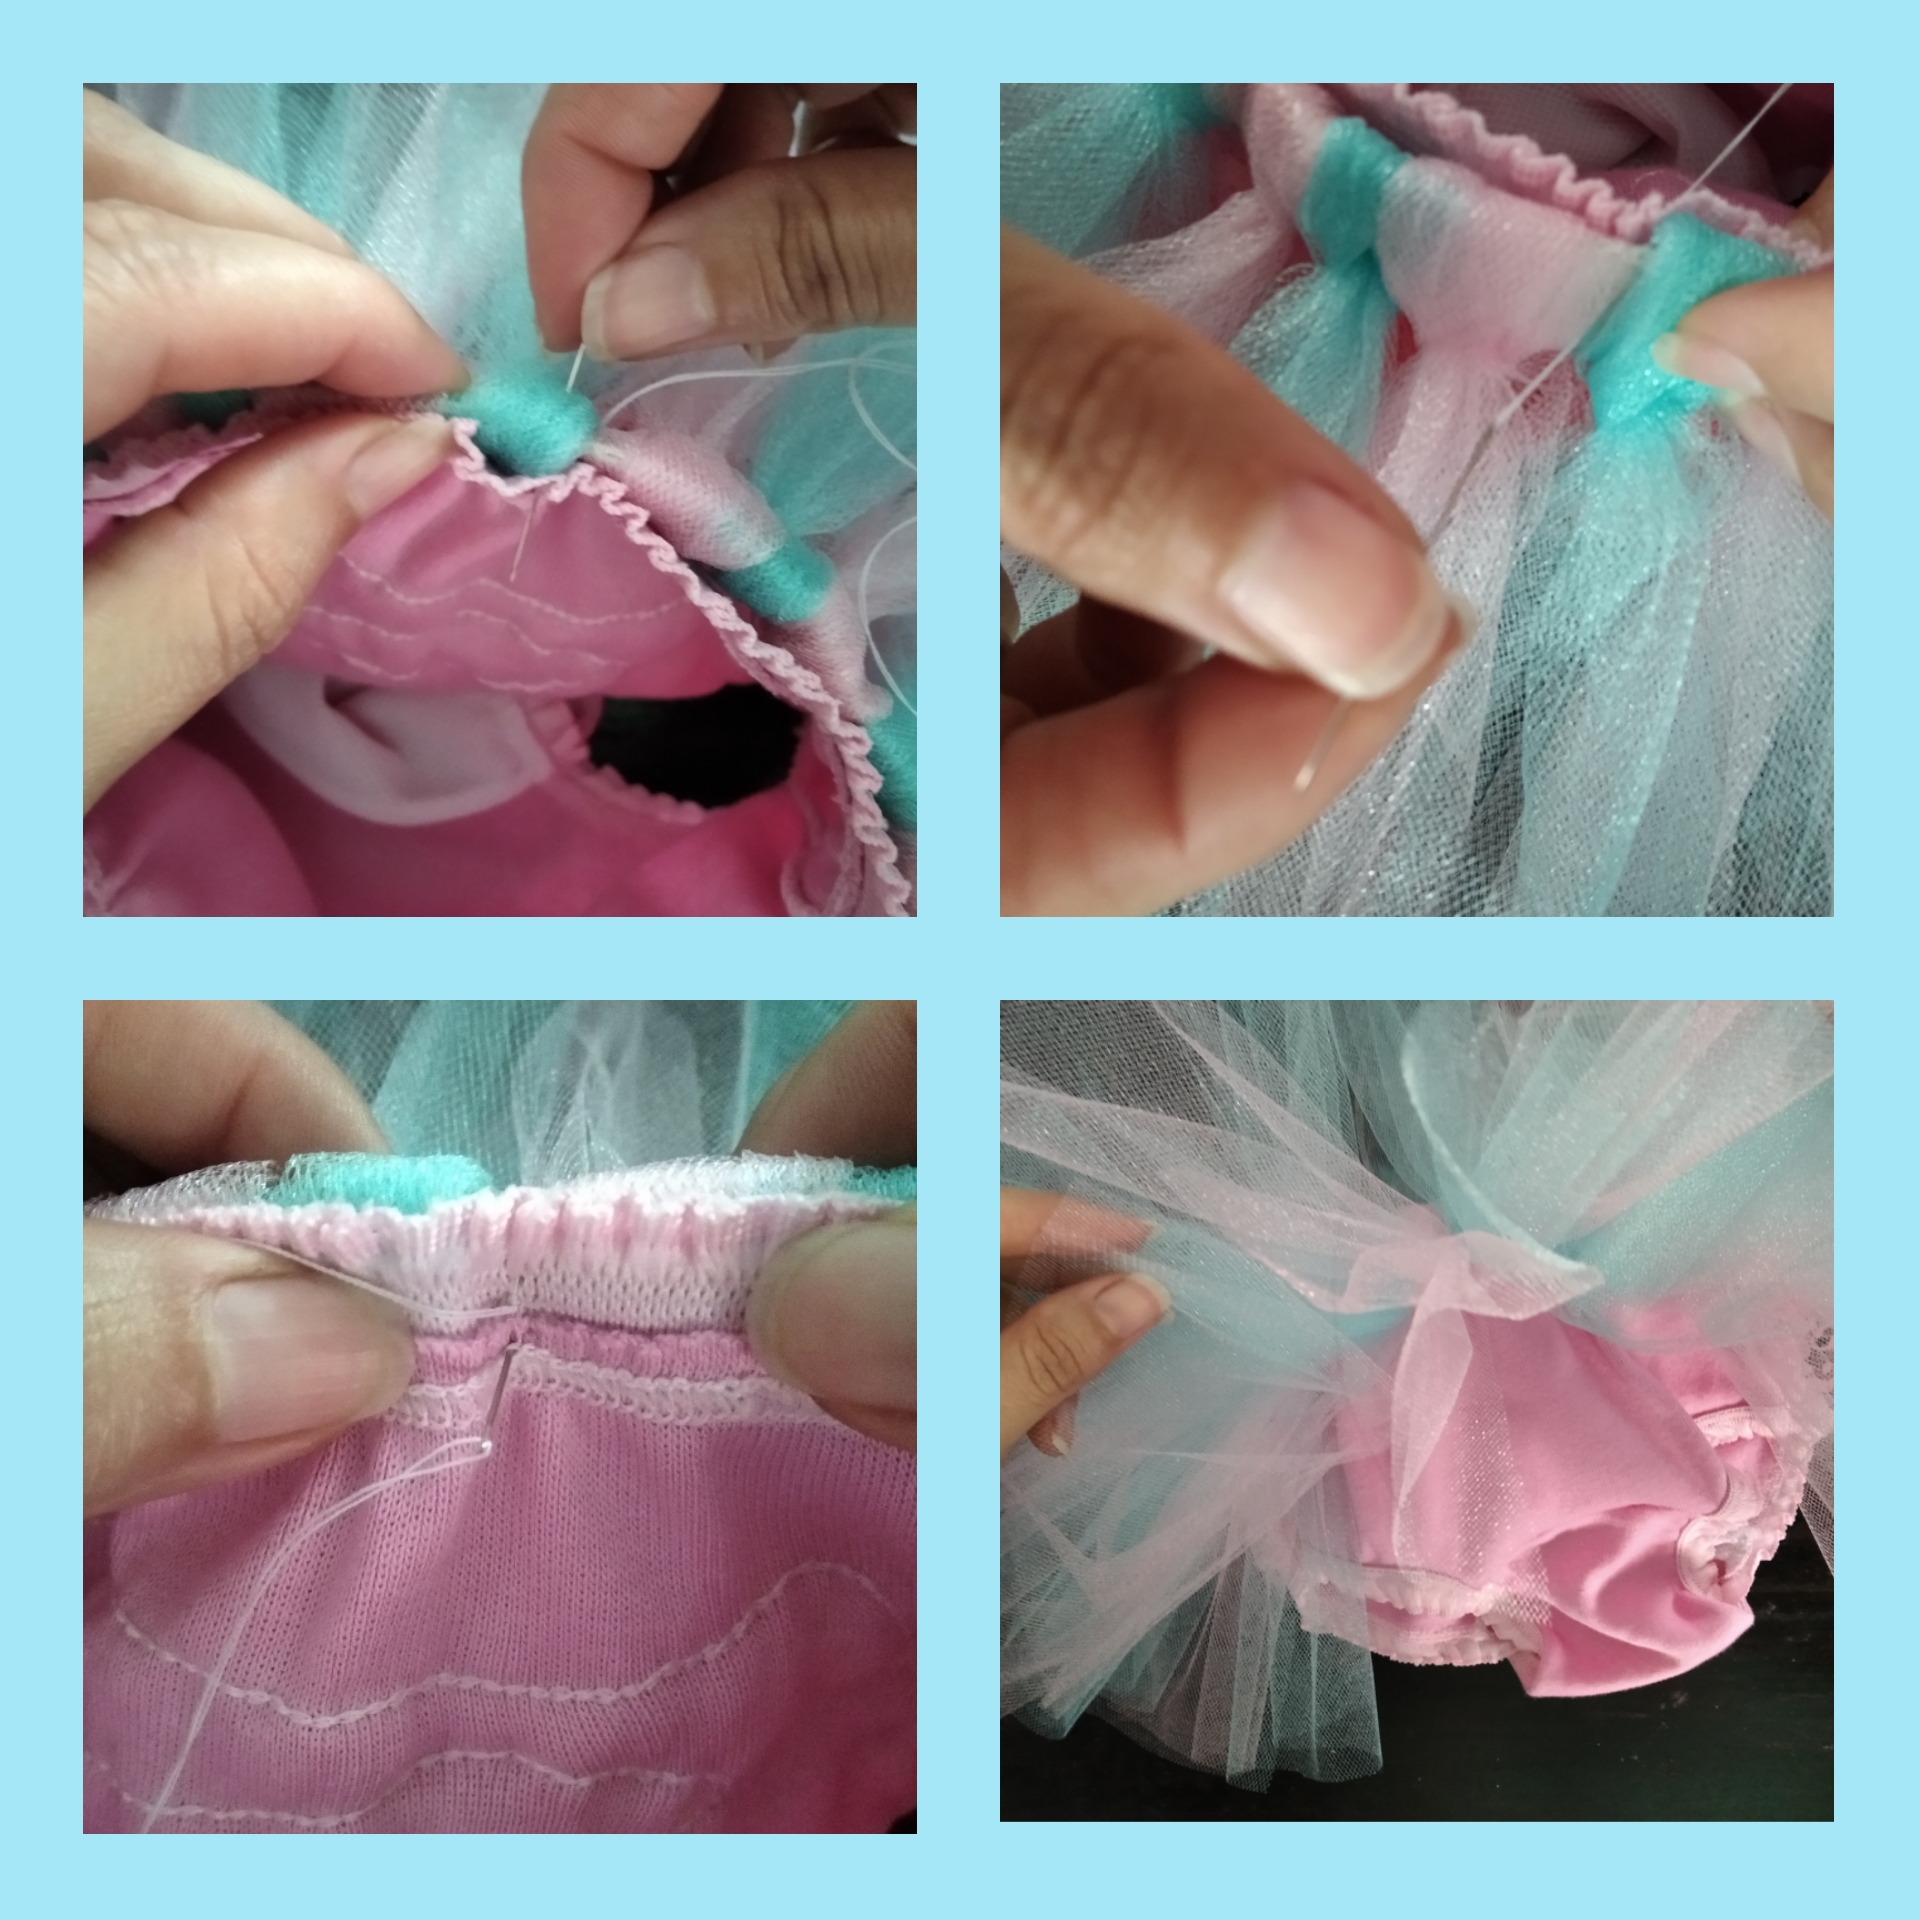
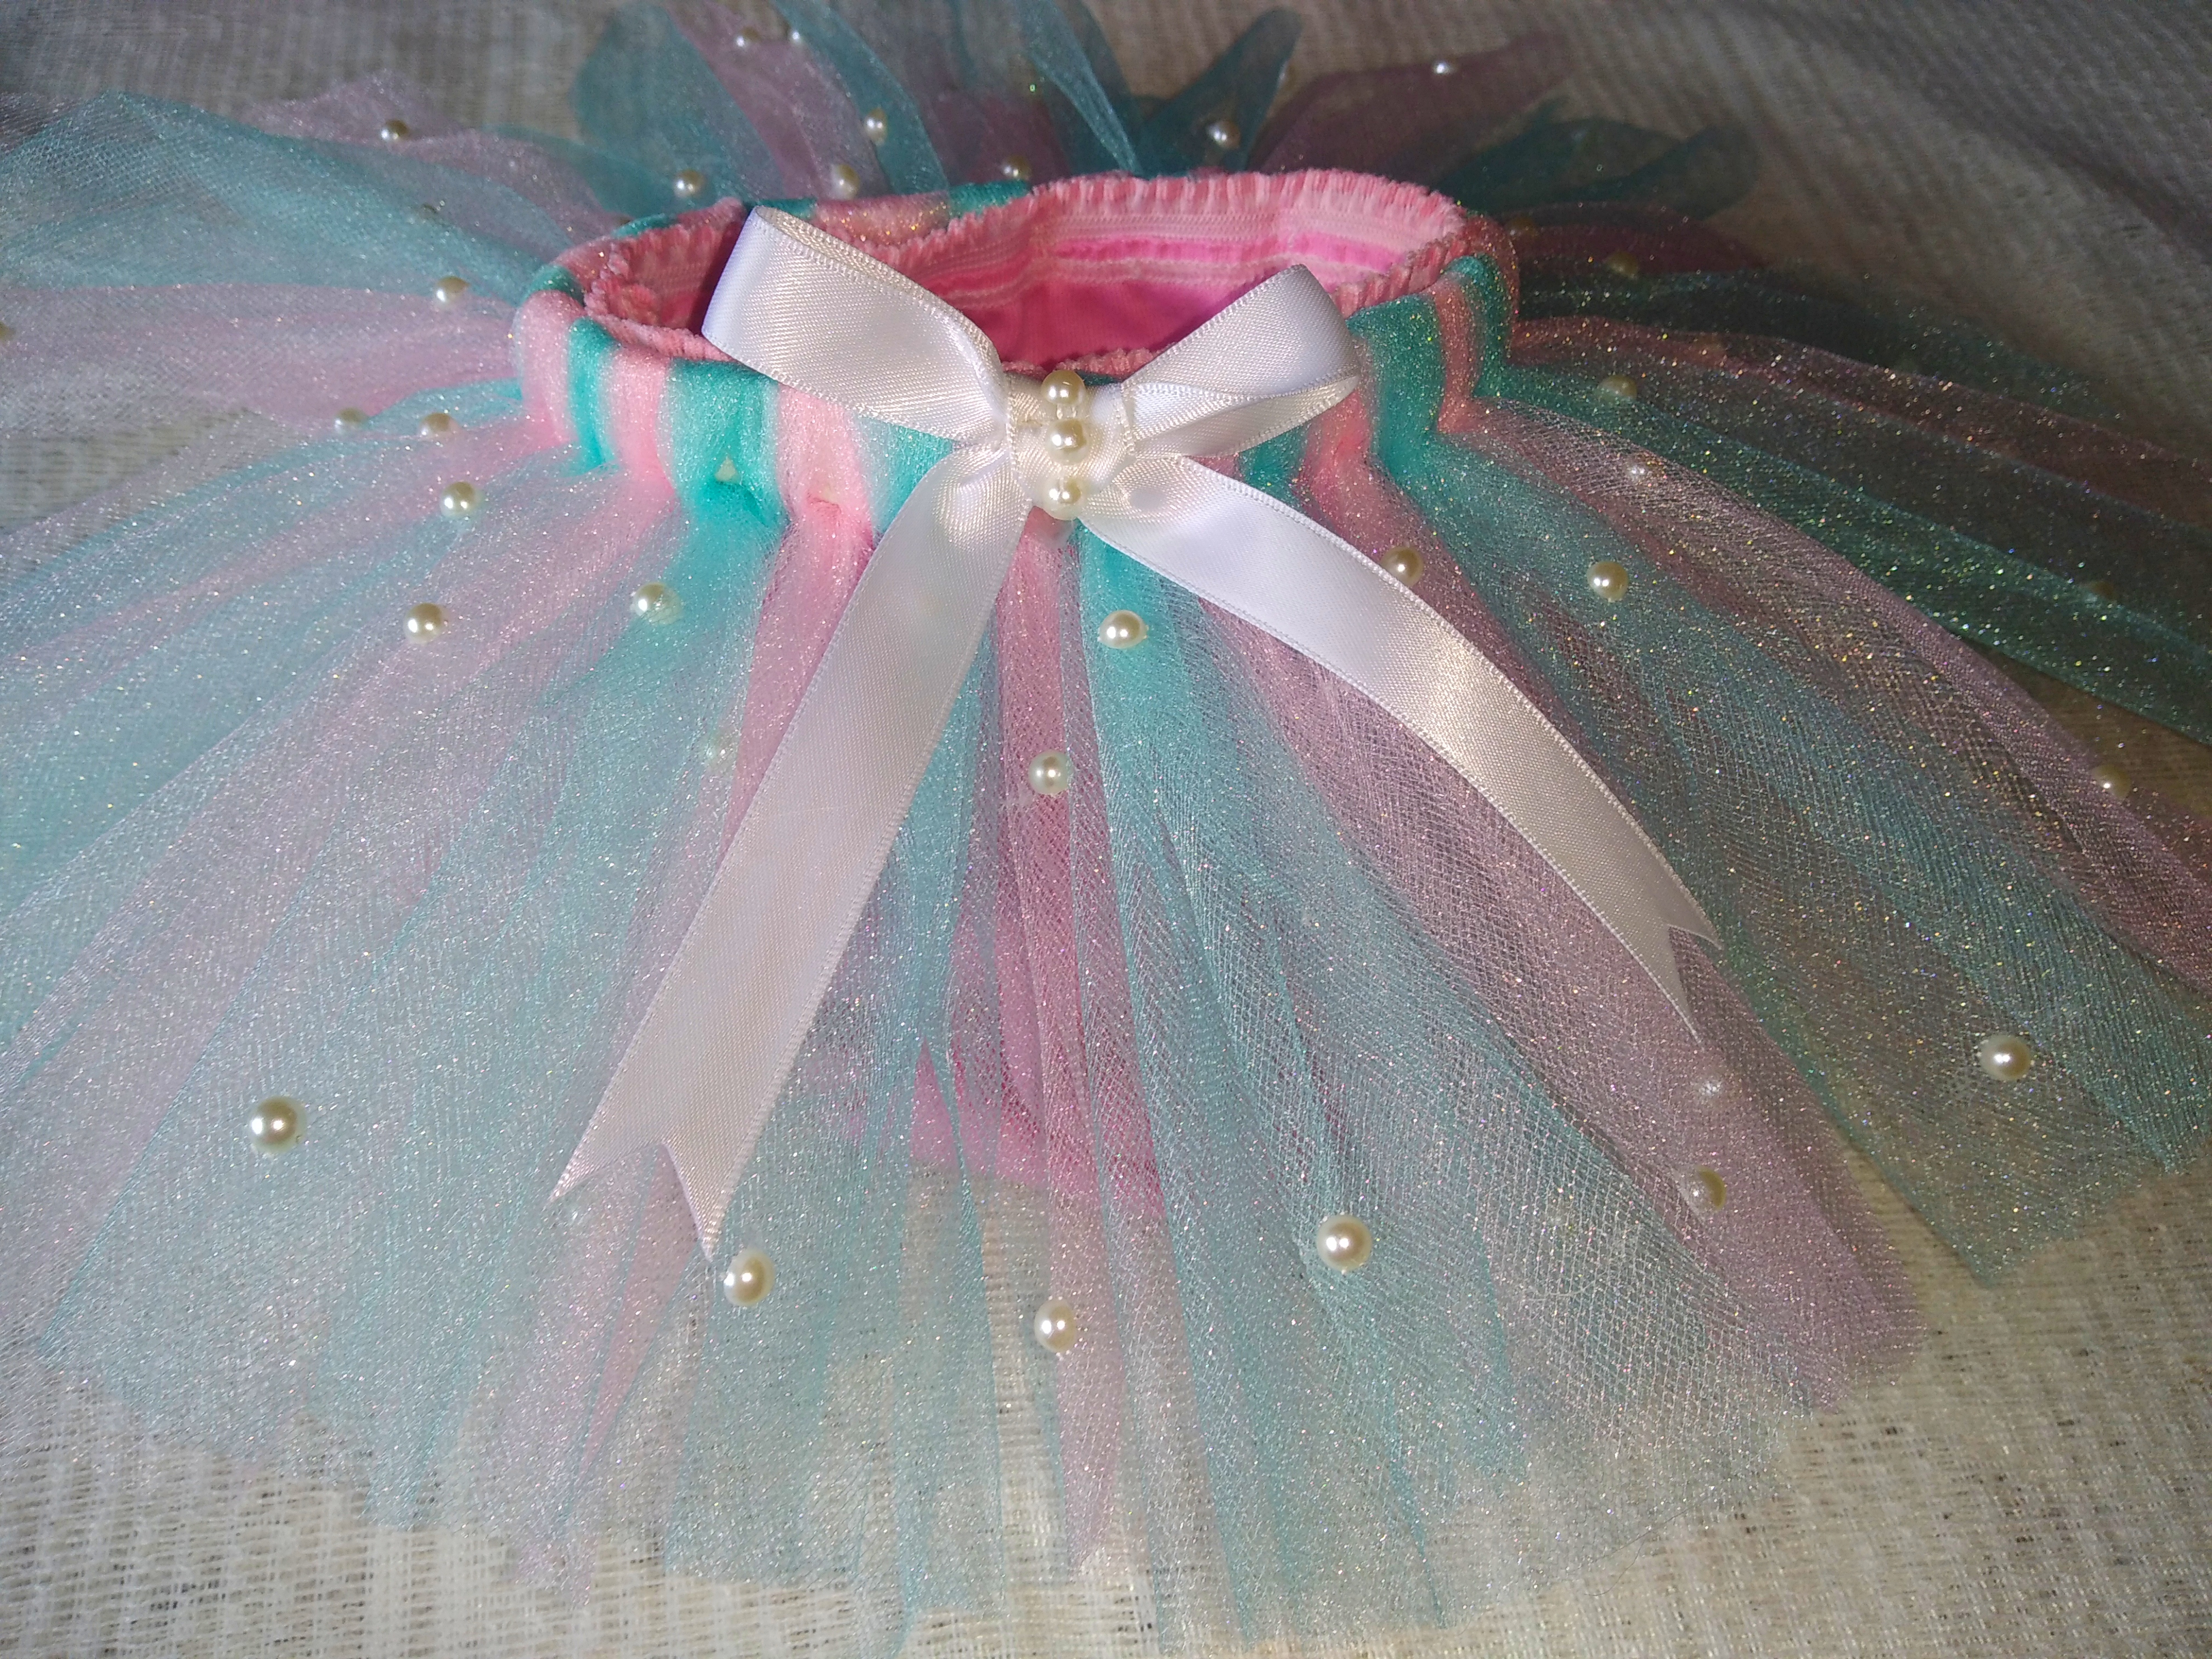
Step 8.In this step we are going to decorate the tutu, we take the glue gun and we are going to glue the pearls that we have chosen for this tutu one by one, we place one on the top and one on the bottom. at the bottom of each piece of tulle.
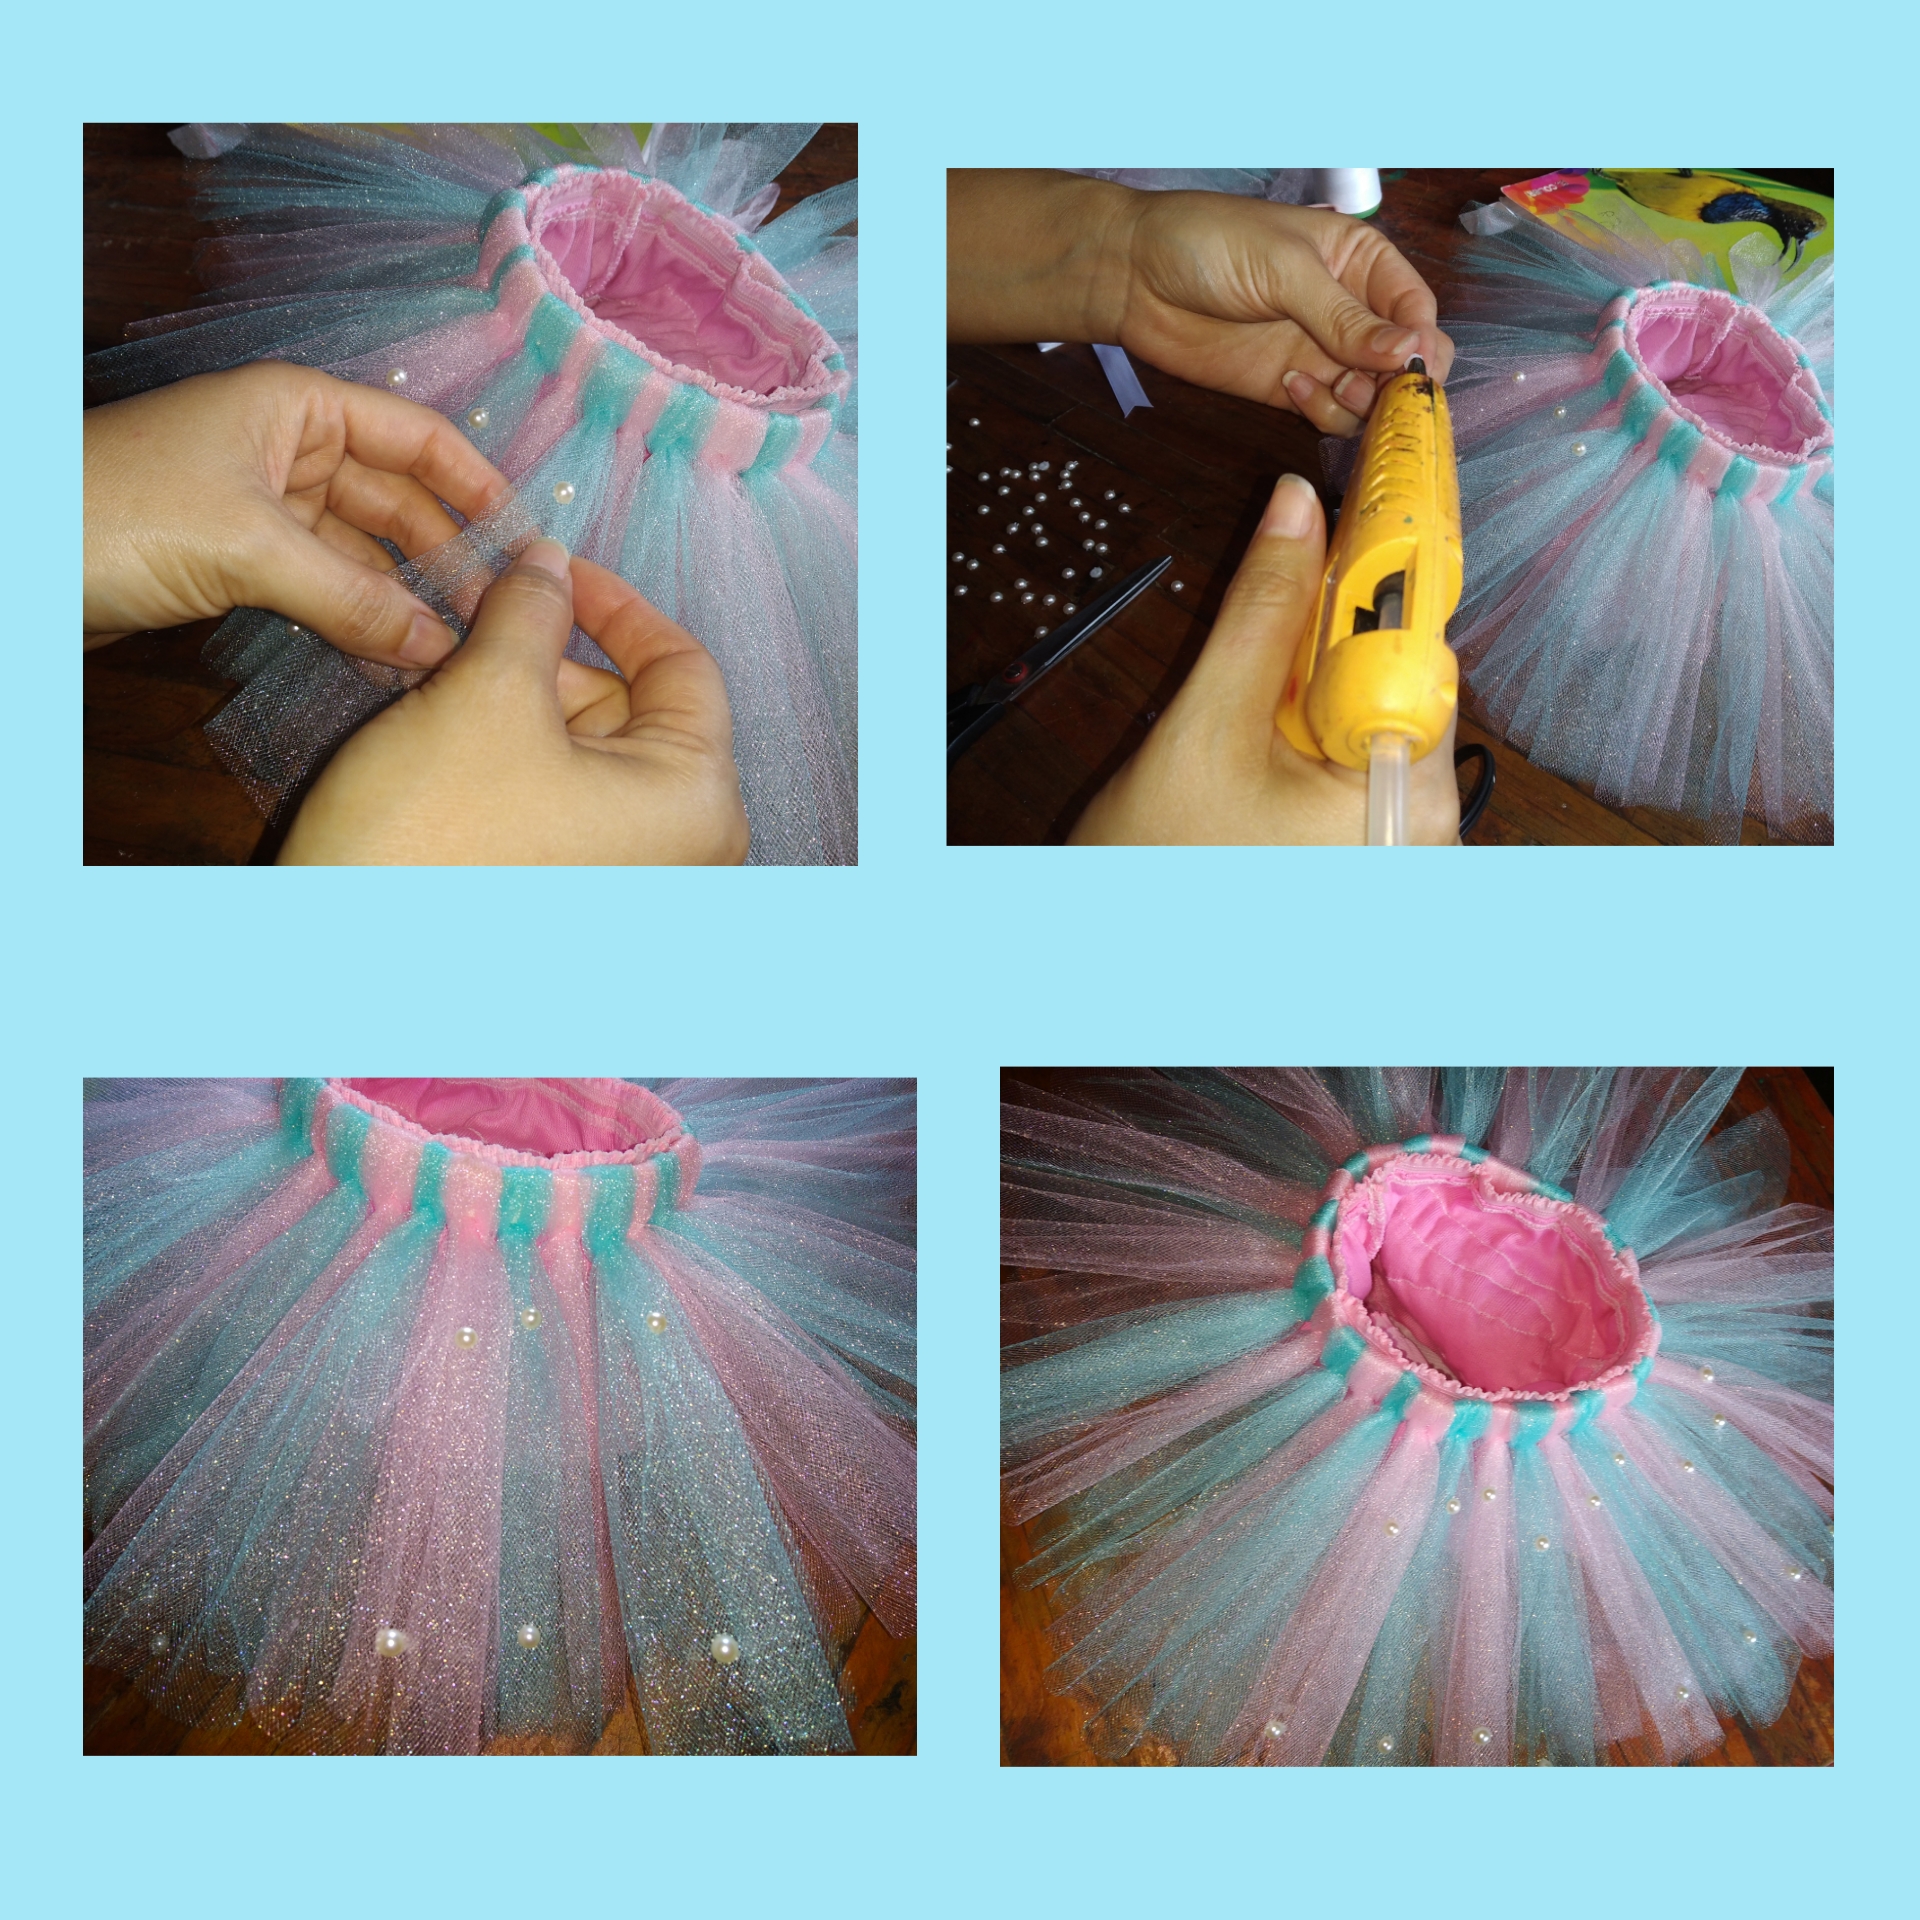
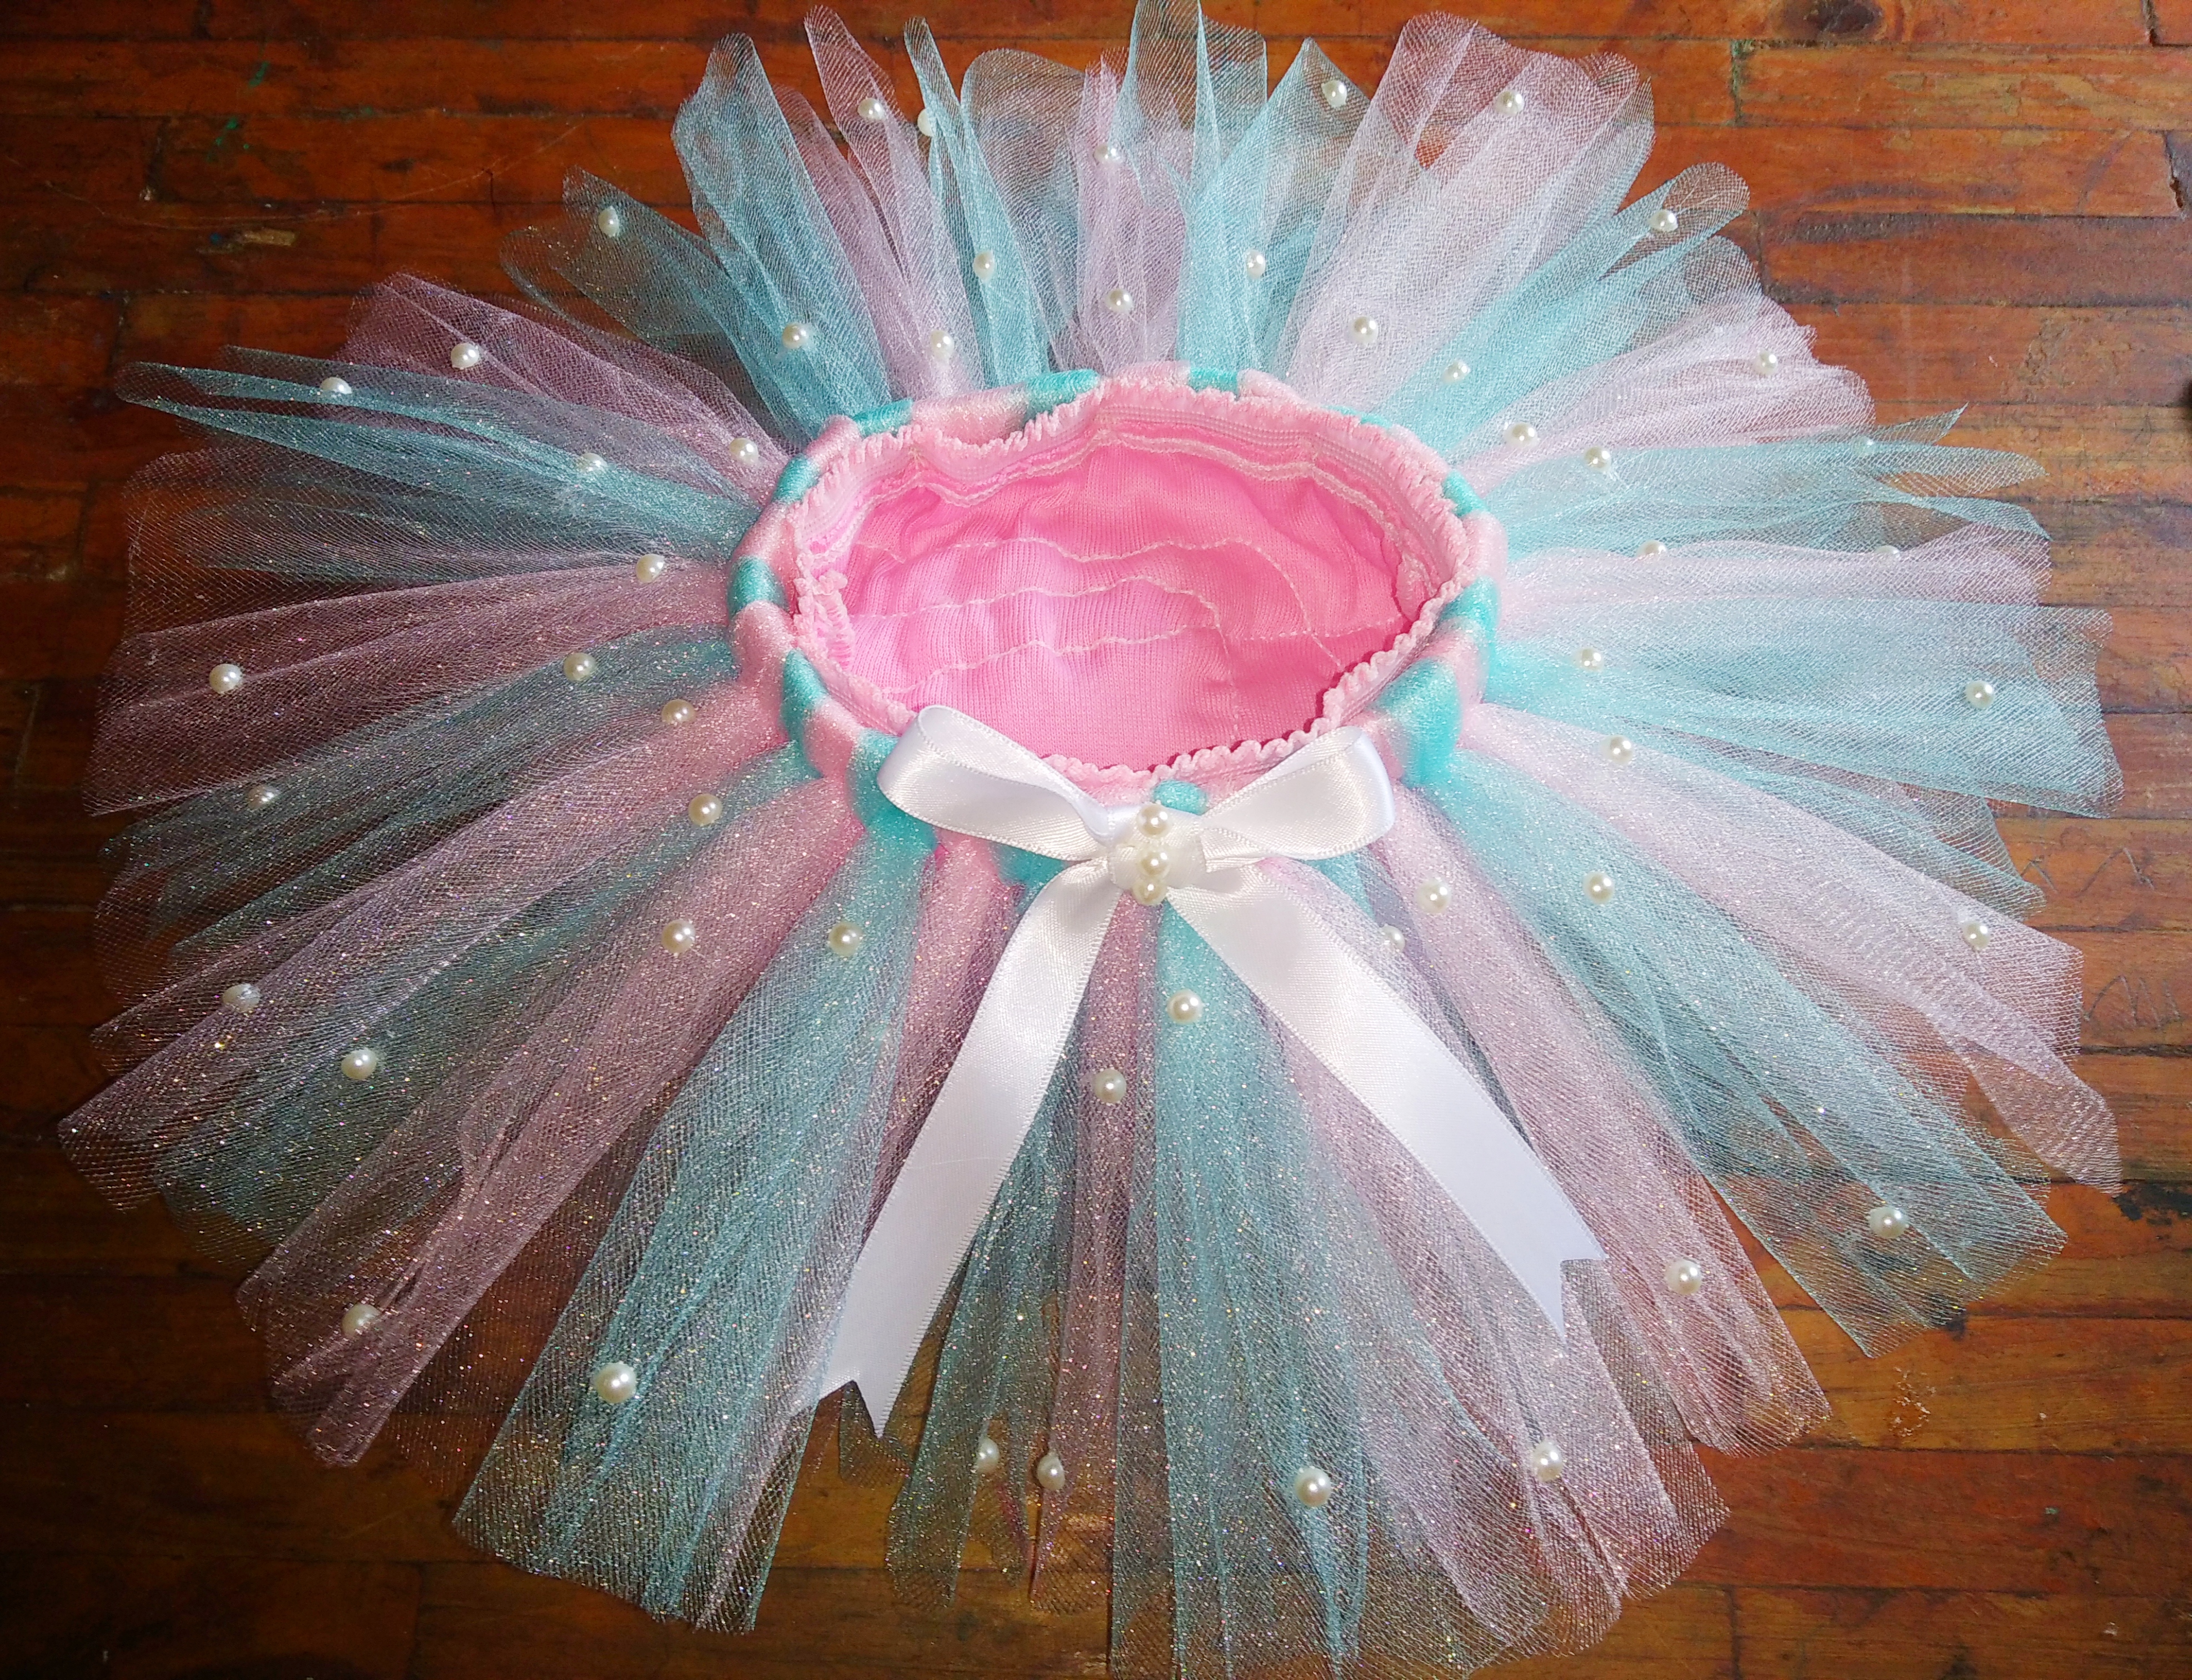
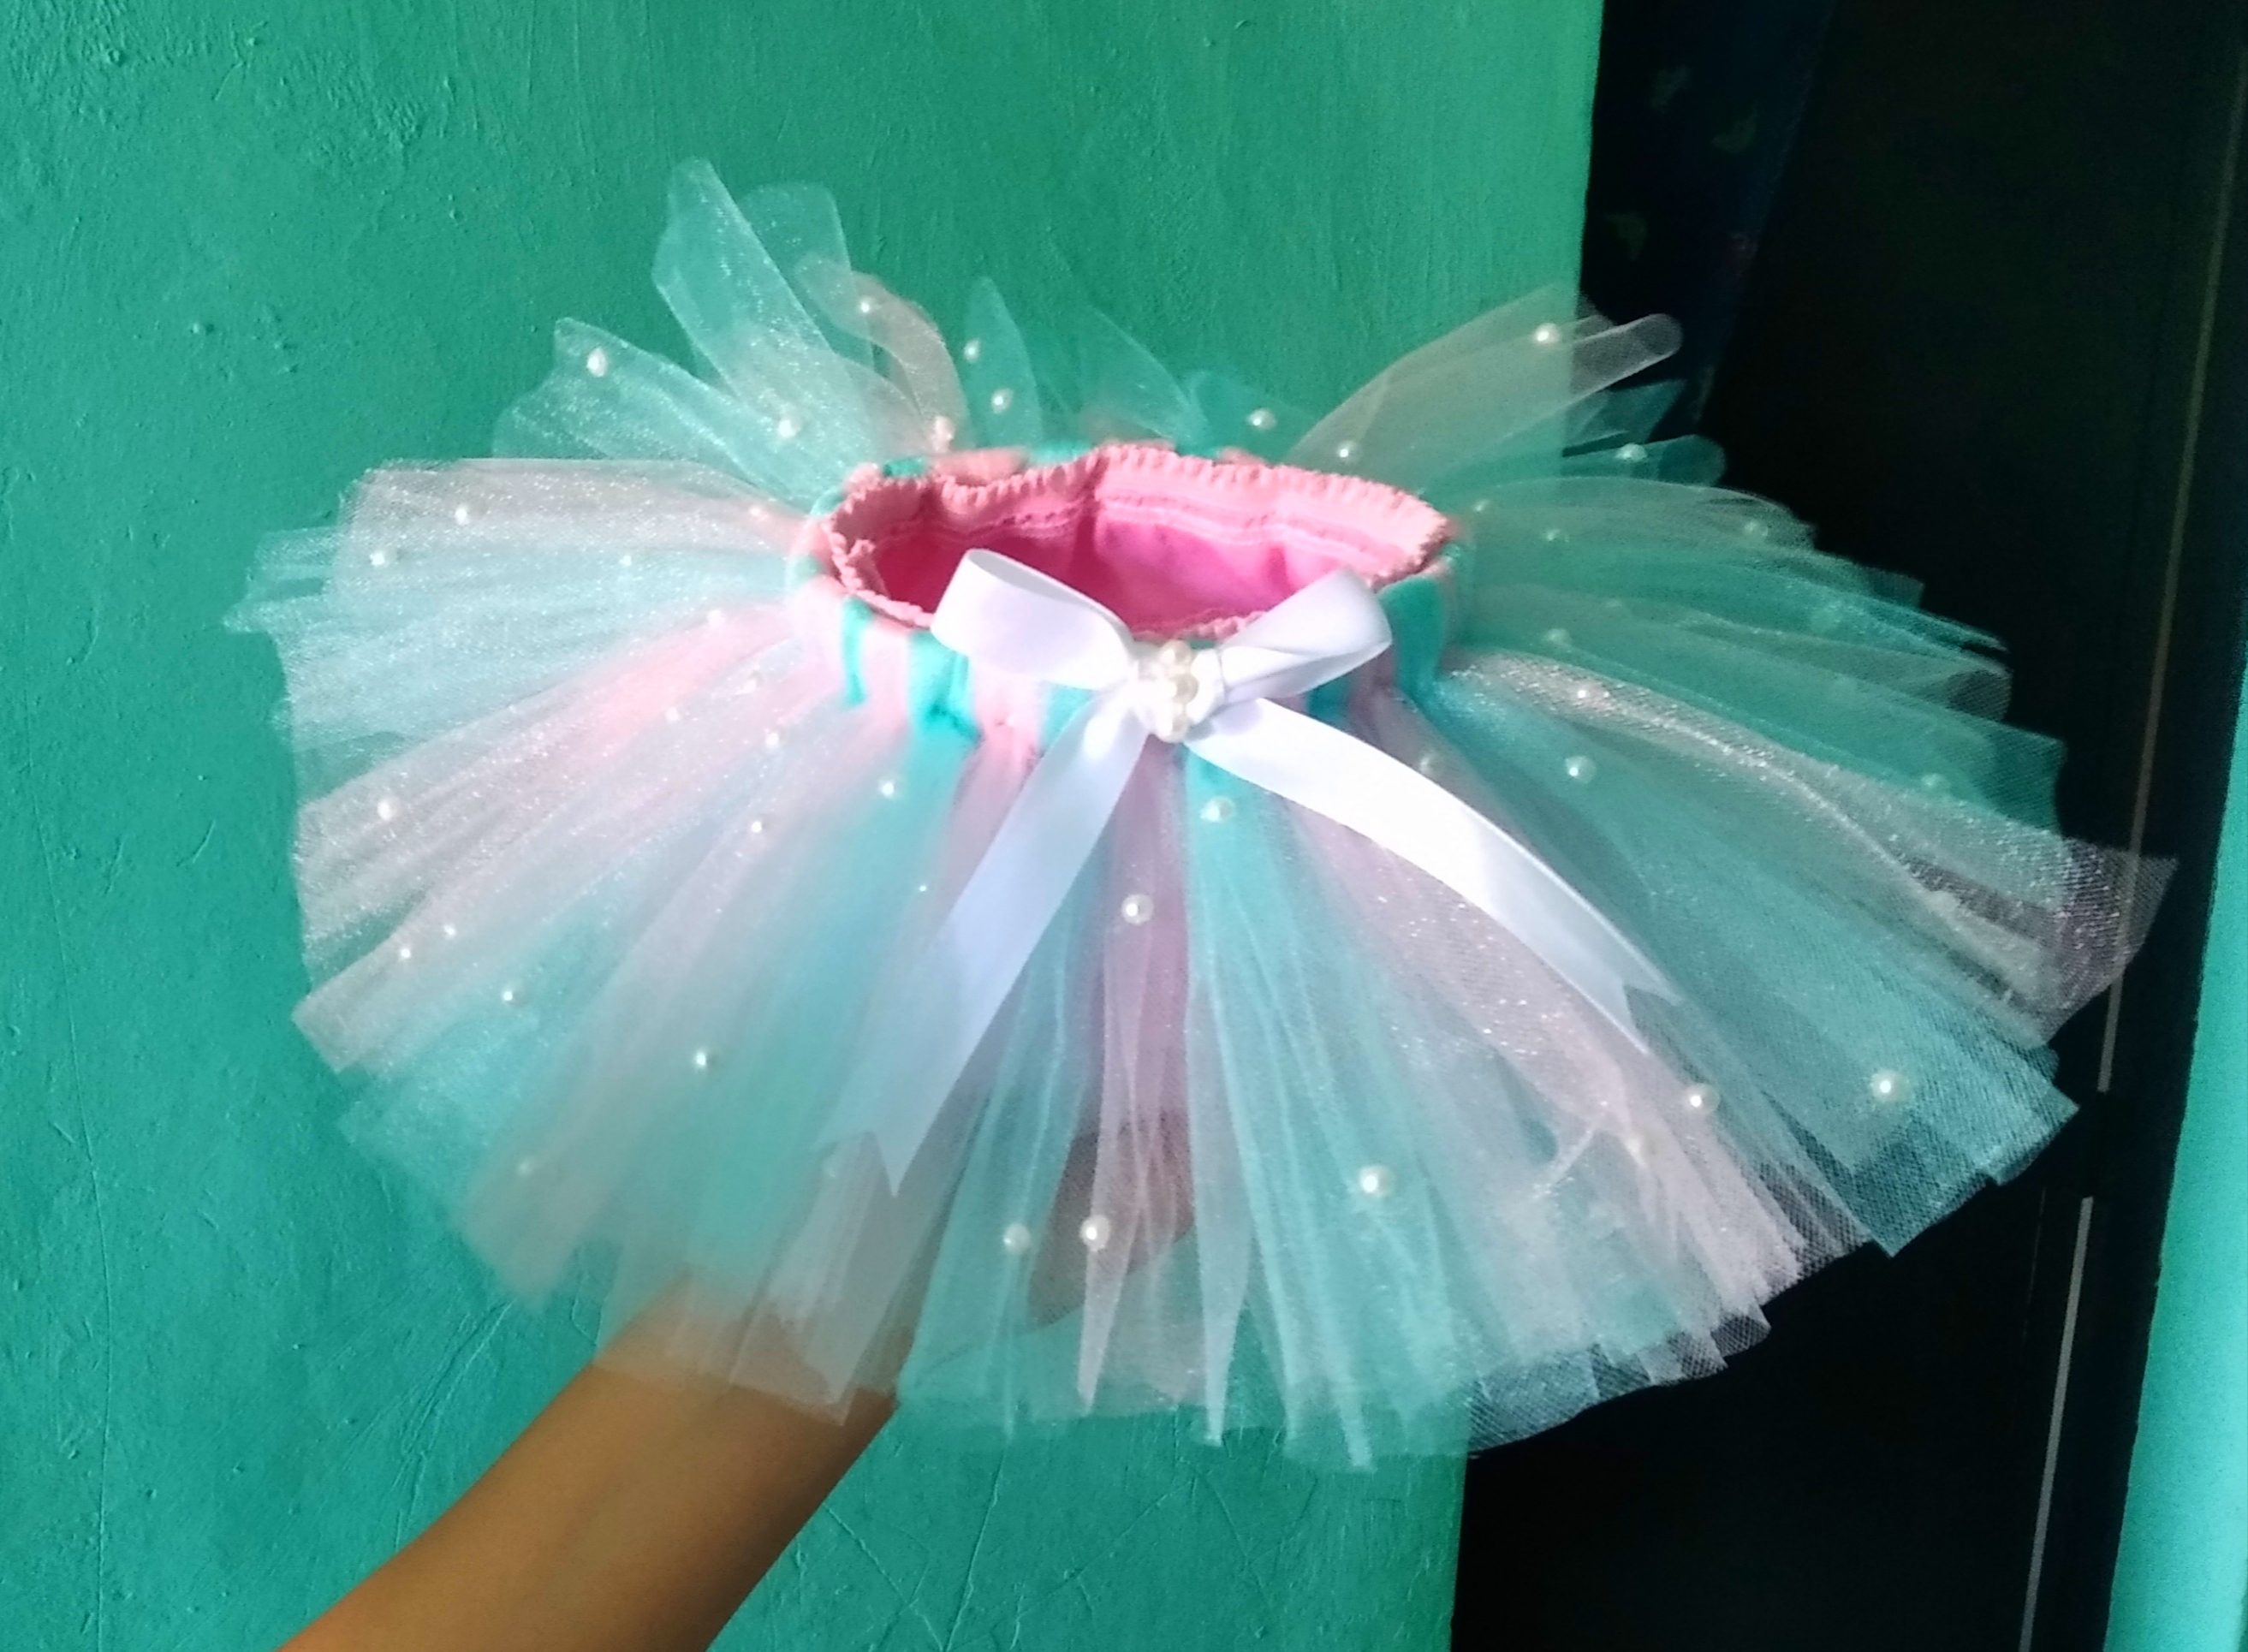
Step 9.As the last step to complete this beauty, we are going to take the bow that we had already created and we are going to attach it to the tutu with silicone and glue it in the entire center. And now my friends have finished our tutu, as you can see it is very, very easy to do and the best thing is that it is super cute and cute. Let's see the result obtained.
Presentación Final.

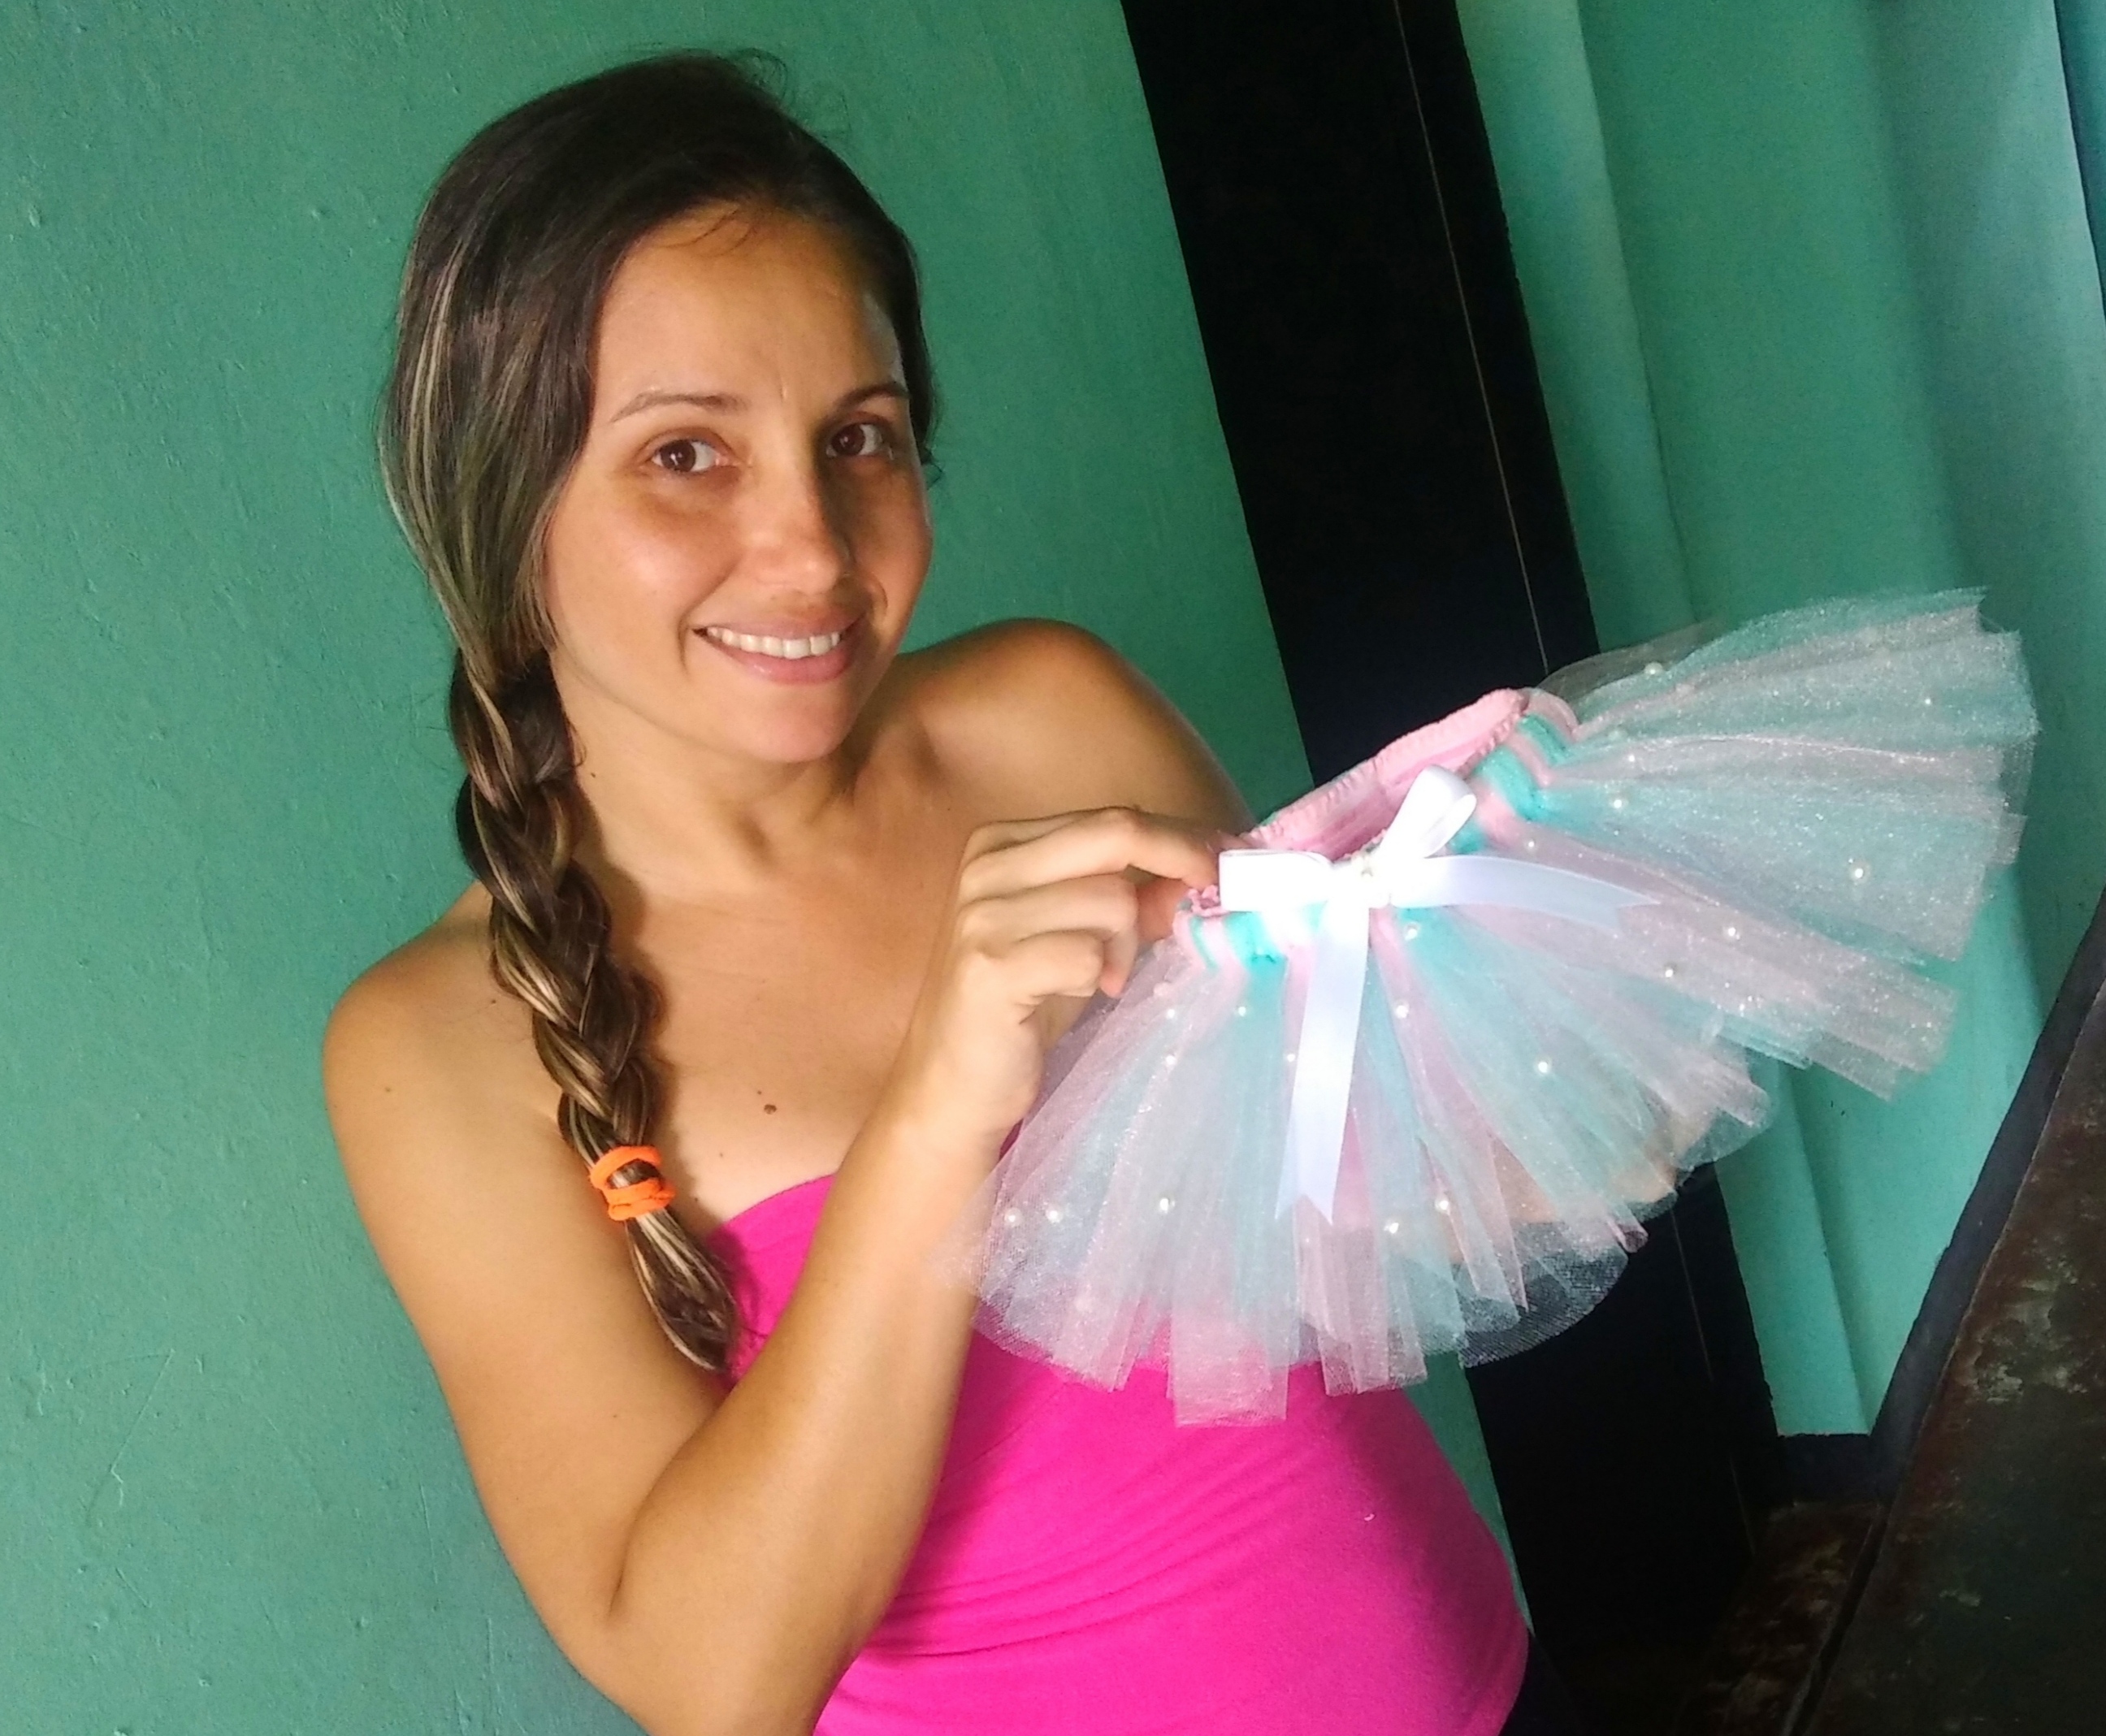
Friends I am super happy with the result, I hope you can do it at home and you liked it as much as I do, I thank you for your attention and for visiting my publication, see you soon in another great one craft.
Gracias por su visita. 💕🥰
Thank you for visiting. 💕
Qué adorable tutú Mayi, sonreí mucho al verlo imaginandome las princesitas de la casa jugando con ellos.
Hola mi amor 😍 gracias por tu valioso comentario 😊🥰 yo también quedé encantada al ver el resultado final 😍 fué una maravillosa manualidad. 😍😍
Que Lindo 😍😍😍esta precioso a demás super sencillo de hacer. Las niñas se ven lindisimas con Tutu 😍me encanto.
Siii está súper lindo, anímate a tener una hembrita para hacerle uno.😃😁😁🥰😍
Hola amiga, hermoso este tutu para bebes. Me gusto mucho. Feliz dia y mucha suerte.
Muchas gracias por ver mi post amiga 😊 me alegra que te haya gustado. 😊😊🥰
Congratulations @mayi04! You have completed the following achievement on the Hive blockchain and have been rewarded with new badge(s):
Your next target is to reach 3000 upvotes.
You can view your badges on your board and compare yourself to others in the Ranking
If you no longer want to receive notifications, reply to this comment with the word
STOPCheck out the last post from @hivebuzz:
Support the HiveBuzz project. Vote for our proposal!