
Hola, hola mi querida comunidad de #Hivediy.🤗 🥰
Hello, hello my dear #Hivediy community.🤗

After a few long days in which I have not been able to post here on my beloved platform because to create we need time, a willing heart, a calm mind and love, but last Wednesday he got sick a little person who is almost like an aunt to me, every day she came home, very happy, when mom told me that they took her to the doctor I didn't think much of her since she was a very active person and I thought it must be something temporary. But it was not like that unfortunately yesterday we buried her, it is a very hard blow when our loved ones have their time to leave, it is so difficult to accept death.
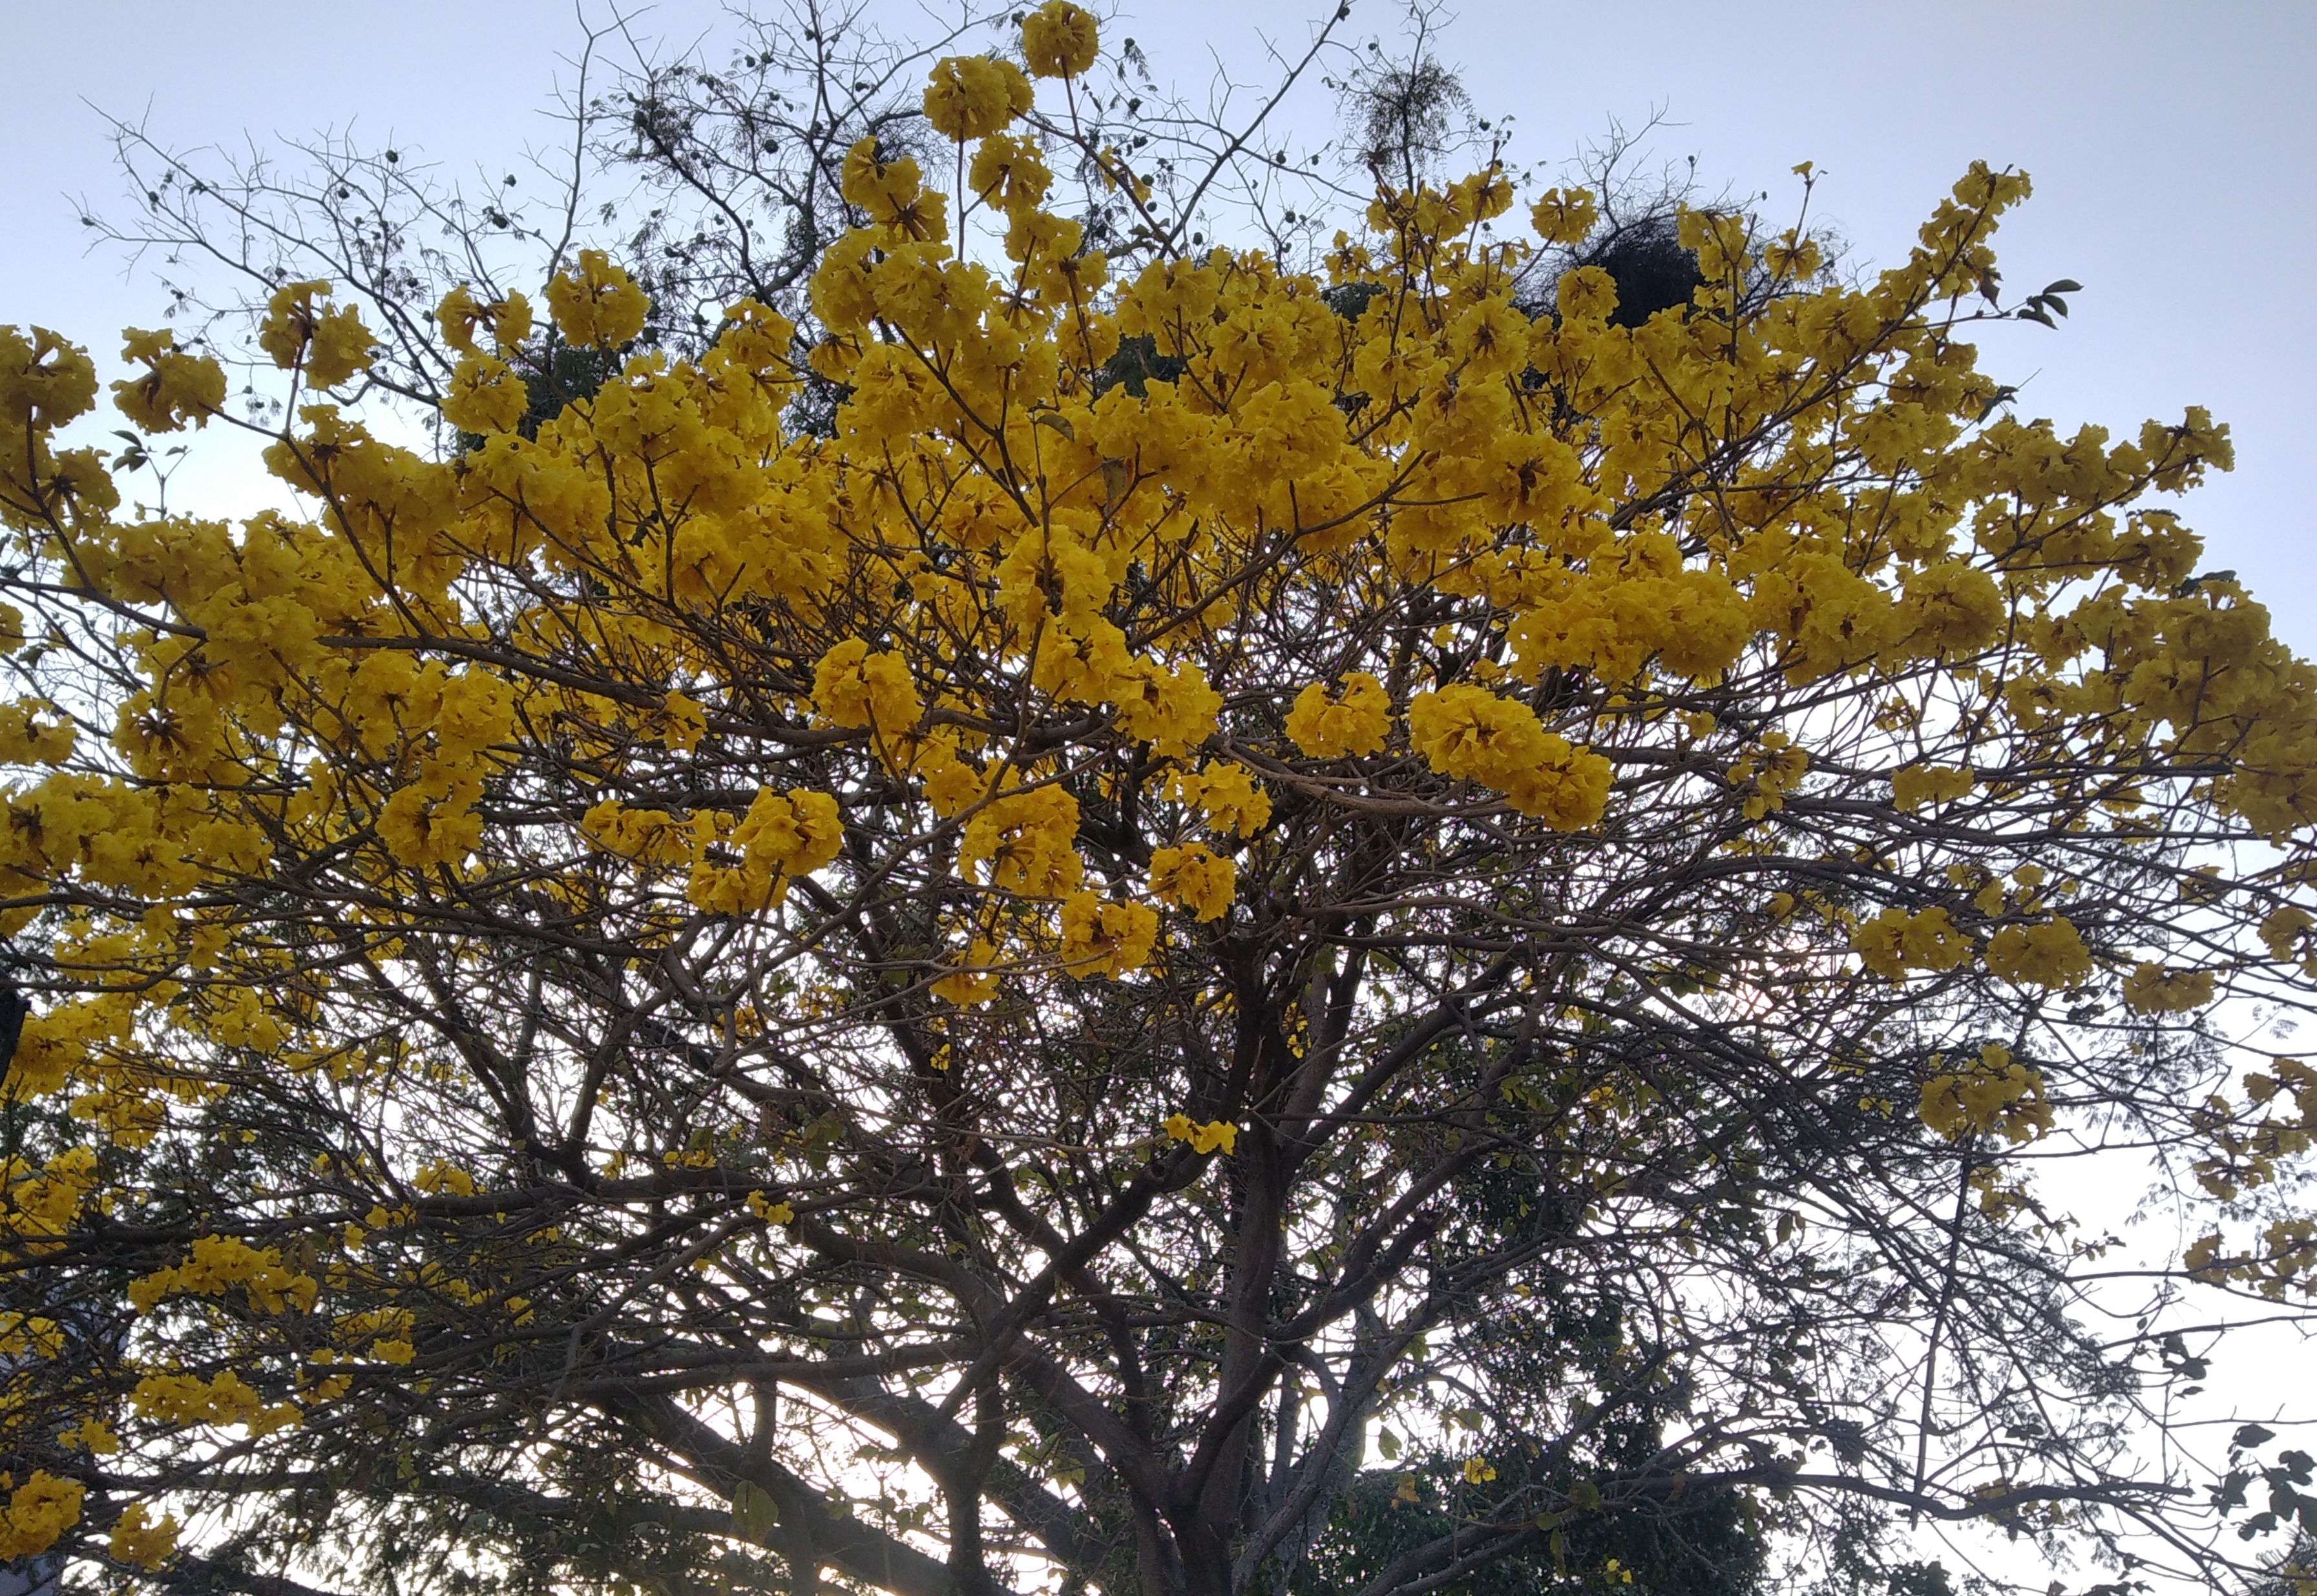
When I arrived at the cemetery I came across a gift from nature, a beautiful araguaney, the national tree of our country Venezuela and my mind thought that I should get out of this desire to do nothing and that it is time to create since that way I would feel better, I photographed it and when I got home I looked for my materials that I have saved and I thought I should do something that reminds me of Aunt Marlene, because of every bad situation we go through we always have to see what Well, I will always remember her as cute, jovial and full of stories.
I decided to make a beautiful painting inspired by the araguaney, this beautiful tree blooms once a year and when we say that it blooms it is in a general way, its branches are completely covered with yellow flowers and it is majestic to be able see these beautiful trees in their bloom. Let's see now, the materials used are the following:
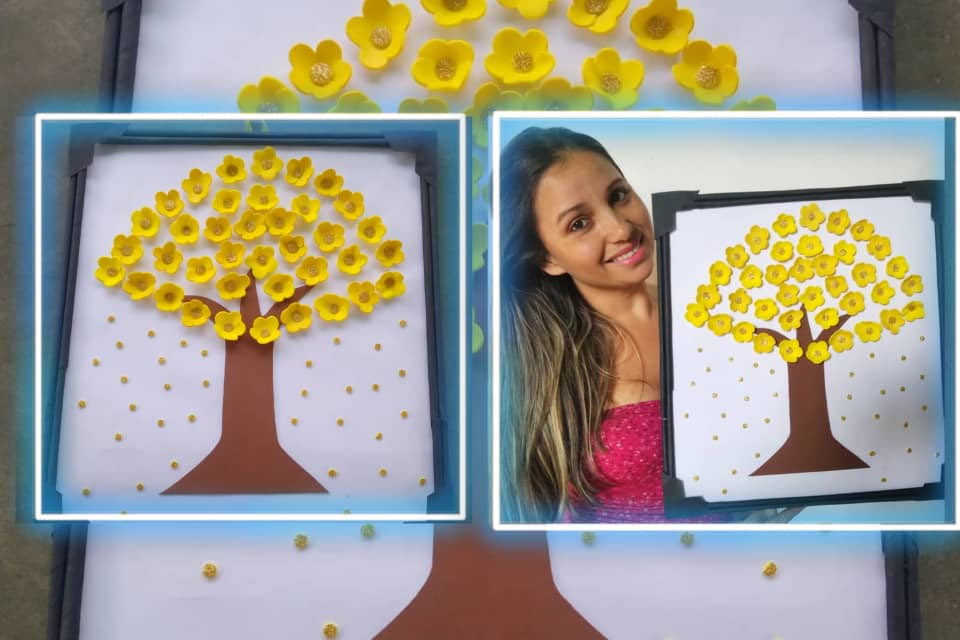
Cuadro Decorativo Inspirado en un Araguaney.
Decorative Painting Inspired by an Araguaney.
Materiales.
Materials.

📝 Foami amarillo.
📝 Foami dorado escarchado.
📝 Foami marrón.
📝 Cartón.
📝 Papel boon.
📝 Cinta.
📝 Pintura acrílica negra.
📝 Pincel.
📝 Pistola de silicón.
📝 Silicón de barra.
📝 Plancha.
📝 Lápiz de grafito.
📝 Tijera.
📝 Pegamento.
📝 Regla.
📝 Abre huecos.
📝 Palito de altura.
📝 Yellow foami.
📝 Frosty golden foami.
📝 Brown foami.
📝 Cardboard.
📝 Paper boom.
📝 Ribbon.
📝 Black acrylic paint.
📝 Brush.
📝 Silicone gun.
📝 Bar silicone.
📝 Iron.
📝 Graphite pencil.
📝 Scissor.
📝 Glue.
📝 Rule.
📝 Open gaps.
📝 Height stick.
Now let's see the steps to make this beautiful painting inspired by an araguaney.
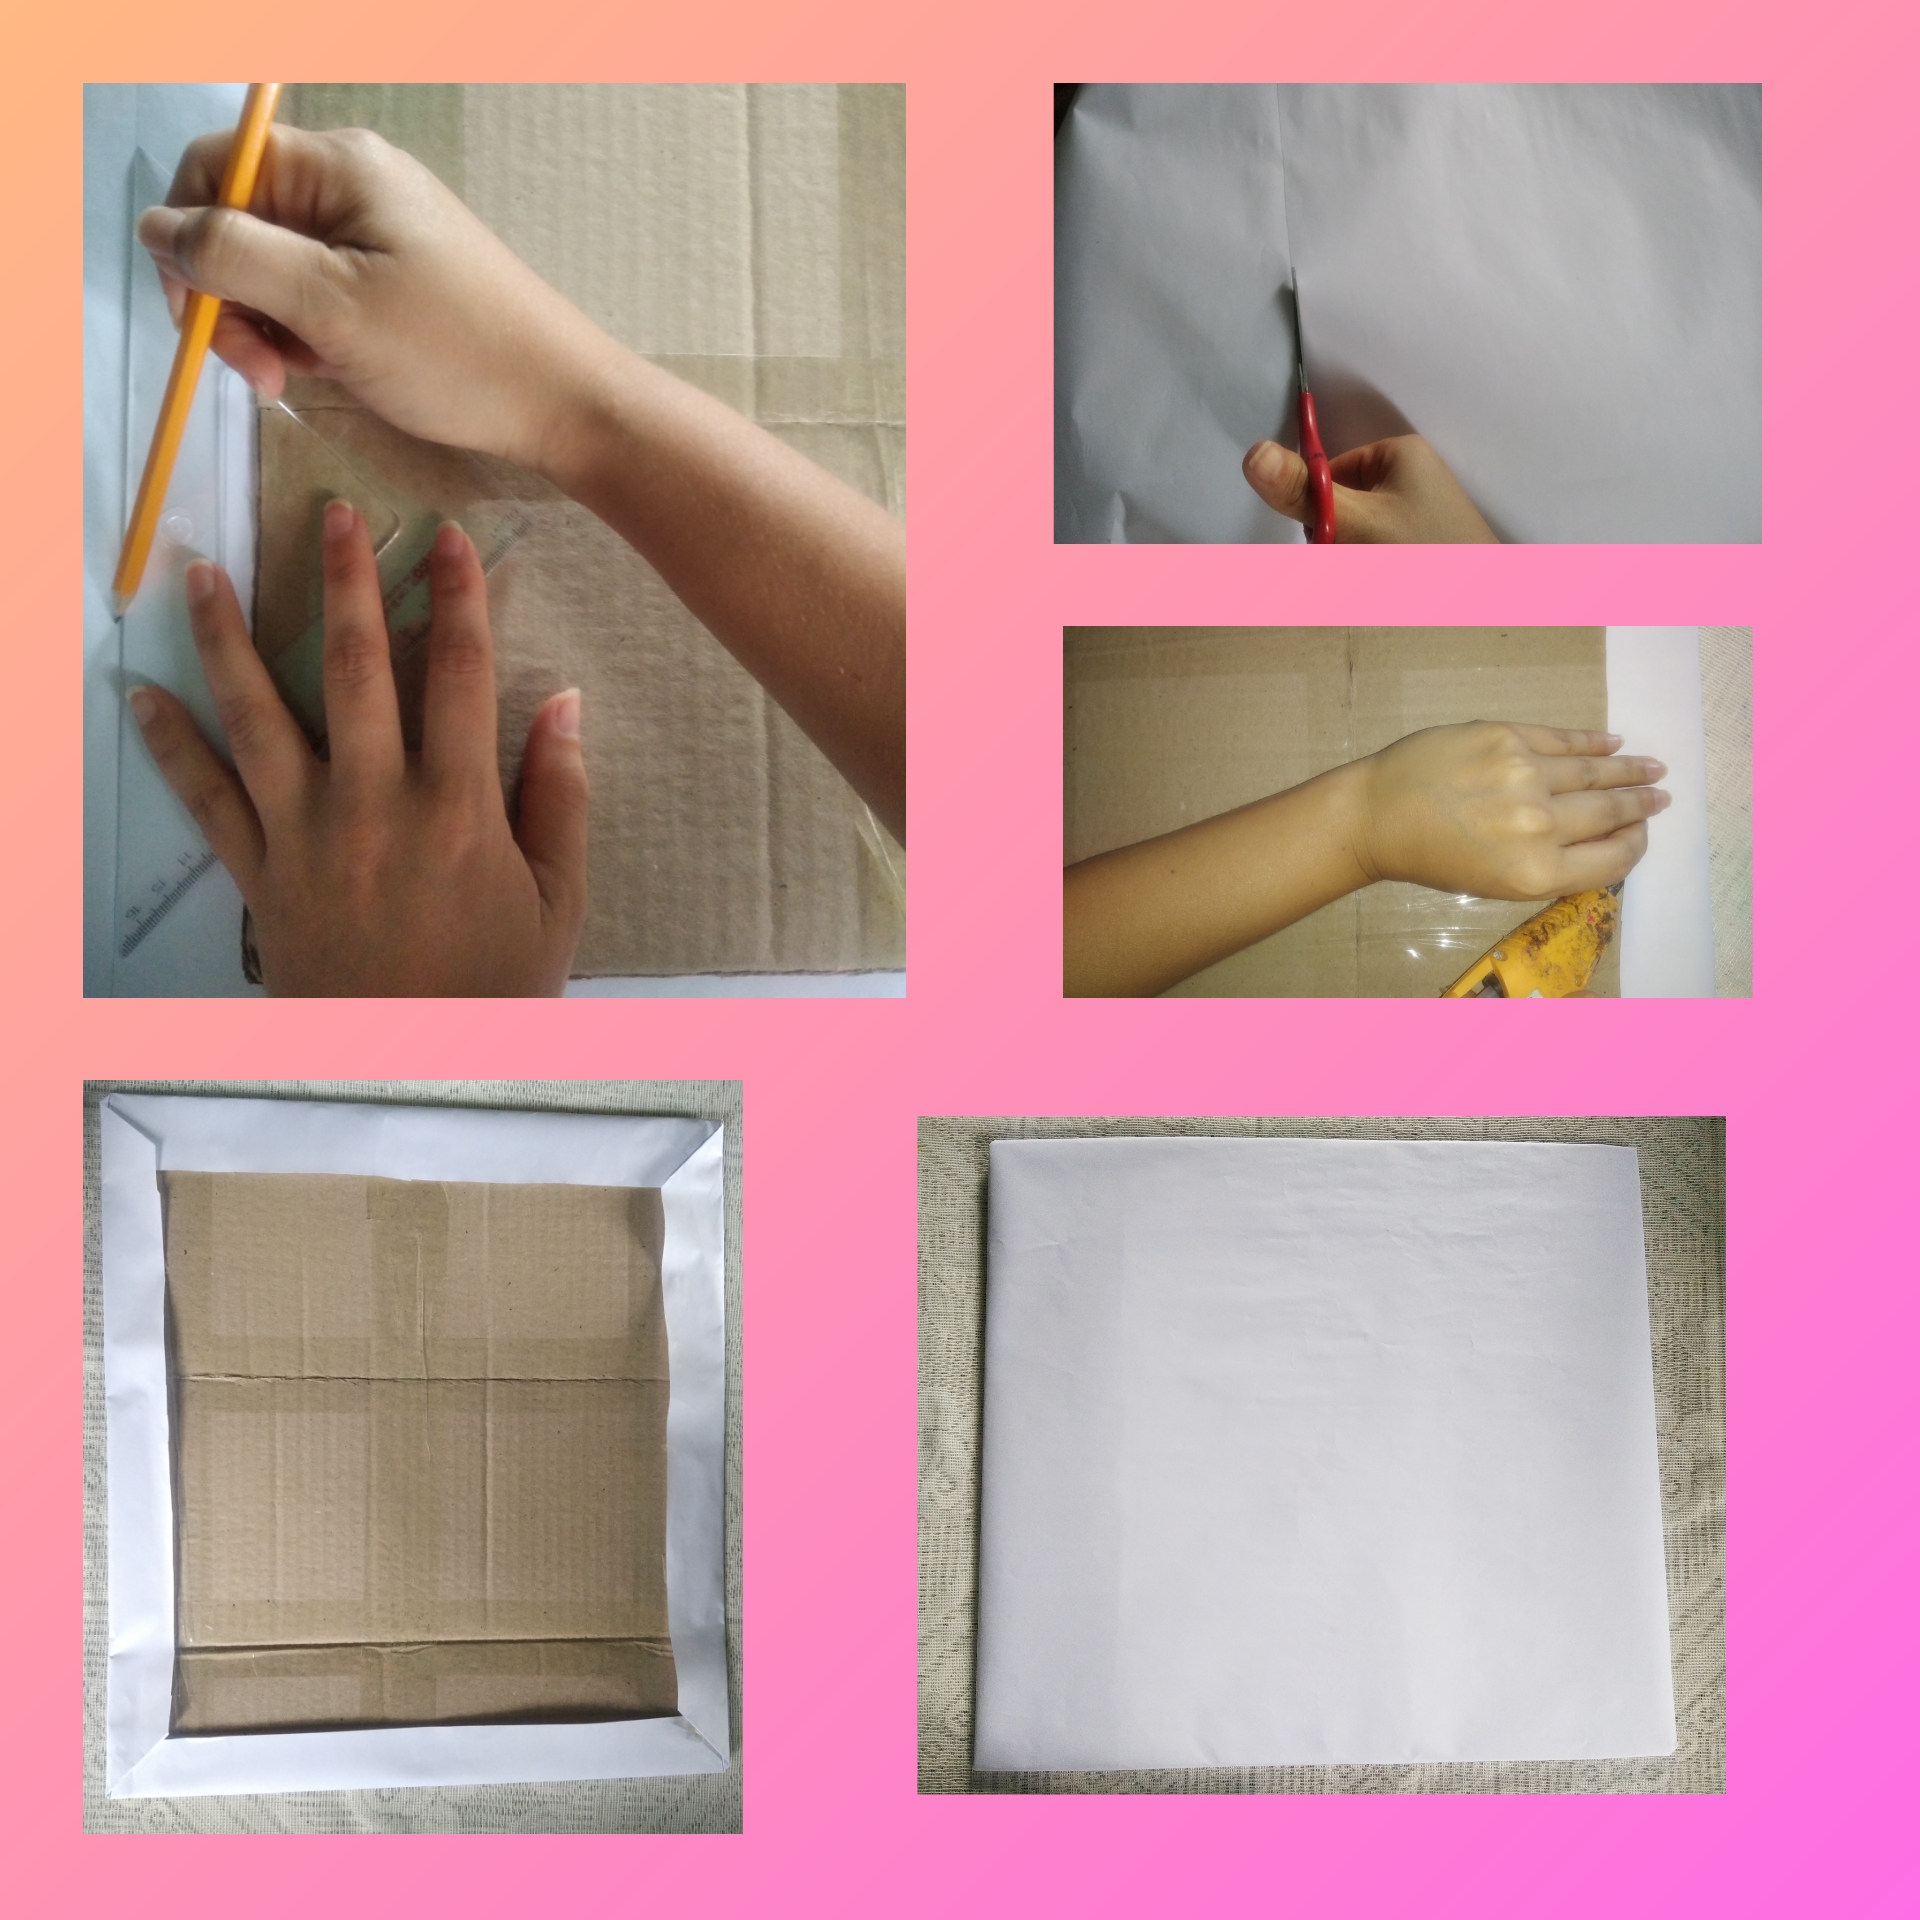
Step 1.To begin the elaboration of this painting, I took a box which I found on the street outside a place where they sell sweets and I began by opening it and cutting out just the piece of cardboard that we need so that form the base of the painting, we will decide the size.
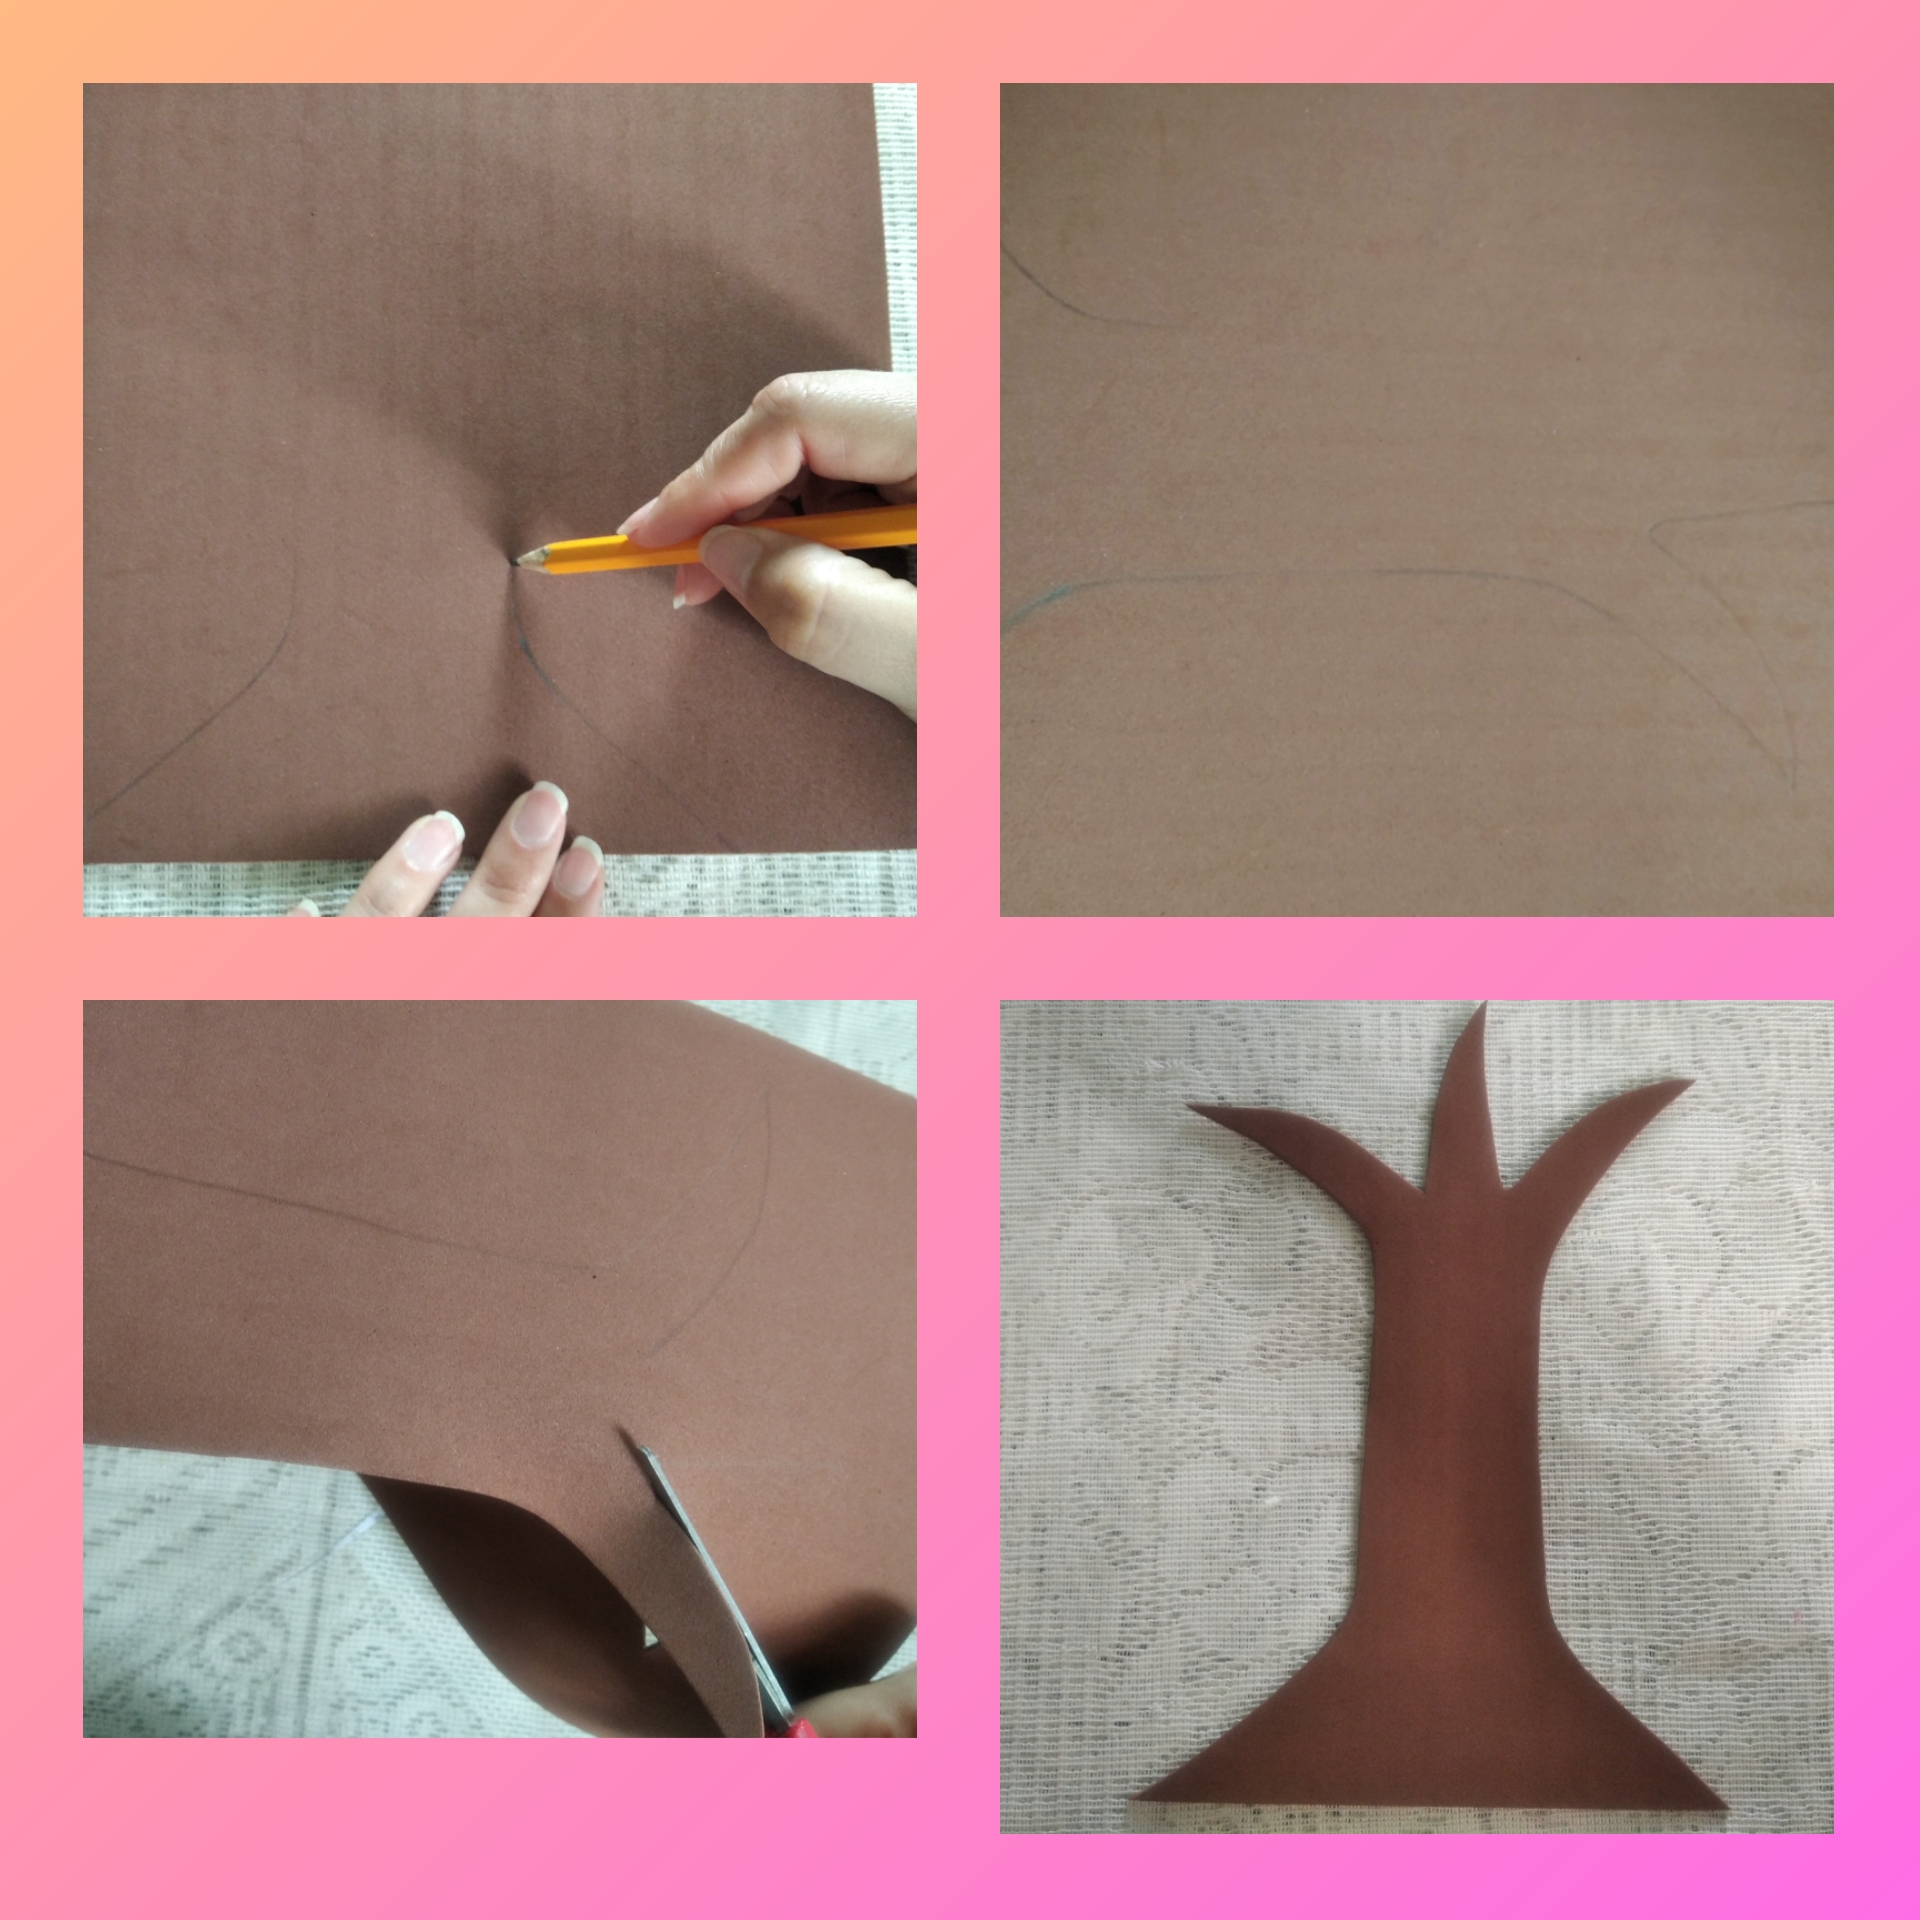
Step 2.Then we take the brown foami and there we are going to draw a nice trunk of a tree, we will make it elongated. With the help of scissors we cut.
Step 3.In this step we are going to start creating the most important part of this painting which are the cute little flowers. On a white sheet we are going to draw a mold of a flower with 5 petals, then with the tip of the height stick we are going to go over it all around the edge of the flower, we cut it out and with the scissors we make a cut only once in the middle of two petals.
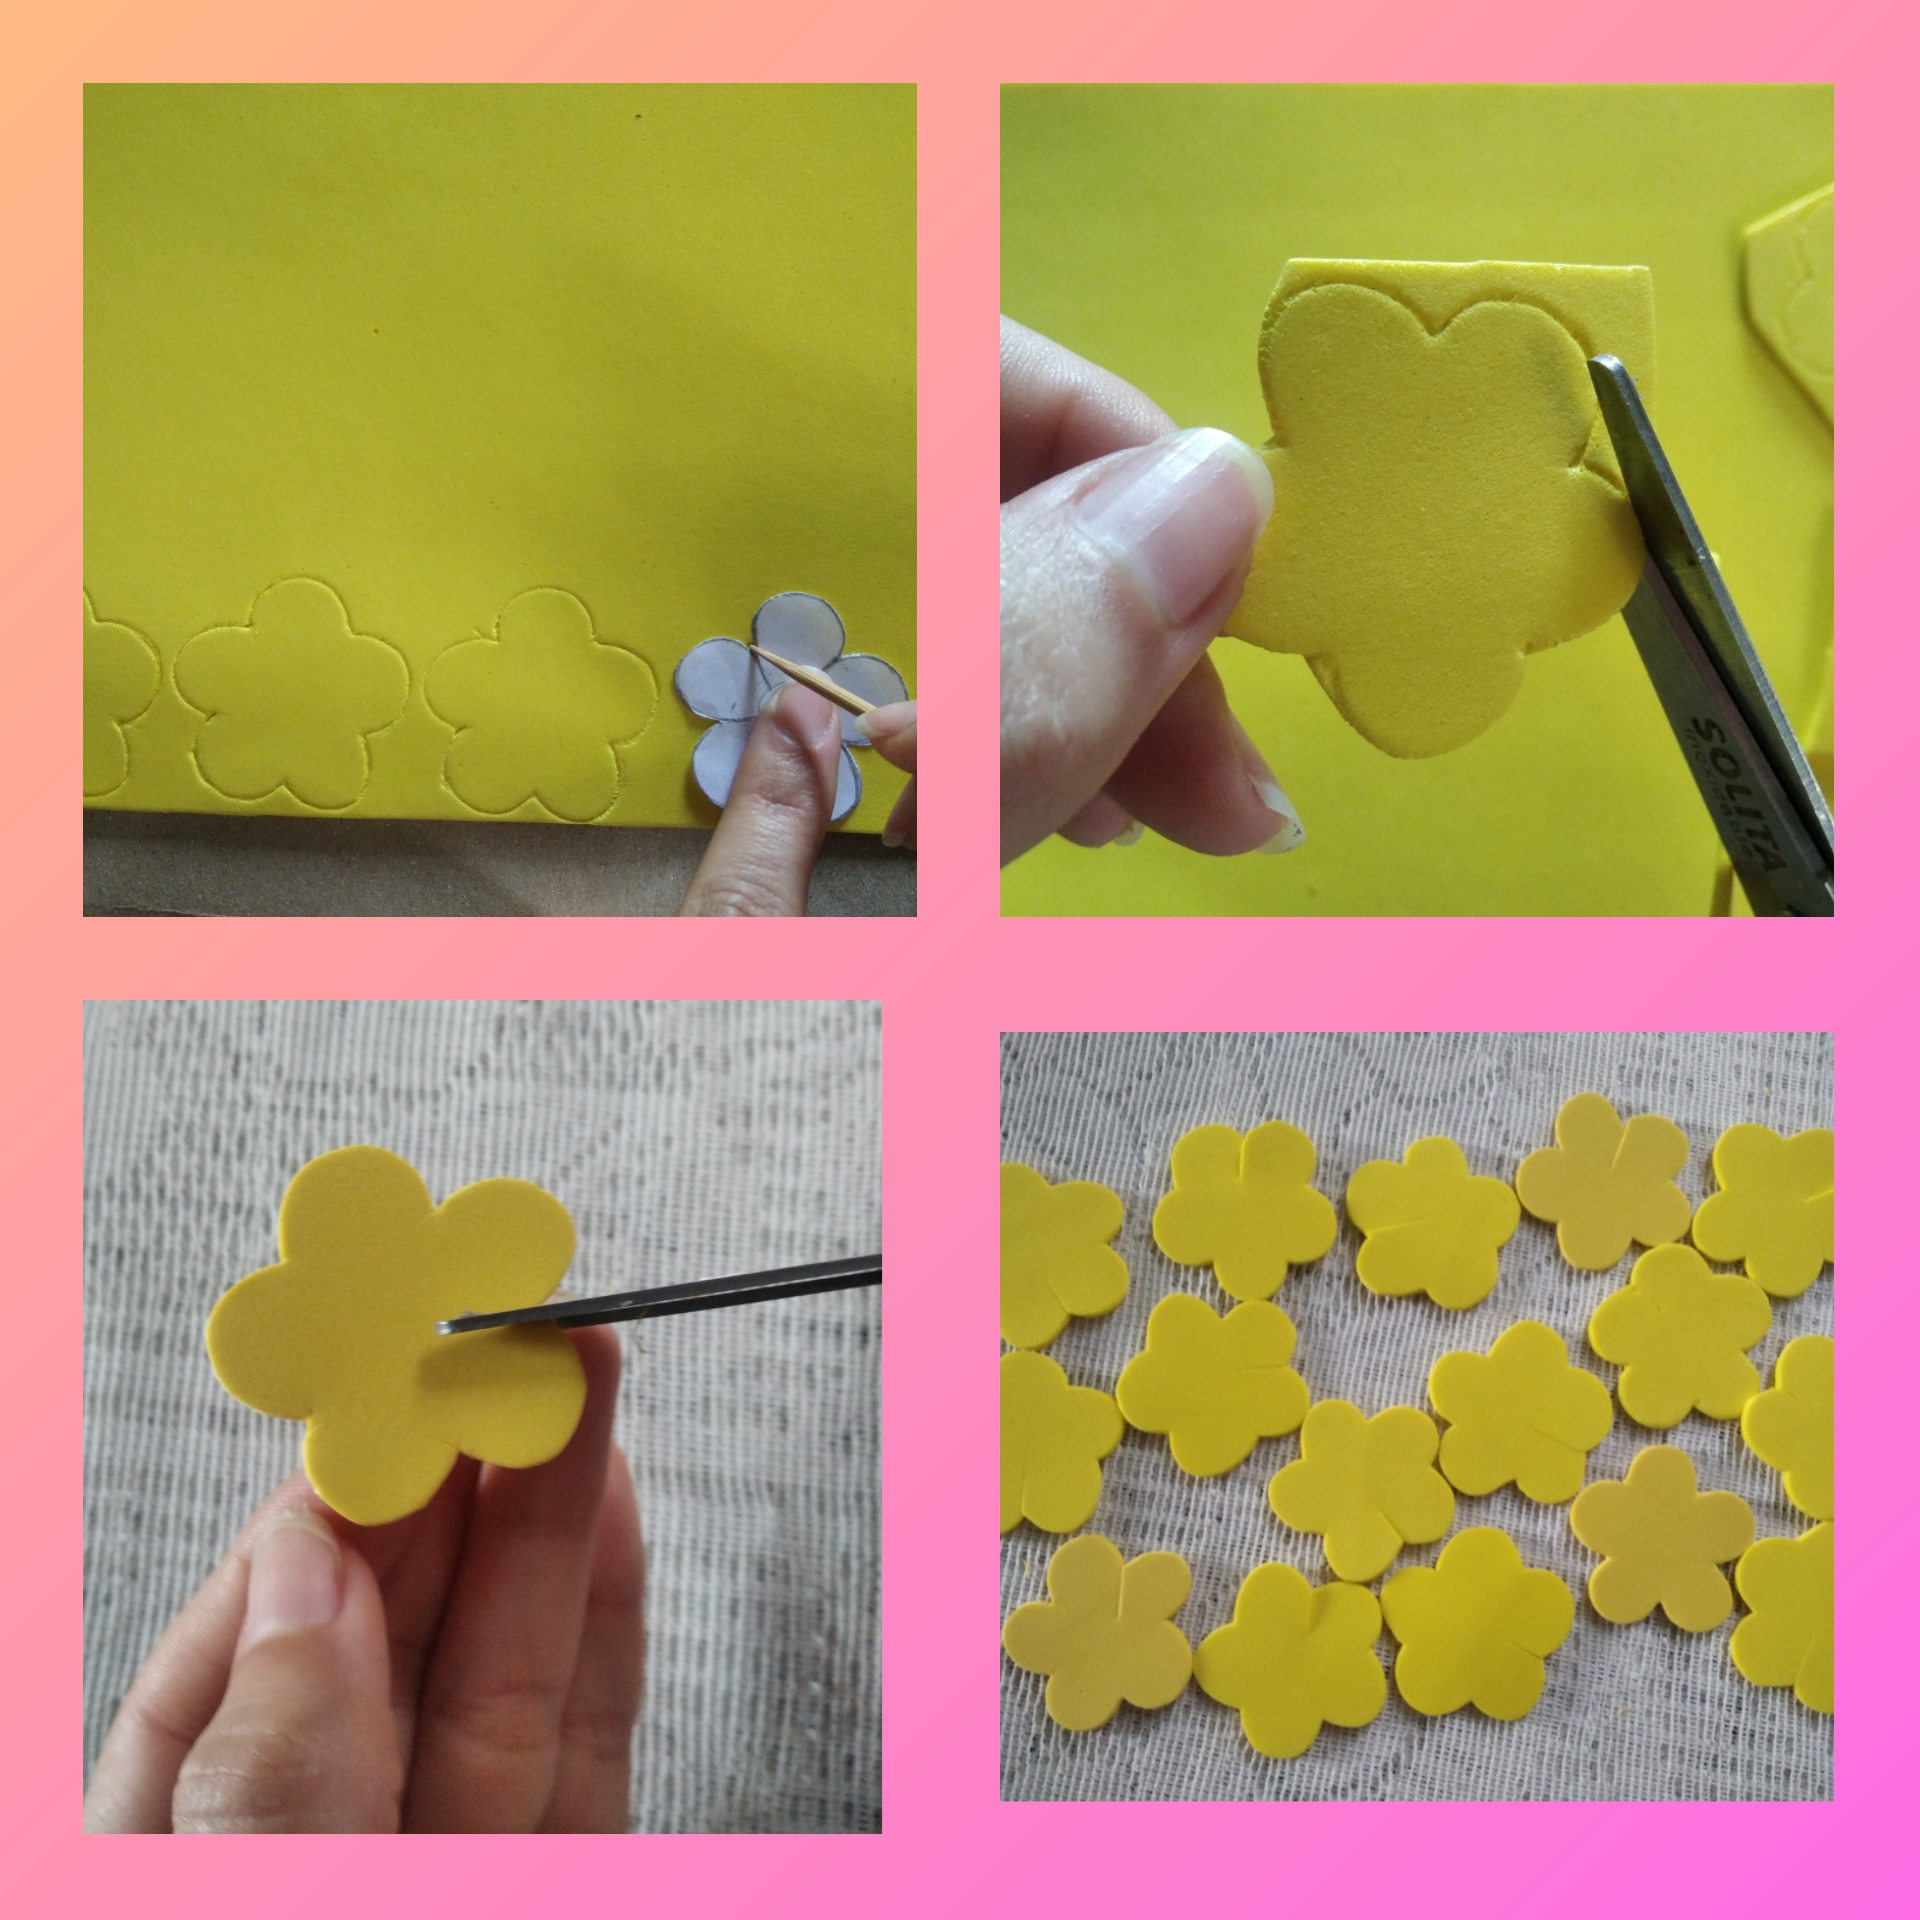
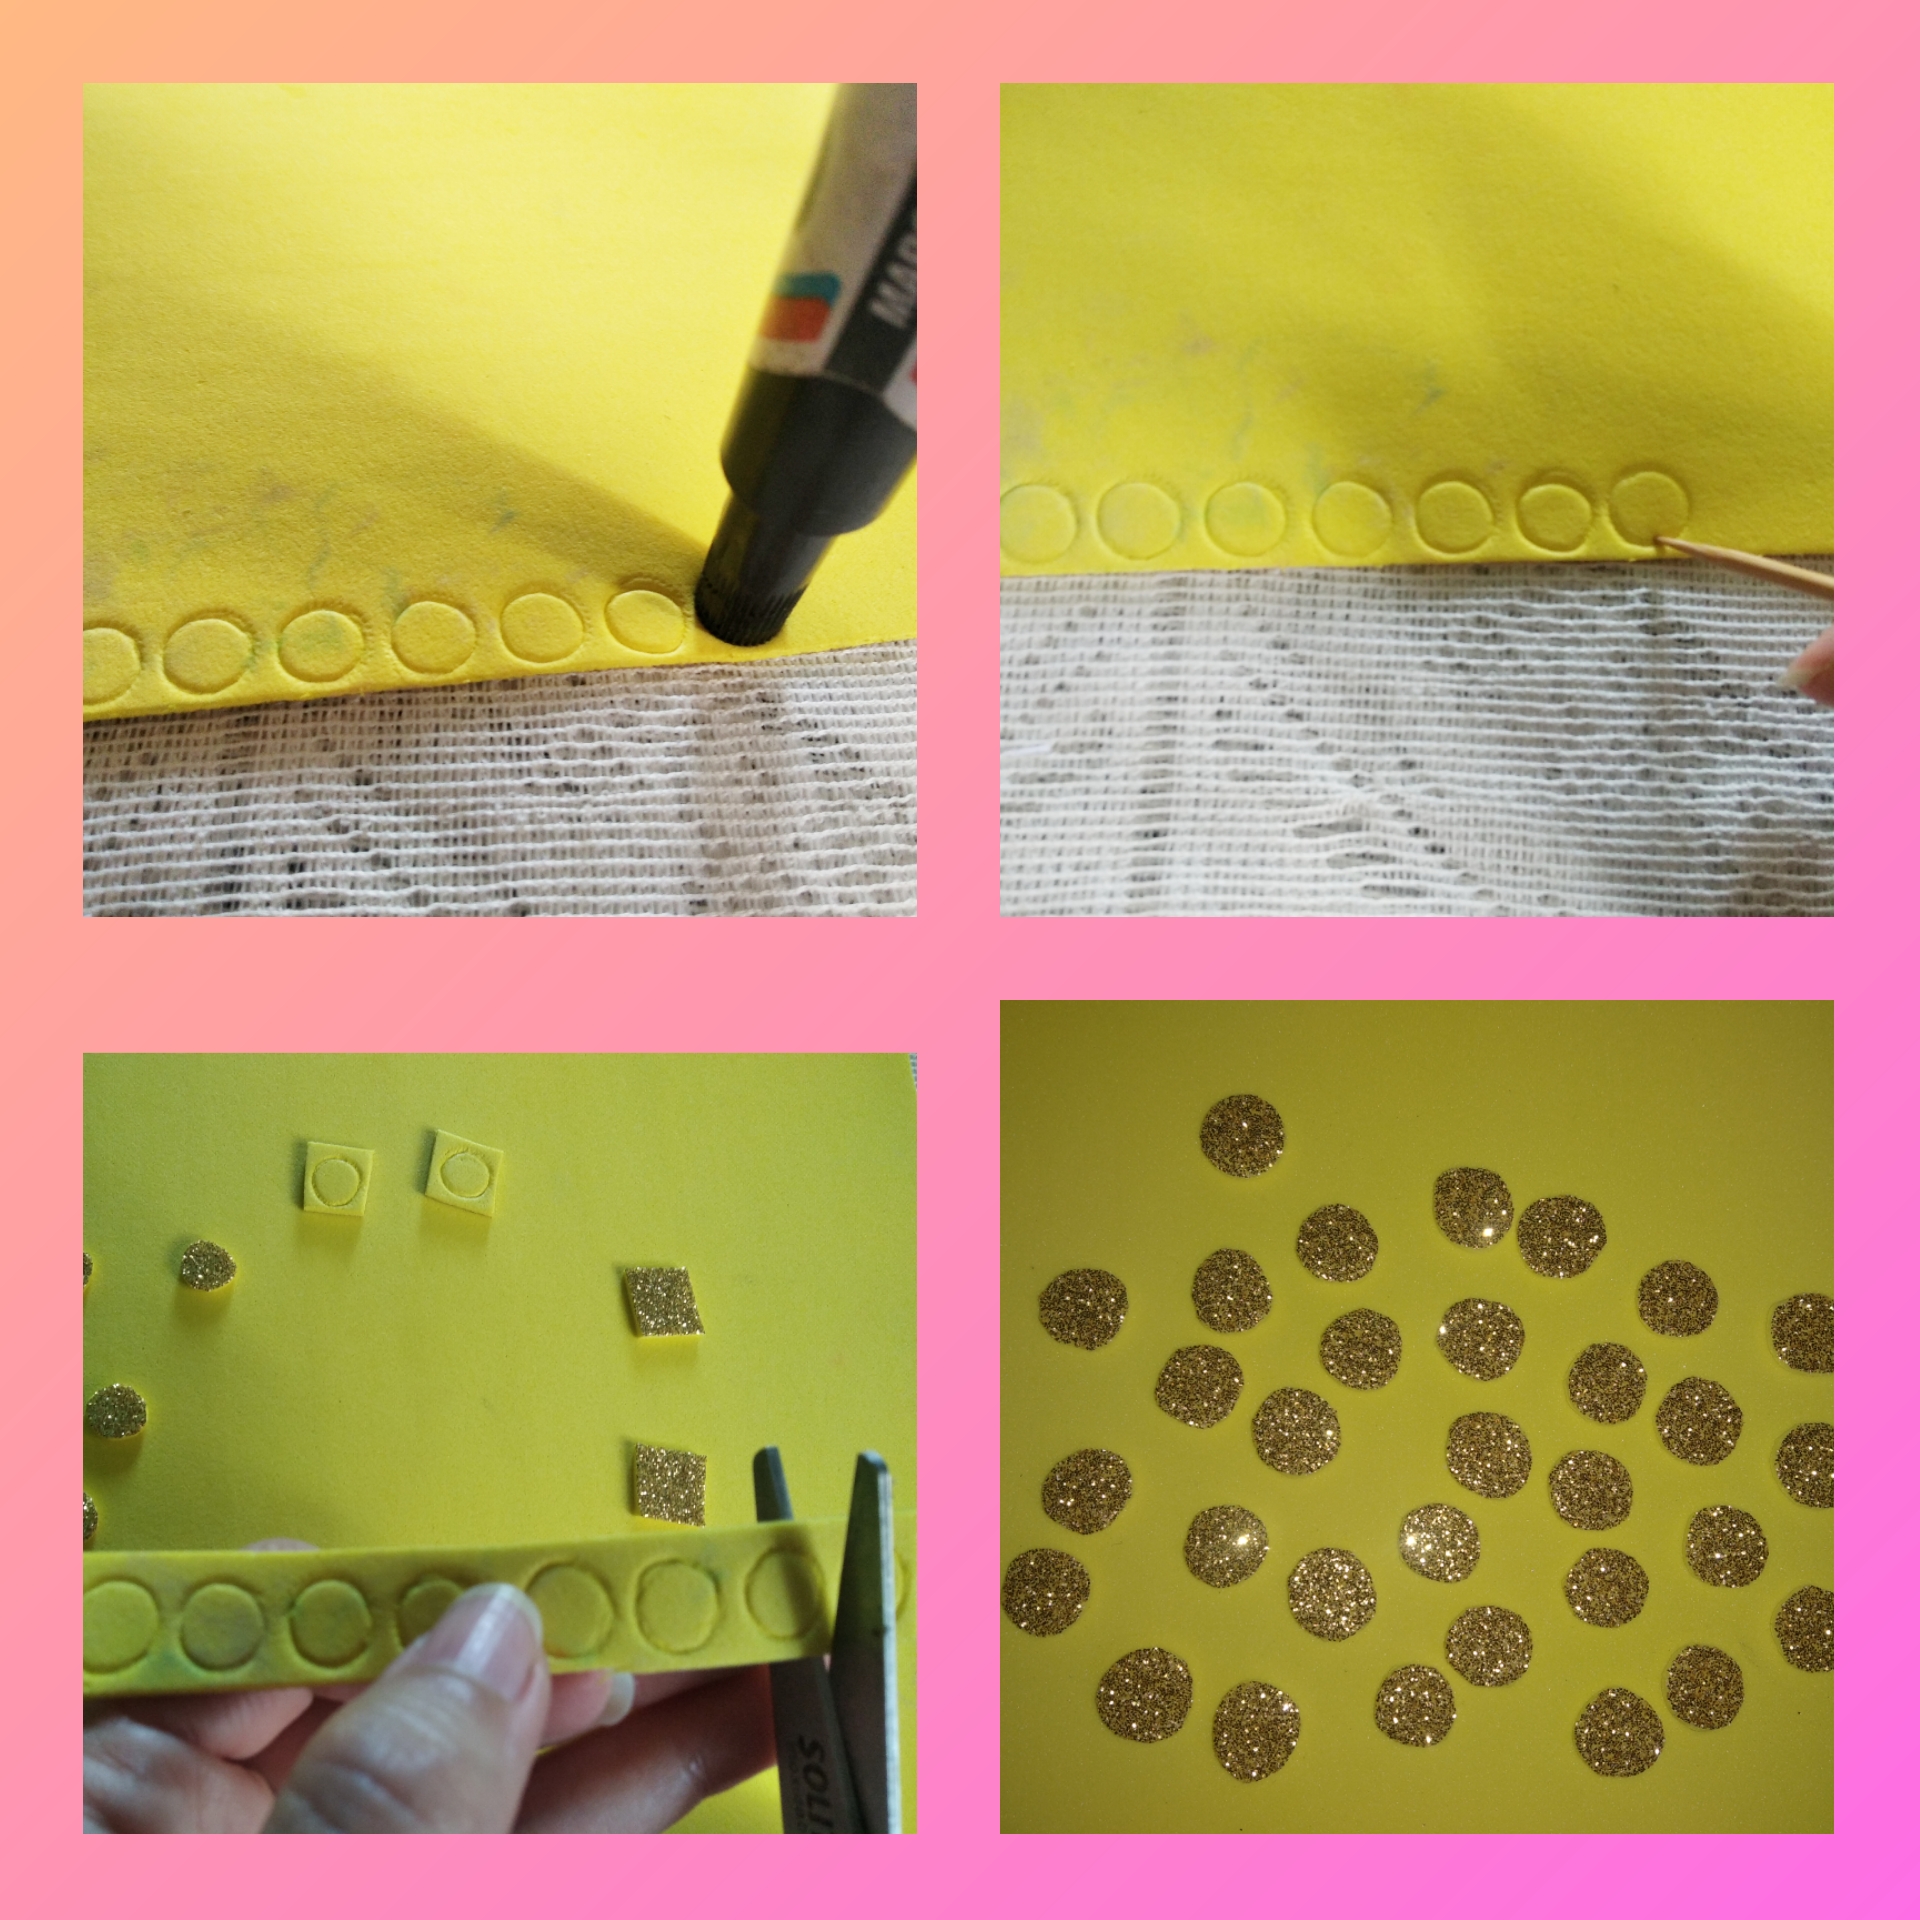
Now we are going to create the buttons for each flower. We take a thick marker and border the tip with the height stick, then we cut and in this way we obtain these circles that will be the buttons for each flower.
We place each flower on the hot iron to give it volume and more real shape, then we remove it from the iron and place it in our hand and place the pencil in the center of the flower, with silicone hot we join the two petals where we made the cut, in the same way we put silicone to the circle of frosty foami and place it in the center of the flower.
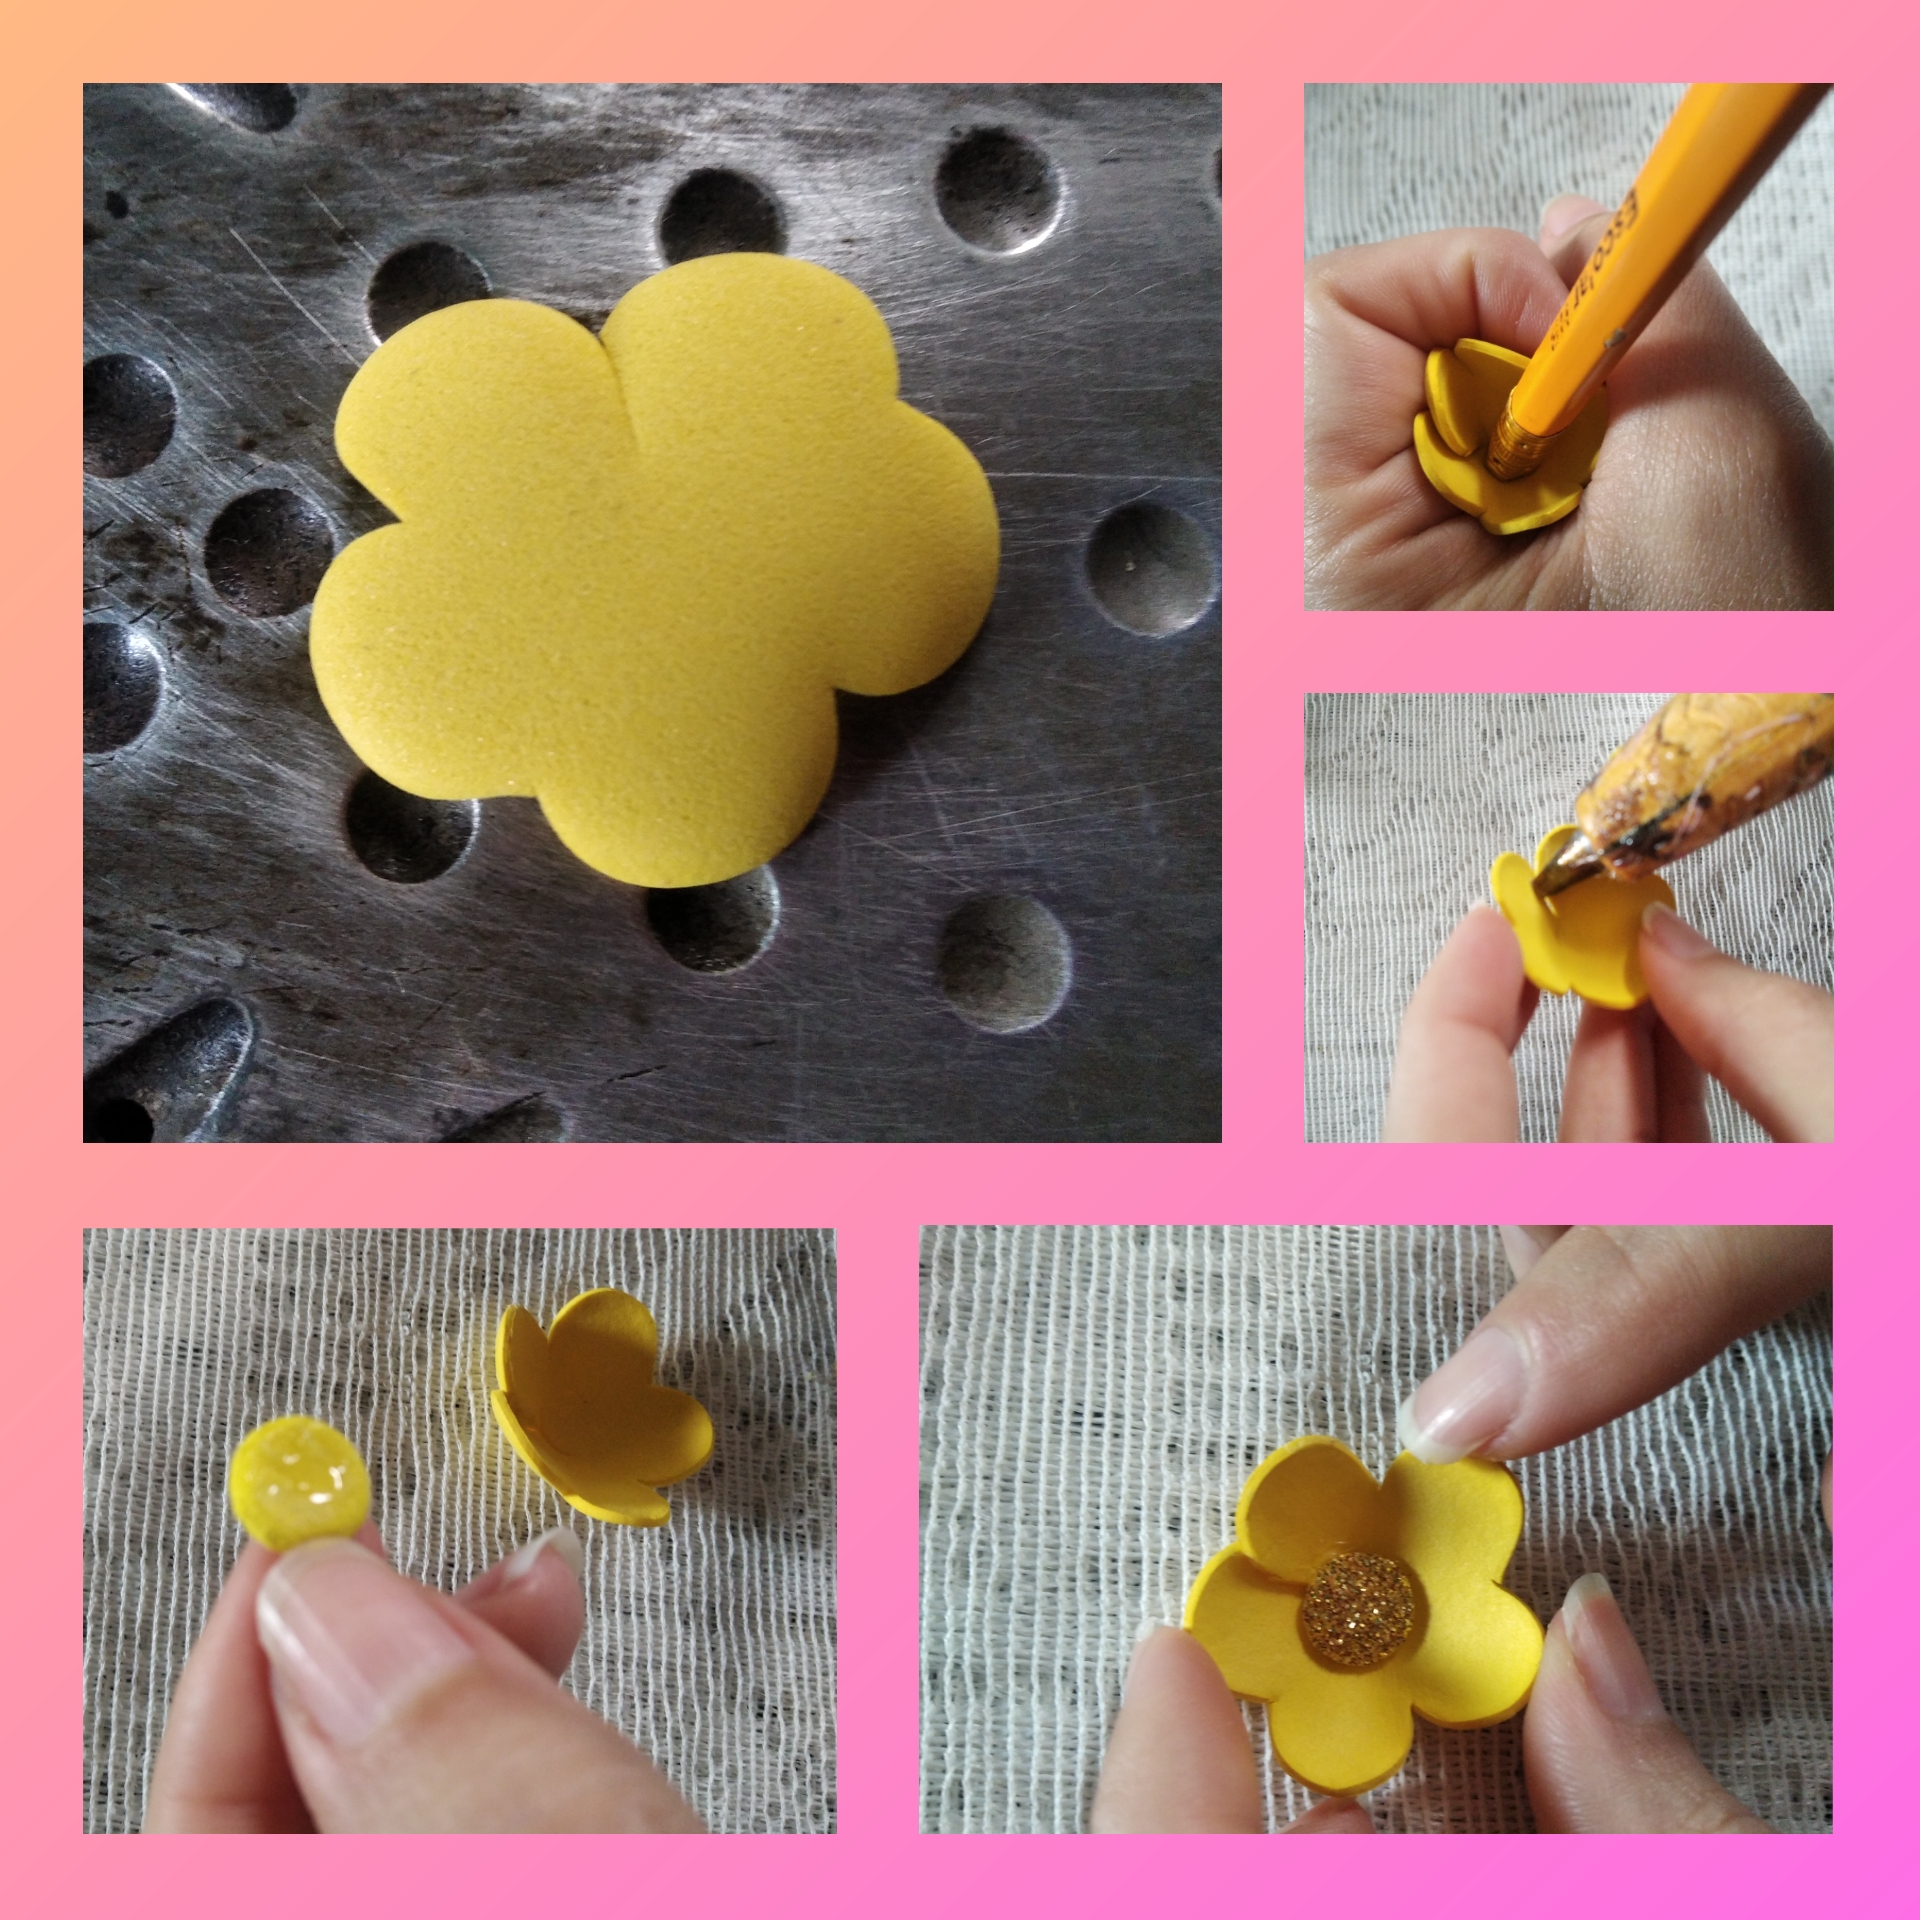
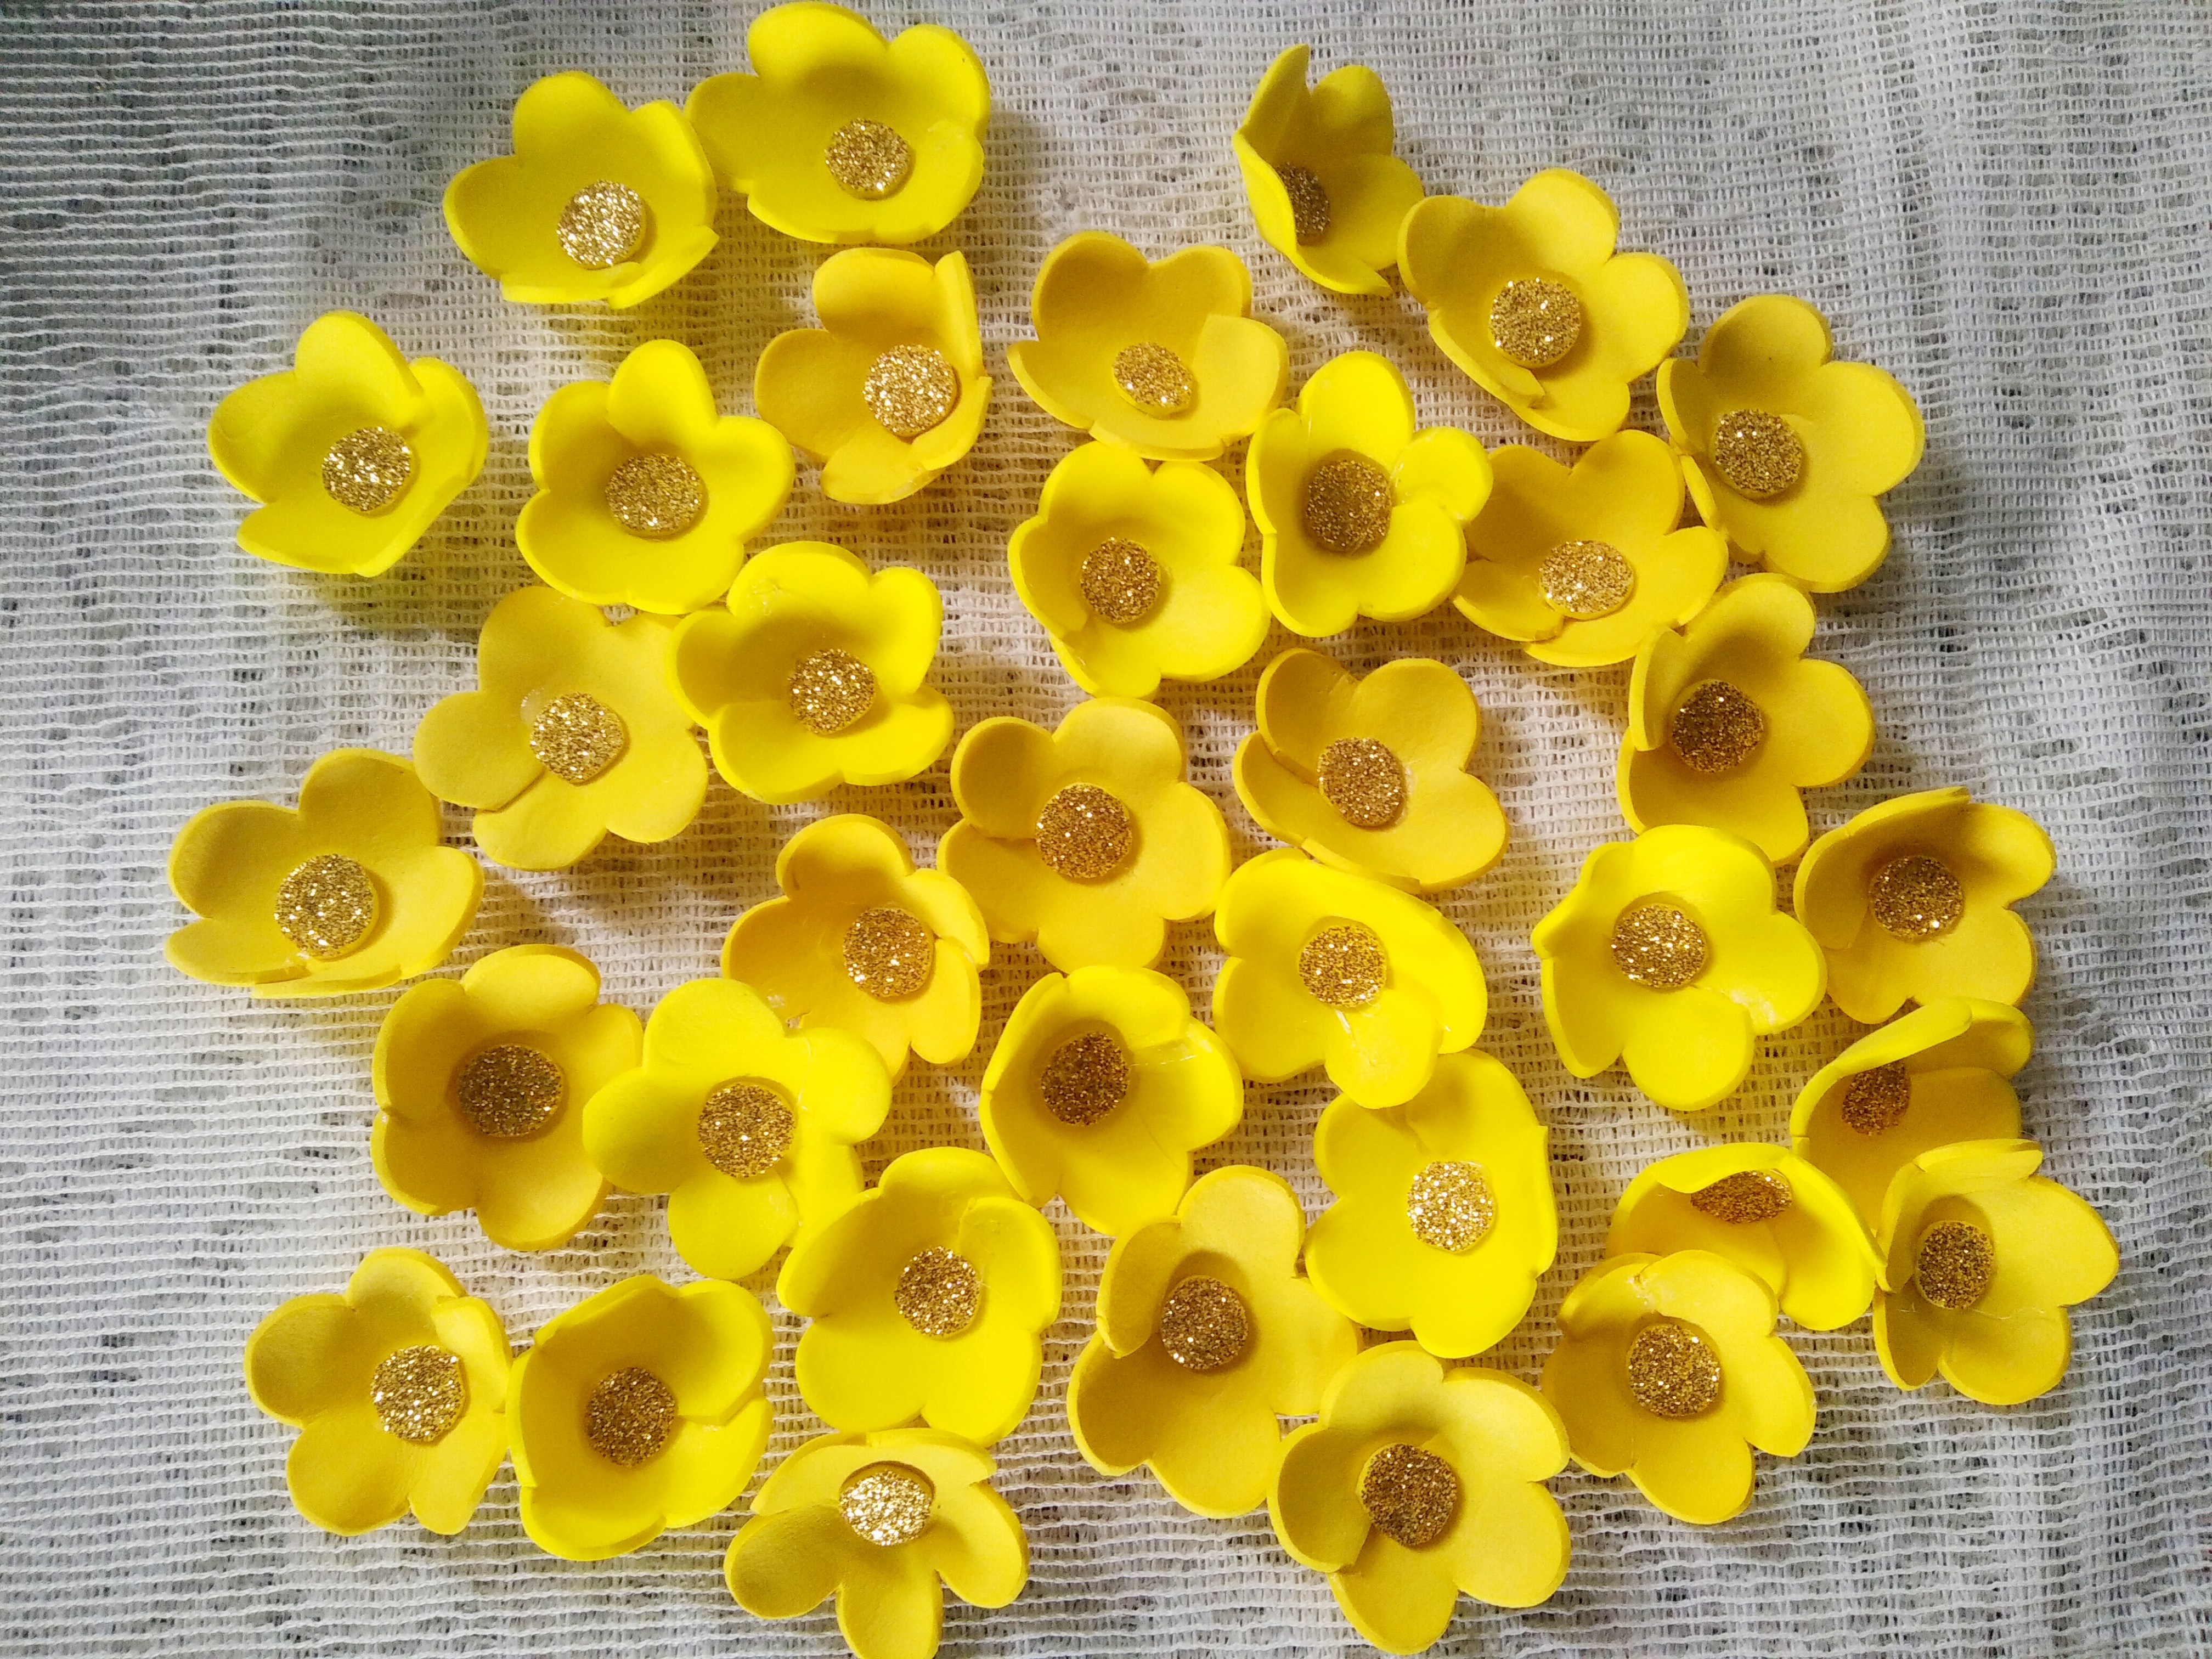
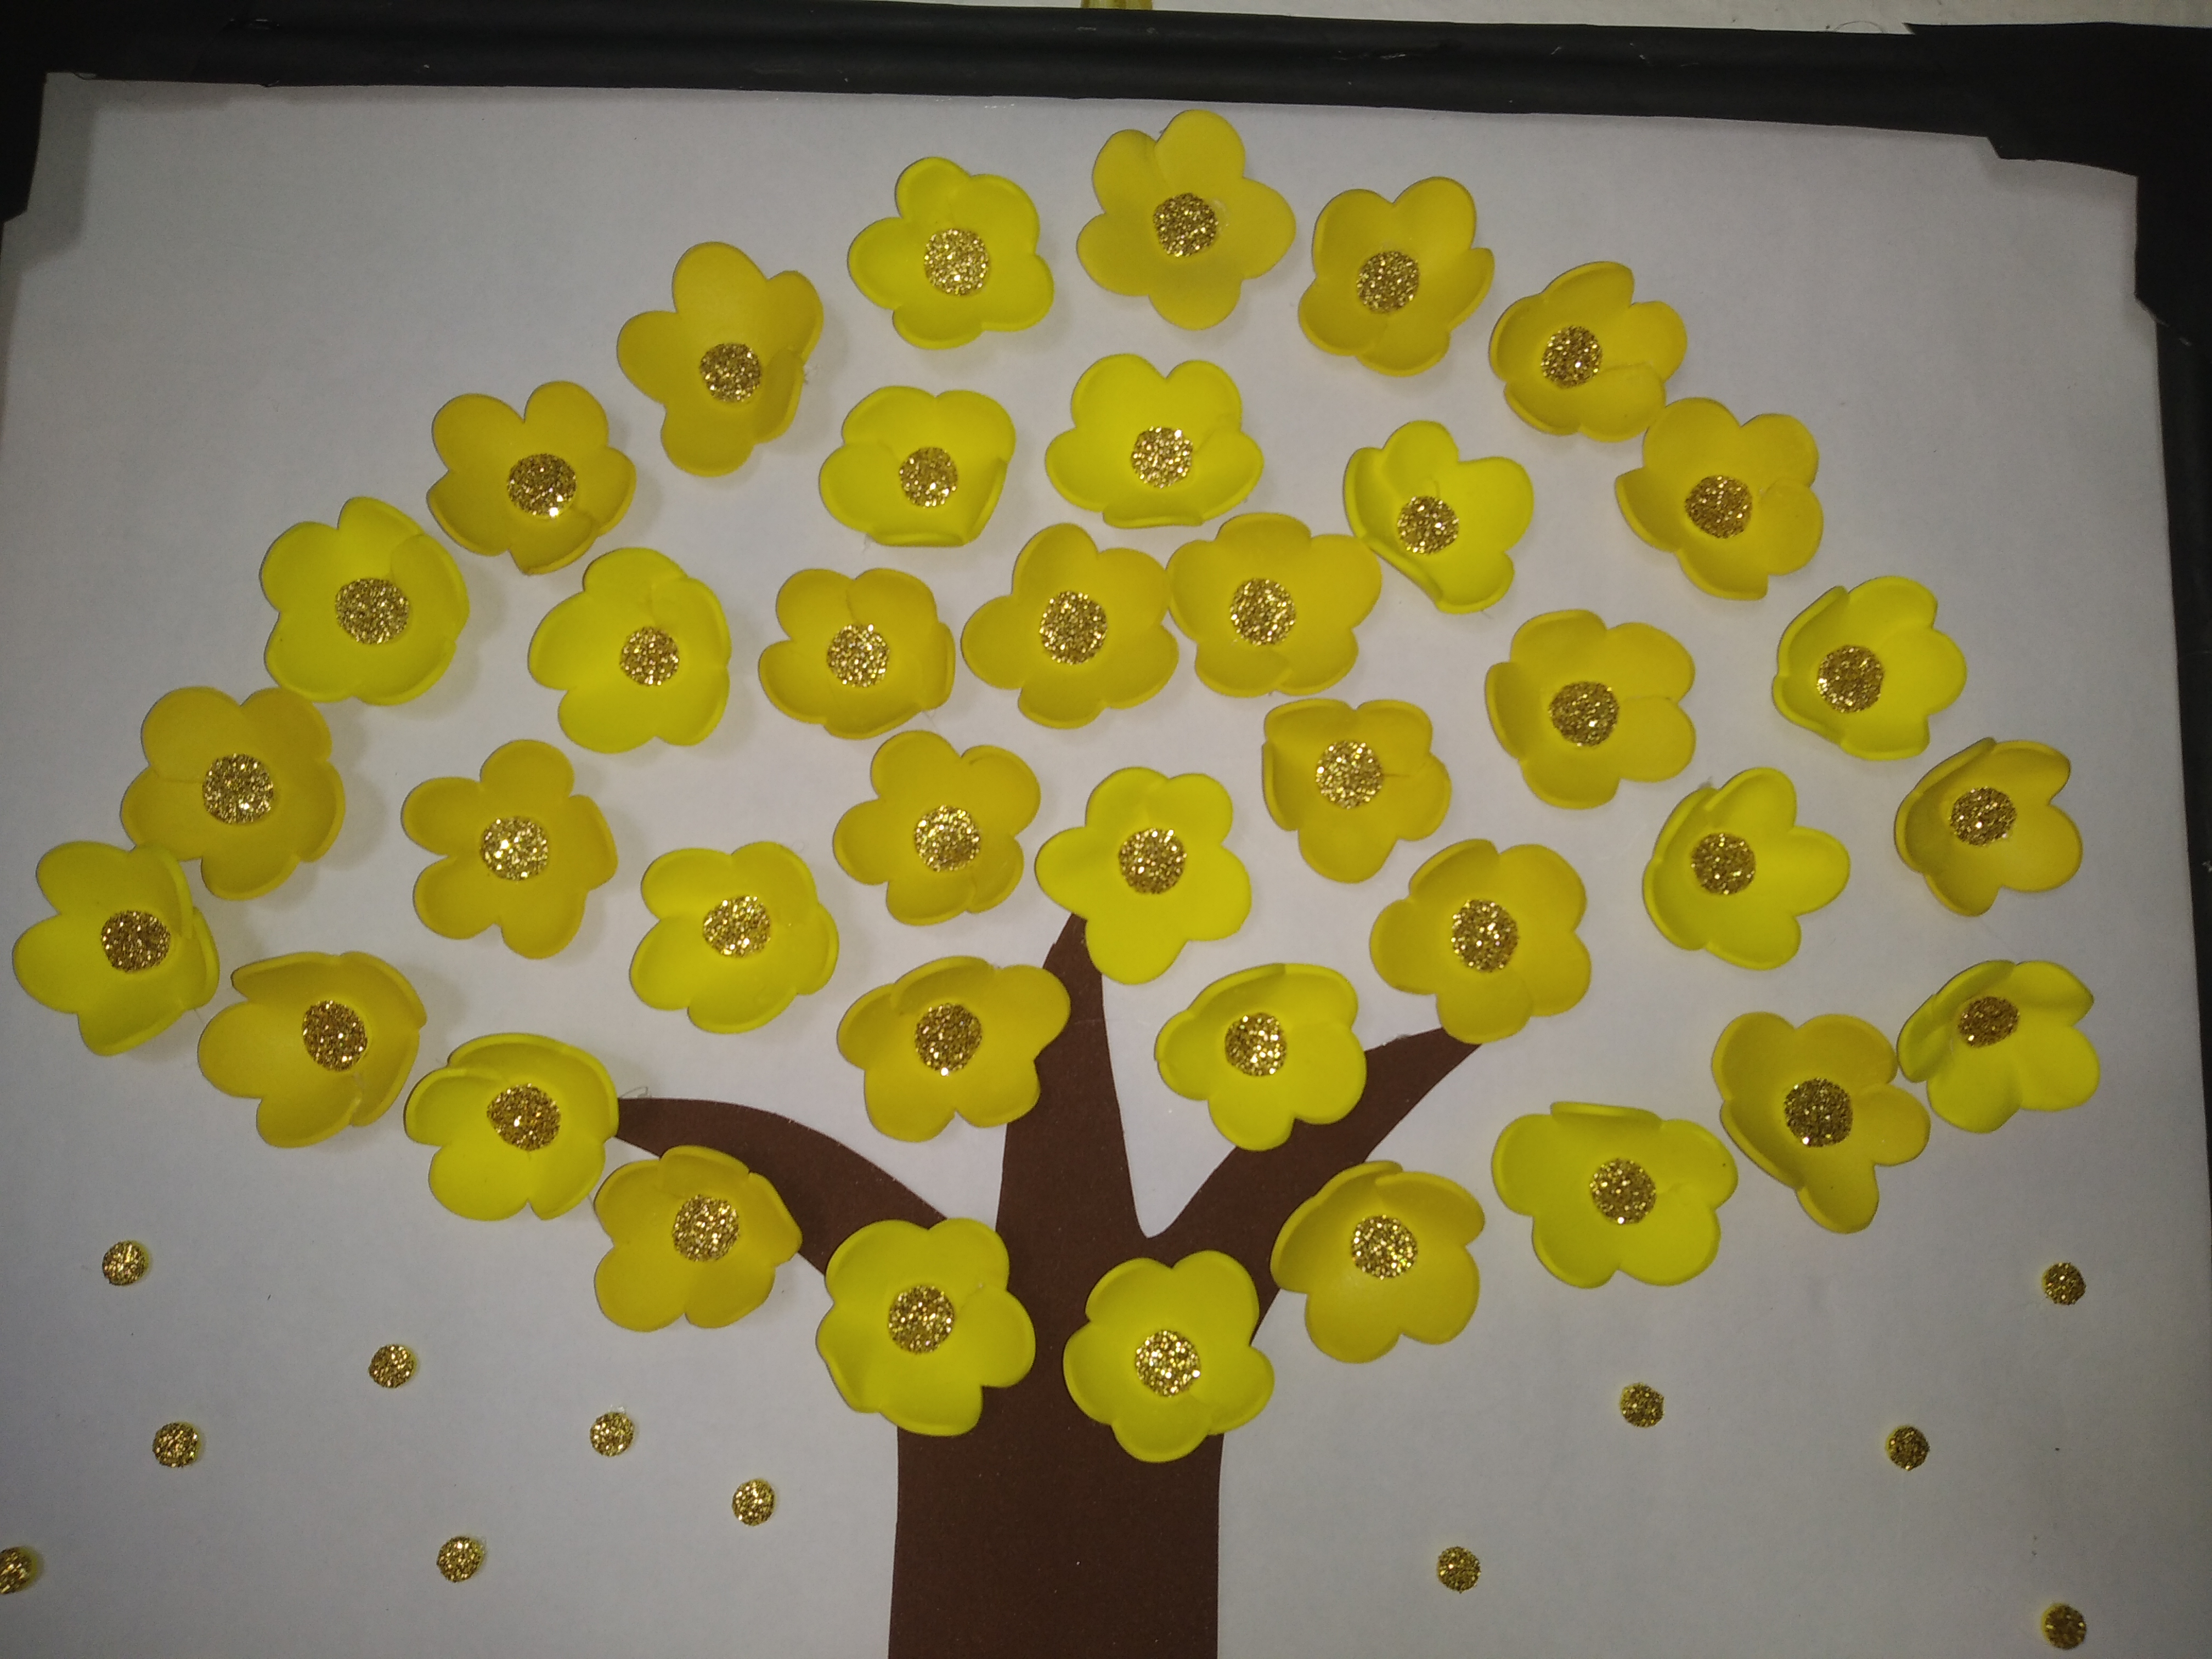
In this way we will have all these pretty little flowers, in total there were 38 flowers that we will make for this painting. While I cut each flower I thought about how ephemeral life is, today we can be fine, relatively healthy and the next day it dies and that's it, sometimes we don't enjoy people always thinking about tomorrow without taking into account that tomorrow is uncertain.
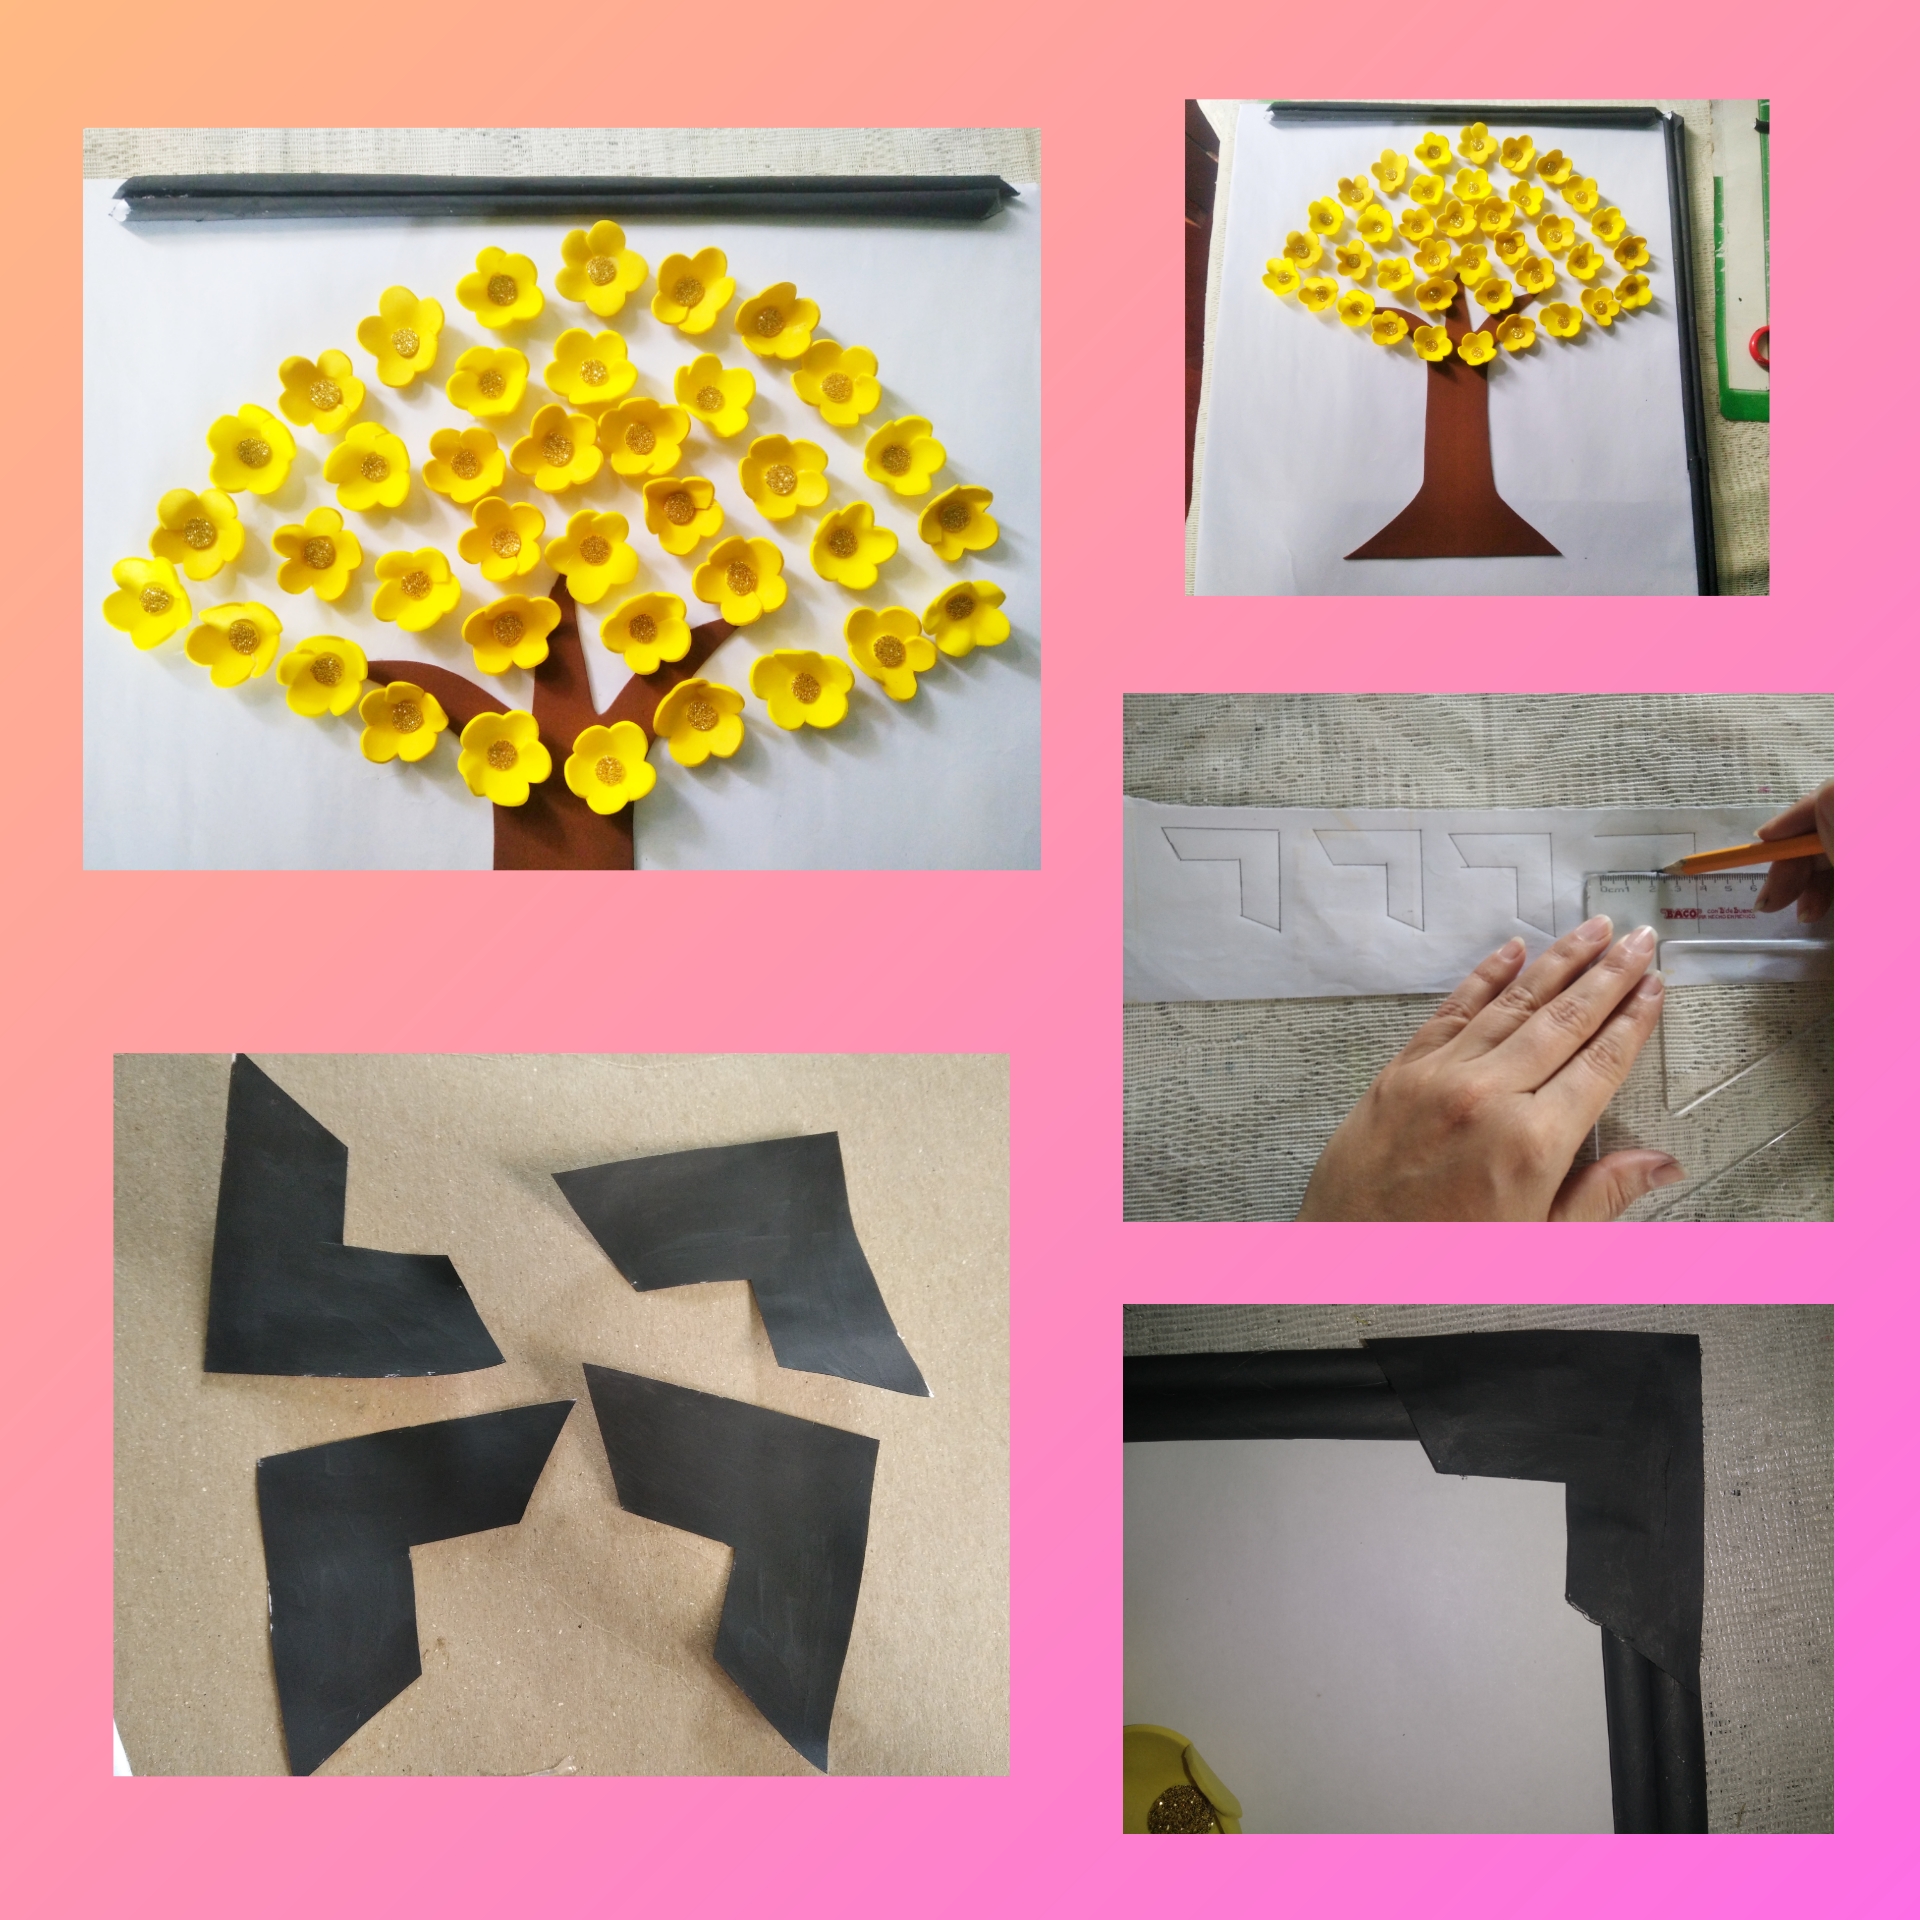
Step 4.In this step we are going to assemble our painting, we take the cardboard already lined, with silicone we paste on the trunk, then the flowers which we place forming the branches of the tree, we shape it, we begin by the part of the trunk and we go up until we reach the top of the tree.
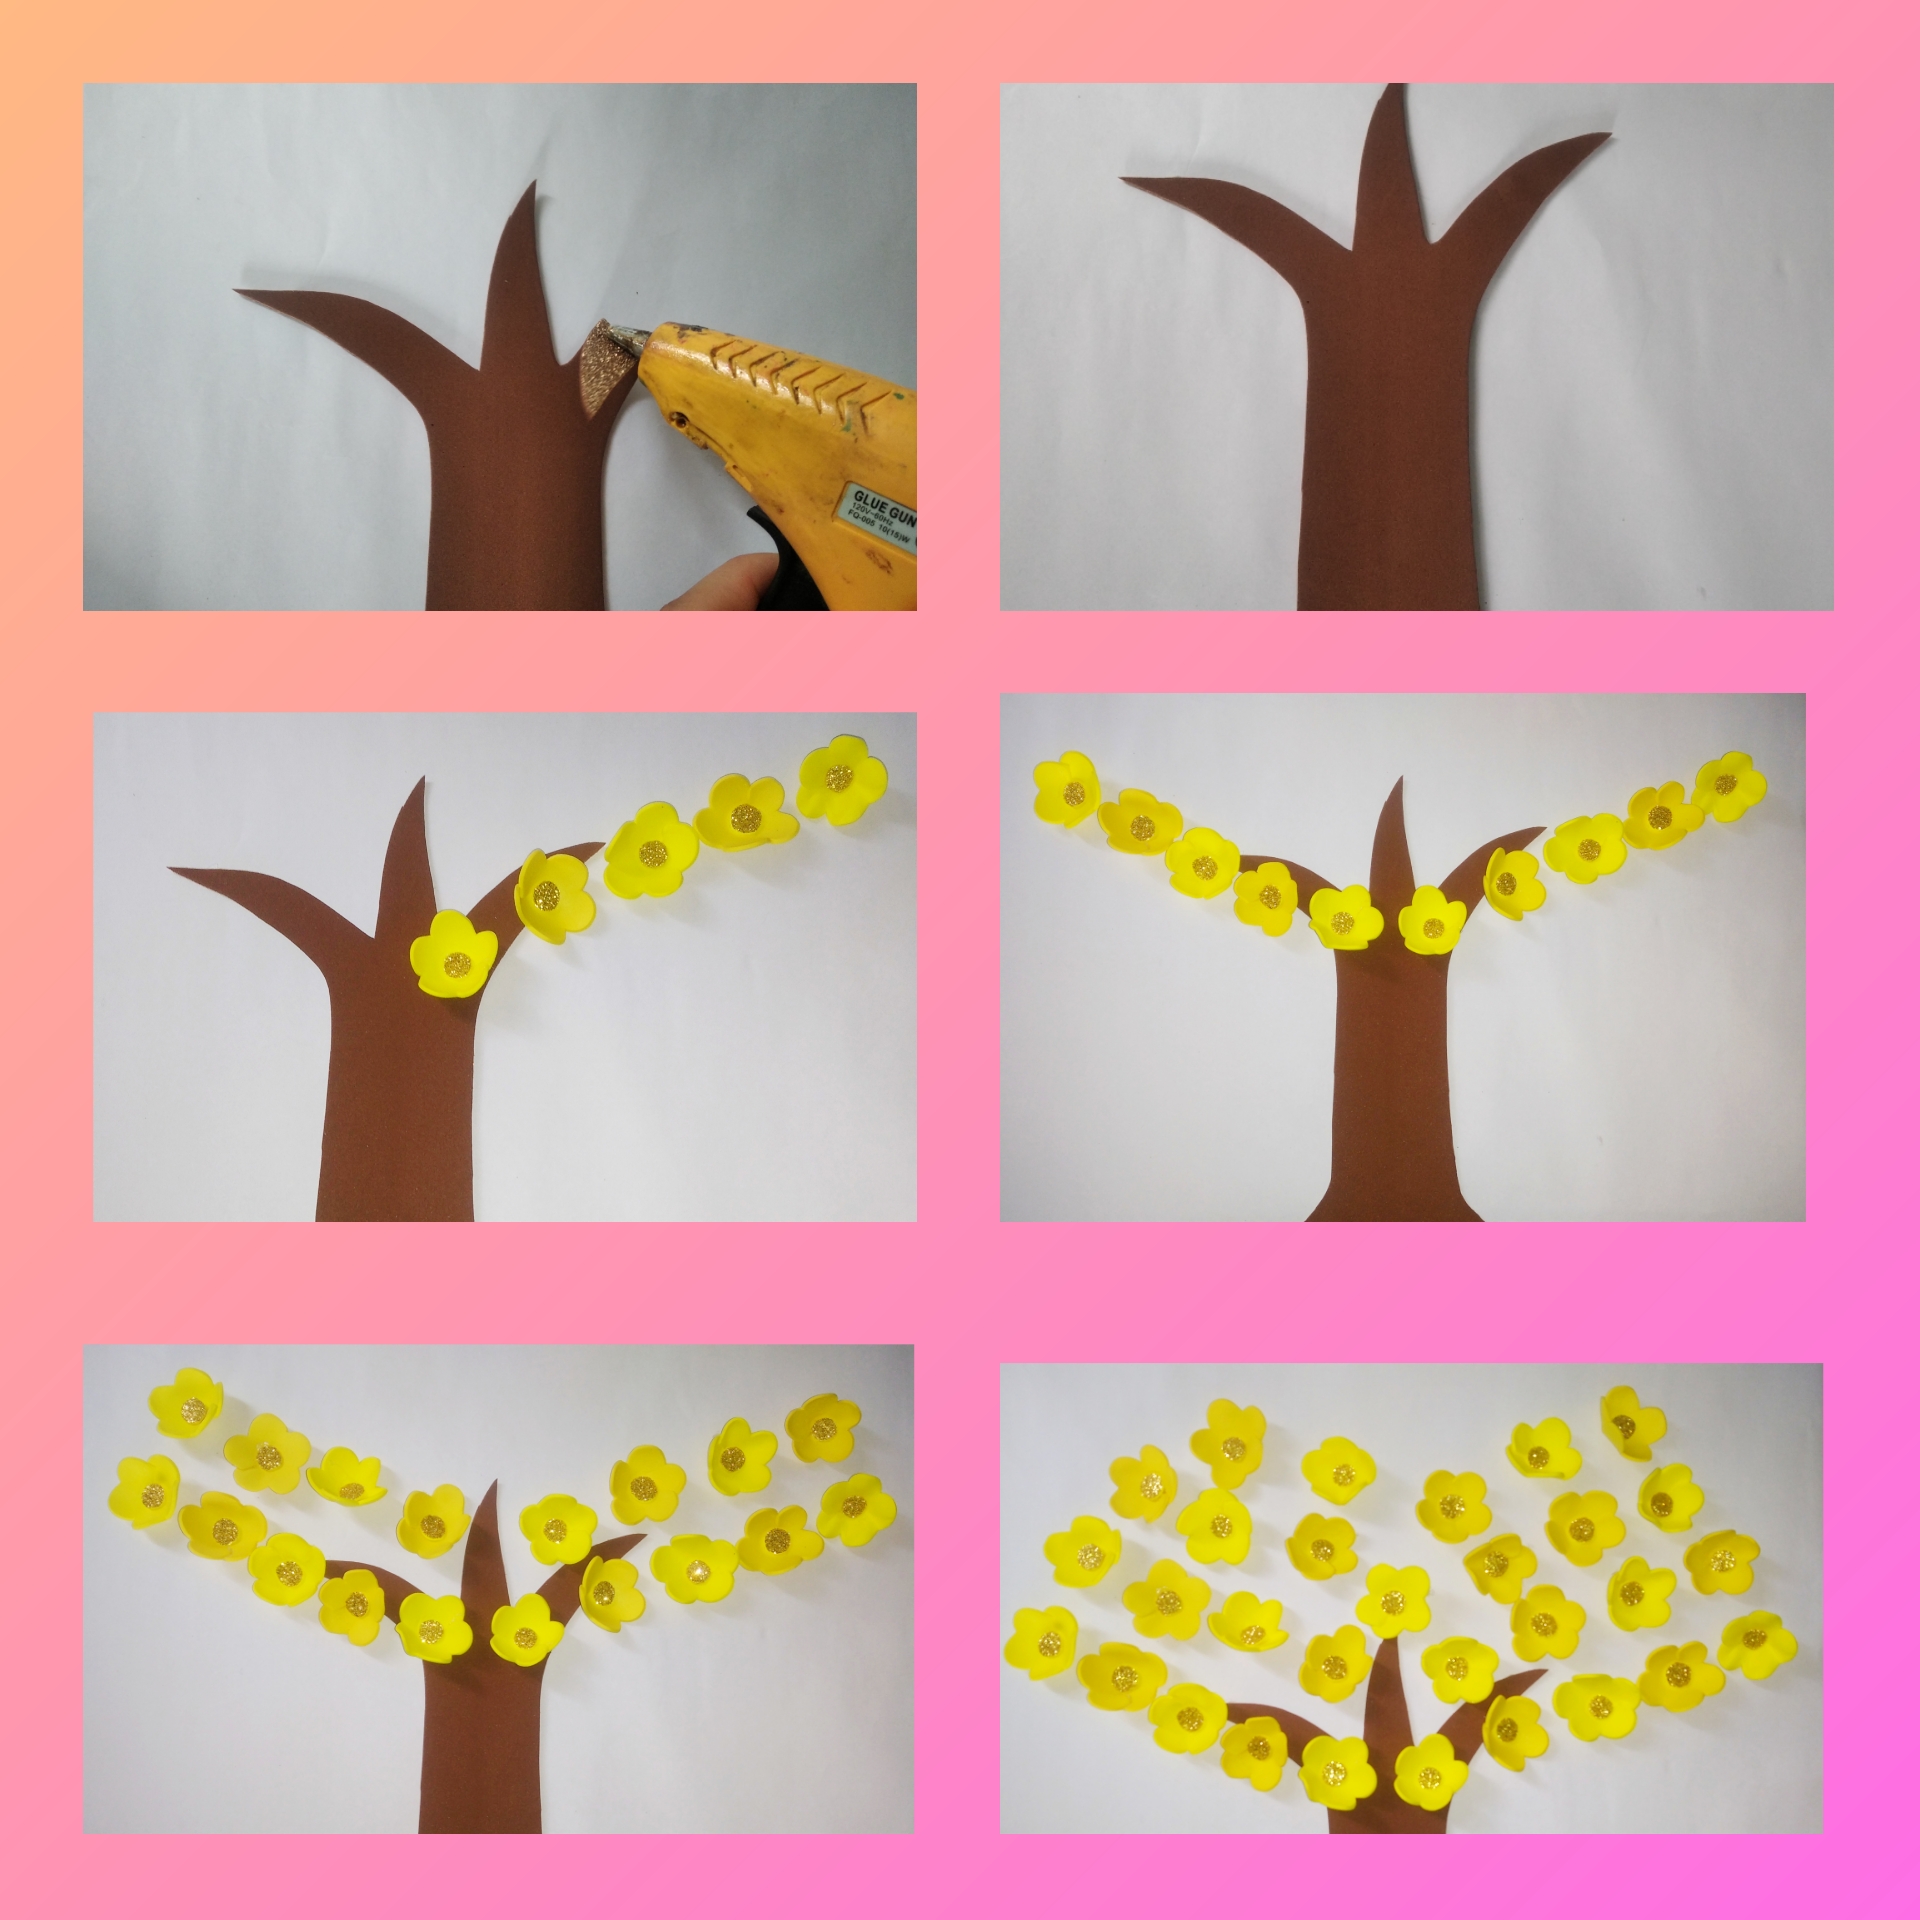
This is how this beautiful Araguaney tree looks. But this picture does not end here, let's continue.

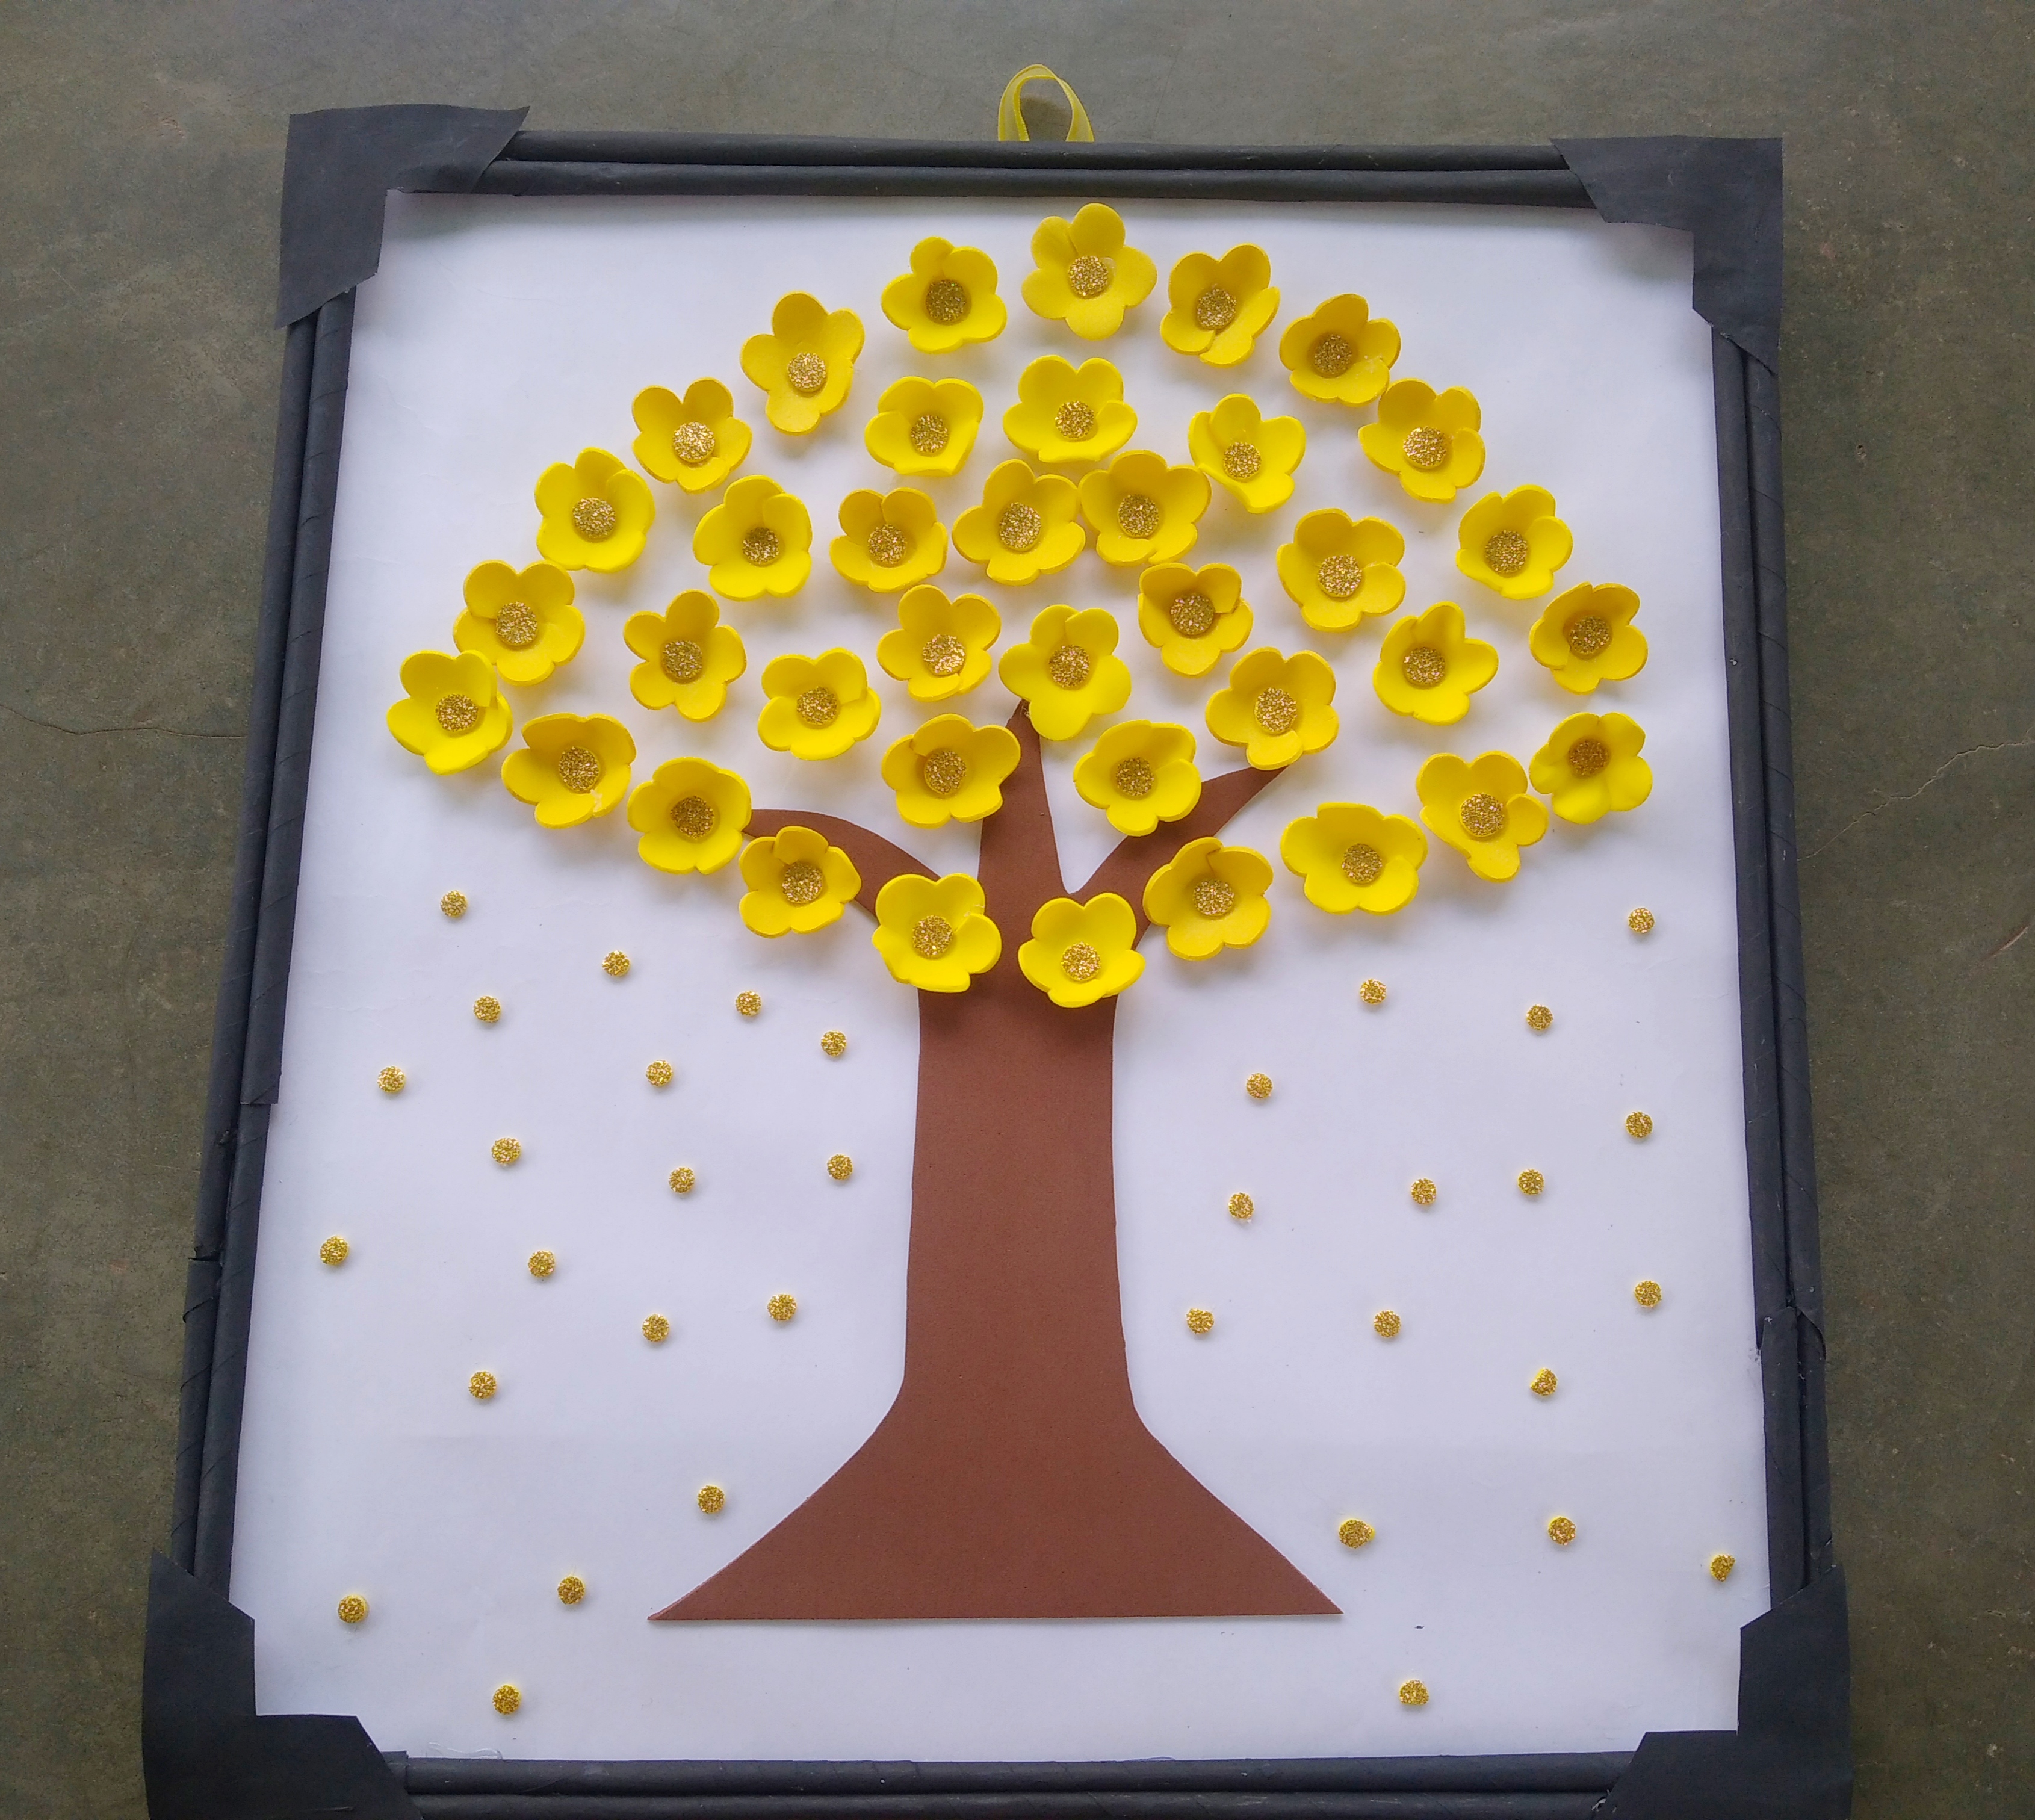
Step 5.Now let's create the frame for this box. We take white sheets and with them we make some 5 cm strips, with glue we join another piece of sheet to lengthen it, then with our fingers we are going to roll it up and with the glue we join at the tip, in this way we obtain several sticks, then with the paint and the brush we give black color to these sticks.
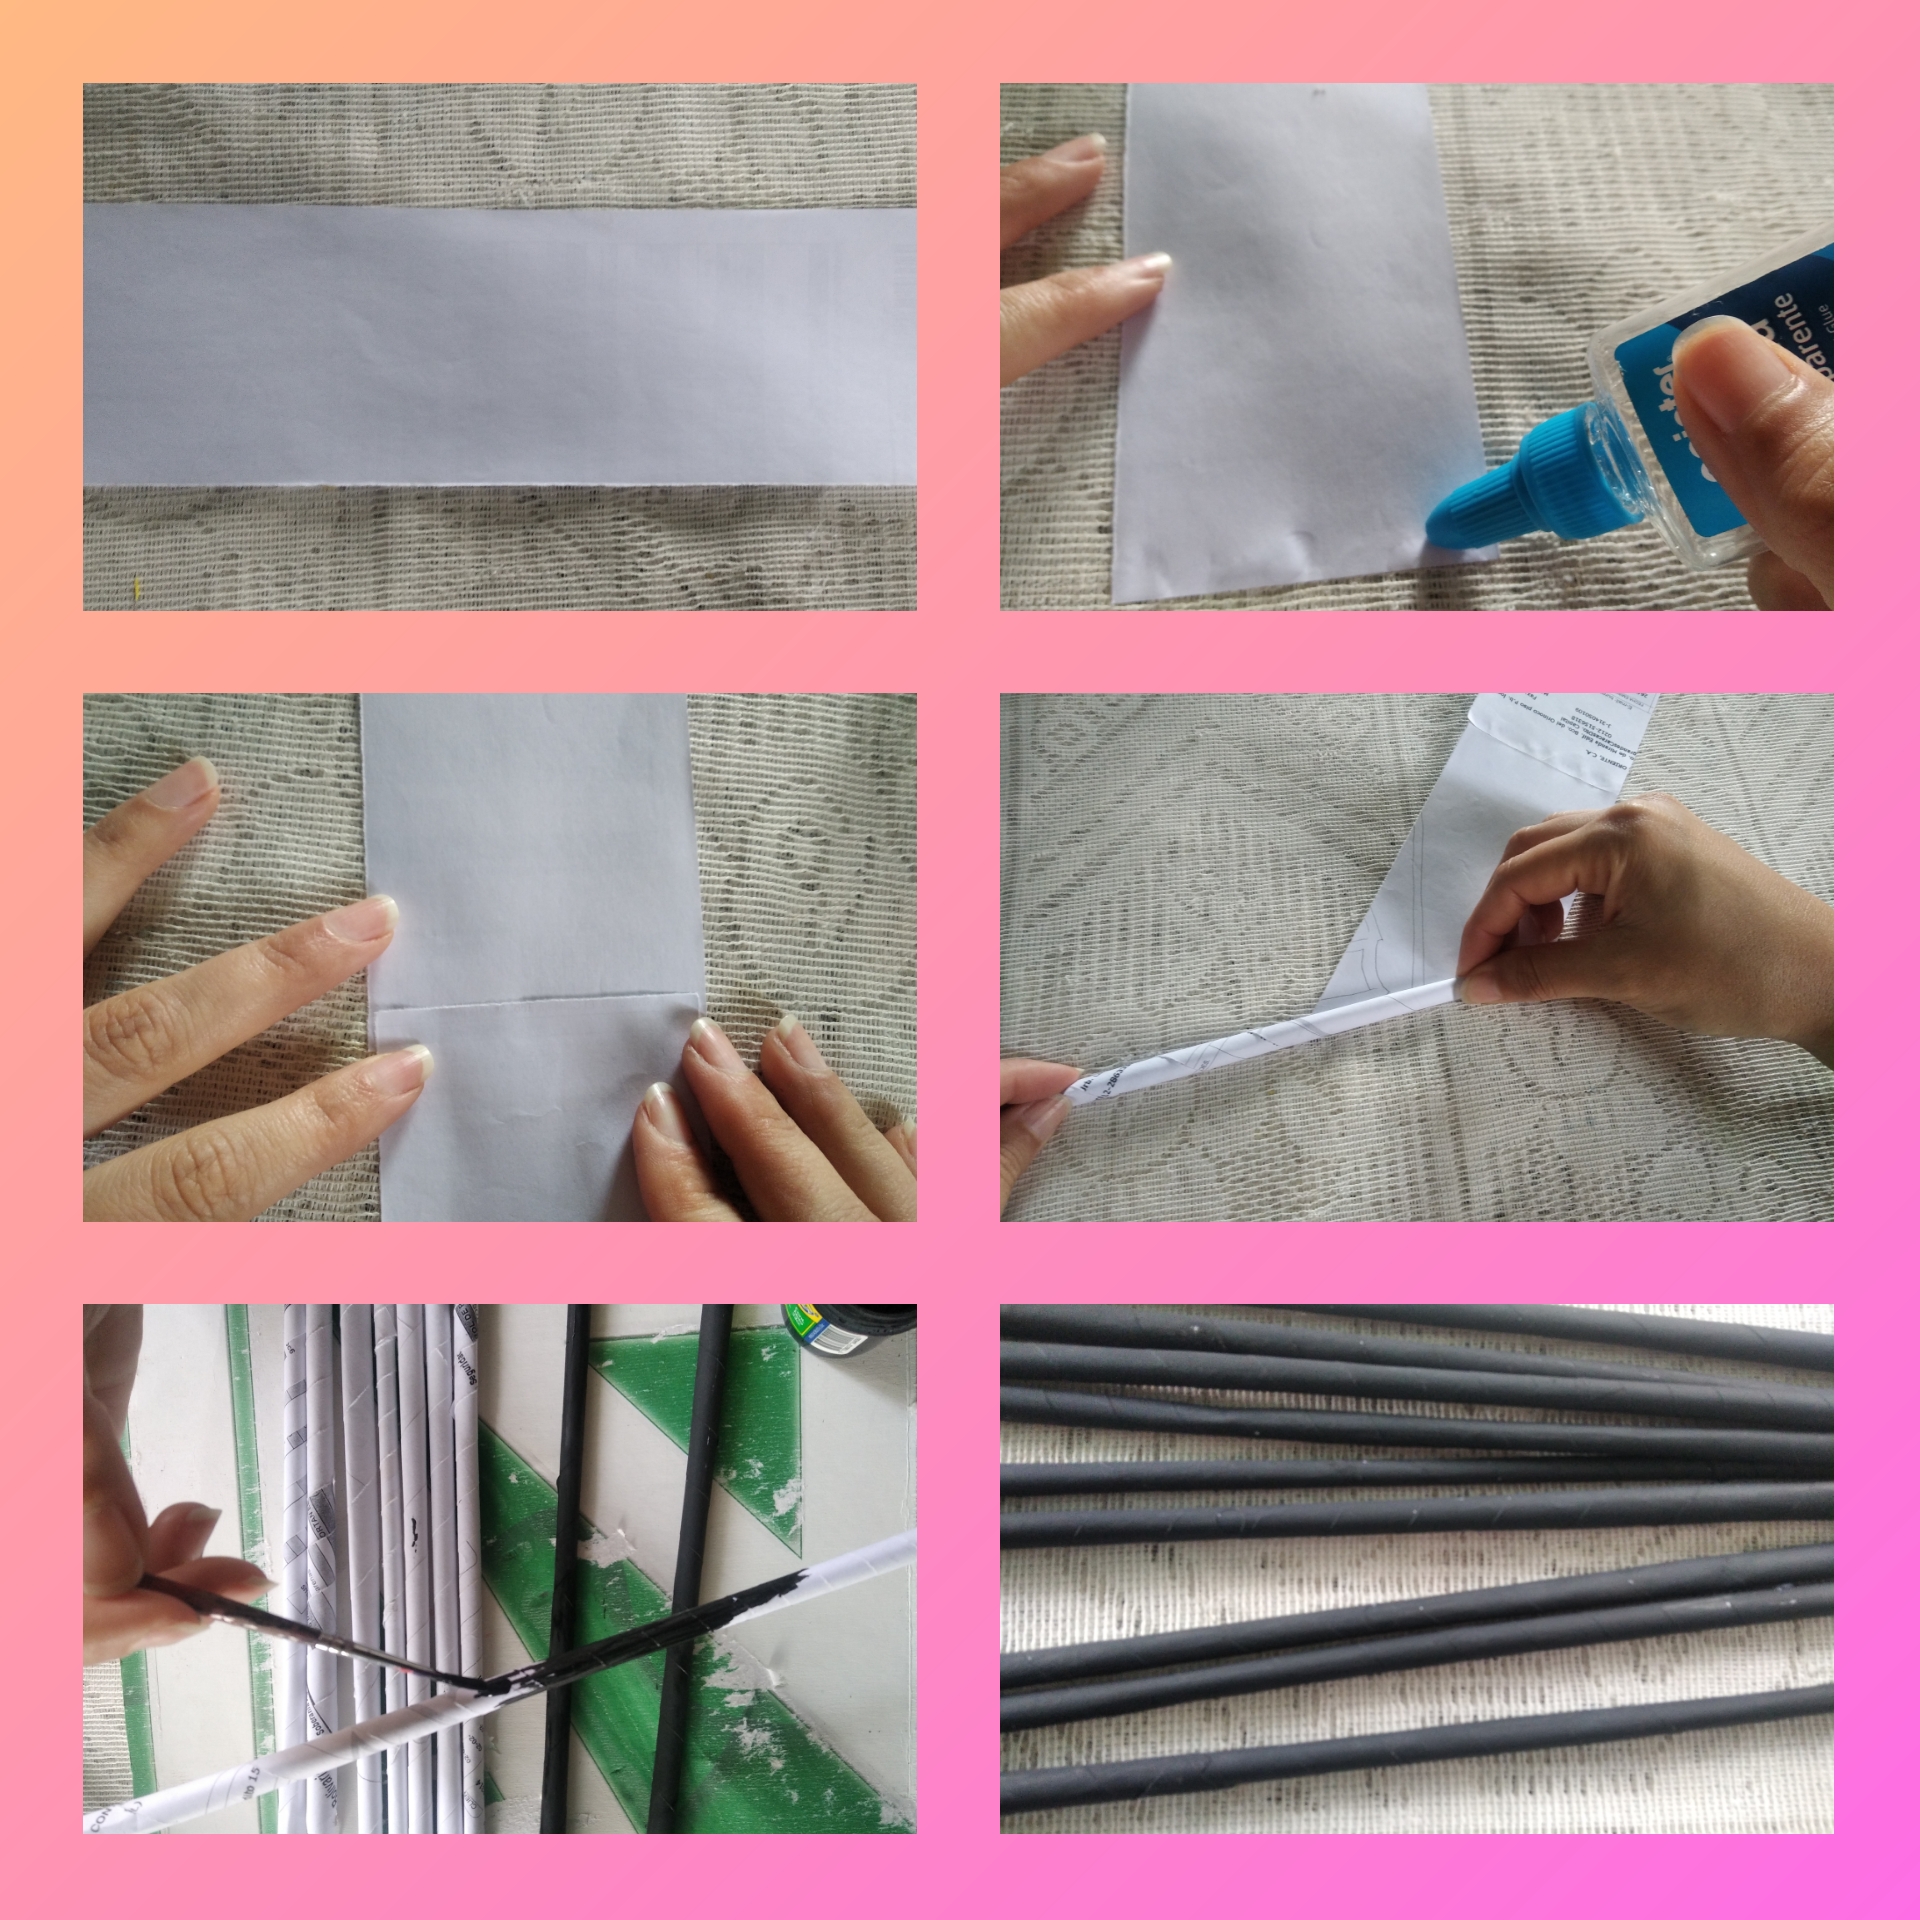
After painting the sticks for the frame, we are going to glue them with two sticks in the four upper, lower, left and right parts. Now to make it a more elegant frame we are going to make some plates that will cover the edges of this frame, we cut them and glue them with silicone on the edges of the frame.
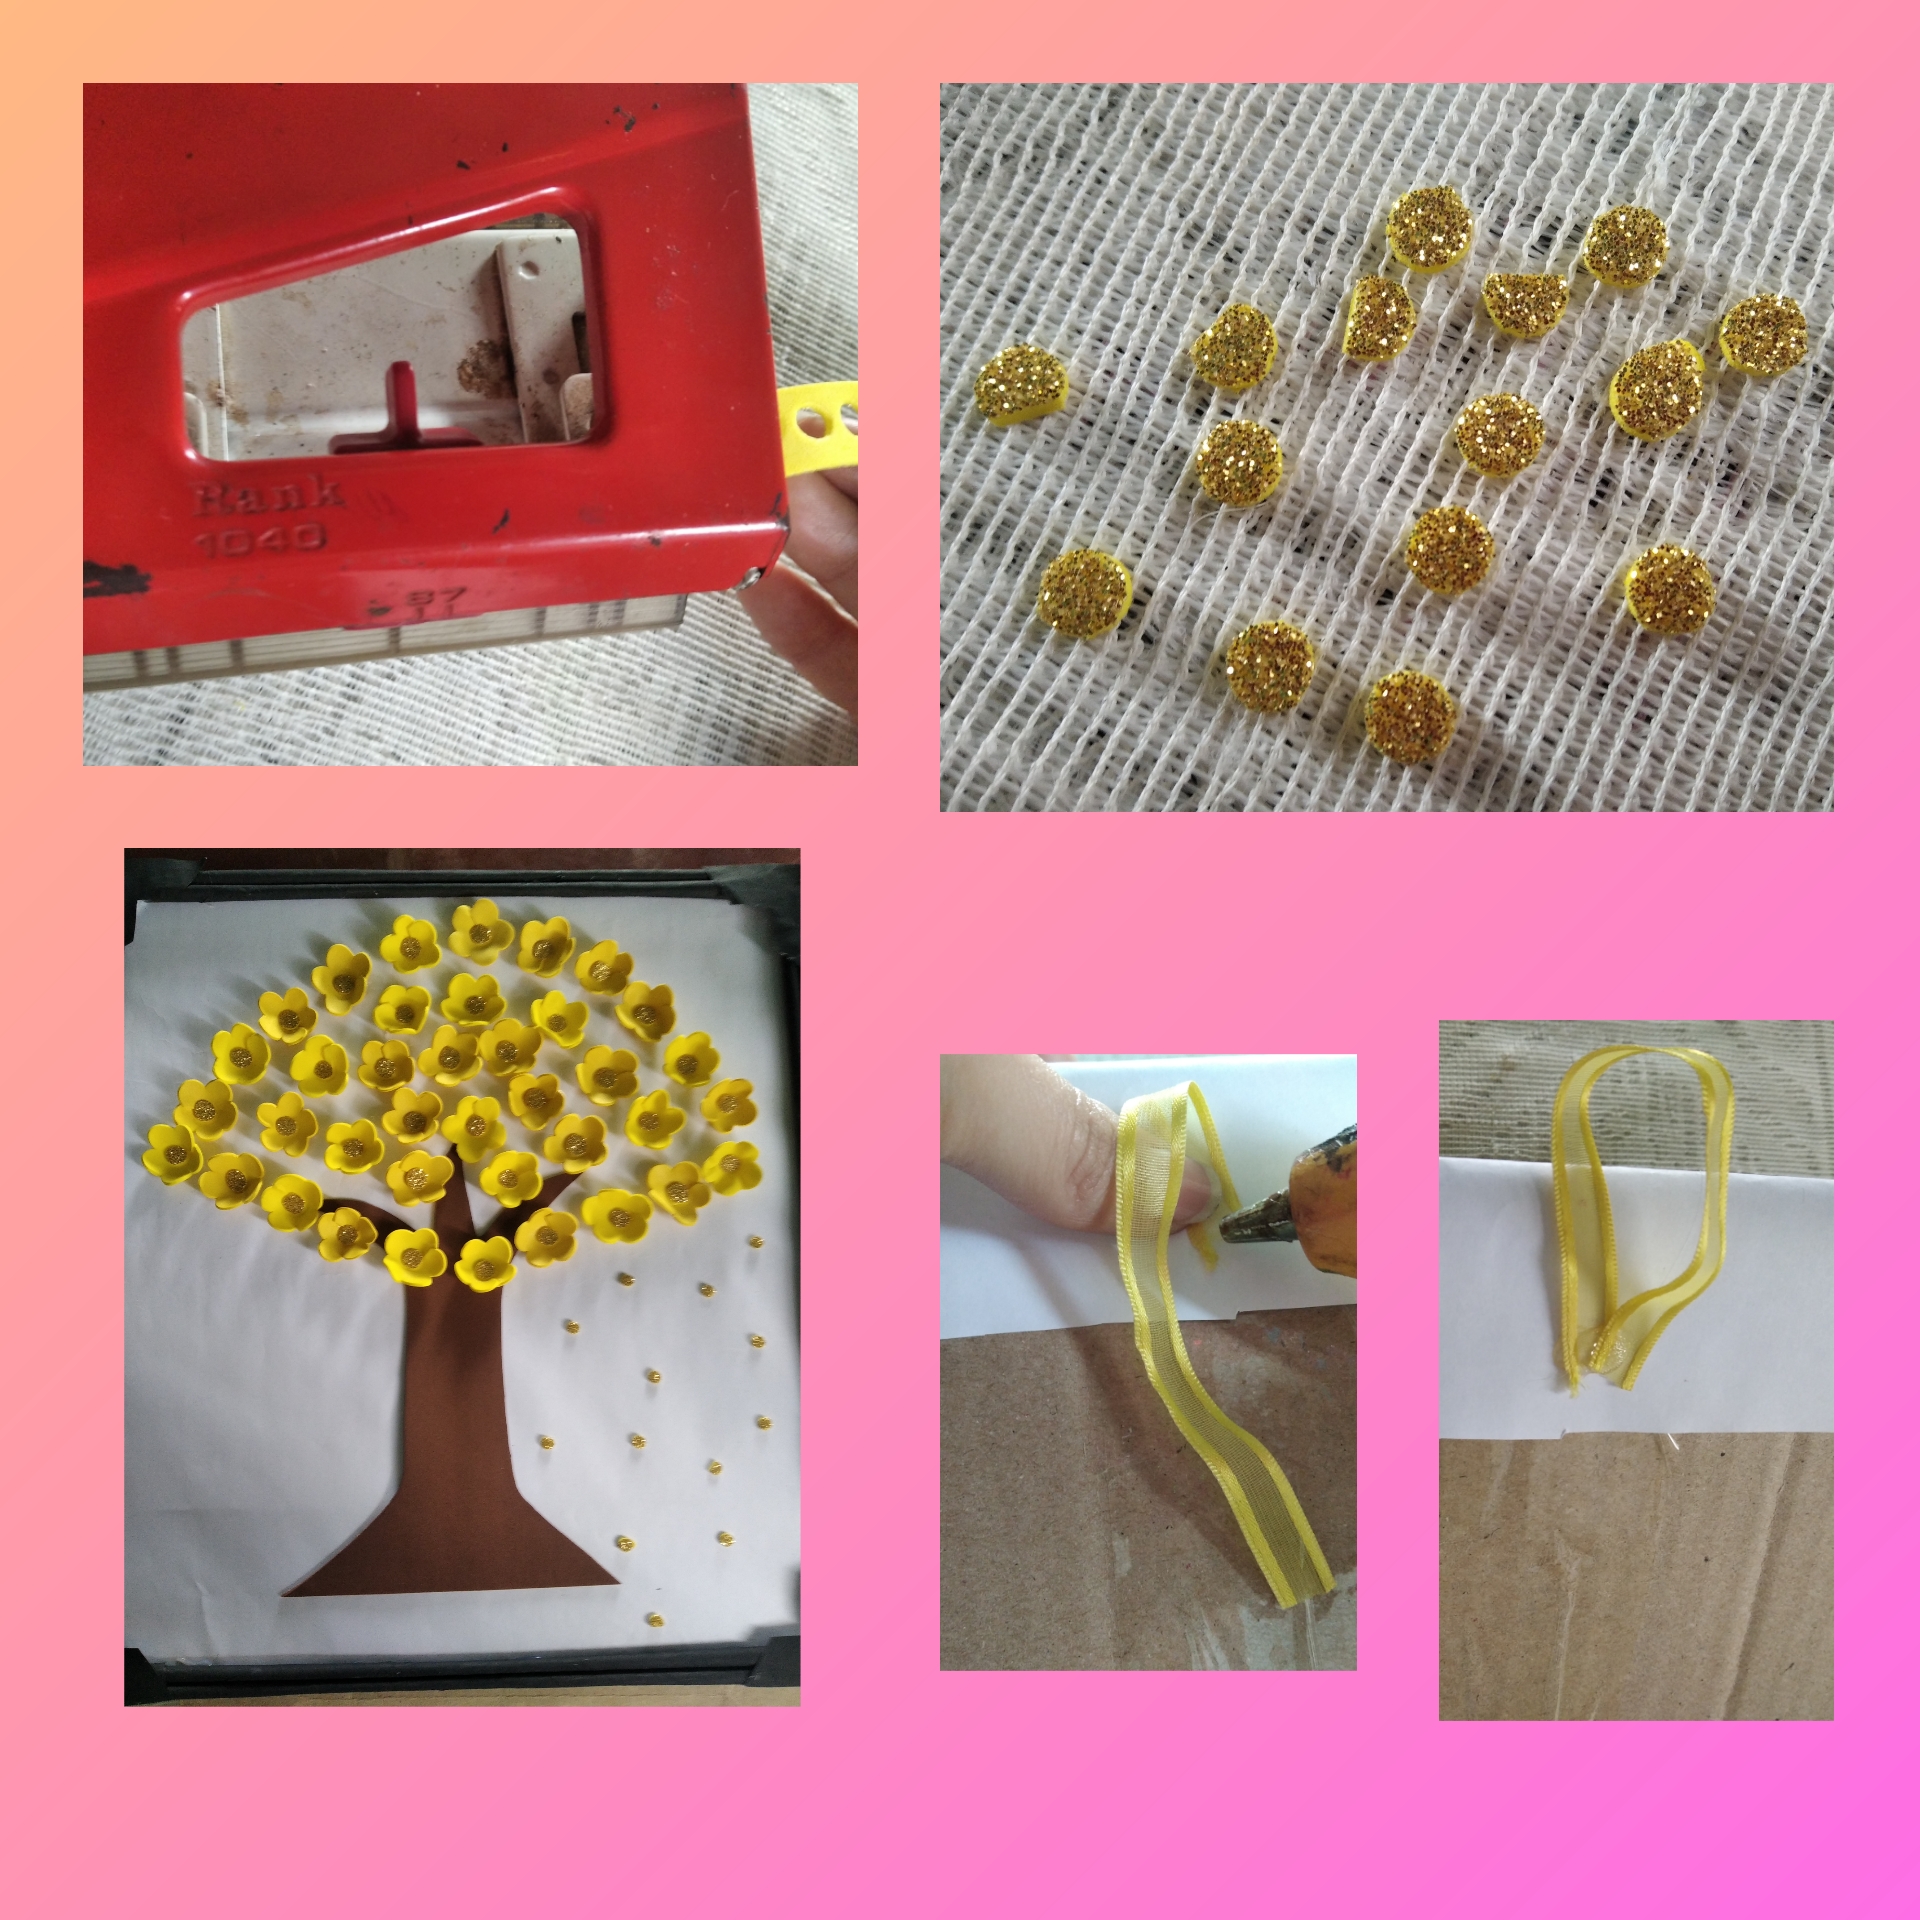
Step 6.With the hole opener we are going to place the frosty gold foami and press several times to obtain smaller circles, then we attach them to the box on the sides of the Araguaney. And as a last step we place a ribbon on the back of the painting to hang it.
Resultado Final.
End Result.

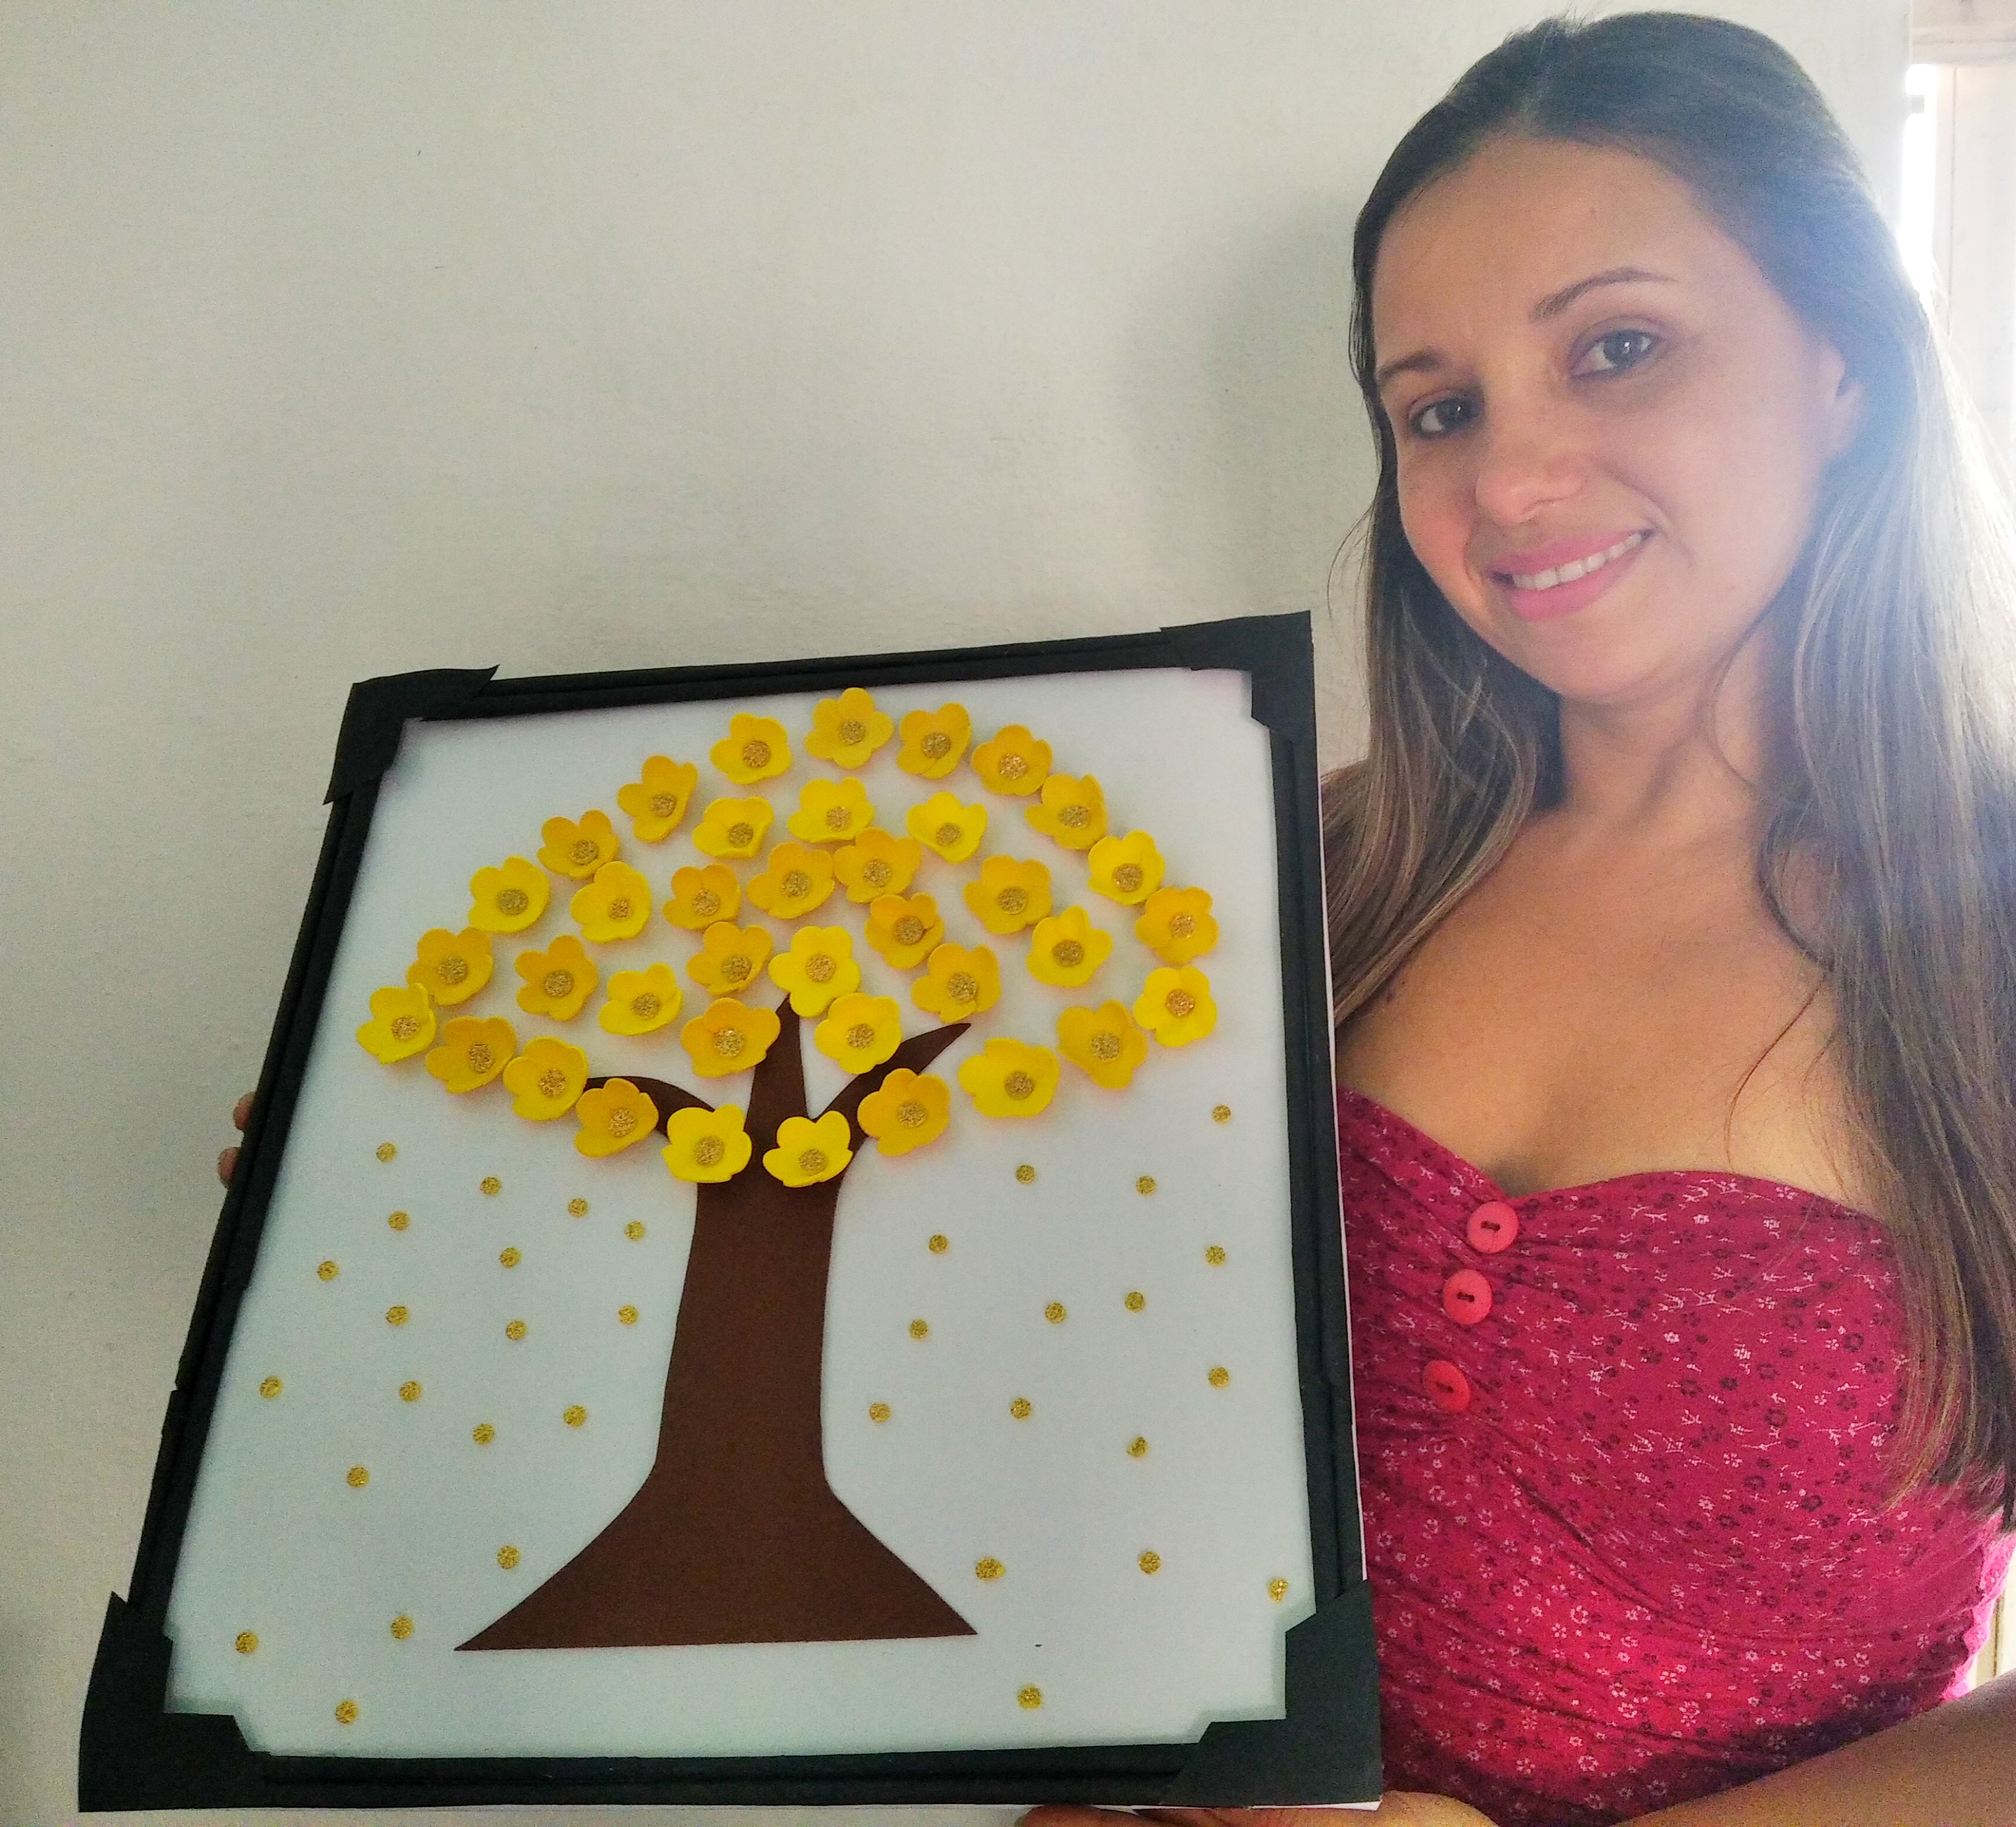
Well my friends, this is the new craft, it was a great pleasure to be able to make it and share it with all of you, my creative friends on this platform, I hope you liked it, for now I'll say goodbye to you soon .
Gracias por su visita 🌷
Thank you for visiting 🌷
Amiga, excelente paso a paso de su Árbol, realmente su publicación es de calidad felicidades..
Hola amigo gracias por su visita y comentario muy amable de tu parte. 😊😊
Congratulations @mayi04! You have completed the following achievement on the Hive blockchain and have been rewarded with new badge(s):
Your next target is to reach 300 upvotes.
You can view your badges on your board and compare yourself to others in the Ranking
If you no longer want to receive notifications, reply to this comment with the word
STOPTo support your work, I also upvoted your post!
Check out the last post from @hivebuzz:
Support the HiveBuzz project. Vote for our proposal!
Esta Hermoso, muy adecuado a la época en Venezuela están actualmente Floreados los Araguaney y este está muy lindo, además muy fácil de hacer y con él embellecer las paredes de nuestro Hogar.
Te felicito por este trabajo tan lindo.
Muchas gracias por tu visita amiga 😌 me alegro que te haya gustado.😘❤️
Hola que hermoso cuadro decorativo de nuestro árbol nacional El Araguaney, sencillo de realizar como tu los explicas en tu paso a paso,excelente como una estrategia para enseñar a los niños a crear cuadros decorativos.
Saludos amigo 🤗 gracias por visitarme y dejarme un buen comentario que aprecio mucho 😊 y como dices está chévere para enseñar a los niños.