Hola comunidad creativa, haces más de 10 días que no publico por aquí y extrañaba compartir con ustedes estos reciclajes creativos que hago.
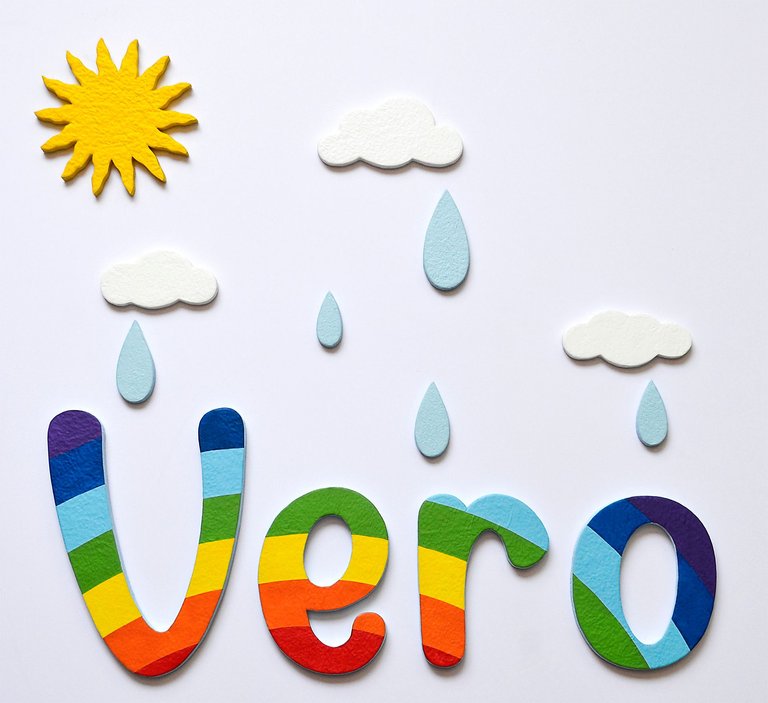
Esta vez es otro nombre. Verónica, pero será solo "Vero", porque así le gusta a esta pequeña de 6 años que la llamen.
A nuestras vidas, llegan a veces, esos seres llenos de luz. Personas buenas que hacen bien a todos a su alrededor.
Es el caso de la clienta que encargó este trabajo. La conocí hace más de 7 años. En aquella ocasión vino para que hiciera un nombre, Valentina, su ahijada recién nacida. Después hice lámparas, relojes, otros nombres, regalos para sus hijos, yerno y nuera...todos adultos. 🤭
Durante estos años no solo hemos tenido contacto por asuntos de trabajo. Ella siempre llama para saber como estamos, para saber de mi hija, como le va con sus animaciones. A cada rato envía algún detalle para ella, unas libretas, bolígrafos, libretas de notas, diarios, cosas útiles que a los adolescentes les encanta tener.
Nosotros en cambio cada vez que andamos cerca de su trabajo pasamos a saludarla y ponernos al día. Así ha sido durante este tiempo.
Si hay algo que me gusta de ella, es que siempre, el diseño lo deja a mi elección, así puedo experimentar un poco. 😉
Hoy les traigo este colorido proyecto y como siempre los invito a dejar fluir su creatividad. Sirva mi tutorial como guía e inspiración.
English here
Hello creative community, it's been more than 10 days since I last posted here and I missed sharing with you these creative recyclings that I do.
This time it's another name, Veronica, but it will be just "Vero", because that's what this little 6 year old girl likes to be called.
Sometimes these beings full of light come into our lives. Good people who do good to everyone around them.
This is the case of the client who commissioned this work. I met her more than 7 years ago. On that occasion she came to me to make a name, Valentina, her newborn goddaughter. Later I made lamps, clocks, other names, gifts for her sons, son-in-law and daughter-in-law...all adults. 🤭
During these years we have not only had contact for work matters. She always calls to know how we are, to know about my daughter, how she is doing with her animations. Every now and then she sends some detail for her, some notebooks,pens, notepads, diaries, useful things that teenagers love to have.
We, on the other hand, every time we are near her work we stop by to say hello and catch up with her. That's how it has been during this time.
If there's one thing I like about her, it's that she always leaves the design up to me, so I can experiment a bit. 😉
Today I bring you this colorful project and as always I invite you to let your creativity flow. Please use my tutorial as a guide and inspiration.
Necesitaré
- Cartón corrugado de 1cm de grosor
- Papel artesanal
- Papel reutilizado
- Papel de seda
- Pegamento
- Pintura acrílica (blanca, azul claro, amarillo, verde, rojo, violeta, anaranjado y azul oscuro)
- Pinceles
- Tijera
- Cúter
- Moldes
- Barniz transparente
- Cinta adhesiva doble cara
I will need
- Corrugated cardboard 1cm thick
- Handmade paper
- Reused paper
- Tissue paper
- Glue
- Acrylic paint (white, light blue, yellow, green, red, violet, orange and dark blue)
- Brushes
- Scissors
- Cutter
- Molds
- Transparent varnish
- Double-sided adhesive tape

Como siempre lo primero será forrar el cartón por delante con papel artesanal y por detrás con papel reutilizado.
As always, the first thing to do is to line the cardboard on the front with craft paper and on the back with reused paper.
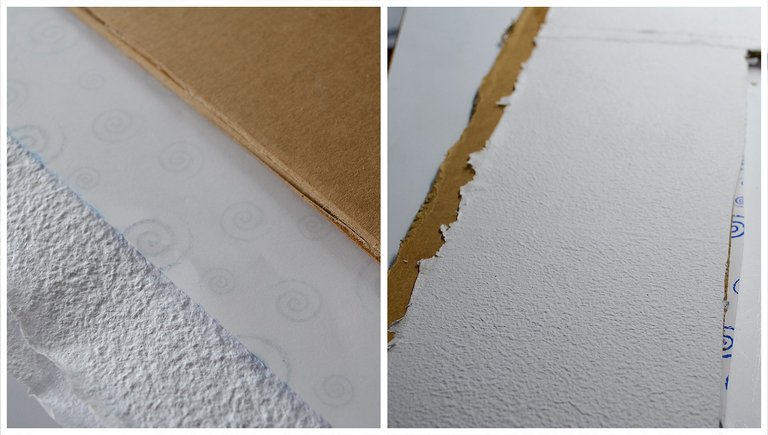
Utilizando los moldes marcaré la letras y todos los elementos decorativos que lleva el diseño y después calaré todo.
Using the molds, I will mark the letters and all the decorative elements of the design and then I will trace everything.
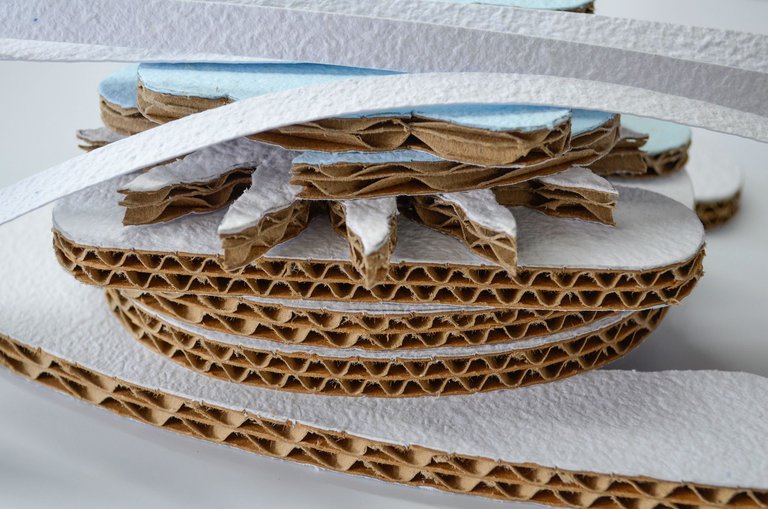
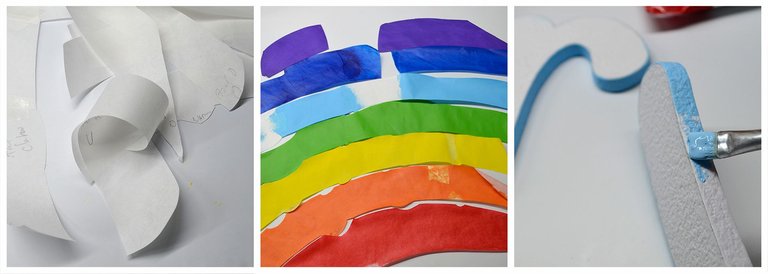
Posteriormente cubriré los bordes expuestos del cartón con tiras de papel artesanal previamente cortadas.
I will then cover the exposed edges of the cardboard with pre-cut strips of craft paper.
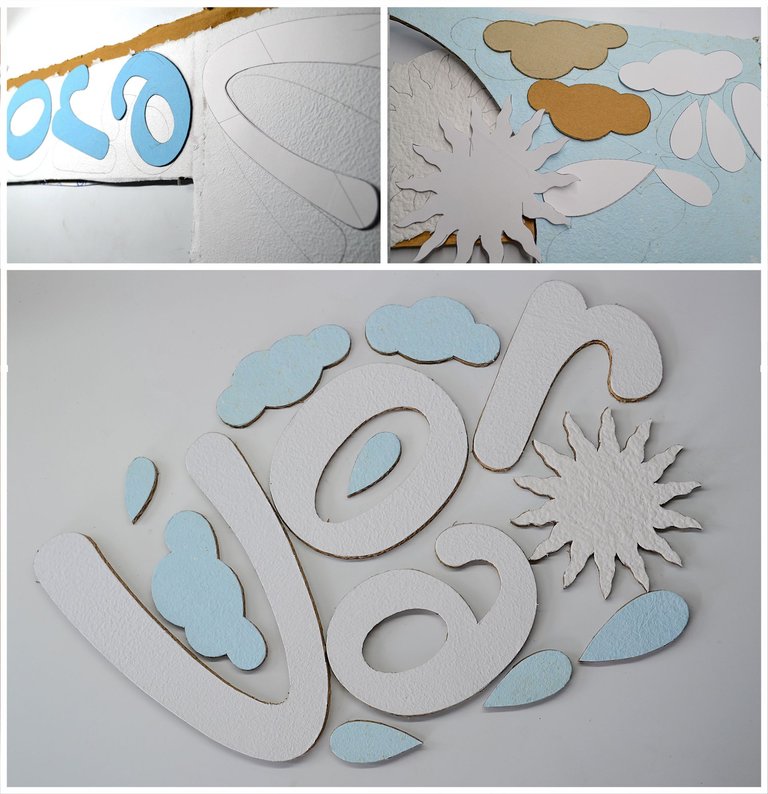
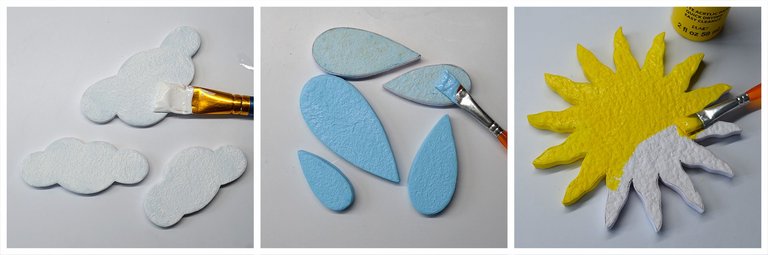
Pintaré cada elemento del color correspondiente. Como el papel de seda que tengo es blanco, pintaré las tiras con pinturas acrílicas de diferentes colores.
I will paint each element in the corresponding color. Since the tissue paper I have is white, I will paint the strips with acrylic paints of different colors.
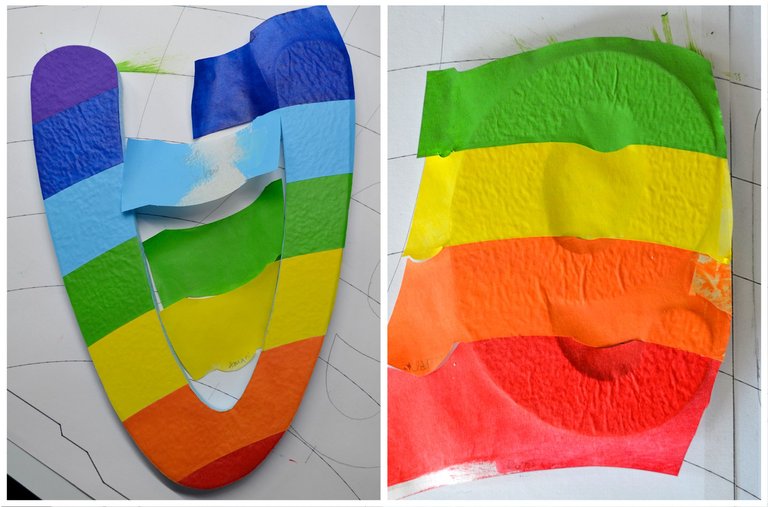
Con todo debidamente pintado y con la ayuda de un molde que imprimí como guía, decoraré cada letra del nombre como si fuera parte de un arcoiris.
With everything properly painted and with the help of a mold I printed as a guide, I will decorate each letter of the name as if it were part of a rainbow.
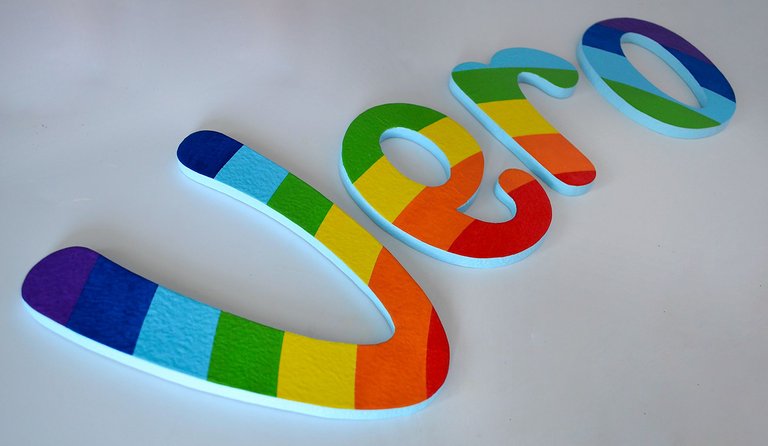
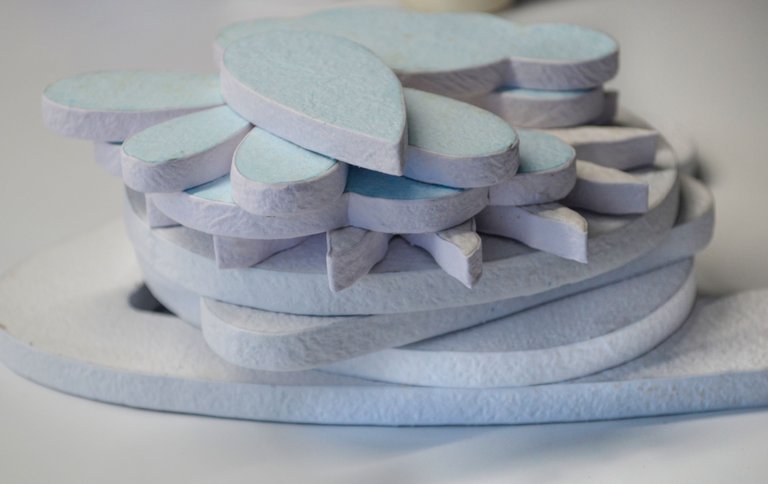
Finalmente aplicaré un capa de barniz transparente y pondré cinta doble cara por detrás de cada elemento del diseño. Quedará listo para decorar la habitación de la pequeña Vero.
Finally I will apply a coat of clear varnish and put double-sided tape behind each element of the design. It will be ready to decorate little Vero's room.

Derecho reservado sobre el texto y las imágenes, que son de mi autoría, a no ser que indique lo contrario. Uso DeepL para la traducción porque mi Inglés es muy malo. 🤭
All rights reserved on the text and images, which are of my authorship, unless otherwise indicated. I use DeepL for translation because my English is very bad 🤭.
Muy lindo trabajo, te felicito, saludos
Muchísimas gracias 💚. Saludos de vuelta.
As always, it is a joy to see your work. 😇 The design is so cool with these colours and rainbow 🌈 and it is not a surprise your client lets you do whatever you want - you can't fail 😁
As always it's an honor to read your praise for my work. Luckily I didn't fail 😬, Veronica was super happy!!! 🤗
Hermoso trabajo!
Muchas gracias.💚
Good people come into your life because you are kind and vibrant like a rainbow. Your friend trusts your creativity because how could she not trust you when she sees the beautiful things you create.
;)
And for the crane fingers?? 🤔🤣
Gracias Nani 🤗
😁😂 Ya voy a dormir para levantarme temprano.
🤣🤣🤣
Congratulations @mdrguez! You have completed the following achievement on the Hive blockchain And have been rewarded with New badge(s)
Your next target is to reach 25000 upvotes.
You can view your badges on your board and compare yourself to others in the Ranking
If you no longer want to receive notifications, reply to this comment with the word
STOPCheck out our last posts:
Achieved thanks to the support of the community. 🤩
Awesome job @mdrguez 👍
¡¡¡Buen trabajo!!! Gracias por publicar tu excelente contenido en Hive Diy, tu trabajo es sorprendente, por eso siempre tienes clientes para hacer estos magnificos trabajos.
Tu comunidad artesana ahora es testigo

Gracias a ustedes por apoyarme siempre y por elogiar mis trabajos. 💚
Muy hermoso tu trabajo, felidades💜 una consulta: que utilizas para cortar el carton? Estuve con un proyecto esta semana y sufri usando tijeras
Muchas gracias 💚. Para cortar el cartón utilizo cúters. Para los cortes rectos el amarillo. El de cabo rojo y negro (se llama exacto o cúter de precisión) es para calar y para cortes curvos y difíciles.
ohh, genial, probare usando uno de precisión a ver que tal me va. Gracias💜
De nada. Lleva un poco de práctica, pero verás que te facilitará mucho el trabajo. Saludos y buenas noches.